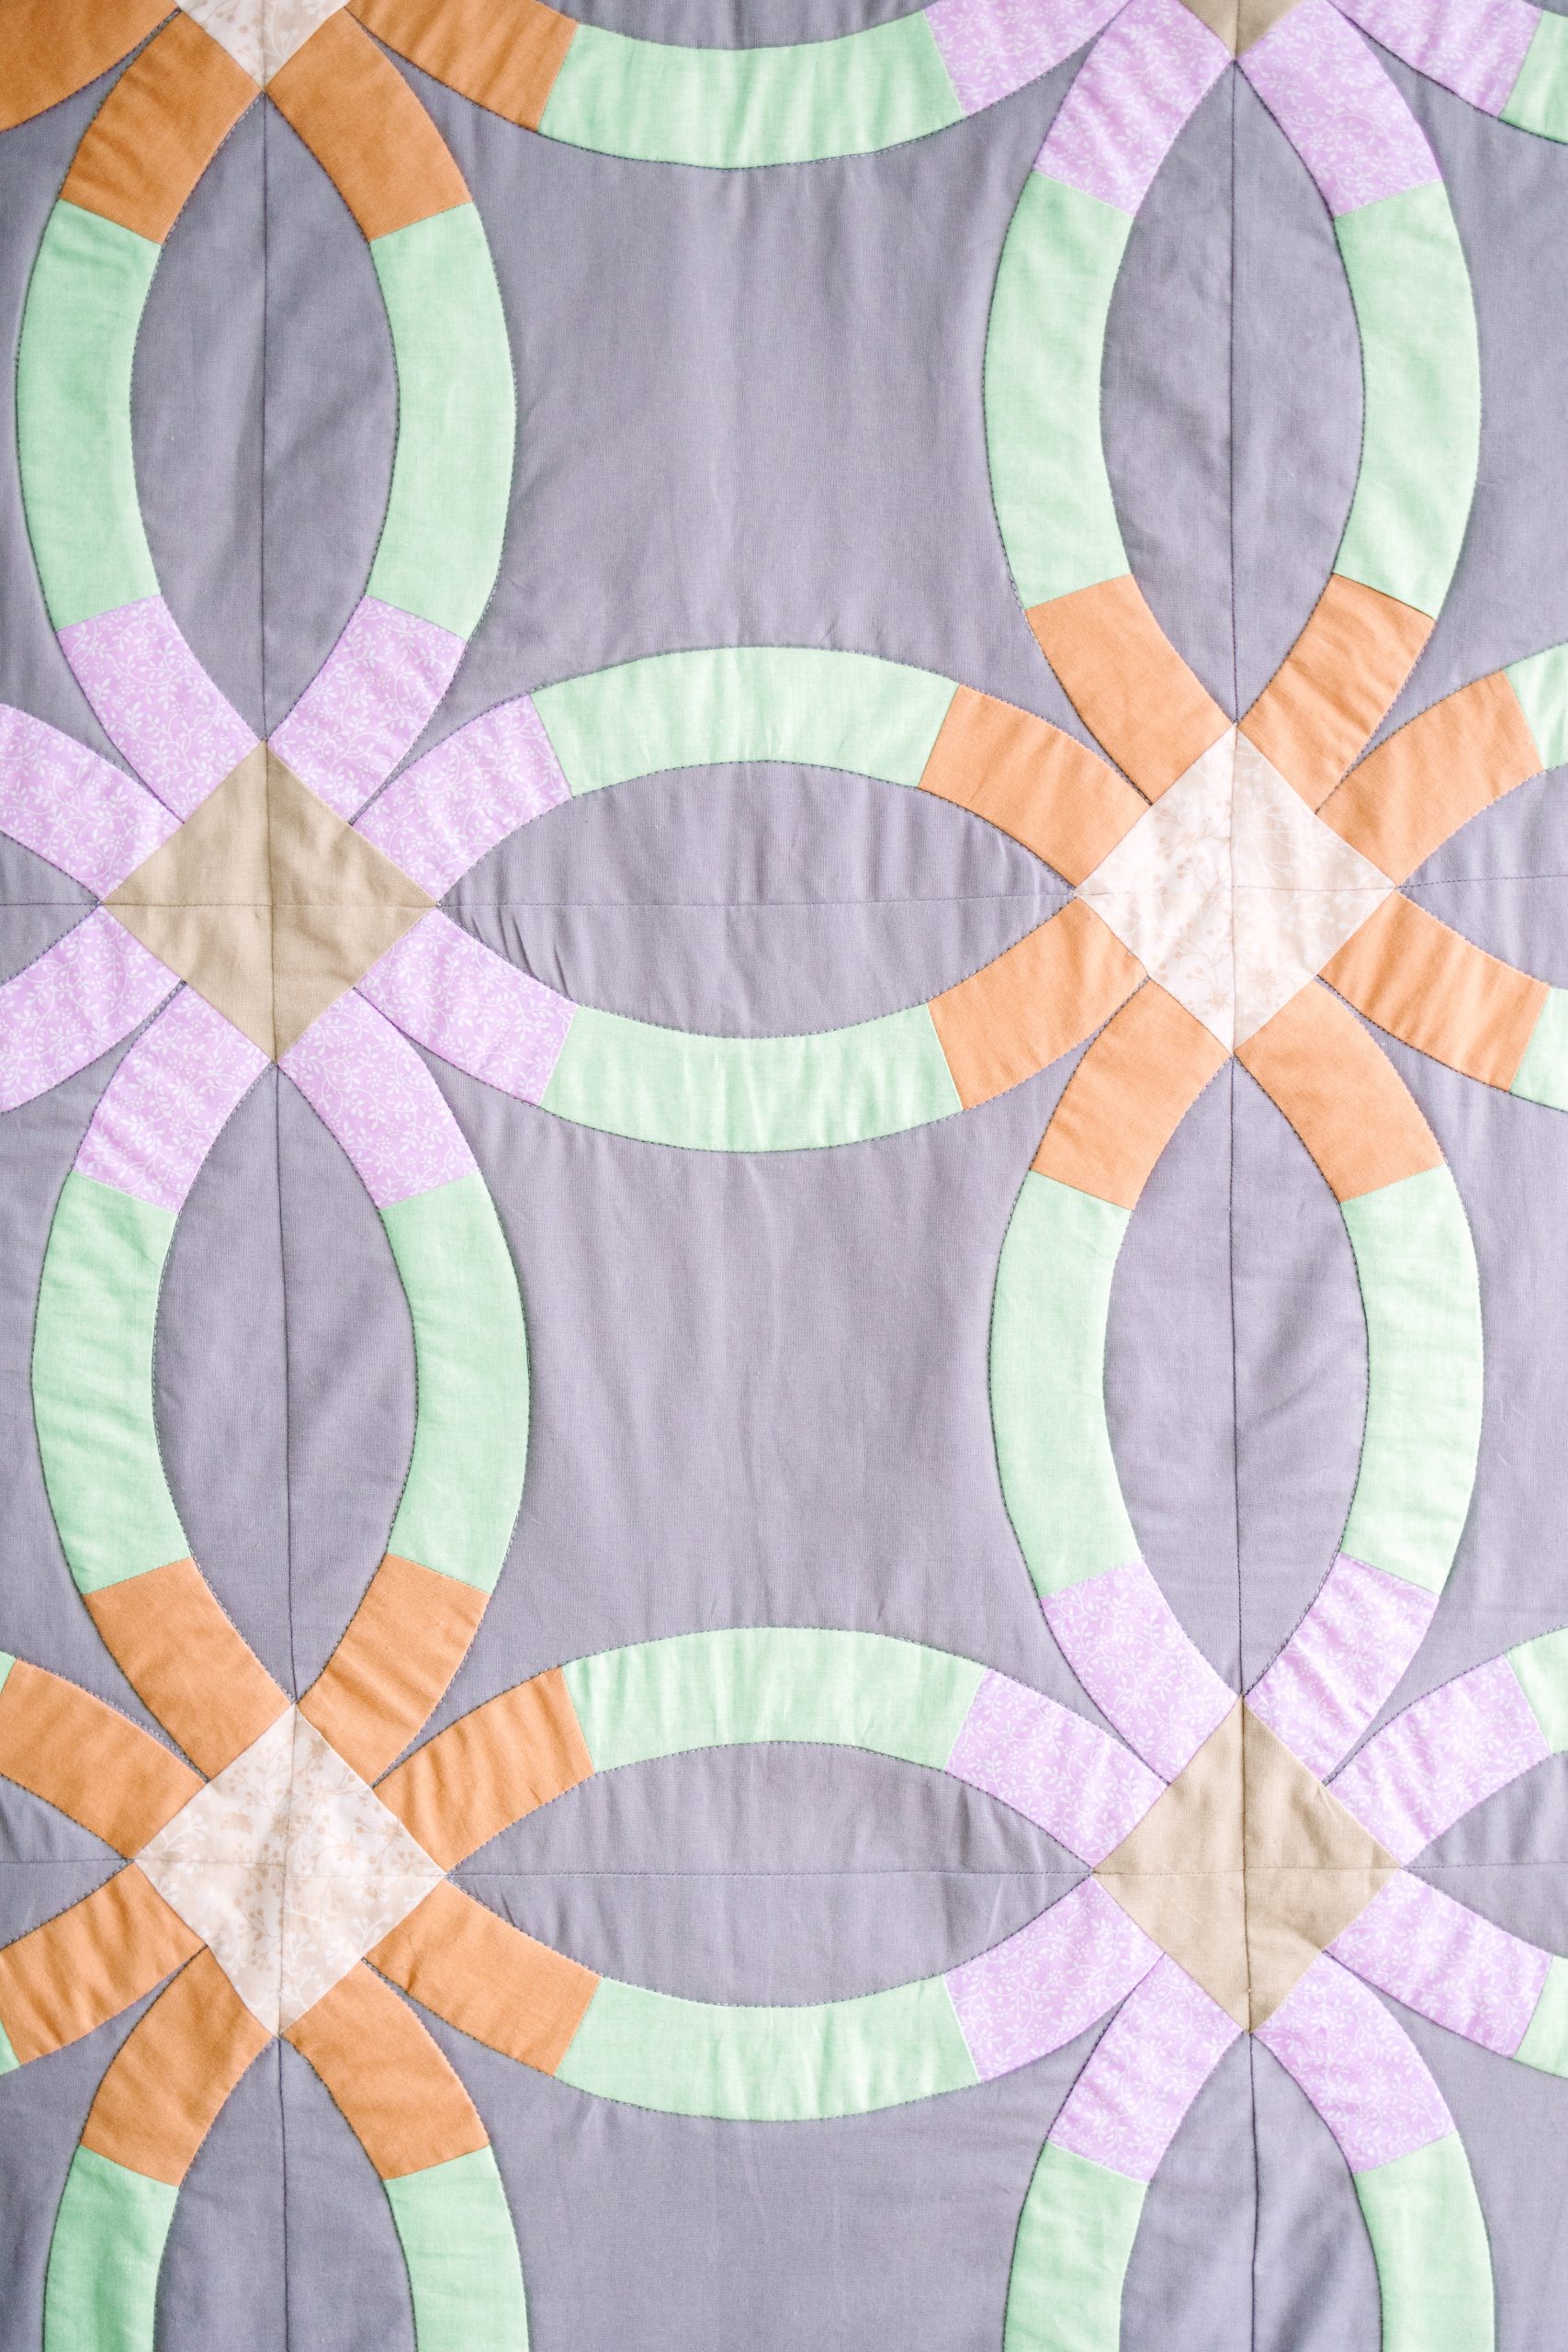
Design a gorgeous winter bed quilt in a bold color palette with this double wedding ring quilt pattern. Designed for intermediate quilters, this bed quilt pattern features the classic double wedding ring block, a design made with intricate, interconnected rings. The colors featured in this quilt (lilac, ash, mint, and umber) remind us of the smoky colors of a beautiful winter sunset. Whether made for yourself or as a wedding gift, this wedding ring quilt pattern is sure to become a treasured family heirloom.
Finished Size: Approximately 72” x 72”
Skill Level: Intermediate
Designer Notes:
- Scant 1/4” seam allowance used throughout
- WOF – Width of Fabric
Materials:
- Fabric (based on 42” wide fabric):
- A (gray) – 3 1/2 yards
- B (green) – 2 yards
- C (lilac) – 1 1/2 yards
- D (spice) – 1 yard
- E (bamboo) – 1/2 yard
- F (ivory) – 1 yard
- Backing – 80” x 80” square
- Batting – 76” x 76” square
- PDF Template – This is located at the bottom of this page. See printing instructions below.
PRINTING INSTRUCTIONS:
To download the PDF template, click on the download button at the bottom of the page. We recommend opening your download using Adobe Acrobat.
Cutting Instructions:
Note: These instructions are for the whole quilt top.
- Fabric A:
- 25 (twenty five) Template 1 patches
- 100 (one hundred) Template 2 patches
- 8 (eight) 2 1/2” x WOF strips for binding
- Fabric B:
- 100 (one hundred) Template 4 patches
- 8 (eight) 2 1/2” x WOF strips for outer border
- Fabric C:
- 100 (one hundred) Template 3 patches
- 8 (eight) 2 1/2” x WOF strips for middle border
- Fabric D:
- 100 (one hundred) Template 3 patches
- Fabric E:
- 50 (fifty) 3 3/8” squares cut on one diagonal to make two triangles
- Fabric F:
- 50 (fifty) 3 3/8” squares cut on one diagonal to make two triangles
- 8 (eight) 2 1/2” x WOF strips for inner border
Sewing Instructions:
MAKING THE QUILT TOP:
- Print the templates, checking that they are the correct size using the 1” test square. (Note: These are located at the bottom of this page)
- Cut out the templates, the seam allowance is included.
- Use the templates to cut the fabric patches required. Half of the 2, 3, 4 template fabric patches need to be cut on the reverse.
- The designer found the quickest way to cut the fabric was to pin the templates to two or four layers of folded fabric. If you are cutting from a single layer, be sure to cut half the number of the 2, 3, 4 templates on the reverse. If your templates become unusable, print another set (remember to check the size).
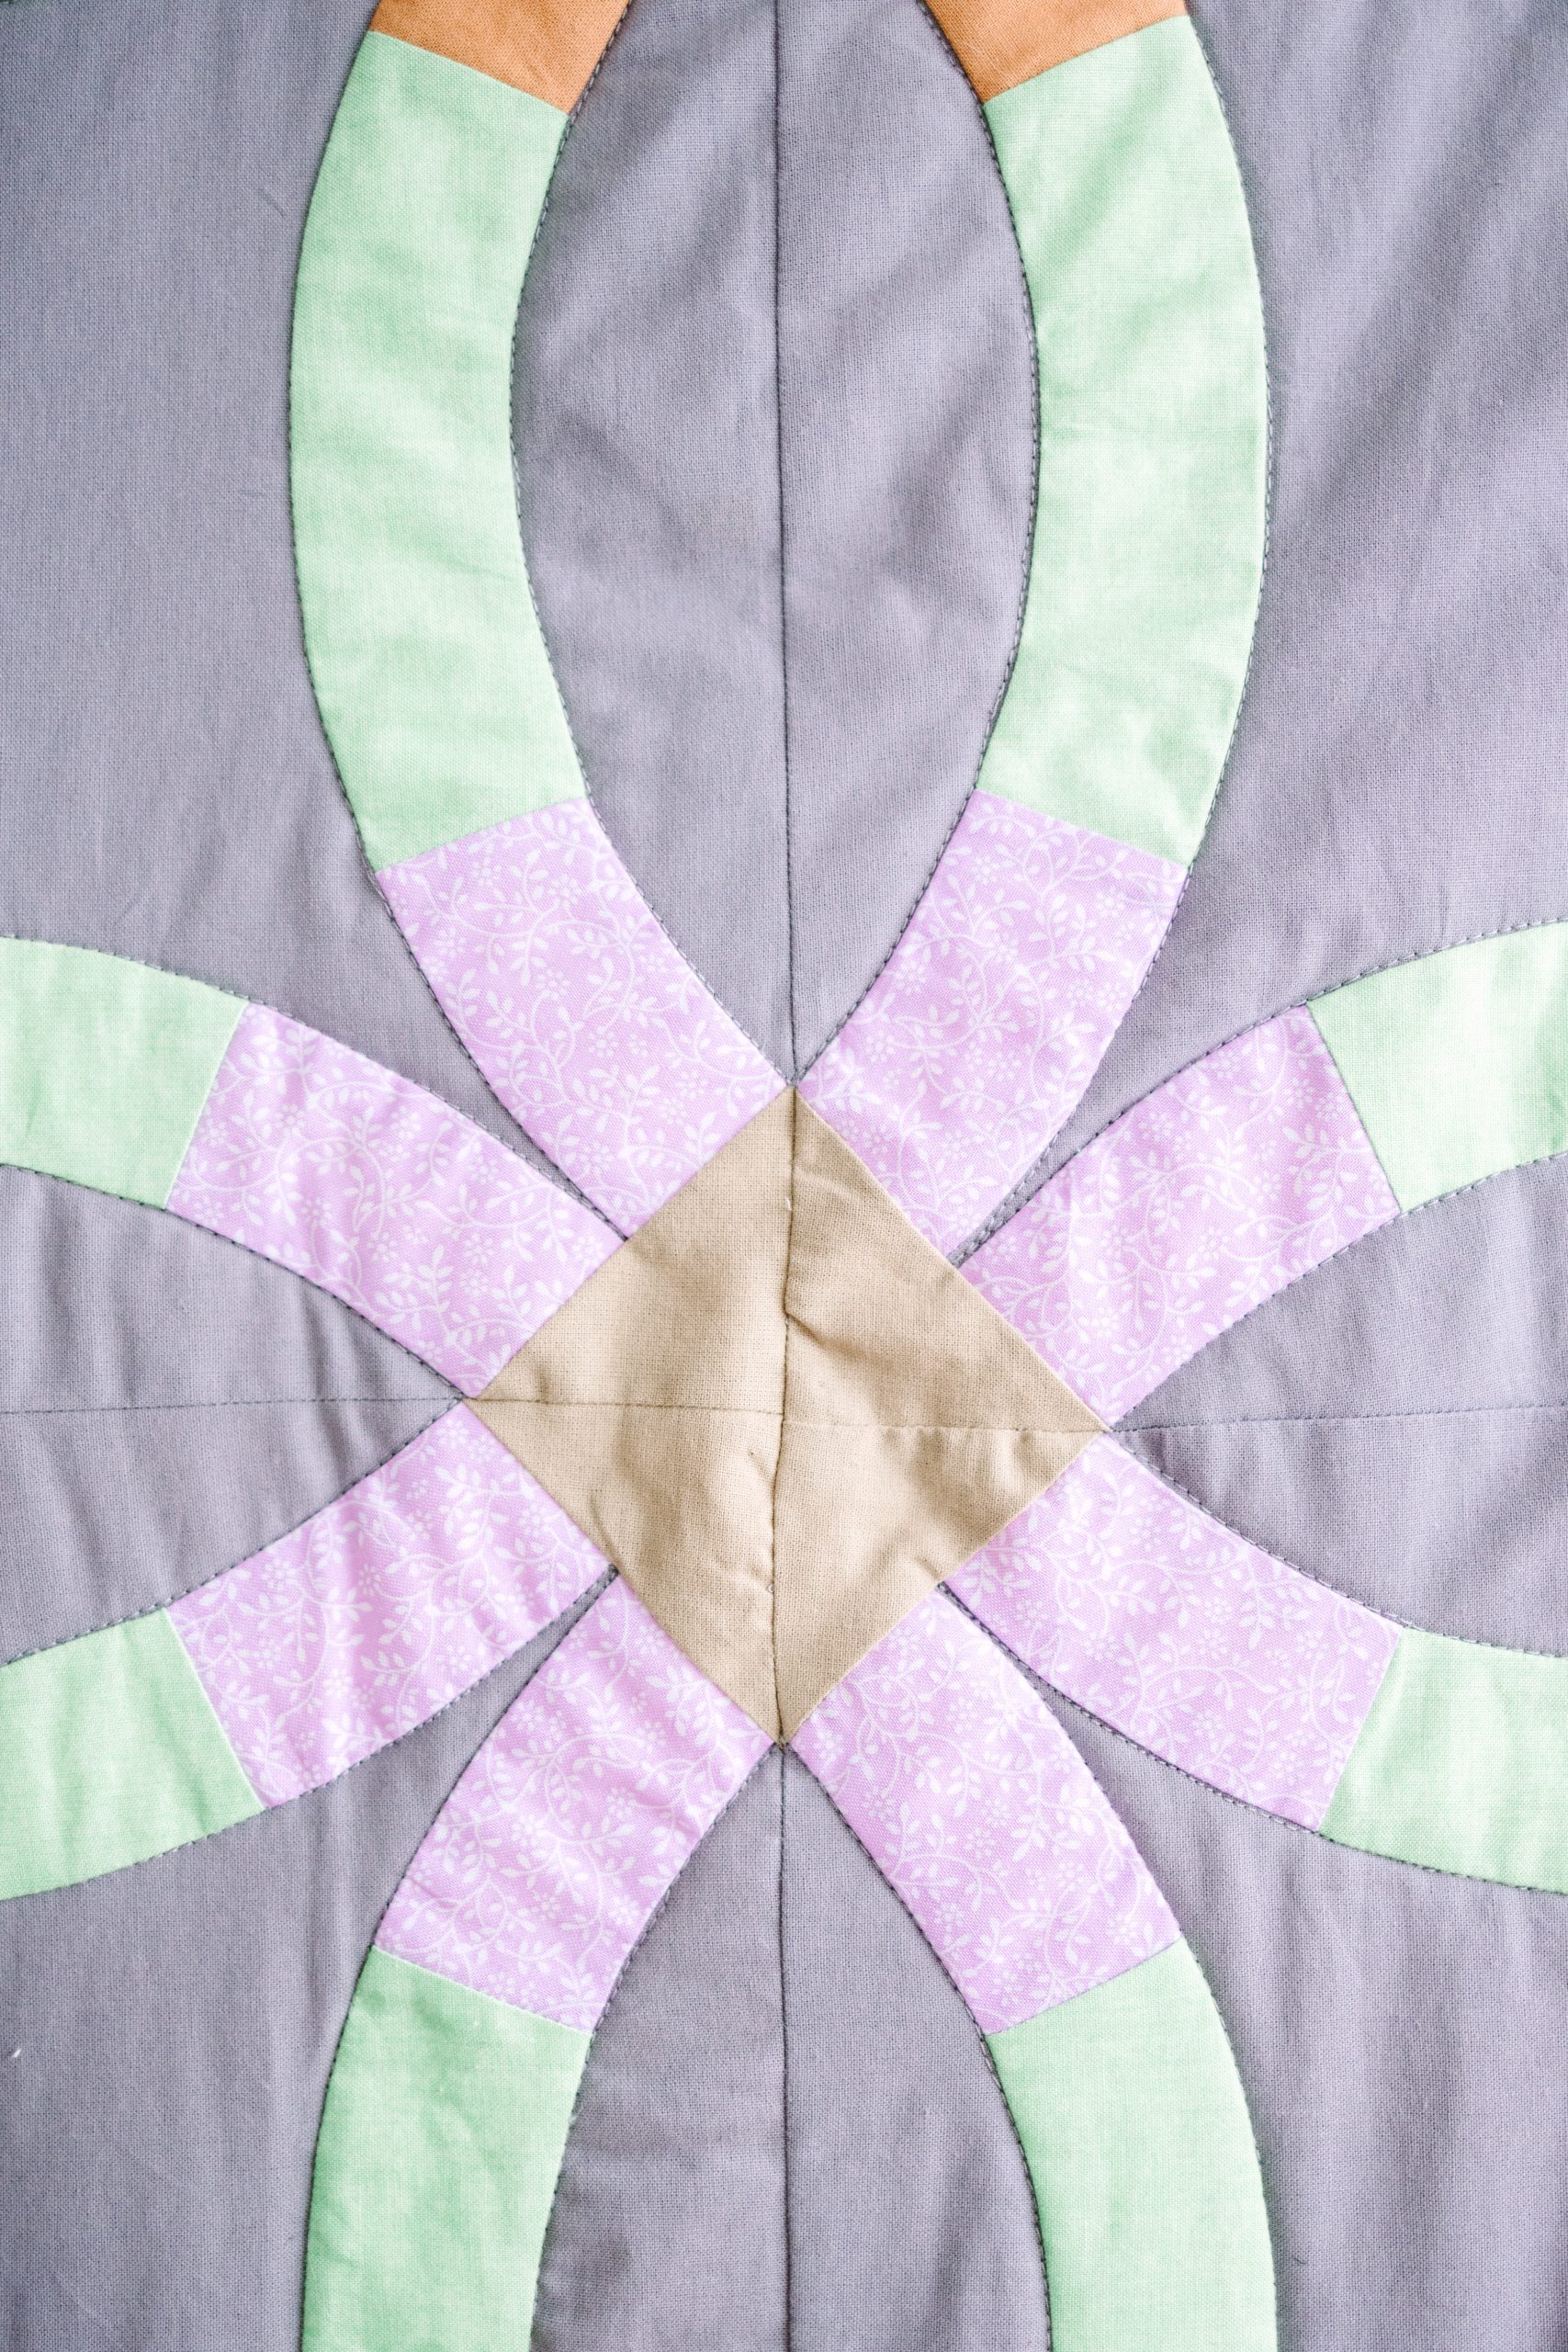
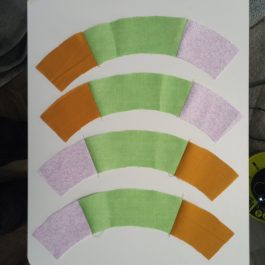
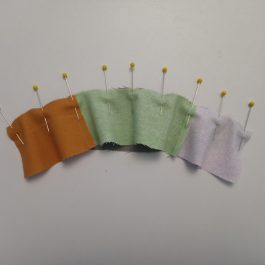
- Making the Ring Sections: Lay out the Template 3 and 4 patches for one block, stitching two Fabric C and two Fabric D patches to the short right sides of the Fabric B patch. On the short left sides, stitch the opposite Fabric C or D. Press the seams towards the B patch.
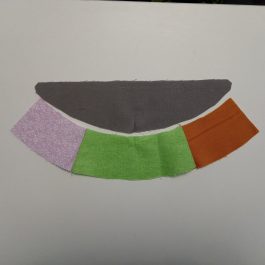
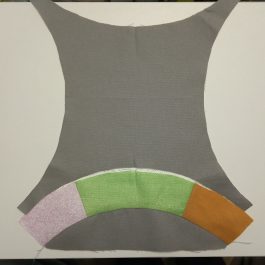
- Making the Side Sections: Lay out one of the ring sections with one of the Template 2 patches. Find the middle of the shorter curve of the ring section and curved side of Template 2. With right sides together, match and pin the middle of the fabric patches. Match and pin the sides of the fabric patches. Ease and pin the rest of the fabric. Stitch with the ring section on top, stopping occasionally to flatten any pleats. Press towards Template 2.
- Stitching the Block: Lay out one of the side sections and one Template 1 fabric patch. Find the middle of both curves and with right sides together, match and pin. Match and pin both sides of the fabric patches. Ease and pin the rest of the fabric. Stitch with Template 1 on top, stopping occasionally to flatten any pleats. Press towards the side section. Repeat to stitch the opposite side section on. Repeat to stitch on the other two side sections.
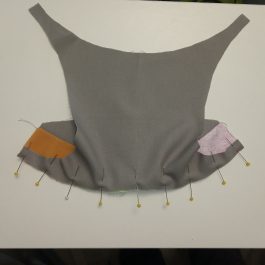
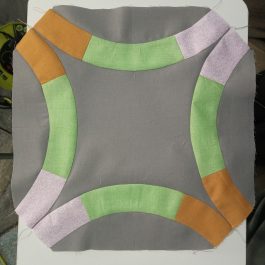
- Finishing the Block: Place one Fabric E and one Fabric F triangle at each corner of the block, matching Fabric E with Fabric C. Add Fabric F with Fabric D. With right sides together, stitch to complete the square. Press towards the triangles. The triangles are deliberately bigger than needed, so trim each square to leave 1/4” seam allowance at the ring sections.
- Making the Rows:
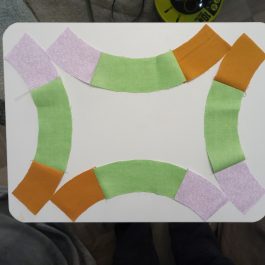
- Place five blocks in a row, rotating the 2nd and 4th so Fabrics E and F match at the corners.
- Stitch the blocks to make a row of five. Press the seams one way.
- Place five more blocks in a row and rotate the 1st, 3rd and 5th so Fabrics E and F match at the corners AND to the row above it. Stitch the blocks to make another row of five. Press the seams in the opposite direction.
- Make three more rows, rotating the blocks to match the blocks next to and above them and pressing the seams in opposite directions.
- Making the Quilt Top: Stitch the five rows together, nesting the seams. Press the seams one way.
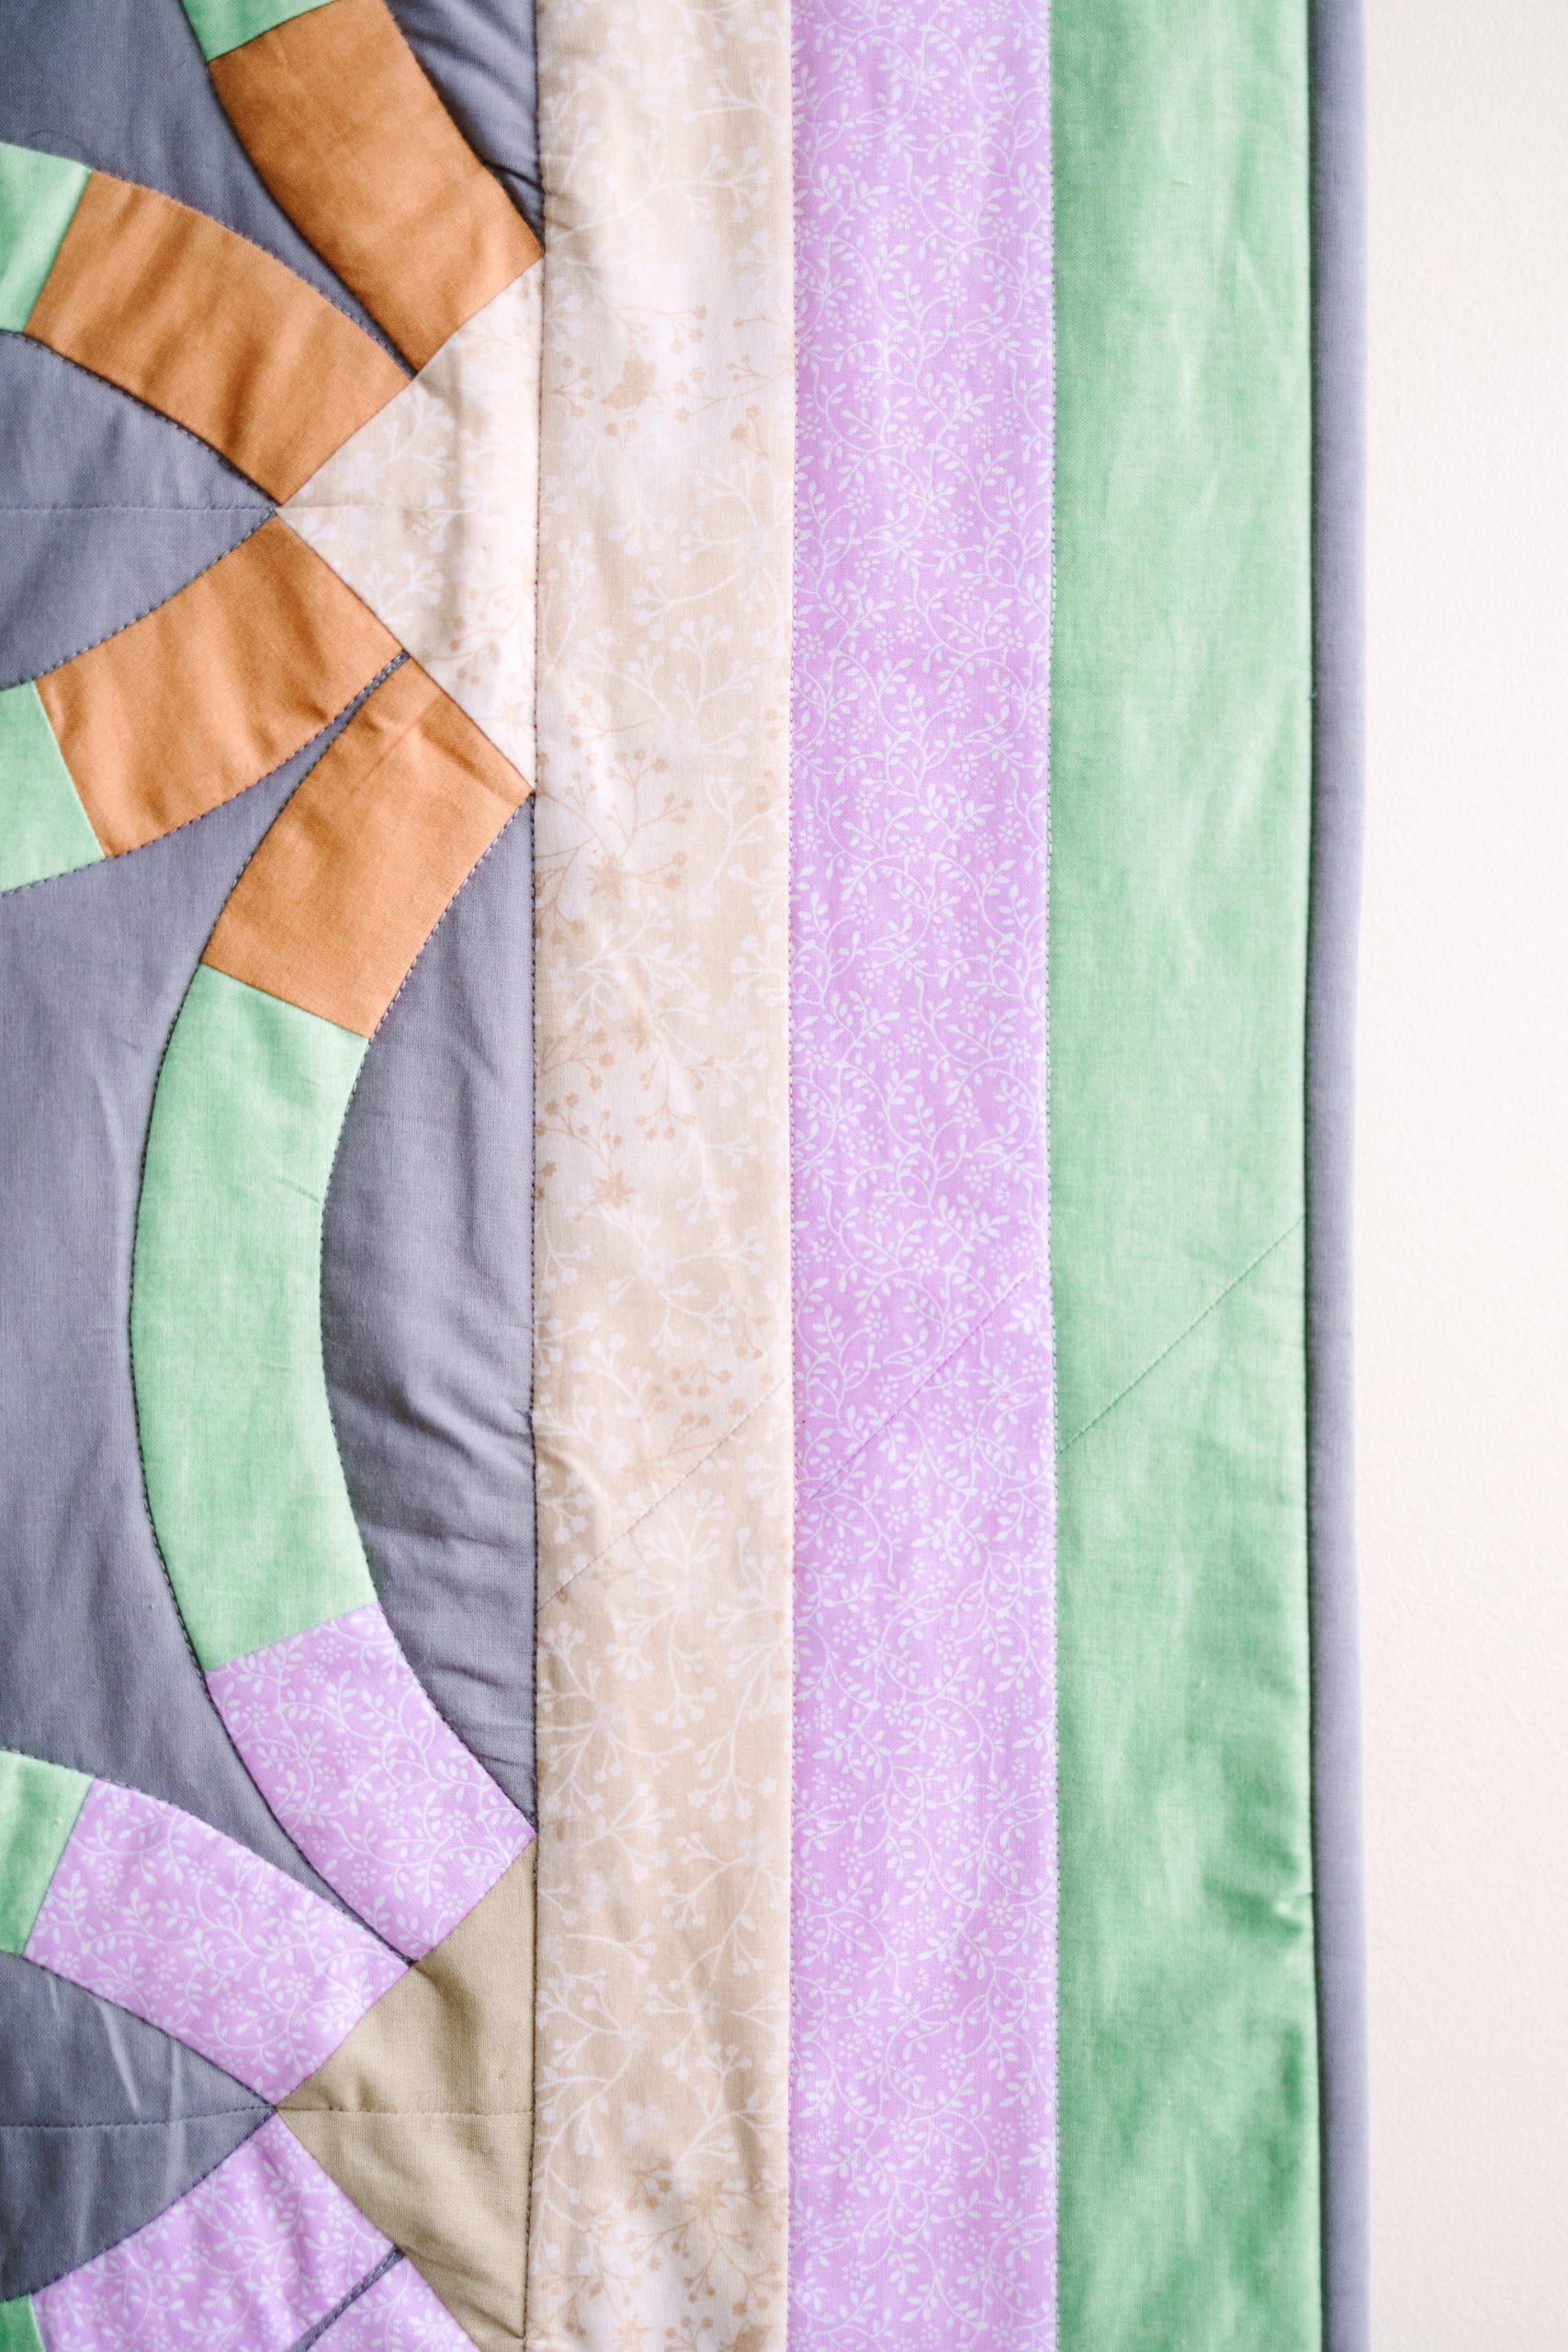
- Making the Borders:
- Join two Fabric F strips together along the short edge to make a long strip.
- Join two Fabric C strips together along the short edge to make a long strip.
- Join two Fabric B strips together along the short edge to make a long strip.
- Stitch the Fabric F strip to the right long edge of the Fabric C strip.
- Stitch the Fabric B strip to the left long edge of the Fabric C strip.
- Press the seams towards the Fabric F strip.
- Repeat to make one more border.
- Repeat stitching the strips together to make two more borders for sides, but this time press the seam towards Fabric B
- Adding the Borders:
- Find the middle of the inner border (Fabric F) and the middle of the quilt top. With right sides together, match and pin the border and quilt top in the middle. Pin the rest of the border to the quilt top.
- Start stitching 1/4” from the edge. Stop stitching 1/4” from the opposite edge. Pin the excess fabric out of the way of the seams still to be stitched.
- Using the other border that has been pressed the same way, place and stitch in the same way to the opposite side of the quilt.
- Place and stitch the other two borders on in the same way.
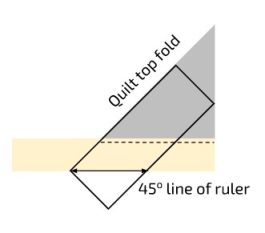
- Mitering the Corners: With right sides together, fold the quilt top along the diagonal and match the border fabrics (the strips should nest together). Line up the 45o (45 degree) line of a quilting ruler along the edge of the border with the edge of the ruler along the folded diagonal. Draw a line from where the stitches finish to the edge of the border fabrics. Check that the border strips are nesting and pin to secure. Stitch along the drawn line. Check the border strips match and trim the seam to 1/4”. If they do not match, adjust them and re-stitch. Repeat for the other three corners. Press the seams to reduce the bulk.
QUILTING:
- Layer the backing, batting and quilt top, securing well using your preferred method. Quilt as desired. The designer stitched in the ditch around all the ring sections and along each border seam. They also found it easier to quilt the border seams with a universal foot (rather than a walking foot) to prevent the fabric from pleating.
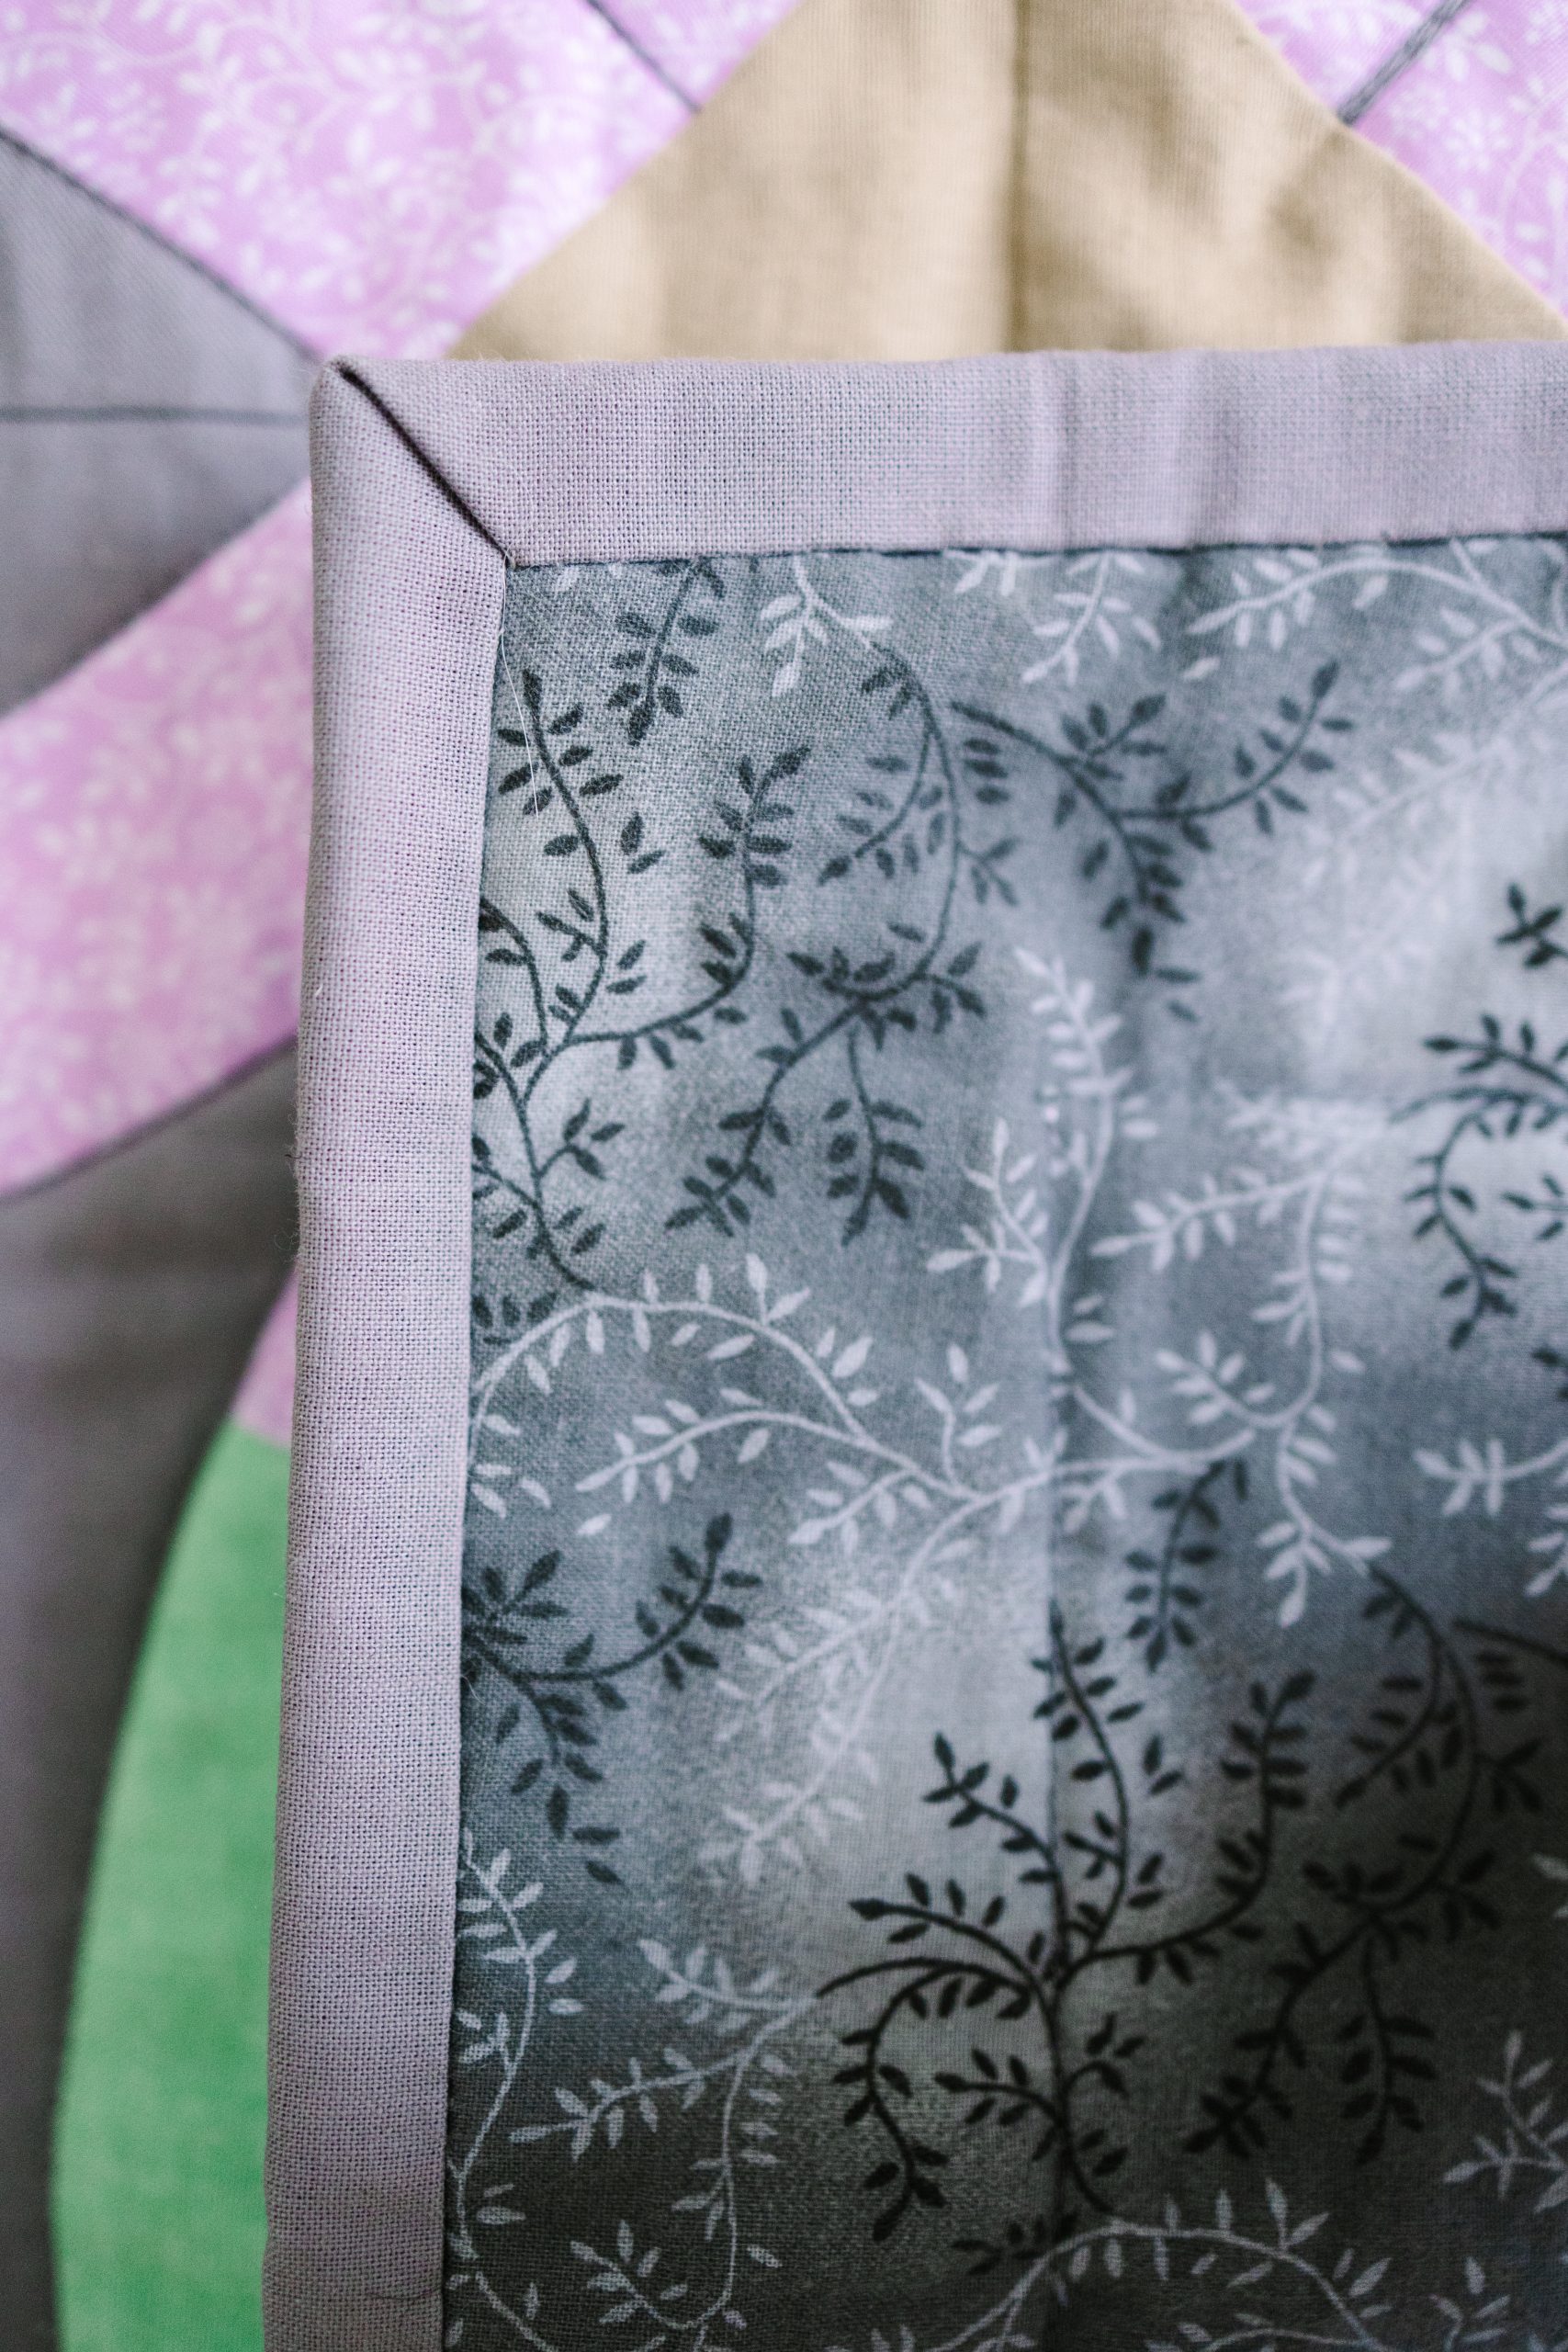
BINDING:
- Join the Fabric A binding strips along the short edges, trim the seams to 1/4”, fold and press with wrong sides together to make one long strip. Double bind the quilt to finish.