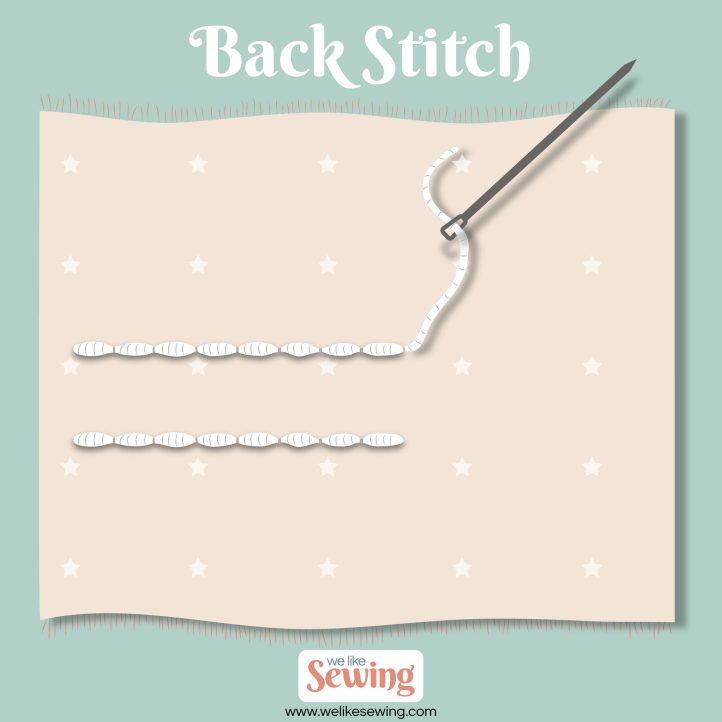
Back Stitch
Back Stitch or backstitch is one of the strongest stitches you can hand sew. It creates a nice, permanent seam and is relatively simple to master. To do the back stitch, bring your needle up through the fabric about a stitch’s length away from where the seam starts, then down again at the beginning point of the seam. Next, come up again with your needle a stitch’s length away from the last stitch, then go down at the end of the last stitch. This motion is what gives the back stitch its appropriate name—you need to go “back” to the previous stitch in order to execute it.
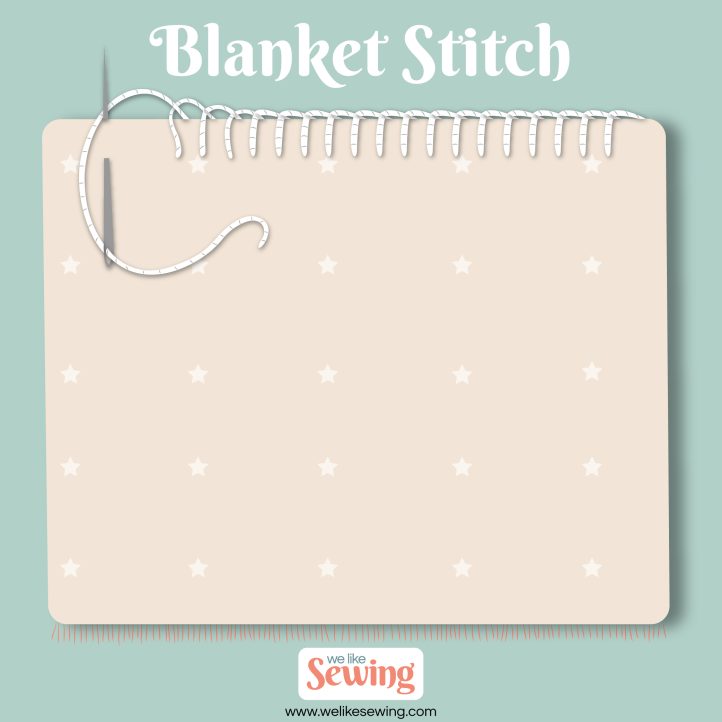
Blanket Stitch
The blanket stitch is a popular technique used to reinforce the edge of any thick material or to seam two pieces of fabric together. The result is a neat, decorative stitch that is ideal for finishing off the edges of unhemmed blankets. Sometimes called the cable stitch or crochet stitch, the blanket stitch is one you will want to have in your sewing toolbox. To complete it, thread your needle and make a knot in one of the tails. Start on the right side of your fabric and bring the threaded needle up from the back so the knot will be hidden. Pull the thread all the way through; then take the thread around to the back of the fabric and go through the same hole once again starting from the back of the fabric. Pull the thread until you have a loose loop. Thread your needle through the loop and pull tight. Move a stitch-width down your fabric and come in through the back again. Pull through until you have a loose loop; then thread your needle through the loop again and pull tight. Repeat the process until your edging is complete.
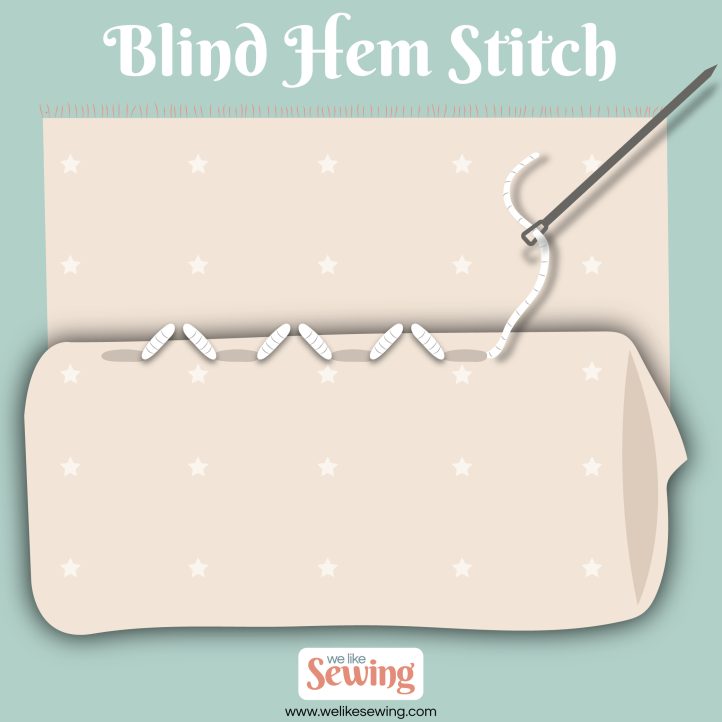
Blind Hem Stitch
The blind hem stitch is used to create a professional finish on hems. When done correctly, the stitches are nearly invisible on the right side of the hem. To complete the blind hem stitch, start working on the wrong side of the fabric and come up near the upper edge of the folded hem. Make a small stitch as you sink the needle down and back up through the back of the fabric. Smaller stitches mean they’re less likely to show on the finished result. Keep going through the folded hem, dipping the needle down and back up to make a stitch that is roughly 1/2 inch long. Repeat these two steps, making small stitches through the outside of the item and longer ones on the inside folded hem.
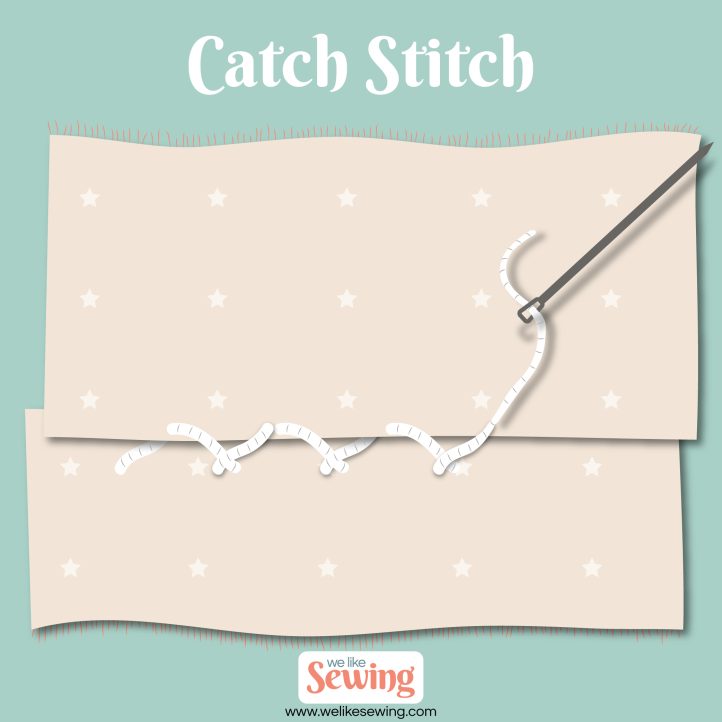
Catch Stitch
The catch stitch (sometimes referred to as the herringbone stitch) is ideal for heavier fabrics, when sewing a hem or with garments that have some stretch to them. Unlike other stitches, it is worked from left to right. Because the stitches will be visible (versus hidden between layers of fabric), the catch stitch is usually used in areas that are covered by a lining. On the right side of the fabric, this stitch creates two lines of tiny horizontal stitches, while on the opposite side, it makes longer crisscrossed stitches. To create this stitch, bring your needle up through the back of the fabric near the edge on the lower-left side. To the right side of this, and on a diagonal, make a right-to-left stitch and pull taught. Make another small stitch (right to left) on a diagonal on the bottom half and pull taught. Repeat, alternating the top line of the fabric and bottom line until you make it all the way across the hem.
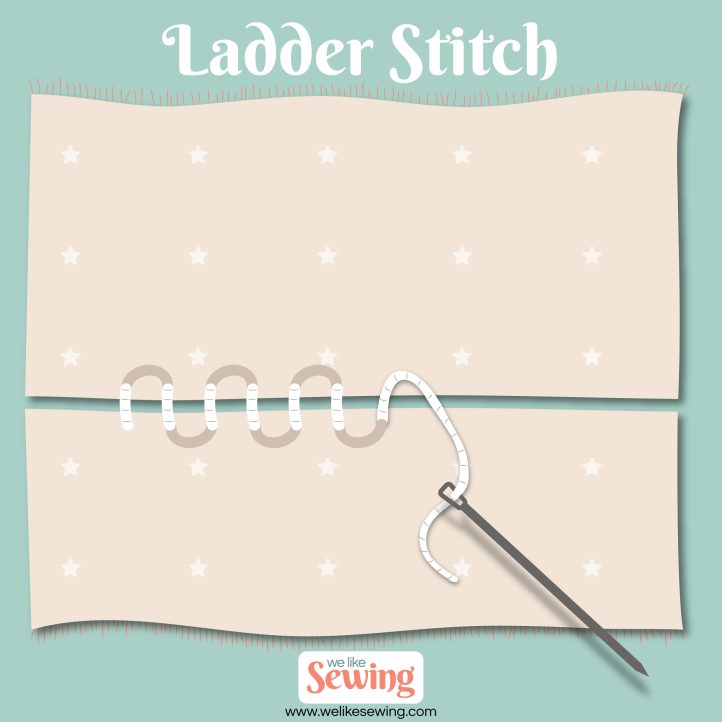
Ladder Stitch
If you are looking for an invisible line to close seams, this is your stitch. The ladder stitch, also called the slip stitch, is worked from the right side where two folded edges need to come together in an invisible seam, e.g., a pillow or sewn toy. To make the ladder stitch, bring the needle up to the right side of the fabric on one of the folded edges. Your knot will be hidden inside the seam once you pull everything tight at the end. Next, directly across from where your needle just came out, go through the opposite folded edge, then come back out a stitch-length away. Repeat this method, going back and forth on each side of the seam until you make it to the end of the area you are seaming together. Pull your thread tightly and watch the seams come together in an invisible seam.
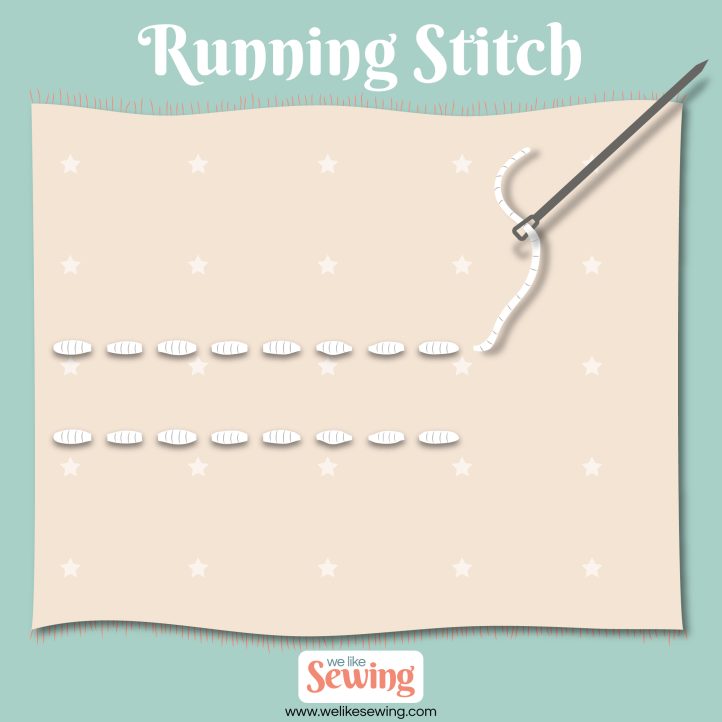
Running Stitch
This is one of the first stitches you will learn as a beginner. The running stitch, also known as the straight stitch, is an essential stitch used in sewing and embroidery. It is ideal for sewing seams, for hand quilting and especially useful for felt projects. To make the running stitch, hold the layers of fabric together and bring the needle up through the fabric, then go back down. Repeat this technique at even distances— and that’s it! The stitches may be of varying length. For more security, keep your stitches smaller. If you are using this technique to baste two pieces together, use longer stitches so they are easier to remove.
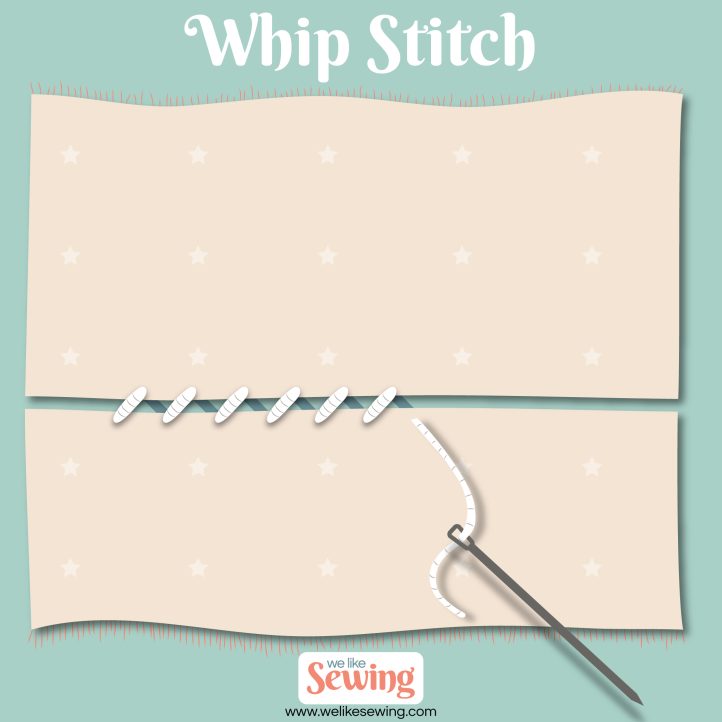
Whip Stitch
The whip stitch is a common way to sew together two pieces of fabric with flat edges. Also known as the overcast stitch or edge stitch, the whip stitch is also perfect for finishing seams so they don’t fray. To make the whip stitch, bring the needle up through the fabric and loop it around the edge of the fabric. Then, come back up again. With this stitch, it is important to always bring your needle from the back to the front so the thread can wrap around the edges of the fabric as intended.
Comments are closed.