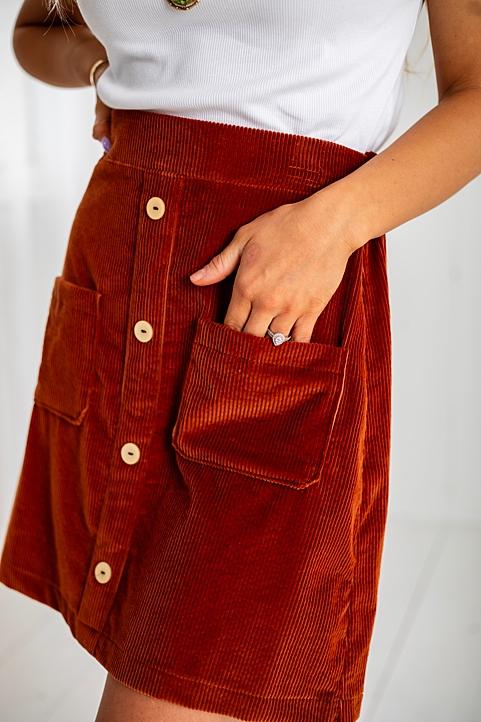
If you’re like us, you’re also obsessed with all things corduroy. Sew a beautiful, colorful spring skirt in soft corduroy with this mini skirt pattern from Traci Anderson. Featuring a waistband with back elastic, this comfortable and chic spring skirt also has patch pockets and a faux button placket. Pair your skirt with a simple tee or tank and your favorite pair of sneakers or spring sandals.
Skill Level: Advanced Beginner/Intermediate
Pattern Seam Allowances: 3/8 inch (.96 cm) = All seams included.
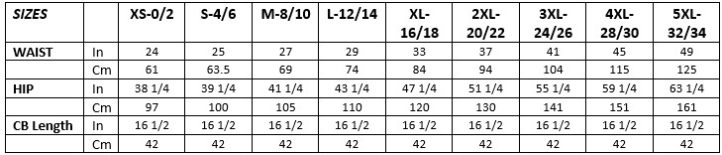
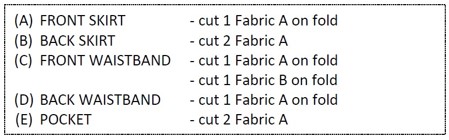
Size Chart:

Finished Garment Measurements:
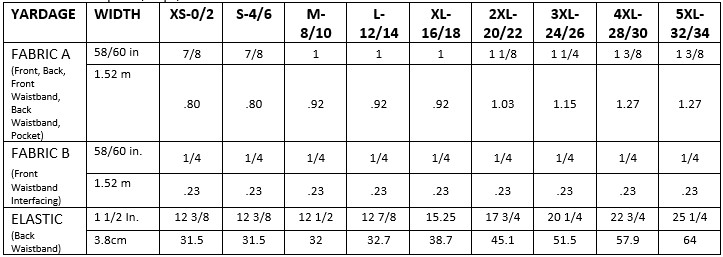
Fabric Yardage: (in yards and centimeters)
Note: Fabric requirements do not account for possible fabric shrinkage, placements, stripes, matching pieces, directional prints, or shorter fabric widths.
Materials:
- Fabric A suggestions – Medium weight woven blend, corduroy, twill, denim, linen, poplin
- Fabric B suggestions – Pellon/interfacing
- Four 3/4-Inch (1.9 cm) buttons
- 1 1/2-Inch (3.8 cm) wide elastic
- Matching thread
- PDF Pattern – This is located at the bottom of this page. Please see printing instructions below.
PRINTING INSTRUCTIONS:
Note: To download the pattern, click on the pattern download button at the bottom of the page. We recommend opening your pattern download using Adobe Acrobat.
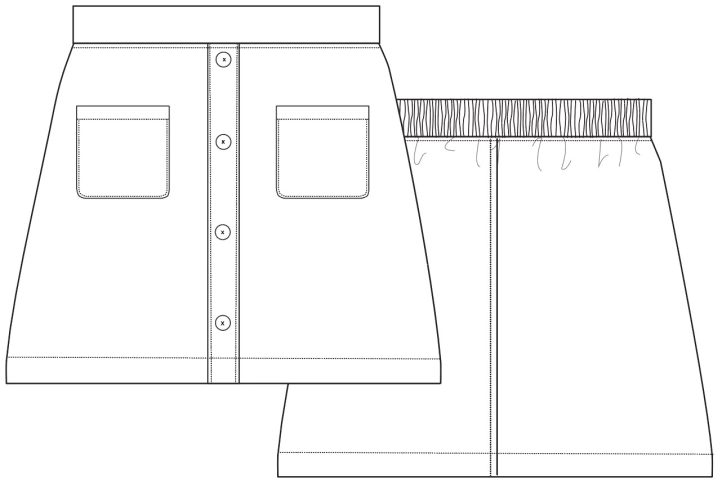
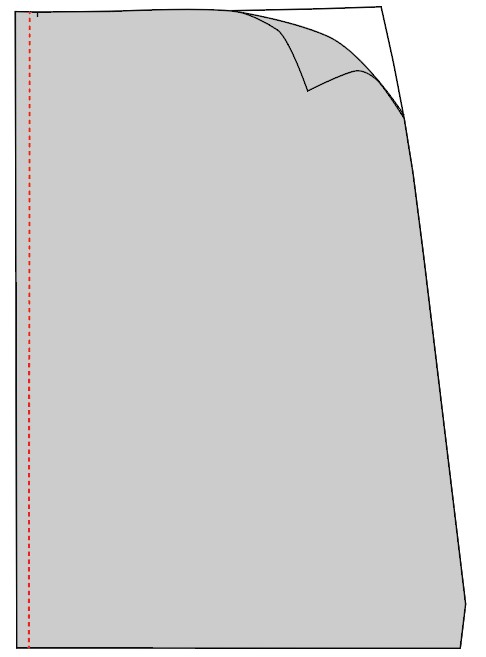
Pattern Description: A-line skirt with a center front box pleat, faux buttons, waistband with back elastic, and patch pockets.

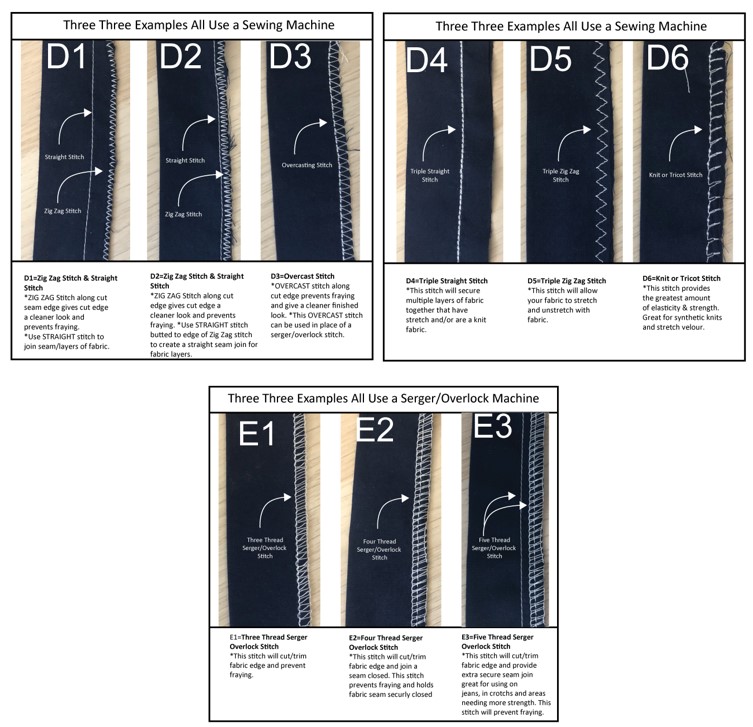
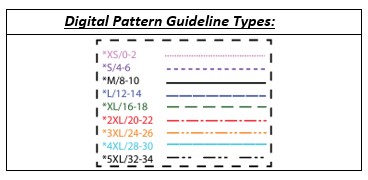
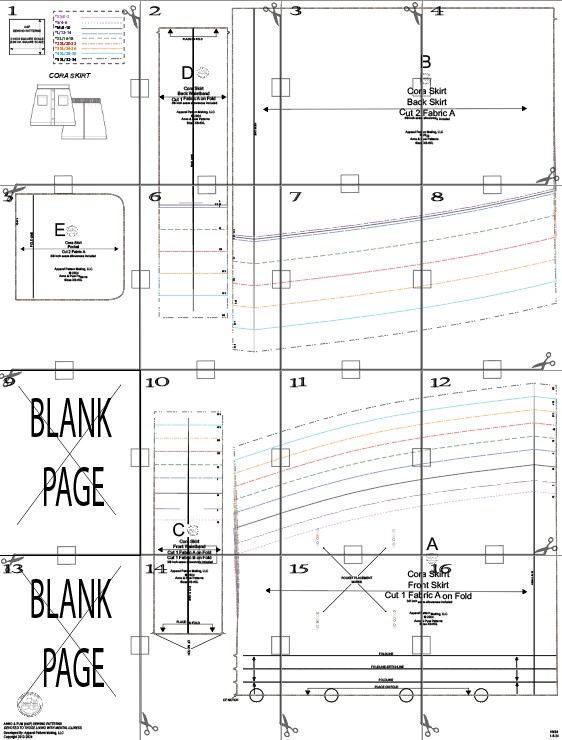
Machine Required: Serger or sewing machine
A sewing machine can be used in place of a serger.
*Optional seam edge finish examples below using serger and/or sewing machine.
DIGITAL PATTERN PIECES:
Downloadable PDF page tiled layouts. *Follow “Pattern Guideline Types” in the below cells for which colored lines to cut per size.
Before printing and cutting out all your pattern pieces, print PAGE 1 which contains the “SQUARE SCALE” at 100% or full scale. Measure the square to confirm it measures 2 inches (5.09 cm) in both directions. If the square measures correctly in length and width, go ahead and print out the remaining pages. Lay pages out next to each other in numerical order (as seen below in the image). Then butt pages together lining up cut lines and half squares next to each other. If you do not cut along page cut lines, you will need to overlap page edges to line pages up. Then tape pages together to hold them in place. Once all pages have been taped together your pattern pieces will be ready to cut out and prepare to layout on your fabric.
Letter & A4 Size Layout:
LAYOUT & CUTTING DIRECTIONS:
Fabric yardage should be laid out on the fold with selvages layered on top of each other. Layout pattern pieces on your fabric with grain lines running parallel to your selvage.
CUT PATTERN PIECES AS FOLLOWS:

Instructions:
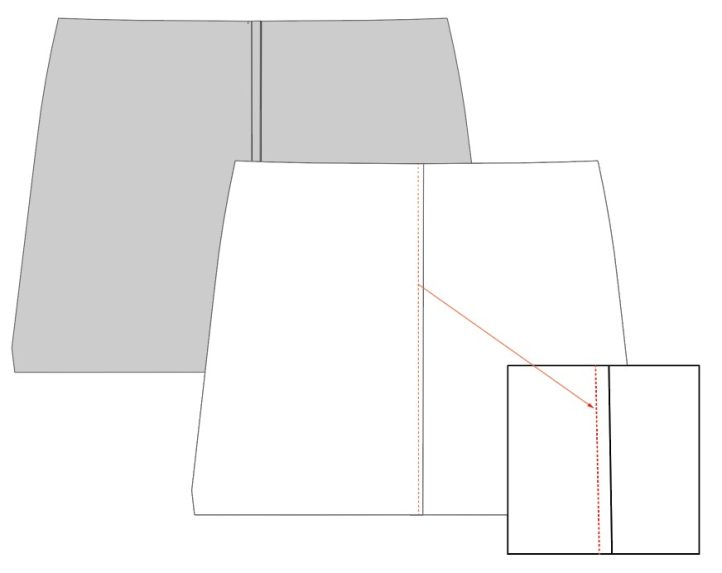
- Mark your fabric at pocket and button placement marks with a fabric marker or tailor chalk. Then fold FRONT SKIRT in half, WRONG SIDES TOGETHER on the center front fold, then stitch layers together along stitch-foldline. Open FRONT SKIRT, right side out and press center front folds flat to form a box pleat, that center of pleats and button marks line up with stitching.
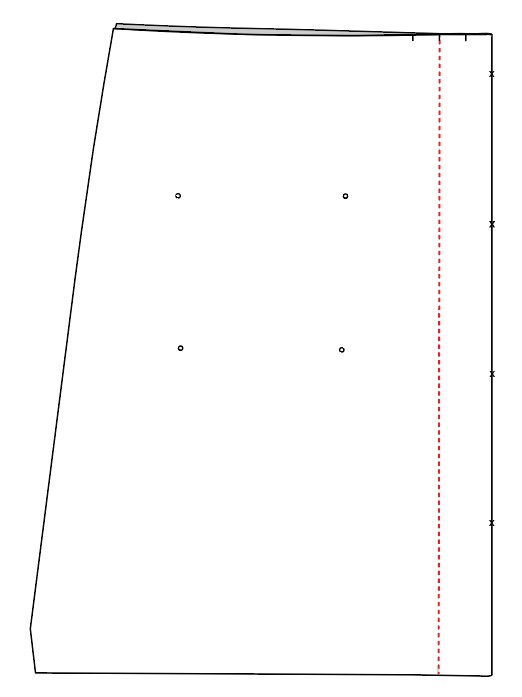
- Topstitch FRONT SKIRT pleat edges 1/8-inch (.32 cm) from fold through all layers.
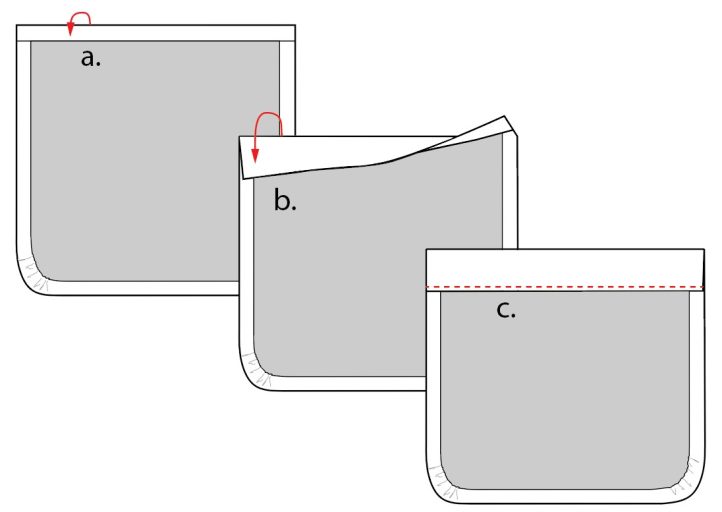
- Place POCKET wrong side up, turn edges along the sides and bottom inward 1/2-inch (1.3 cm).
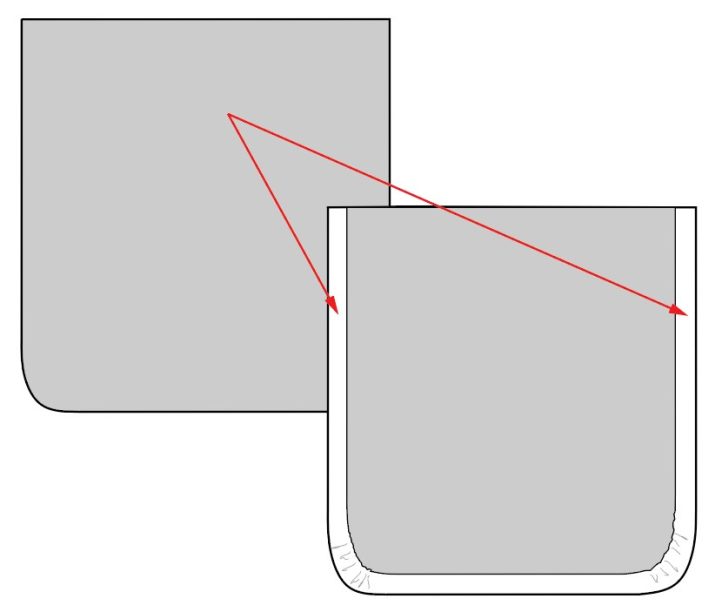
- Turn top edge of POCKET under 1/4-inch (.64 cm) [a.], then turn under another 3/4-inch (1.91 cm) [b.] and topstitch through all layers about 1/8-inch (.32 cm) [c.] from the folded edge for a clean hem finish.
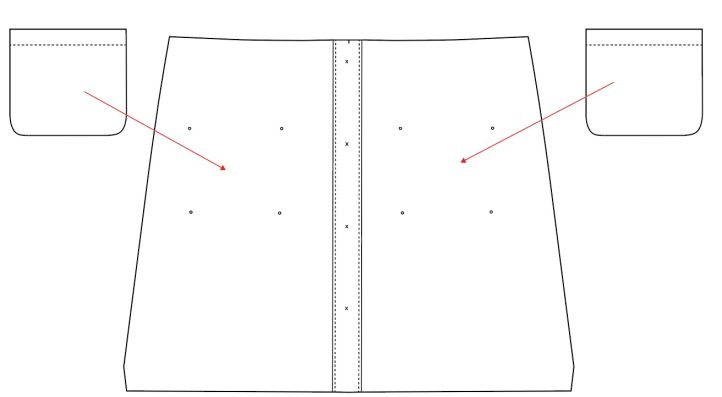
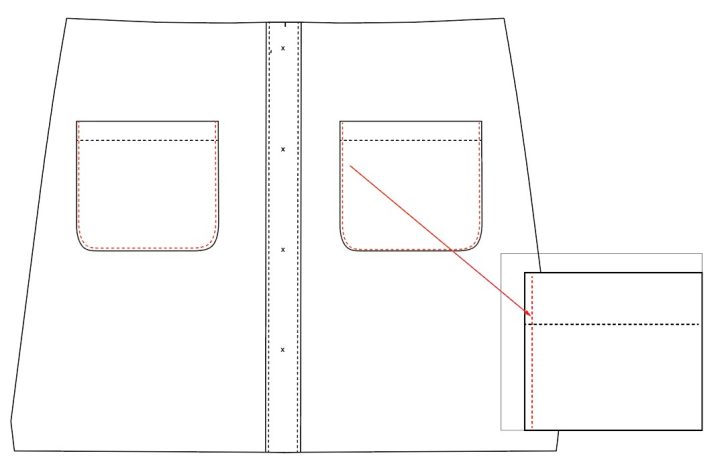
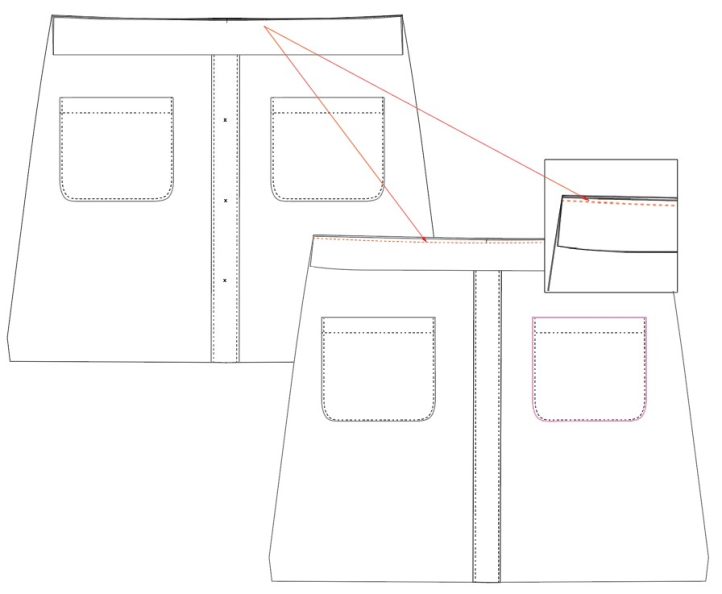
- Place POCKETS on top of the FRONT SKIRT at placement marks. Then topstitch from top edge all around to the opposite top edge. Make sure to backstitch at both ends to lock stitches in place.
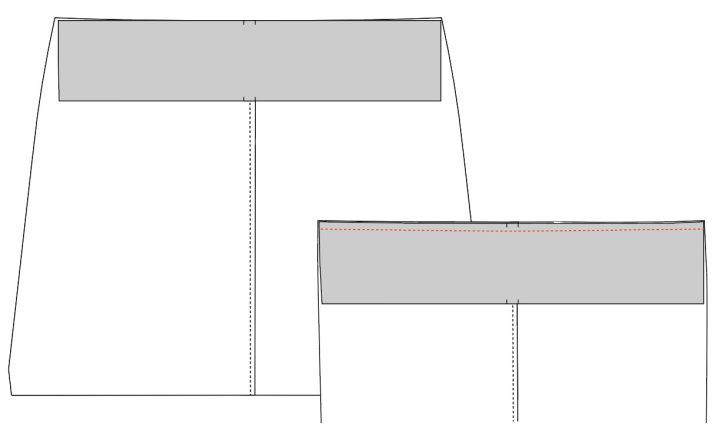
- Attach FRONT WAISTBAND Interfacing [b] to wrong side of FRONT WAISTBAND fabric [a]. Then fold the FRONT WAISTBAND in half lengthwise with wrong sides/interfacing together [c].
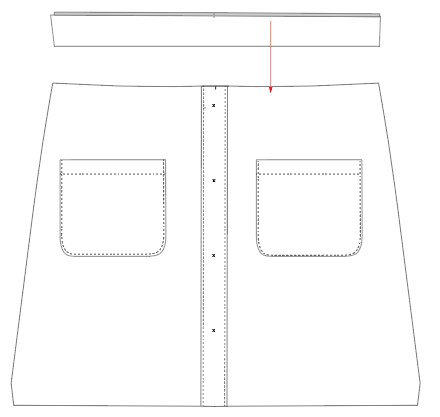
- Attach the FRONT WAISTBAND edges to FRONT SKIRT right sides together making sure to match center front notches.
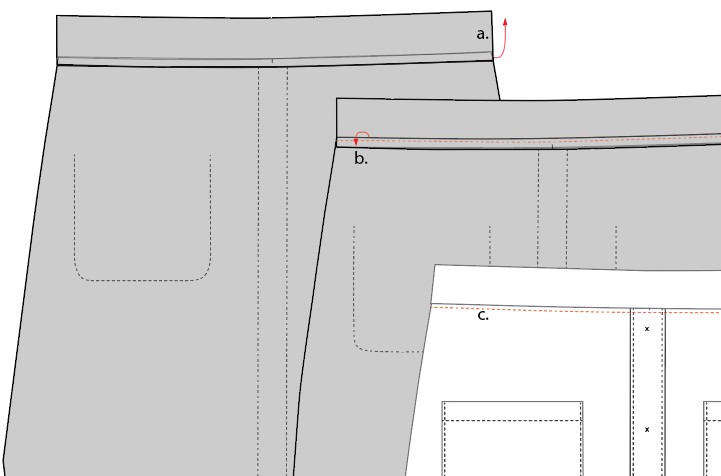
- Turn FRONT WAISTBAND/FRONT SKIRT to the wrong side and turn the FRONT WAISTBAND upward [a]. Press the seam allowance down and topstitch 1/8-inch (.32 cm) from the seam join through all layers side to side, [b] is wrong side view and [c] is right side view. *If you prefer to serge or zig-zag raw edges, be sure to do that before topstitching.
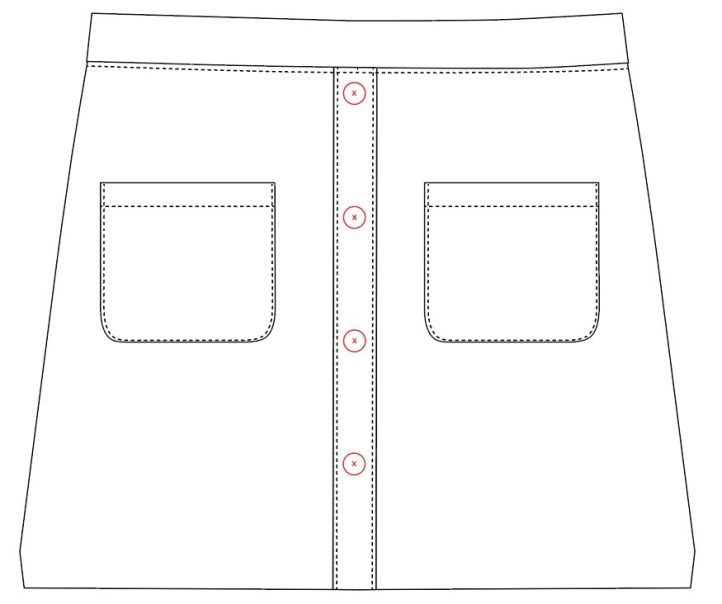
- Attach buttons to FRONT SKIRT at marking placements through all layers.
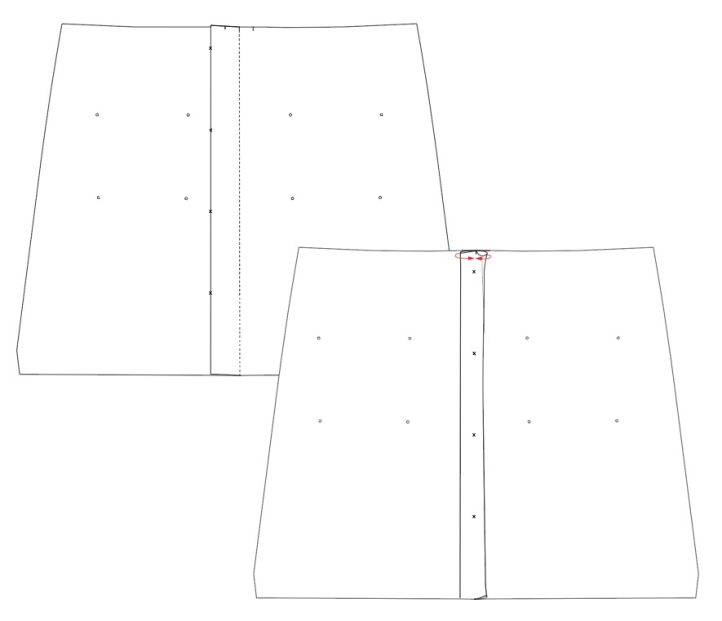
- Join BACK SKIRT at center back. *If you prefer to serge or zig-zag raw edges, be sure to do that after this step.
- Open BACK SKIRT wrong side out and turn seam allowance to right (or wearer’s left). Then flip BACK SKIRT to right side out and topstitch seam allowance through all layers 1/8-inch from seam join.
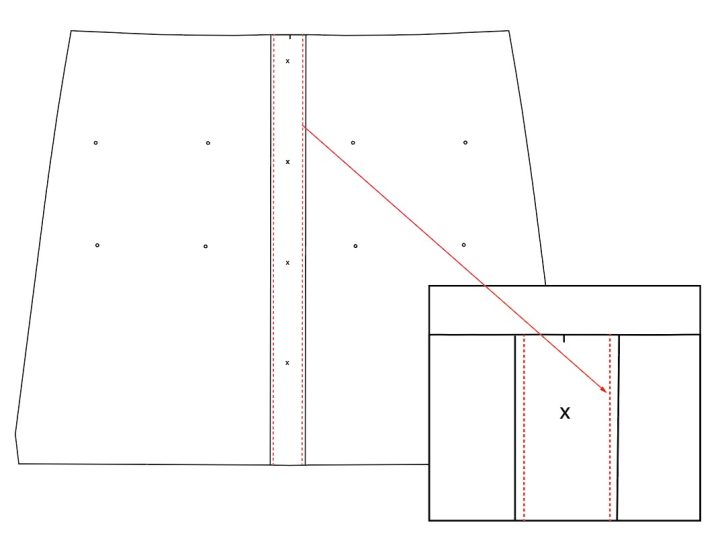
- Join one edge of the BACK WAISTBAND to BACK SKIRT from side to side matching notches at center. *If you prefer to serge or zig-zag top and bottom raw edge of WAISTBAND, be sure to do that after this step.
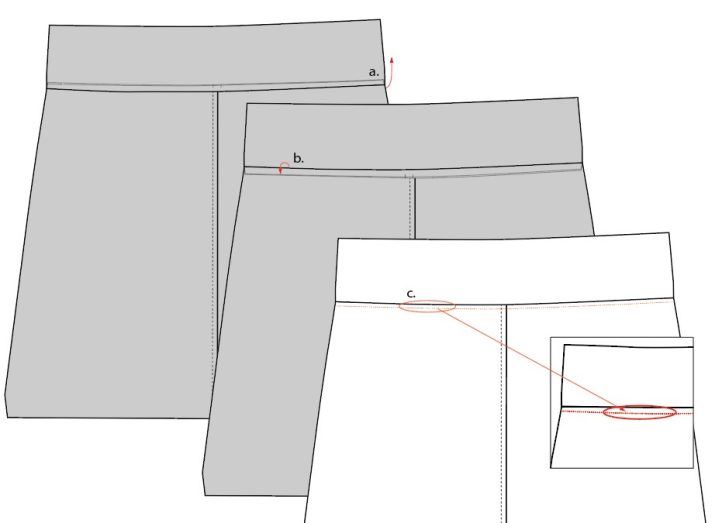
- Turn the BACK WAISTBAND/BACK SKIRT to wrong side and fold the WAISTBAND upward [a]. Press seam allowance down [b]. Then turn to right side and topstitch 1/8-inch (.32 cm) from join through all layers, side to side.
- Place FRONT SKIRT & BACK SKIRT right sides together, matching WAISTBAND seam joins and hem at side. Repeat at opposite side.
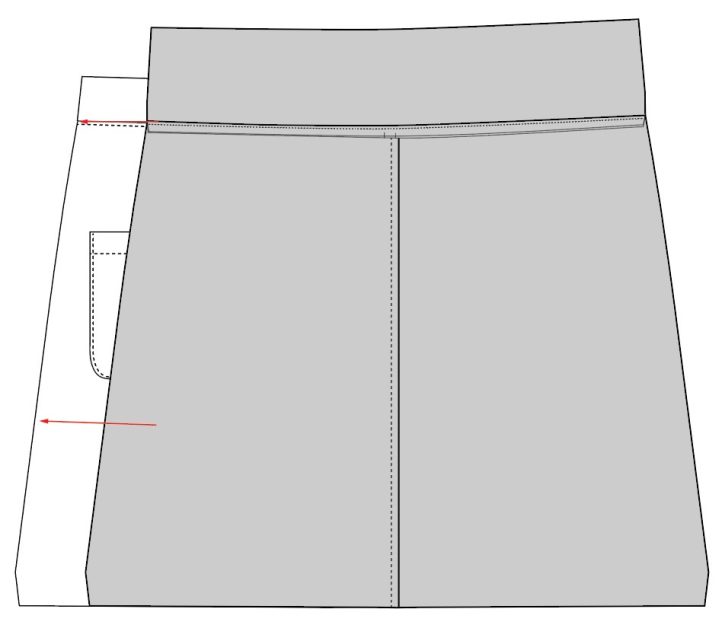
- Wrap the BACK WAISTBAND over the FRONT WAISTBAND so that side ends match up. Your FRONT WAISTBAND should now be sandwiched between the BACK WAISTBAND as shown in the diagram below. Repeat on opposite side.

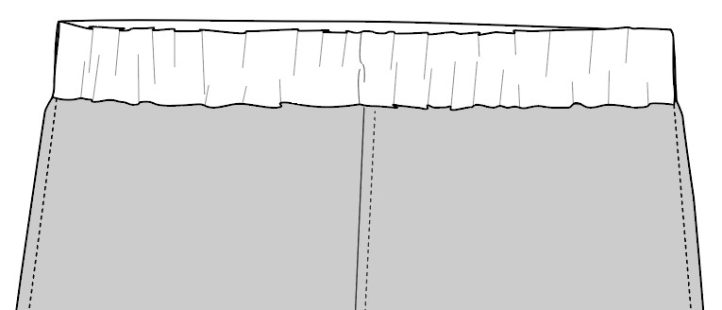
- Cut elastic to length per yardage chart elastic measurement and attach to WAISTBAND sides. Then stitch WAISTBAND, elastic, and side seams from folded edge to hem of SKIRT. Be sure to back stitch at both ends to reinforce stitching. *If you prefer to check elastic length for a more personal fit, stitch one side of the elastic to the waistband through side seam, and baste the opposite side waistband (without elastic) through side seam. Flip the skirt right side out to try it on. Pull the non-stitched elastic side to a comfortable length and pin elastic to opposite side of waistband side. Remove skirt, trim elastic to length, making sure to include 3/8-inch (.96 cm) extra for seam allowance stitching to WAISTBAND. *If you prefer to serge or zig-zag side seam raw edges, be sure to do this before next step.
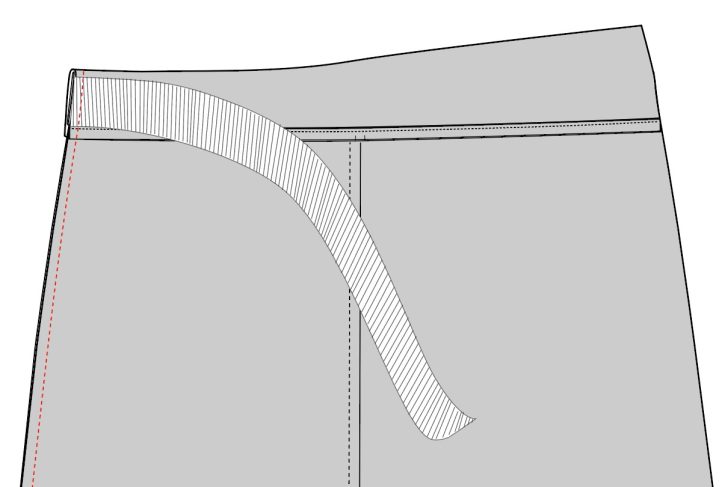
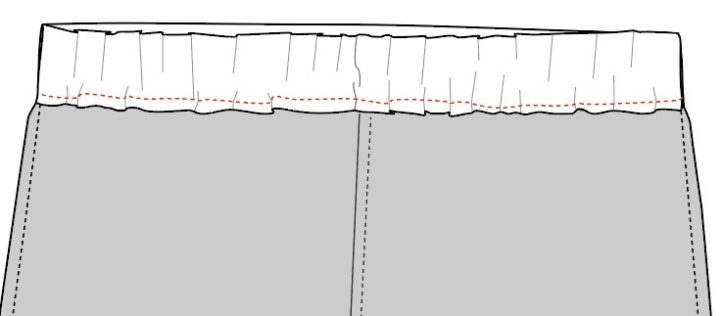
- Flip BACK WAISTBAND over FRONT WAISTBAND so they are both right side out and elastic is sandwiched between fold of BACK WAISTBAND.
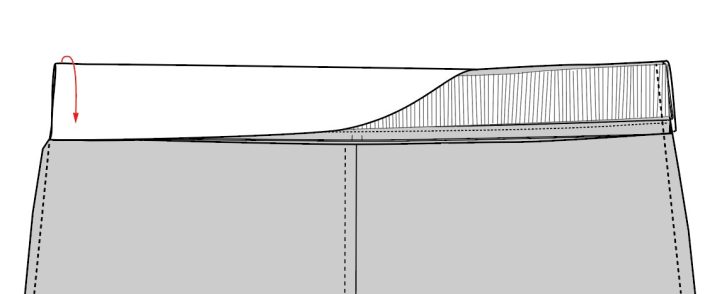
- Stitch BACK WAISTBAND in the ditch of the BACK SKIRT/BACK WAISTBAND join from side to side, making sure to backstitch at ends to reinforce stitching.
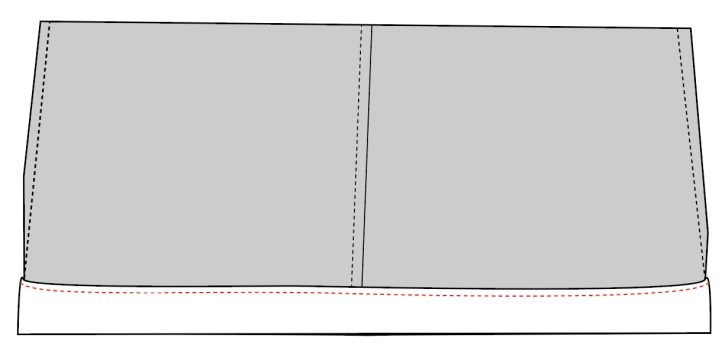
- Turn bottom hem up 1/4-inch (.64 cm) [a] and turn up again 1-inch (2.5 cm) to create a double hem [b].
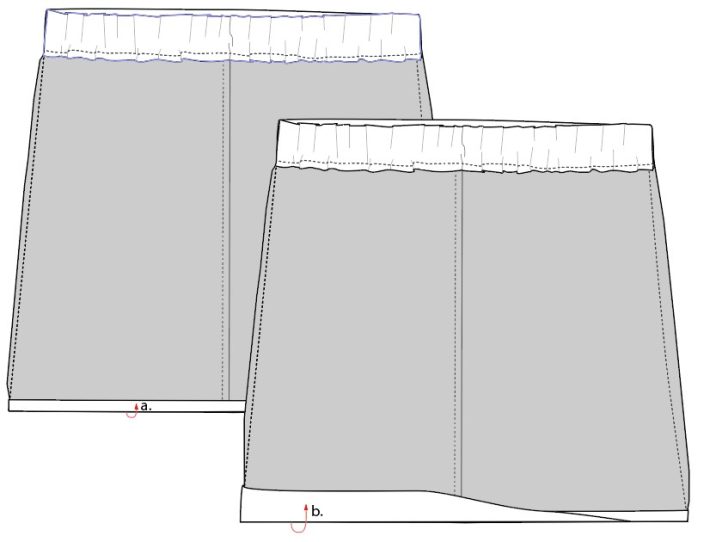
- Then topstitch 1/8-inch (.32 cm) along folded edge all around.
- Turn Skirt right side out, trim all loose thread ends, and enjoy wearing your new skirt!