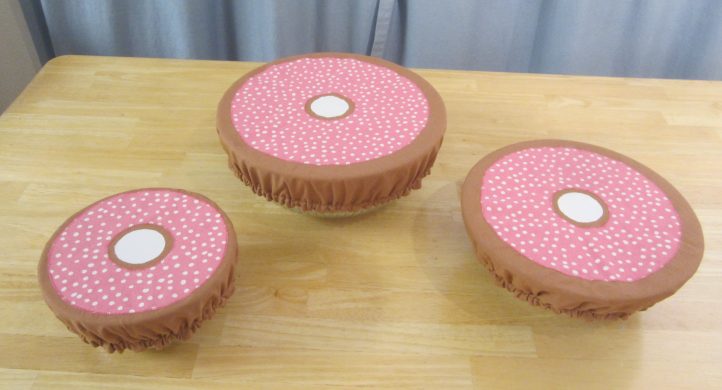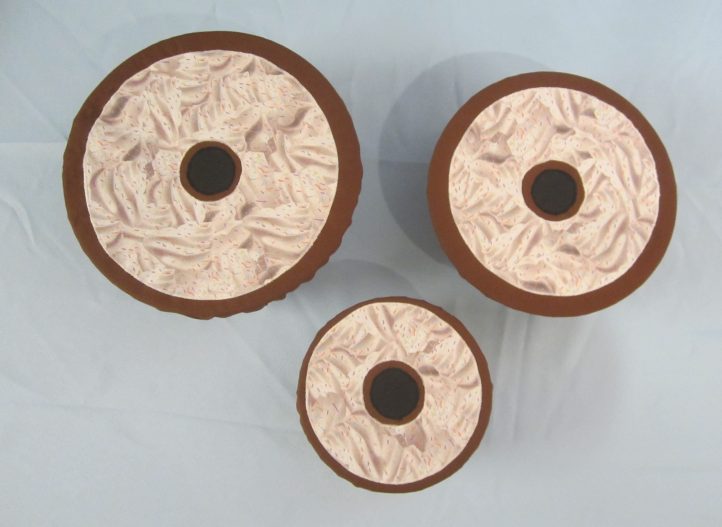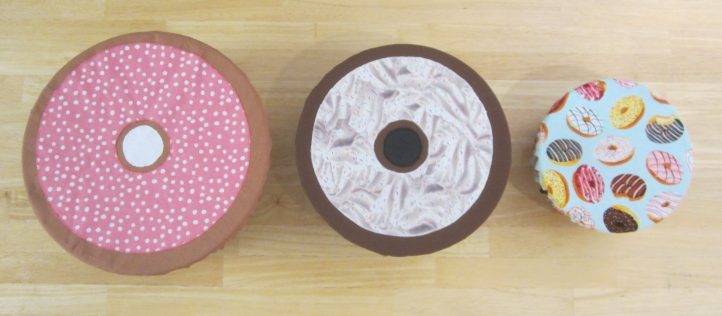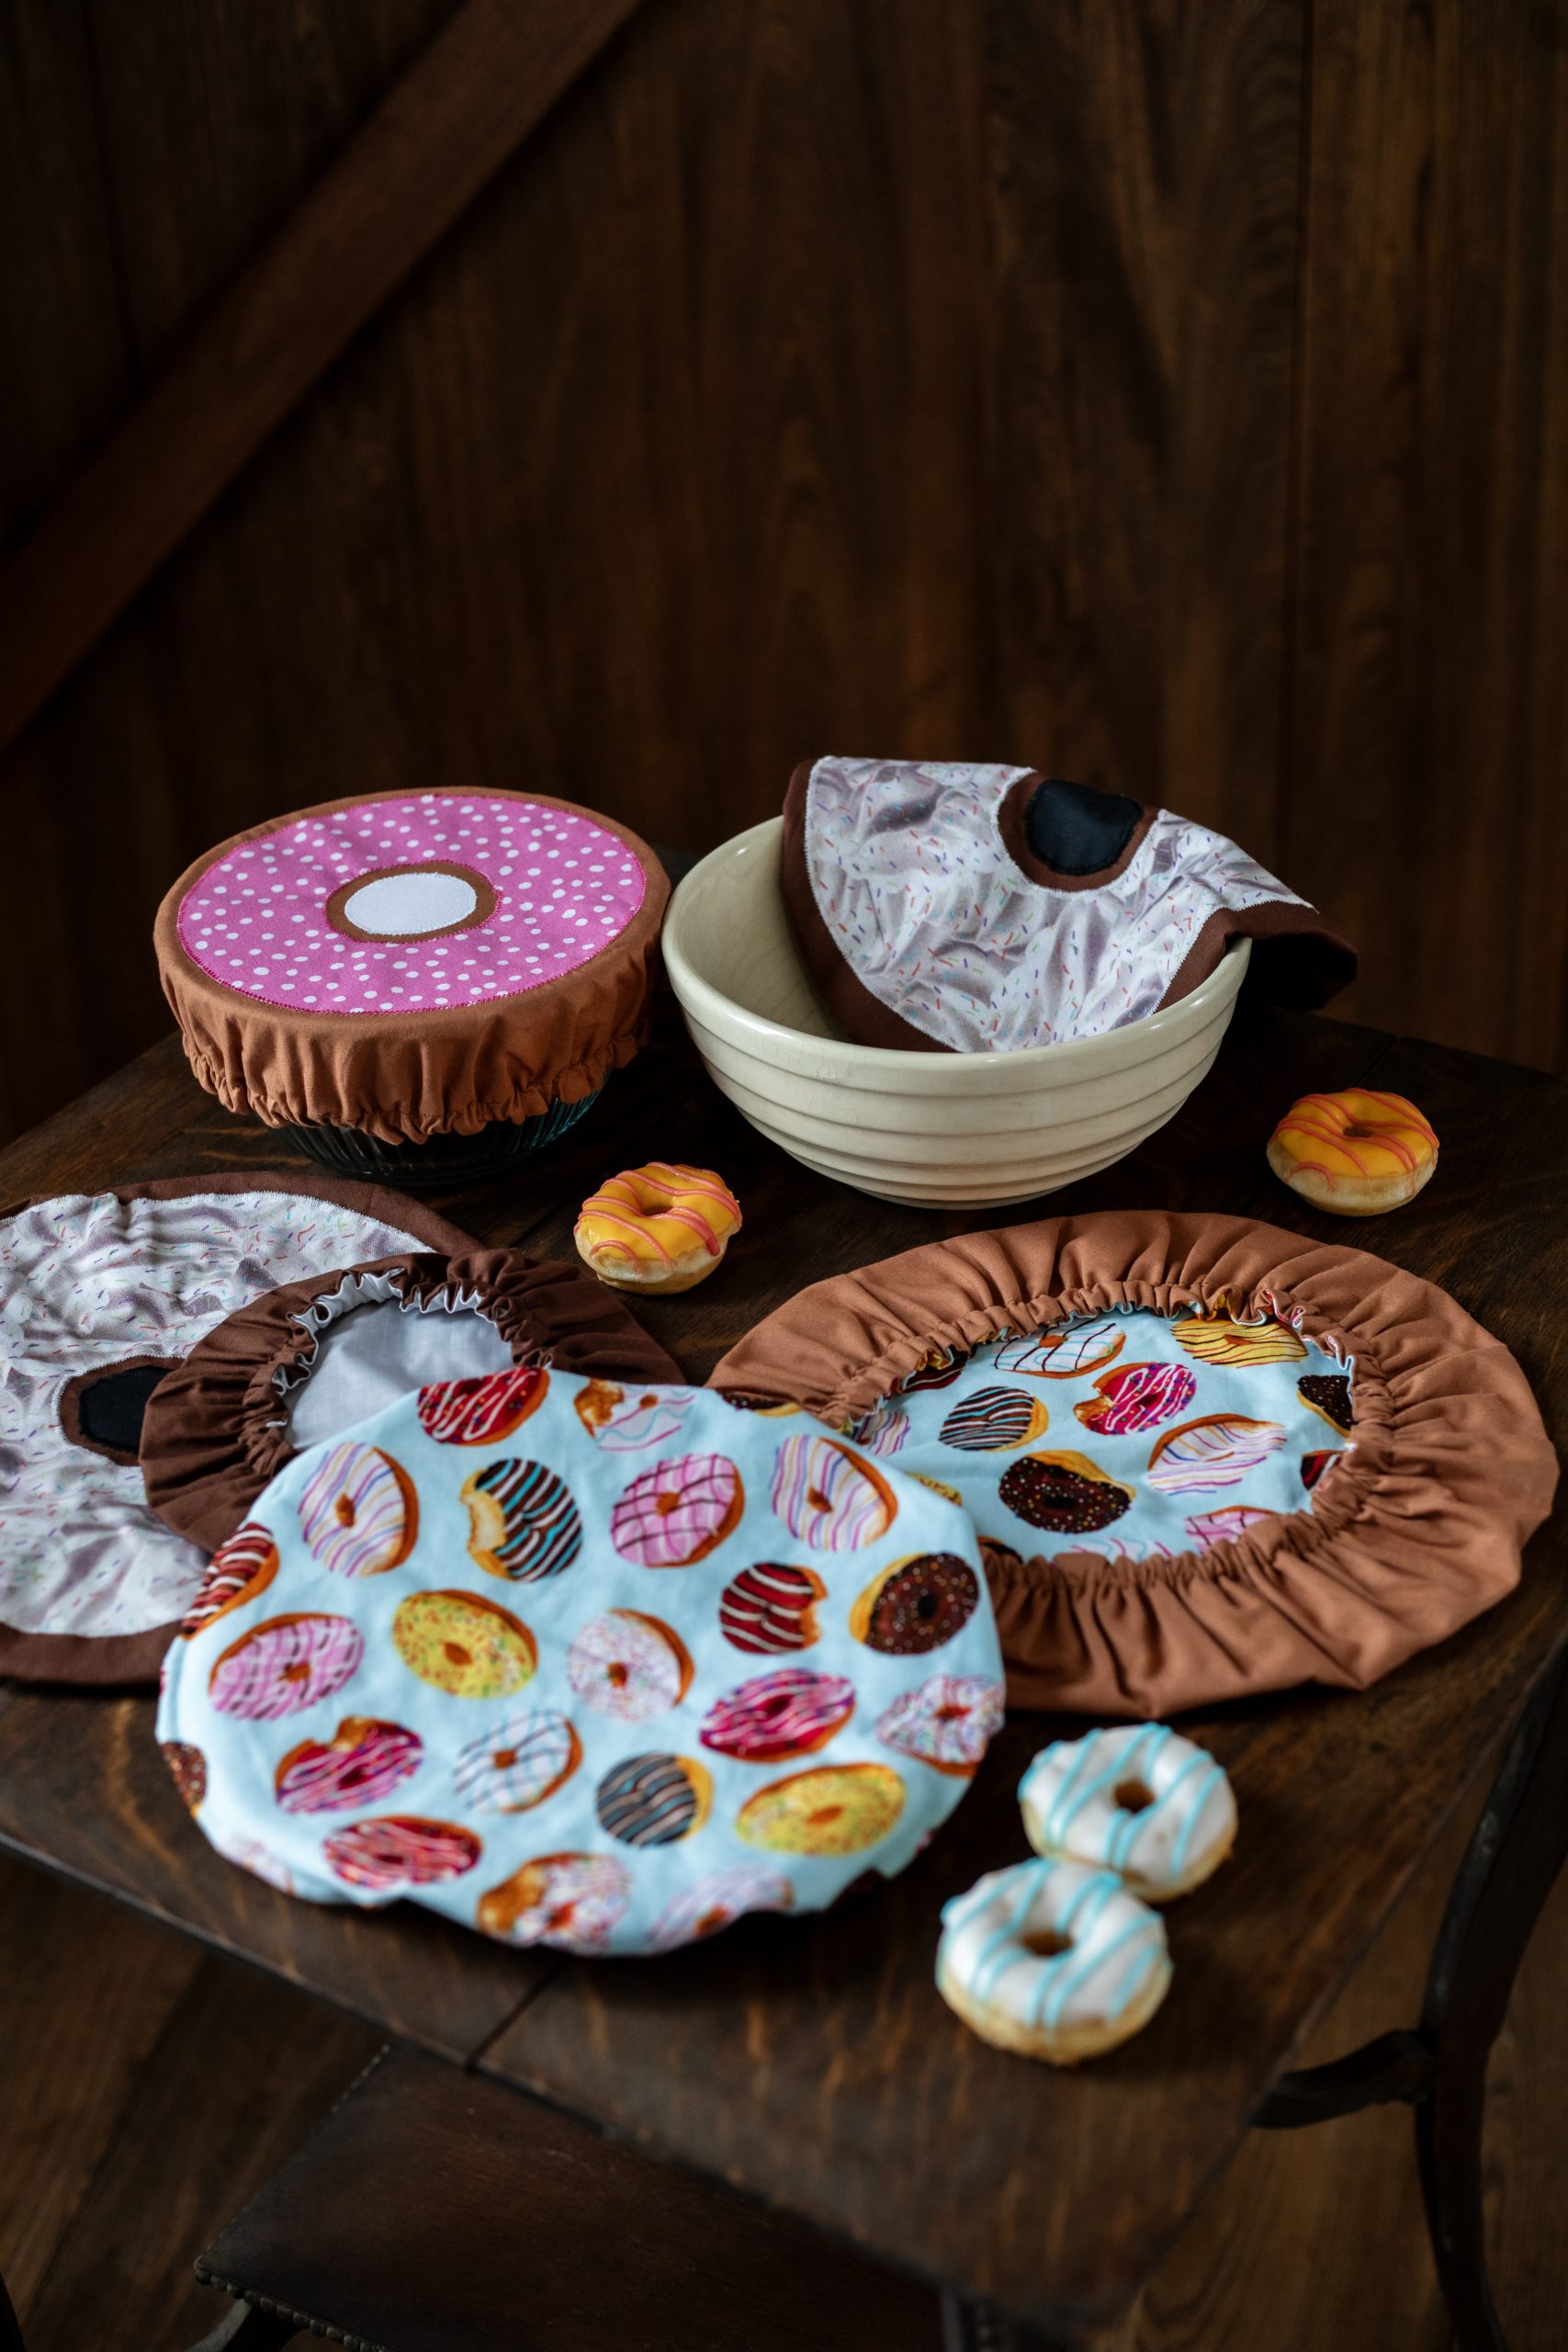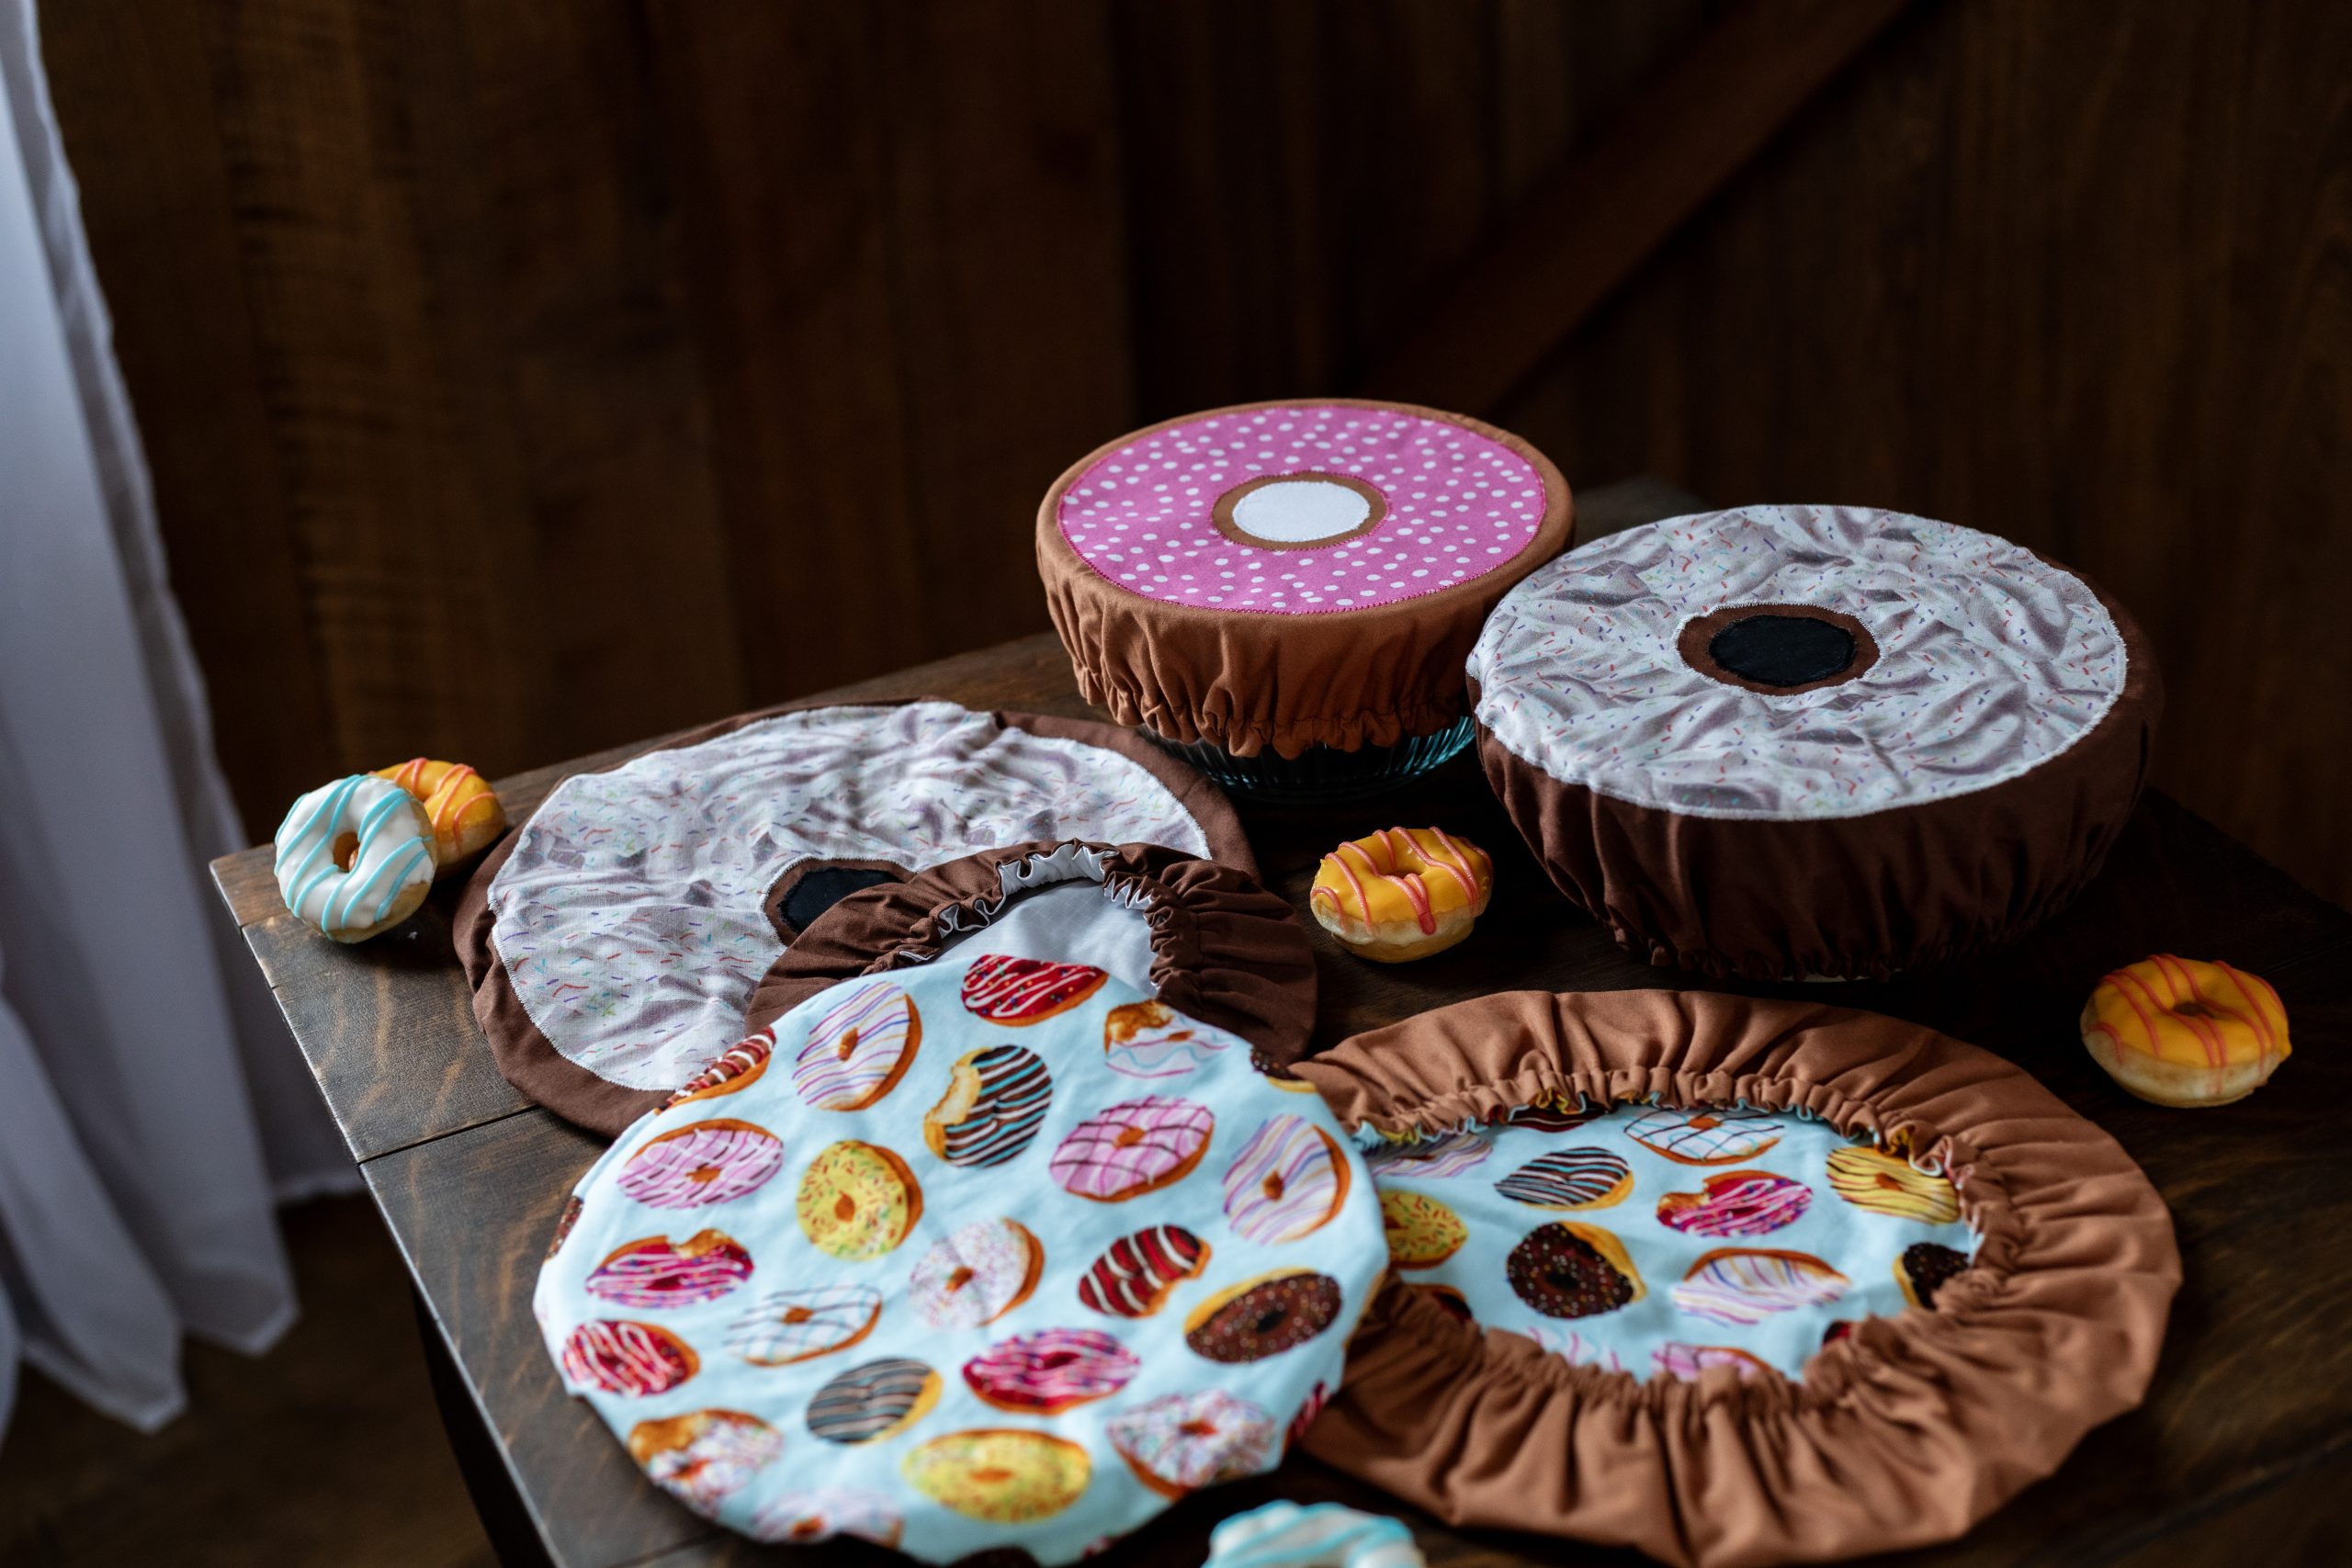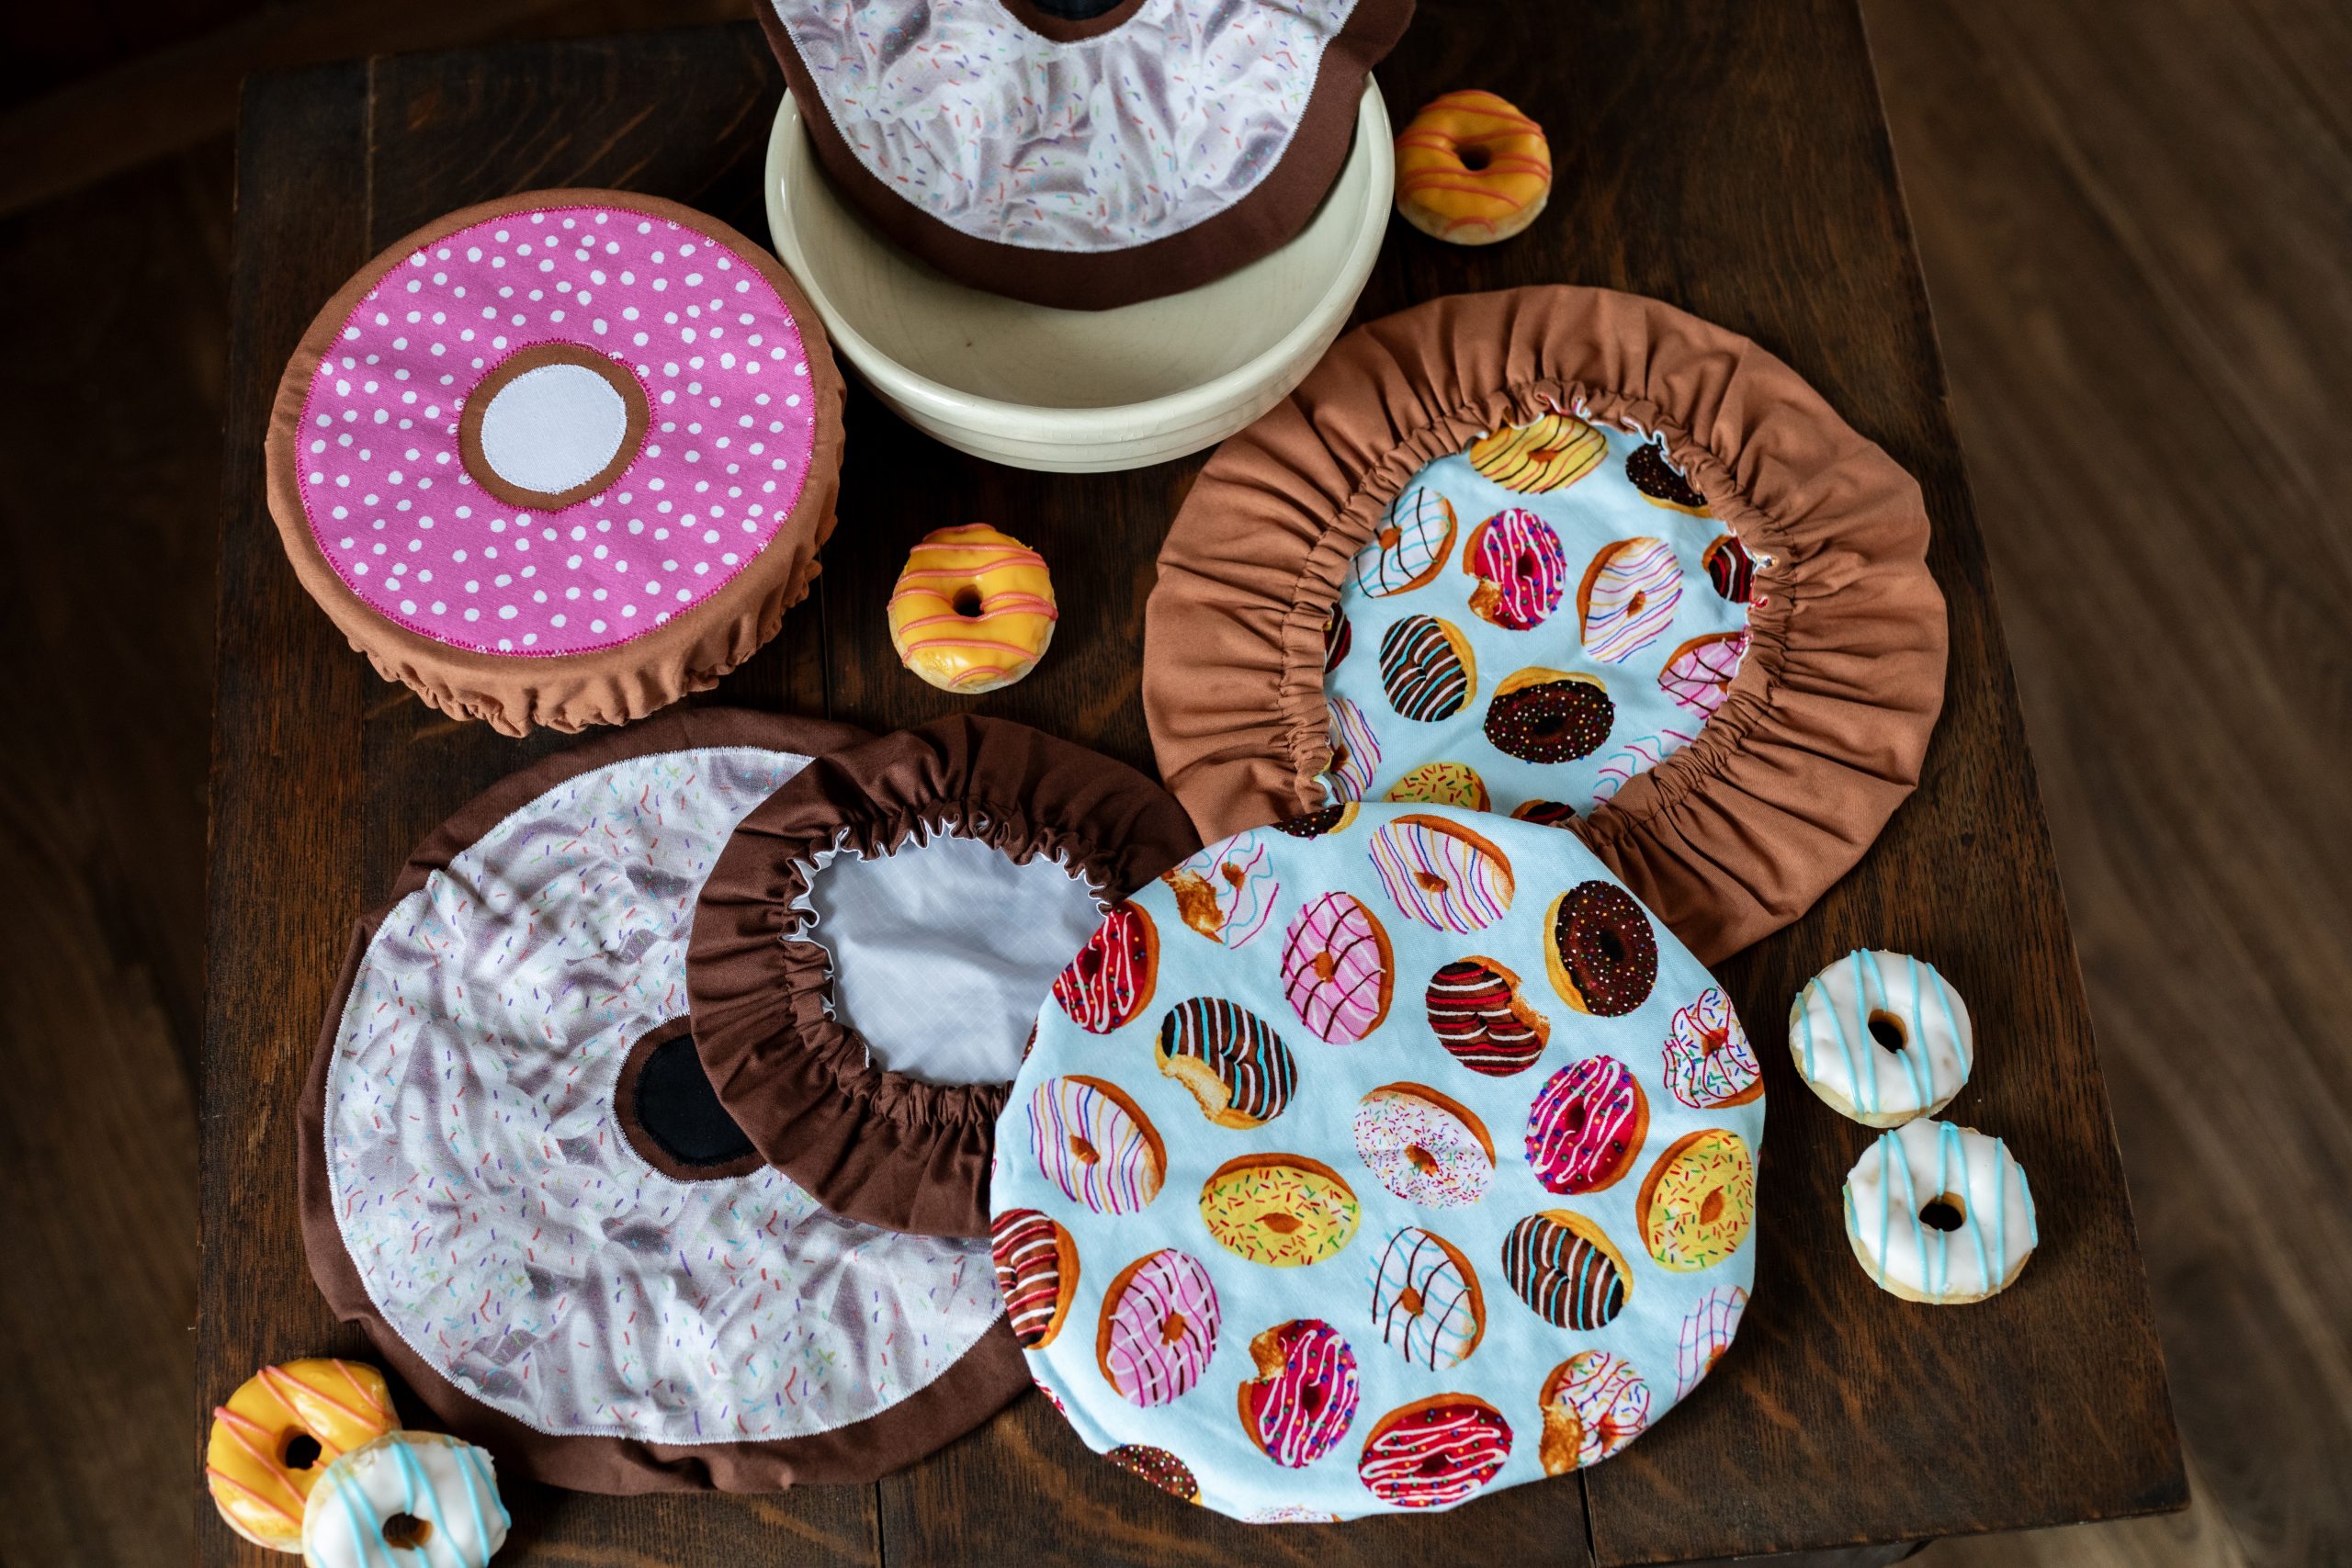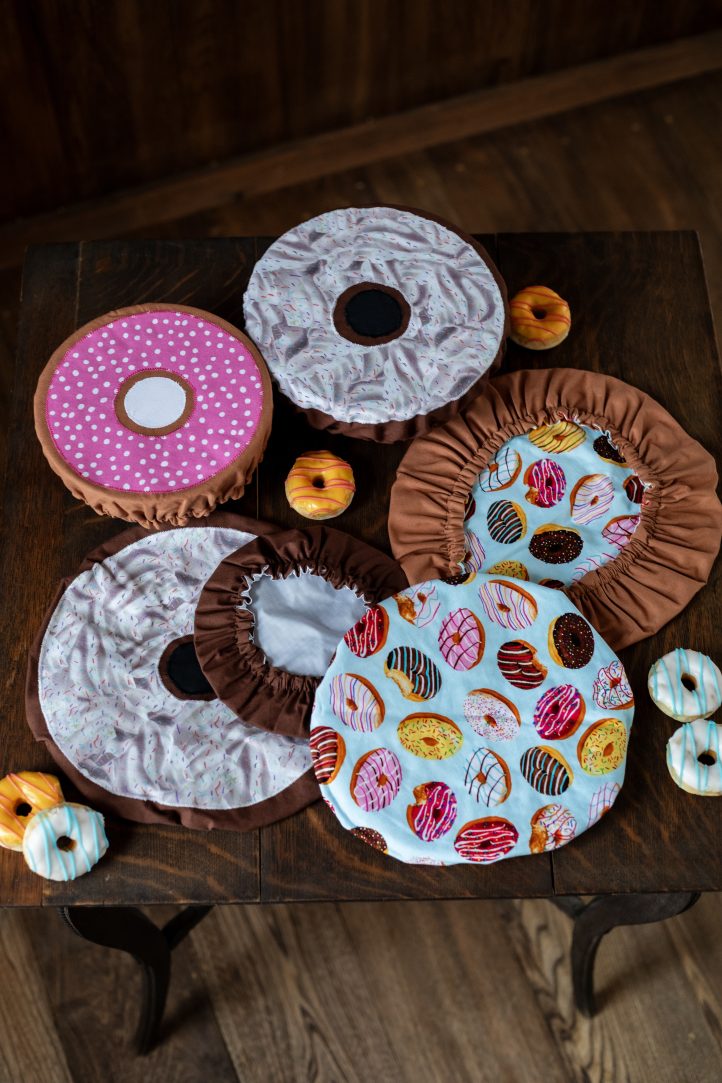
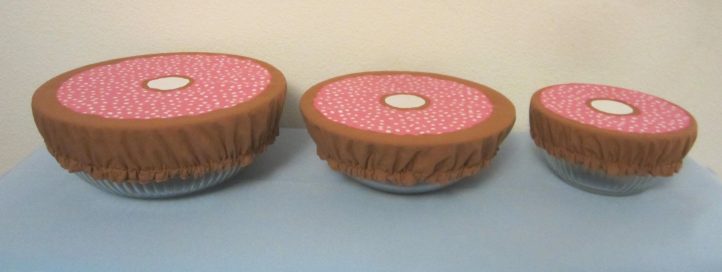
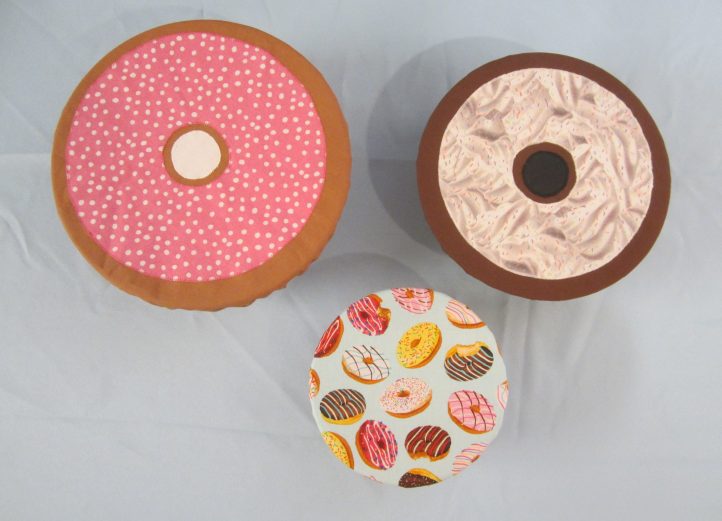
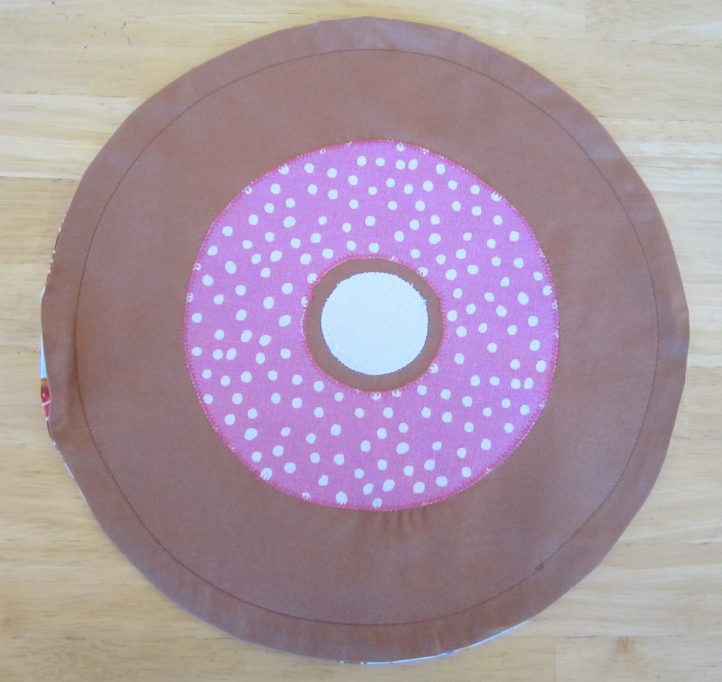
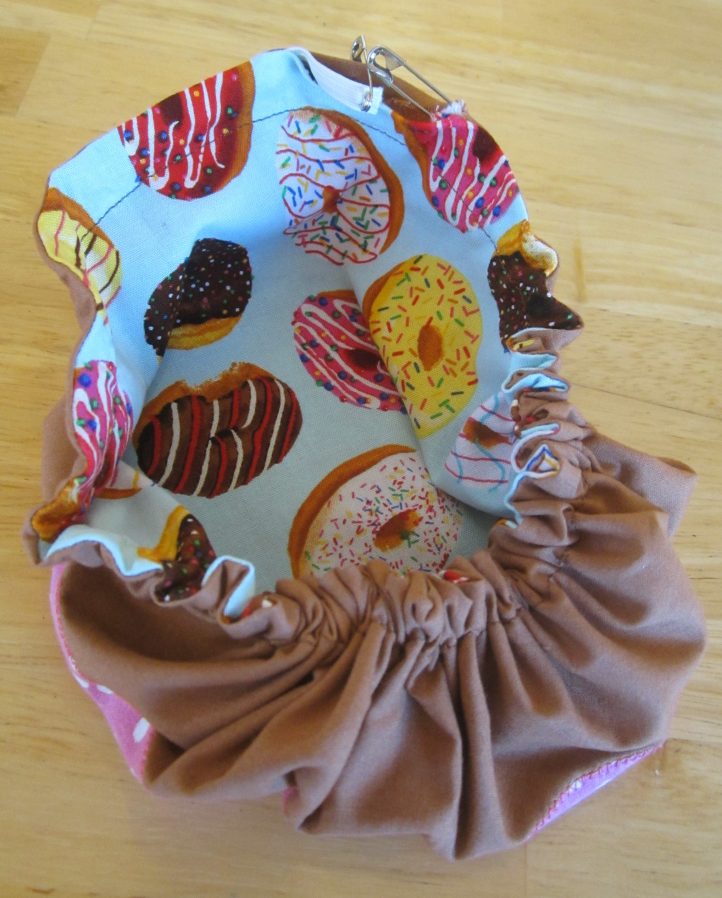
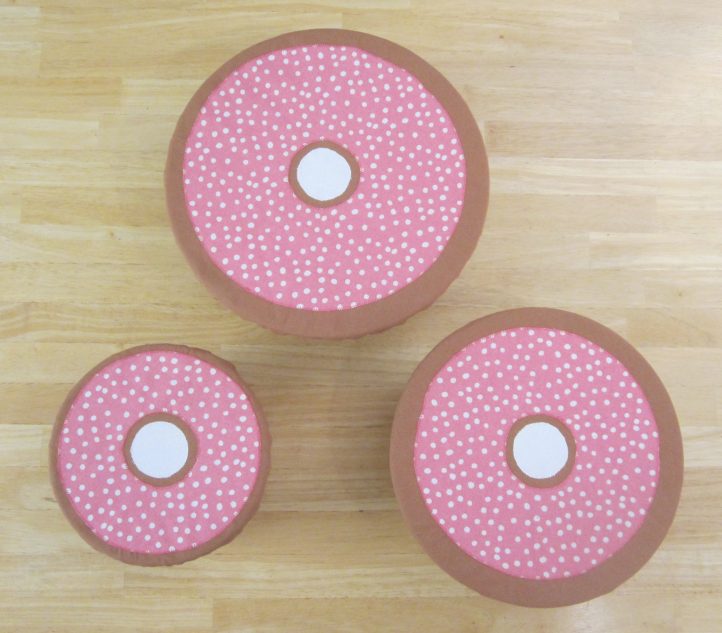
Whip up a batch of super sweet bowl covers that look good enough to eat with this fun pattern from Christy Jones. Perfect for family cookouts or church potlucks, this pattern for fabric bowl covers comes in three sizes (8-inch, 10-inch and 12-inch). Featuring a whimsical donut design, these bowl covers can also be made reversible or with rip-stop nylon for easy clean-up.
Skill Level: Easy
Time: Approximately 30-45 minutes per cover
Materials:
- 1/2 yard brown cotton
- 1/2 yard lining fabric
- 3/8 yard sprinkle or dot print for frosting
- Scrap of white or black cotton (about 4 inches square) for donut holes
- 1 1/2 yards of 1/4-inch wide elastic
- Matching threads
- 2 small safety pins
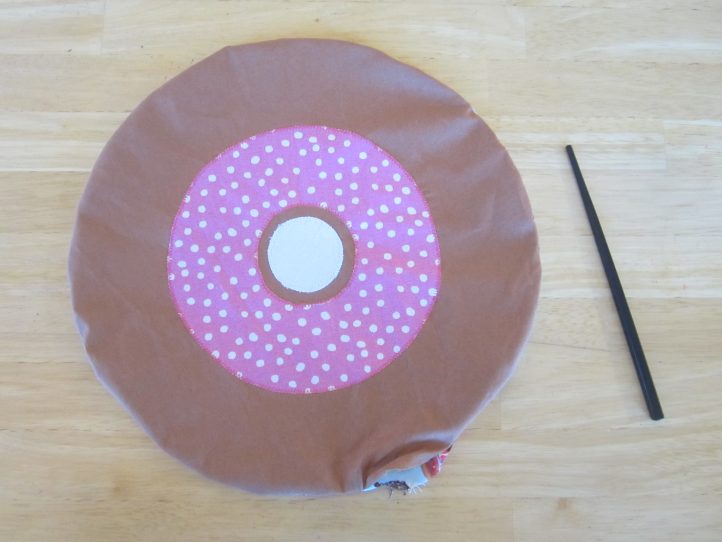
- Turning tool, such as the blunt end of a pen, chopstick, or crochet hook
- PDF Patterns – These are located at the bottom of this page. Please see printing instructions below.
Note: These supplies provide enough material for one bowl cover in each size. Prewash and iron cotton fabric before cutting.
PRINTING INSTRUCTIONS:
Note: To download the patterns, click on the pattern download button at the bottom of the page. We recommend opening your pattern download using Adobe Acrobat.
Instructions:
PREPARE THE PATTERNS:
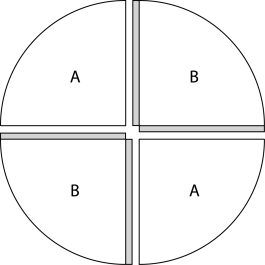
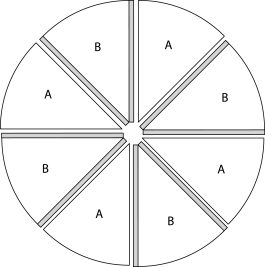
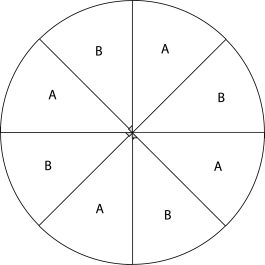
- Print 2 copies of the Donut Bowl Cover Part A pattern and 2 copies of the Donut Bowl Cover Part B pattern in the size of your choice, then cut out the pattern pieces.
- Alternate the A and B pieces, forming a circle.
8-inch or 10-inch donut bowl cover pattern pieces
12-inch donut bowl cover pattern pieces
- Position the A pieces on top of the shaded overlap of the B pieces, so the outside edges line up evenly.

8-inch or 10-inch donut bowl cover patterns overlapped
12-inch donut bowl cover patterns overlapped
- Tape the pieces together where they overlap. Use this complete circle as the pattern for both the donut bowl cover and the lining.
SEW THE DONUT APPLIQUES:
Tip: If you are making multiple bowl covers at the same time, you may want to complete each step for every bowl cover before moving on, so you don’t have to change thread colors as often.
- Cut 1 donut bowl cover from brown fabric using the assembled pattern size of your choice.
- Choose the frosting pattern that matches the size of your donut bowl cover. Fold the frosting fabric right sides together, and line up the straight edge of the frosting pattern with the fold. Cut 1 frosting piece, then unfold the frosting. Press the frosting fabric if needed.
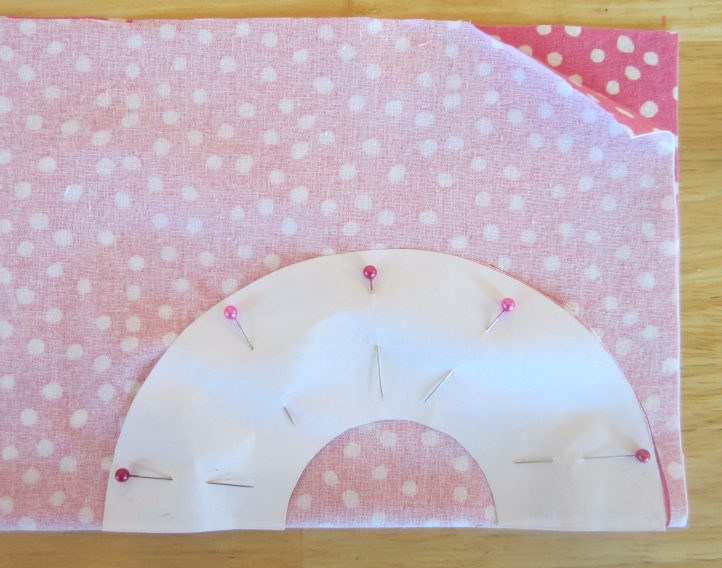
- With both fabrics right side up, center the frosting on the brown fabric. Pin the frosting in place.
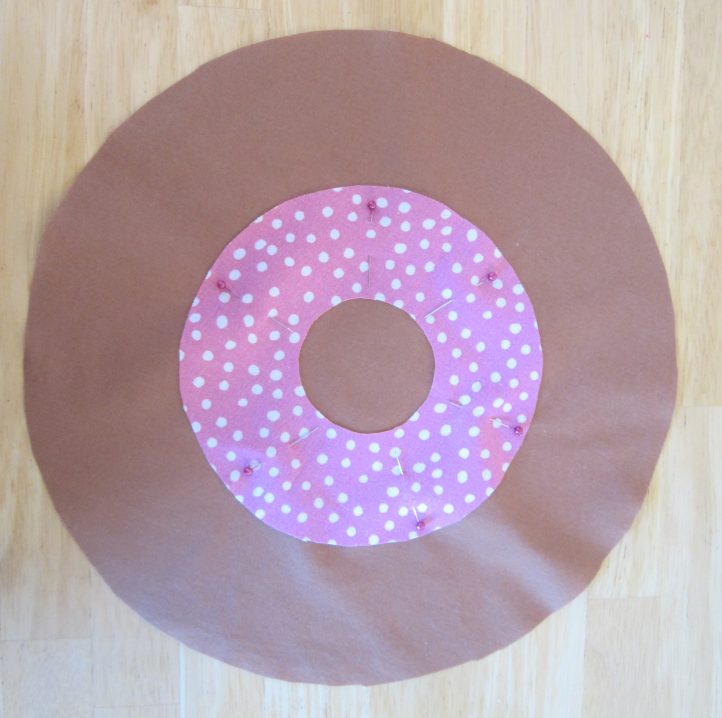
- Using a narrow, closely-spaced zigzag stitch, stitch around both the inner and outer edges of the frosting with matching thread. Be sure that the stitches overlap the edges of the frosting fabric, so that no raw edges are exposed.

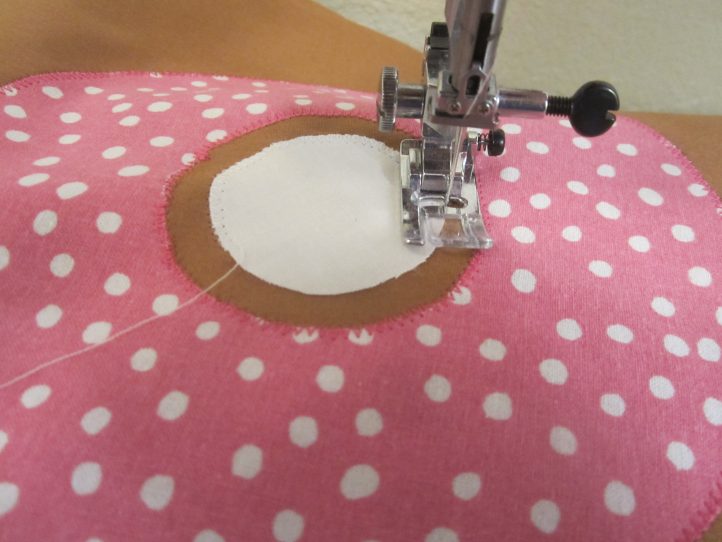
- Cut 1 donut hole from white or black fabric. (These are the same size for all patterns.)
- Center the donut hole right side up in the middle of the donut bowl cover.
- Zigzag stitch around the donut hole using matching thread.
ASSEMBLE THE BOWL COVER:
- Cut 1 donut bowl cover from lining fabric.
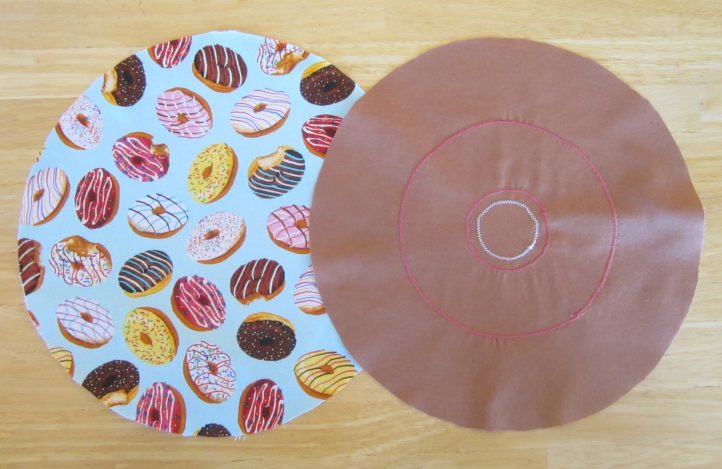
- Place the donut and the lining fabric right sides together and pin them in place. Mark a 2-inch opening with pins.
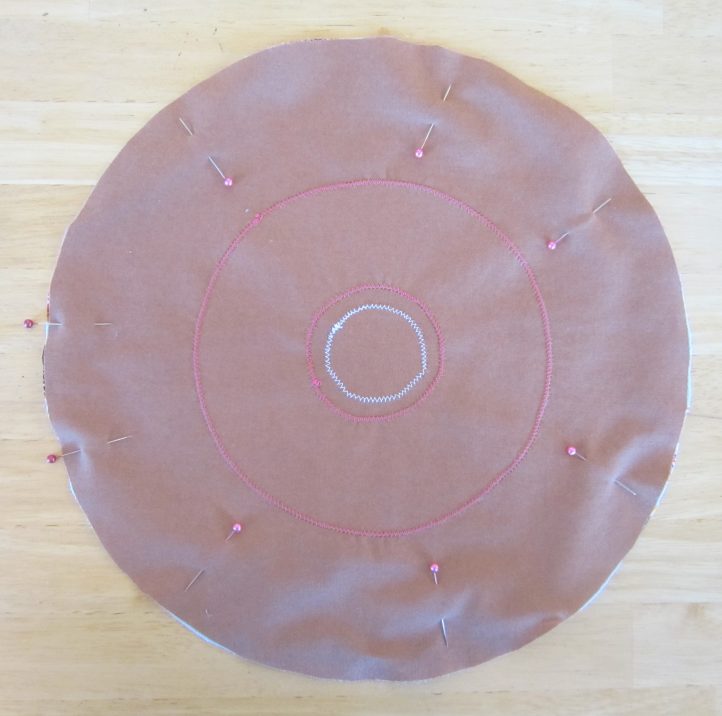
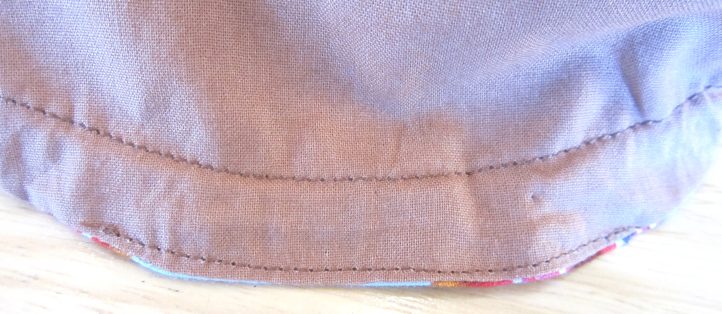
- Straight stitch around the bowl cover using 1/4-inch seam allowance, leaving a 2-inch opening.
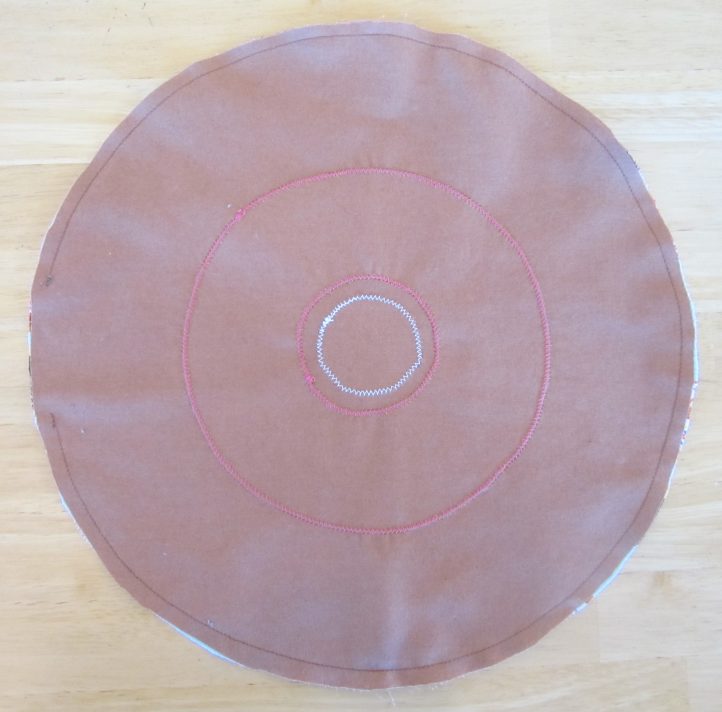
- Turn the bowl cover right side out.
- Insert a turning tool (such as a rounded pen, chopstick, or the blunt end of a crochet hook) through the opening and press it gently along all the edges to make sure the fabric is fully right side out.
- Turn the edges of the opening to the inside of the bowl cover (about 1/4 inch). Press the edges of the bowl cover flat. (Note: If you are using nylon lining fabric, be sure to use a low iron setting for synthetics.)
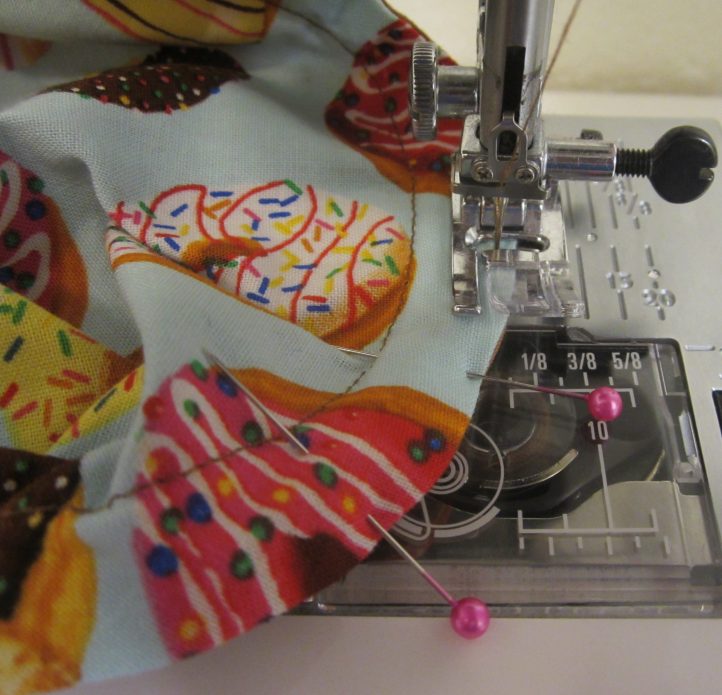
- Use 1/2 inch seam allowance to top stitch around the bowl cover (including the open area) using brown thread. This creates the casing for the elastic.
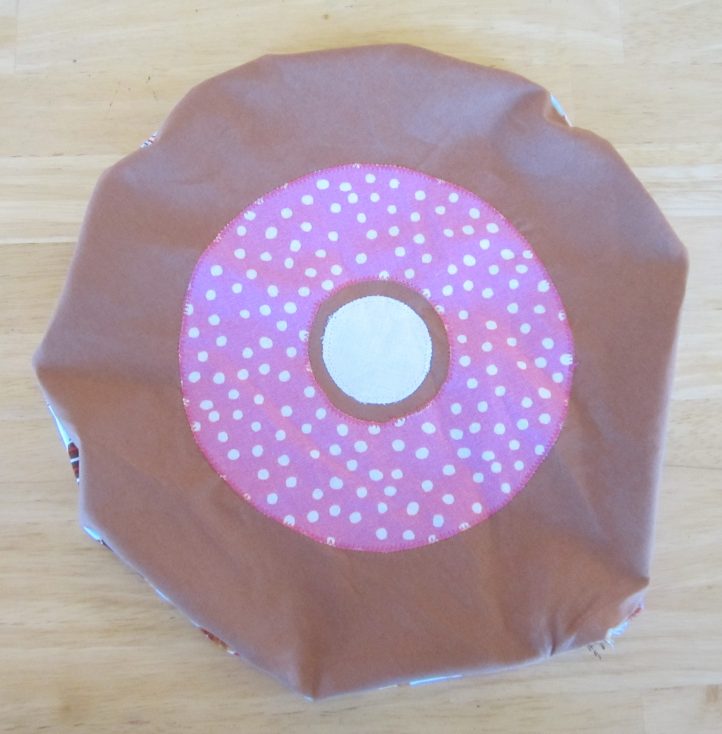
FINISH THE BOWL COVER:
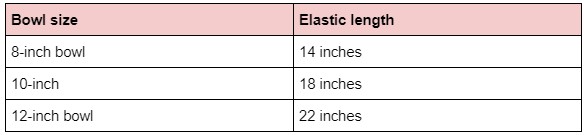
- Cut a piece of 1/4 inch wide elastic the appropriate size for the bowl cover. Take care to flatten, but not stretch, the elastic when measuring.
- Attach a safety pin to one end of the elastic. Push the safety pin into the casing.
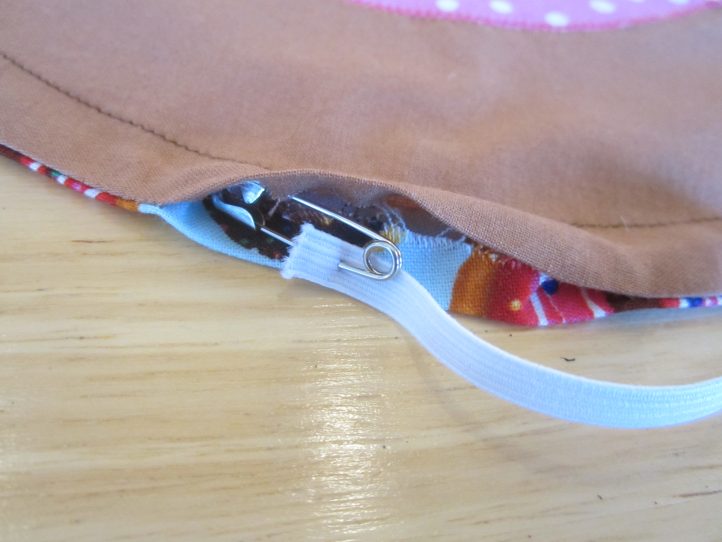
- Temporarily pin the opposite end of the elastic to the fabric, to prevent the elastic from being pulled completely inside the casing.
- Push the safety pin all the way through the casing, bunching the fabric up as you go, until it emerges from the other side of the opening.
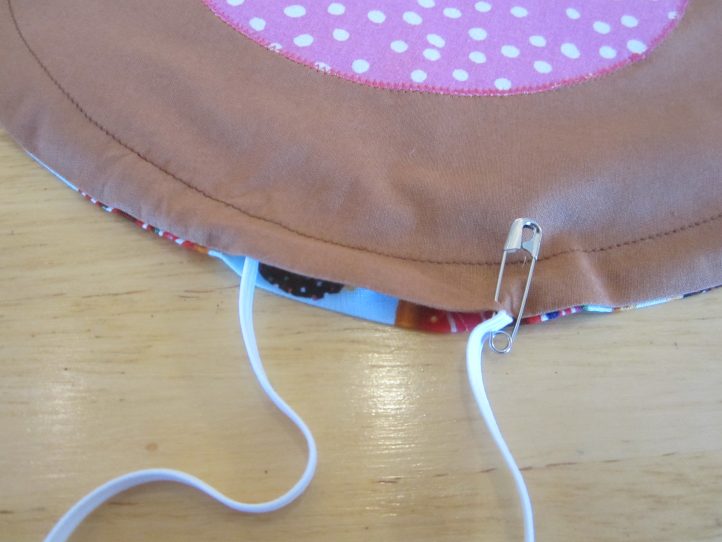
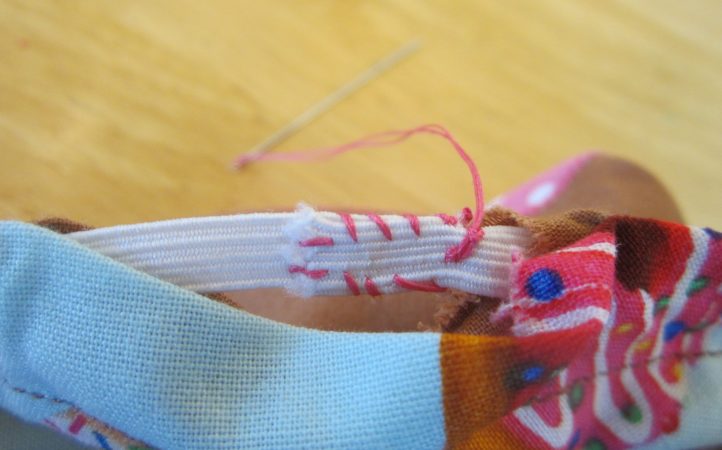
- Remove the safety pins. Overlap the ends of the elastic by about 1/2 inch. Hand stitch the ends together securely.
- Pin the edges of the opening together, making sure all the elastic is fully inside the casing (and will not get sewn when you topstitch the opening closed).
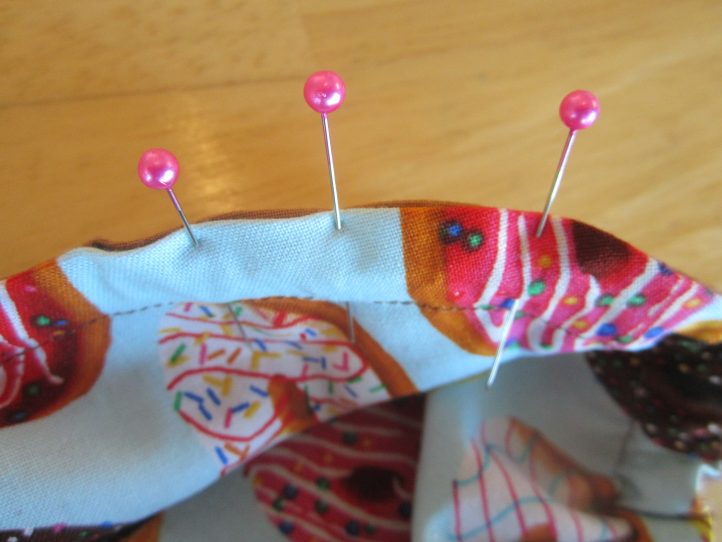
- Sew the opening in the casing closed by topstitching very close to the edge of the opening using brown thread.
- Adjust the bunched up fabric so that it gathers evenly.
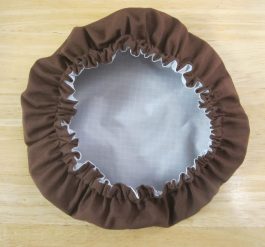
Wipeable bowl cover with nylon lining