
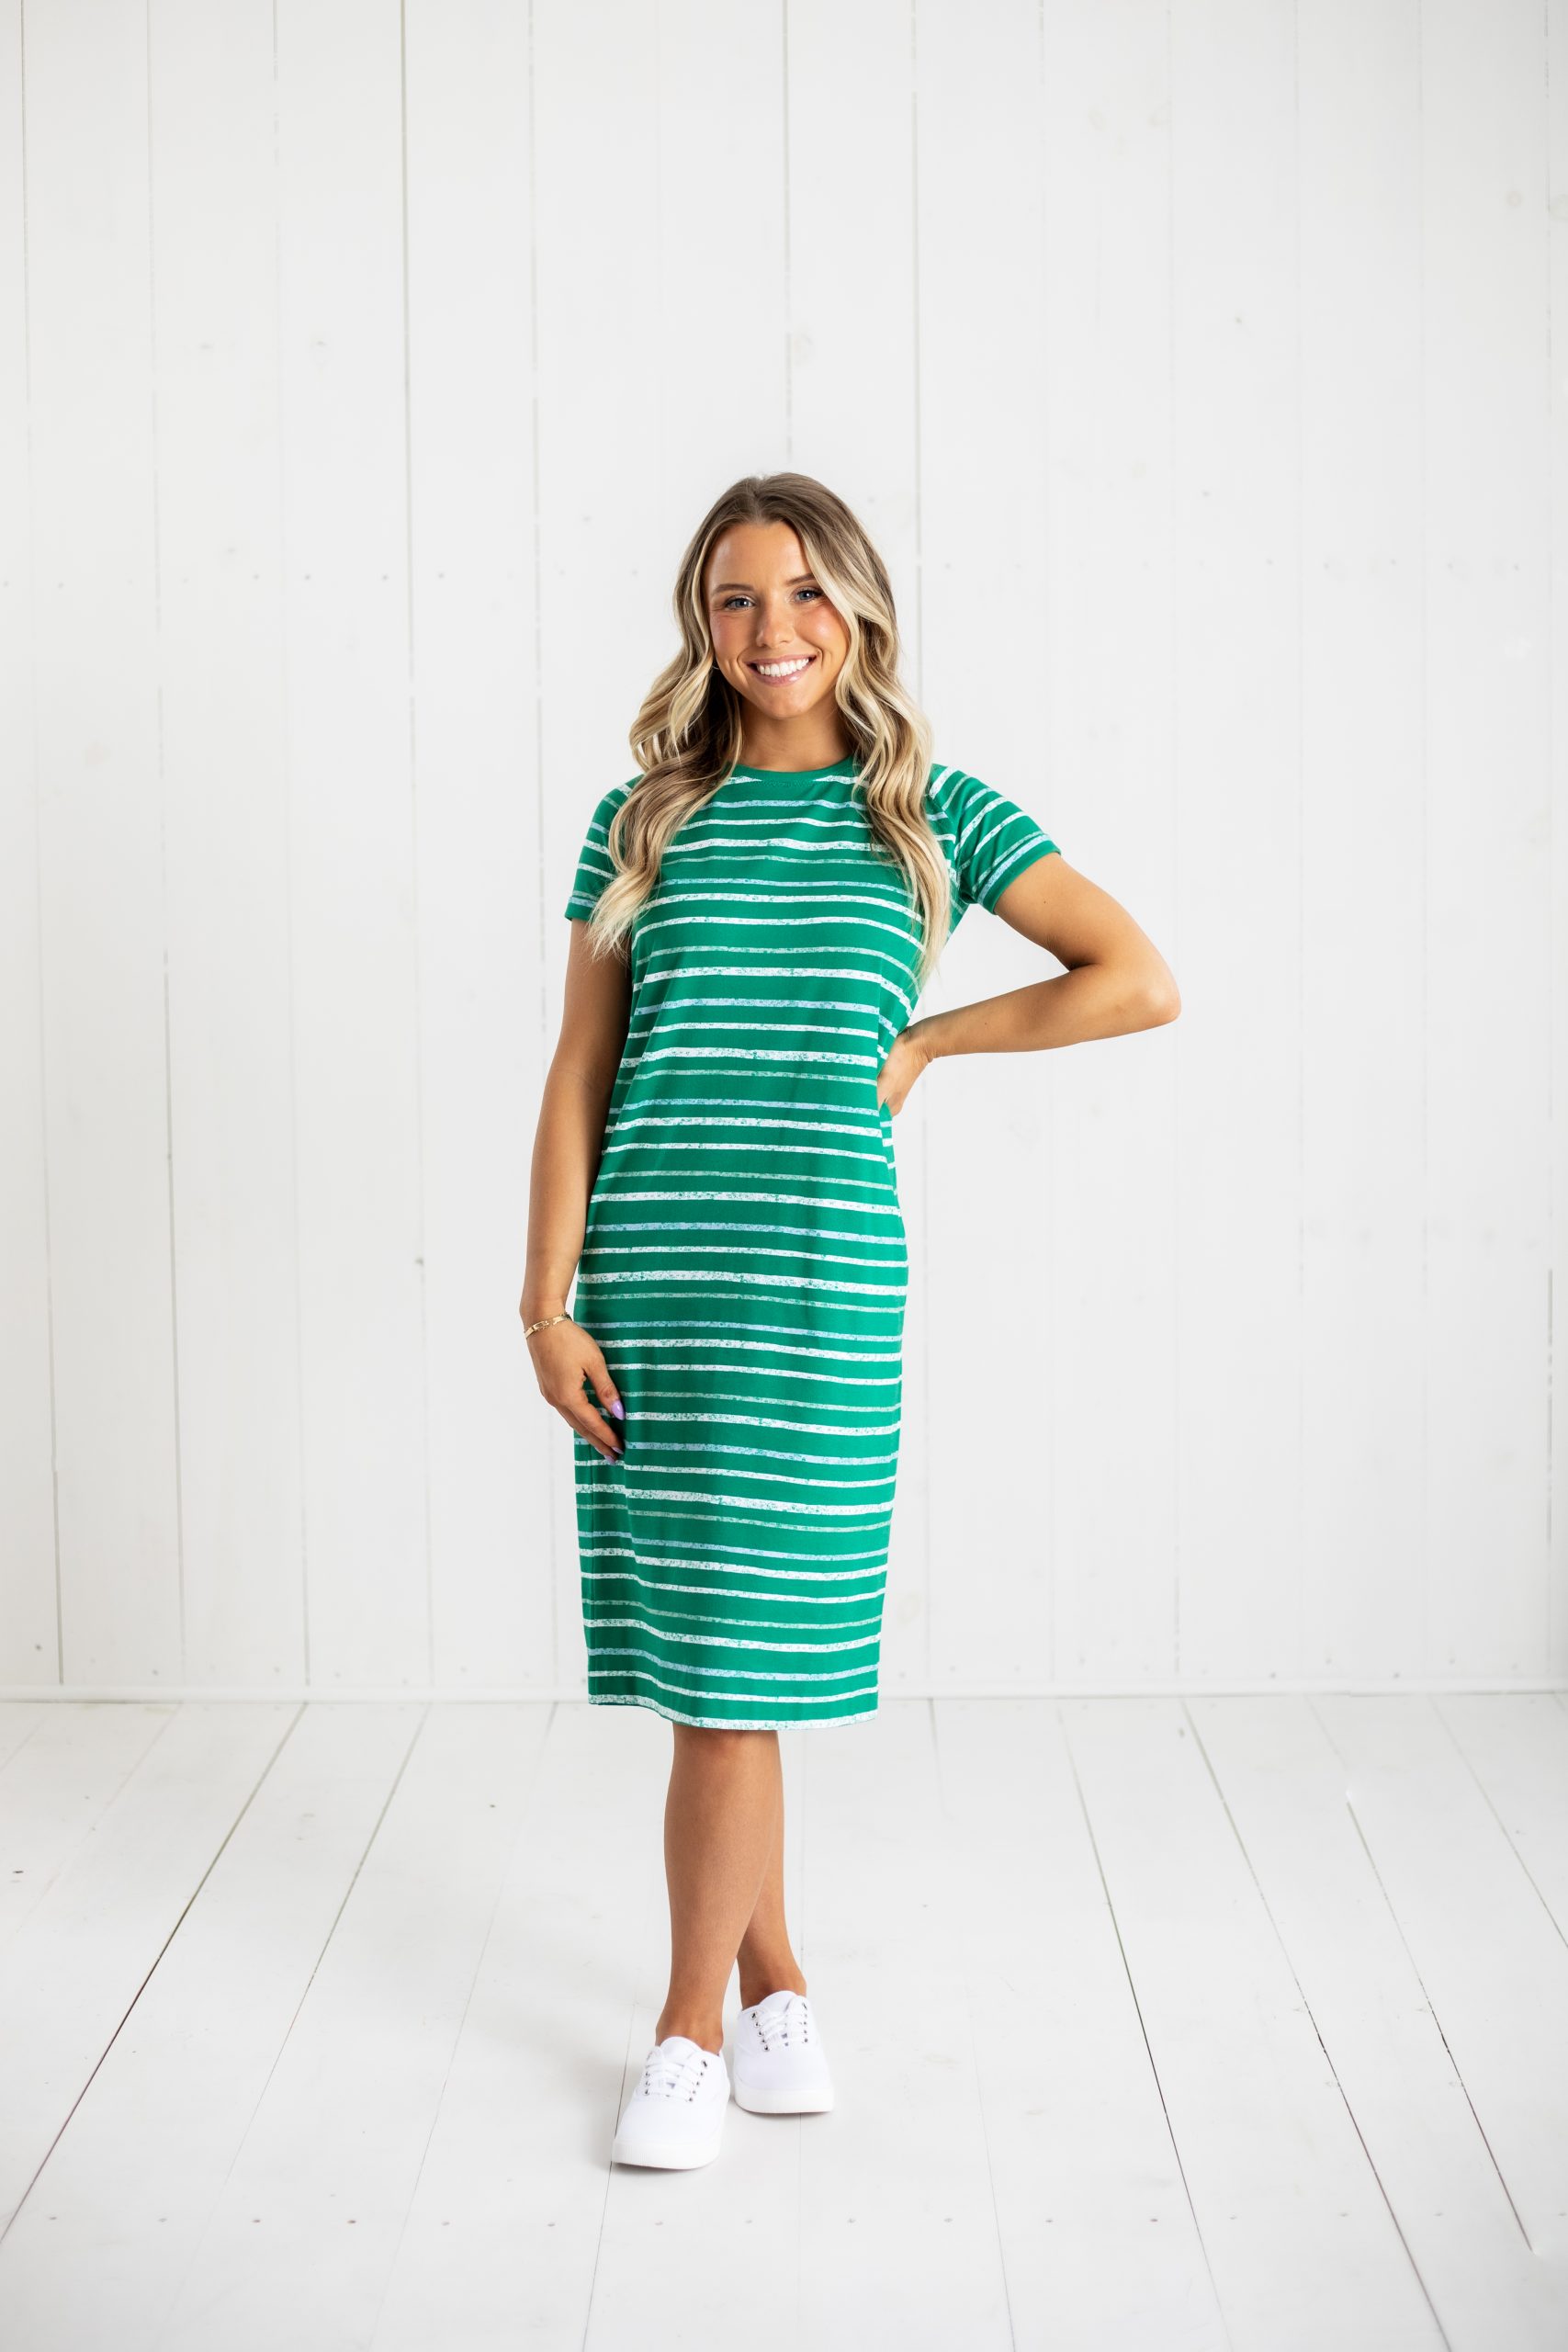
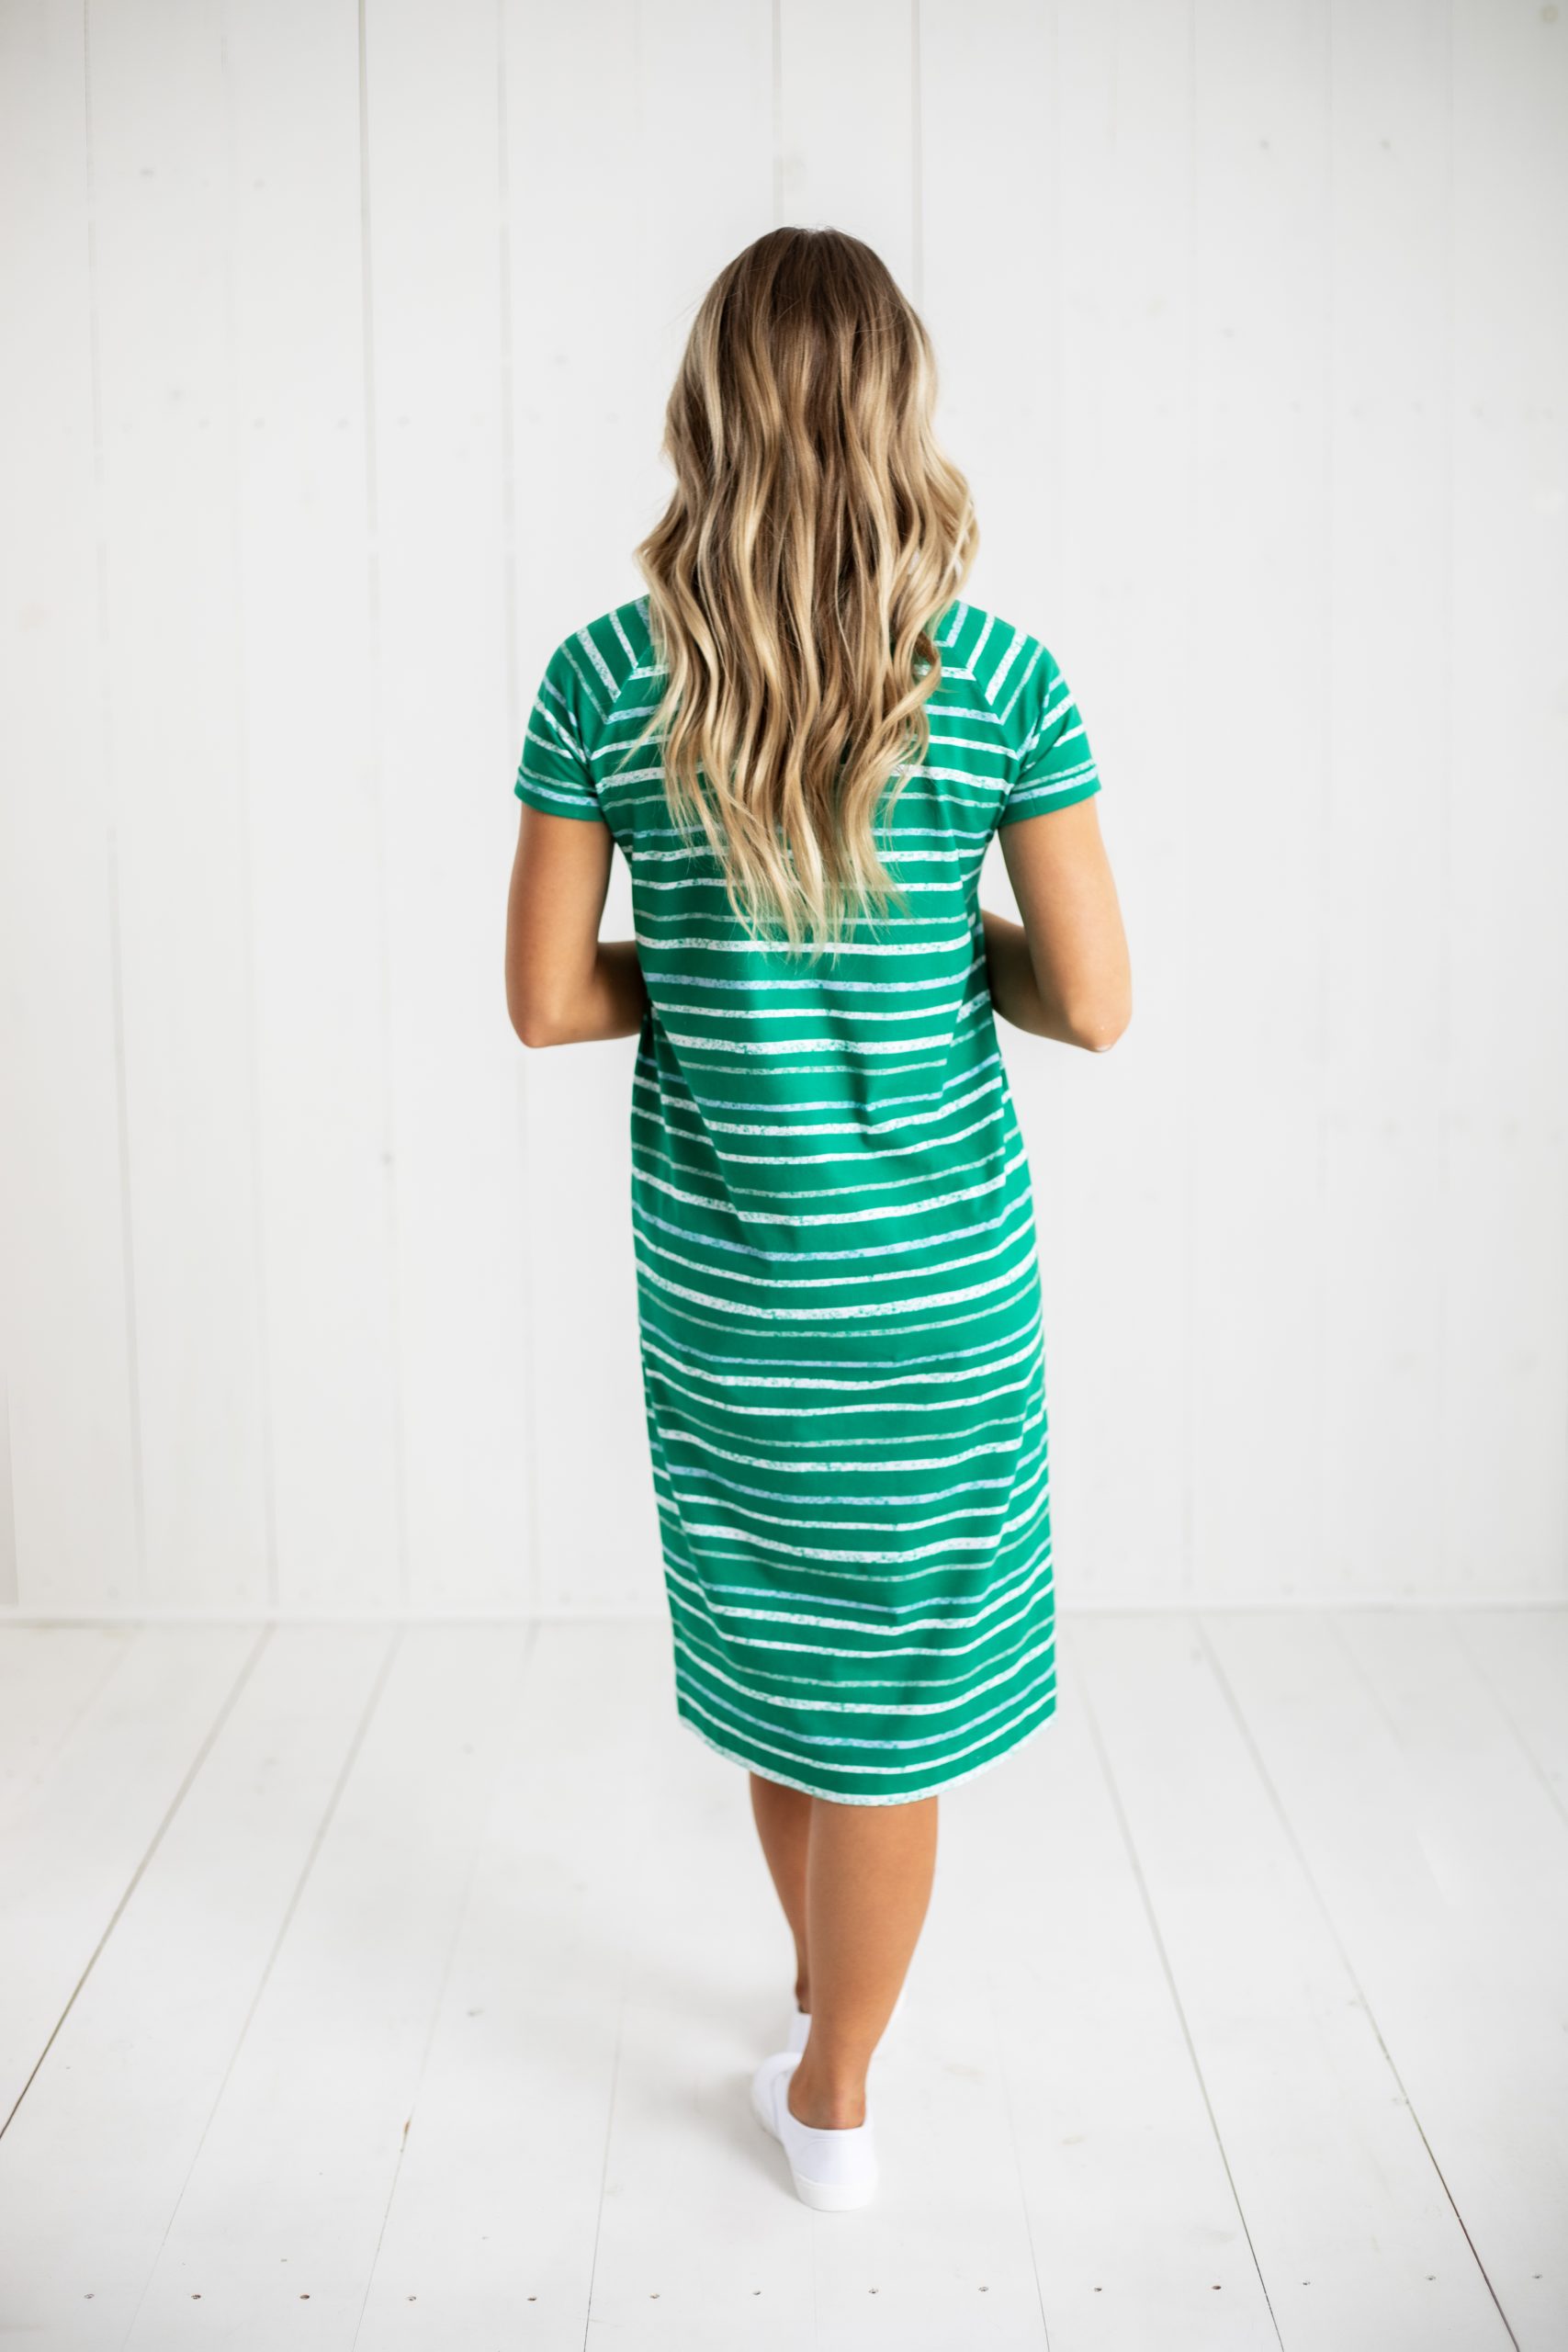
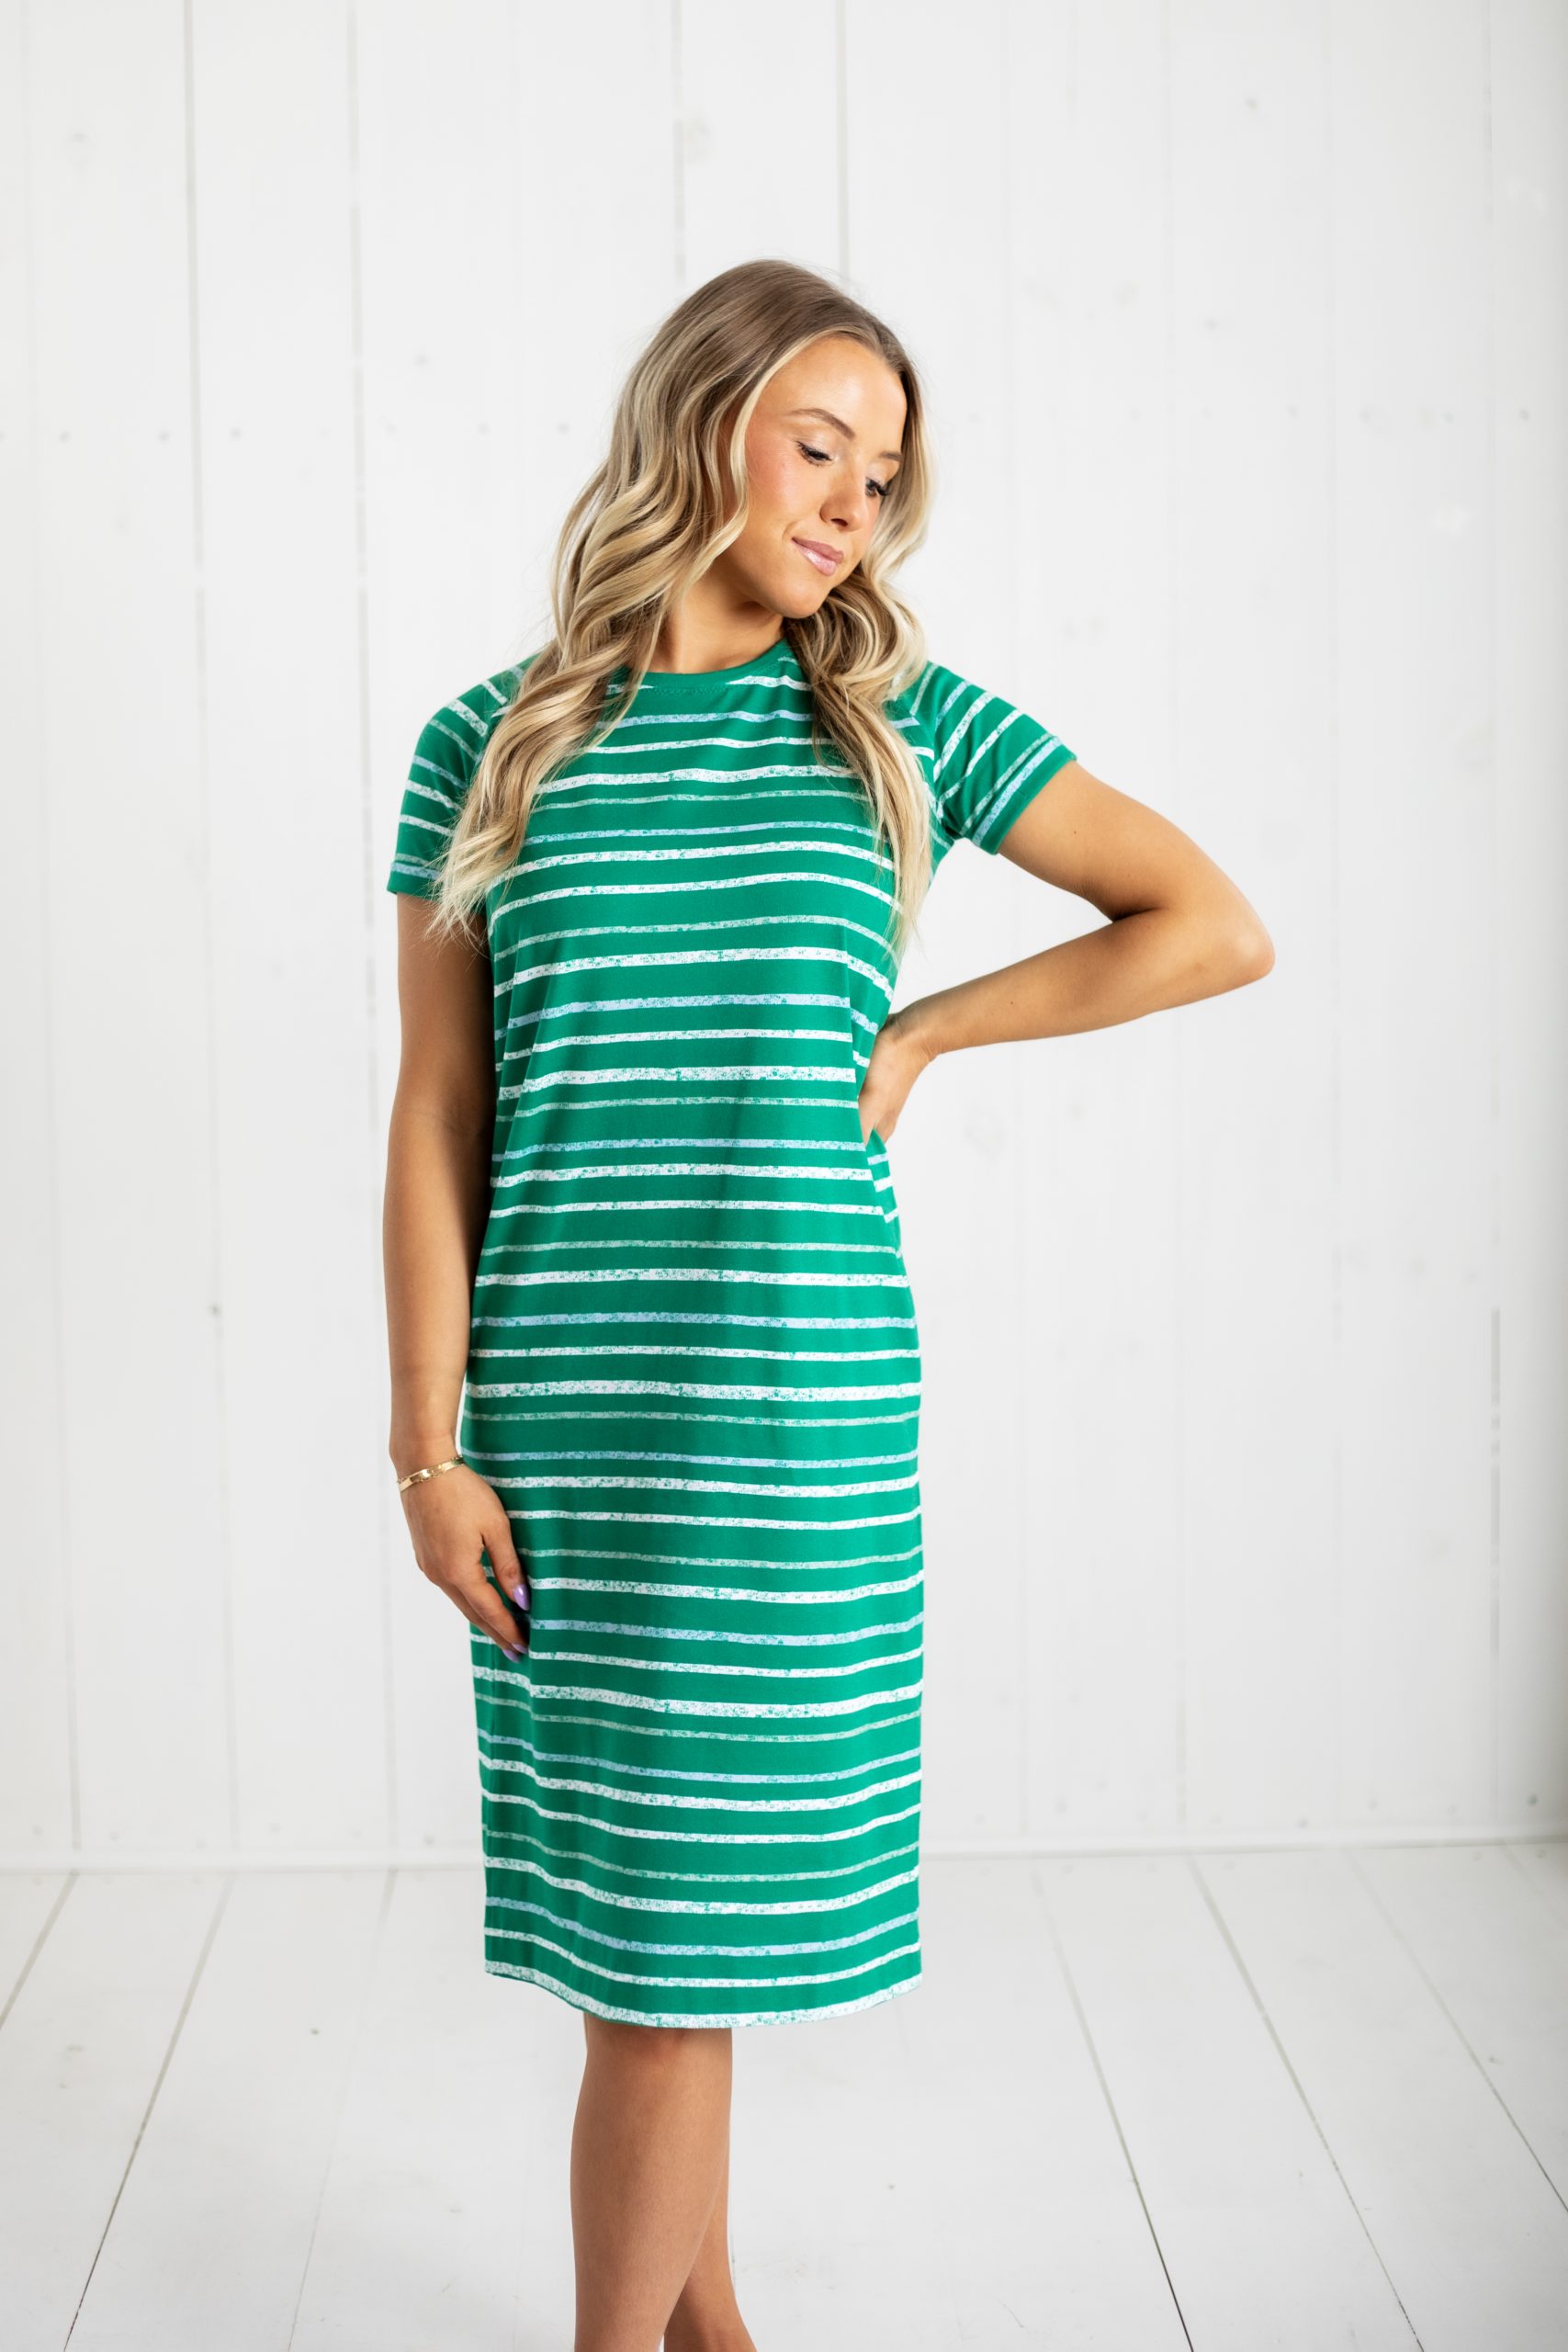
Casual chic has never looked so effortless! Designed by Lauren Merciris, this summer dress pattern is comfy and stretchy, making it ideal for jersey or other stretch fabrics, and can be made with raglan or roll-up raglan sleeves. This t-shirt dress pattern is sure to become one of your wardrobe essentials, so make multiples in lengths from mini to midi to fill your closet this spring and summer.
Designer Notes:
- There are 2 sleeves versions: Standard raglan sleeves, or roll-up raglan sleeves.
- There are 2 lengths: Mini or midi.
- All the seam allowances are included: 1 cm / 0.4 in. and 3 cm / 1.20 in. for the hems (4 cm / 1.6 in. for the roll-up sleeve hem)
Materials:
- Fabric Requirements: Jersey or stretch fabrics only – Fabric width 150 cm / 59 in.

- PDF Pattern – This is located at the bottom of this page. Please see printing instructions below.
PRINTING INSTRUCTIONS:
Note: To download the pattern, click on the pattern download button at the bottom of the page. We recommend opening your pattern download using Adobe Acrobat.
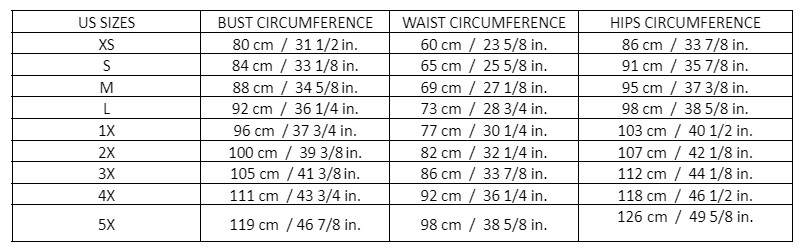
SIZE CHART: (cms / inches)
FINISHED GARMENT LENGTH:
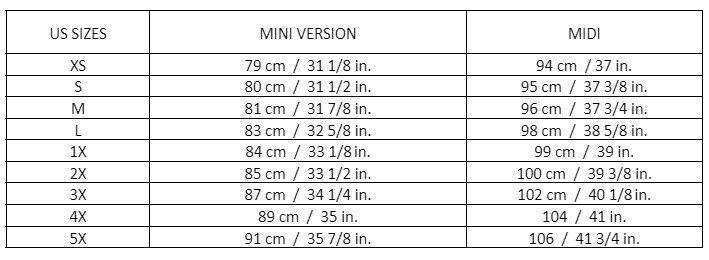
*Note: (from neckline to hemline in cm/inches)
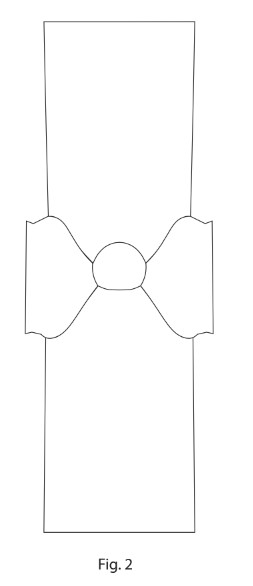
- A: Front – cut 1 x on fold – 2 lengths (mini or midi)
- B: Back – cut 1 x on fold – 2 lengths (mini or midi)
- C: Classic raglan sleeve – cut 2 x OR C’: Roll-up raglan sleeve – cut 2 x
- D: Neckline band – cut 1 x
Instructions:
CUTTING:
- Lay the fabric and fold the two selvage edges back to the middle of the fabric, edge to edge to obtain 1 fold on the left and 1 fold on the right (right sides together).
- Lay out the pattern pieces on the fabric as mentioned, and cut out each piece as many times as the pattern indicates.
ASSEMBLING THE DRESS:
- Join each side of the sleeve right sides together at the Front and Back respectively.

- Pin and sew.
- Sew with an overlock (serger). If you don’t have an overlock machine, you can stitch with the stretch stitch of your sewing machine, using a zig-zag stitch to enclose the seam allowances.
- To close the dress, place the front and back right sides together. Pin and overlock (or sew as explained above) the entire side and along the sleeves. Make sure that the seams are aligned where the sleeve meets the dress.
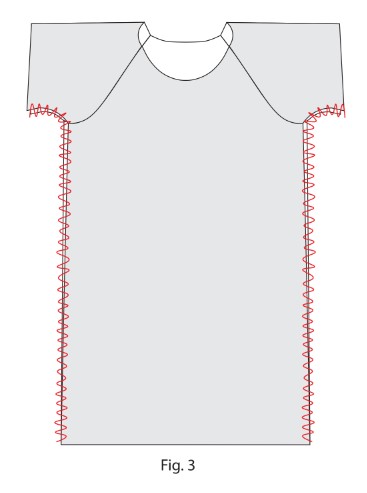
- Do the same on the other side of the dress.
- Iron to flatten the seams.
FINISHING THE SLEEVES:

If You Choose the Classic Raglan Sleeves (C):
- Overlock all the hem of the sleeves.
- Fold over the bottom of the sleeves to the wrong side by 3 cm / 1.2 in. and pin.
- Sew with a stretch stitch or a zig-zag stitch all around the sleeves at 2.80 cm / 1.1 in. from the edge.
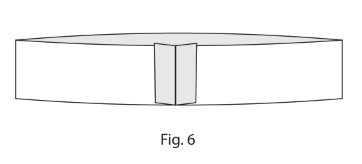
If You Choose the Roll-Up Raglan Sleeves (C’):
- Overlock all the hem of the sleeves.
- Fold over the bottom of the sleeves to the wrong side by 4 cm / 1.60 in. and pin.
- Sew with a stretch stitch or a zig-zag stitch all around the sleeves at 3.80 cm / 1.5 in. from the edge.
- Iron.
- Fold over to the right side 2 cm / 0.8 in. and pin.
- Keep the hem strip turned inside out by doing a few stitches on the sleeve seam, as well as equidistantly on the middle and sides. So that 4 stitches are equidistant from each other.
NECKBAND STRIP:
- Fold the strip in half across the width, right sides together, and sew the ends 1 cm / 0.4 in. apart to close the strip.

- Iron, spreading the seam allowances.
- Fold the entire strip on the length, wrong sides together.
- Overlock or sew the strip lengthways at 0.5 cm / 0.2 in. from the edge.
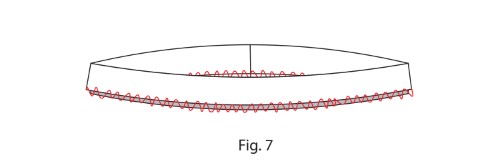
- Mark 2 marks on the strip: The back mark (closing seam of the strip), and the front mark (equidistance from the back mark).
- Place the Neckband strip on the edge of the dress’s neckline, right side, edges together. Pin the seam of the neckband in the middle of the back, and pin the front mark of the strip on the middle of the front dress. Adjust and pin the strip all around the neckline.
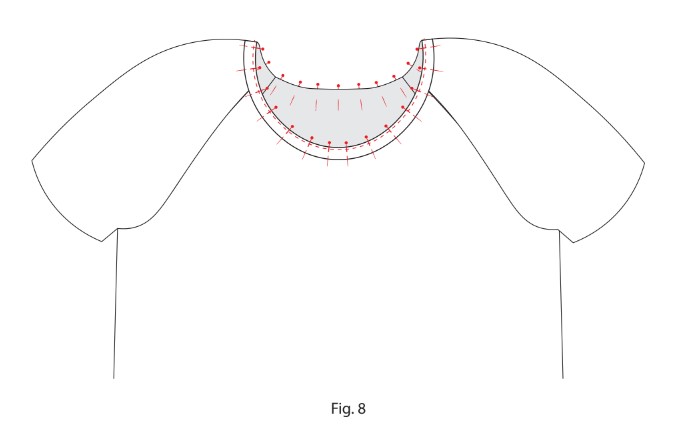
- Sew 1 cm / 0.4 in. along the edge of the neckband and the neckline together, stretching slightly the neckband, with a stretch stitch.
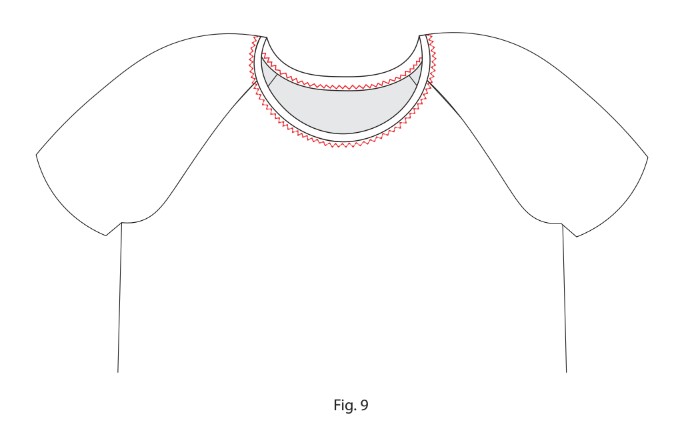
- Turn over the neckband and place the seam allowance on the wrong side of the dress, iron, and pin.
- Sew on the right side of the dress with zig-zag stitch all around the neckline to keep seam allowance flat against the wrong side of dress.
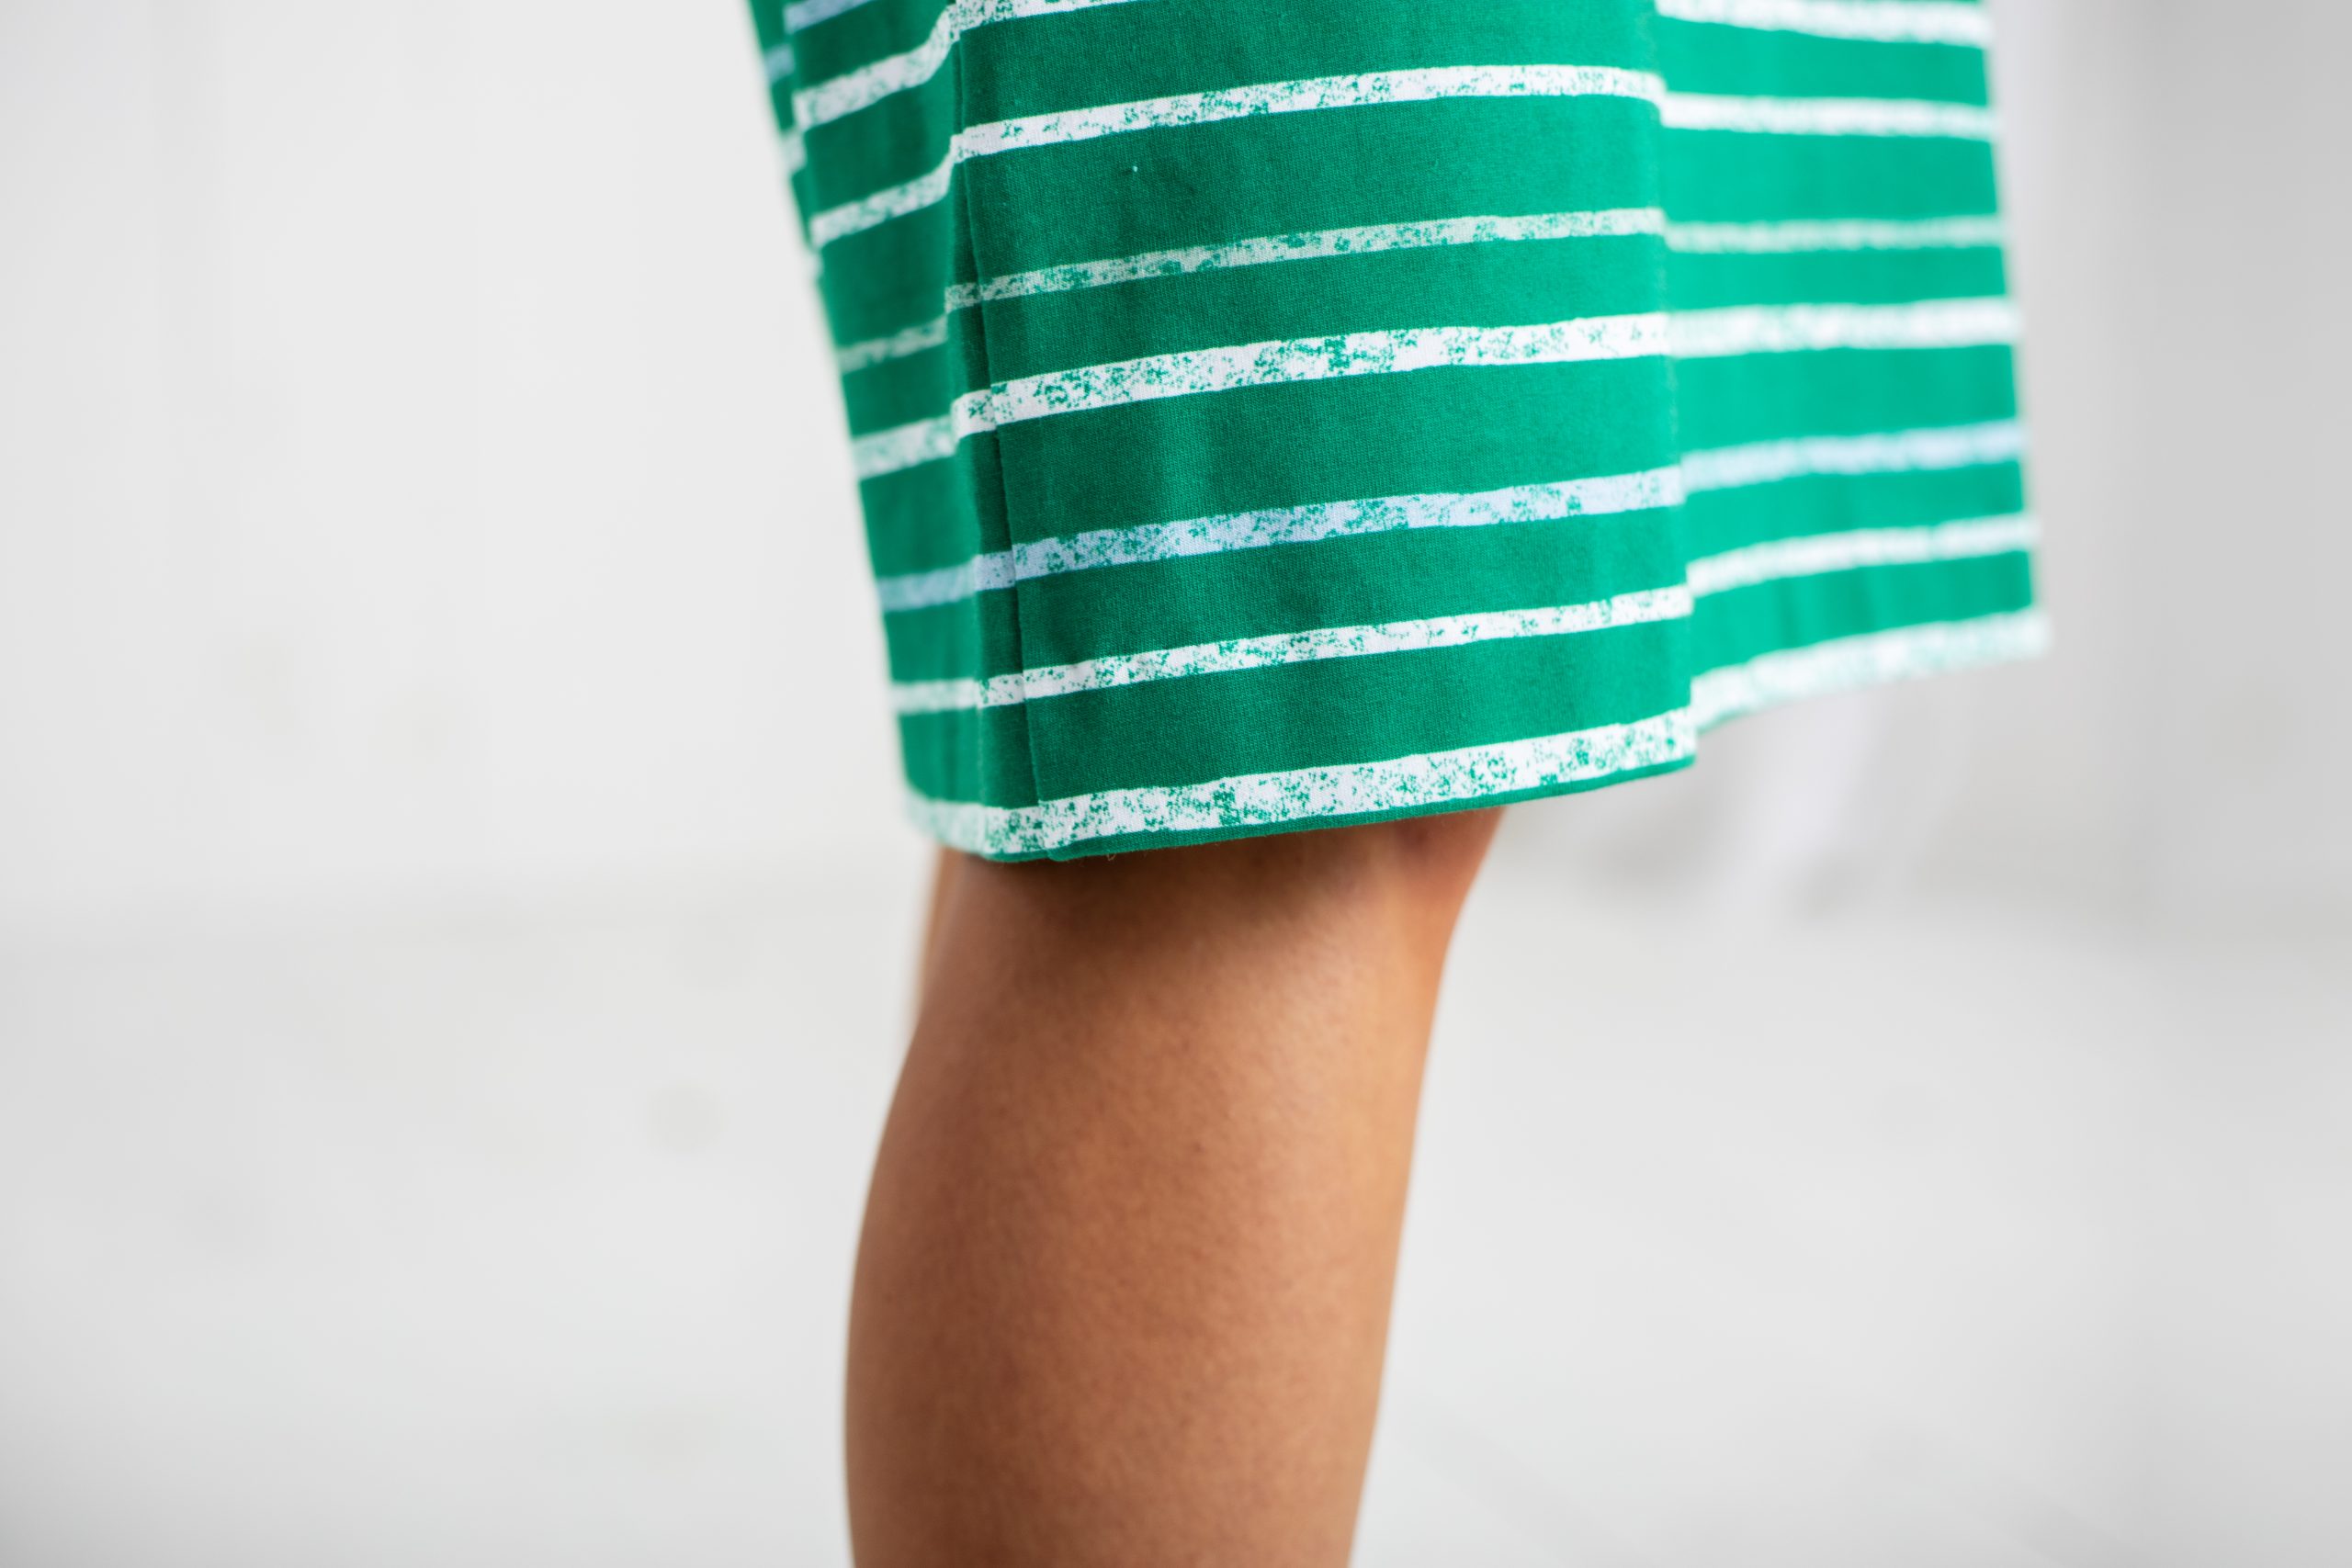
HEMMING:
- At the bottom of the dress, fold over to the wrong side by 3 cm / 1.20 in.
- Pin, and sew at 2.80 cm / 1.1 in. of the edge, with a stretch stitch, or a zig-zag stitch. *Note: You also can sew by hand with an invisible stitch on the wrong side.
- Iron.

So excited to make this dress