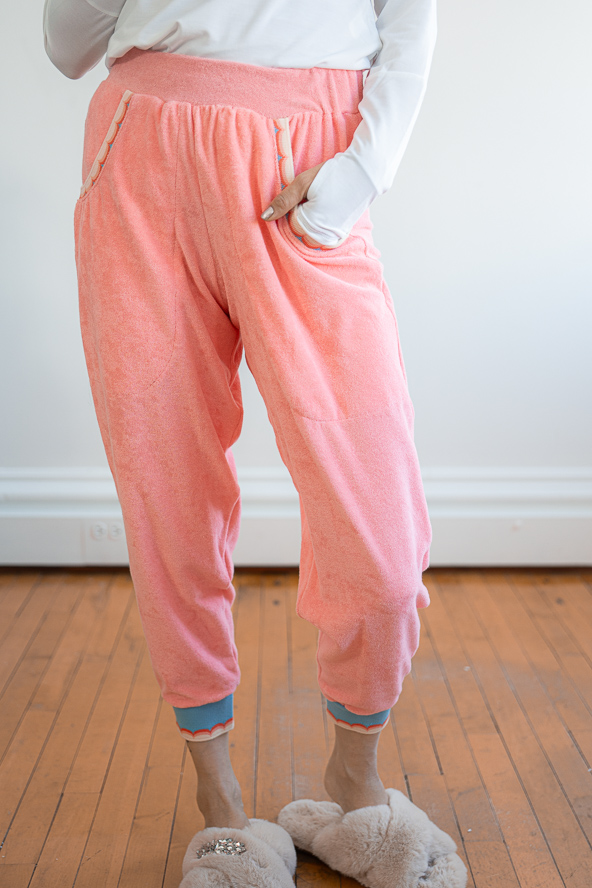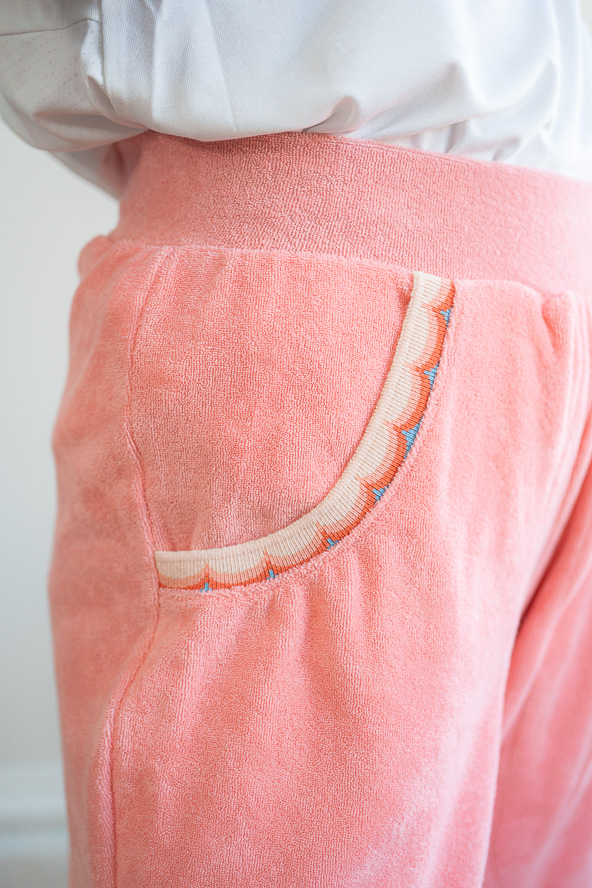
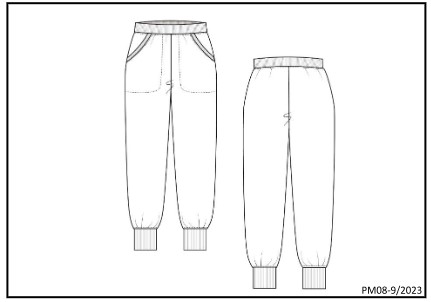
This winter, we’re all about staying comfy and cozy while we lounge by the fireside. Get your Christmas Eve look started now by sewing these colorful joggers! Made in ultra soft fabrics like French terry, this joggers sewing pattern features front pockets and retro-inspired trim. Complete your loungewear look with some stylish slippers and a colorful long-sleeve tee.
Skill Level: Competent Beginner
Pattern Seam Allowances: 3/8 inch (.9525 cm) = All seams included.
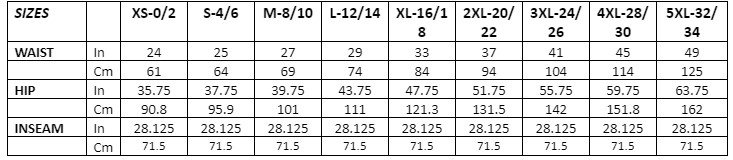
Size Chart:

Finished Garment Measurements:
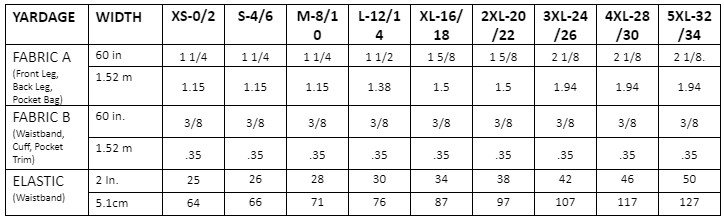
Fabric Yardage: (in yards and centimeters)
Note: Fabric requirements do not account for possible fabric shrinkage, placements, stripes, matching pieces, directional prints, or shorter fabric widths.

Materials:
- Fabric A suggestions – Medium weight knit, interlocks, jersey, sweatshirt fleece, French terry, polar fleece, flannel
- Fabric B Suggestions – Ribbed knit w/ 3-5% Spandex
- 2-inch (5.1 centimeters) wide elastic
- Matching thread
- PDF Pattern – This is located at the bottom of this page. Please see printing instructions below.
PRINTING INSTRUCTIONS:
Note: To download the pattern, click on the pattern download button at the bottom of the page. We recommend opening your pattern download using Adobe Acrobat.
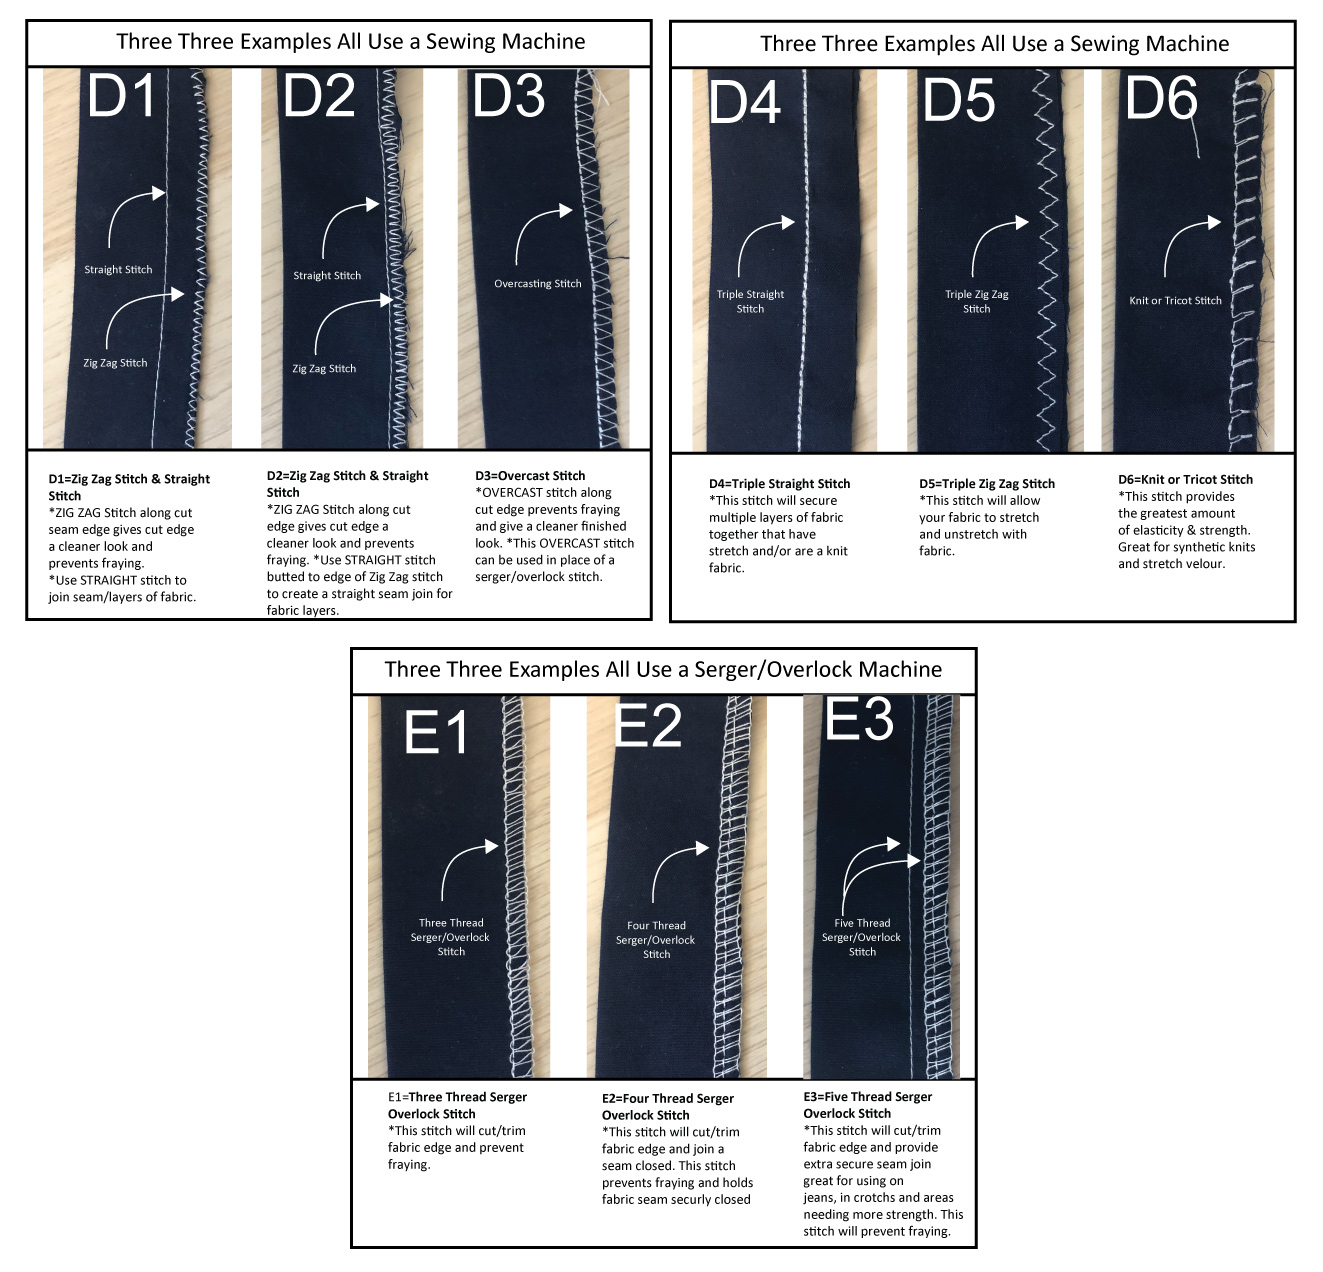
Machine Required: Serger or sewing machine
A sewing machine can be used in place of a serger.
*Optional seam edge finish examples below using serger and/or sewing machine.
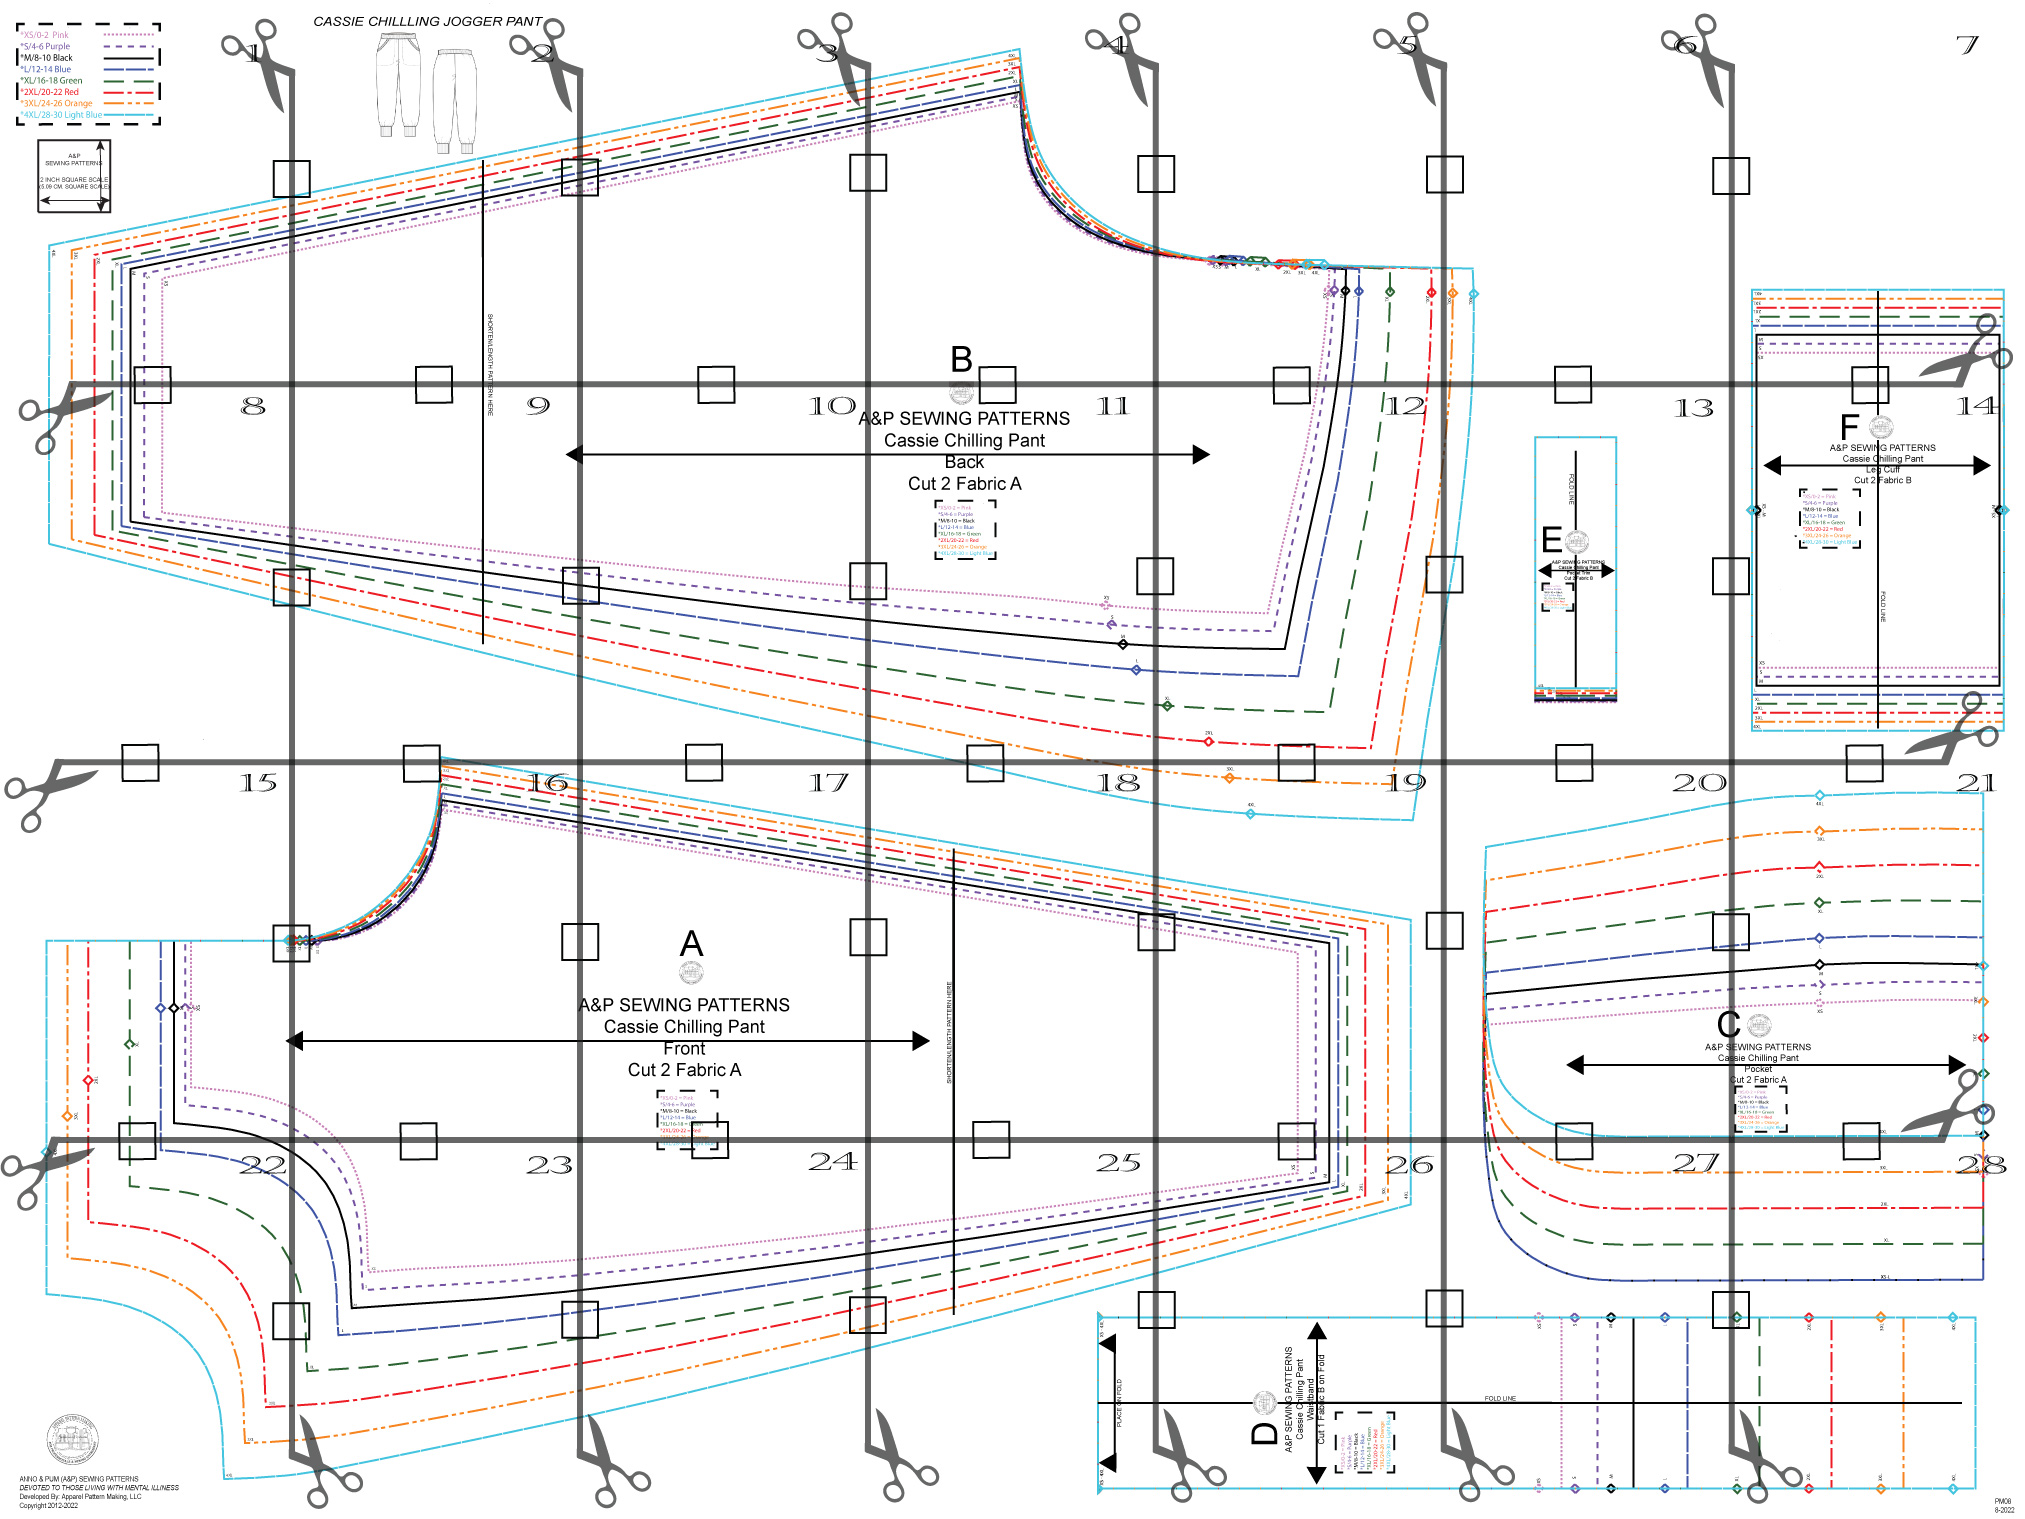
DIGITAL PATTERN PIECES:
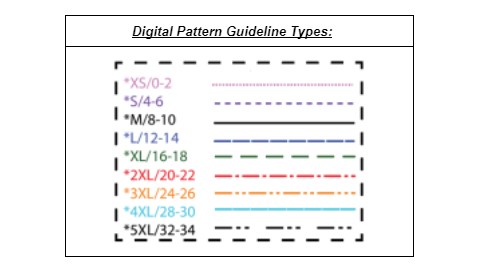
Downloadable PDF page tiled layouts. *Follow “Pattern Guideline Types” in the below cells for which colored lines to cut per size.
Before printing and cutting out all your pattern pieces, print PAGE 1 which contains the “SQUARE SCALE” at 100% or full scale. Measure the square to confirm it measures 2 inches (5.09 cm) in both directions. If the square measures correctly in length and width, go ahead and print out the remaining pages. Lay pages out next to each other in numerical order (as seen below in the image). Then butt pages together lining up cut lines and half squares next to each other. If you do not cut along page cut lines, you will need to overlap page edges to line pages up. Then tape pages together to hold them in place. Once all pages have been taped together your pattern pieces will be ready to cut out and prepare to layout on your fabric.
Letter & A4 Size Layout:
LAYOUT & CUTTING DIRECTIONS:
Fabric yardage should be laid out on the fold with selvages layered on top of each other. Layout pattern pieces on your fabric with grainlines running parallel to your selvage, with most stretch of fabric around body.
CUT PATTERN PIECES AS FOLLOWS:
- (A) FRONT – Cut 2 Fabric A.
- (B) BACK – Cut 2 Fabric A.
- (C) POCKET – Cut 2 Fabric A.
- (D) WAISTBAND – Cut 1 Fabric B on fold.
- (E) POCKET TRIM – Cut 2 Fabric B.
- (F) LEG CUFF – Cut 2 Fabric B.


Instructions:
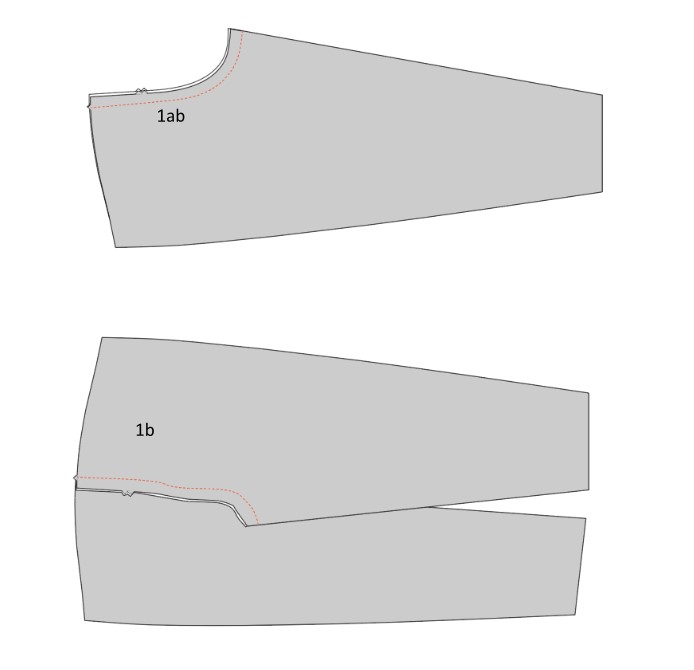
- Place BACK pieces right sides together and join center back rise (1a) then open pieces up like shown below in image (1b).
- Fold POCKET TRIM pieces in half lengthwise with right side facing outward as shown in image (2b). Be sure raw edges line up.

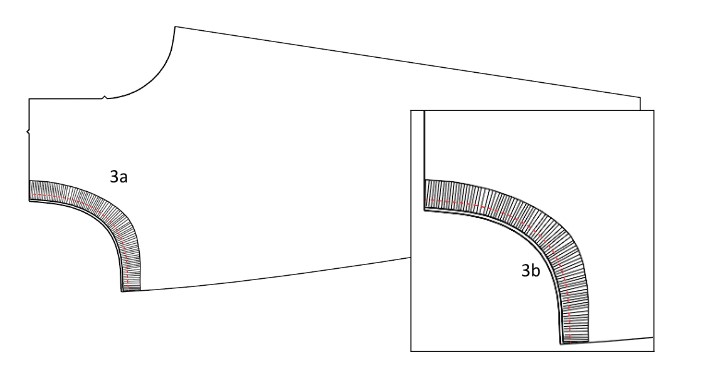
- Pin POCKET TRIM to FRONT with right sides of fabric facing each other at both ends. Then distribute remaining POCKET TRIM evenly between pins to FRONT. With all raw edges aligned, join POCKET TRIM to FRONT while slightly pulling POCKET TRIM fabric to fit curve. See images 3a along with 3b for closeup of construction.
- Turn POCKET TRIM upward so seam allowance faces down towards pant. If needed, you can trim seam allowance down to 1/4 inch (.635 cm) or make small clips up to, but not through stitch line to allow POCKET TRIM to lay smoothly. Refer to image 4a & 4b below.

- Turn FRONT right side out and topstitch through all layers to hold POCKET TRIM seam allowance down in place as shown in image 5a below.

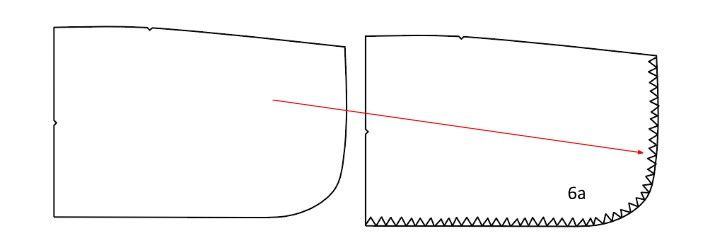
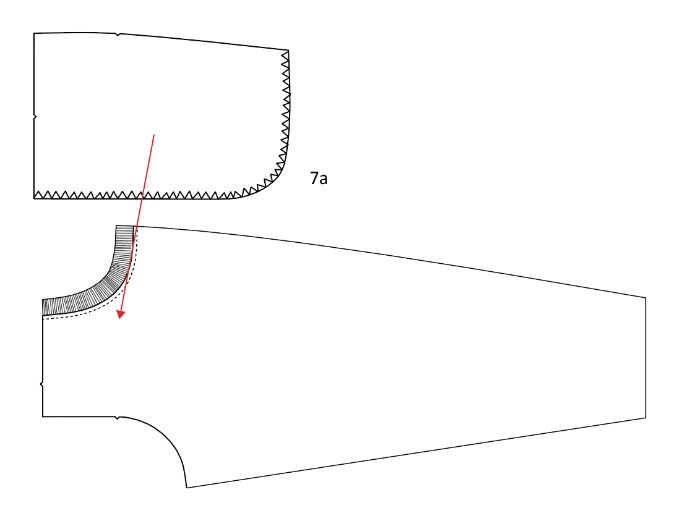
- Take your POCKET and overcast, zigzag, or serge curved edge if you do not want a raw edge there, similar to image 6a below.
- Move POCKET underneath FRONT & FRONT TRIM pieces, matching notches on POCKET at top fold of POCKET TRIM. Once layered correctly, your pieces should look like image 7b below.

- Baste your POCKET to your FRONT & POCKET TRIMS at 1/4 inch (.635 cm) from cut edges along top and side edges inside seam allowance, from notch/POCKET TRIM folded edge to POCKET raw edge. Basting should look similar to image 8a below. These basting stitches will not show once the pant is sewn together.

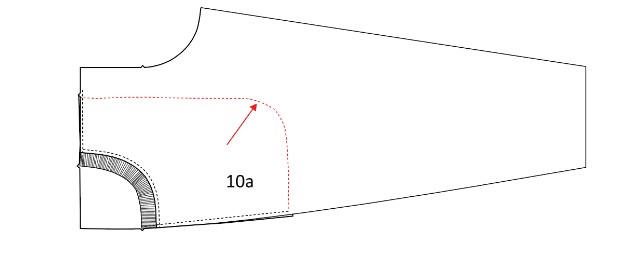
- Turn FRONT to back side and topstitch along POCKET curved edge through FRONT to close POCKET.

- Turn FRONT pant right side out and your topstitching should show through as seen in image 10a below.
- Place FRONT right sides together and join center front rise as shown in image 11a, same as you did in Step #1 for your BACK.

- Open FRONT pieces and lay BACK pieces (from Step #1b) with right sides together. Then join side seams of legs together matching notches.
- Join FRONT and BACK inseam of legs together. Make sure to match crotch seam at FRONT rise and BACK rise as shown in images 13a and 13b.

- Take your WAISTBAND as seen in image 14a and fold it lengthwise, right sides together, then join short ends in a circular tube, like image 14b. Refer to image 14c for close-up of stitching ends together. Be sure to backstitch at both ends to prevent stitching from unraveling.

- Fold WAISTBAND in half again to reduce height of tube. Your joined seam allowance from step #14 should now be on the inside of folded tube. Similar to image 15a below.

- Next, cut elastic to your specified size length, by referring to the FABRIC YARDAGE chart directions, in the Elastic column.
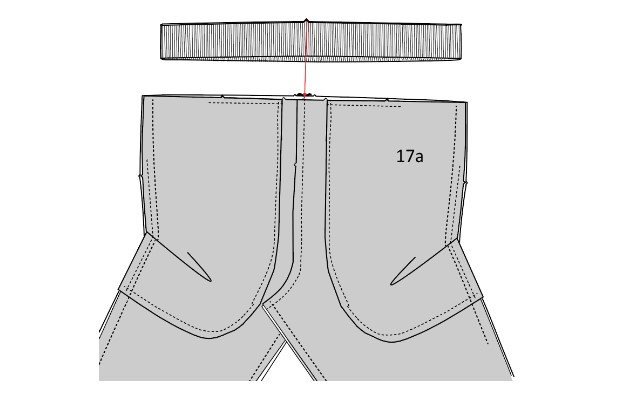
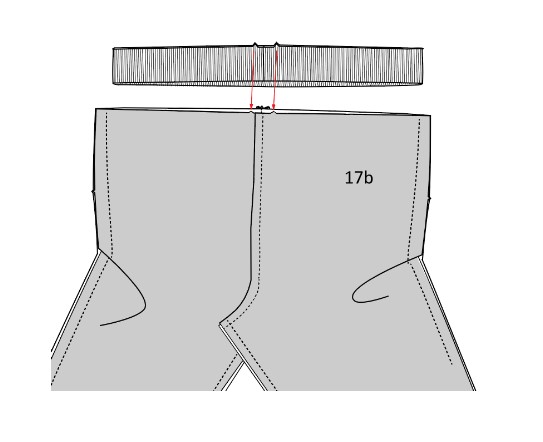
- Turn WAISTBAND upside down with notches facing upward like image 17a below. Pin WAISTBAND to pant, matching front WAISTBAND notches to FRONT rise seam join and back WAISTBAND notches to BACK notches, similar to image 17b below.
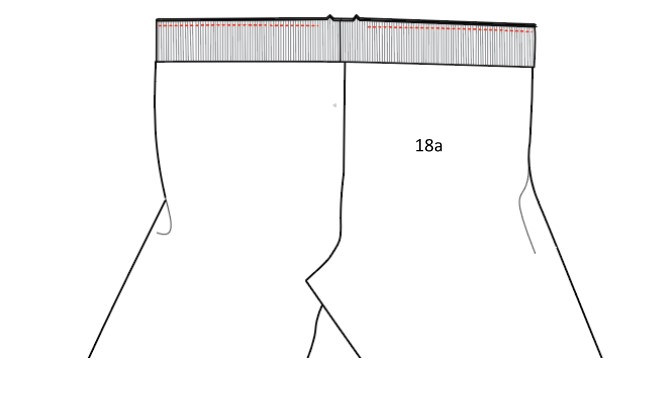
- With WAISTBAND aligned to PANT waist, right sides together. Pin WAISTBAND to PANT at center back notches, center front notches, and side seams. Making sure to distribute WAISTBAND evenly between Front & Back notches. Then join WAISTBAND to PANT waist leaving about a 2 inch (5 cm) opening. Similar to image 18a below.
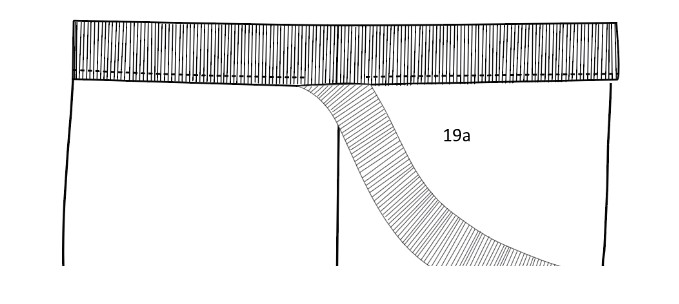
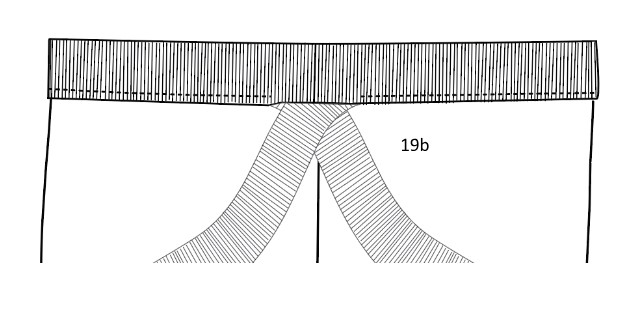
- Insert elastic into the WAISTBAND opening at the center back as shown in image 19a until the elastic end comes back out of the opposite side same opening. Make sure both ends of the elastic stick out of the WAISTBAND once this step is completed. As shown in image 19b below.
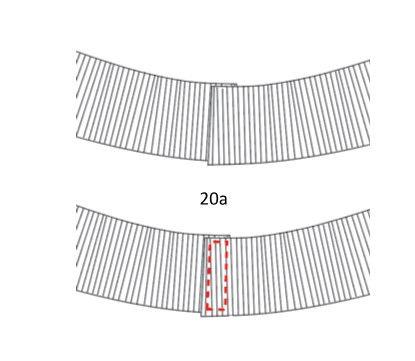
- Making sure elastic lays flat inside WAISTBAND, overlap elastic ends 1/2 inch (1.27 cm), and stitch together. The designer prefers to make a box stitch to reinforce stitching. Similar as shown in image 20a.
- Tuck the joined elastic end into WAISTBAND and tug on your WAISTBAND gently to get the elastic all inside and distributed evenly. Then stitch close WAISTBAND and PANT waist all together to close opening, making sure to back stitch at both ends to reinforce stitching ends. Similar as shown in image 21a.

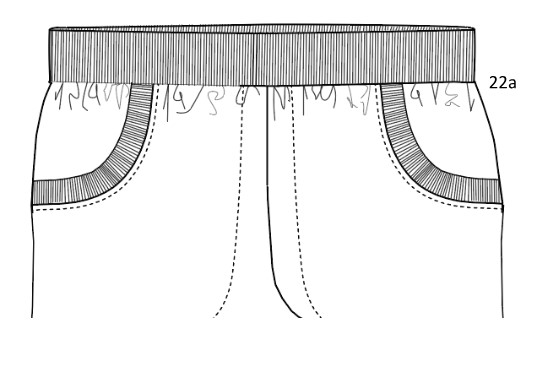
- Turn WAISTBAND upward and pant around to front. Your Pant should now look similar to image 22a below with attached WAISTBAND.
- Next take your LEG CUFF pieces and fold them in half and join them along the side seam to create a tube. Similar to Steps #14-15 from when you made your WAISTBAND. Image 23a is your LEG CUFF pieces cut and image 23b should look similar to your sewn LEG CUFF in a tube and folded in half height-wise.

- Attach LEG CUFF to PANT leg opening right sides together and join all around, pulling LEG CUFF fabric slightly as you join to PANT leg. Be sure to distribute LEG CUFF to leg opening evening by matching LEG CUFF notches to leg outseam and LEG CUFF seam join to leg inseam (side seam) as you sew them together.

- Once attached, turn LEG CUFF downward (right side out) and it should look similar to image 25a below once finished.

- Once your LEG CUFF is joined to leg opening, turn pant right side out and trim any excess threads. Enjoy your new pants!