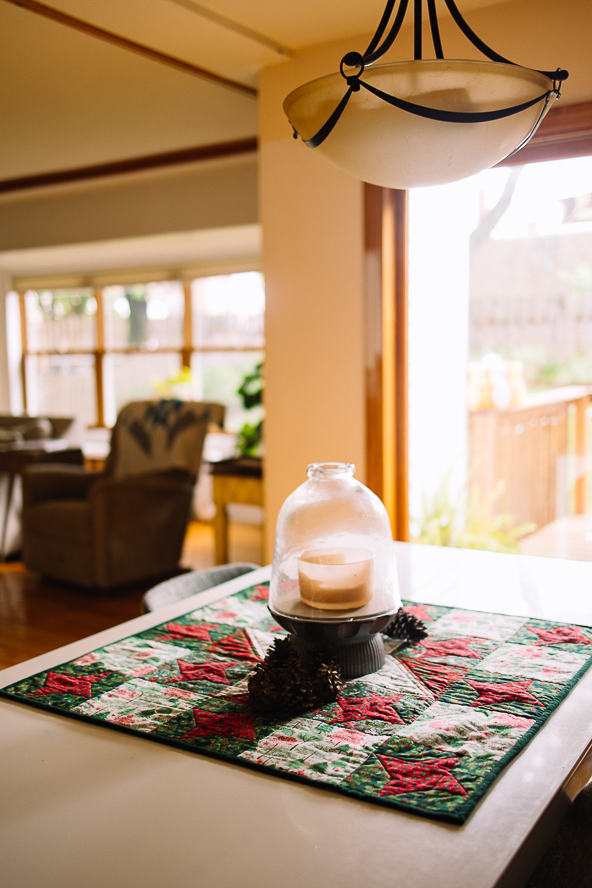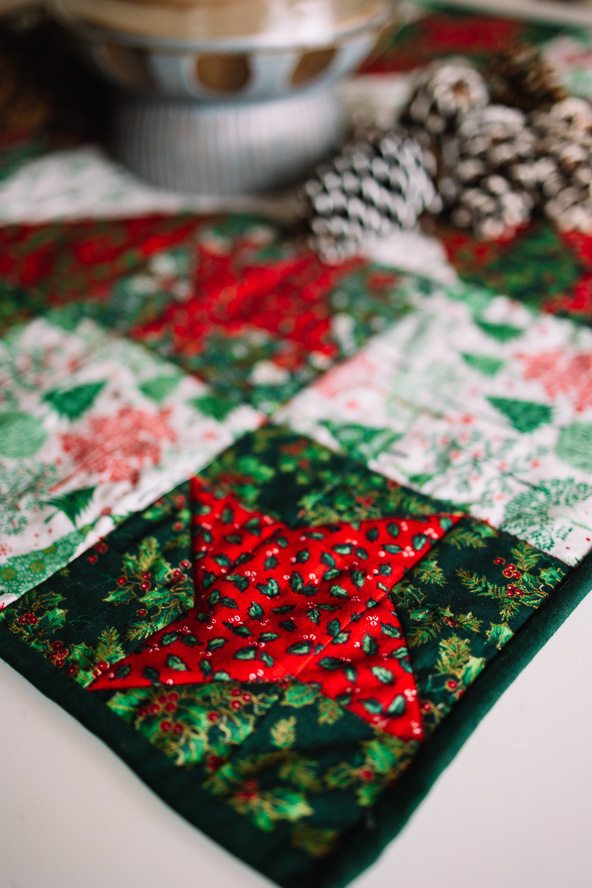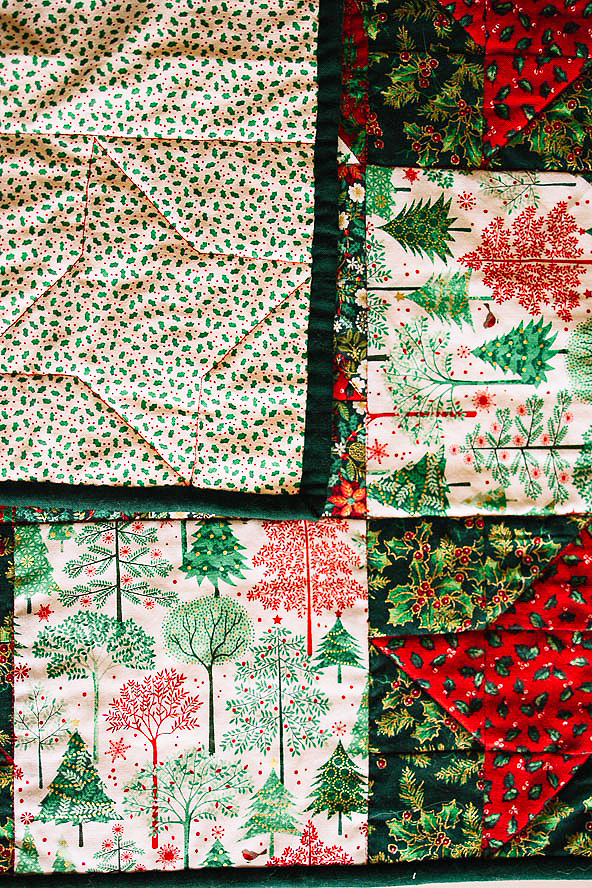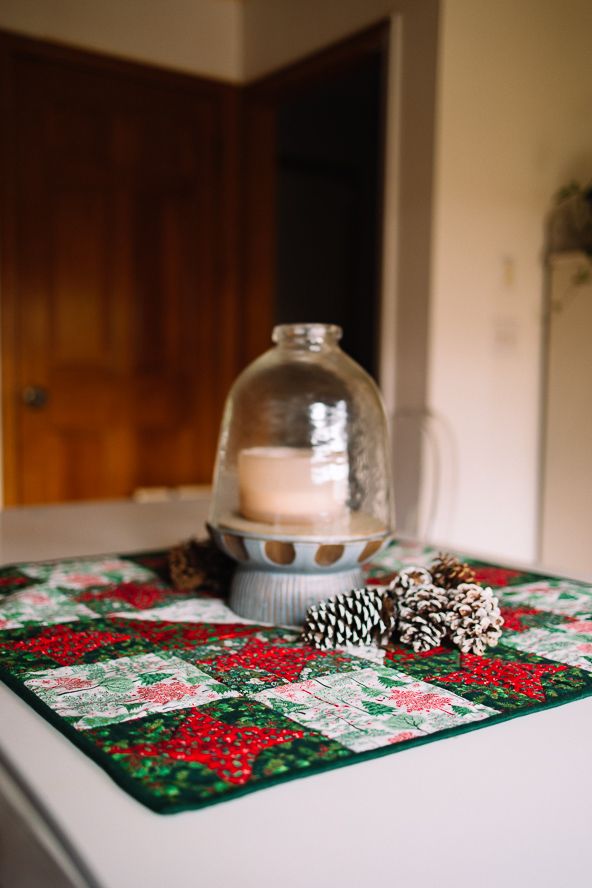
Decorate your table elegantly for Christmas dinner with this festive quilted table topper. Perfect for leftover holiday prints, this table topper pattern has a classic friendship star at its center, with smaller stars surrounding the central design. This quilted holiday project is a great make-ahead pattern, so you have plenty of time to enjoy it before the holidays are here. Create warm and inviting holiday décor that friends and family will love with this quilting pattern.
Finished Size: 30″ x 30”
Materials:
DESIGNER NOTE: A, B, D, E, and F are all-over, non-directional prints, but Fabric C can be a directional print, placed facing outwards on each side of the table topper.
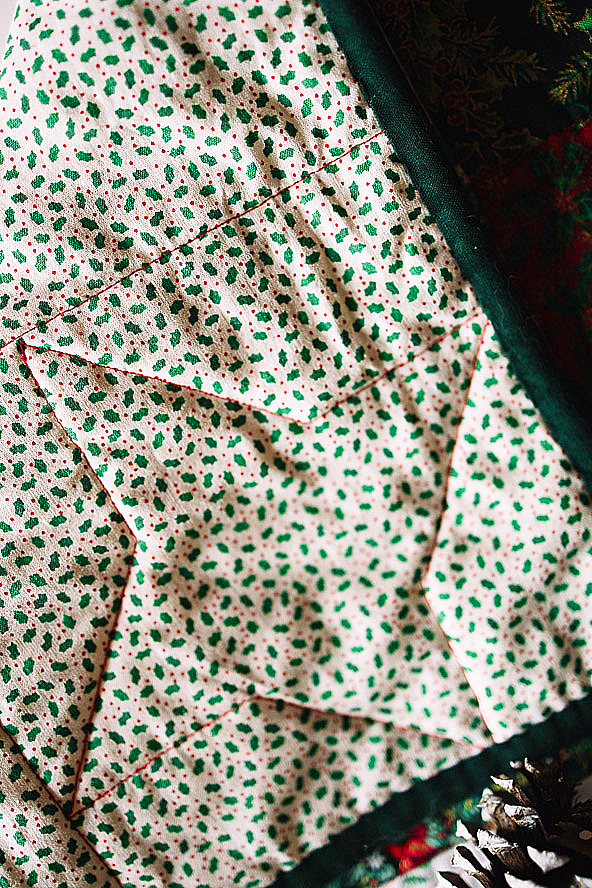
- 9″ x 11” Fabric A (green holly leaves and red berries on a white background)
- 9″ x 21” Fabric B (red poinsettia flowers and green holly leaves)
- 20″ x 21” Fabric C (red and green trees on a white background)
- 9″ x 21” Fabric D (green holly leaves on a red background)
- 20″ x 21” Fabric E (red poinsettia and white flowers, plus green leaves on a green background)
- 1/2 yard Fabric F (green holly and red berries on a green background)
- 1/4 yard Fabric G for the binding
- Backing fabric and batting at least 36″ x 36”
- Sewing and quilting thread
- PDF Layout – This is located at the bottom of this page. See printing instructions below.
PRINTING INSTRUCTIONS:
To download the PDF layout, click on the download button at the bottom of the page. We recommend opening your download using Adobe Acrobat.
Cutting Instructions:
- From Fabric A, cut one square 6 1/2″ x 6 1/2″ and two squares 6 7/8″ x 6 7/8”.
- From Fabric B, cut two squares 6 7/8″ x 6 7/8”.
- From Fabric C, cut eight squares 6 1/2″ x 6 1/2”.
- From Fabric D, cut twelve squares 2 1/2″ x 2 1/2” and twenty-four squares 2 7/8″ x 2 7/8”.
- From Fabric E, cut sixteen squares 2 1/2 x 2 1/2” and eight squares 2 7/8″ x 2 7/8”.
- From Fabric F, cut thirty-two squares 2 1/2″ x 2 1/2” and sixteen squares 2 7/8″ x 2 7/8”.
- From Fabric G, cut strips 2 1/4” wide, across the width of the fabric, enough to make a strip 130” long when joined at the ends.
Sewing Instructions:
MAKING THE TABLE TOPPER:
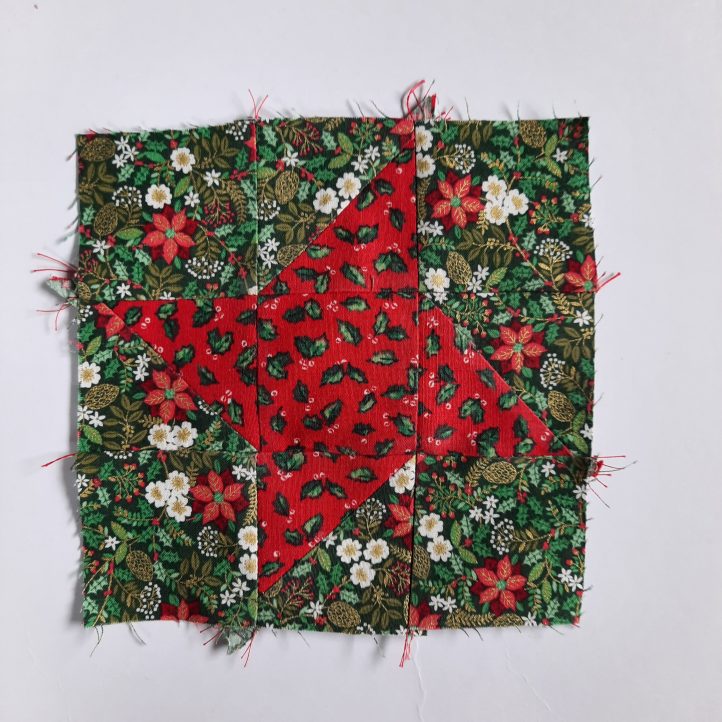
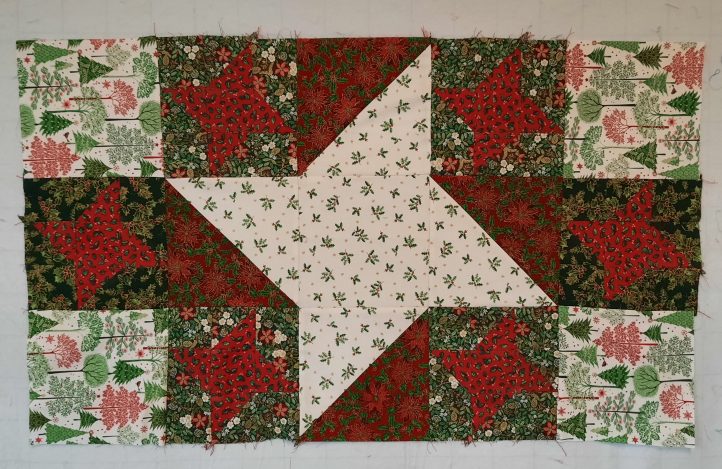
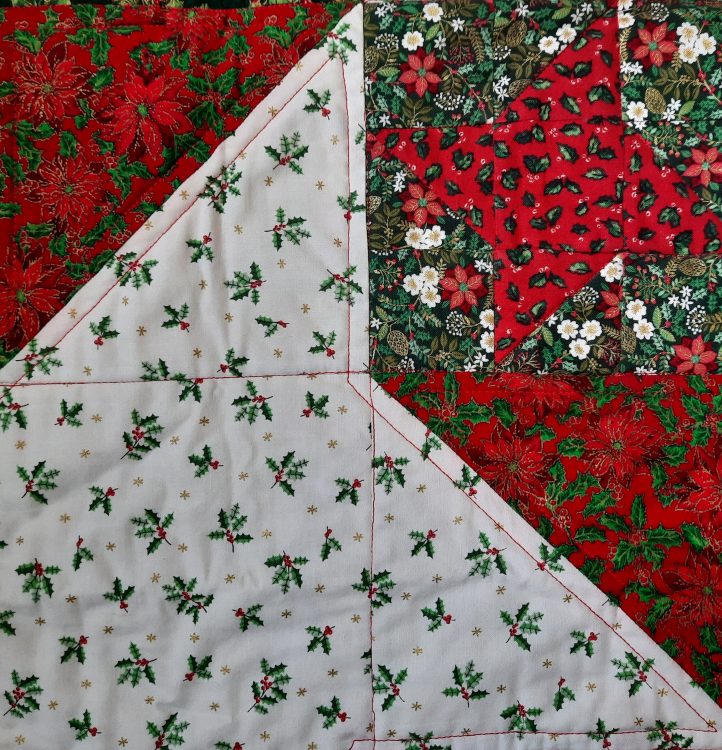
- Begin by making the center section of the quilt, consisting of nine blocks. Please note that the background of the smaller friendship stars in this section is Fabric E (in the outer sections of the quilt, the background fabric is F).
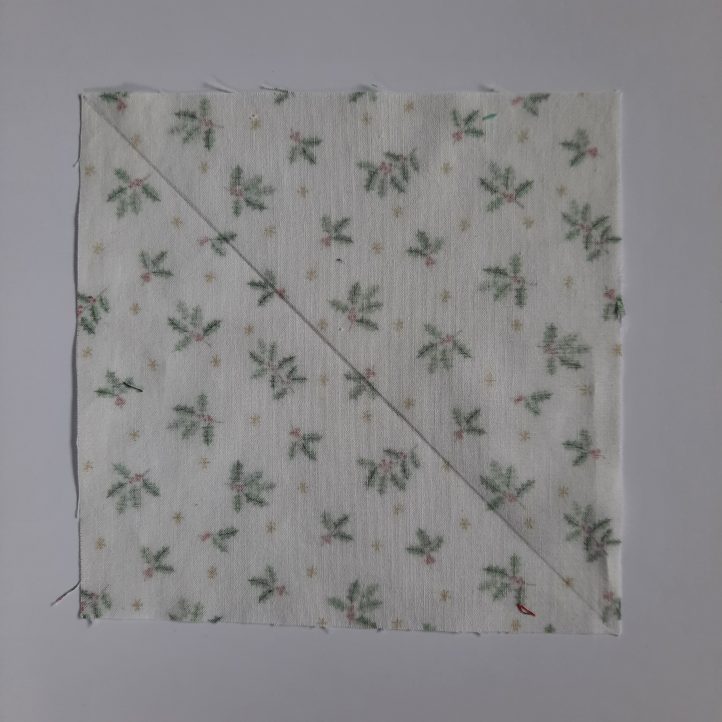
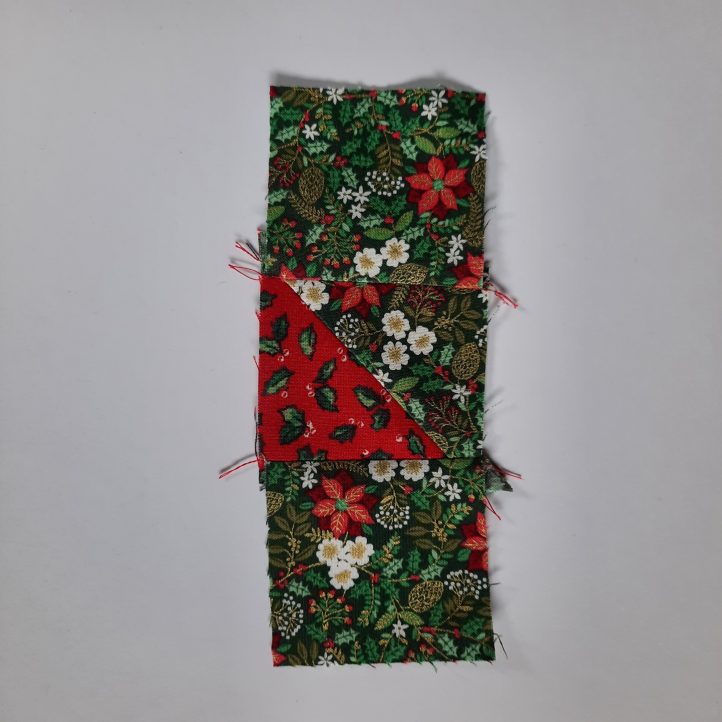
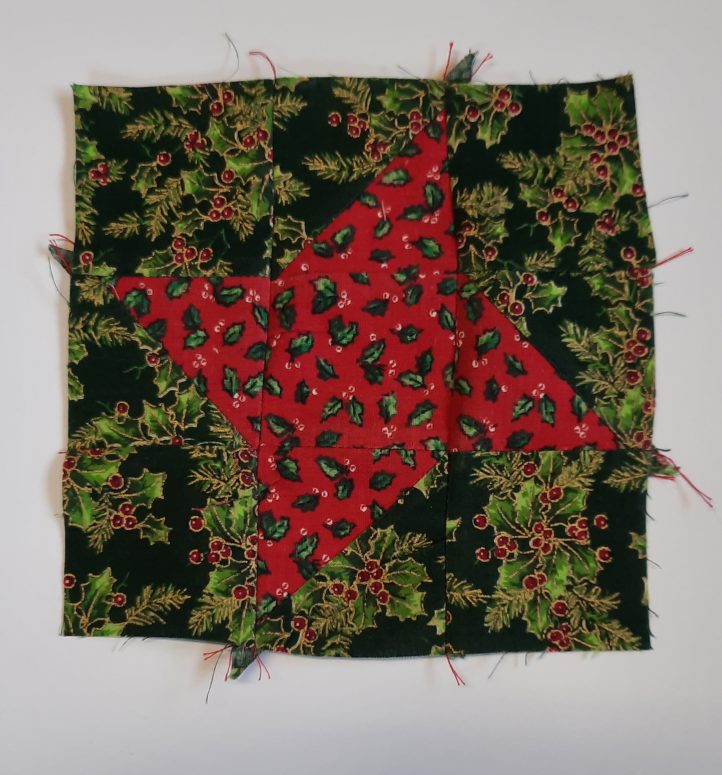
- Prepare the large friendship star. Draw a diagonal line corner to corner on the back of a 6 7/8″ x 6 7/8” Fabric A square.
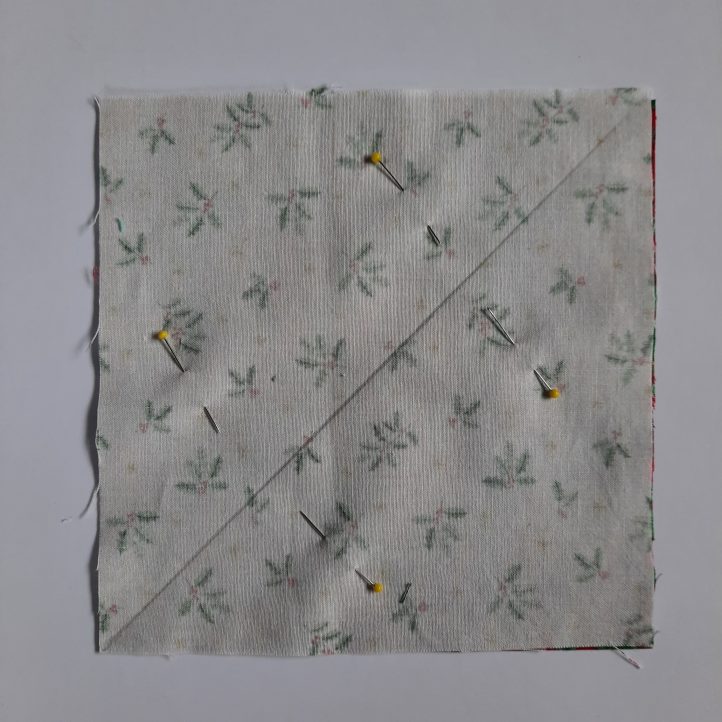
- Place the Fabric A square right sides together on top of a 6 7/8″ x 6 7/8” Fabric B square. Pin in the unmarked area.
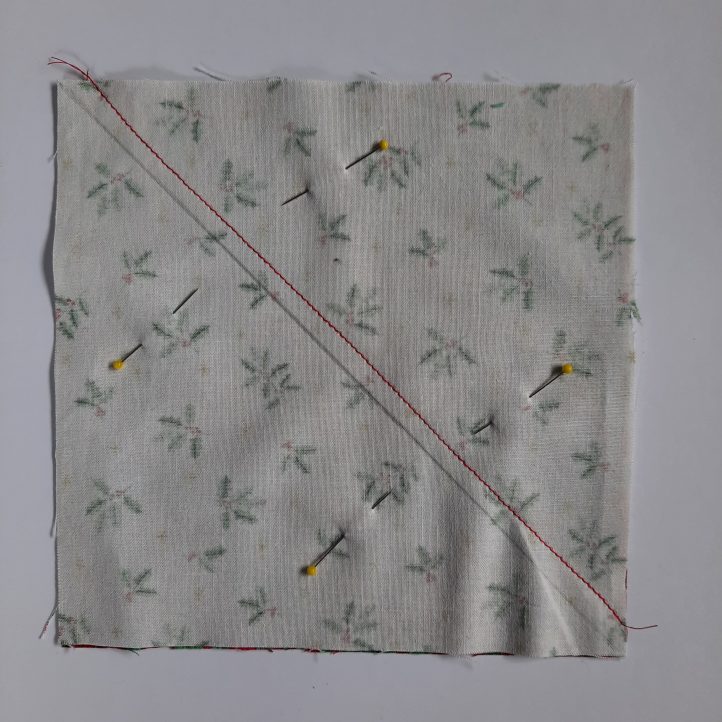
- Stitch 1/4” away from the line, to the left of the line. Take the piece out of the machine and stitch (in the same direction) 1/4” away from the line, this time to the right of the line.
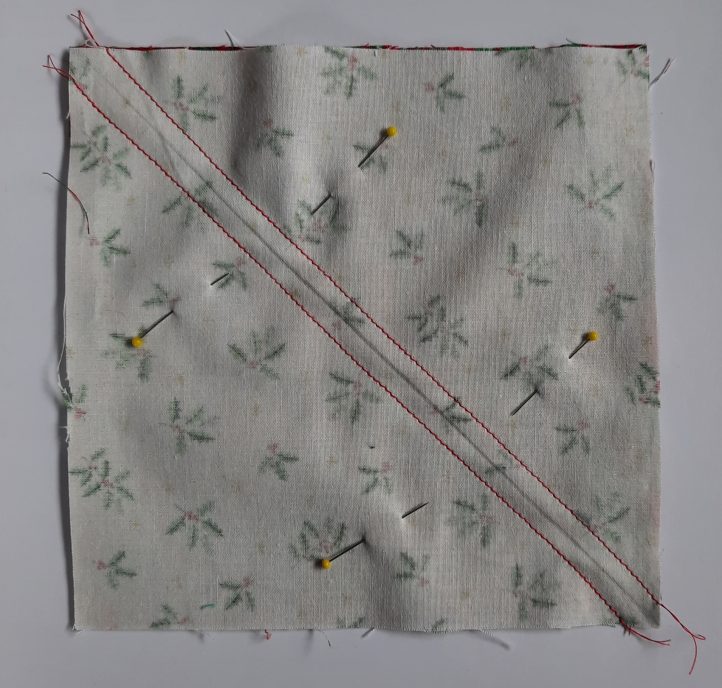
- Cut along the marked line.
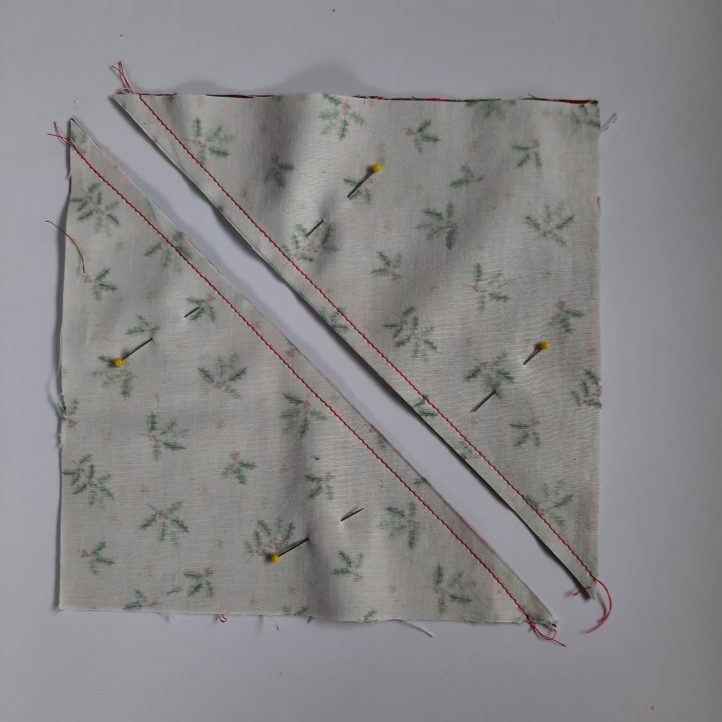
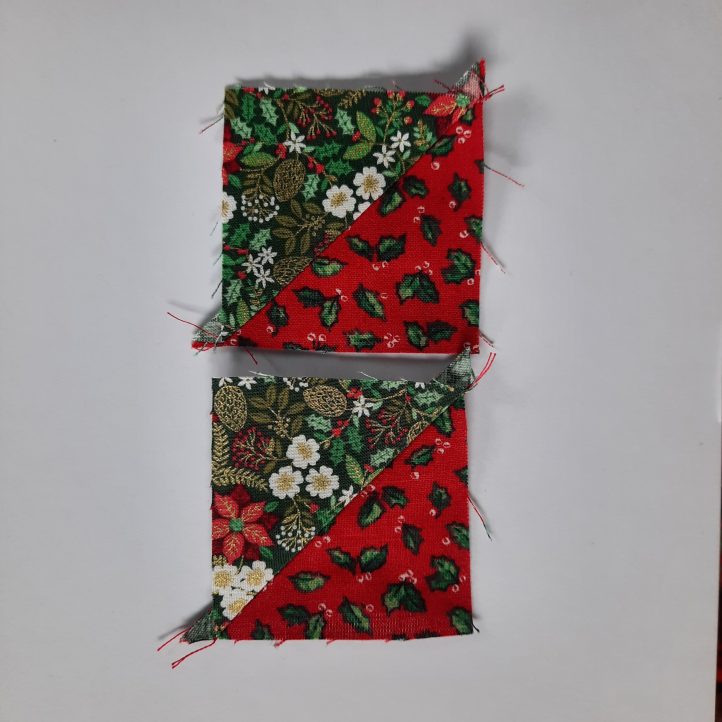
- Press the seam. Open the triangles and press the seam allowances across towards the darker fabric. This makes two half-square triangle pieces.

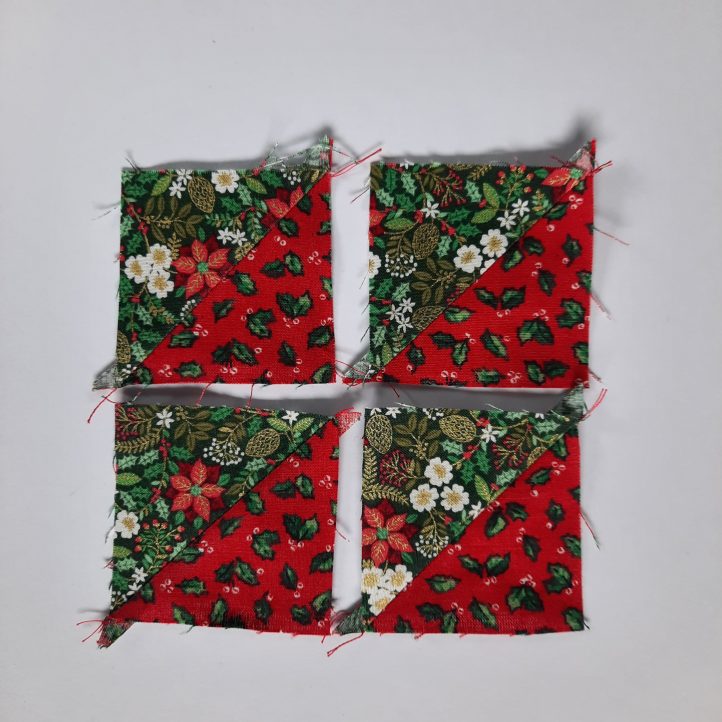
- Repeat Steps 2-6 with another 6 7/8″ x 6 7/8” Fabric A and Fabric B square. Lay the pieces out on the worktable as shown.

- Make a small friendship star. Repeat Steps 2-6, this time with a 2 7/8″ x 2 7/8” square of Fabric D and a 2 7/8″ x 2 7/8” square of Fabric E to make two half-square triangle pieces.
- Repeat Step 8 to make two more half-square triangle pieces.
- Make the small friendship star block, taking care to match the orientation of the half-square triangle pieces to the printable diagram and the photographs. Make row 1 by joining a 2 1/2″ x 2 1/2” square of Fabric E to a Fabric D/E square and then another 2 1/2″ x 2 1/2” square of Fabric E. Press the seam allowances out towards the sides.
- Make Row 2 by joining a D/E square to a 2 1/2″ x 2 1/2” square of Fabric D and then another D/E square. Press the seam allowances in towards the center.
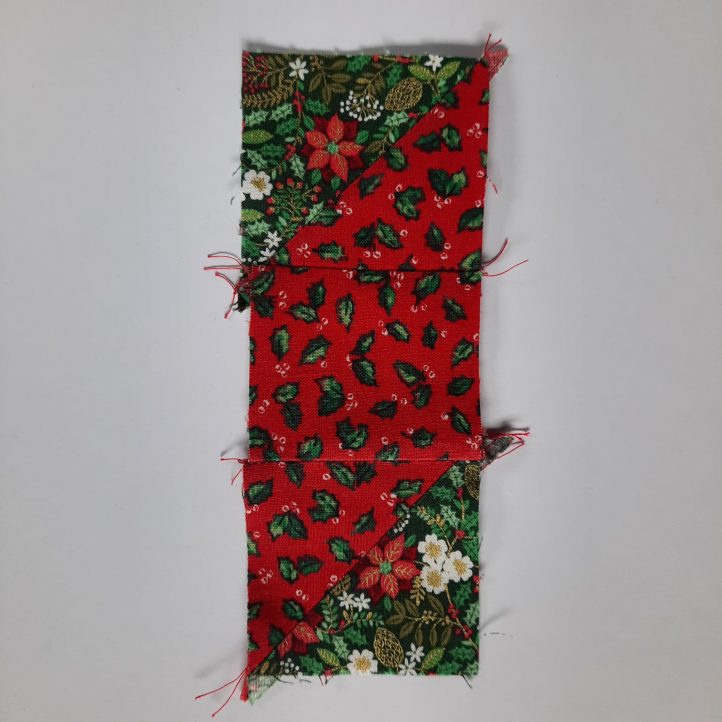
- Make Row 3 by joining a 2 1/2″ x 2 1/2” square of Fabric E to a Fabric D/E square and then another 2 1/2″ x 2 1/2” square of Fabric E. Press the seam allowances out toward the sides.
- Join the three rows, aligning vertical seams.
- Repeat Steps 8-13 three times more.
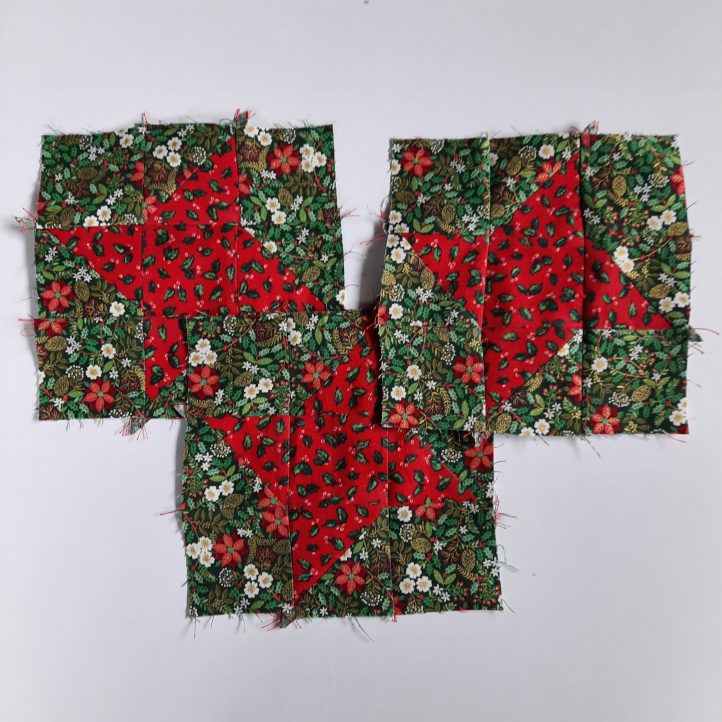
- Add the new blocks to the layout you prepared in Step 7, one in each corner.
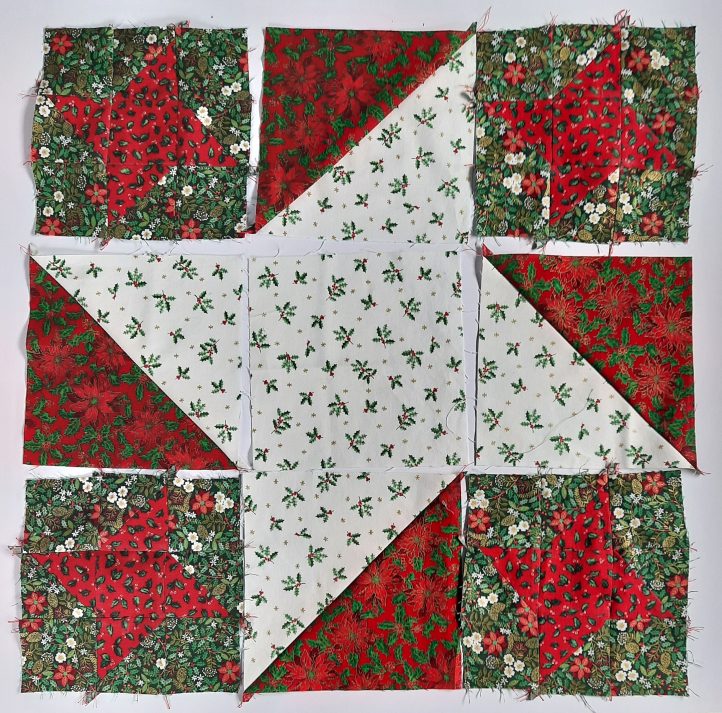
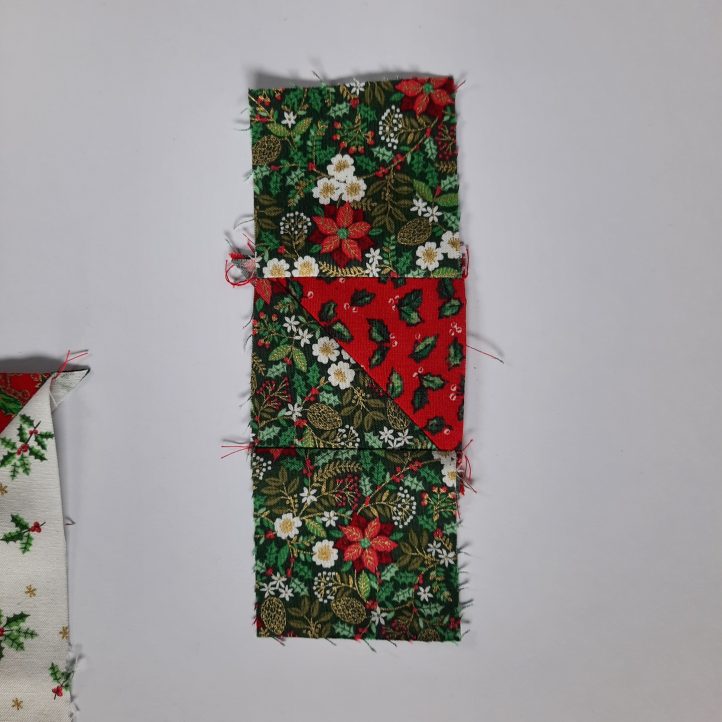
- Make Row 1: Join a small friendship squares block to a large B/A square and then a second small friendship squares block. Press the seam allowances in toward the central square.

- Make Row 2: Join a B/A square to a 6 1/2″ x 6 1/2” Fabric A square and then an A/B square. Press the seam allowances out towards the outside squares.

- Make Row 3: Join a small friendship squares block to a large A/B square and then a second small friendship squares block. Press the seam allowances in toward the central square.
- Join the three rows, ensuring that the vertical seams align and that the seam allowances face in opposite directions at those points. The center part of the Table Topper is complete.
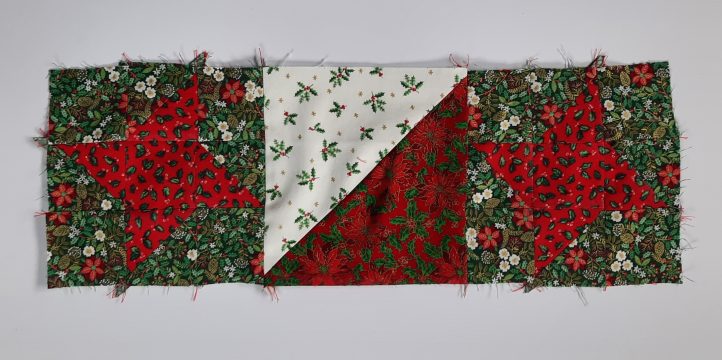
- Repeat Steps 8-13 eight times, using Fabric D for the stars but this time using Fabric F for the background.
- Make a side strip. Join a 6 1/2″ x 6 1/2” Fabric C square to a D/F small friendship squares block, then another 6 1/2″ x 6 1/2” Fabric C square.
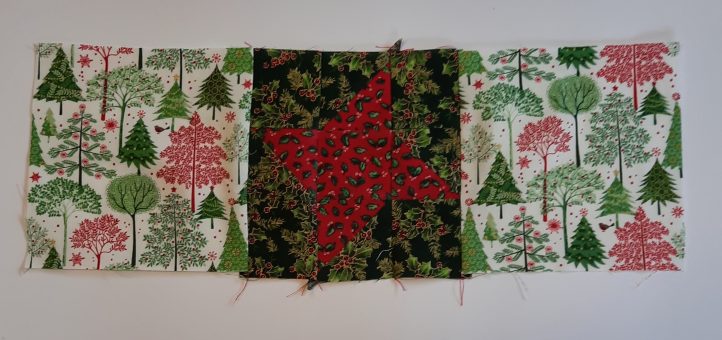
- Repeat Step 21.
- Join the pieces made in Steps 21 and 22 to opposite sides of the center square, matching the vertical seams. If using a directional print, make sure the print reads correctly from each side of the Table Topper.
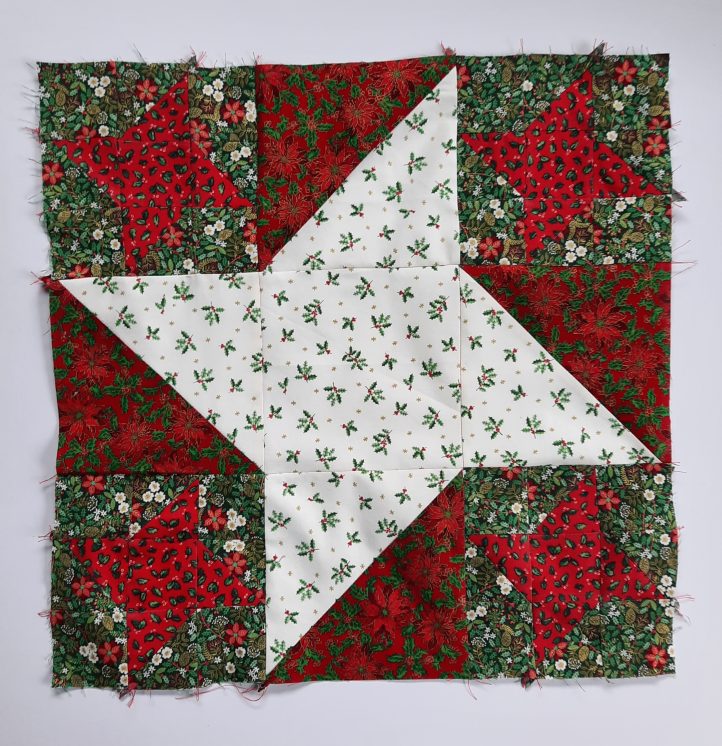
- Make a longer side strip by joining a D/F block to a Fabric C square, a second D/F block and a second Fabric C square and then a D/F block. Check the directional print, as before.
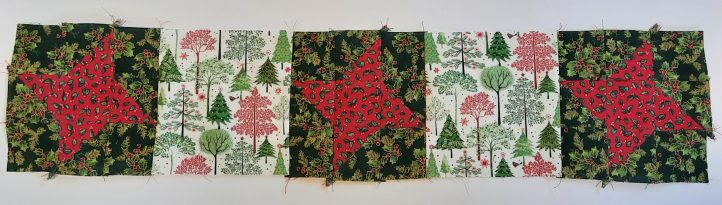
- Repeat Step 24.
- Join the pieces made in Steps 24 and 25 to opposite sides of the piece completed in Step 23, aligning the vertical seams. Press well.

- Layer up the quilt top, batting and backing, aligning the centers of each side of the three layers, to ensure that the quilt is placed squarely. Join with basting, specialist fabric spray adhesive, or quilters’ pins.
- Quilt as desired. Quilting suggestion: Starting at the center, do a line of quilting stitches ‘in the ditch’ (on top of the seam) in a grid of horizontal and vertical lines across the quilt, 6” apart. Then quilt in the ditch round each of the small friendship stars (This will help them to stand out). Finally, ‘shadow quilt’ round the inside of the large friendship star at the center, 1/2” away from the outside seam.
- Join the binding strips together at the short ends. Fold the binding in half lengthways and press, pressing the seams open.