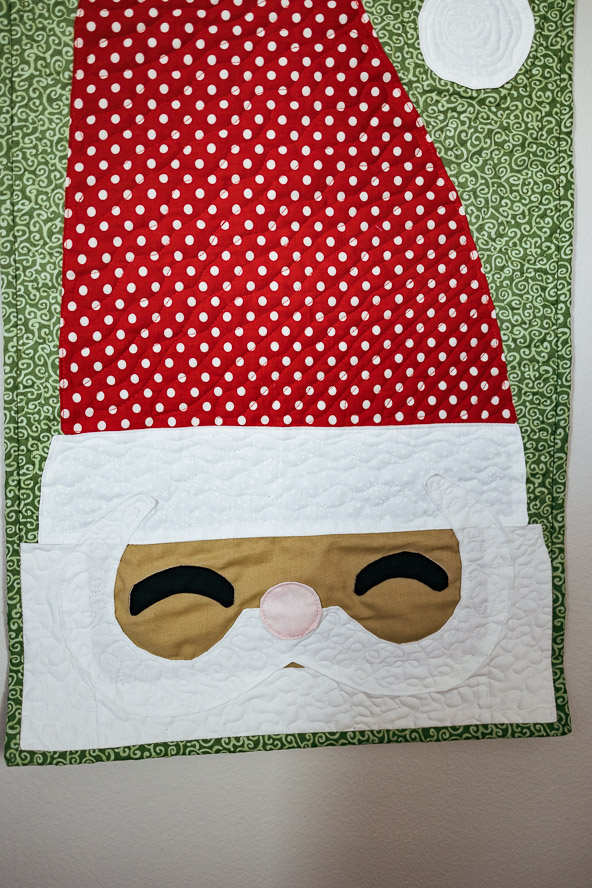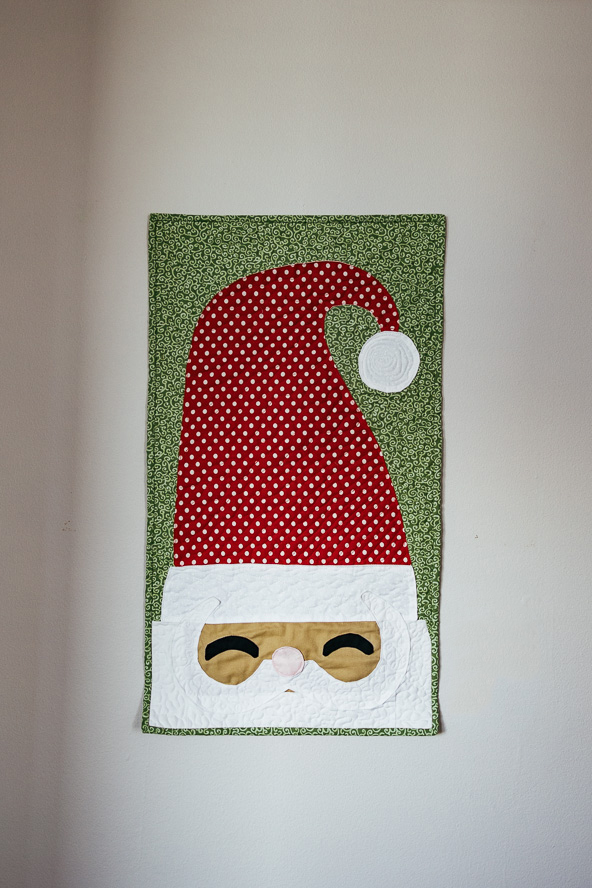
Get ready to deck the halls with this jolly and joyful quilted wall hanging. Featuring our favorite North Pole resident, this Christmas wall hanging pattern shows you a special appliqué technique to create smooth, curved edges. This mini quilt project is all machine-sewn, so if you’ve been procrastinating on your holiday quilting, you still have plenty of time to make this project before Christmas. Make this festive winter wall hanging by combining fat quarters and fabric scraps.
Finished Size: Approximately 16” x 28”
DESIGNER NOTE: 1/4” seam allowance throughout
Materials:
- Most pieces can be made from scraps in your stash (nose, eyes, hat band, hat pom pom, etc.). You can also get a variety of fat quarters for the different elements on the quilt.
- 2/3 yd – background fabric, quilt back, and binding
- 1/2 yd – lightweight interfacing (see applique instructions below to choose between fusible or non-fusible interfacing). Note: The designer HIGHLY recommends non-fusible interfacing for this project, as some of the pieces are small and it’s easier if you can press your pieces before placing them on the quilt. Omit if using a different applique technique.
- Basic sewing and quilting notions
- PDF Template/Layout – These are located at the bottom of this page. See printing instructions below.
PRINTING INSTRUCTIONS:
To download the PDF template/layout, click on the download button at the bottom of the page. We recommend opening your download using Adobe Acrobat.
Cutting Instructions:
CUT FABRIC AND INTERFACING:
- Cut 1 fabric and 1 interfacing each from template pattern pieces (these are located at the bottom of this page):
- Mustache
- Nose
- Hat Band
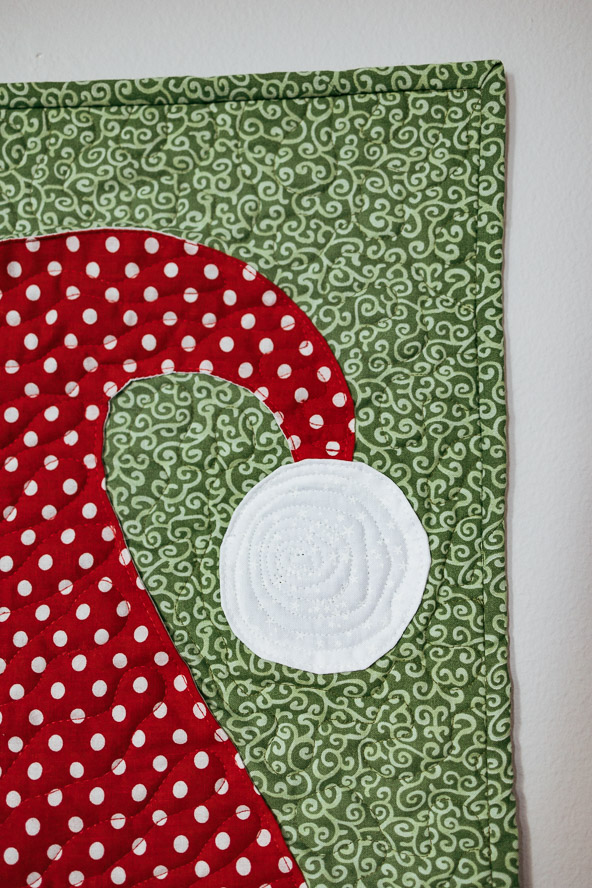
- Hat Pom Pom (Santa Hat Ball)
- Main Hat – (Note: If you don’t have the ability to enlarge the pattern piece, you can easily free hand your own pattern piece. Make sure the bottom width matches the hat band width and decide how tall you want your hat to be and draw your own!)
- Cut 2 from template pattern pieces:
- Eyes – fabric
- Eyes – interfacing
- Cut 2 mirror image pieces (please see the PDF layout at the bottom of the page):
- Piece C – Beard Edge – no pattern pieces, fabric only
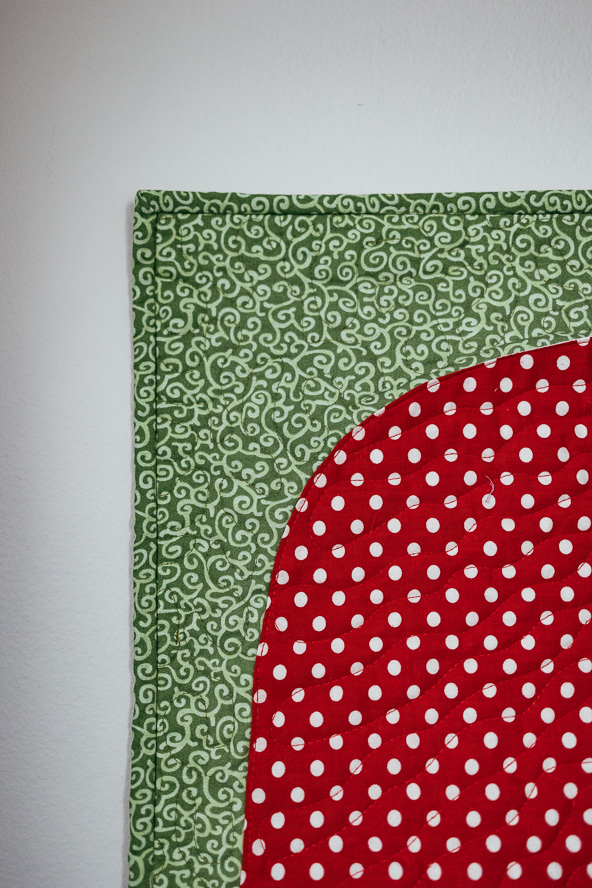
- Piece B – Triangle Background – no pattern pieces, fabric only
- Cut the following using the dimensions listed (no pattern pieces, fabric only) (please see the PDF layout at the bottom of the page):
- 1 Top Background – 16” x 22”
- 1 Piece A – Bottom Beard – 11.5” x 2.5”
- 1 Piece D – Face – 11.5” x 4.5”
- 1 Quilt Back (if you plan to turn your project into a quilt) – cut out after your front is complete, about 17” x 29”
- Binding – about 88 inches of binding. The designer used 2 1/2” strips but you can use your preferred binding method.
Sewing Instructions:
PIECE BACKGROUND:
- Sew Piece A to Piece D to make the face.
- Sew Piece B to Piece C once for each side; this will create two mirror image pieces.
- Sew one BC piece to each side of the face (AD) to create the full face and beard background. The triangles should be on the outside edge (see PDF layout).
- Sew the entire face and beard to the Top Background piece to create the full base of the quilt background.
CREATE ALL APPLIQUE PIECES:
- Use your favorite applique technique or the “Applique with Interfacing” technique described below for each of the following pieces:
- Eyes
- Mustache
- Nose
- Hat Band
- Hat
- Hat Pom Pom (Santa Hat Ball)
To Applique with Interfacing:
- Cut out fabric and interfacing pieces as listed above.
- Sew together using a 1/4” seam allowance.
- If using a non-fusible interfacing, place the pieces RST (right sides together).
- If using a fusible interfacing, place the glue side facing the Right Side of your fabric – DO NOT PRESS.
- Clip into any corners and around curves for smoother edges.
- Cut a small slit in the middle of your interfacing layer only (DO NOT CUT THROUGH FABRIC) and turn the pieces right side out, poke out any corners and smooth curved edges.
- If you are using a non-fusible interfacing, you can press your pieces flat. If you are using a fusible interfacing, only finger press around the edges.
- Once your pieces are prepared, place them on the background of the quilt.
- If you are using non-fusible interfacing, pin them in place and then sew around the edge.
- If you are using a fusible interfacing, you can iron them into place and then stitch around the edge.
FINISH:
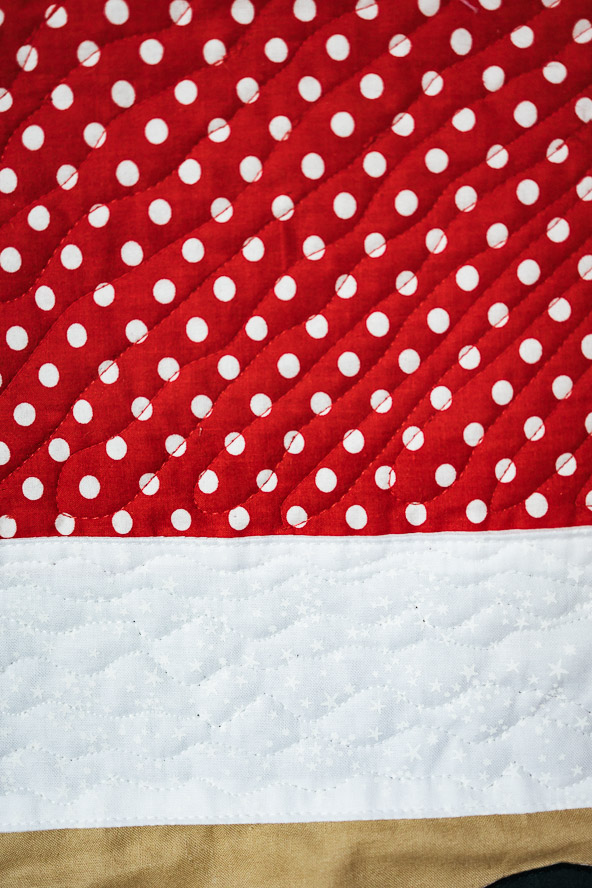
- Use your favorite quilting and binding techniques to finish your wall hanging. Add a fabric sleeve or hooks to the back for hanging.