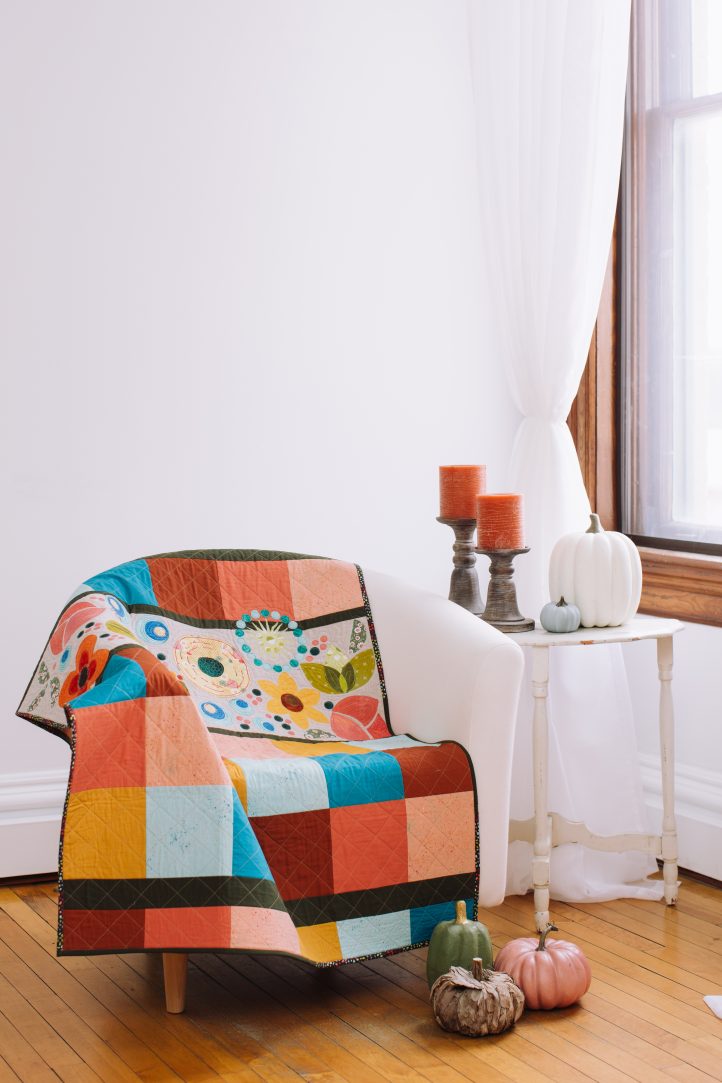
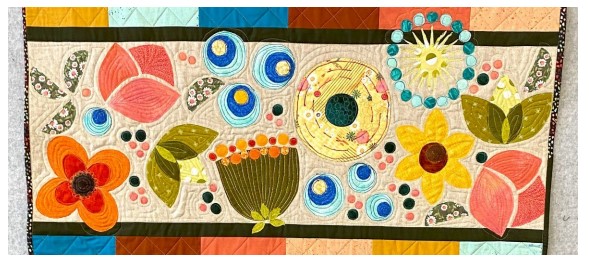
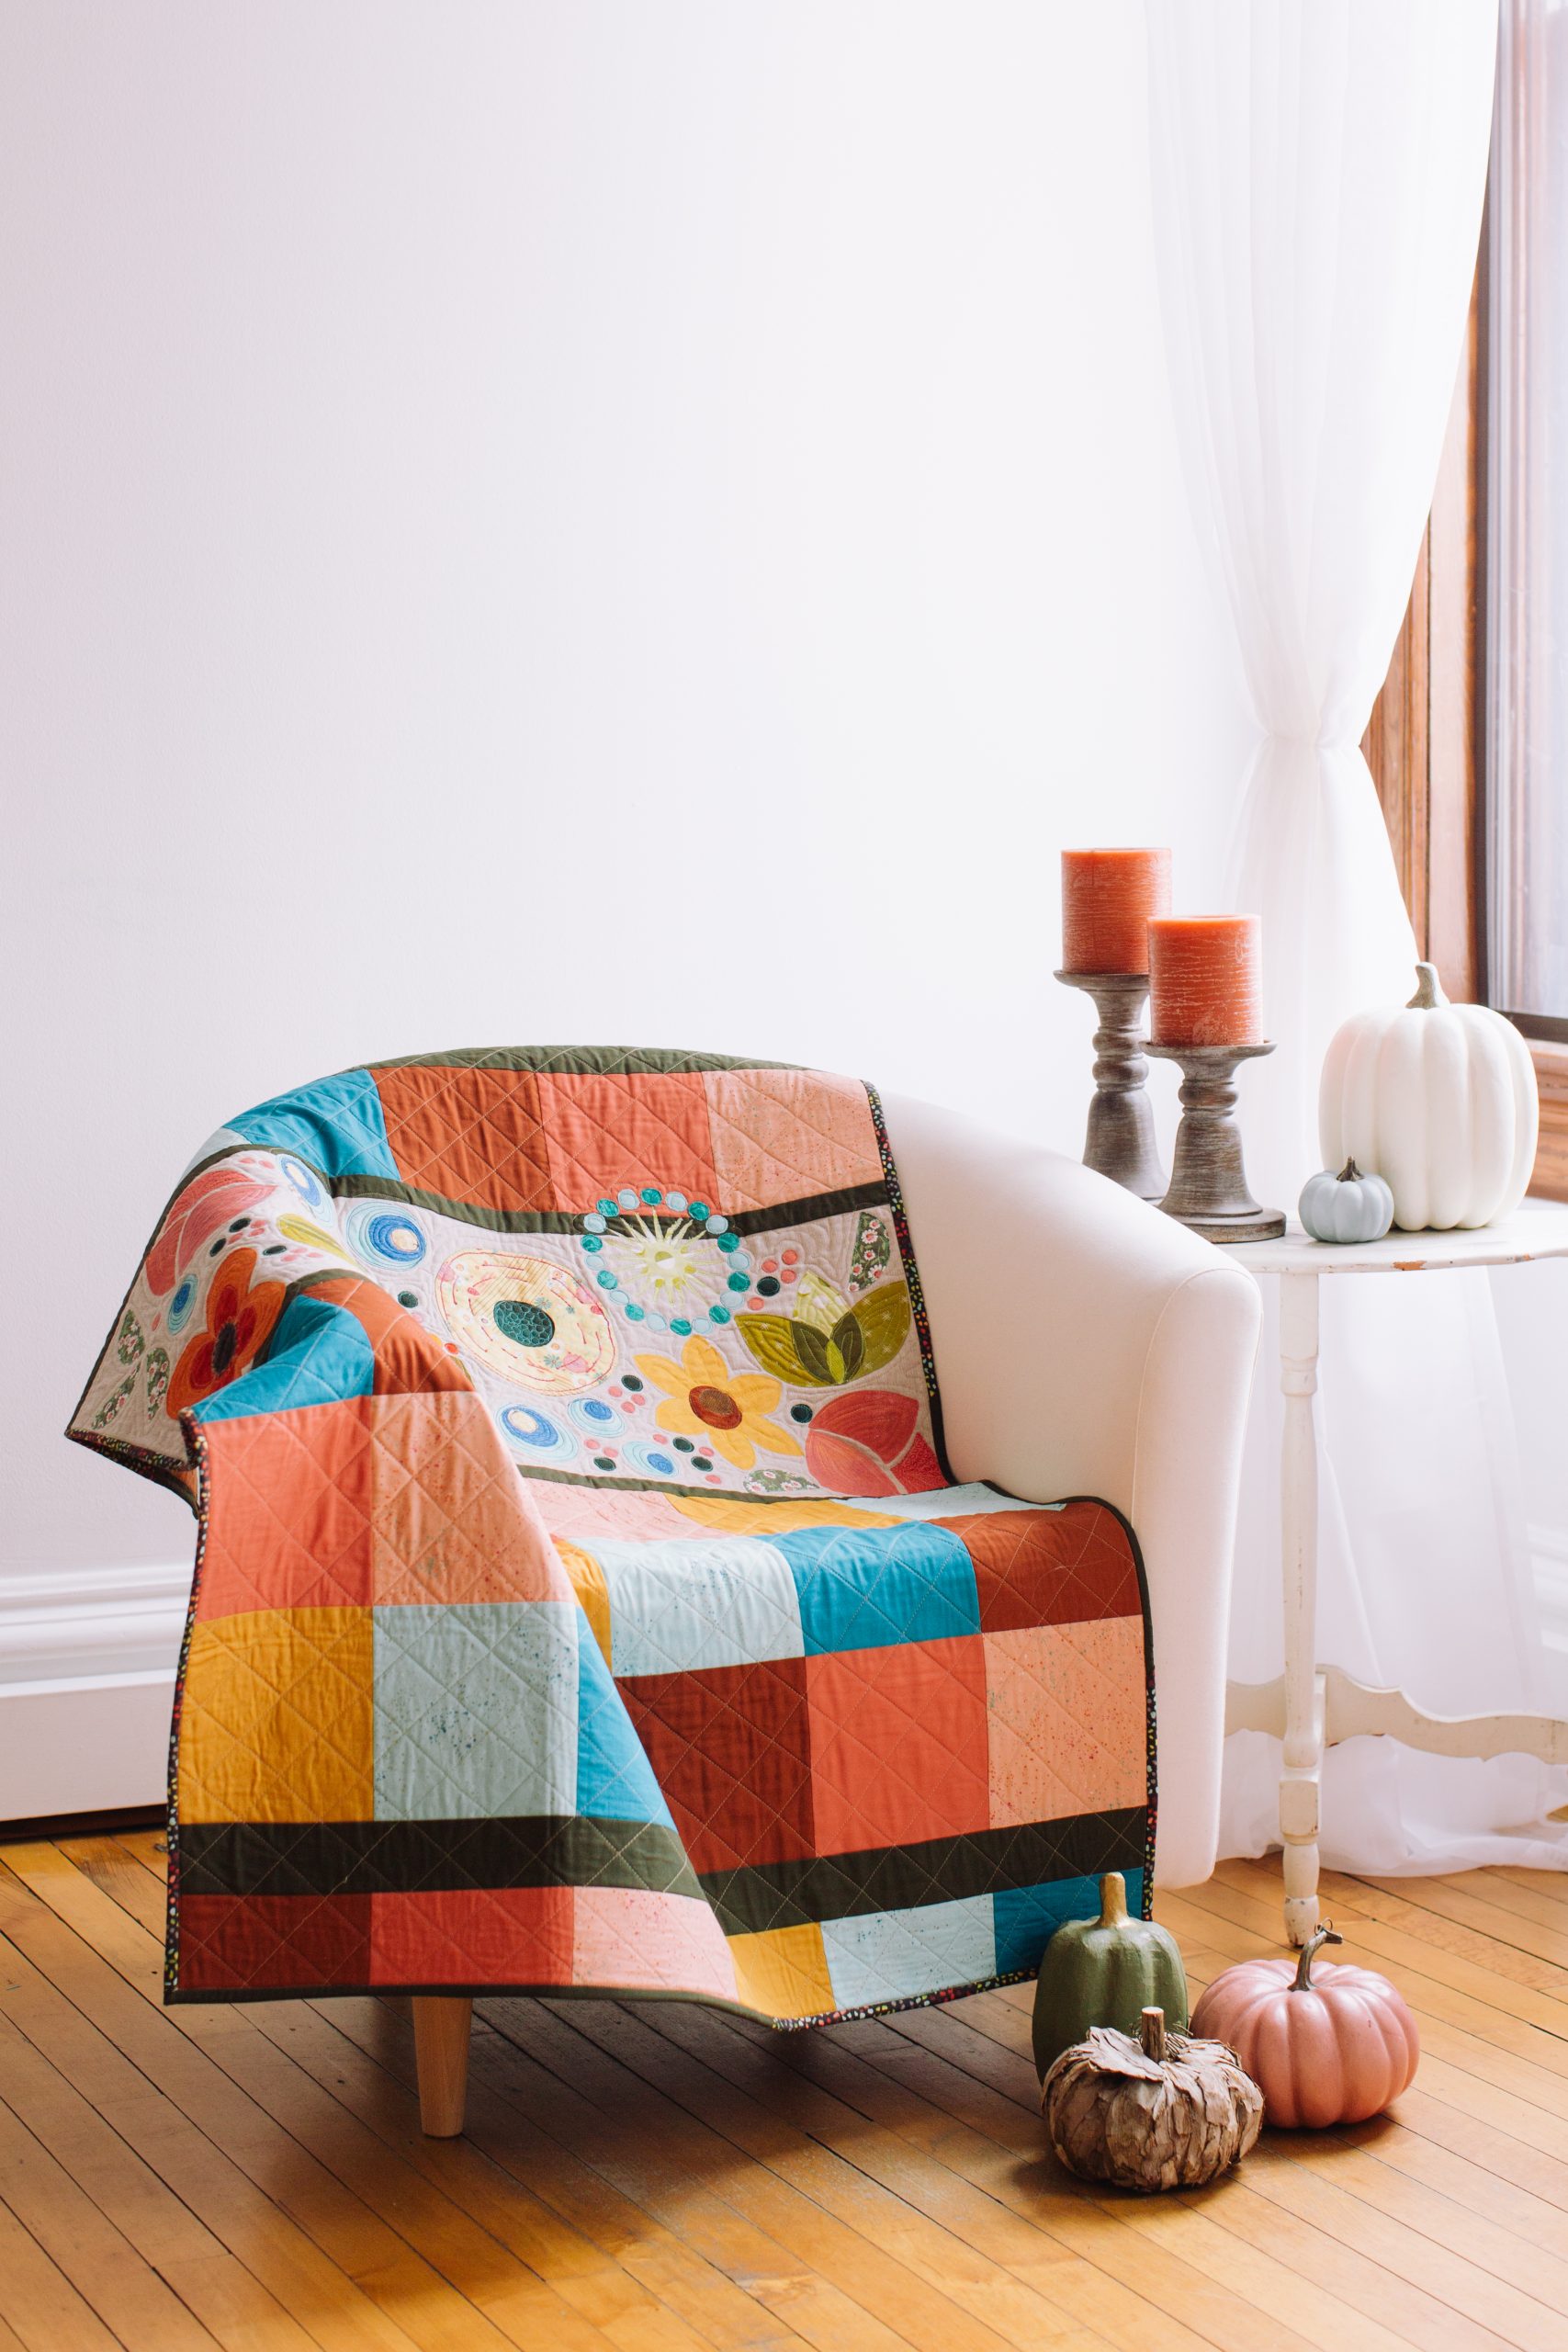
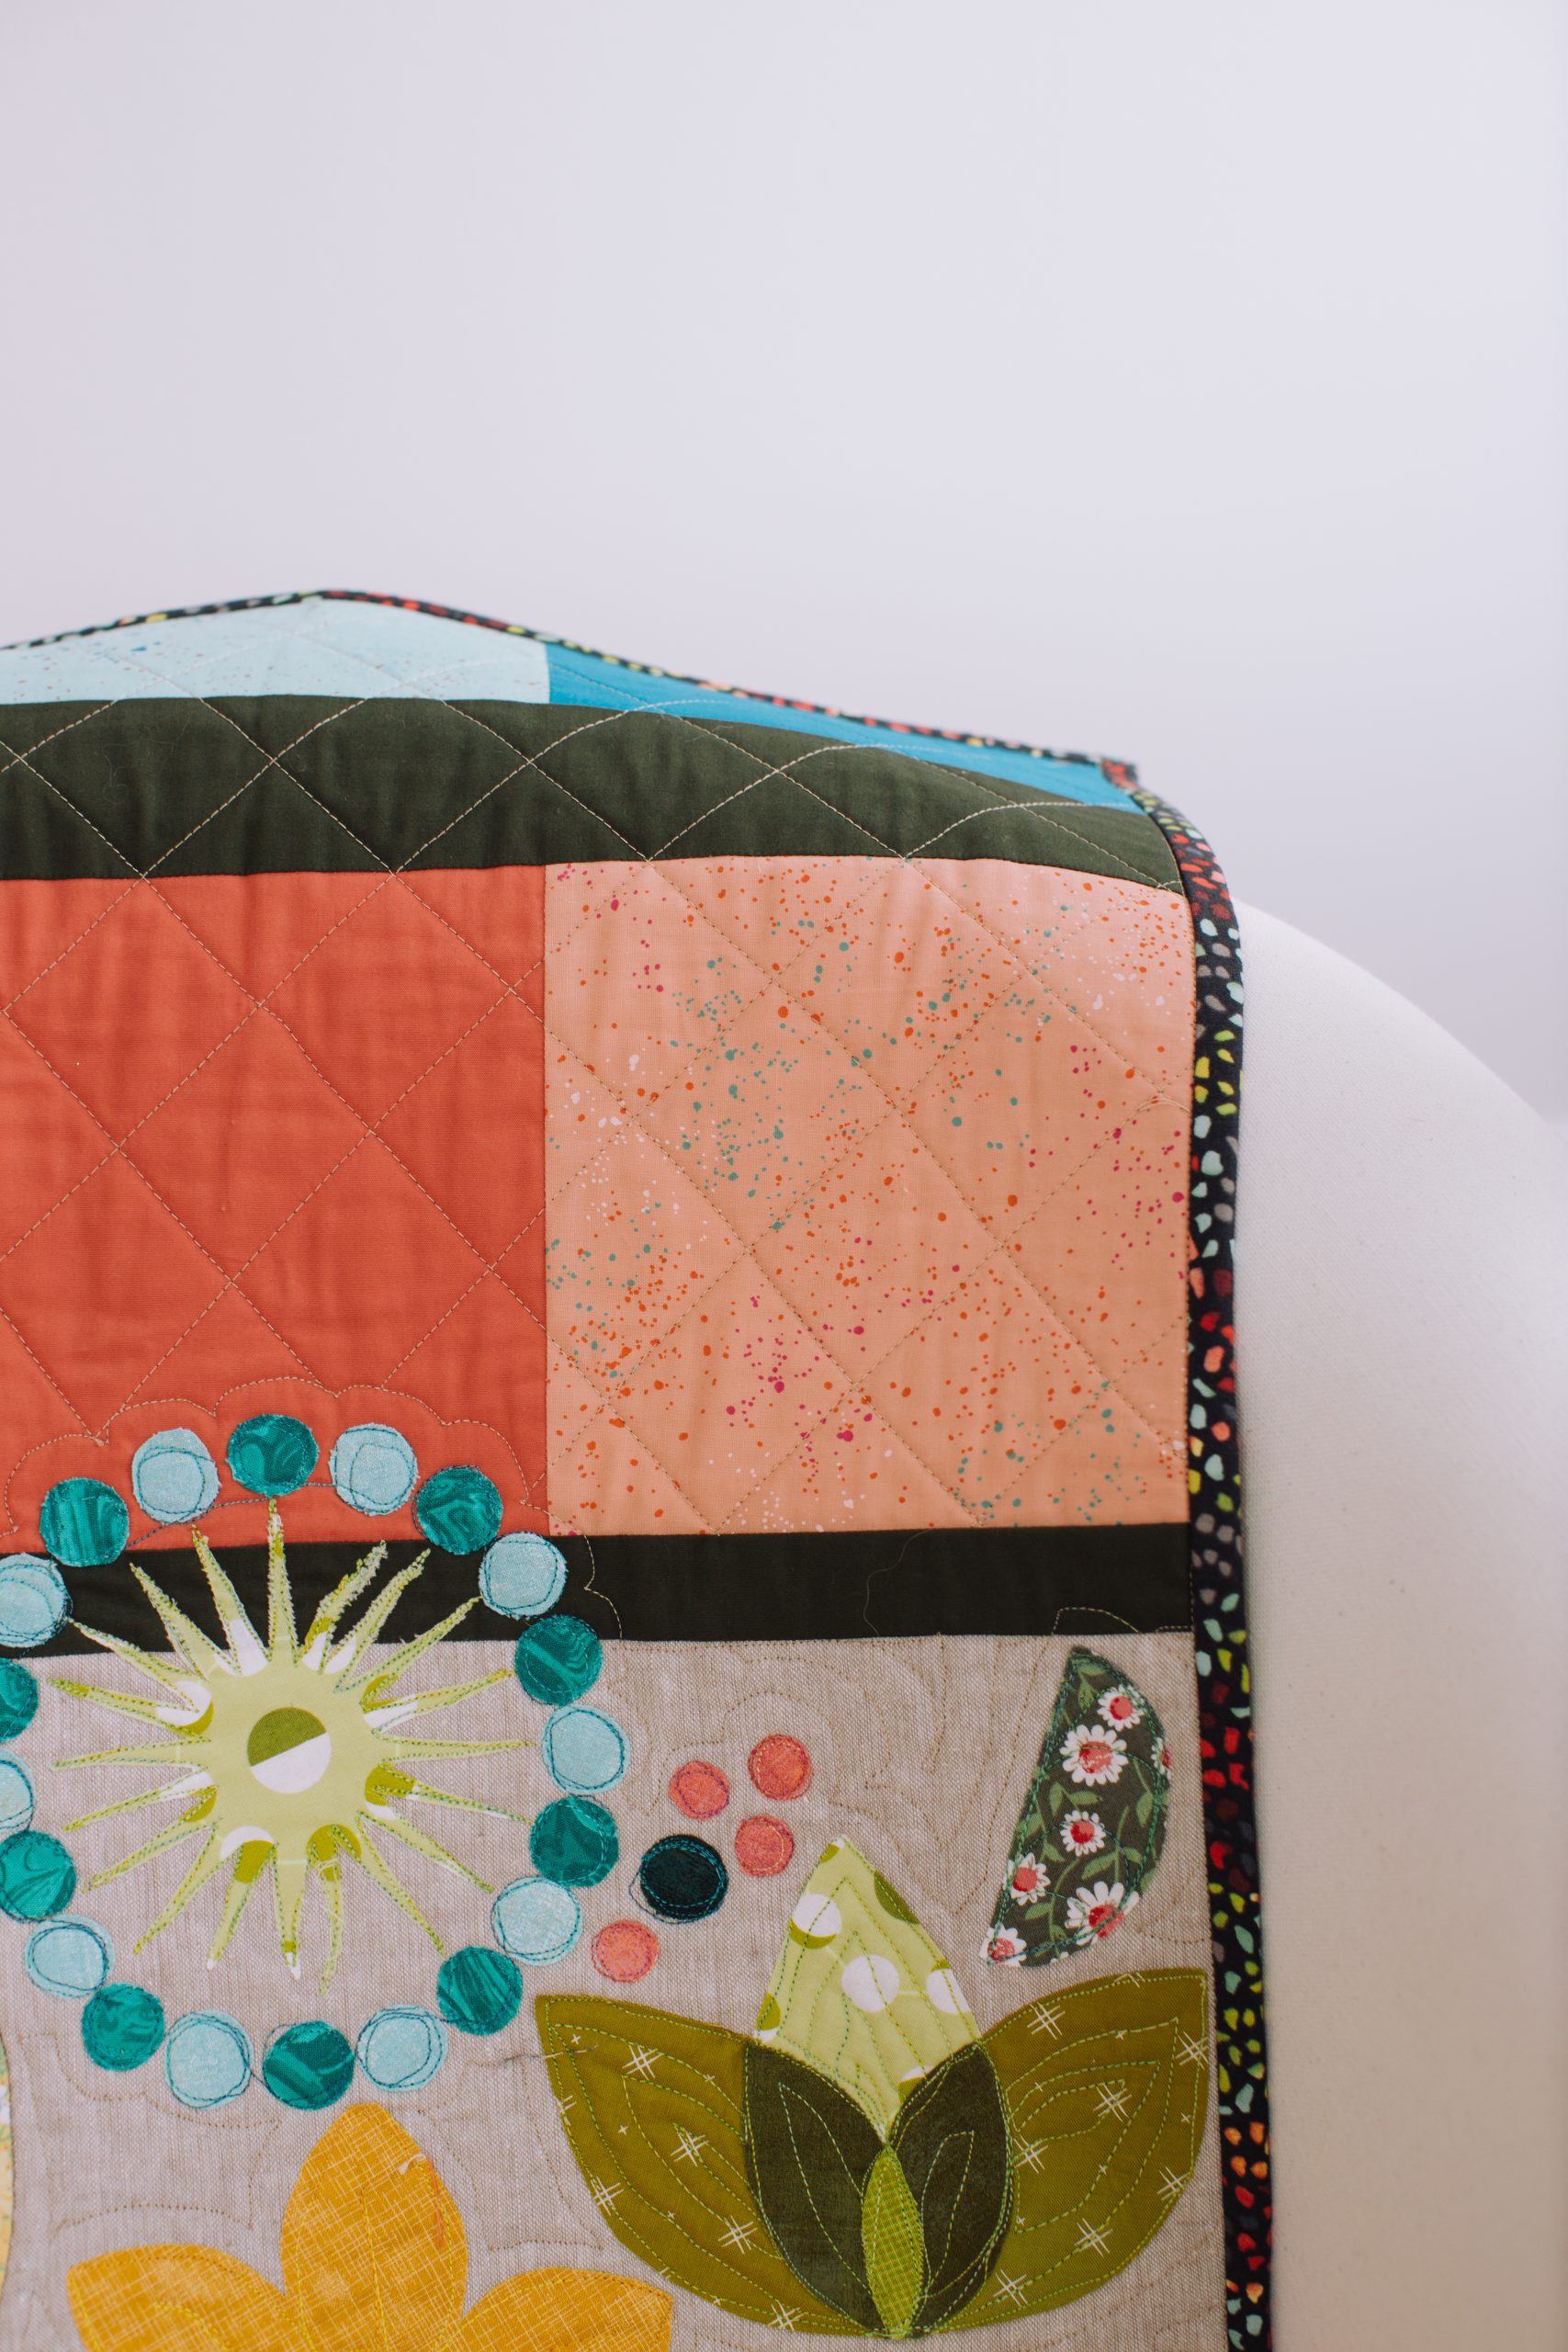
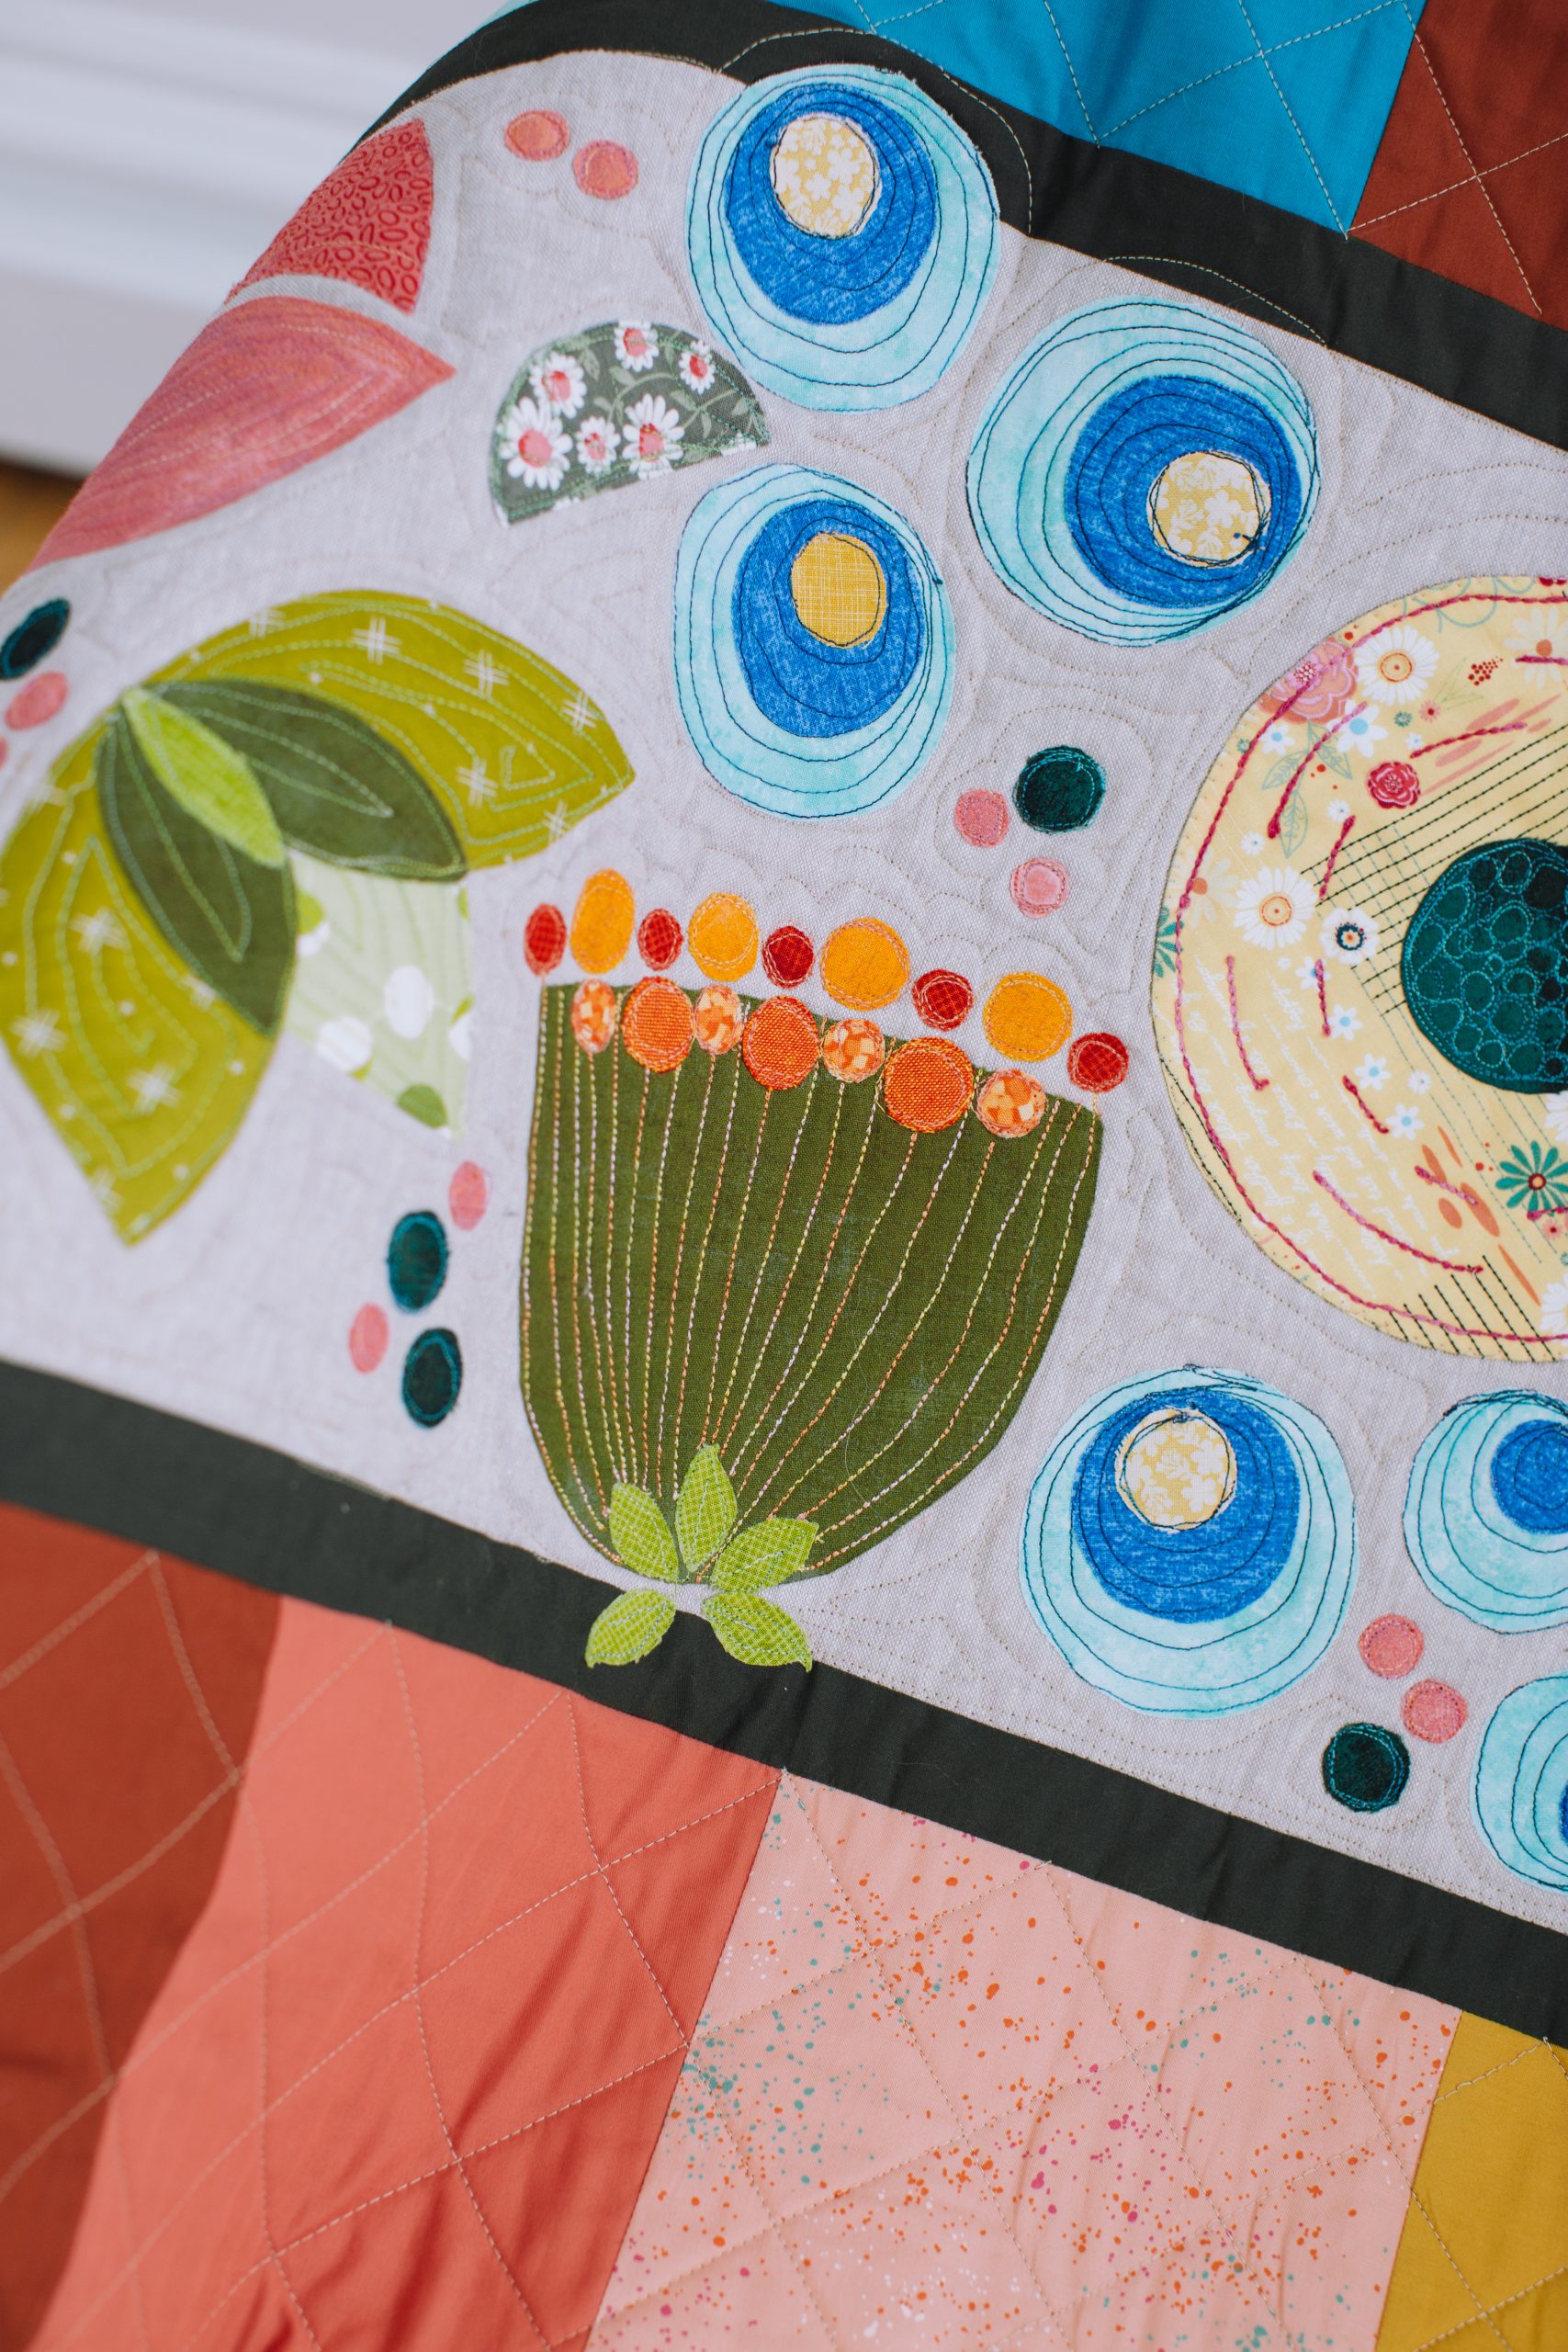
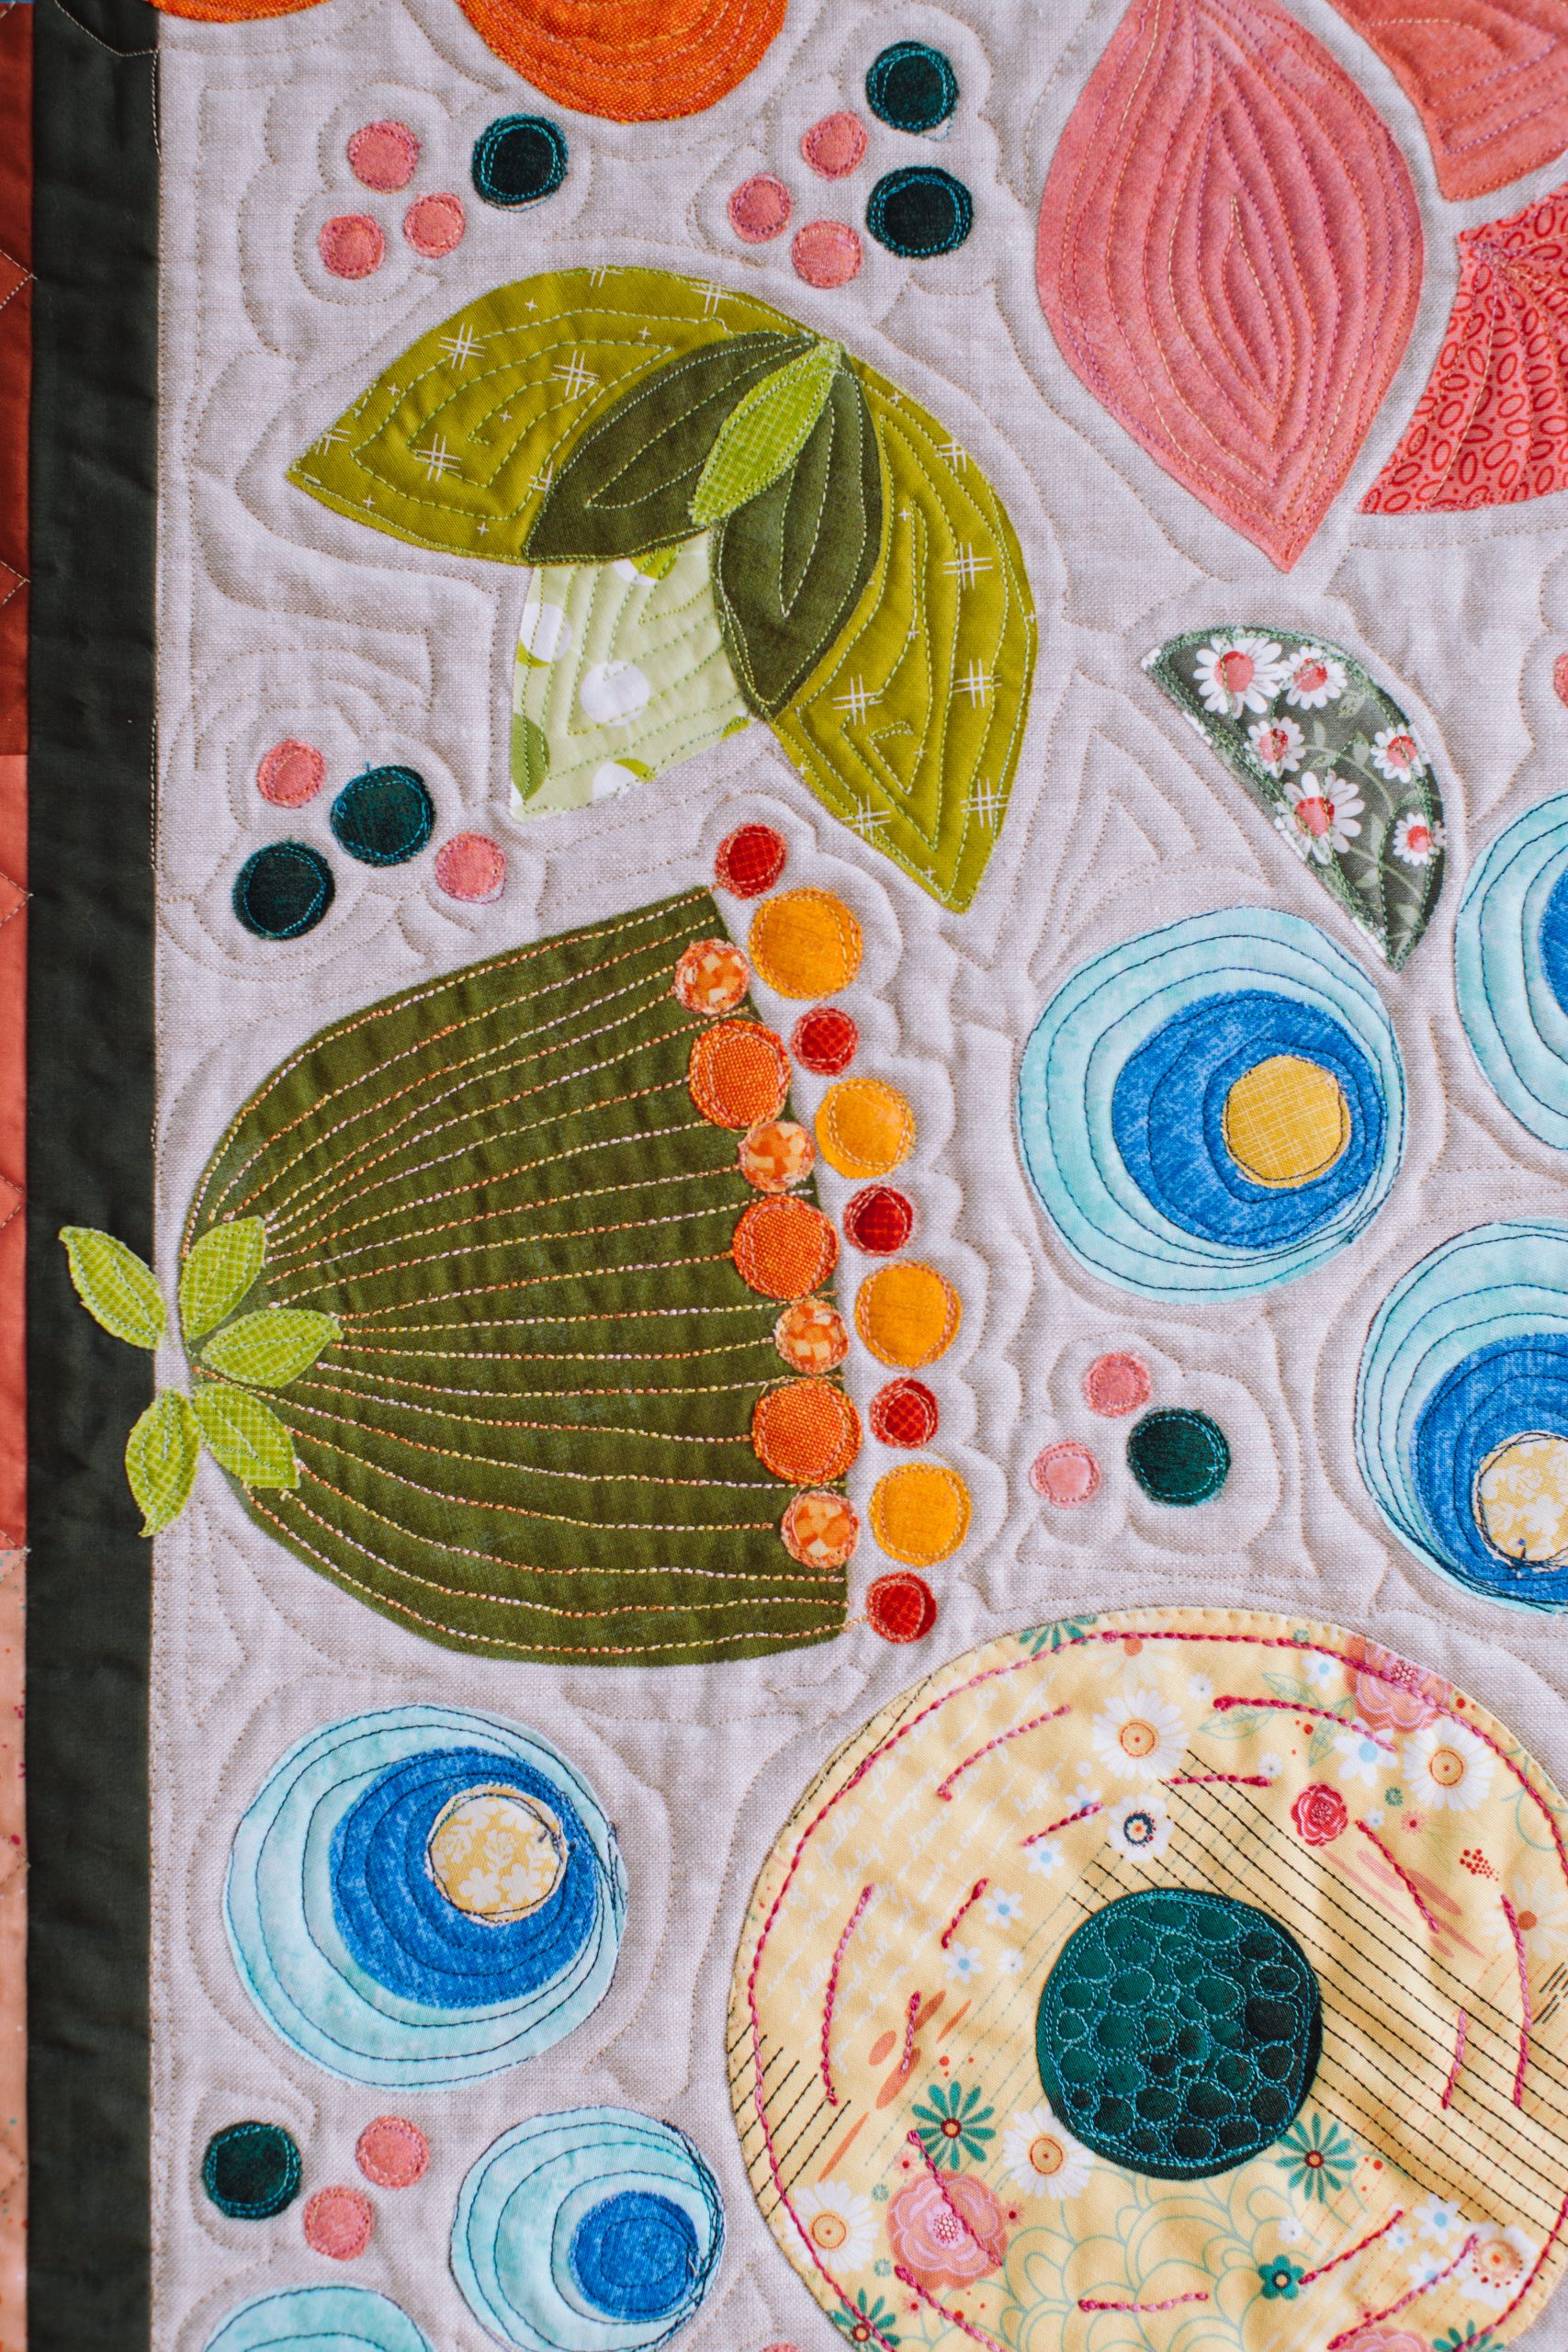
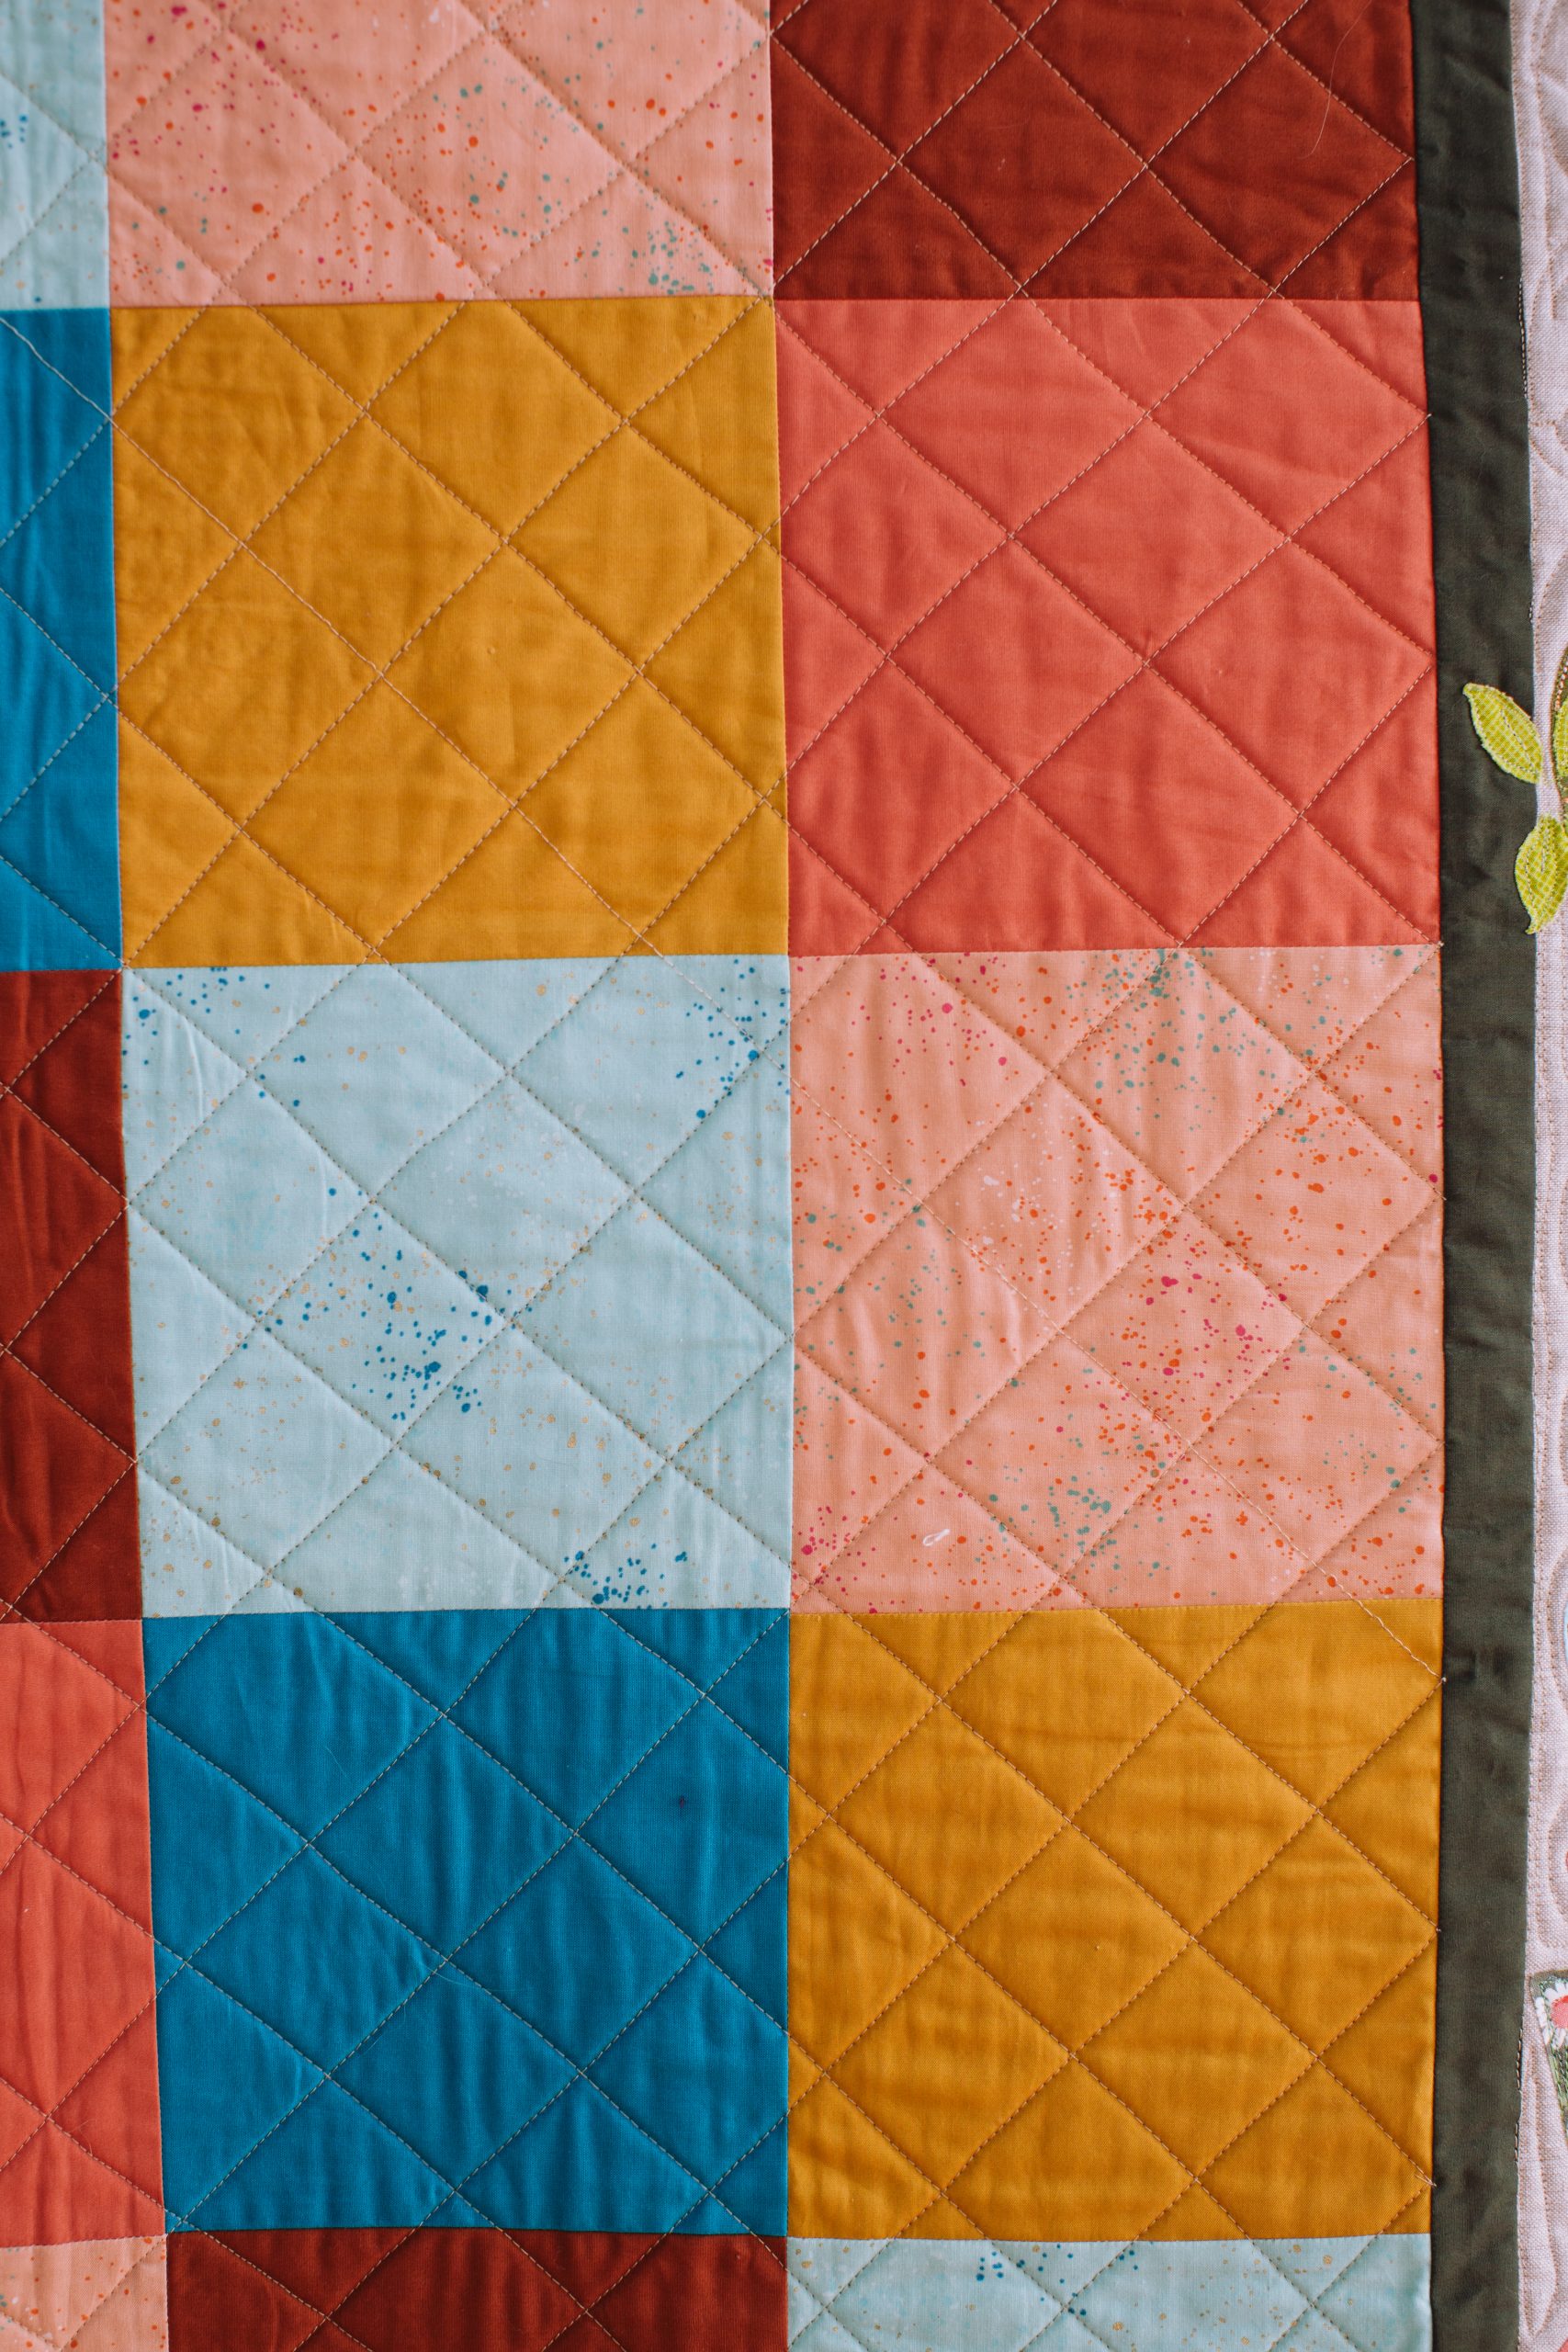
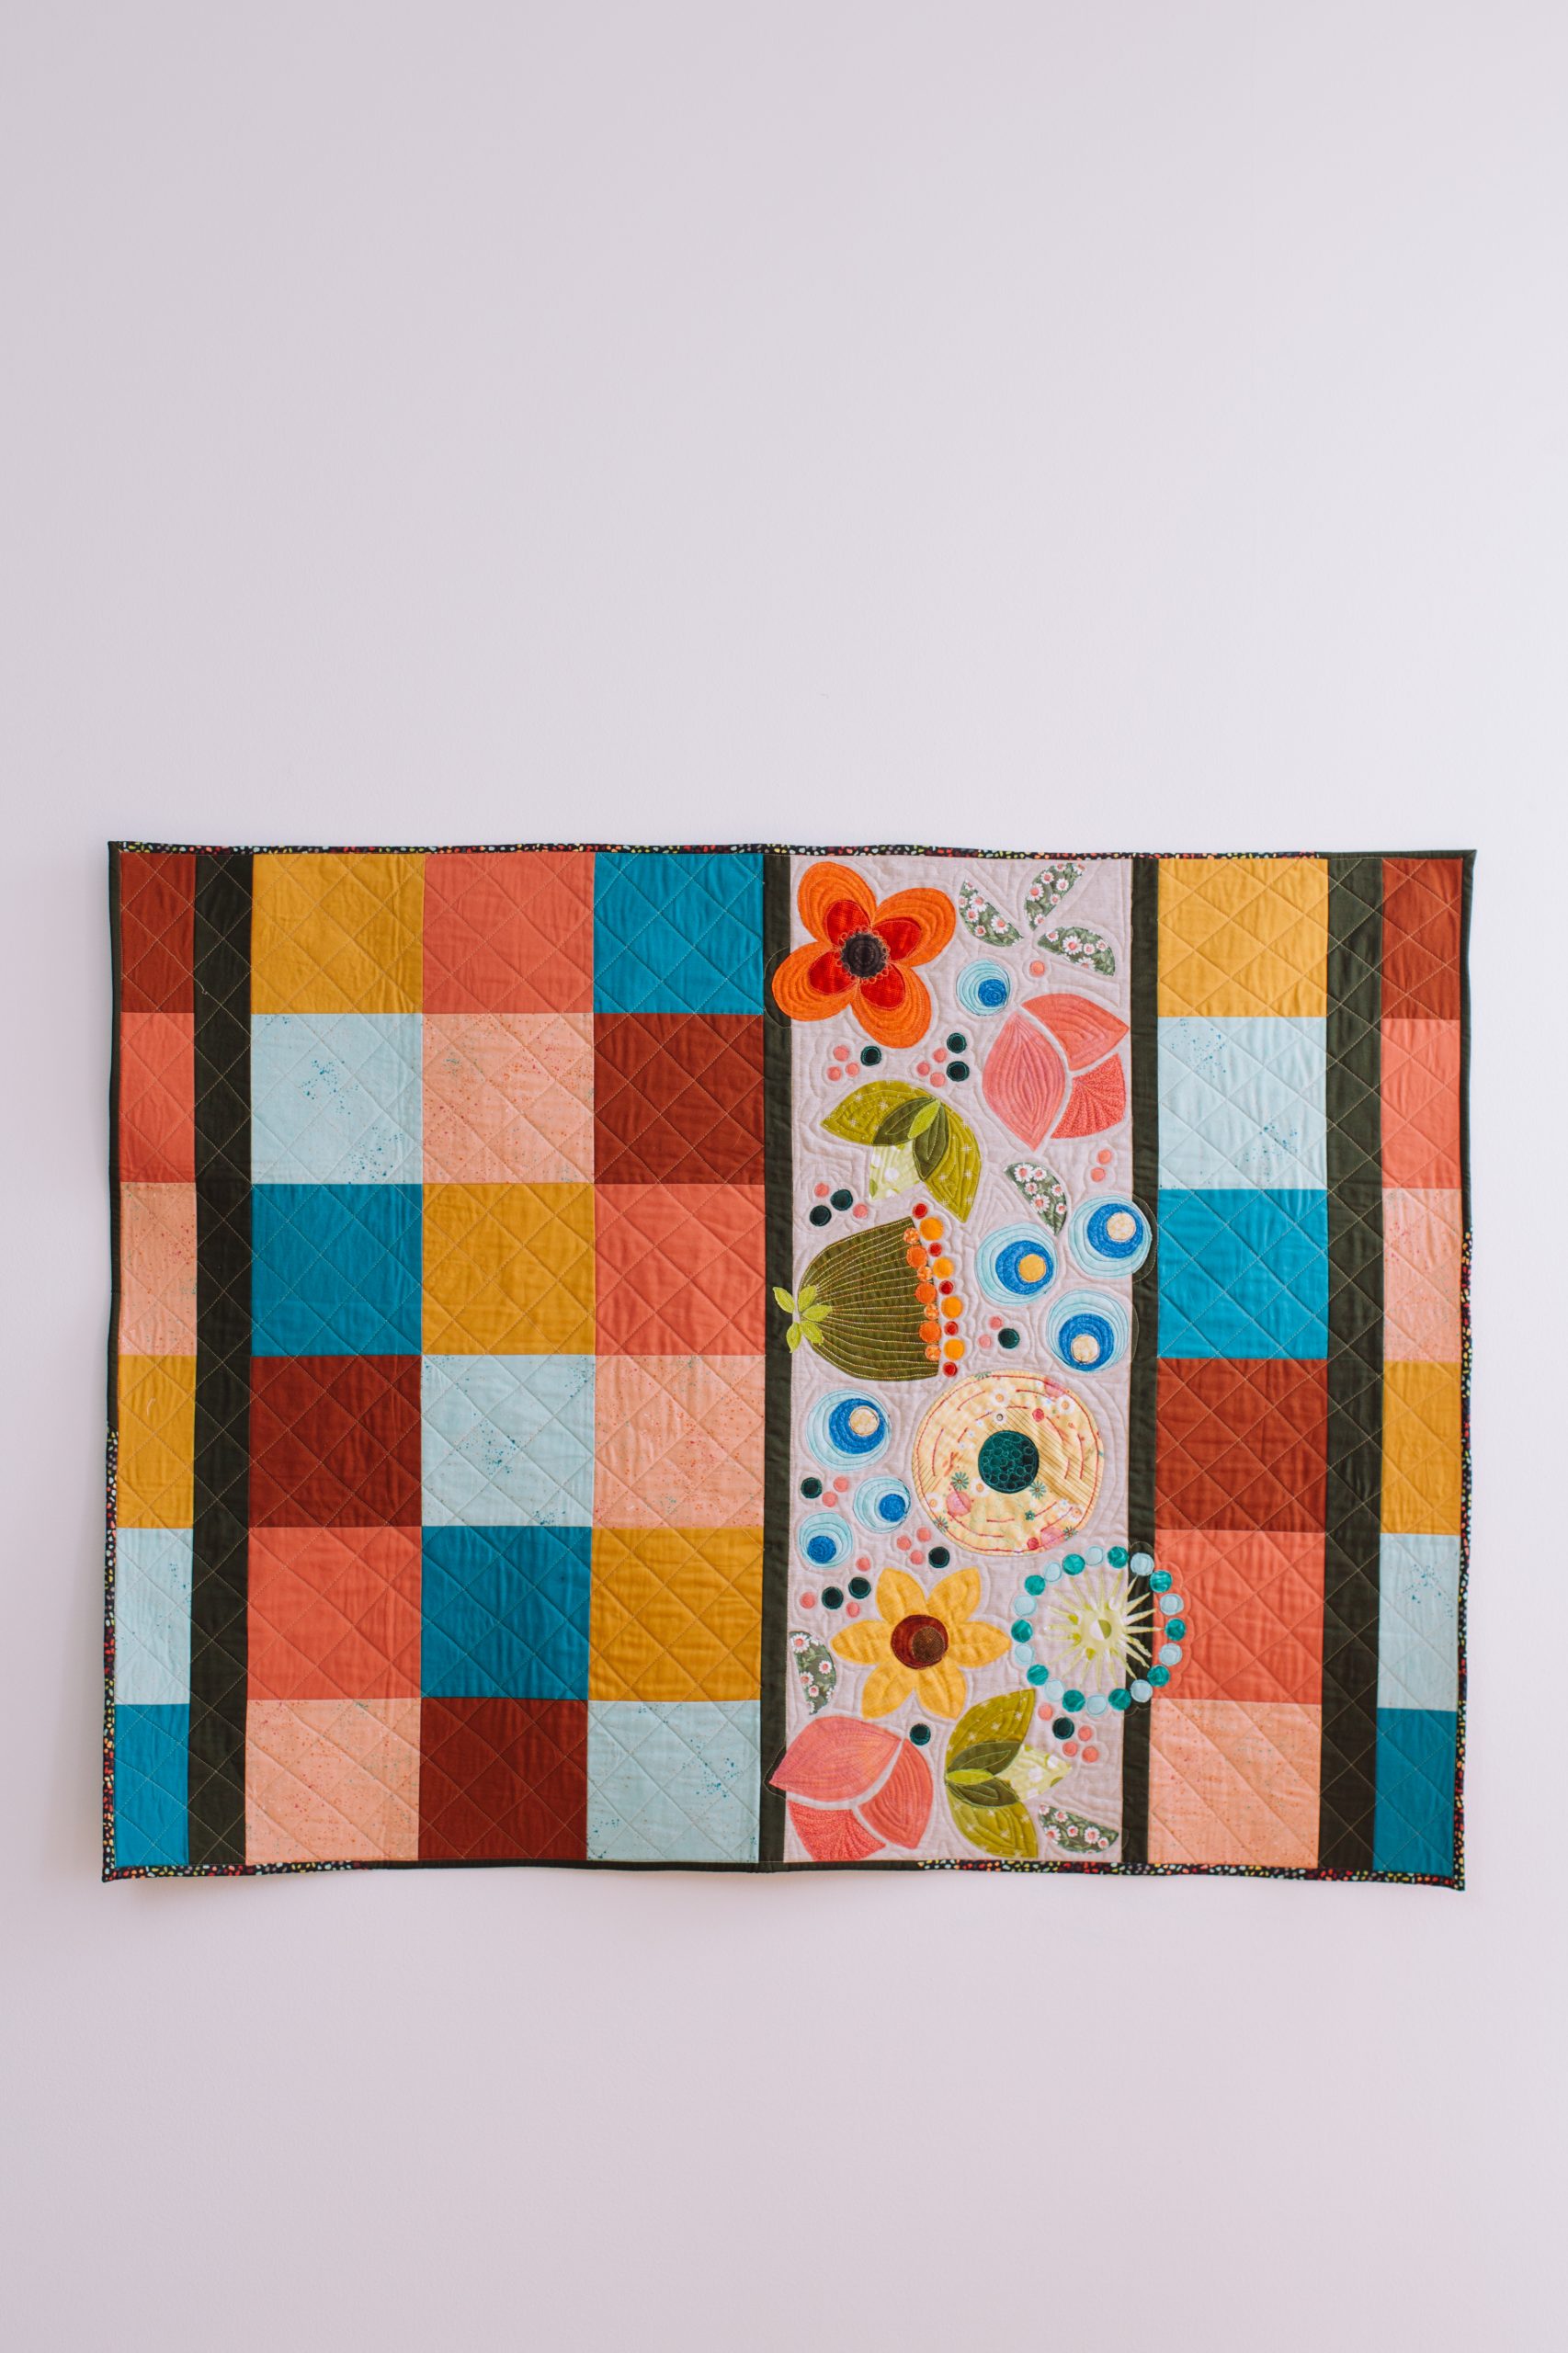
Celebrate the arrival of the newest addition to your family with this stunning fall baby quilt pattern. Featuring solid squares in beautiful colors like burnt sienna and cyan, the showstopper of this baby quilt pattern is a simple panel covered in a swirl of gorgeous florals and berries, appliqued and completed with lovely quilted details. Create a colorful floral concoction of alliums, posies and sunflowers with this baby quilt pattern from Laura Strickland.
Designer Note: All seam allowances 1/4” unless noted otherwise.
Materials:
- Fabric:
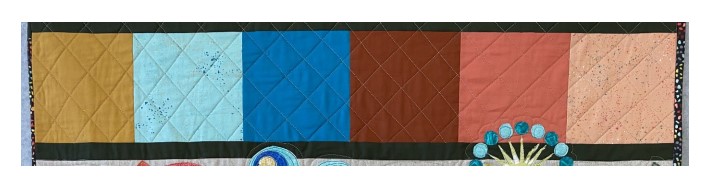
- Square prints (6 assorted colors/prints) – 1/4 yard each
- Sashing (Dark green) – 1/3 to 3/8 yard
- Focal fabric (Essex linen) – 3/8 yard
- Applique flowers buds and berries – Assorted scraps and fat eighths
- Applique leaves and berries – 1 fat quarter or assorted scraps
- Fusible webbing or film (based on 12″ roll width) – 1 1/2 yards
- Binding – 3/8 yard
- Batting – 46″ X 58″
- Backing – 2 5/8 yards
- Basic sewing and quilting tools
- PDF Template – This is located at the bottom of this page. Please see printing instructions below.
PRINTING INSTRUCTIONS:
Note: To download the templates, click on the pattern download button at the bottom of the page. We recommend opening your pattern download using Adobe Acrobat.
Cutting Instructions:
- Assorted solids or tone-on-tone fabrics (6 colors):
- Fabrics A: 24 – 6 1/2″ square
- Fabrics B: 12 – 3 1/2″ X 6 1/2″
- Focal background:
- Fabric C: 1 – 12 1/2″ X 36 1/2″
- Sashing:
- Fabric D: 2 – 2 1/2″ X 36 1/2″
- Fabric E: 2 – 1 1/2″ X 36 1/2″
- Binding: 5 – 2 1/2″ X WOF strips
Sewing Instructions:
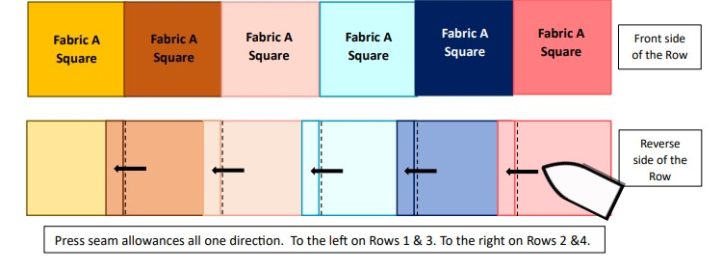
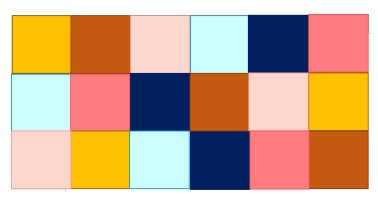
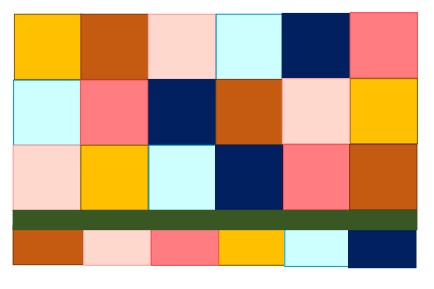
- Create 4 Rows of 6 Fabric A squares, alternating the colors. Press Rows 1 and 3 to the left. Press Rows 2 and 4 to the right. This is so the seams will nest together when sewing the rows together. The rows should each measure 6 1/2” X 36 1/2”.
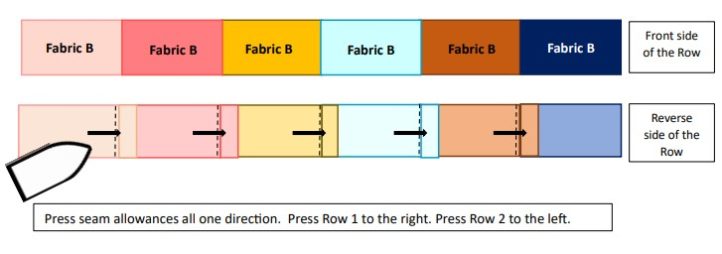
- Create 2 Rows of 6 Fabric B pieces, alternating colors. Press the seams as shown in Diagram 2. The rows should each measure 3 1/2” X 36 1/2”.
- Sew 3 of the Rows from Step 1 together. Press the seams. This should measure 18 1/2” X 36 1/2”.
- Sew a Step 2 Row to 1 Fabric D strip. Press toward the Fabric D Strip. Repeat with the remaining Step 2 Row and Fabric D strip. This should measure 5 1/2” X 36 1/2”.

- Sew 1 of the Step 4 units to the bottom of the Step 3 unit. Press the seam toward the Fabric D strip. This should measure 23 1/2” X 36 1/2”.
- Sew the second Step 4 unit to the remaining Step 2 row. Press the seam toward the Fabric D strip. This should measure 11 1/2” X 36 1/2”.

- Sew the 2 Fabric E strips to either side of Fabric C. Press the seams toward the Fabric E strips. This should measure 14 1/2” X 36 1/2”.

- Sew the Step 7 unit between the Step 5 and Step 6 units. Press the seams toward the Fabric E strips.
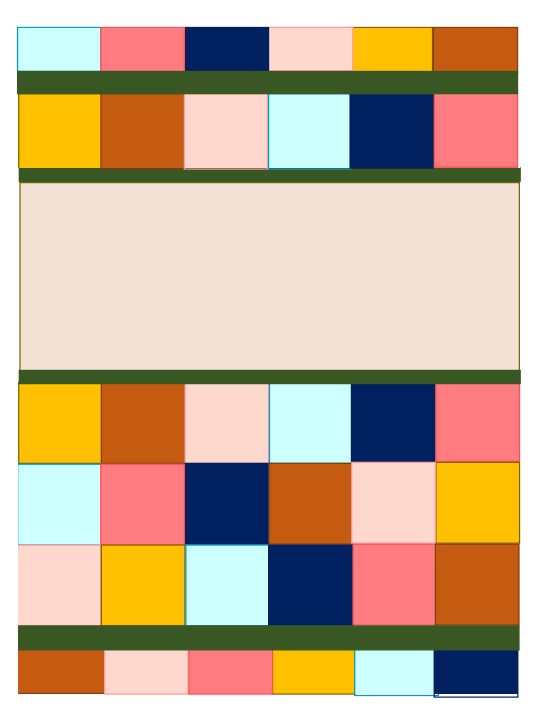
The piecing of the quilt top is complete. The quilt top should measure 36 1/2” X 48 1/2”.
Applique Instructions:
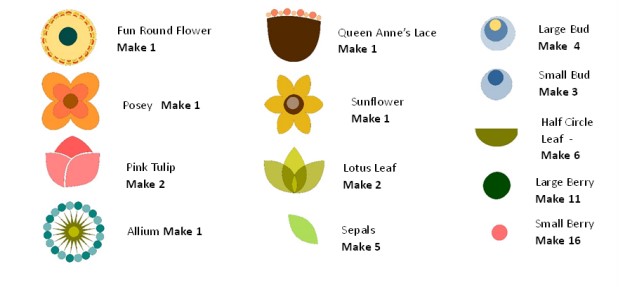
- Using your favorite fusible trace or print out the Applique Templates for the construction of the flowers in the Fabric C section of the Quilt top.
- Cut the fusible apart, but do not cut directly on the printed/drawn lines.
- Press the fusible to the wrong side of the fabrics you have chosen to create the flowers.
- Once the fusible is adhered to the reverse side of the fabric for the applique, cut out the applique flowers directly on the drawn/printed lines.
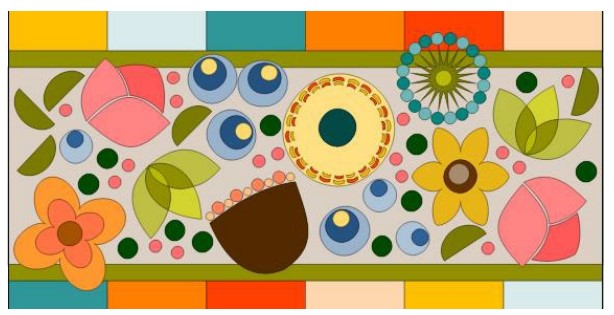
- Consulting the applique layout, place your applique pieces in place on the Fabric C strip in your quilt top.
- Remove the paper backing from the fusible webbing and press your appliques in place using the layout provided.
- Once the appliques are all fused in place, use your sewing machine to stitch down all the applique components.
Finishing Instructions:
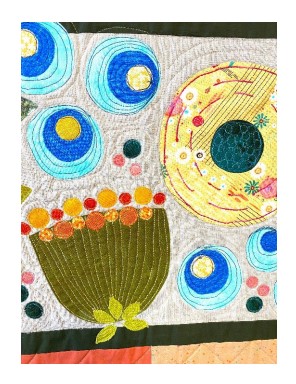
- The designer quilted around and through the floral applique and then used thread to accentuate the character of the flowers.
- On the remainder of the quilt top, Laura quilted at a 45 degree angle 1 1/2” apart to form diamonds on the area not quilted for the floral focal point.
- Sew the strips for binding together to make one long strip. Fold it in half with wrong sides together and press to form binding. Attach to quilt front using a 1/4” seam allowance. Make sure to miter the corners. Once stitched around the entire quilt front, roll the binding to the back side and hand stitch it in place using a ladder or whip stitch.
I thought I was going to receive the magazine or is everything digital.
Hi Carolyn! Our magazine is digital. Please let us know if you have any questions. Have a great day! – Ashley, We Like Sewing