
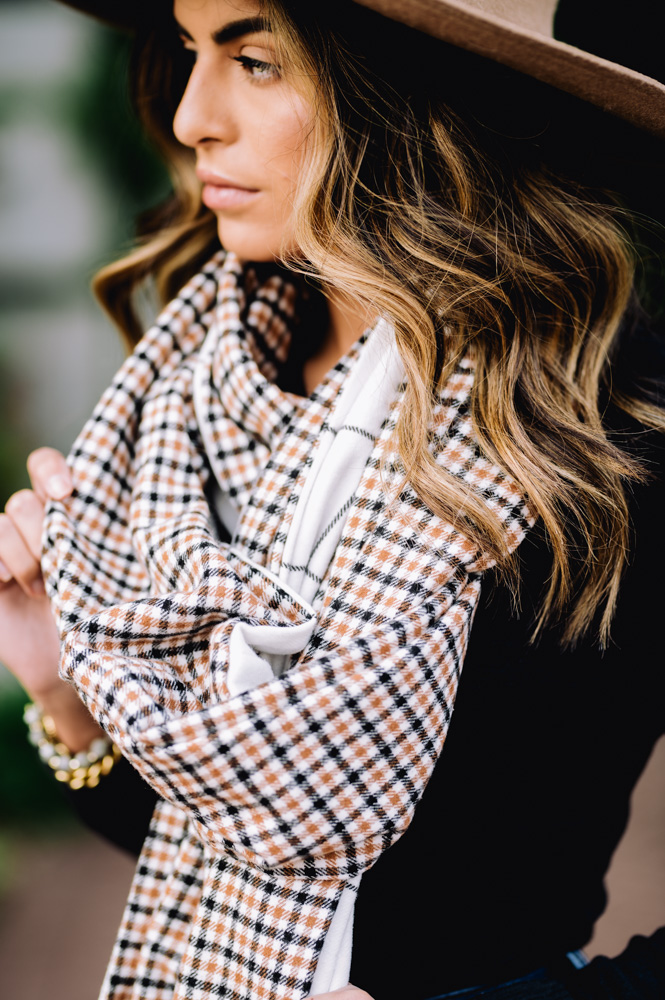
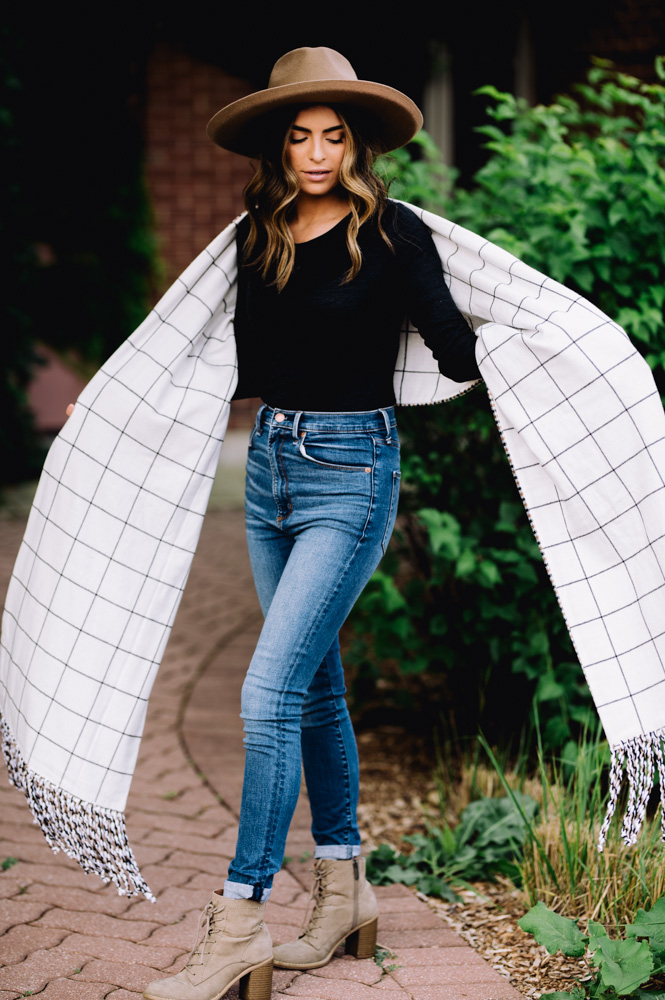
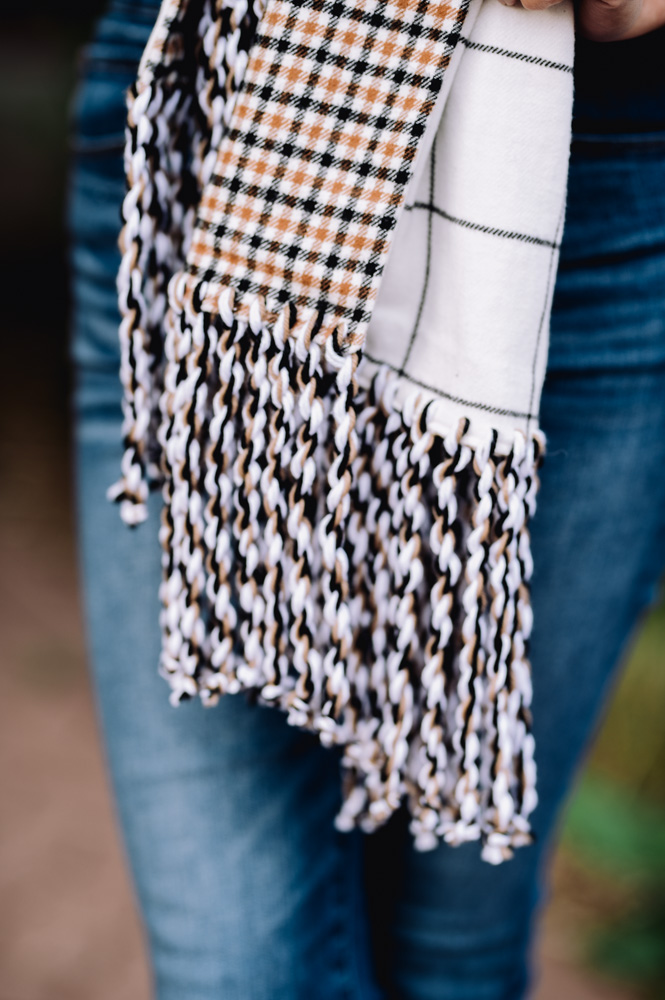
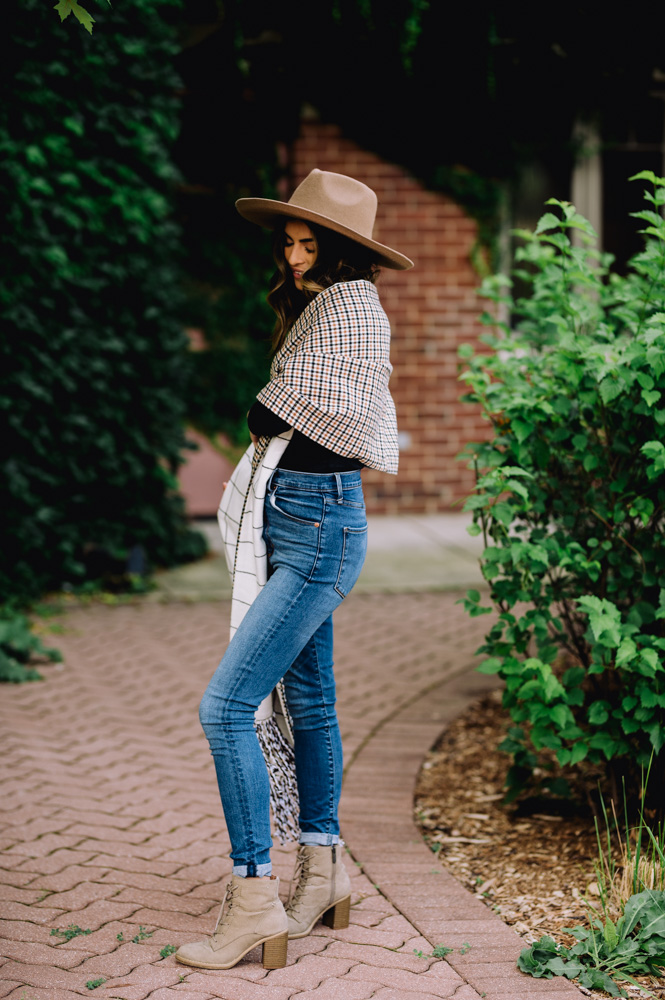
This chic and sophisticated fall scarf is a quintessential cool weather staple! Drawing inspiration from traditionally woven plaid scarves, the eye-catching detail of this sewn accessory is its elegant and professional fringe edging. The oversized nature of this scarf makes it the perfect final layering piece of any fall outfit and is a great way to inject some New England prep into your autumn wardrobe. All that is missing is the crunch of leaves underfoot and a hot coffee.
Project Time: Afternoon Project
Skill Level: Beginner
Finished Measurements: Length: 100’’ without fringe, 116’’ with fringe. Width: 16’’
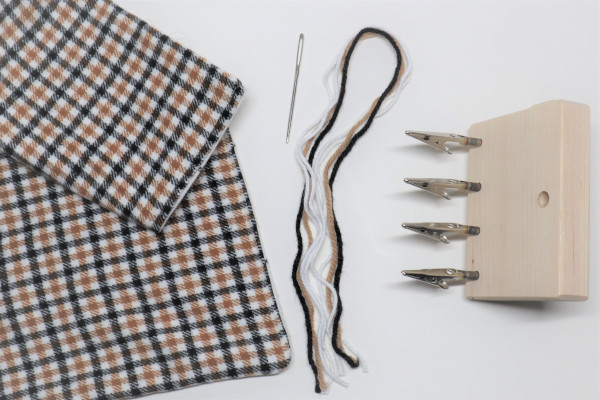
Tools:
- Rotary cutter
- Cutting mat
- Ruler
- Scissors (if not using a rotary cutter)
- Safety pins or Wonder Clips
- Iron
- Sewing machine
- Fringe Twister (Optional)
- Tapestry needle
Materials:
- (Fabric A) 1 1/2 yards woven plaid fabric (45’’ width)
- (Fabric B) 1 1/2 yards woven contrasting plaid fabric (45’’ width)
- Matching thread
- Assorted matching worsted weight yarn
NOTES
- Fringe length will shrink due to twisting.
- Fringe twisting can be done by hand as well, or fringe may be tied in overhand knots towards their base as another finishing option.
Instructions:
CUTTING
- Cut two 17” x 51” rectangle panels from both fabrics.
SEWING
- Bring both panels right sides together from fabric A and fabric B. Pin along one of the 17’’ sides. Sew across side with 1/2’’ seam allowance. Backstitch at both ends. Repeat on opposite 17” side.
- Press seam on both fabrics flat. Bring panels right sides together and pin around the edge. Starting towards the middle of a long edge, sew along the entire edge of fabric using a 1/2’’ seam allowance. Leave a 4’’ space between beginning and ending to turn fabric on one side only.
- Clip corners and turn the scarf right side out, taking care to push out along all edges. Tuck in raw turning space and press the entire scarf.
- Starting anywhere, sew around the entire edge of the scarf using 1/4’’ seam allowance. Connect beginning and end, backstitching both. Trim all threads.
ADDING FRINGE TRIM
- Cut 264 strands of yarn at a 24’’ length.
Thread 4 strands of yarn onto tapestry needle and push the needle through a corner of one 16’’ edge.
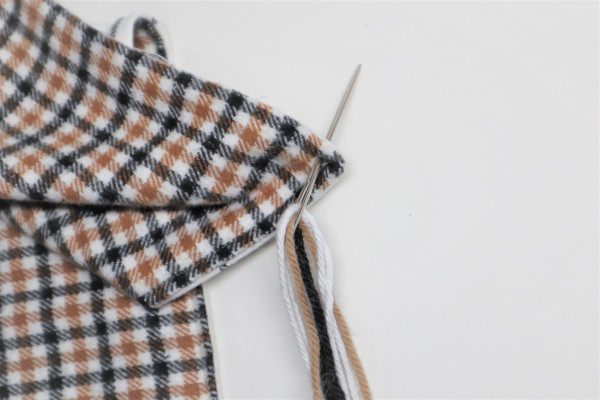
Pull yarn through evenly. Repeat process every 1/2’’ down edge, for 33 sections in total.
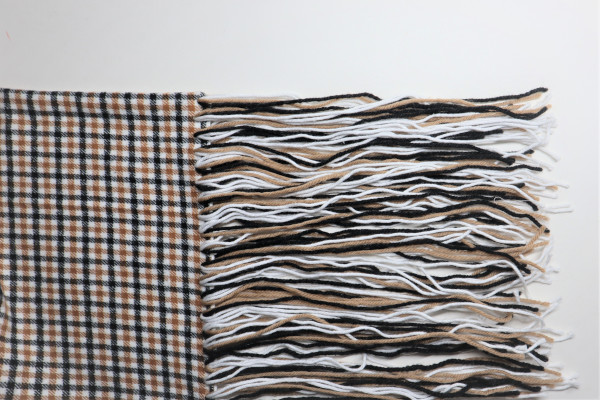
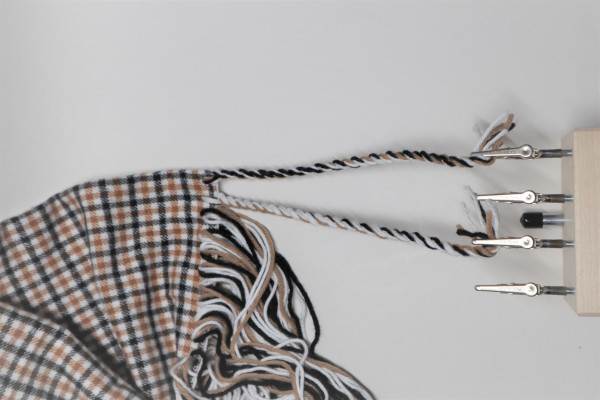
Repeat on the other side. - Setup Fringe Twister and divide 1 section evenly over two clamps.

Twist handle clockwise for 15 complete rotations.
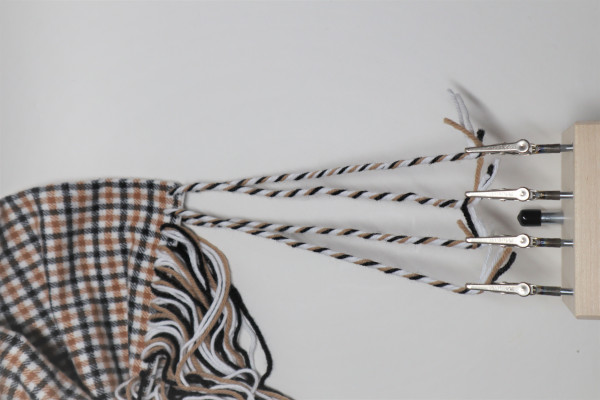
Move divided threads to one clamp.
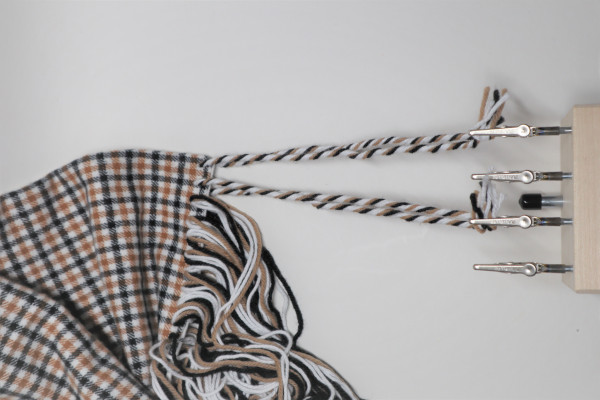
Twist handle counter clockwise for 10 complete rotations.
Remove the section from the clamp and secure the end with a tight overhand knot.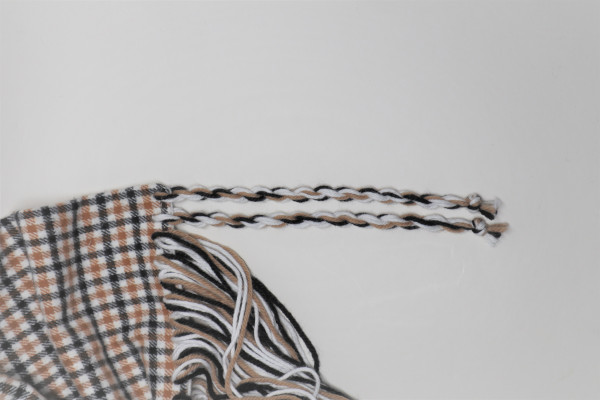
Repeat the process for all sections.
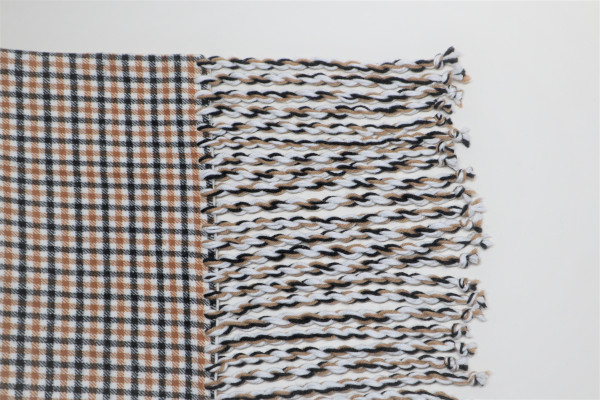
- Trim all fringe ends to make even, press the scarf once more.
If I wanted a shorter shawl. What would I reduce the 51 inches to so it hit just below hips/ bottom?
I decided to follow the pattern as written this time around and will piece two lengths 51″ fabric pieces together. Question…. If I sew the 17″ seams together making a circle; then sew the 51″ sides all the way around leaving a 4″ opening… am I double seaming the 17″ ends?
Nevermind! I figured it out. 🙂
I do not know much about fabric. Is flannel a good choice? If so, do you think the lengths could be pieced together for variance in color? Thank you! Great project.
Hi Beryl! While it appears that the designer used a woven cotton fabric, I think you could make it with flannel. For the second part of your question, when you say the lengths pieced together, do you mean instead of 2 fabric panels (each in a different fabric), you would use multiple fabrics to create each fabric rectangle panel? If so, I think yes. Hope this helps! – Ashley, WeLikeSewing
What type of fabric is recommended for this scarf??
Hi Cheryl! The designer recommends a woven plaid fabric for this project. Please let us know if you have any questions. Have a great day! – Ashley, WeLikeSewing
wher can I get a frenge twister?
Hi Georgia! It looks like Yarn.com and Woolery.com have multiple options for fringe twisters similar to the one used by the designer in this tutorial. Hope this helps! – Ashley, WeLikeSewing
Amazon also has them for I believe around $23.99
Great find, Vickie! Thank you for sharing 🙂 – Ashley, We Like Sewing
Kathie Washington I love all the projects. I can’t wait to try them.
What a great project. Gifts galore. Great instructions, easy to follow and complete. Thank you.
You’re so welcome! We’re glad you enjoyed this project. Have a great day! – Ashley, WeLikeSewing
I love this shawl. Thank you
Hi Georgia! We’re so happy to hear you love this project. Have a great day! – Ashley, WeLikeSewing