If you love adding color and movement to your quilts, then this pinwheel quilt block is perfect for you. Designed by Zoe Ballard, this beginner-friendly quilt block pattern strategically uses colors to elevate the simple hourglass block into a playful pinwheel design. This classic quilt block pattern uses fat quarters and fat eighths, making it a great project for those that love working with precuts.
Finished Size: 12 1/2” x 12 1/2”
Skill Level: Beginner
Materials:
- Fabric A light pink – Fat quarter
- Fabric B medium Pink – Fat eighth
- Fabric C orange – Fat eighth
Cutting Instructions:
- Fabric A: Eight 4 1/4” squares
- Fabric B: Four 4 1/4” squares
- Fabric C: Four 4 1/4” squares
Sewing Instructions:
HOW TO MAKE THE BLOCK:
- Half Square Triangles (HST): Draw a line diagonally from corner to corner on the back of each A square. With right sides together, pin and stitch an A square to a B square 1/4” from either side of the drawn line. Cut along the drawn line and press the seam to the darker fabric. Repeat for all B and C squares.

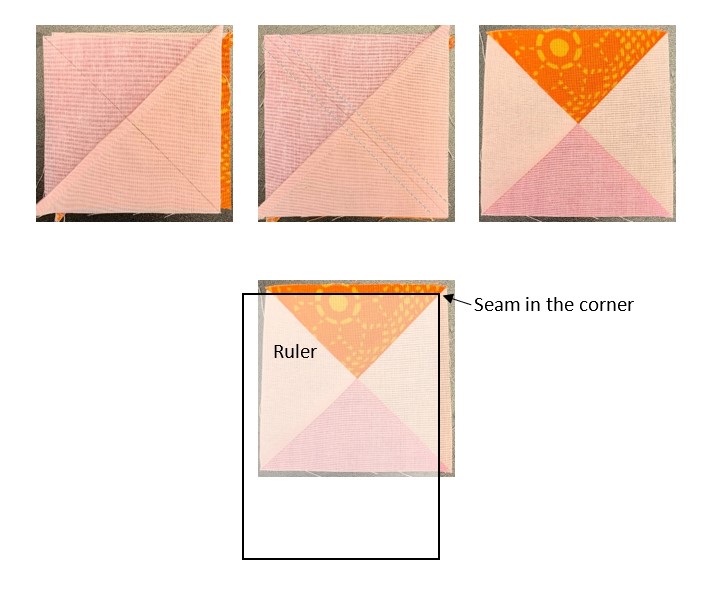
- Quarter Square Triangles (QST): Draw a line diagonally from corner to corner on the back of each A/B HST. With right sides together, pin and stitch an A/B HST to an A/C HST 1/4” from either side of the drawn line. The seams should nest together and the opposite fabrics are face each other. Cut along the drawn line and press the seam to one side. Repeat for all HST units. They will measure 3 1/2” square, trim to size if necessary. If most of the QST units are smaller than 3 1/2”, trim the bigger ones to match the size of the smallest making sure the seam is in the corner.
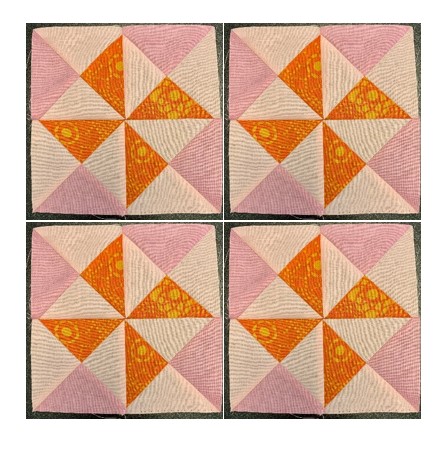
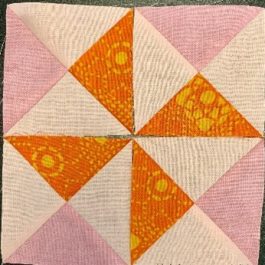
- Pinwheel Units: Set out four QST units like in the picture below so the C fabric is creating the pinwheel design. With right sides together, stitch the top two units together matching or nesting the seams. Press the seam in one direction. With right sides together, stitch the bottom two units together matching or nesting the seams. Press the seam in the opposite direction. With right sides together, stitch the top and bottom rows together matching or nesting the seams. Repeat to make three more pinwheel units. Press the seams so they will nest (in opposite directions to each other).
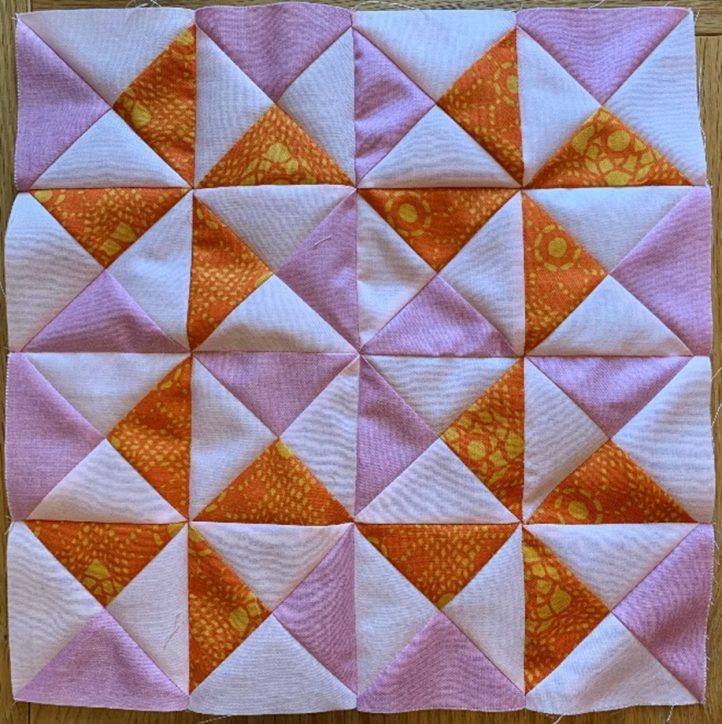
- The Block: Lay the four pinwheel unit like in the diagram below. With right sides together, stitch the top two units together matching or nesting the seams. Press the seam in one direction. With right sides together, stitch the bottom two units together matching or nesting the seams. Press the seam in the opposite direction. With right sides together, stitch the top and bottom rows together matching or nesting the seams. Press the seams in one direction.