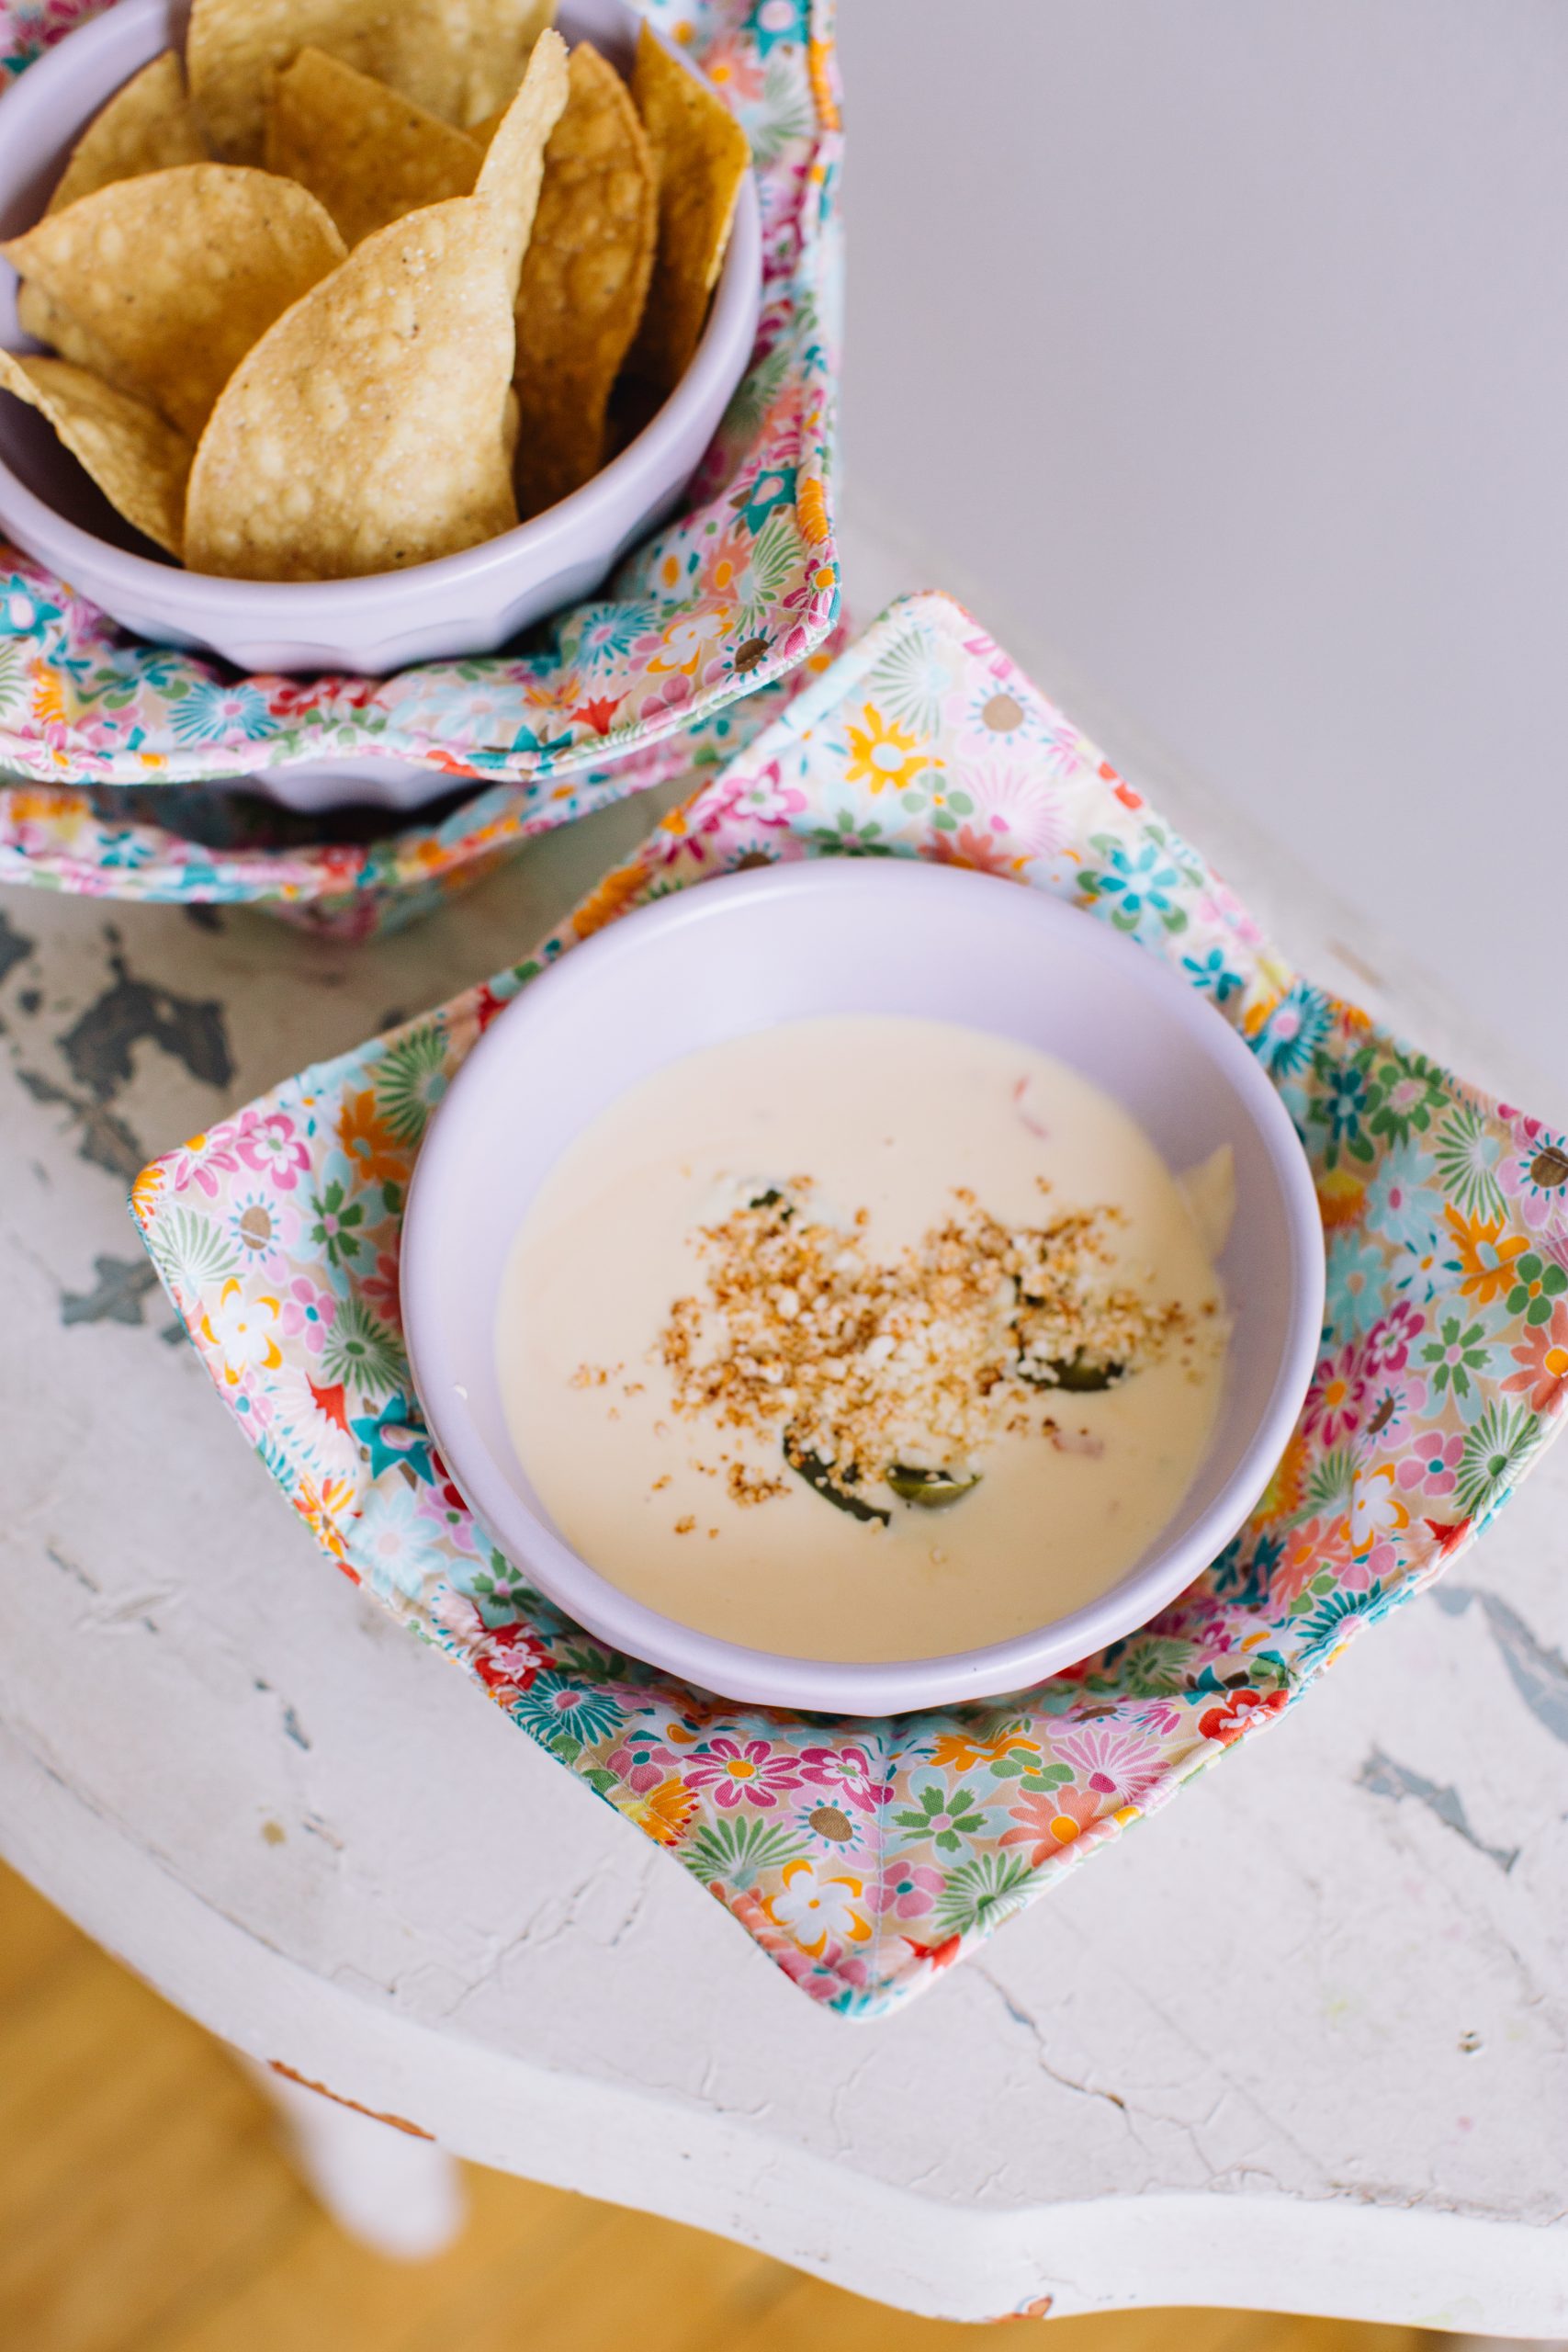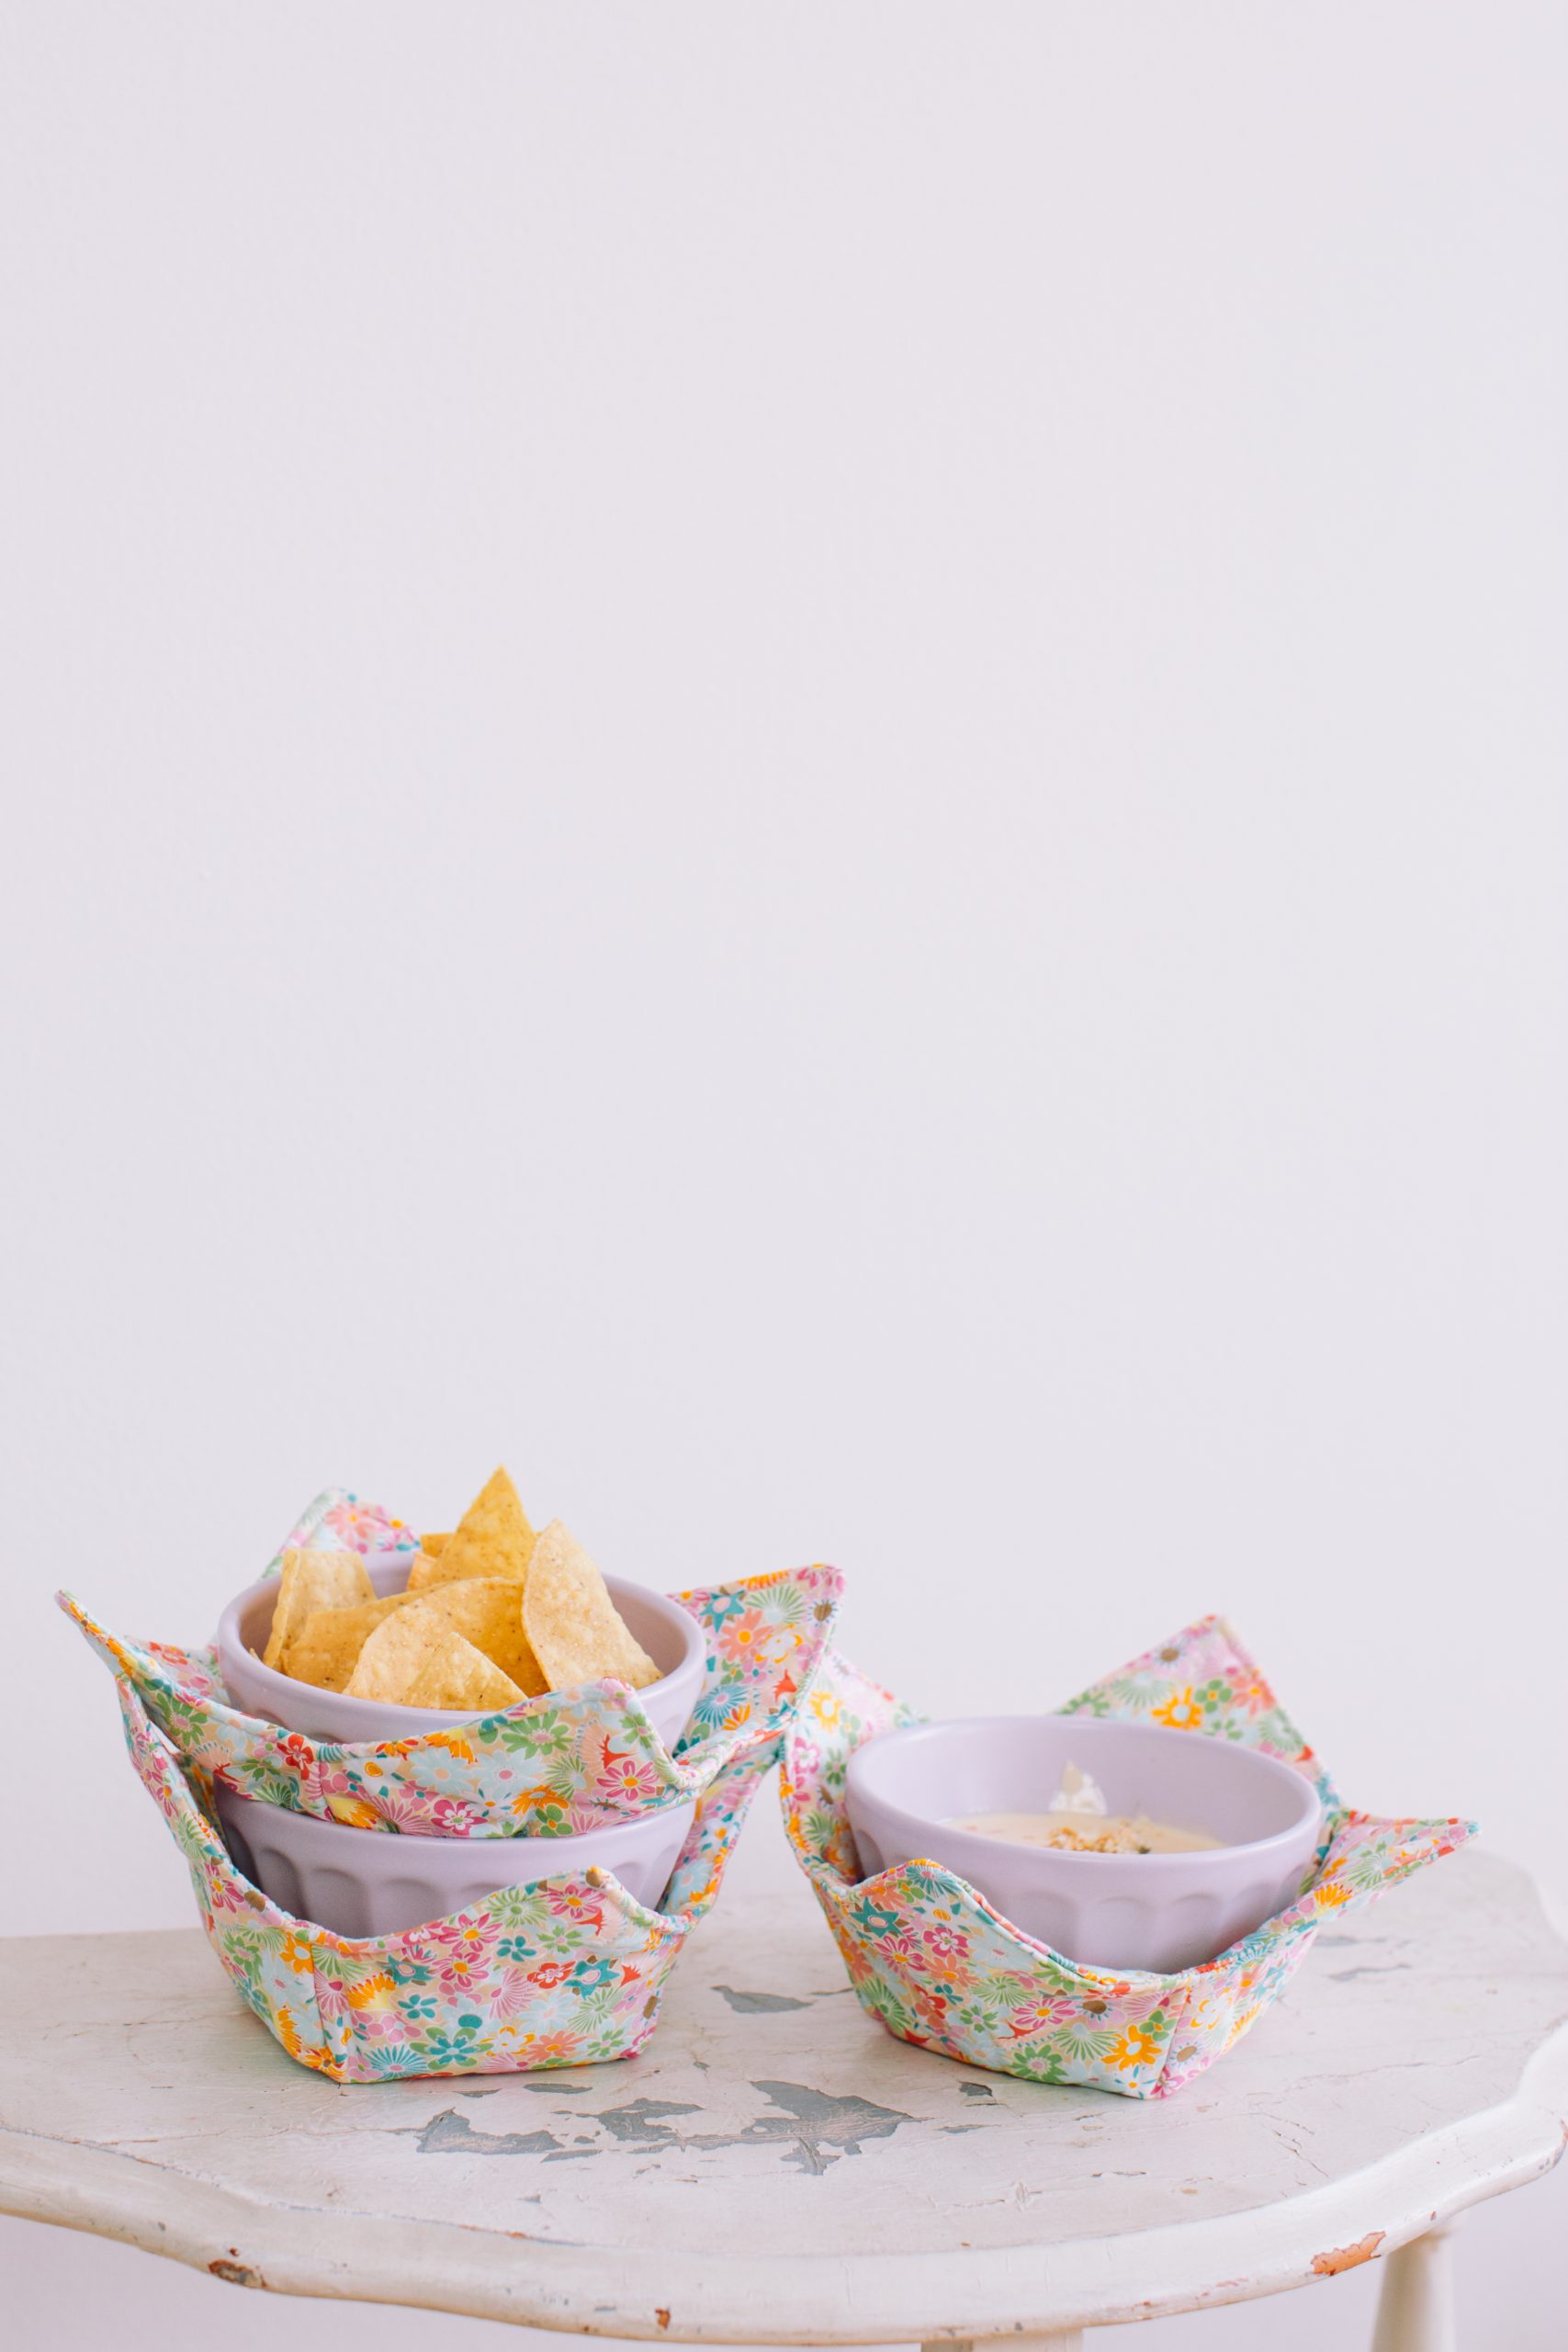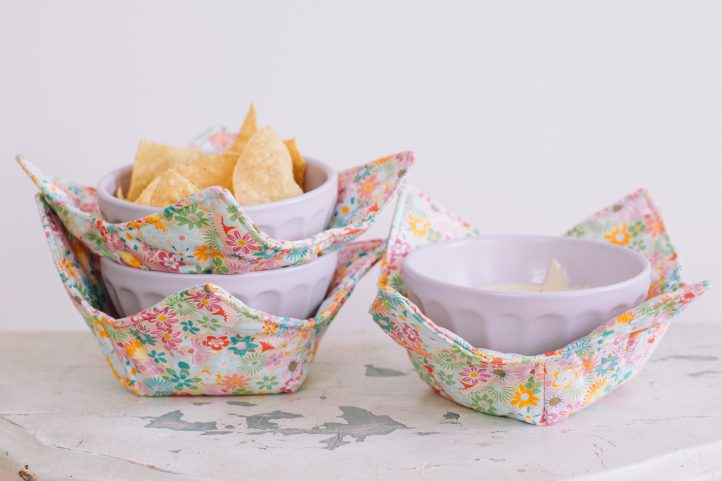
Fall weather = soup season! Keep your hands safe from hot bowls with these useful quilted bowl cozies. Designed for easy-level sewists, these bowl cozies are quick to make and are reversible, so that you can switch them up with holiday prints or coordinate them to match your dining room décor. This kitchen quilting project is a great gift idea for friends and family and would be a perfect hostess gift for the holidays. Plus, these quilted bowl cozies easily stack together for easy storage!
Skill Level: Easy
Seam Allowances: 1/4 inch
Finished Size: Fits a standard 8-12 ounce soup bowl
Designer Note: Make your cozies even more heat-resistant by using an insulating quilt batting, such as Insul-Bright or Bosal Poly-Therm Fleece.
Materials:
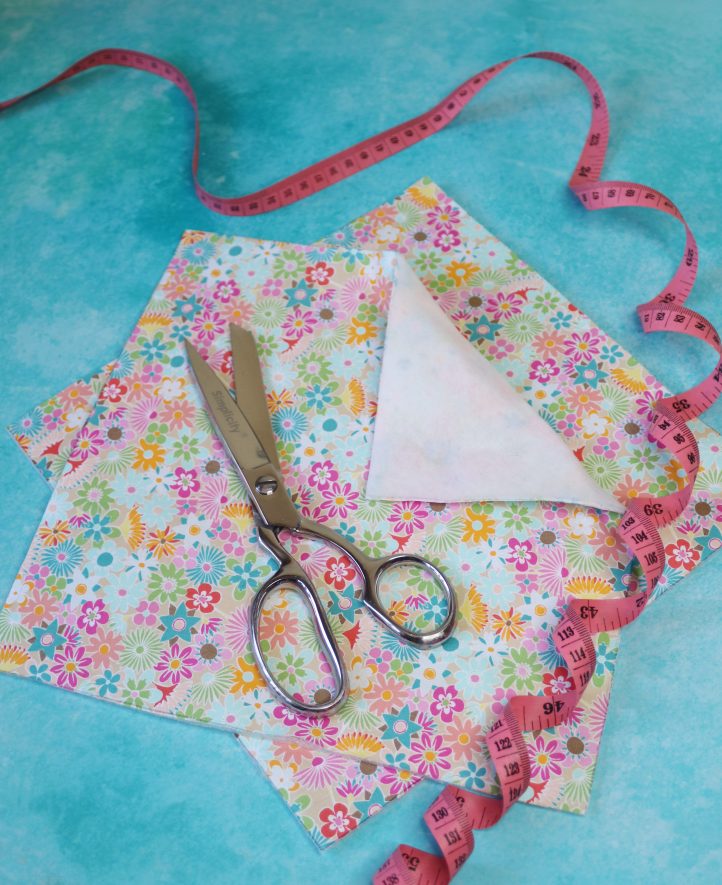
- Fabric: Art Gallery Fabrics Flowers All Around cotton, two 10” squares per cozy
- Fusible quilt batting: Two 10” squares per cozy
- Sewing thread: White
Tools:
- Scissors
- Iron
- Water soluble fabric pen
- Ruler
- Pins
- Sewing machine
Instructions:
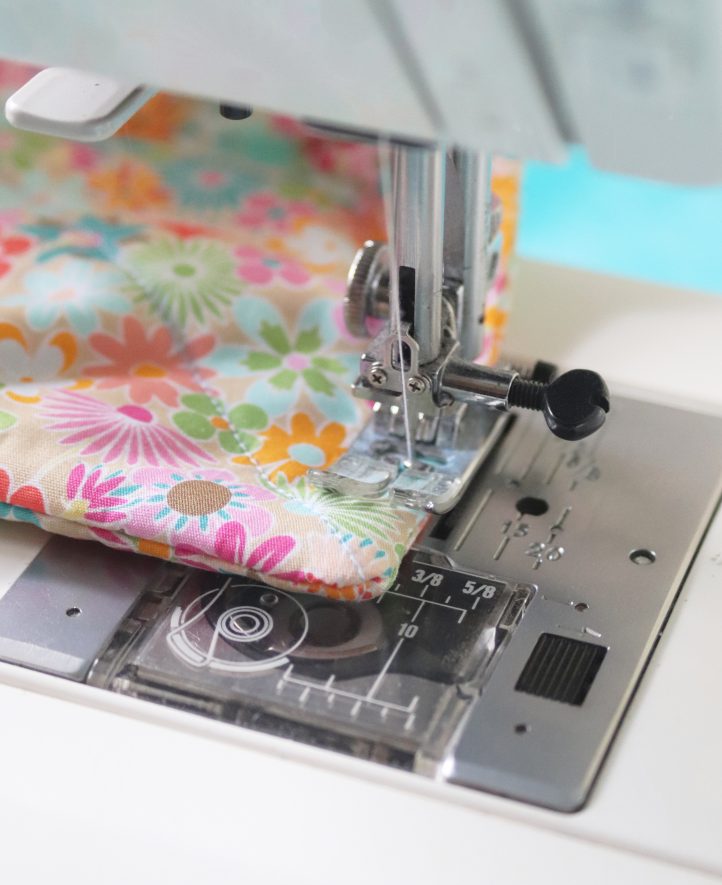
- Begin by cutting out your materials. For each cozy, you’ll need to cut two 10” squares of cotton fabric and two 10” squares of fusible quilt batting. Following the manufacturer’s instructions carefully, use a warm iron to fuse the batting squares to the wrong side of each fabric square, aligning the edges carefully to make sure they match up neatly.
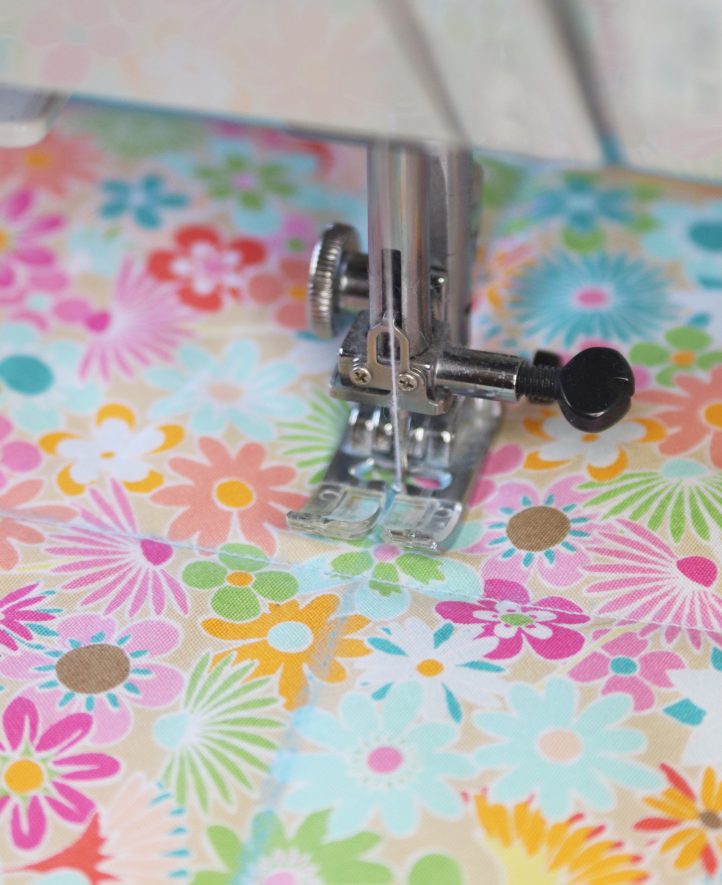
- Lay your squares out with the right sides facing up. Take a ruler and draw two lines across each one with a water soluble fabric pen. Each line should go from one corner, across to the opposite diagonal corner, to create an X. Take the squares over to your sewing machine. Set it to work a 2.6mm (1/8 in) straight stitch, then work carefully over each line, stitching through both the fabric and the batting underneath.
- Fold each of your squares in half, with right sides together. Measure and mark two points along the folded edge with a water soluble fabric pen, each 2” in from the side edges. Then, along each of those side edges, measure and mark a point 1” up from the fold, too. Connect the two marks in each corner, then pin to hold the layers in place.
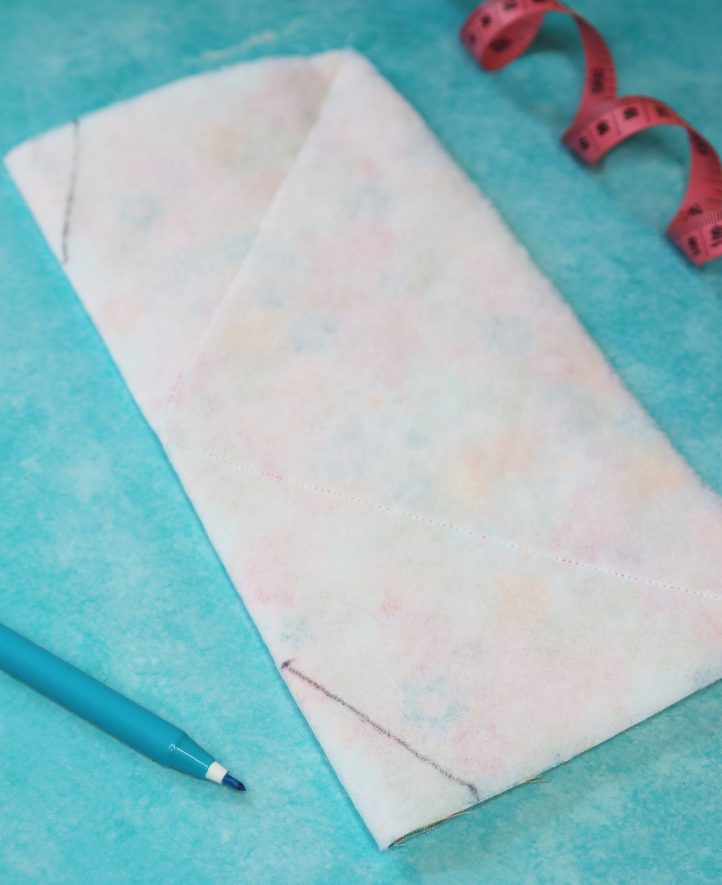
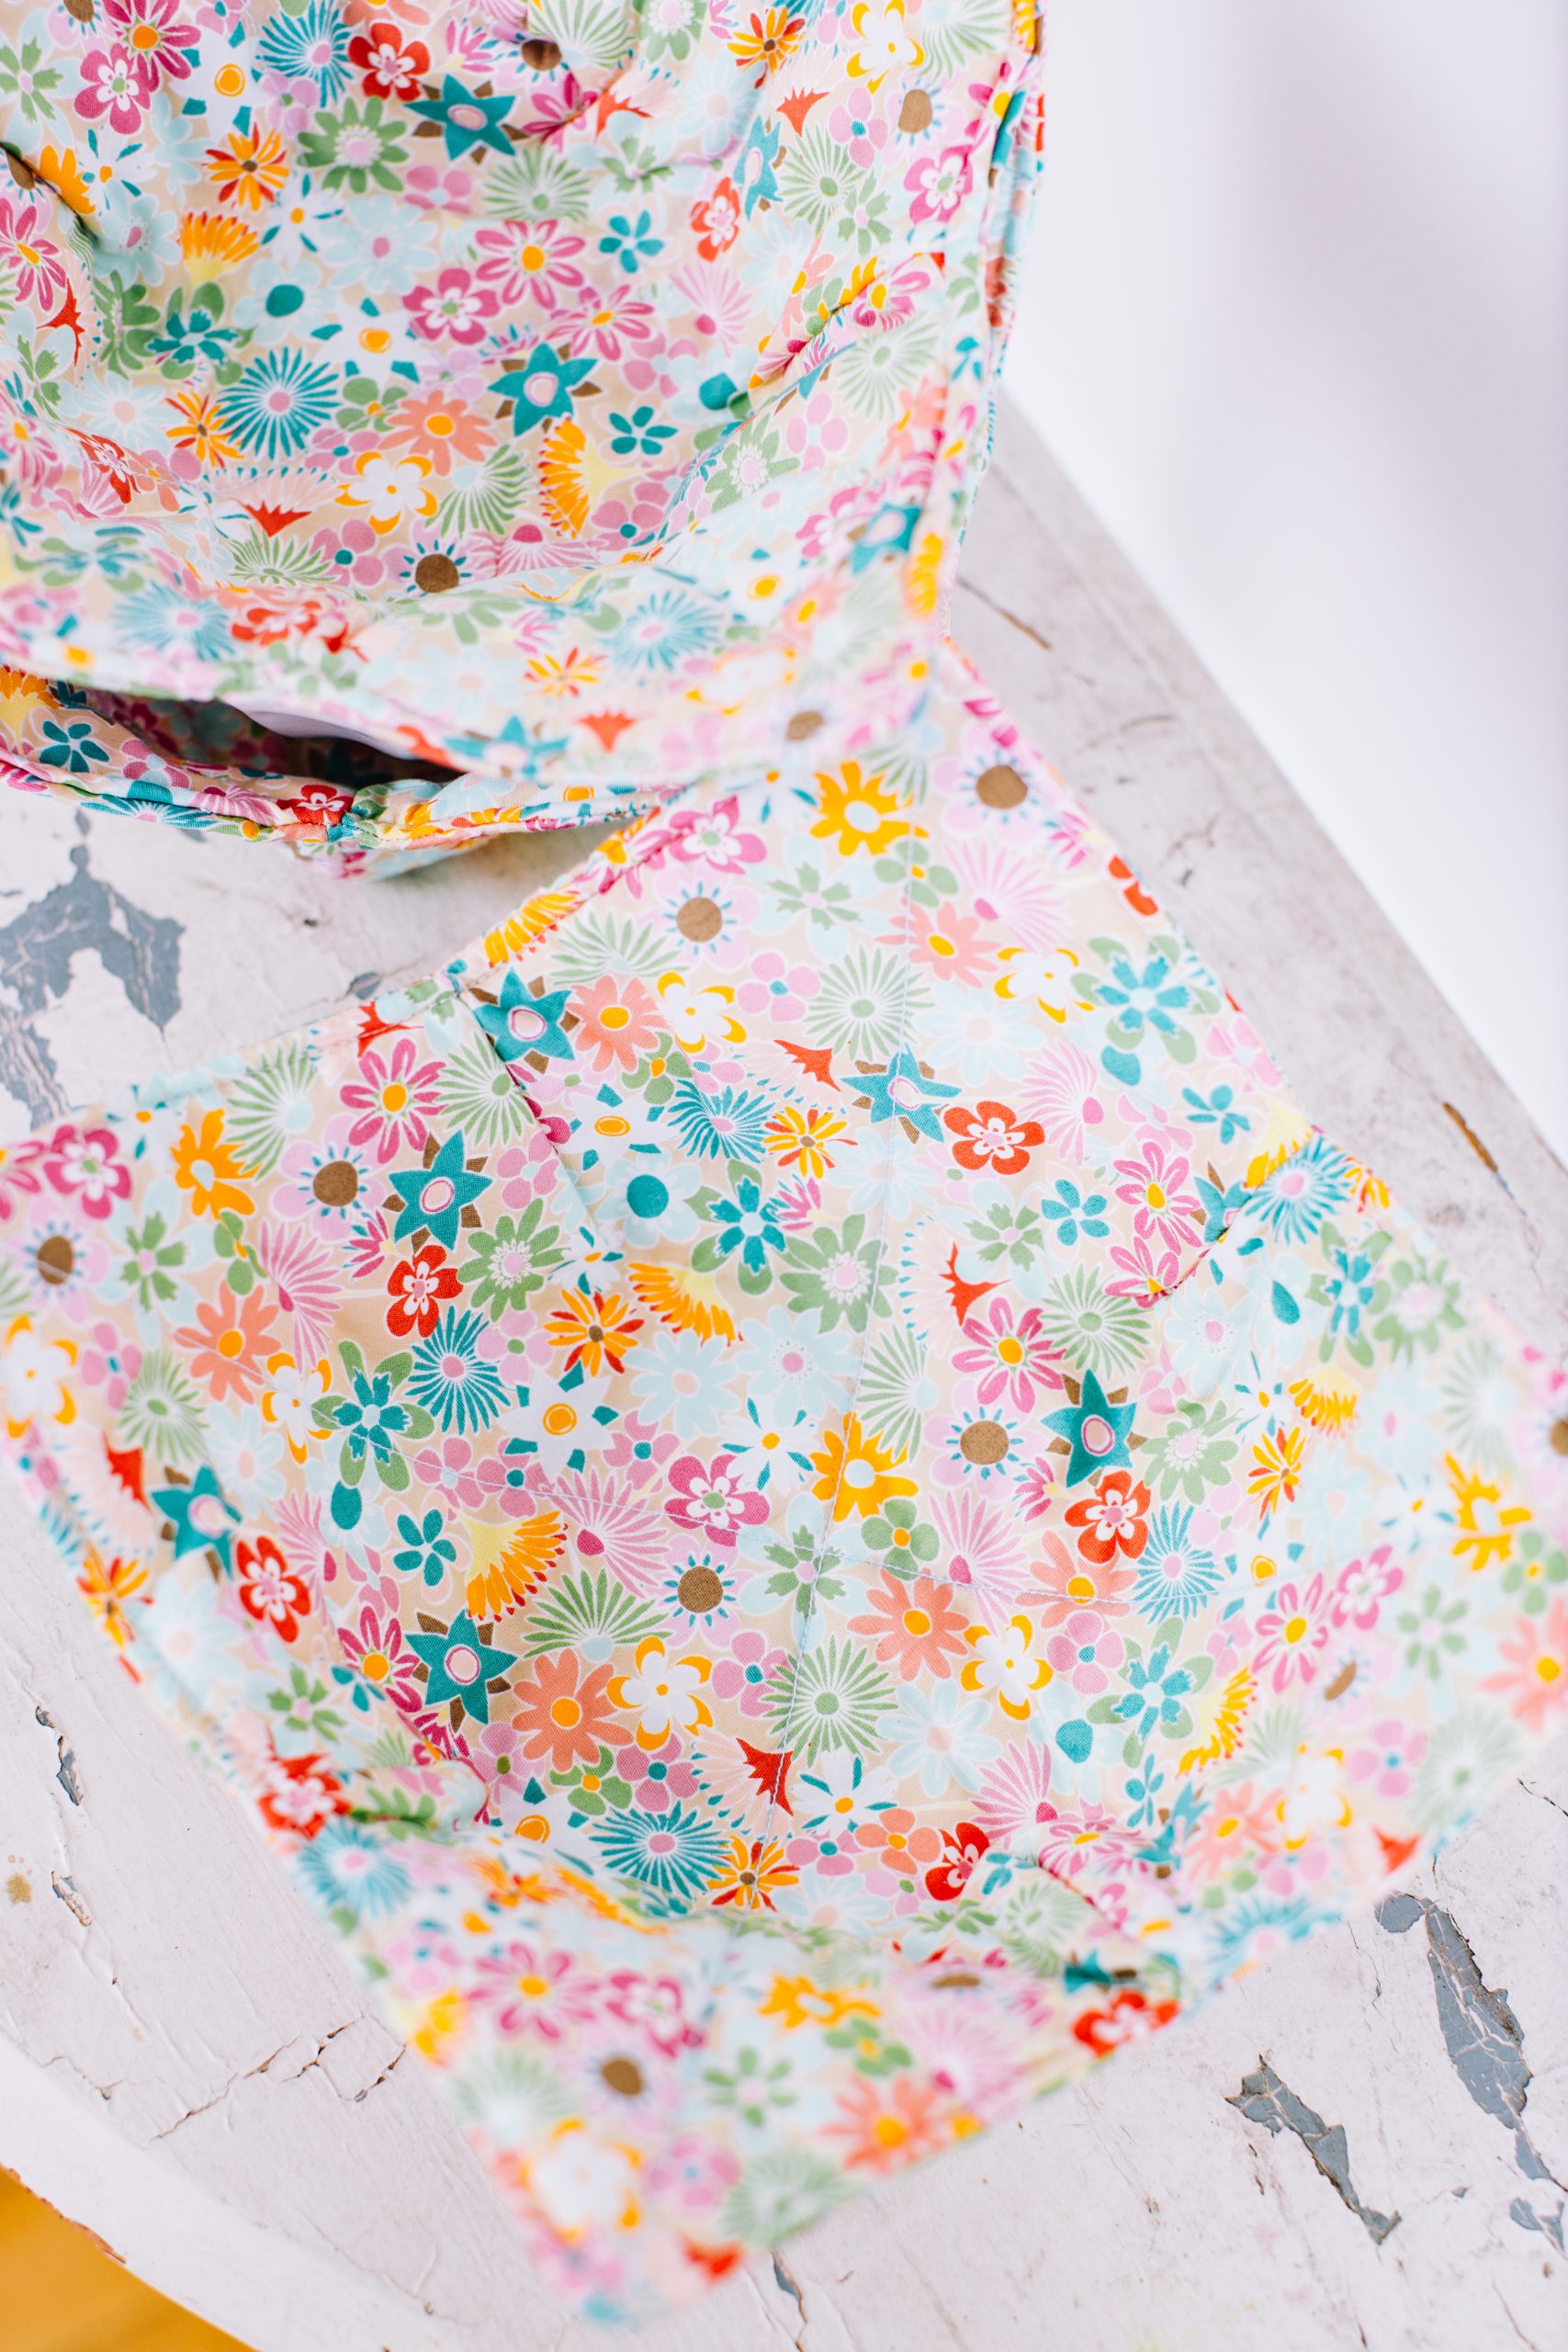
- Take your folded and marked squares over to your sewing machine and using a 2.6mm (1/8 in) straight stitch, machine sew along each of the lines you just drew, then trim the corners, leaving a 1/4” seam allowance. Open out each square, then fold in half in the other direction, and repeat the last two steps. You should now have two 3D bowl shapes.

- Place one bowl inside the other, with right sides facing. Match up the seam lines, edges, and corners, and pin the two layers together carefully. Your basic cozy shape is now coming together.
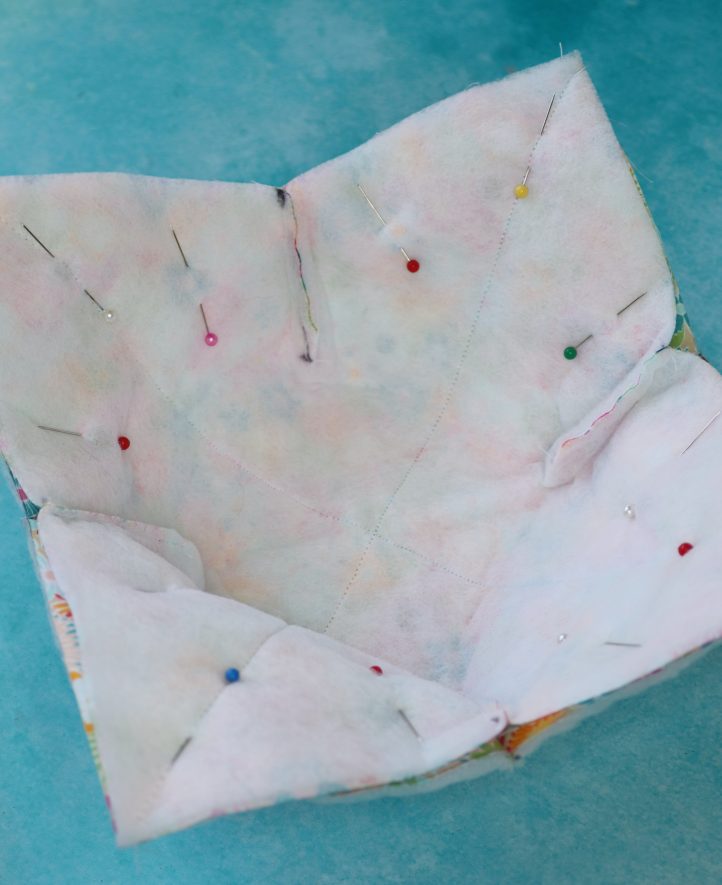
- Take your pinned cozy over to your sewing machine and work a straight stitch all around the edge, leaving a 1/4” seam allowance and a 4” gap open along one side. Clip the corners, then turn the work right sides out through the gap. You might need to use a chopstick or a pencil to push the corners out. Straighten up the work, and turn the open edge along the gap over to the wrong side by 1/4”, and pin.
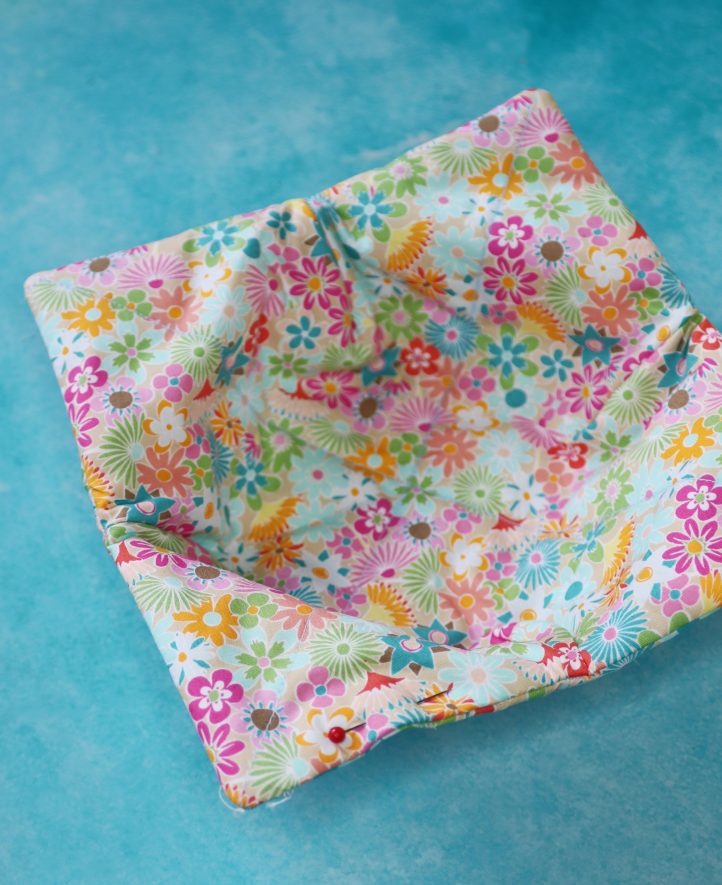
- Finally, take your bowl cozy back to your sewing machine and work a straight machine top stitch all around the edge of the cozy with a 1/4” seam allowance, which will not only neaten the shape up but close the gap in the seam, too. Lastly, use a damp cloth to dab away any remnants of the water soluble pen. Your cozy is now complete!