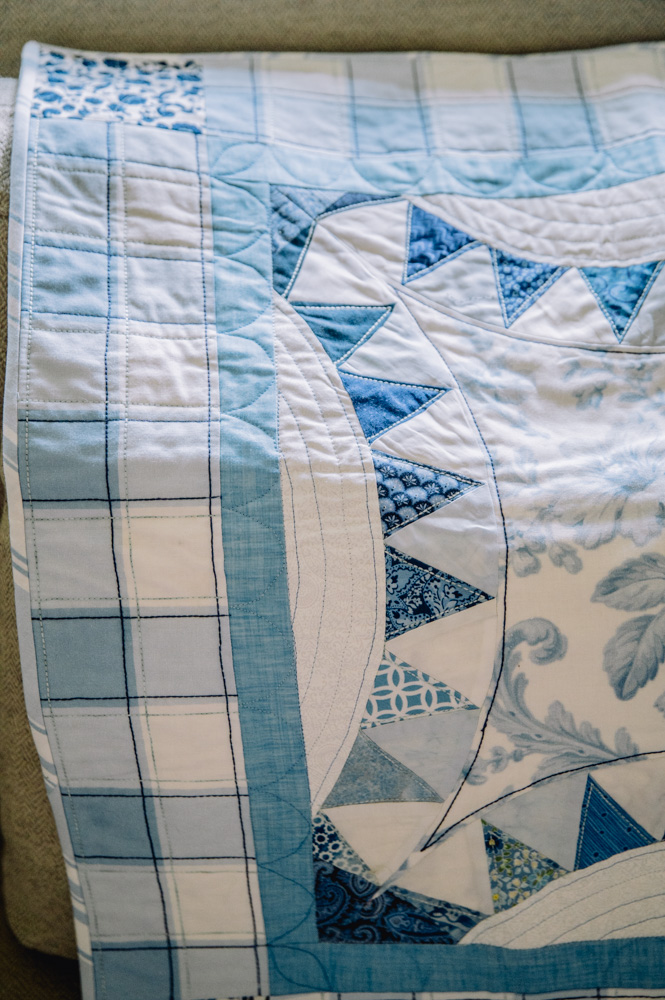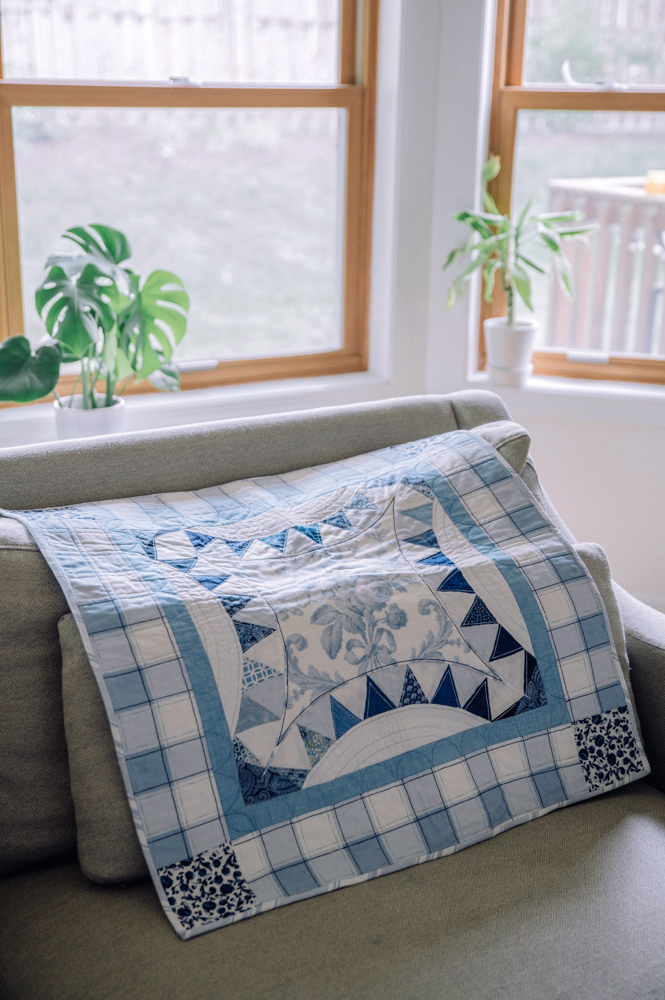
Design a gorgeous picnic quilt in soft blues and deep purples with this mini quilt project. This stunning quilt design uses the classic pickle dish pattern, noted for its particular points within the quilt’s rounded arches. If you’ve been wanting to step up your paper piecing skills, then you’re in luck, as this pattern uses foundation paper piecing to create its top. Improve your quilting skills and practice working with more intricate designs with this pretty paper piecing project.
Skill level: Intermediate
Finished size: 24” X 24”
Materials
- Fabrics
- Blue & white large scale toile print [center] – fat quarter *
- Blue & white medium scale print [cornerstone] – 1/8 yard
- White [side crescent] – 1/4 yard
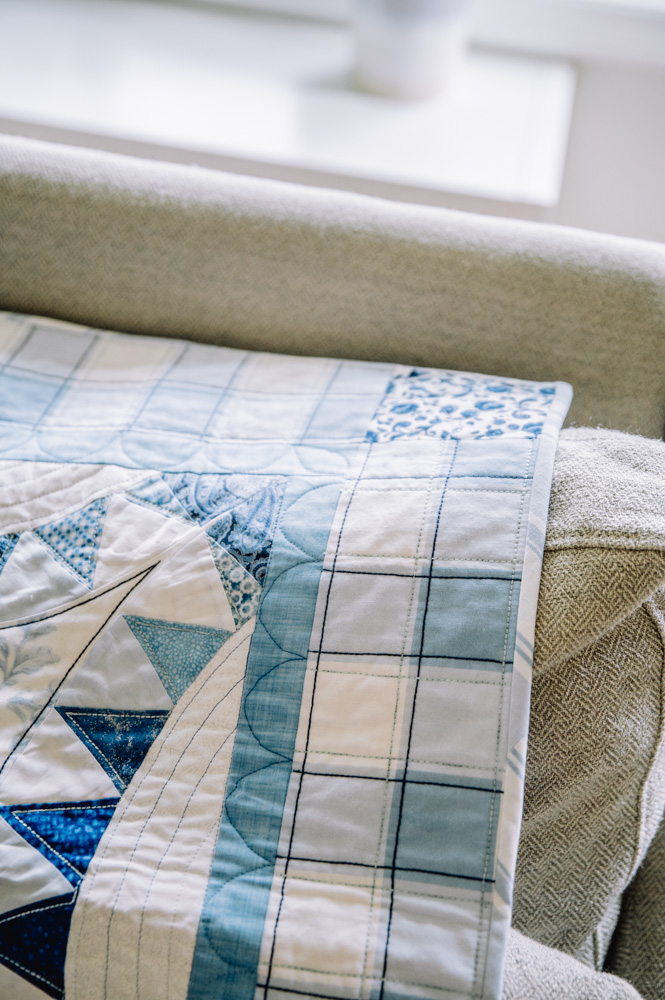
- Blue & white plaid [border] – 1/4 yard**
- Very light blue – 1/3 – 3/8 yard
- Assorted blues [total yardage for all shades used] – 1/3 – 3/8 yard
- Navy/dark blue [pickle dish corners] – 1/8 yard
- Very light blue – 1/8 yard
- Binding [blue & white Strip]- 1/4 yard
- Batting – 32″ X 32″
- Backing – 1 yard
Notes
- For fussy cutting, you will need 3/4 yard. Fussy cutting is a method of cutting your quilt fabric so that you get the specific area of the pattern from your fabric in exactly the place that you want it vs. cutting the yardage into random pieces.
- To match the plaid, you will need 3/8 – 1/2 yard.
- Designer note: I used 14 different fabrics for assorted blues and 2 different fabrics for navy corners.
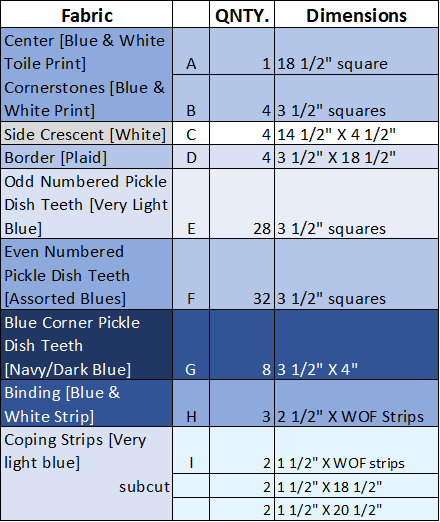
Cutting Instructions
NOTE: Pieces for foundation paper piecing are approximate size. You do not need to precut these pieces. Make sure the fabric piece you choose will cover the section of the block you wish to use it in. Make sure the piece you are choosing is 1/2” to 1” larger in all directions than the space you are using it in.
INSTRUCTIONS
- Using printer paper or newsprint and your printer, print out the foundation paper templates for the block. Cut them apart using paper scissors. I like to cut each section of paper as I sew, so I don’t have a huge puzzle to decipher. The center and side crescent sections are all single fabric pieces. Using a Sewline Glue Pen, adhere the wrong side of the fabric to the wrong side of the template and cut each of these sections on the dotted line before you begin piecing the pickle dish crescents.
- Sew the fabrics you choose to the foundation papers following the number sequence (1,2,3,4,5,etc.) for each section. Each section is given a letter. The letters start with uppercase letters A-Z, then lowercase letters a-z [NOTE: This block only has Sections A through D]. Be sure to shorten your stitch length as this will help when you are removing the foundation paper later. I use a Sewline Glue Pen to adhere my first piece in each section. You are placing the wrong side of your fabric against the wrong side of the foundation papers. I also use an Add-a-Quarter ruler to trim my pieces as I stitch. Here is a color chart to help you with placement of the fabrics.

- Trim the block sections using the outer marking line. THIS IS THE DASHED LINE. (Be careful if you trim on the wrong line; all your work is for nothing! You will have to do it again.)
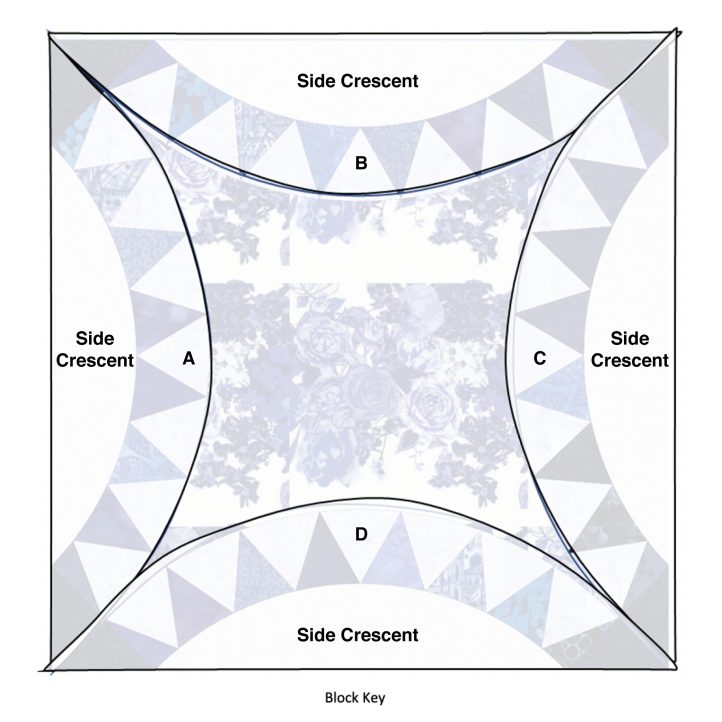
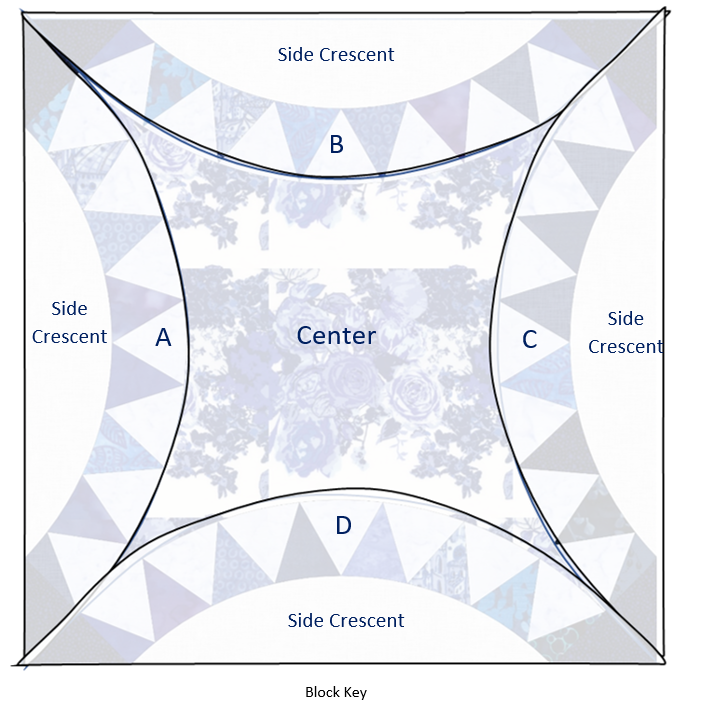
- Once all four pickle dish sections are complete and trimmed to the 1/4” outer marking (Dashed Line) join the sections to form the block. Press all the seams while joining the sections out from the center of the block. Refer to the Block Key (shown below) for layout.
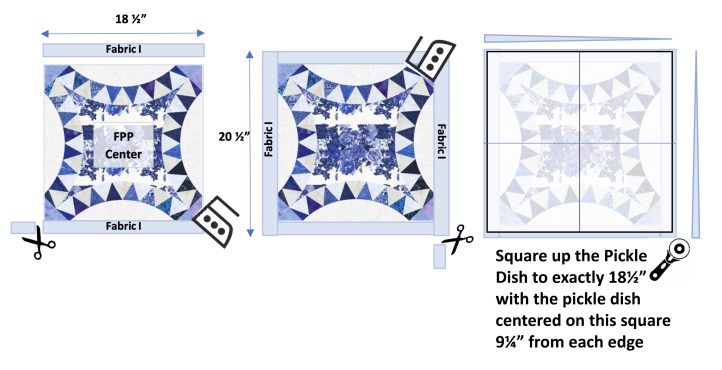
- Join the segments in the following order (steps I – V below): NOTE: Once all the foundation paper piecing is complete and the block is pressed measure the block, it should measure exactly 18 1/2″ square. On some printers, the foundation papers end up printing smaller than actual size needed. This happened to me in the sample. When this occurs, the easiest method to fix this problem is using “coping” strips. These strips are accounted for in the fabric requirements and cutting instructions. If you need to add the coping strips because you block measures smaller than 18 1/2″ square, follow these steps. Add the (2) 1 1/2″ X 18 1/2″ strips of light blue to the top and bottom of the pickle dish center. Press the seams toward the coping strips. Once sewn, trim the ends to match with the sides of the center pickle dish. Then add the (2) 1 1/2″ X 20 1/2″ to the sides of the pickle dish center. Press these toward the coping strips. Once pressed trim the entire center to 18 1/2″ square with the pickle dish centered.
- Join a side crescent to each of the pickle dish crescents. Fold the side crescent in half to find the middle point. Pin on each end and at the middle point. Sew with the side crescent on the top. Shorten your stitch length and pivot the pieces after every couple of stitches to ensure you have a smooth and well-constructed curve. Press the seam toward the side crescent. Make 4.

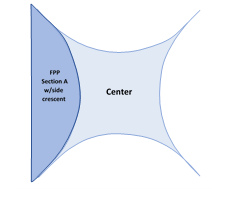
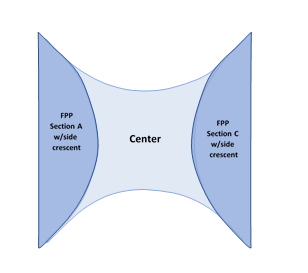
- Sew the center piece to the A crescent. Fold the center piece in half to find the middle point of the curve. Pin on each end and at the middle point. Sew with the Pickle Dish A crescent on the top. Shorten your stitch length and pivot the pieces after every couple of stitches to ensure you have a smooth and well-constructed curve. Press the seam toward the Pickle Dish A crescent.
- Add the Pickle Dish C crescent to the opposite side of the center piece. Use the fold you made in the center square from placing Pickle Dish A as the middle point for attaching Pickle Dish C. Sew with the Pickle Dish C crescent on the top. Shorten your stitch length and pivot the pieces after every couple of stitches to ensure you have a smooth and well-constructed curve. Press the seam toward the Pickle Dish C crescent.
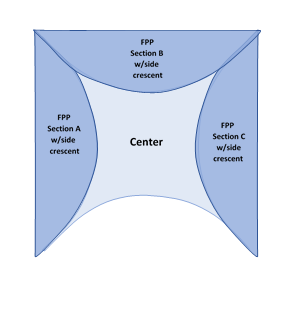
- Sew the center piece to the B crescent. Fold the center piece in half to find the middle point of the curve. Pin on each end and at the middle point. Sew with the Pickle Dish B crescent on the top. Shorten your stitch length and pivot the pieces after every couple of stitches to ensure you have a smooth and well-constructed curve. Press the seam toward the Pickle Dish B crescent.
- Add the Pickle Dish D crescent to the opposite side of the center piece. Use the fold you made in the center square from placing Pickle Dish B as the middle point for attaching Pickle Dish D. Sew with the Pickle Dish D crescent on the top. Shorten your stitch length and pivot the pieces after every couple of stitches to ensure you have a smooth and well-constructed curve. Press the seam toward the Pickle Dish D crescent.
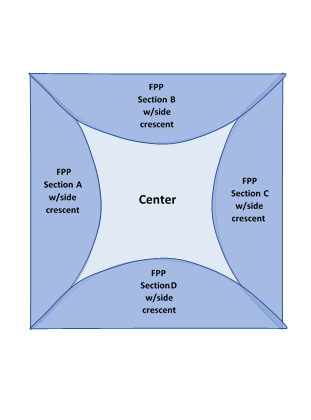
The center block is now complete and should measure 18 1/2” square. Add the borders before you remove the foundation papers.
- Join a side crescent to each of the pickle dish crescents. Fold the side crescent in half to find the middle point. Pin on each end and at the middle point. Sew with the side crescent on the top. Shorten your stitch length and pivot the pieces after every couple of stitches to ensure you have a smooth and well-constructed curve. Press the seam toward the side crescent. Make 4.
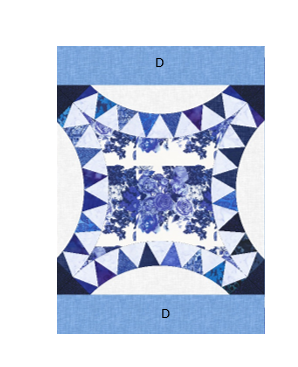
- Sew 2 cornerstones (Fabric B) to either end on 1 border strip (Fabric D). Make 2. Press the seams toward the border strips.

- Sew the remaining 2 border strips (Fabric D) to the top and bottom of the center square. Press the seams toward the border strips.
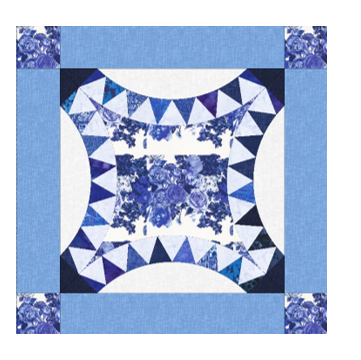
- Sew the units you made in Step 6 to either side of the center. Align the corner squares with the corner of the center block, nesting the seams. Press the seams toward the borders. Your quilt top is now finished. Remove the foundation papers now.
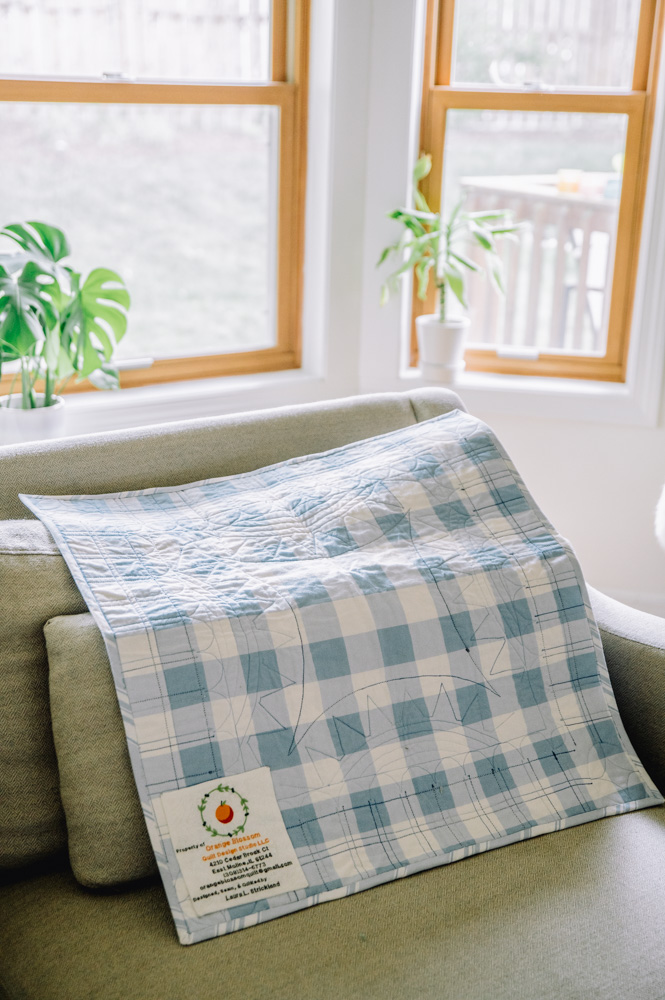
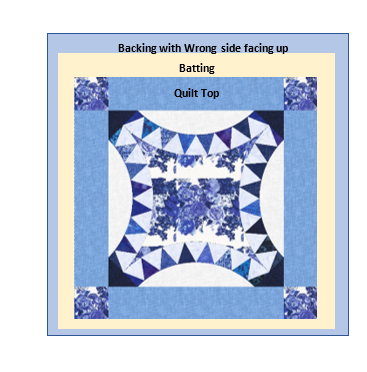
- Layer the quilt top, batting, and backing and quilt as desired.
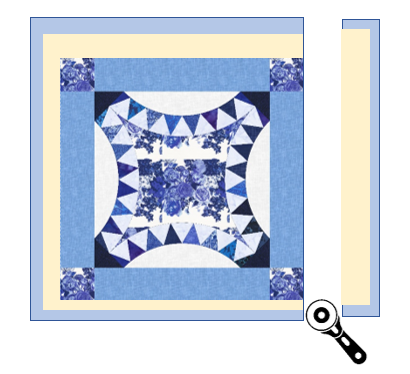
- Once quilted, trim excess batting and backing away. The mini quilt should measure 24” wide by 24” long.
- Cut 3 – 2 1/2” X WOF (Width of Fabric) strips for the binding [Fabric H]. Join all binding strips together to form one long strip [2 1/2” X approx. 120”]. Press in half with right side of the fabric facing out. You should have a 1 1/4” X approximately 120” long strip of binding.
- Using a quarter inch seam allowance, sew binding to quilt edge. Sew with the raw edge of the binding strip against the outer edge of the quilt sandwich. Sew the binding to the top of the quilt. Be sure to miter your corners at each turn.
- Press binding out away from quilt top. Using binding clips to hold the binding in place, wrap the folded edge of the binding to the quilt back and stitch into place using a hand stitch or machine stitch. Your mini picnic quilt is now complete.