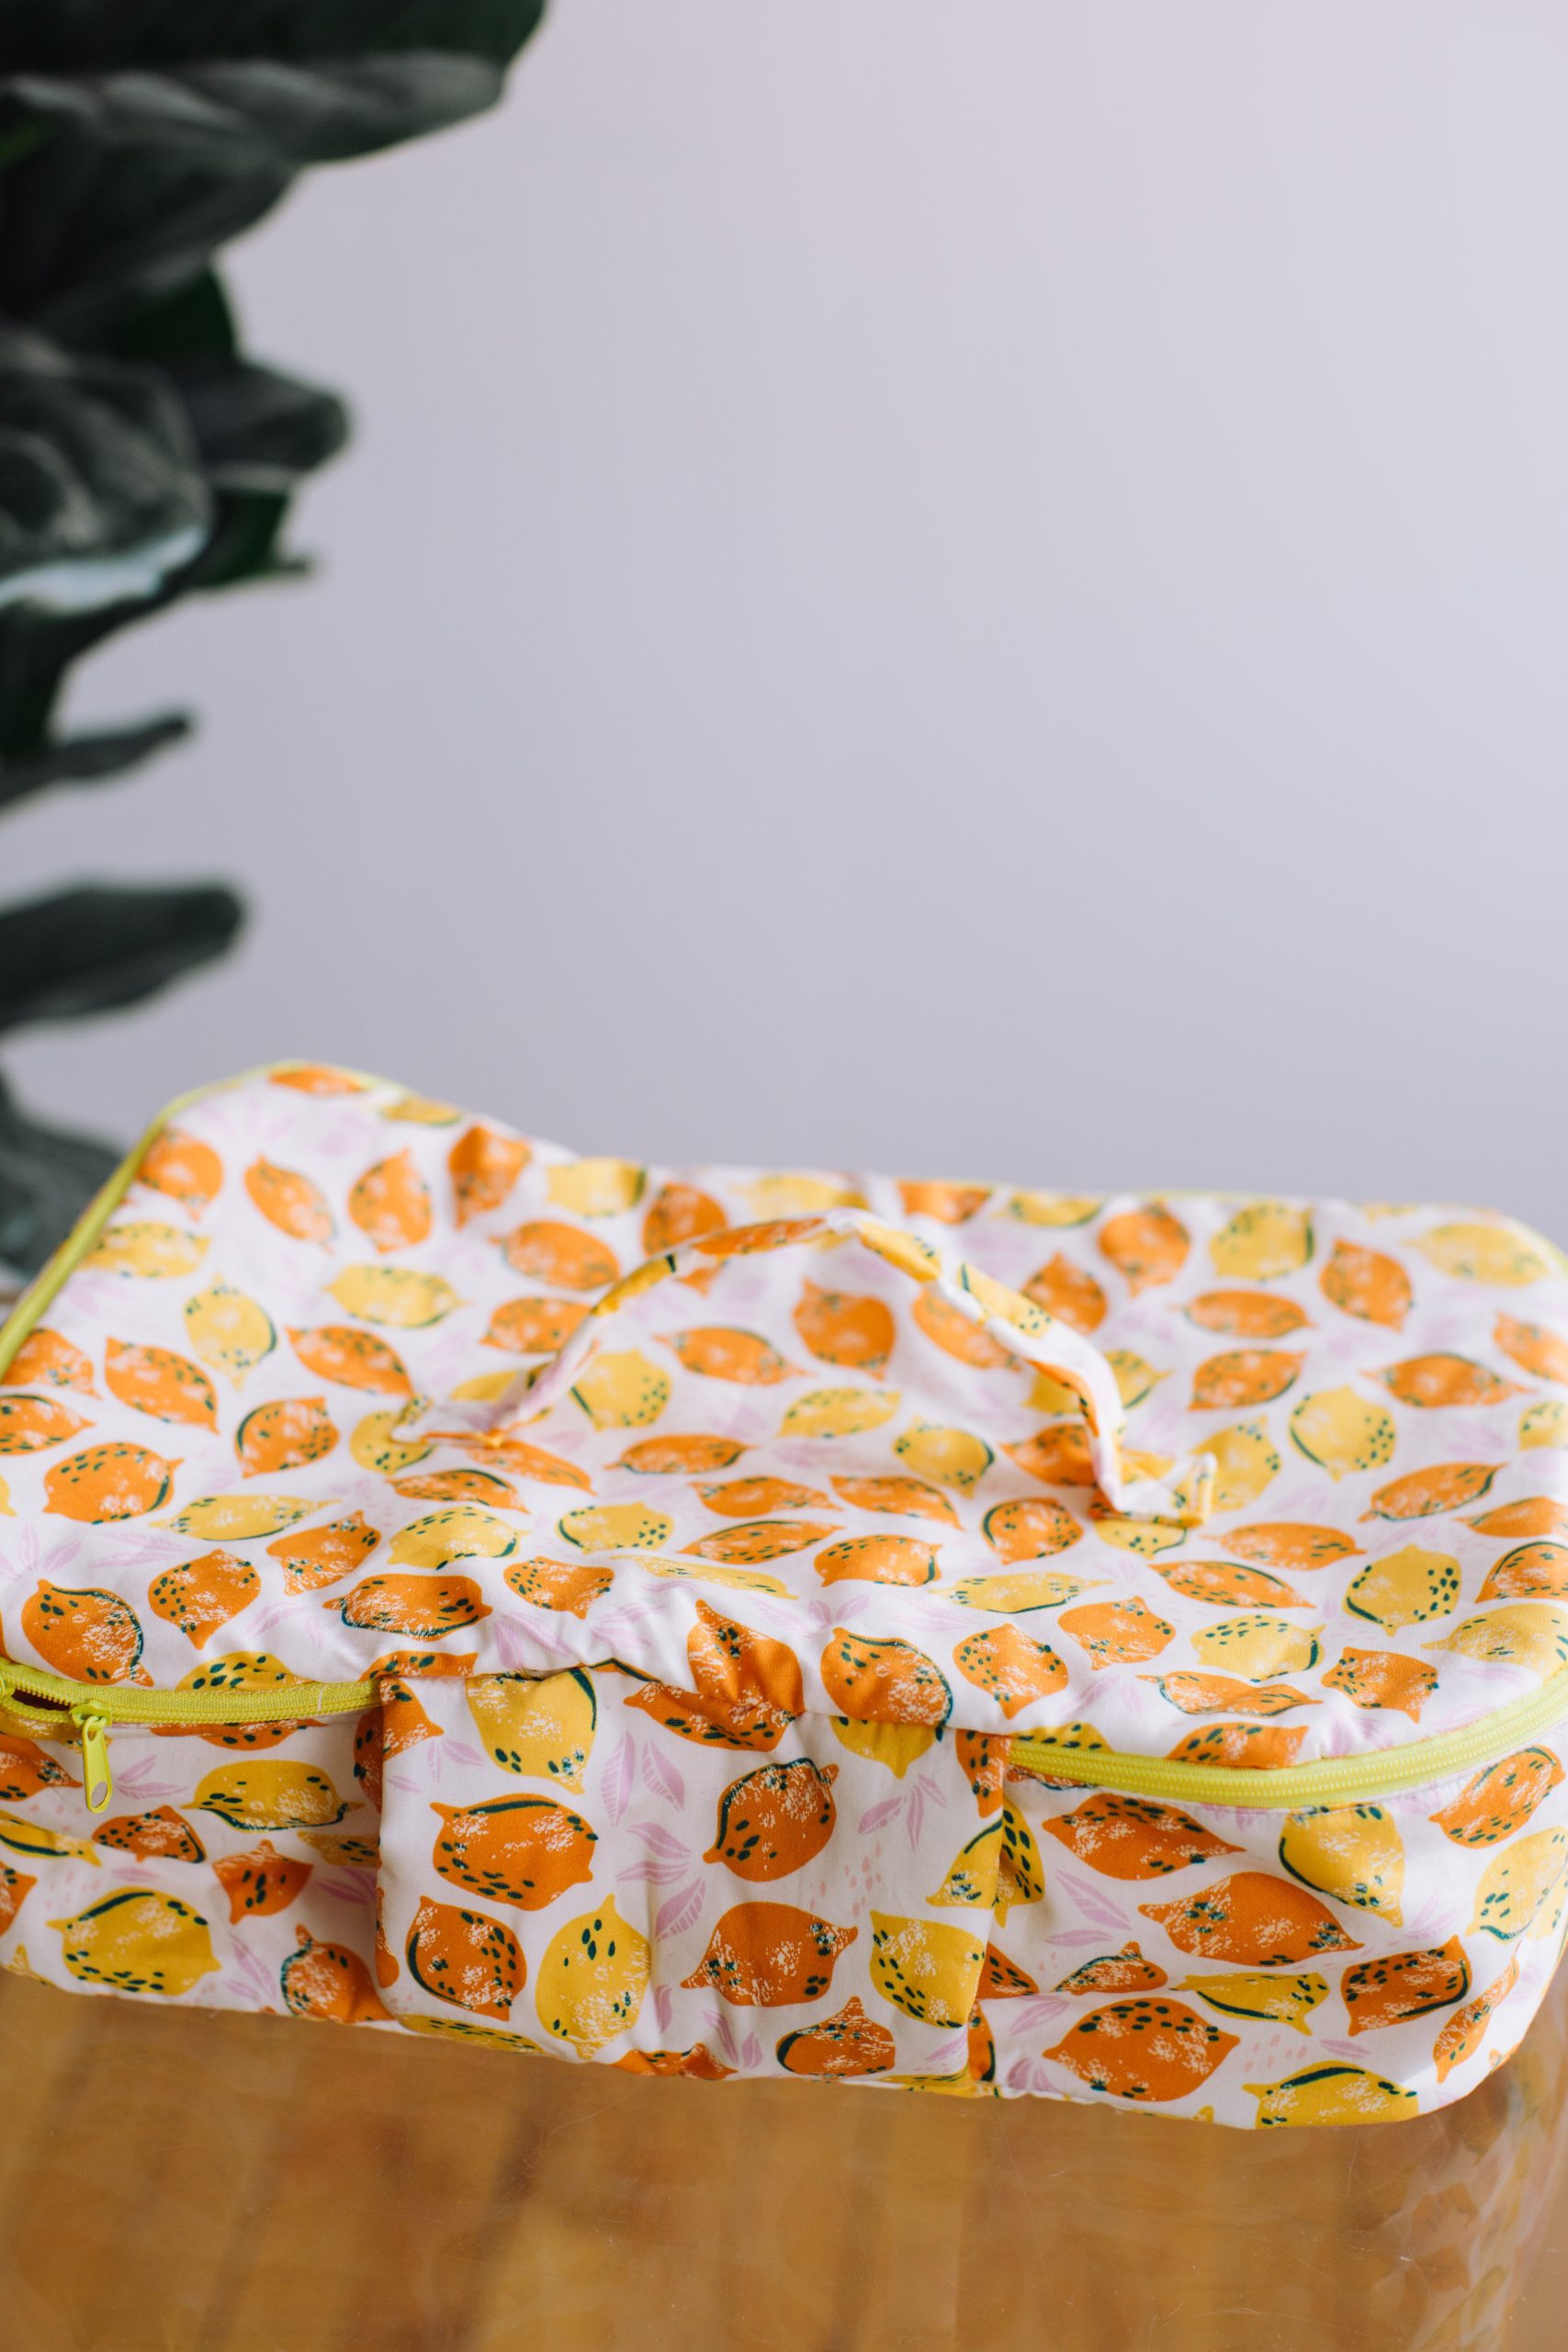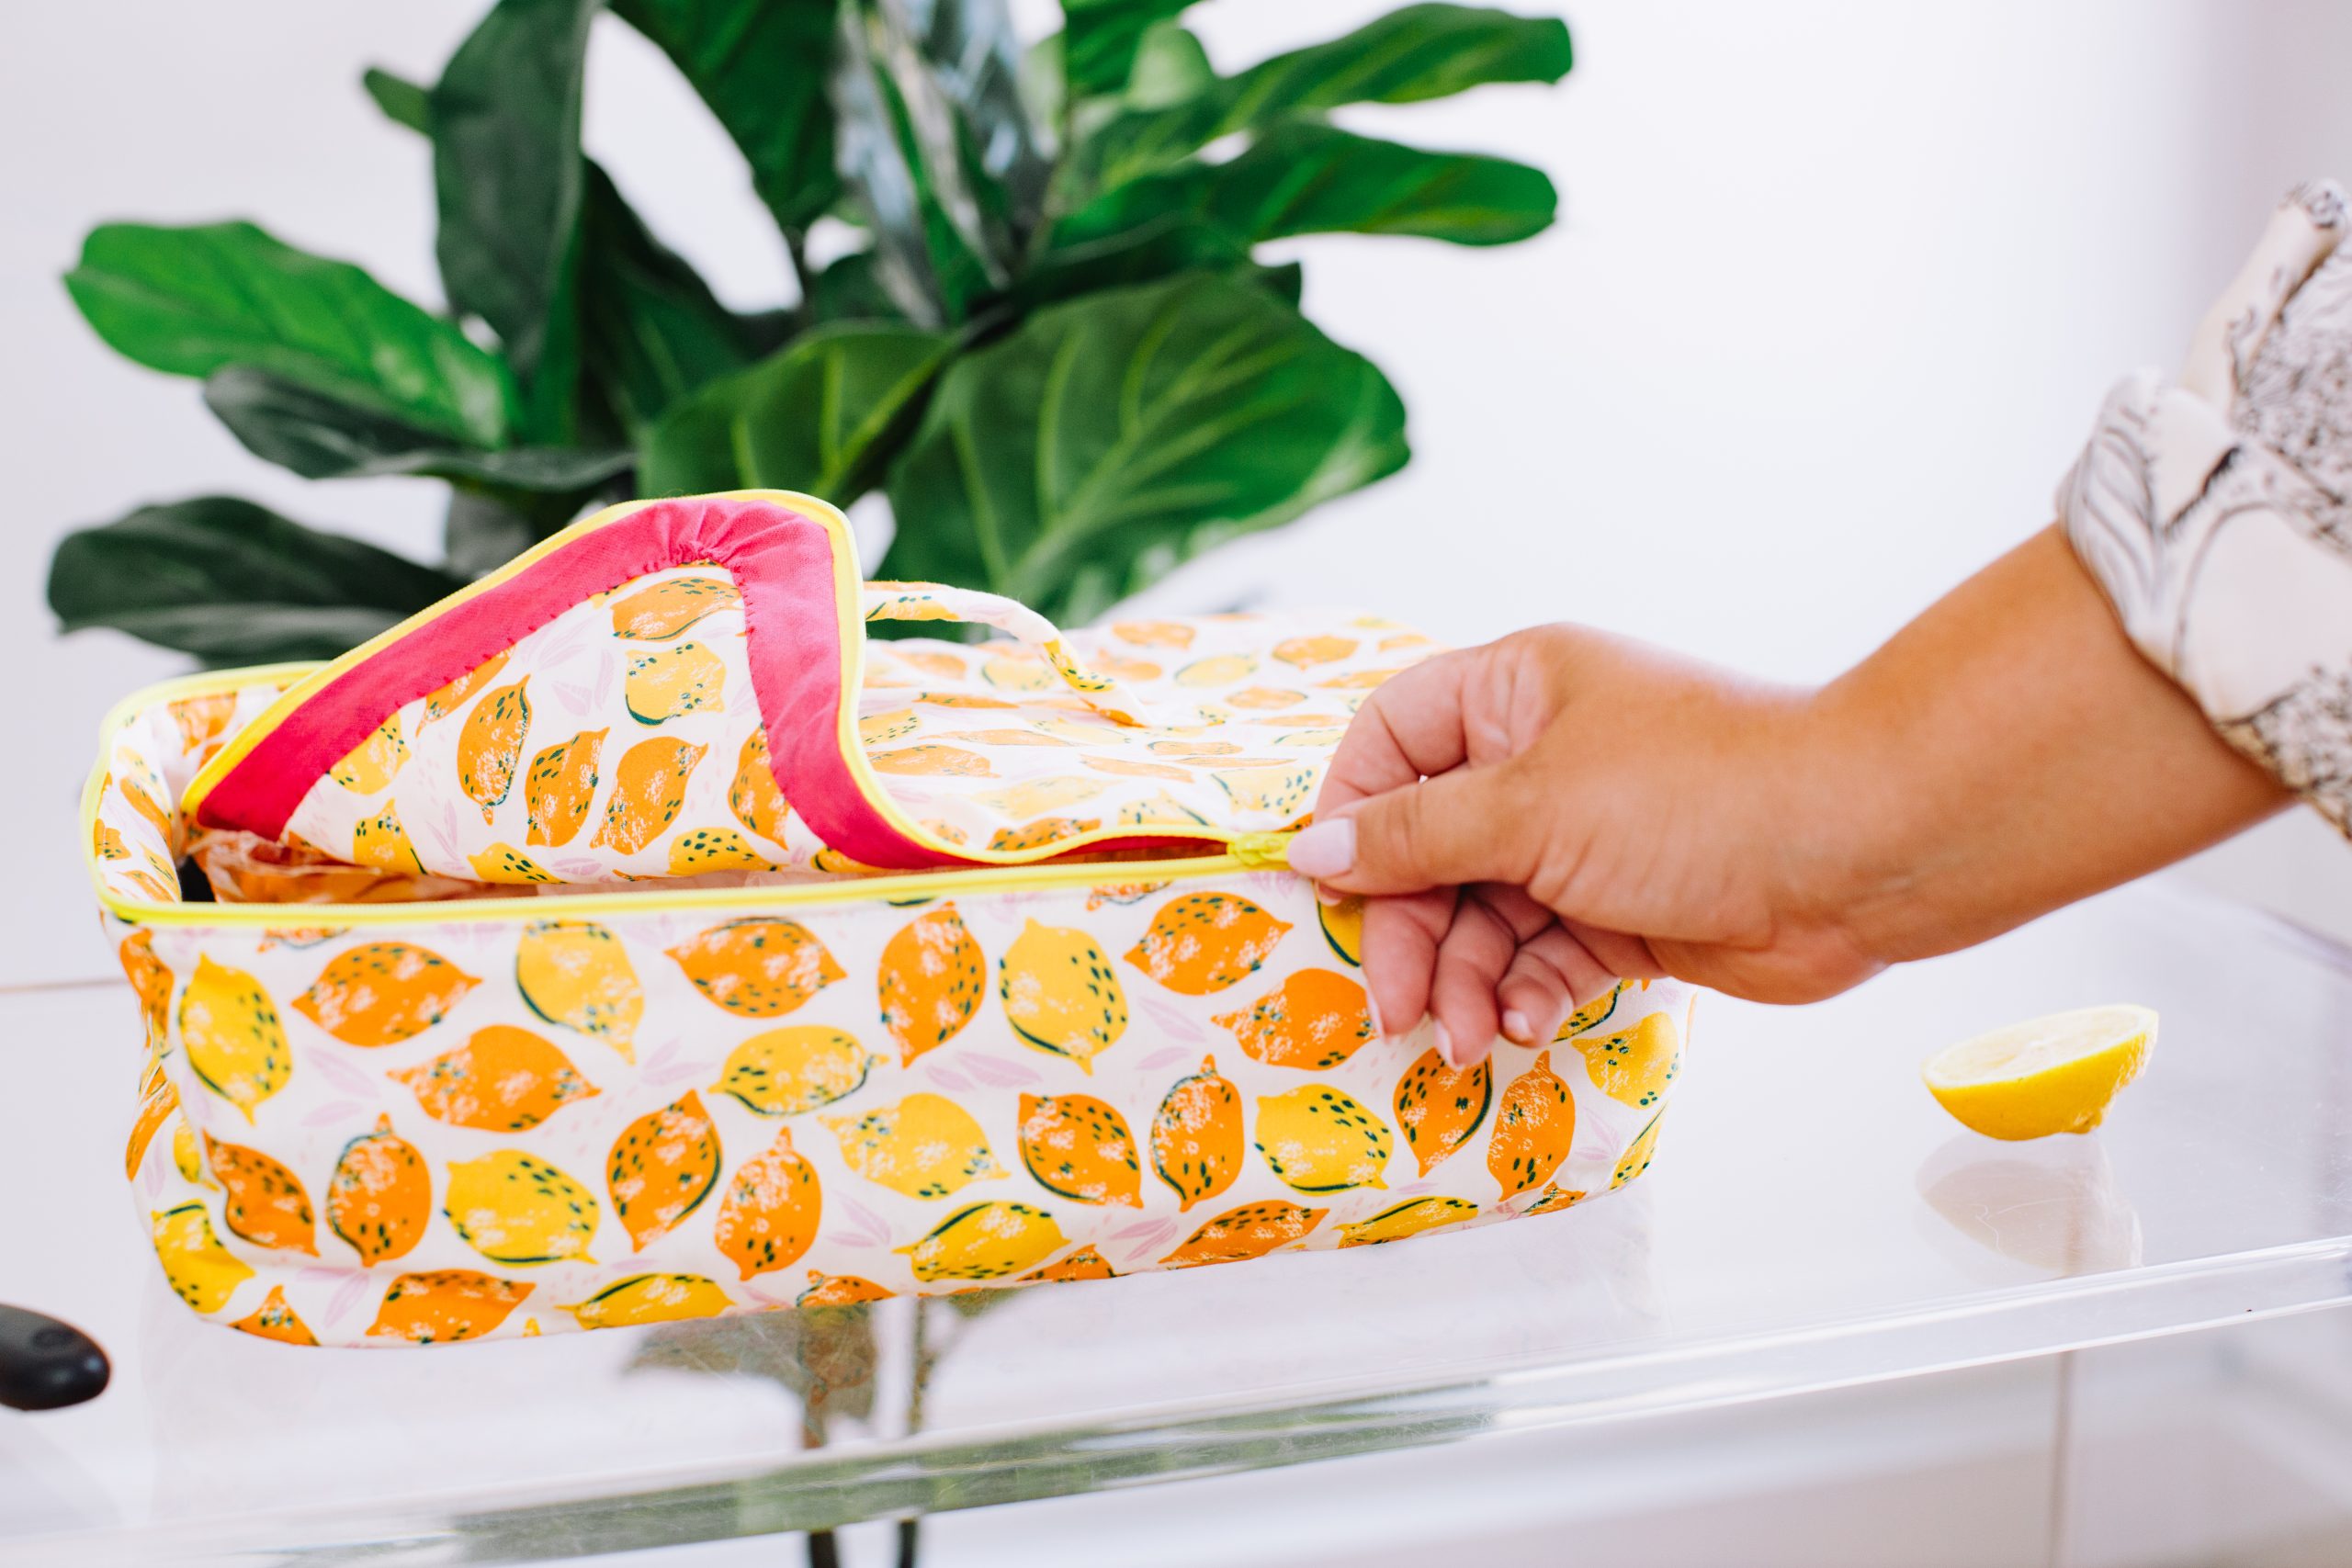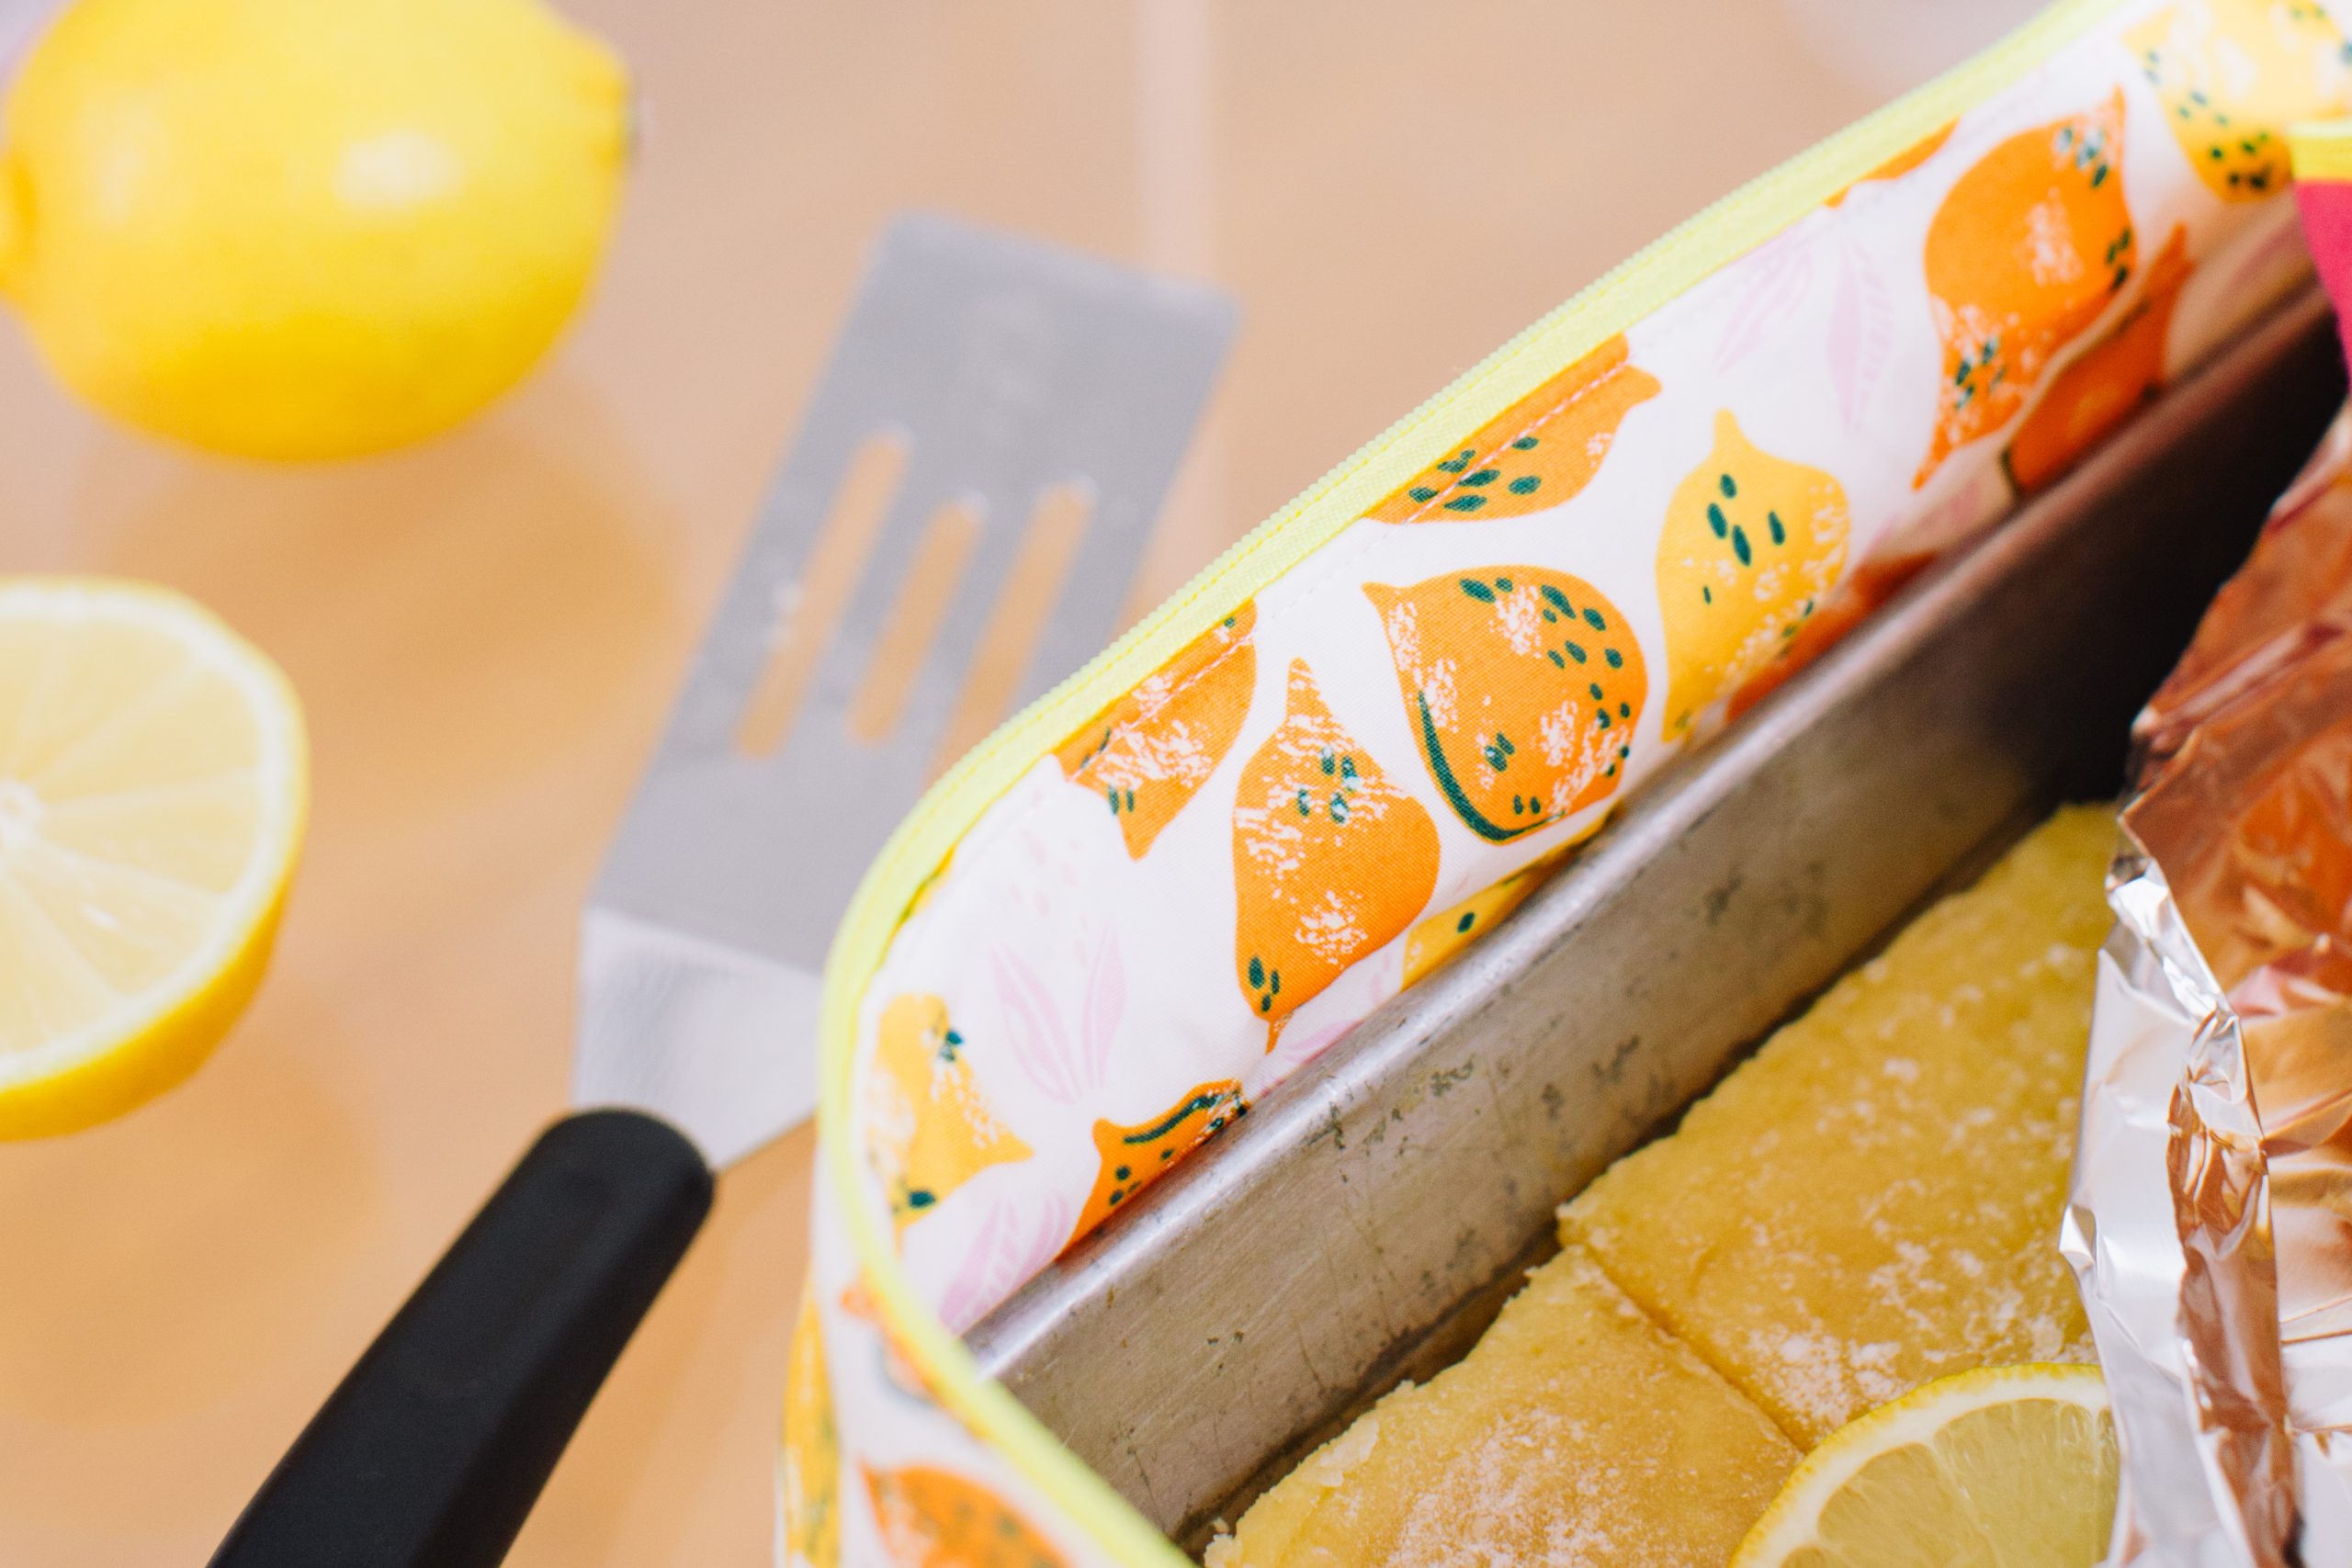
Fall means the start of holiday traveling, shopping, and of course, family gatherings. Keep your tasty casseroles and desserts safe from spillage with this colorful casserole carrier pattern! Created with intermediate sewists in mind, this kitchen sewing pattern features a double-zipper fastening and uses insulated fabric to keep your dishes secure and hot. This sewing pattern is also a wonderful gift idea for the chef in your family, so be sure to whip up one for Mom as well.
Skill Level: Intermediate
Seam Allowances: 1/2 inch unless otherwise stated
Finished Size: Fits a standard 9” x 13” casserole dish
Designer Note: When you come to sew everything together, you may find that the Side Panel is slightly longer than the Base and Lid, due to differences in seam allowance and the slight loss of fabric from rounding-off the corners. If this happens, don’t despair! Simply add a couple of pleats in the back of the Side Panel, positioning them at the seam where the Side and Back Panel pieces joined. This will actually add strength to the back of the carrier, and means you can custom-fit the Panels together even if they don’t quite match up.
Materials:
- Fabric: Art Gallery Fabrics Sunburst cotton poplin, 1 yard
- Fusible quilt batting: 1 yard
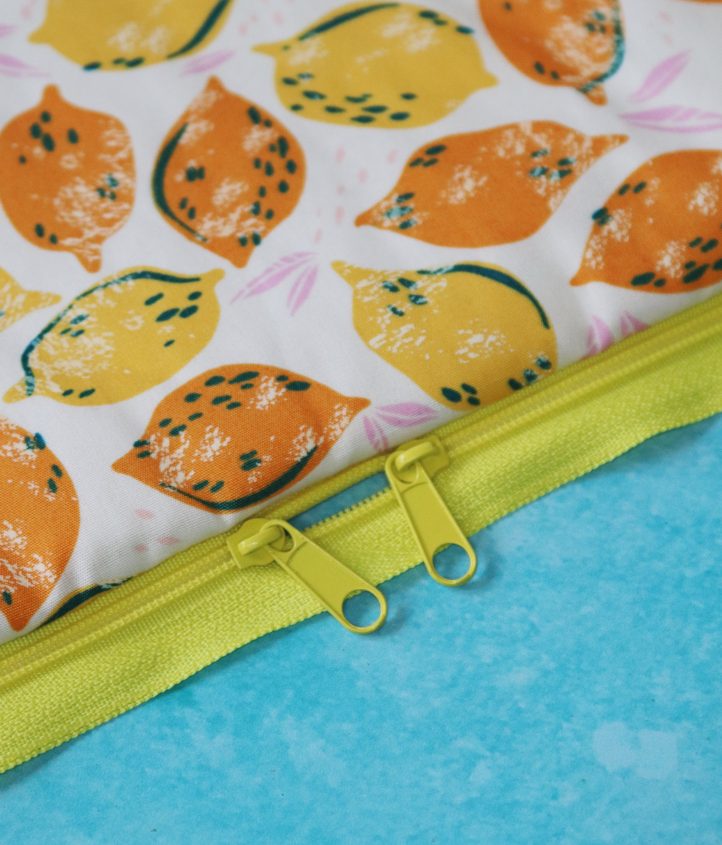
- Endless zipper kit, yellow
- Sewing thread: White
- 1” wide single fold bias tape: Pink, 3 yards
Tools:
- Scissors
- Iron
- Fork
- Water soluble fabric pen
- Ruler
- Pins
- Quilting clips
- Sewing machine
- Sewing needle and thread
Instructions:
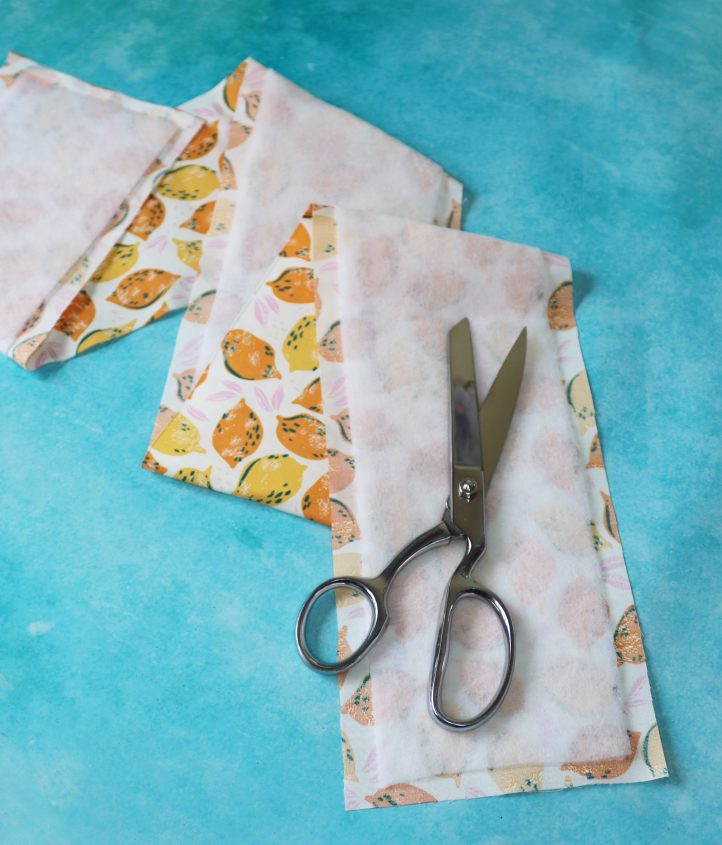
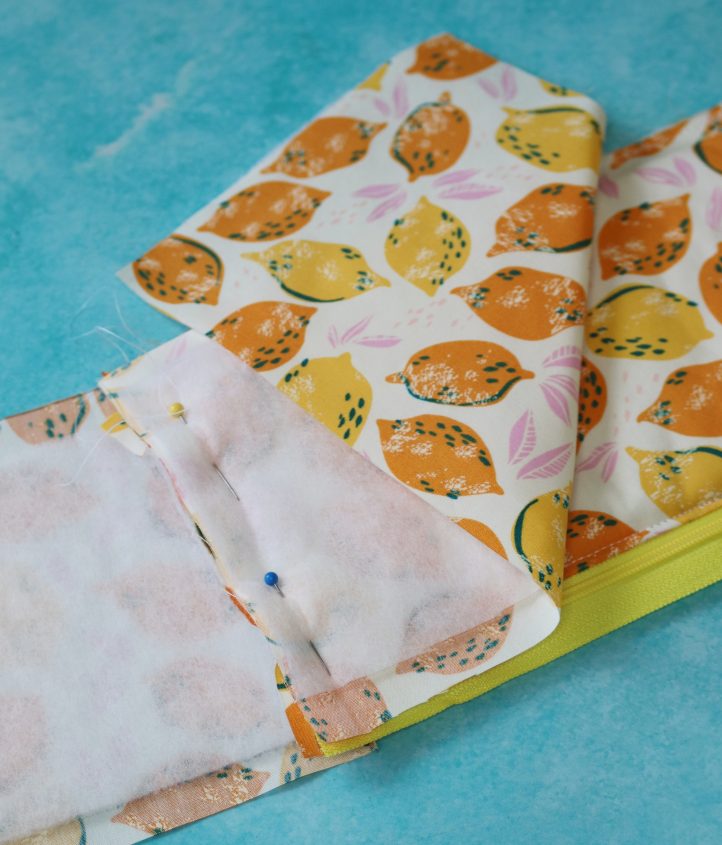
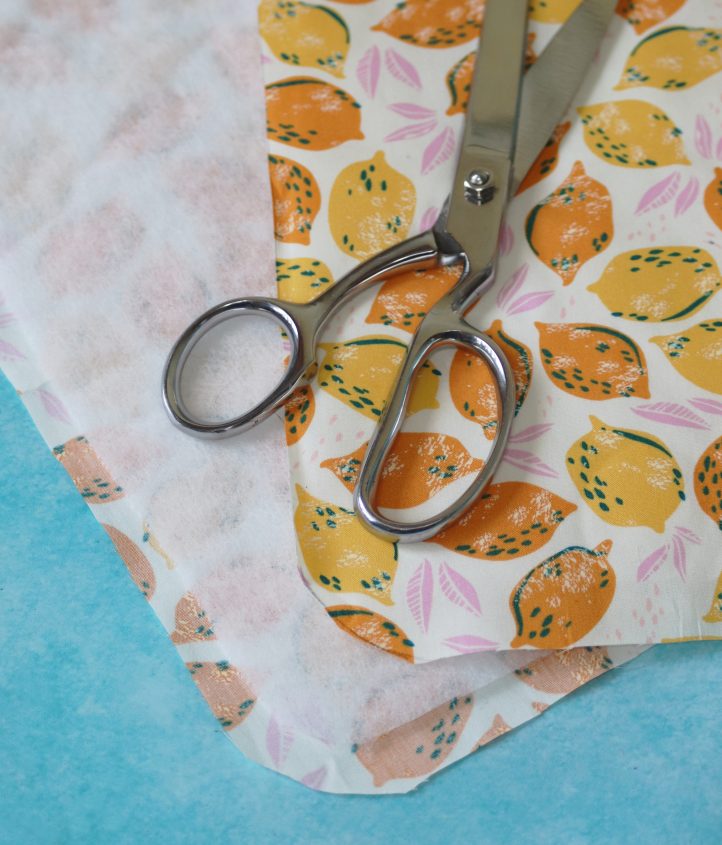
- Begin by cutting out your Side Panel. From your cotton fabric, cut two 5” x 44” strips. One of these is your outer Side Panel, and the other is the lining. From fusible batting, cut two 4” x 43” strips. Fuse each batting strip to the wrong side of each of the fabric strips, positioning them in the center.
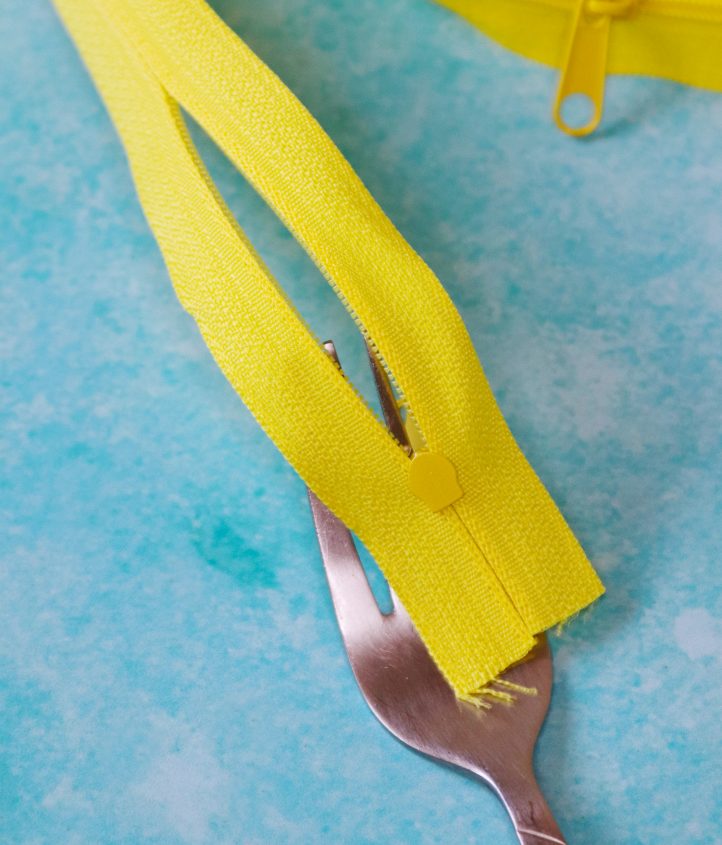
- Make your zipper. To do this, first tape a fork and wedge the head of a zipper pull between two of the prongs, with the back of it facing towards you. Cut a 46” length of zipper tape and carefully feed each side of it through the zipper head, making sure the teeth line up and the zipper works properly when you try and fasten it up. Repeat to add a second zipper head, facing in the opposite direction so that the two heads work together to open and close the zipper.
- Lay your outer Side Panel out flat, with the right side facing up. Place the zipper tape along the top edge of it with right sides facing, making sure the long edges are aligned. Place the lining Side Panel on top, with right side facing down. Pin, then work a straight machine stitch all along this top edge, leaving a 1/4” seam allowance. Open the work out, then work a machine top stitch along the top edge of the Side Panel to neaten it. Trim any excess zipper tape from the side edges.
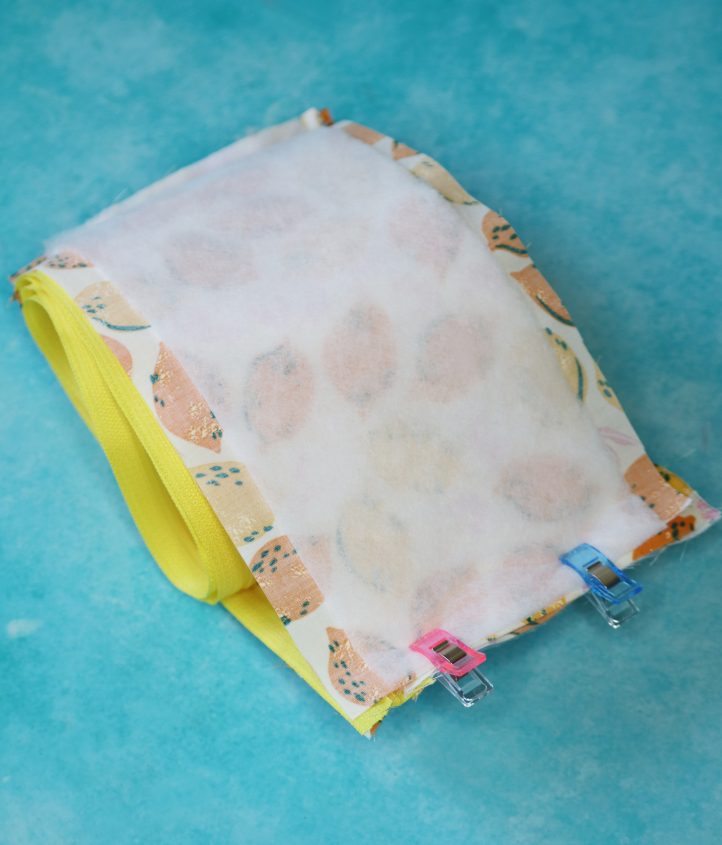
- Make the Back Panel. Cut two 5” x 9” pieces from your cotton fabric, and two 4” x 8” pieces from batting. Fuse each batting piece to the wrong side of a fabric one. As before, one of these is your outer Back Panel and one is the lining. Lay your Side Panel out with the outer side facing up. Place the outer Back Panel on top, with right sides facing, and align along one side edge. Then, repeat to add the lining Back Panel underneath the Side Panel, with right side facing up and the same side edge aligning with the others. Pin, then machine stitch along this edge to hold everything in place.
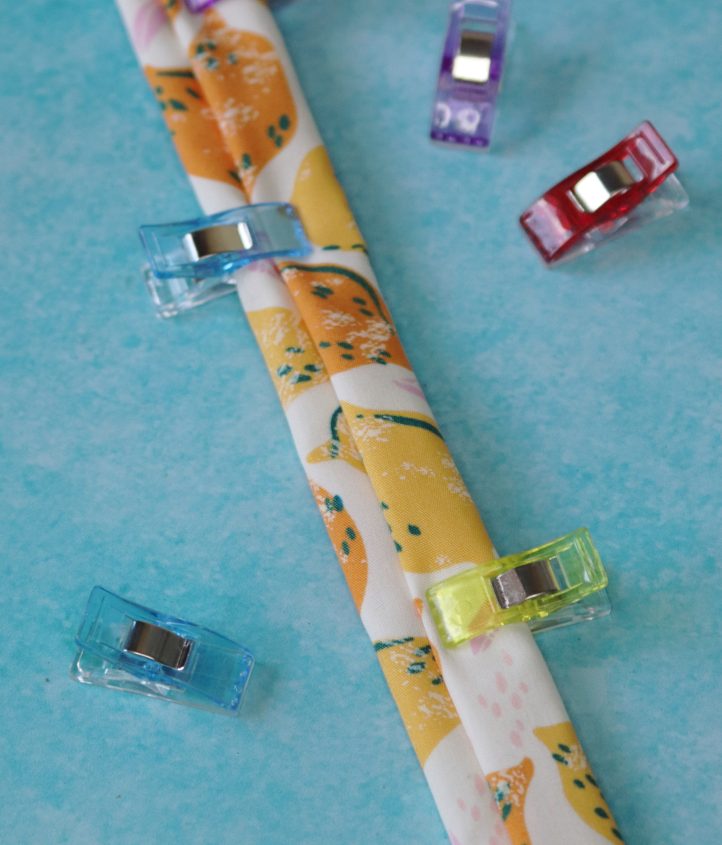
- You now need to pin the opposite side edges of the Back and Side Panels together. To do this, first open out the Back Panel pieces that you just stitched to the Side Panel. With the outer side facing up, fold the remaining open side edge of the Side Panel round to meet the open side edge of the outer Back Panel, and temporarily hold it in place with clips. Then, roll the rest of the Side Panel up and bring the lining Back Panel round so that the side edge of that meets the clipped side edges of the other pieces. Hold this in place with the others, then machine stitch to secure. Turn the work out to reveal one continuous looped piece.
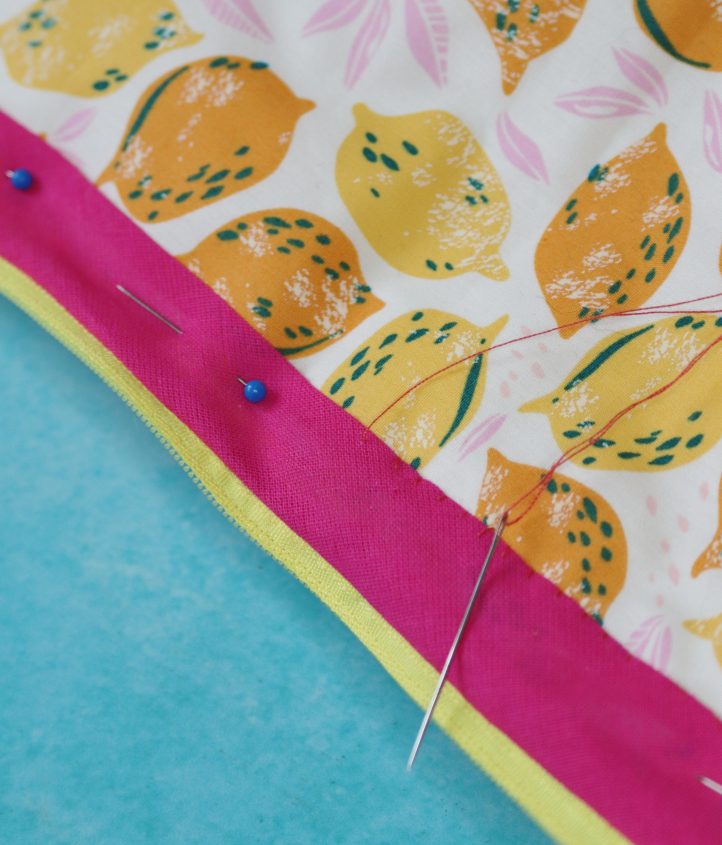
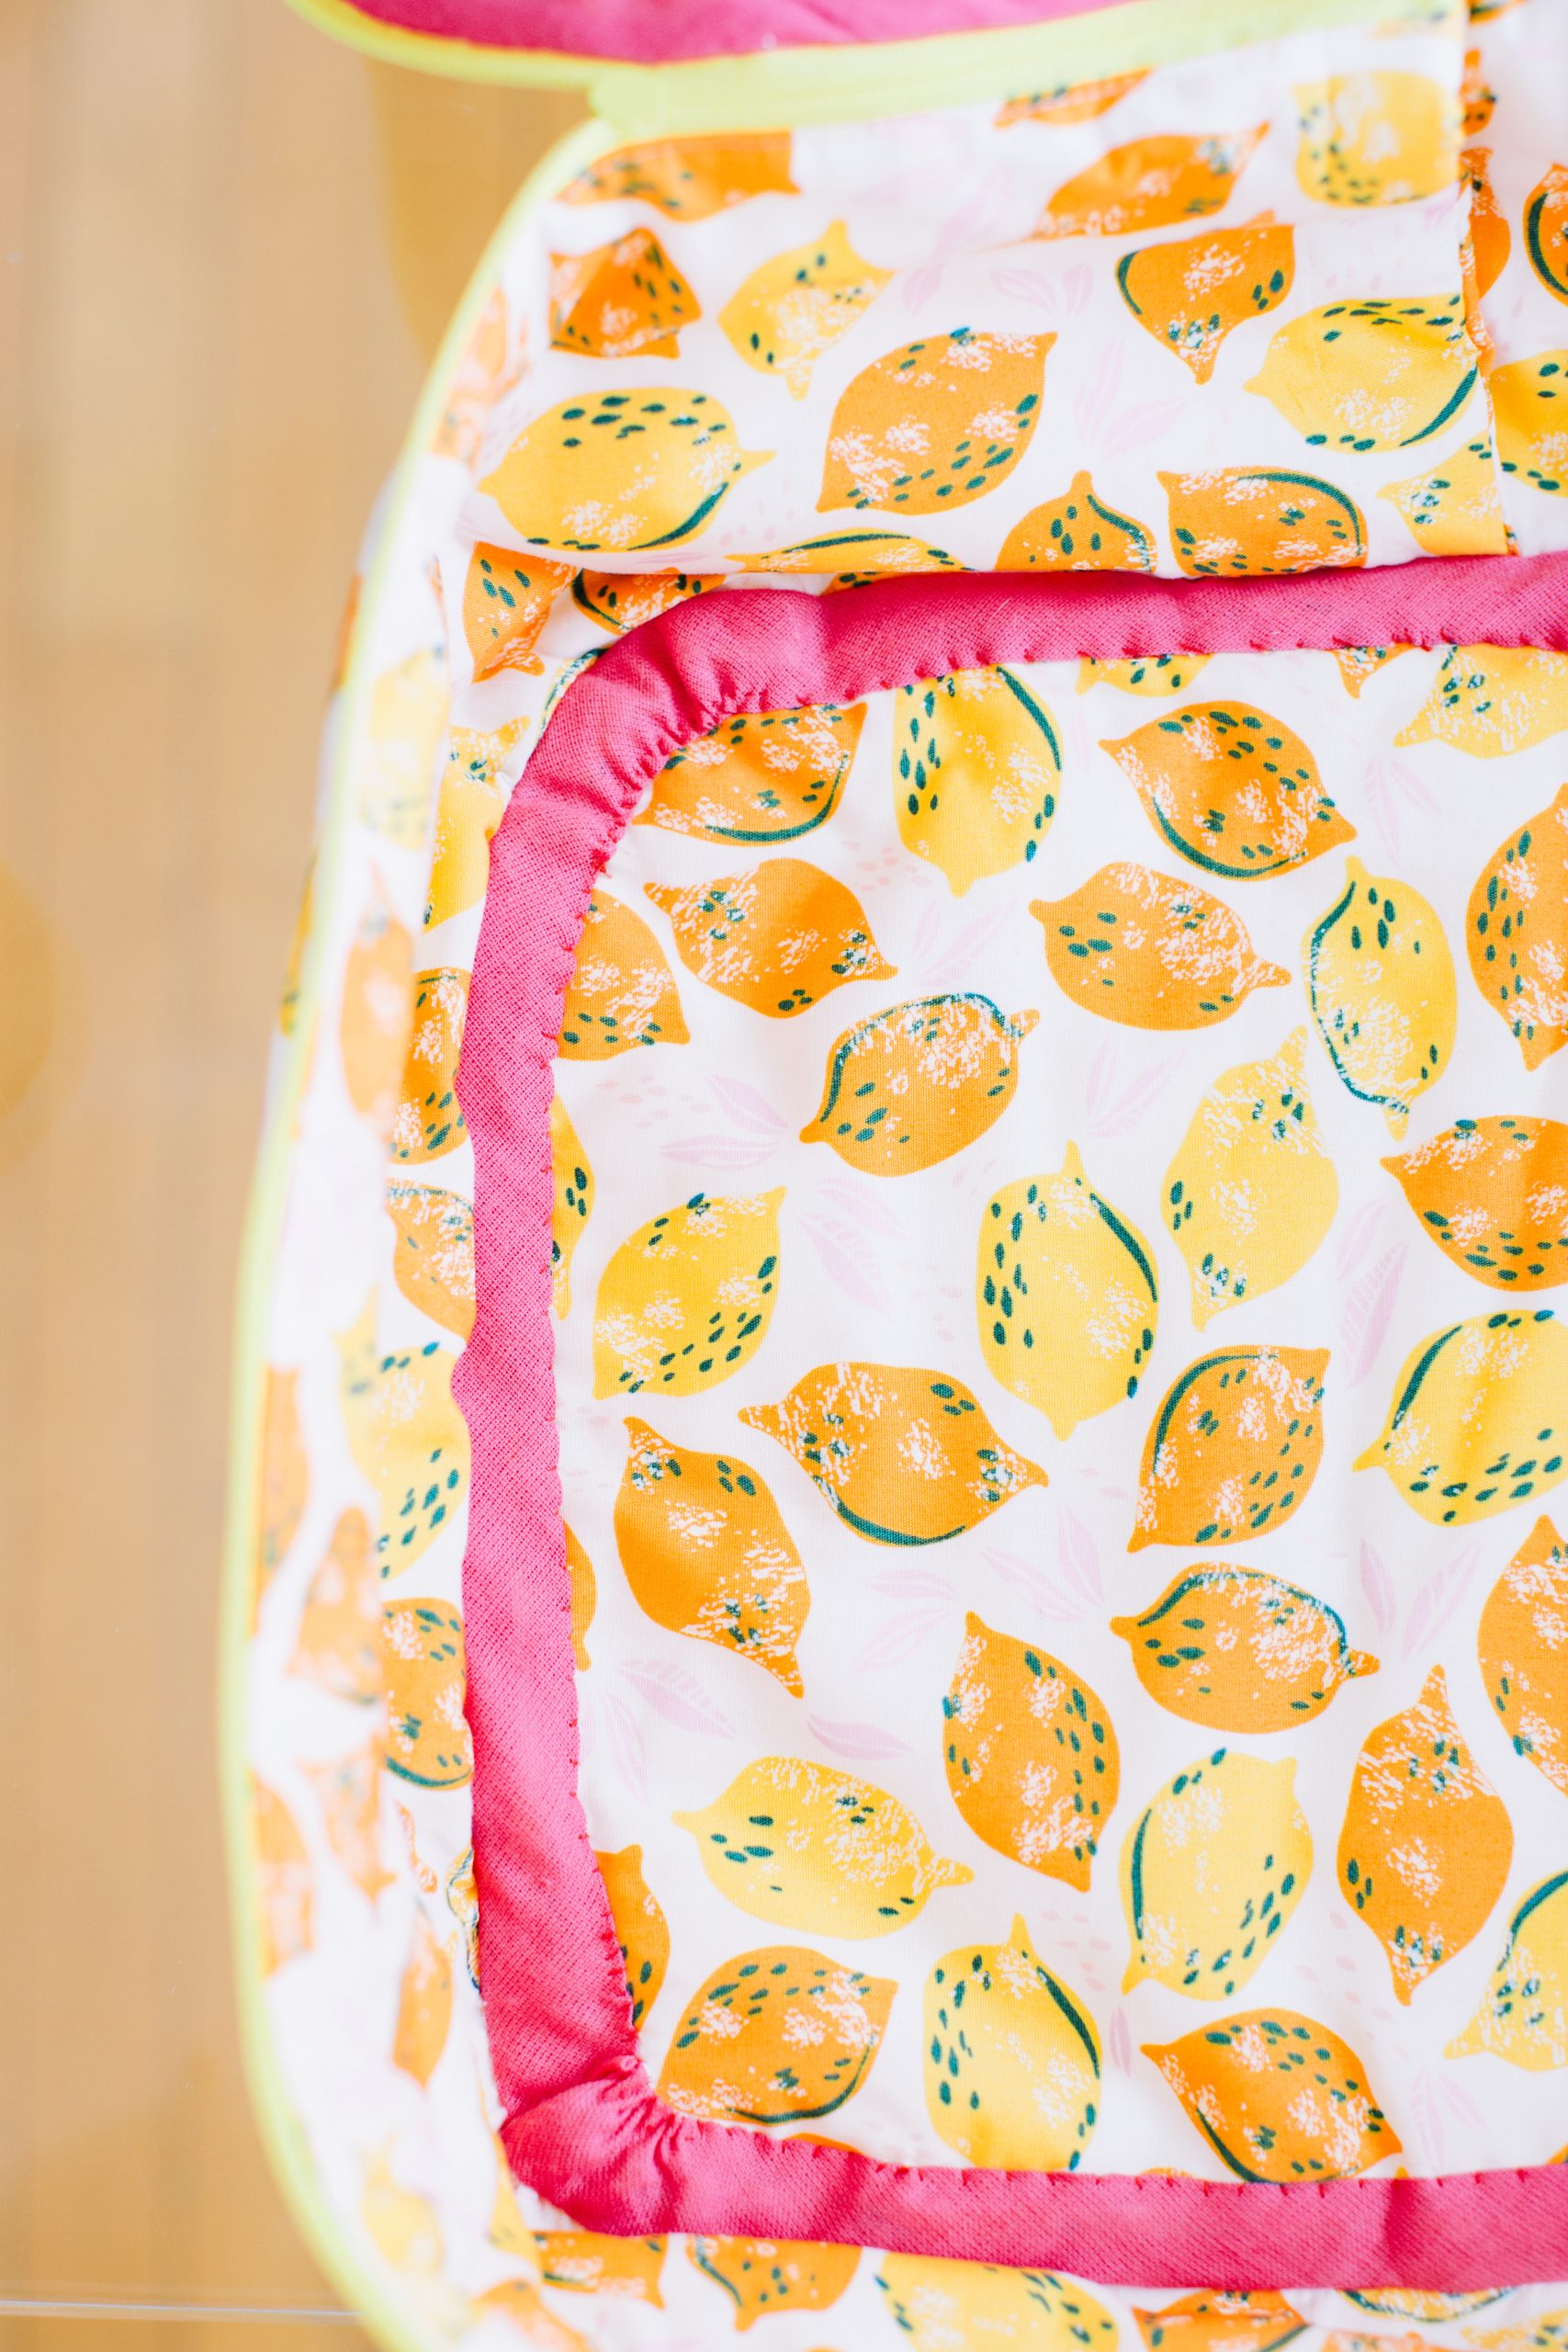
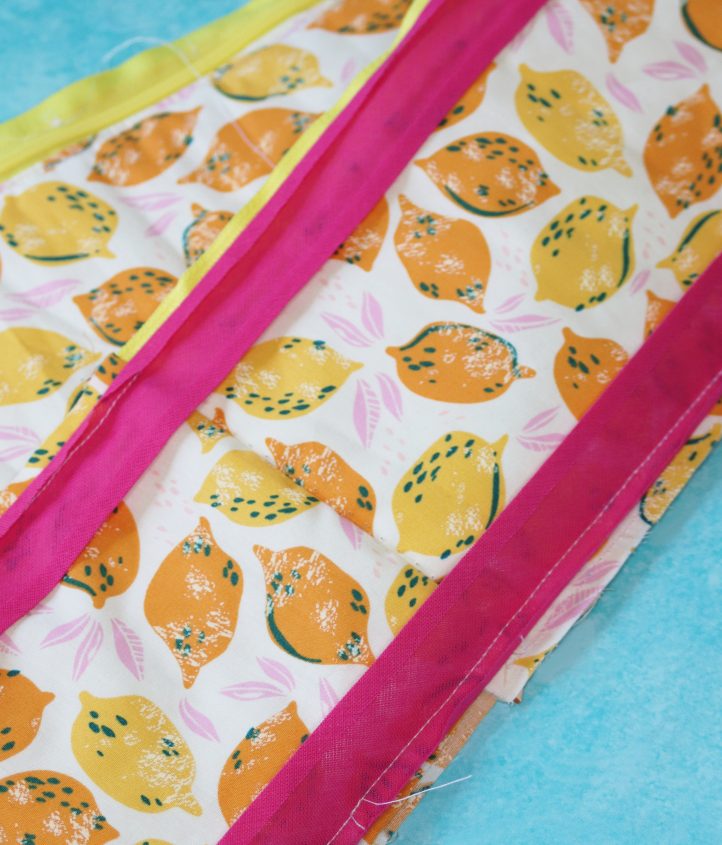
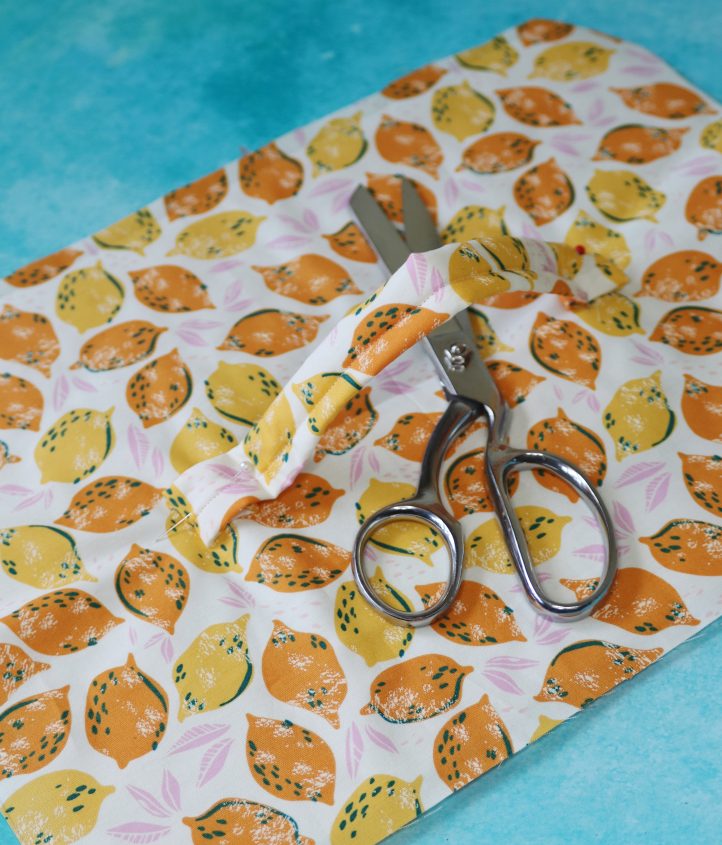
- Turn the Side Panel so the lining side is facing out. Cut two 46” lengths of bias tape and unfold one edge of each one. Position the unfolded edge of the tape along the top and bottom edges of the Side Panel. Pin, then machine stitch into place with a 1/4” seam allowance, folding the cut edges of the bias tape over to the wrong side by 1/4” and overlapping them slightly in the middle of the Back Panel piece for a neat finish.
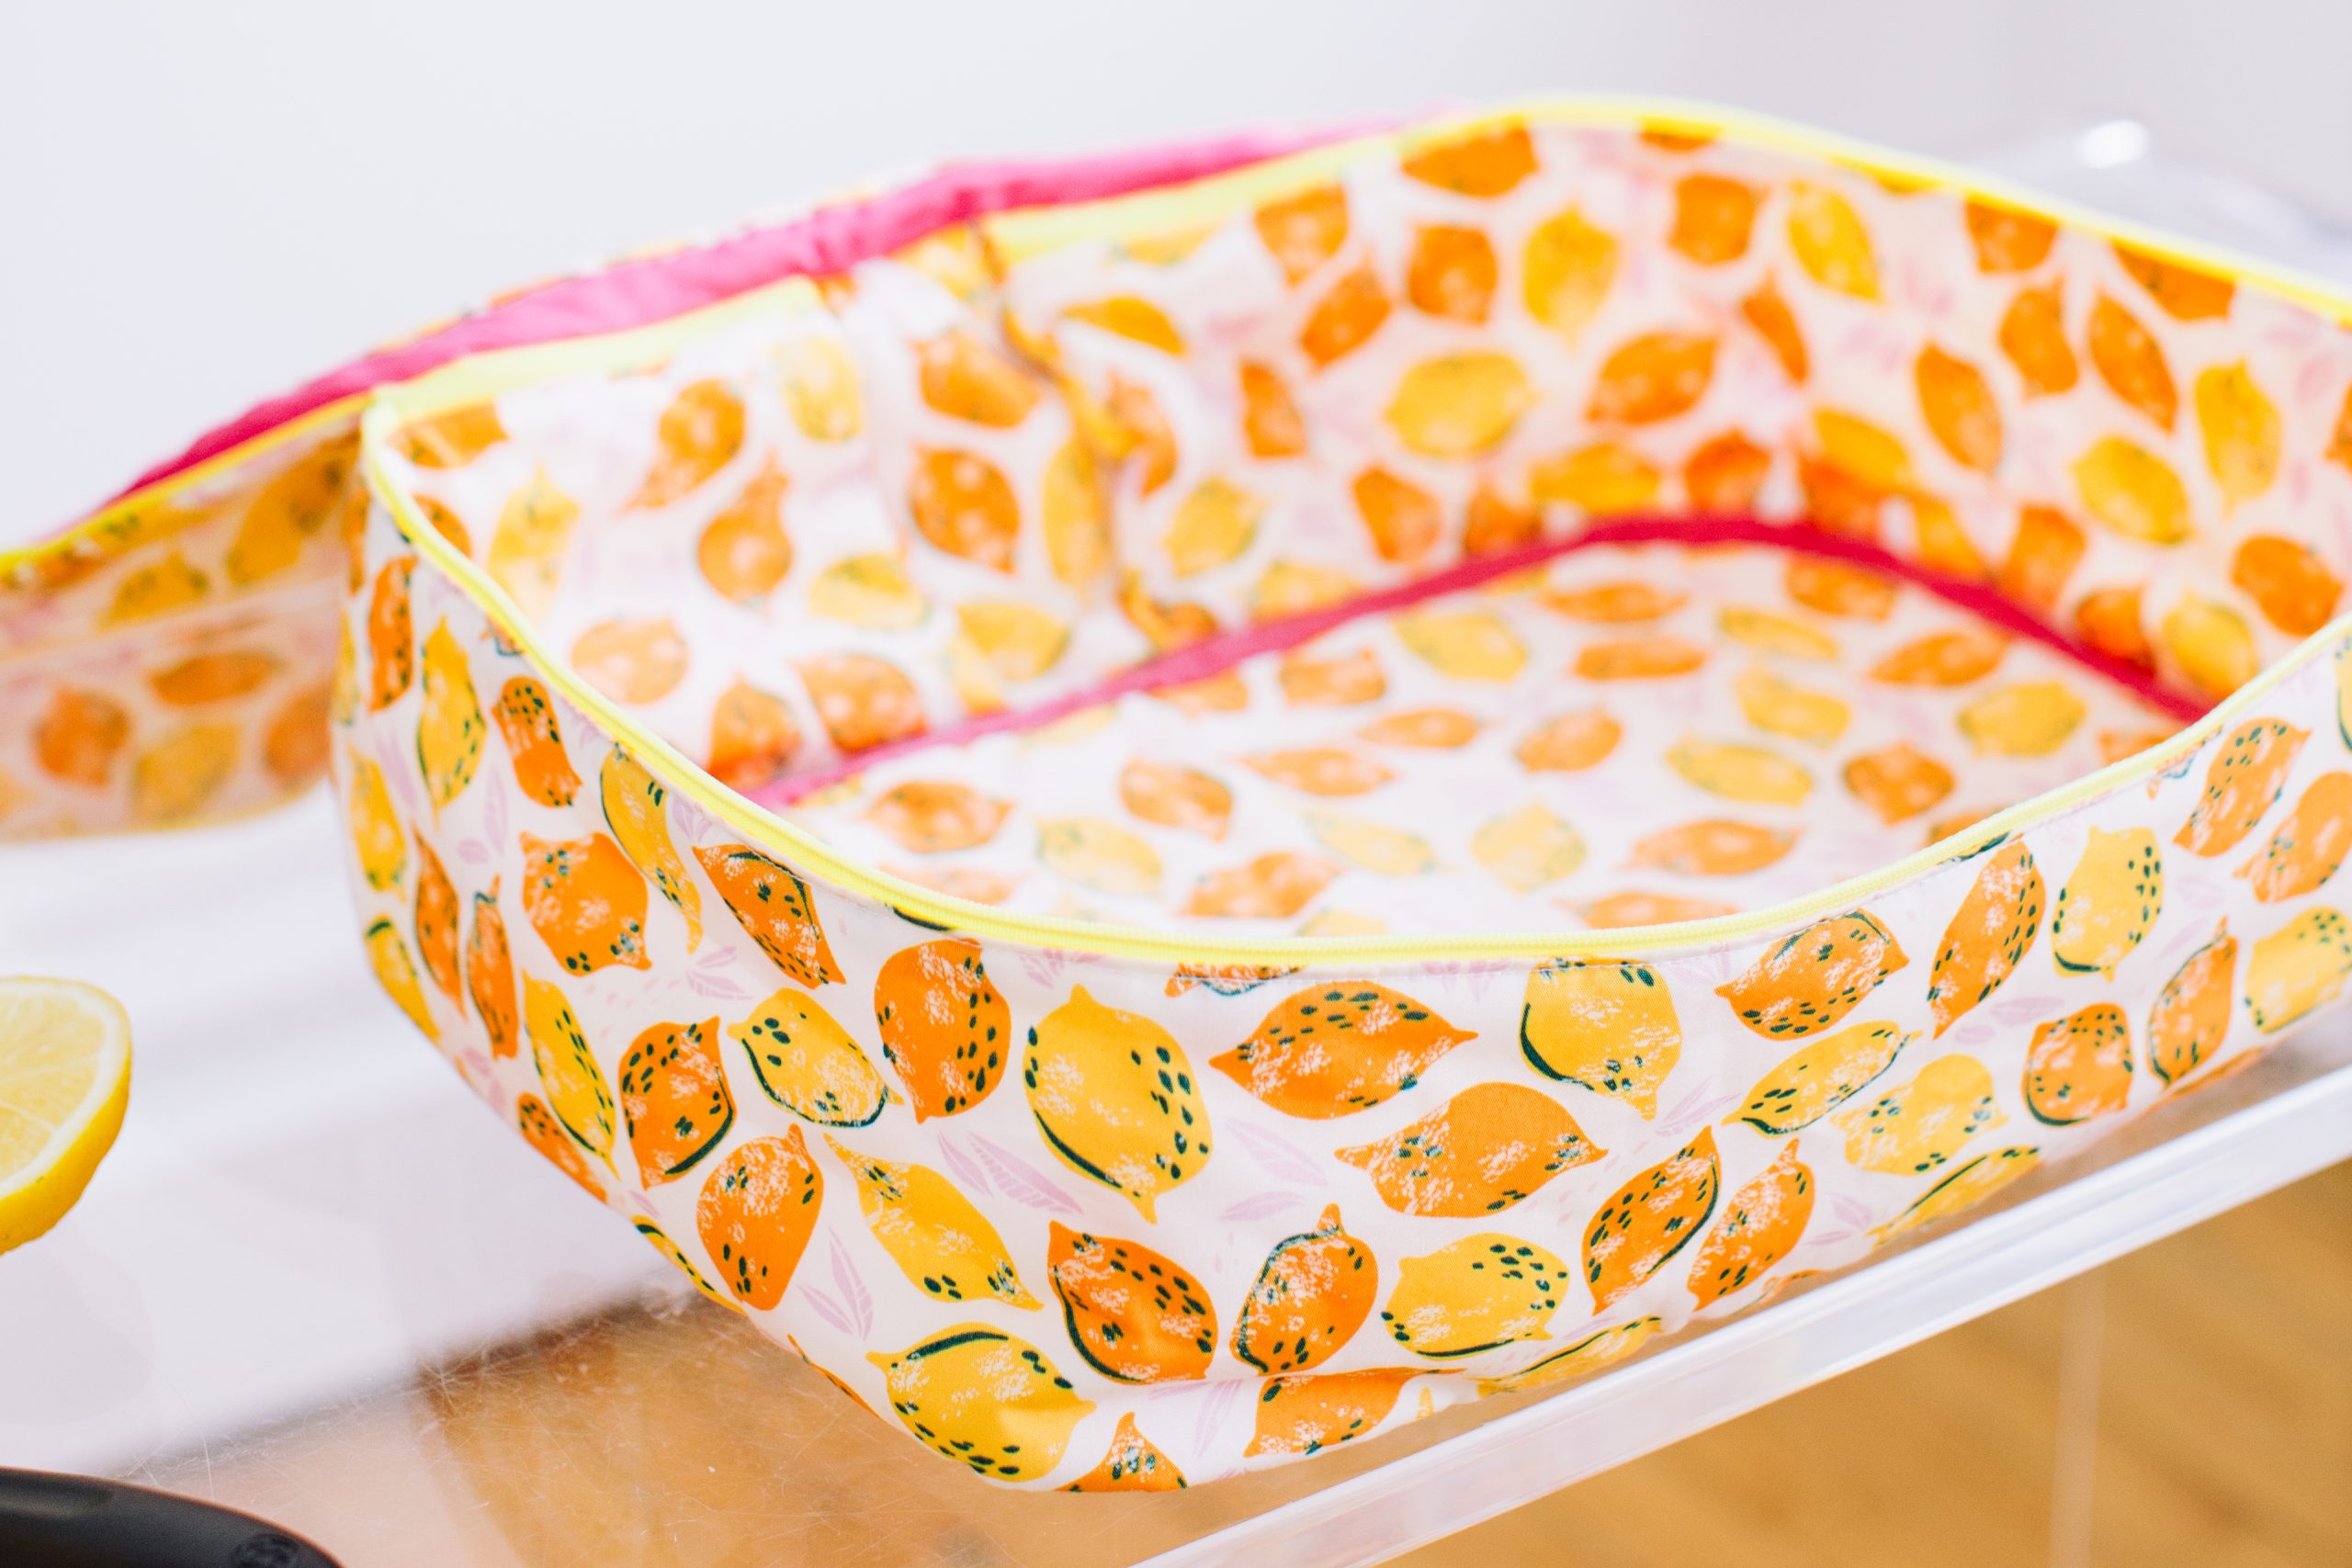
- Cut out your Base and Lid pieces. For each one, cut two 11 1/2” x 14 1/2” pieces from your fabric, and two 10 1/2” x 13 1/2” pieces from your batting. Fuse the batting pieces to the wrong side of each fabric piece, positioning them in the middle as before. Round the corners of each piece off slightly, by drawing around a glass or a small bowl. Place two of the fabric pieces together with right sides facing out, and stitch around the edge with a 1/4” seam allowance to hold them together. This is your Base. The two remaining pieces will be used to make the Lid.
- Make a strap. From both fabric and batting, cut a 2 1/2” x 12” rectangle. Fuse the batting to the wrong side of the fabric, then fold one of the long edges over to the wrong side by 1/2”. Fold the same long edge over again twice to make a strap, with the long raw edge concealed beneath the folded one. Hold in place with clips, then machine sew along folded edge to hold everything in place.
- Add your strap. Take your outer Lid piece and lay it out with right side facing up. Measure and mark the center of it. Take your strap and fold the two short edges over twice, once by 1/2” and then again by another 1”, to hide the raw edge within the fold. Pin the folded edges of the strap to the outer Lid, using the center point for positioning. Machine stitch into place, working an ‘X’ of stitches over each of the folded edges of the strap. Place the lining Lid piece together with the outer one (with right sides facing out), and stitch around the edges with a 1/4” seam allowance to hold them together.
- Construct the carrier. With the lining side still facing out, pin your Base piece to the bottom of the Side Panel. Work a straight machine all around the edge, working through all the layers, including the bias tape (there should be no zipper tape on this side). Repeat to add the Lid to the top edge (working through the opposite side of the zipper tape), making sure the outer Lid is facing inwards and the lining is facing out, and that the zipper is left slightly open.
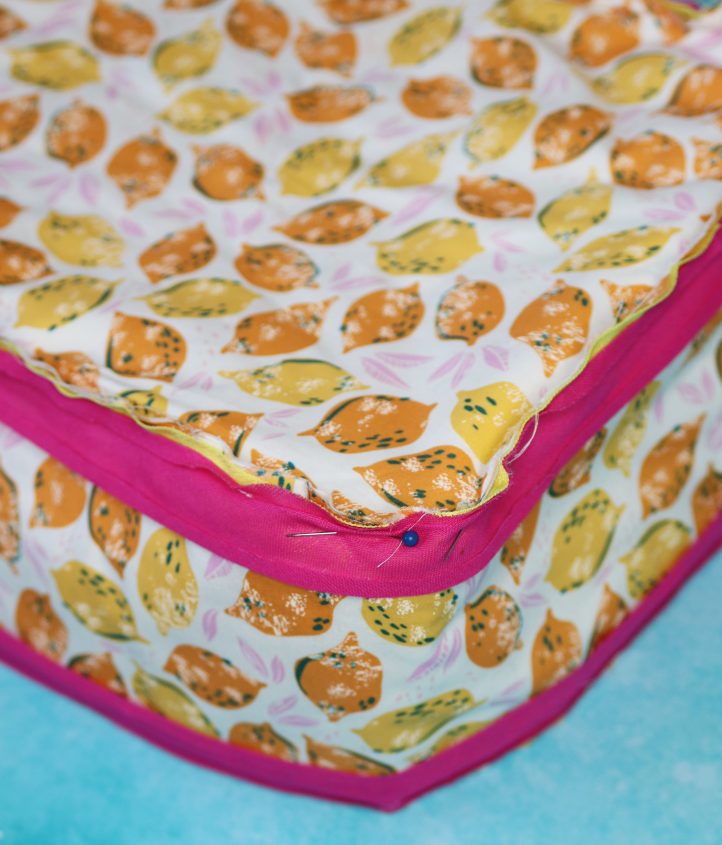
- Turn the finished carrier right sides out through the open zipper and open the Lid out. Fold the remaining open edge of the bias tape over the top and bottom seams – this should conceal the joins in the fabric and neaten everything up. Pin them in place, then hand stitch. You may need to work a small gathering stitch around each inner corner to get a perfect fit.