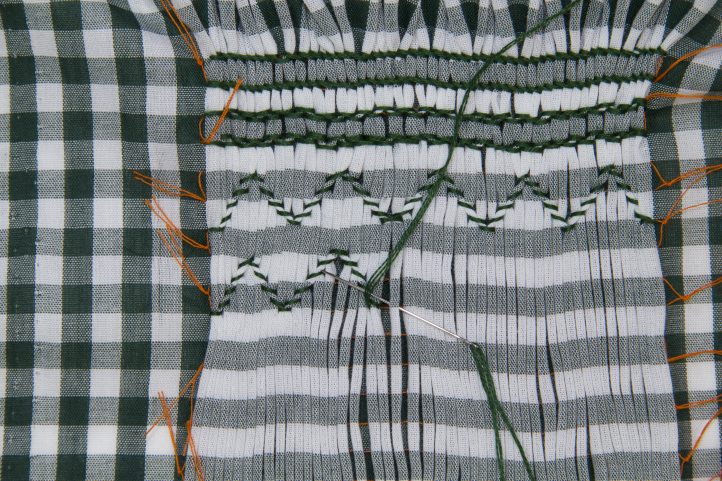
Wrap up your tour through the ins and outs of smocking by conquering the wave stitch! In the final part of our Smocking 101 series, you’ll learn how to create the wave stitch, also known as the chevron stitch. Resembling a zigzag, this embroidery stitch not only creates an eye-catching pattern on your gathered fabric, but it also allows your fabric to stretch without losing your gathers. Confidently add some beautiful smocking to a homemade dress or blouse with our educational smocking series.
Smocking Embroidery — Wave Stitch/Chevron Stitch
Wave stitch has many variations, depending on how many stitches are created between the top and bottom of the wave. Two sets of wave stitches can be worked in a repetitive pattern, as it is here, to form mountains and valleys or in an offset, mirrored pattern to form diamonds. Generally, wave stitch is worked between two rows of gathering stitches but here it is worked between three rows.
How to Create the Wave Stitch
- Working on the right side of the fabric, bring the needle up through the left side of the first reed, above the gathering stitches, at half to a third of the depth of the reed. Bring the needle and thread to the right and, with the needle pointing left, insert it into the right side of the second reed at the same depth. Bring your needle and thread out on the left side of the second reed, just above the standing thread. Pull the thread through.
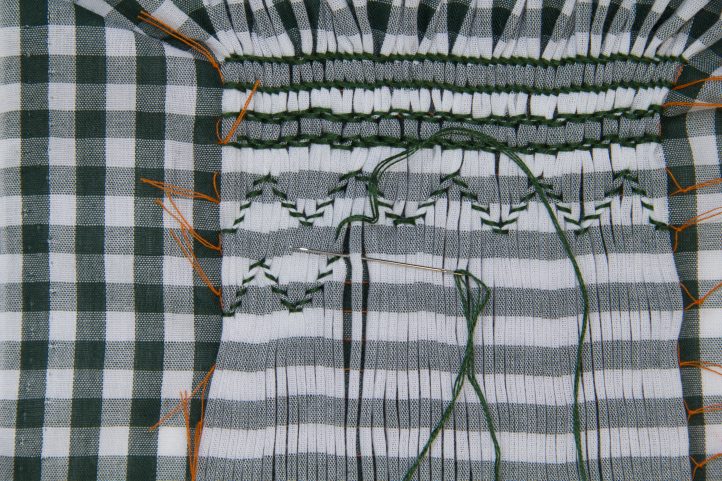
- Move right over the reed you just exited. On the next reed, halfway between the gathering rows, insert the needle and thread and pull it through. Repeat this step, moving over two reeds and down an equal amount until you reach the bottom of the wave.
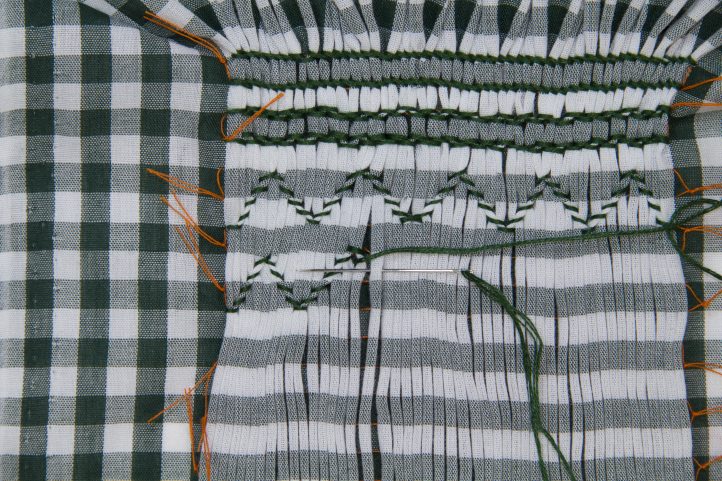
- At the bottom of the wave, sew two reeds together with the needle and thread, coming out between the two reeds, as in Step 1.
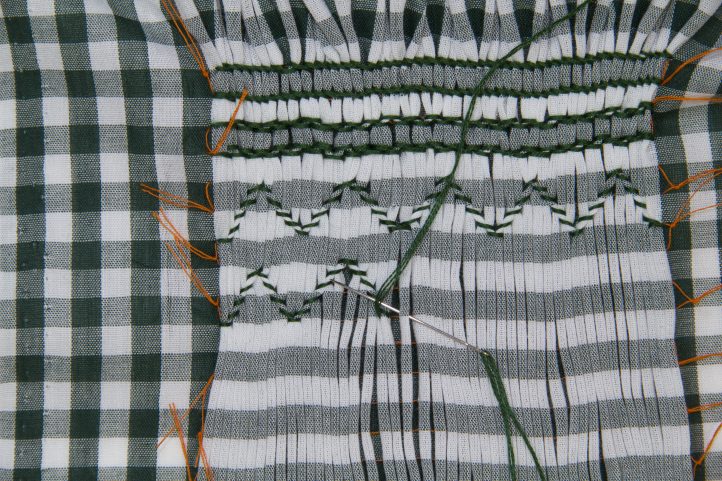
- Repeat Step 2, moving over two reeds and up an equal amount until you reach the top of the wave. Repeat Steps 1–4, moving up and down across the row.
