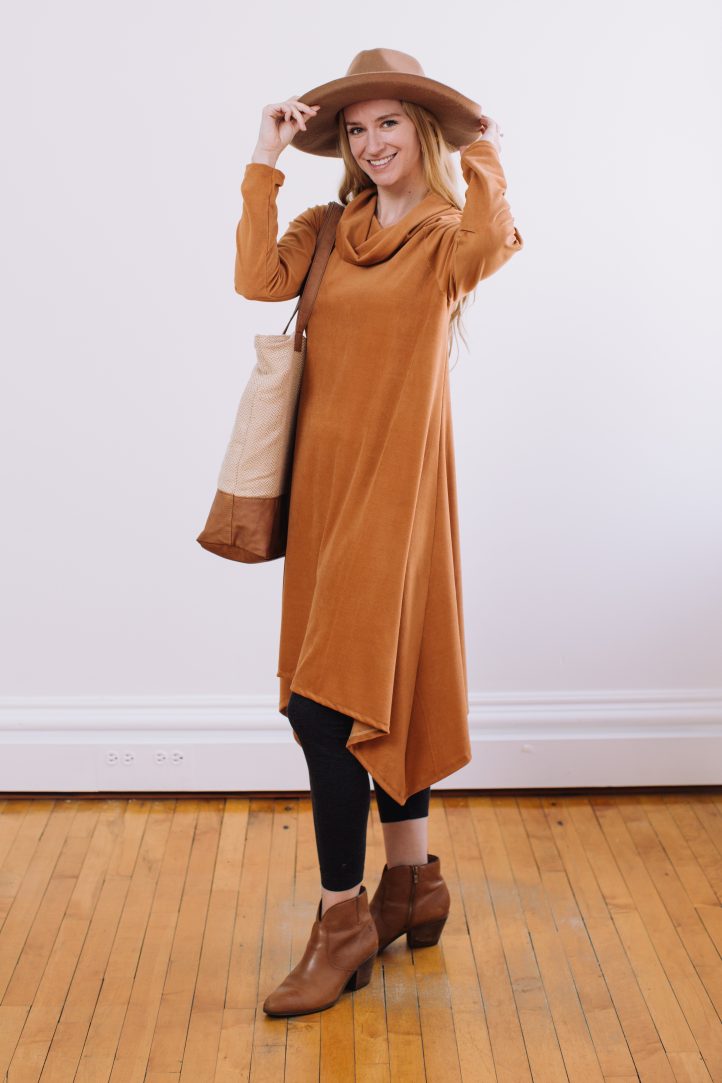
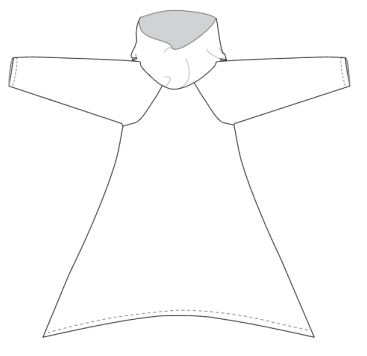
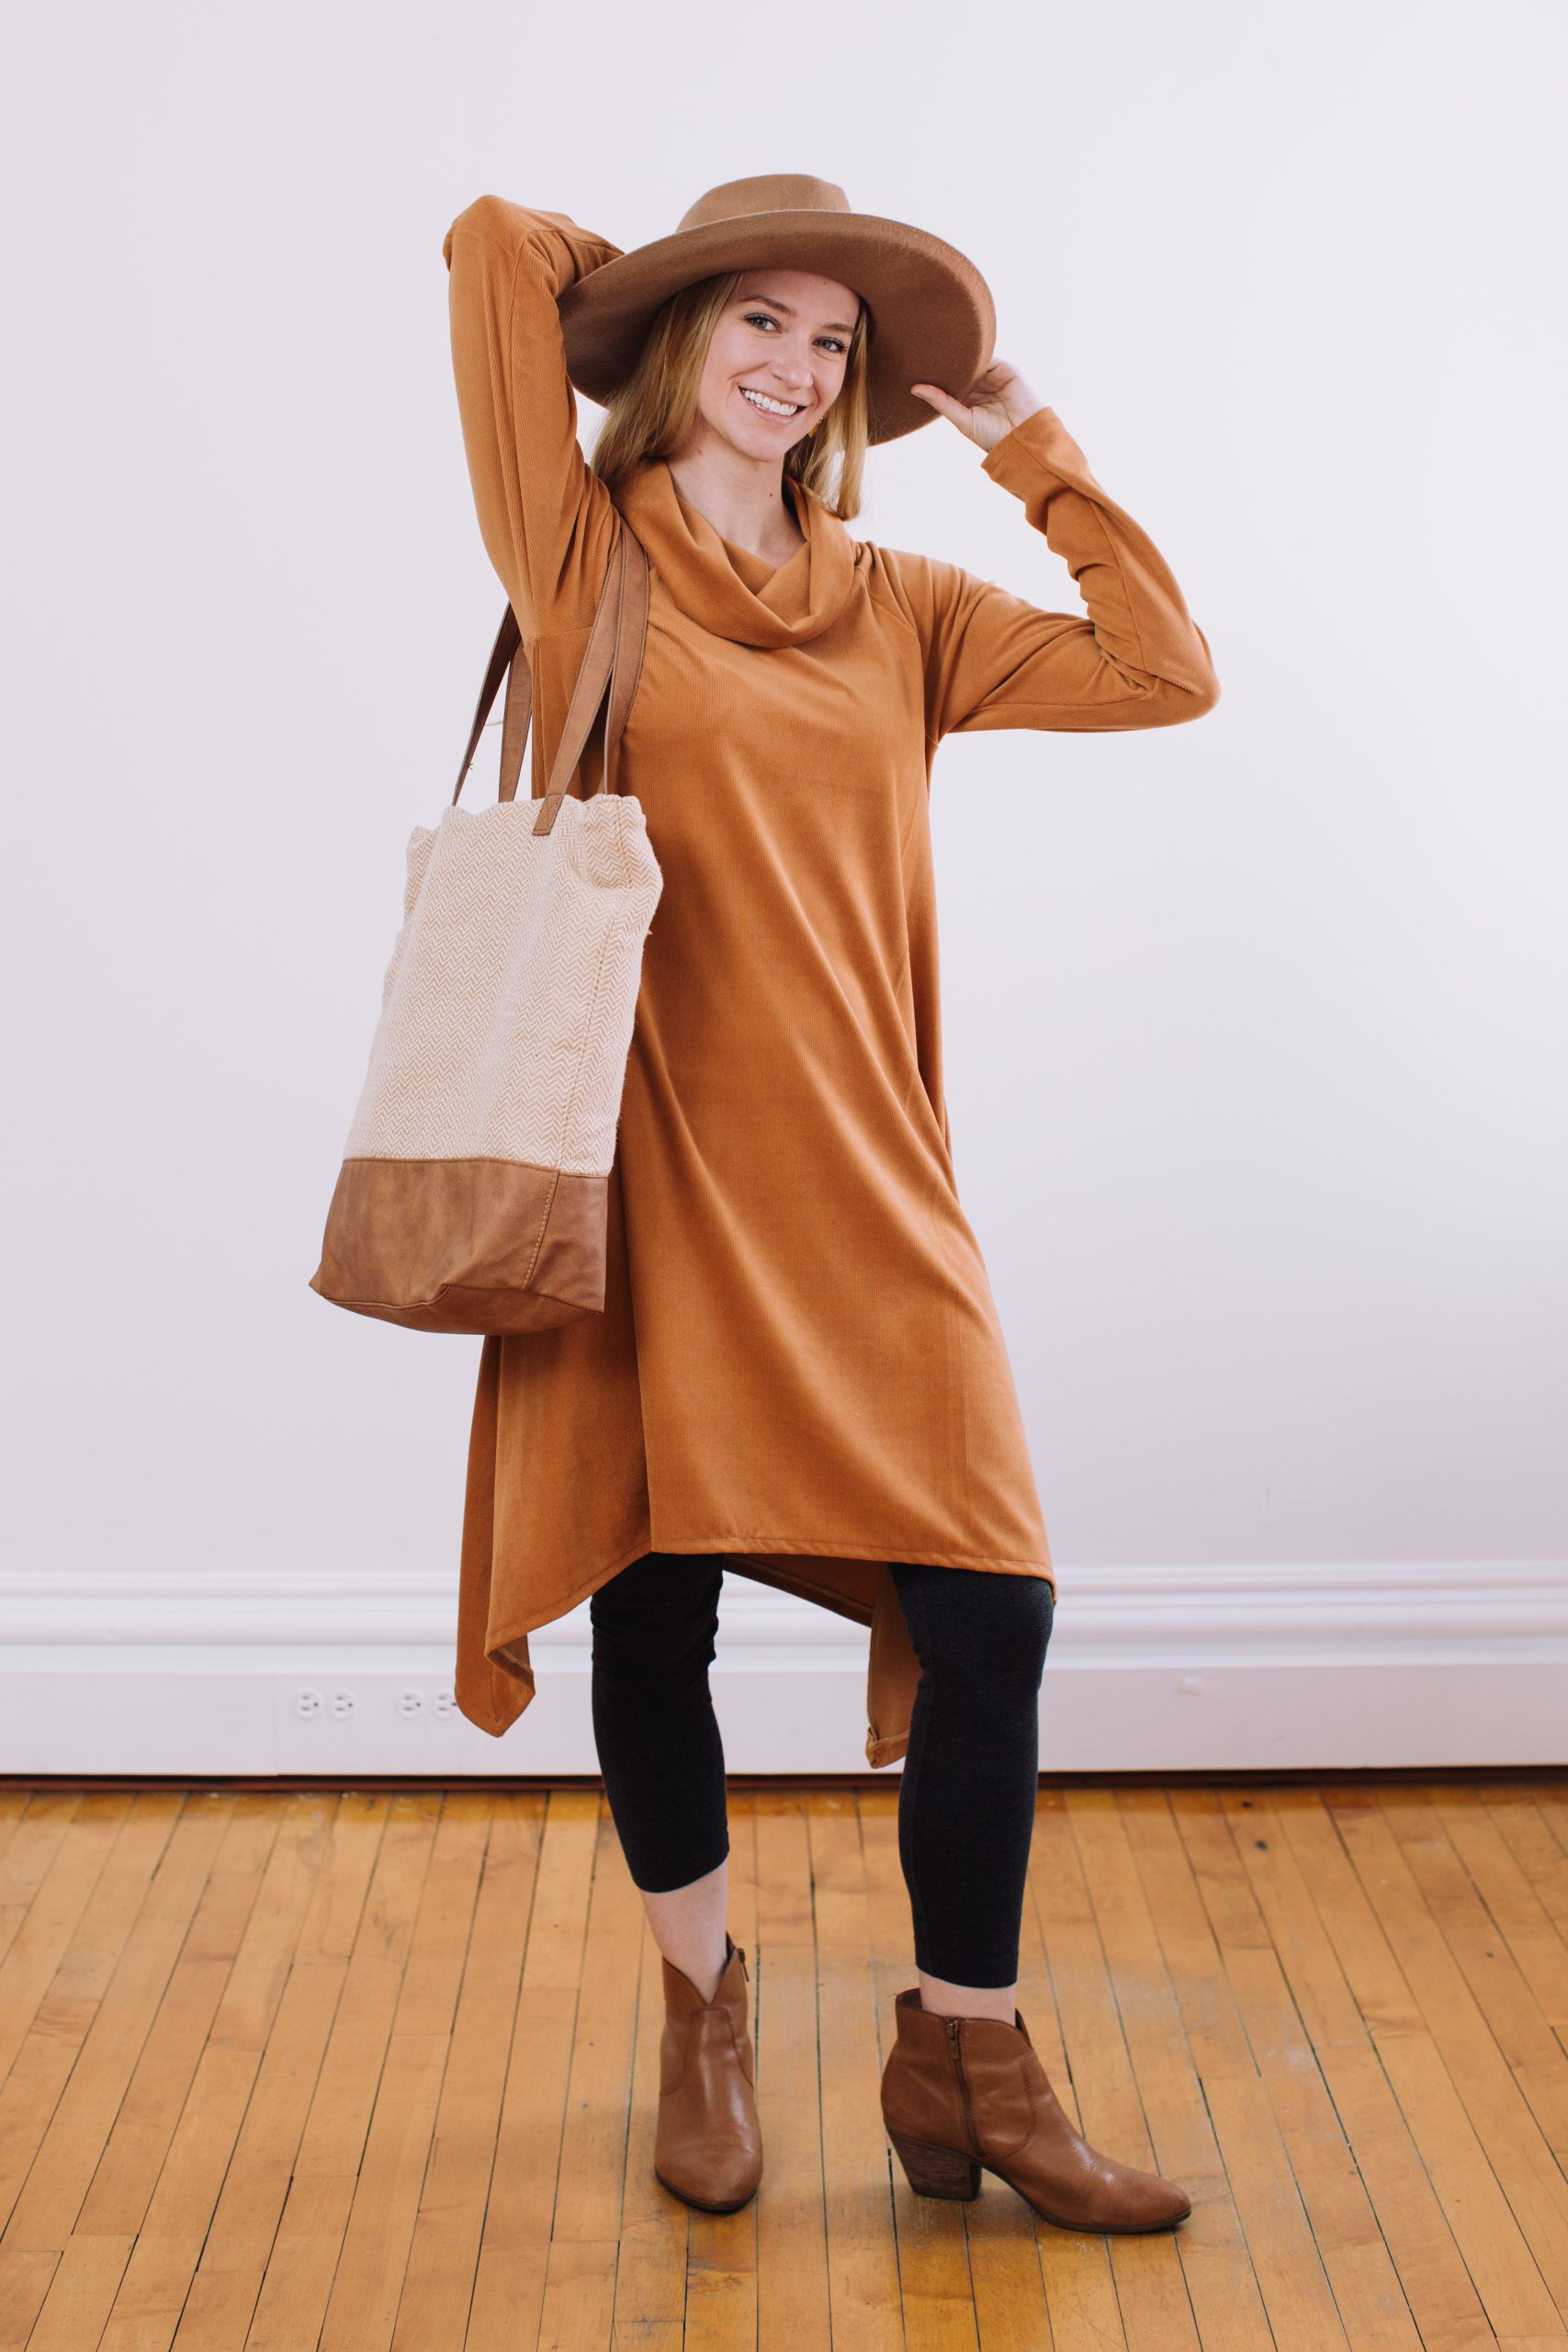
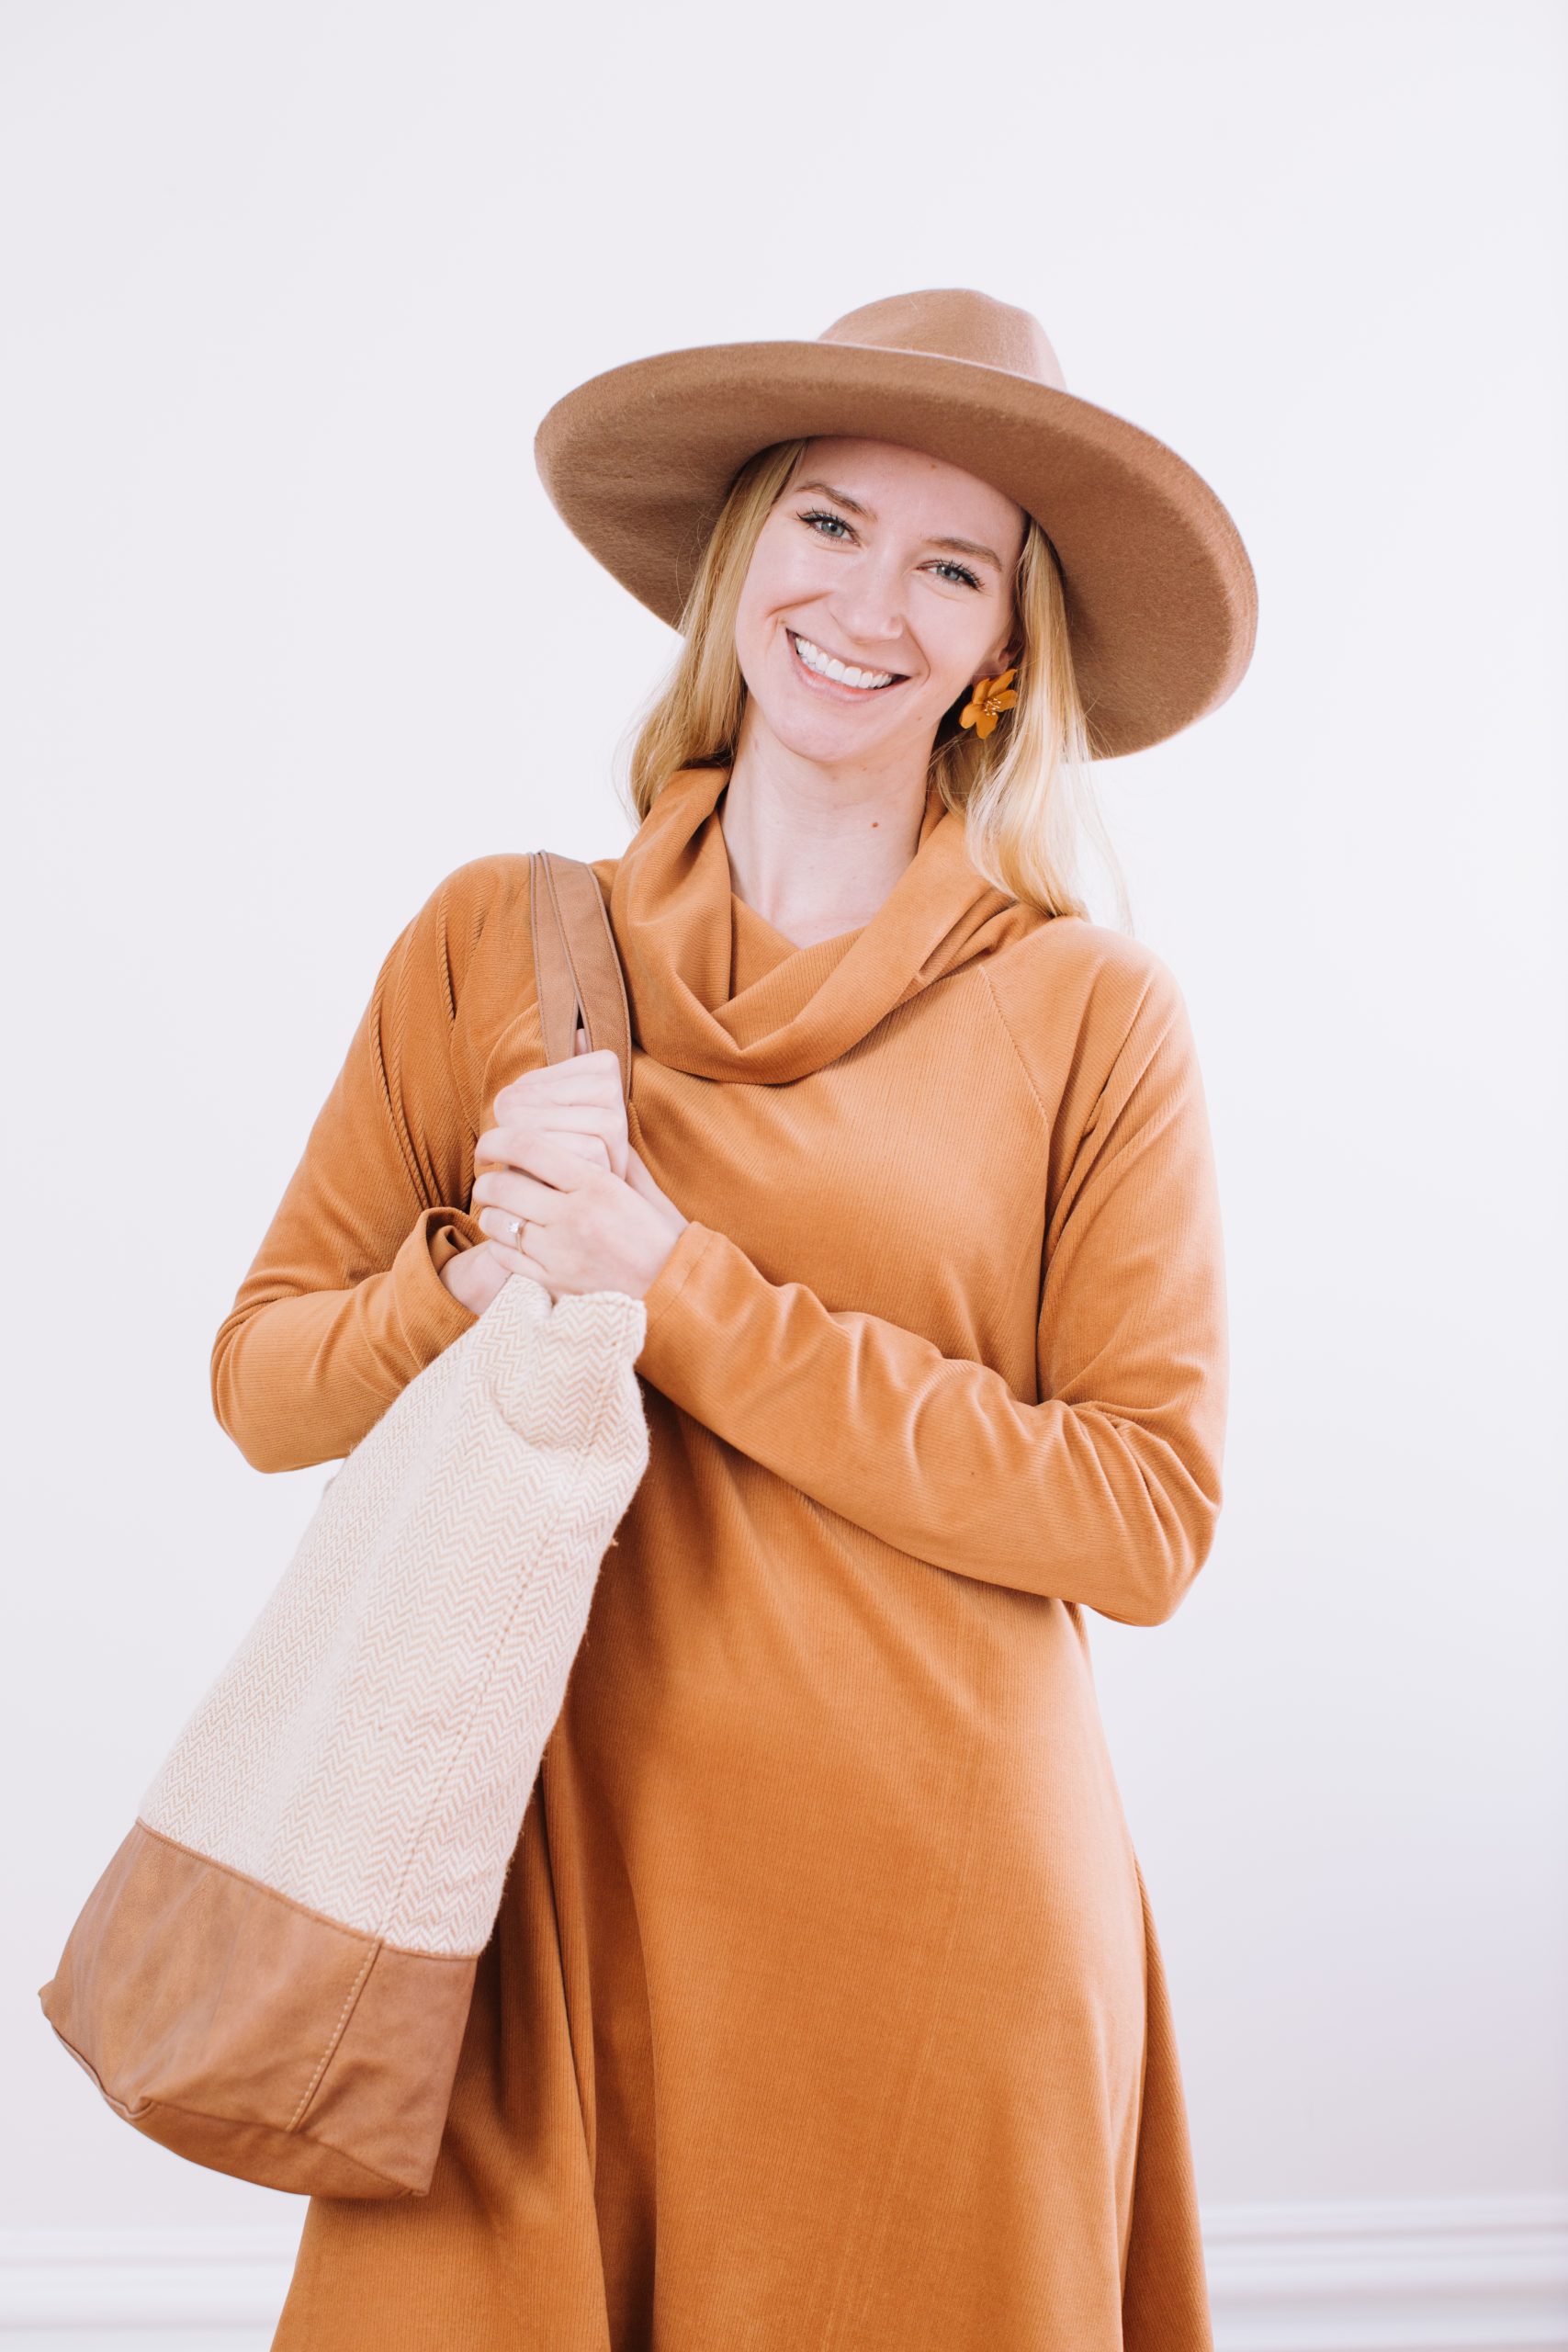
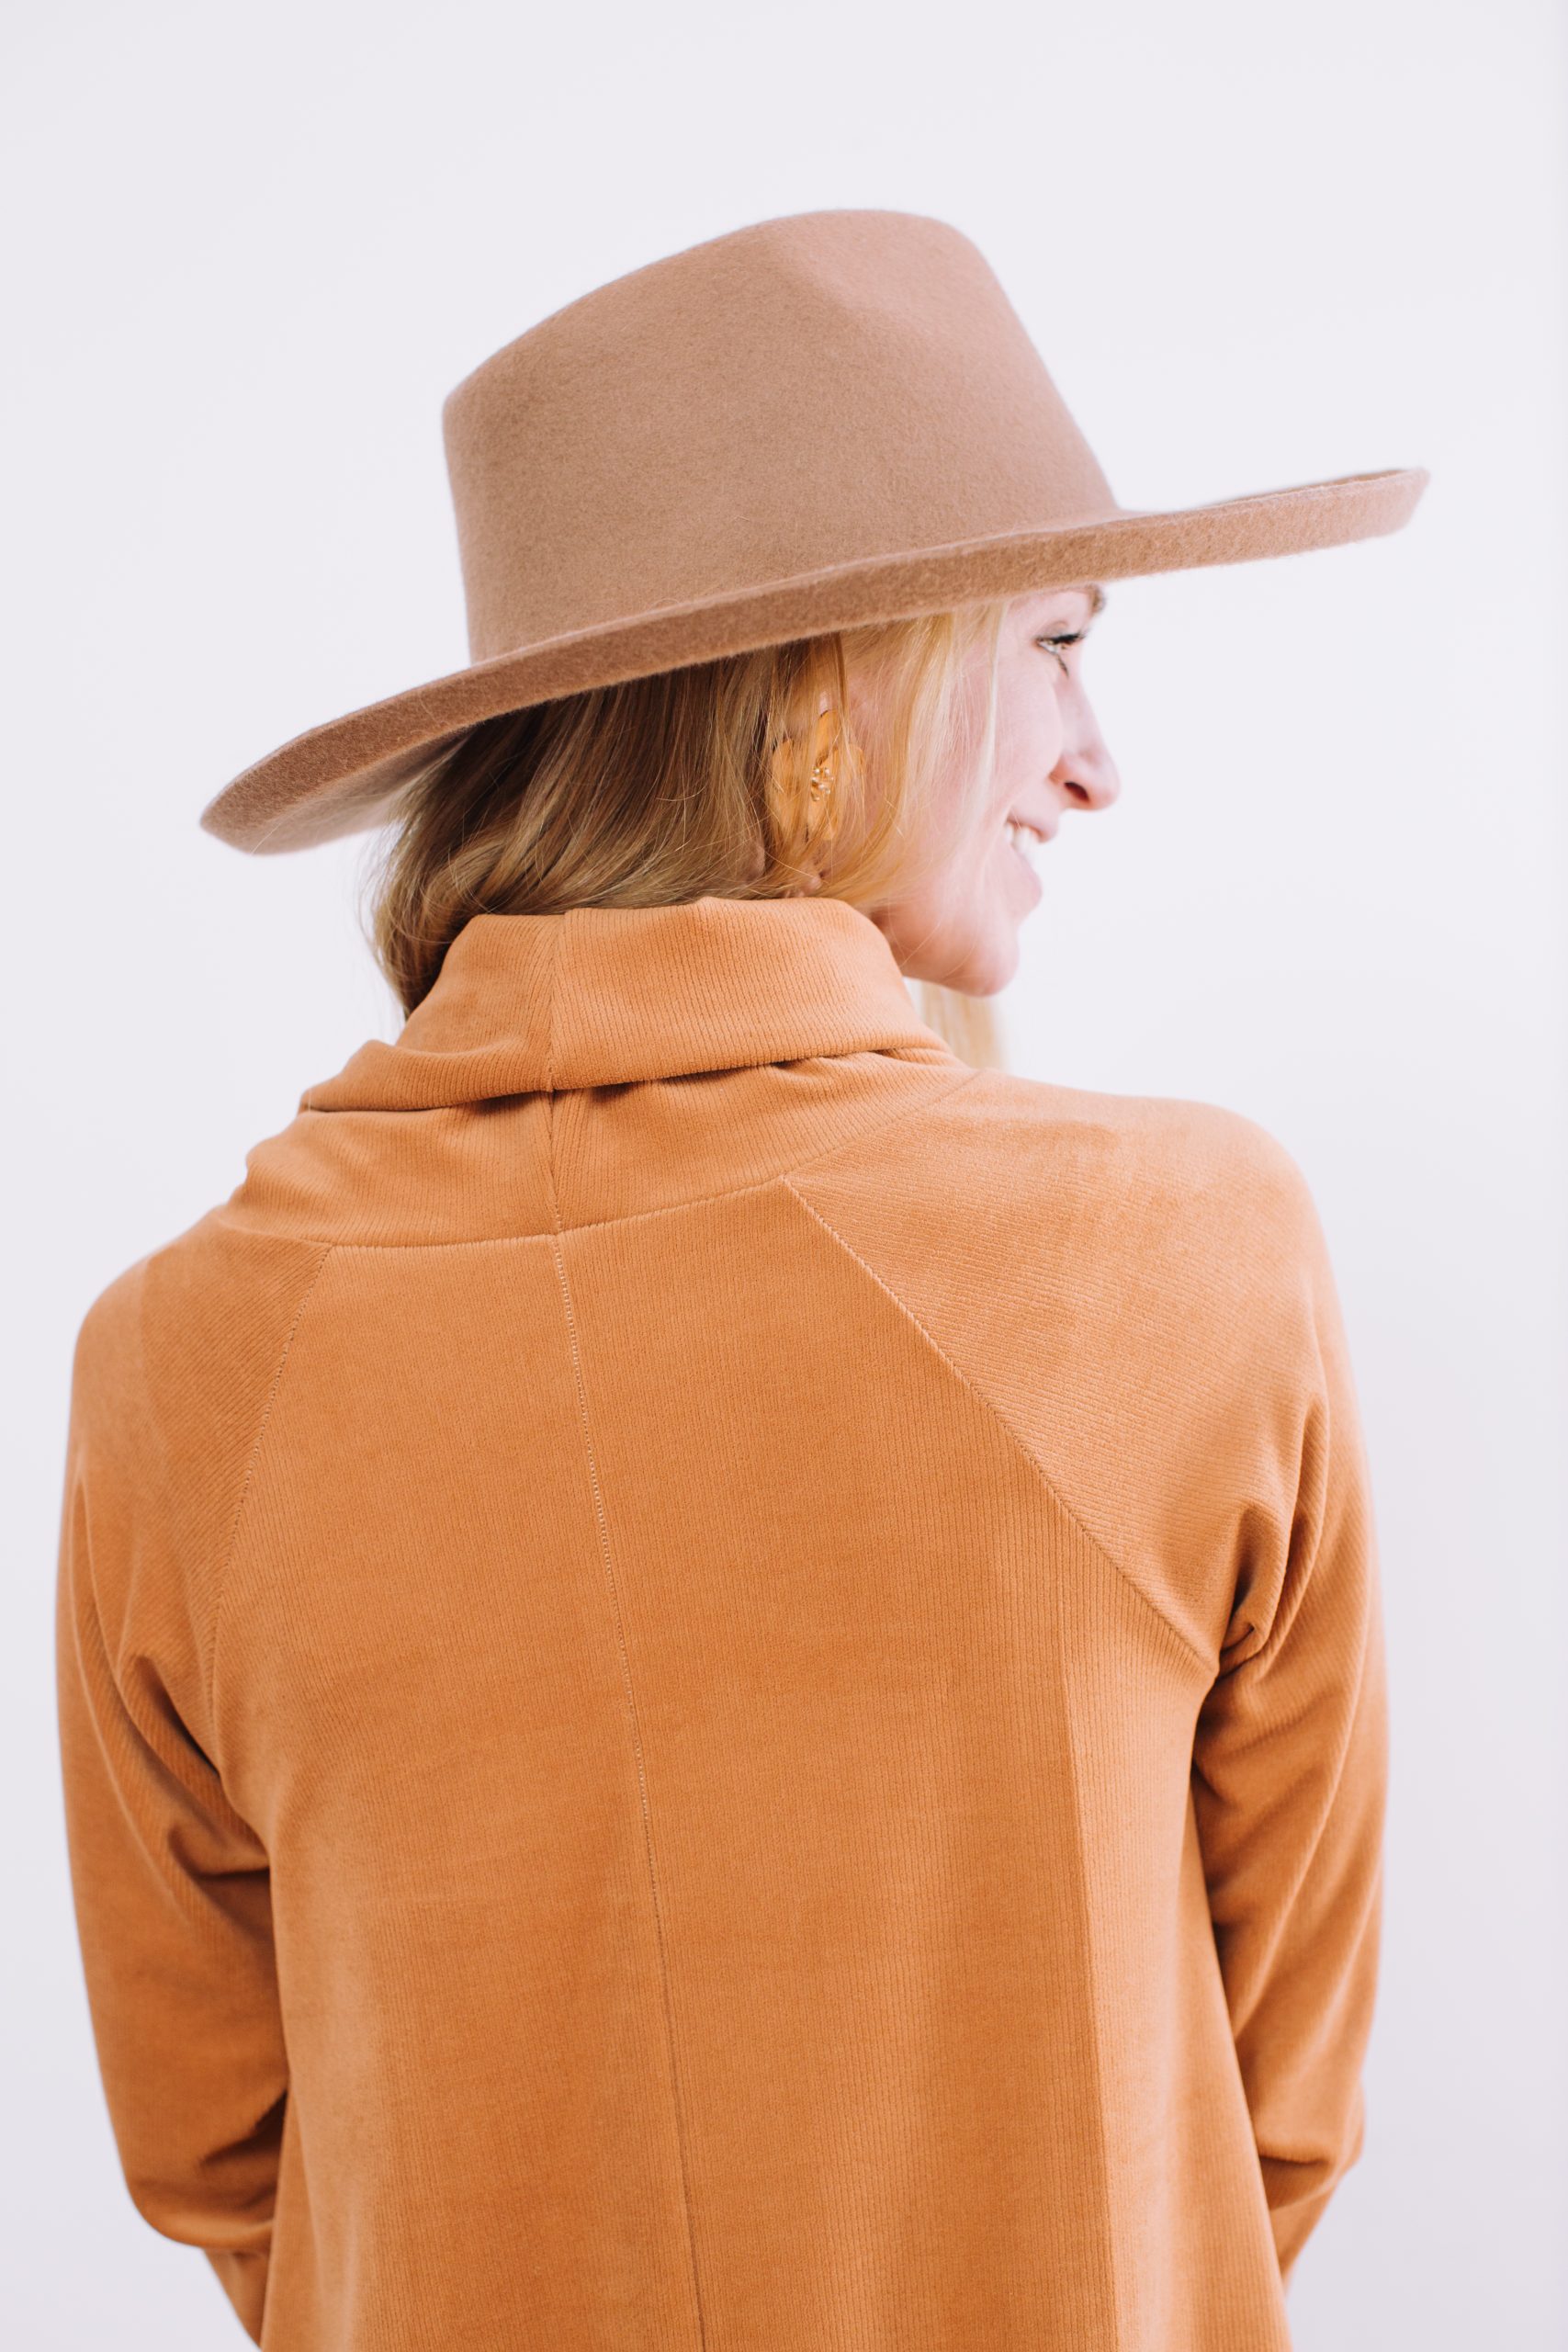
Stay cozy and look ultra chic with this cowl neck dress pattern that’s sure to be your new go-to fall outfit. Tights and boots season is finally upon us, which is why we’re so excited to share this handkerchief hem dress pattern. Featuring a drapey cowl neck and loose, flowy fit, this autumn dress pattern is designed to be made in rich fall colors like camel, burgundy or chocolate and can be sewn in soft fabrics like French terry and rib jersey.
Skill Level: Advanced Beginner/Intermediate
Pattern Seam Allowances Included:
- All seams = 3/8 inch (.95 cm)
- Hems = 5/8 inch (1.59 cm)
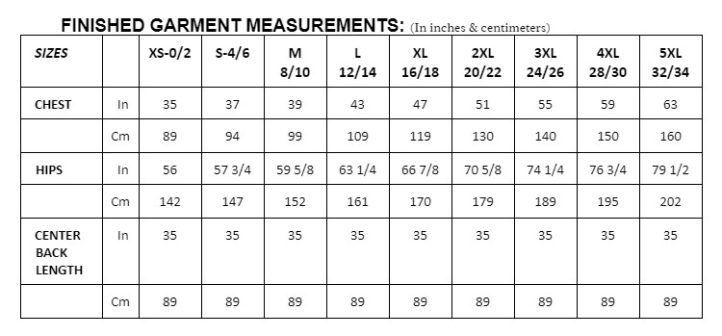
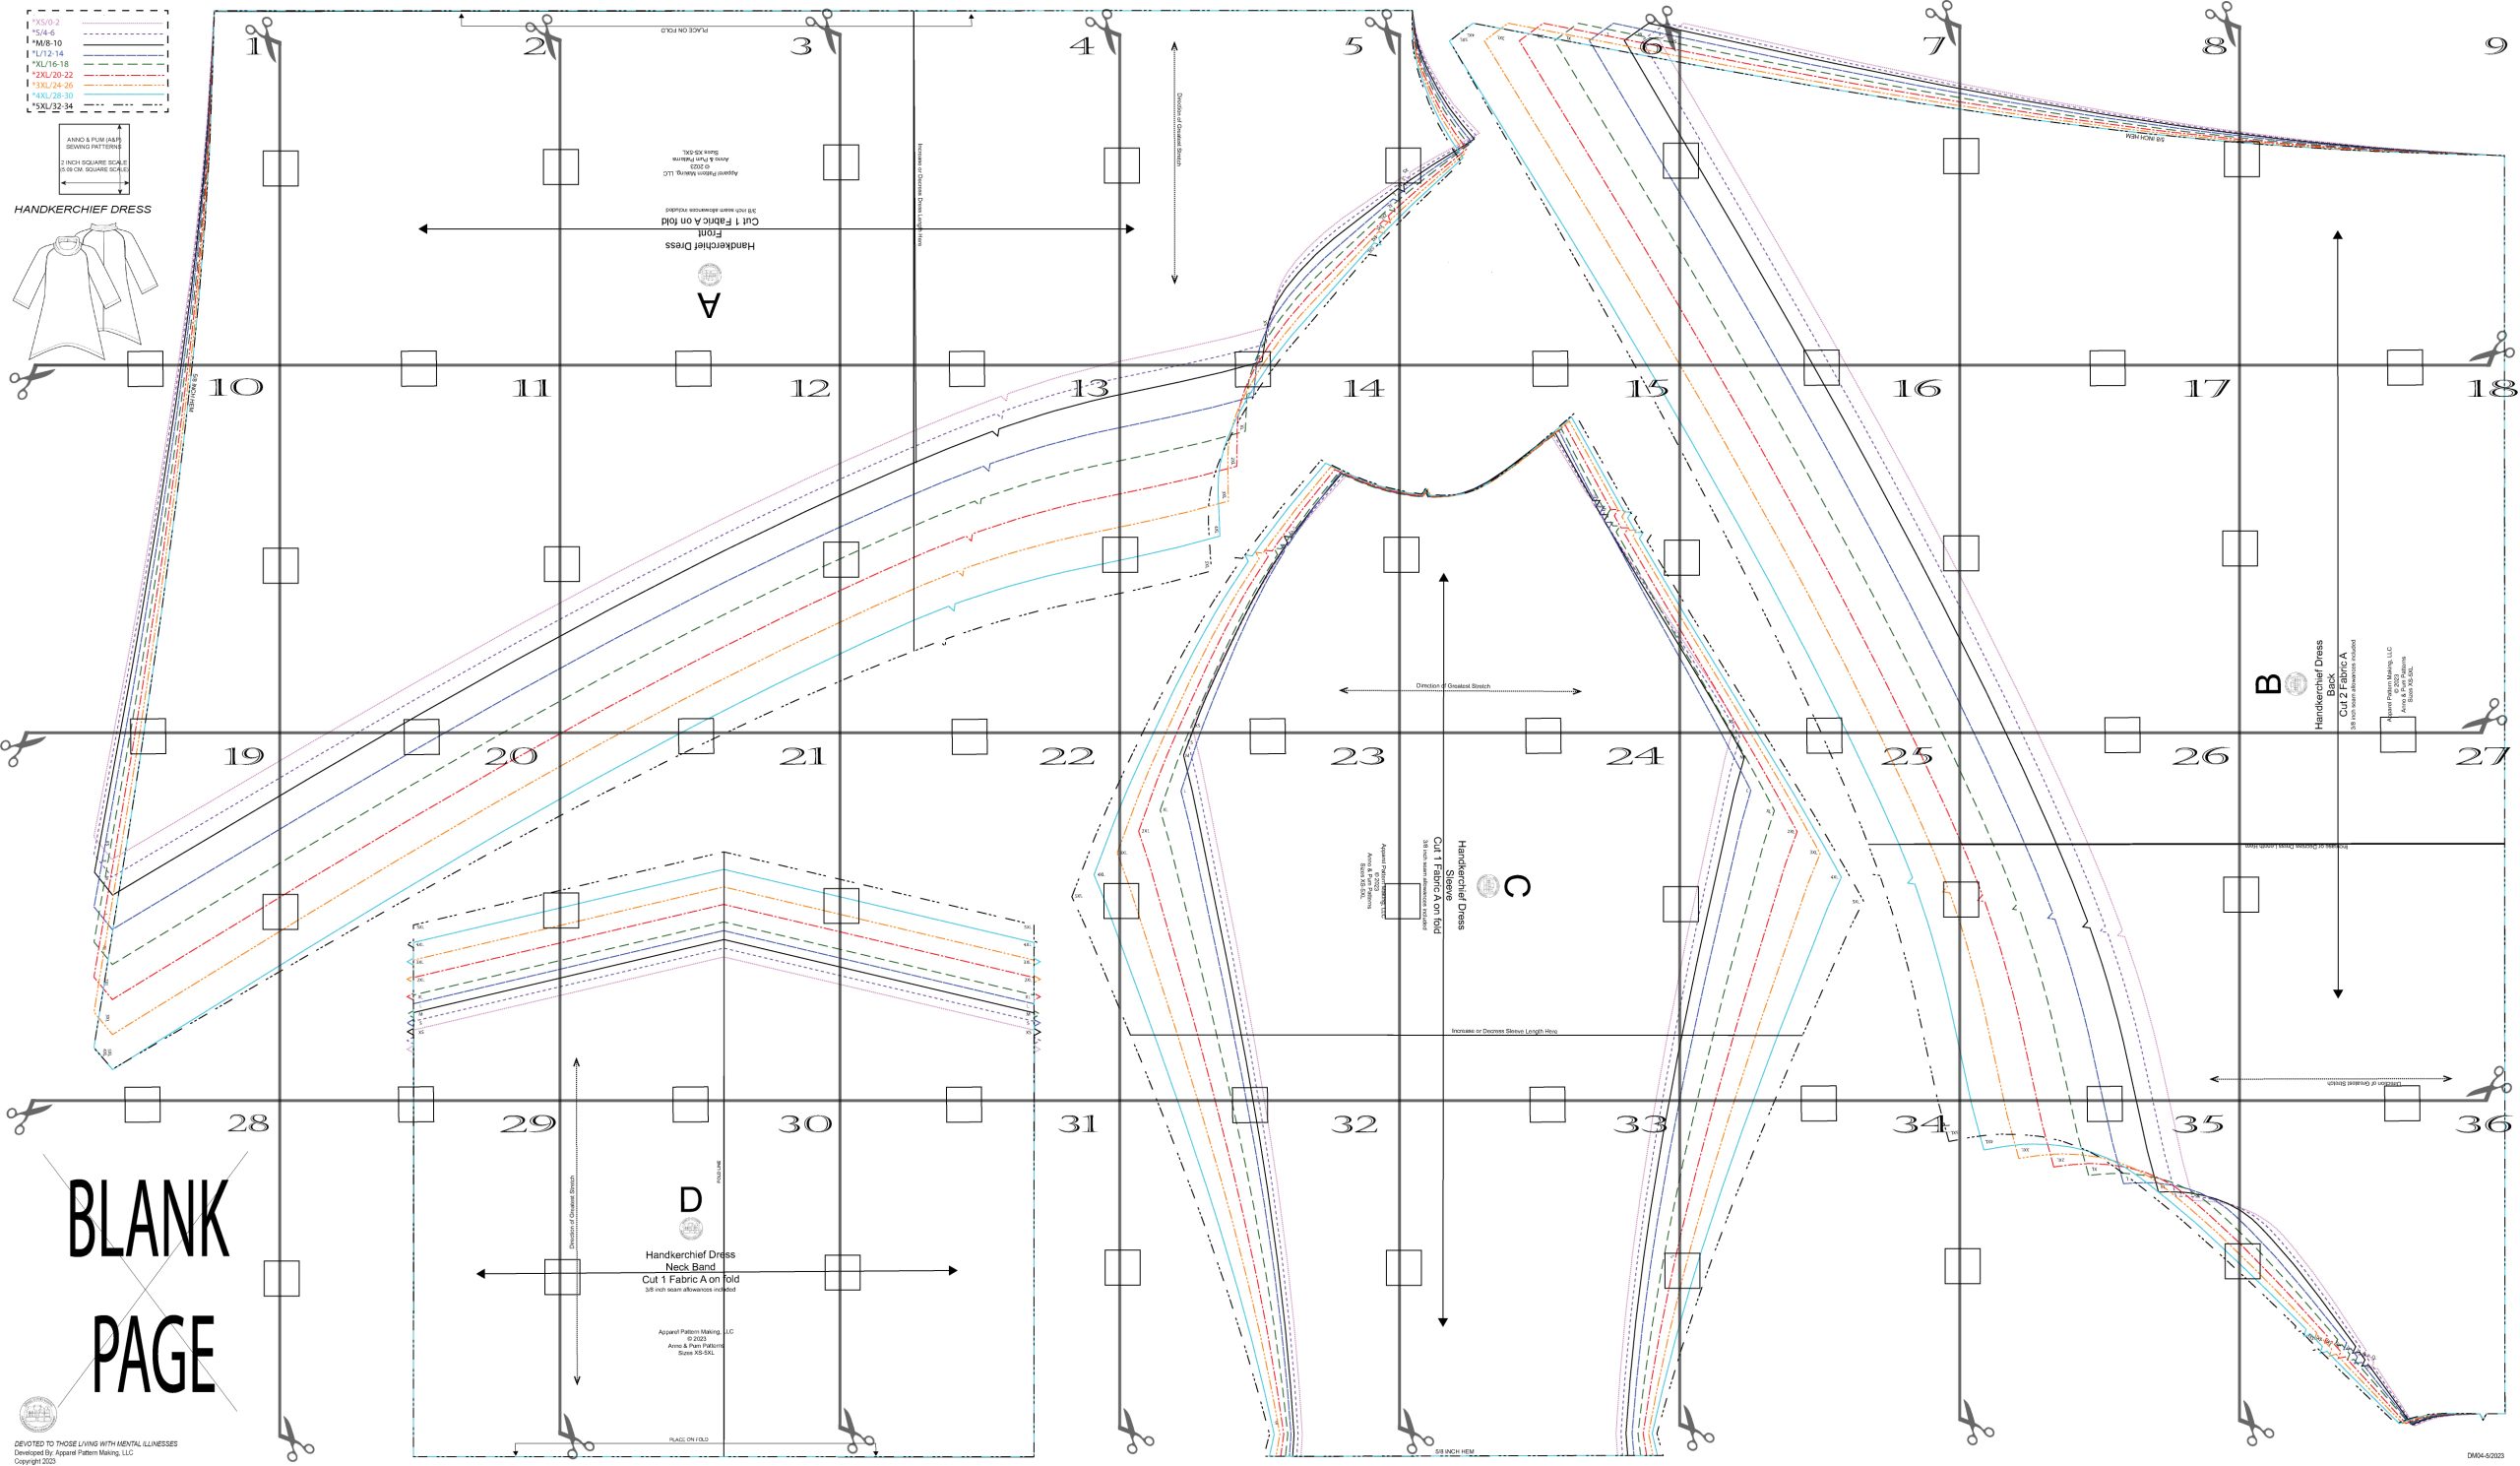
Size Chart:

Finished Garment Measurements:
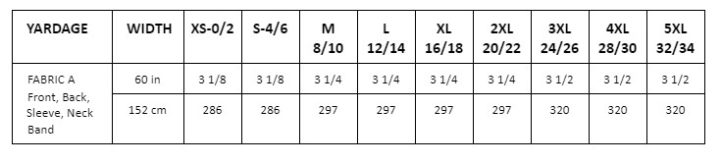
Fabric Yardage: (in yards and centimeters)
Notes:
- Fabric requirements do not account for possible fabric shrinkage, placements, stripes, matching pieces, or shorter fabric widths.
- It’s recommended to use the Chest measurement over hip measurement when choosing best size to sew due to A-line fullness in the hip for this style.
Materials:
- Fabric suggestions – (Fabric A) Polar fleece, sweatshirt fleece, French terry, rib jersey with 2-3% Spandex.
- Matching thread
- PDF Pattern – This is located at the bottom of this page. Please see printing instructions below.
PRINTING INSTRUCTIONS:
Note: To download the pattern, click on the pattern download button at the bottom of the page. We recommend opening your pattern download using Adobe Acrobat.

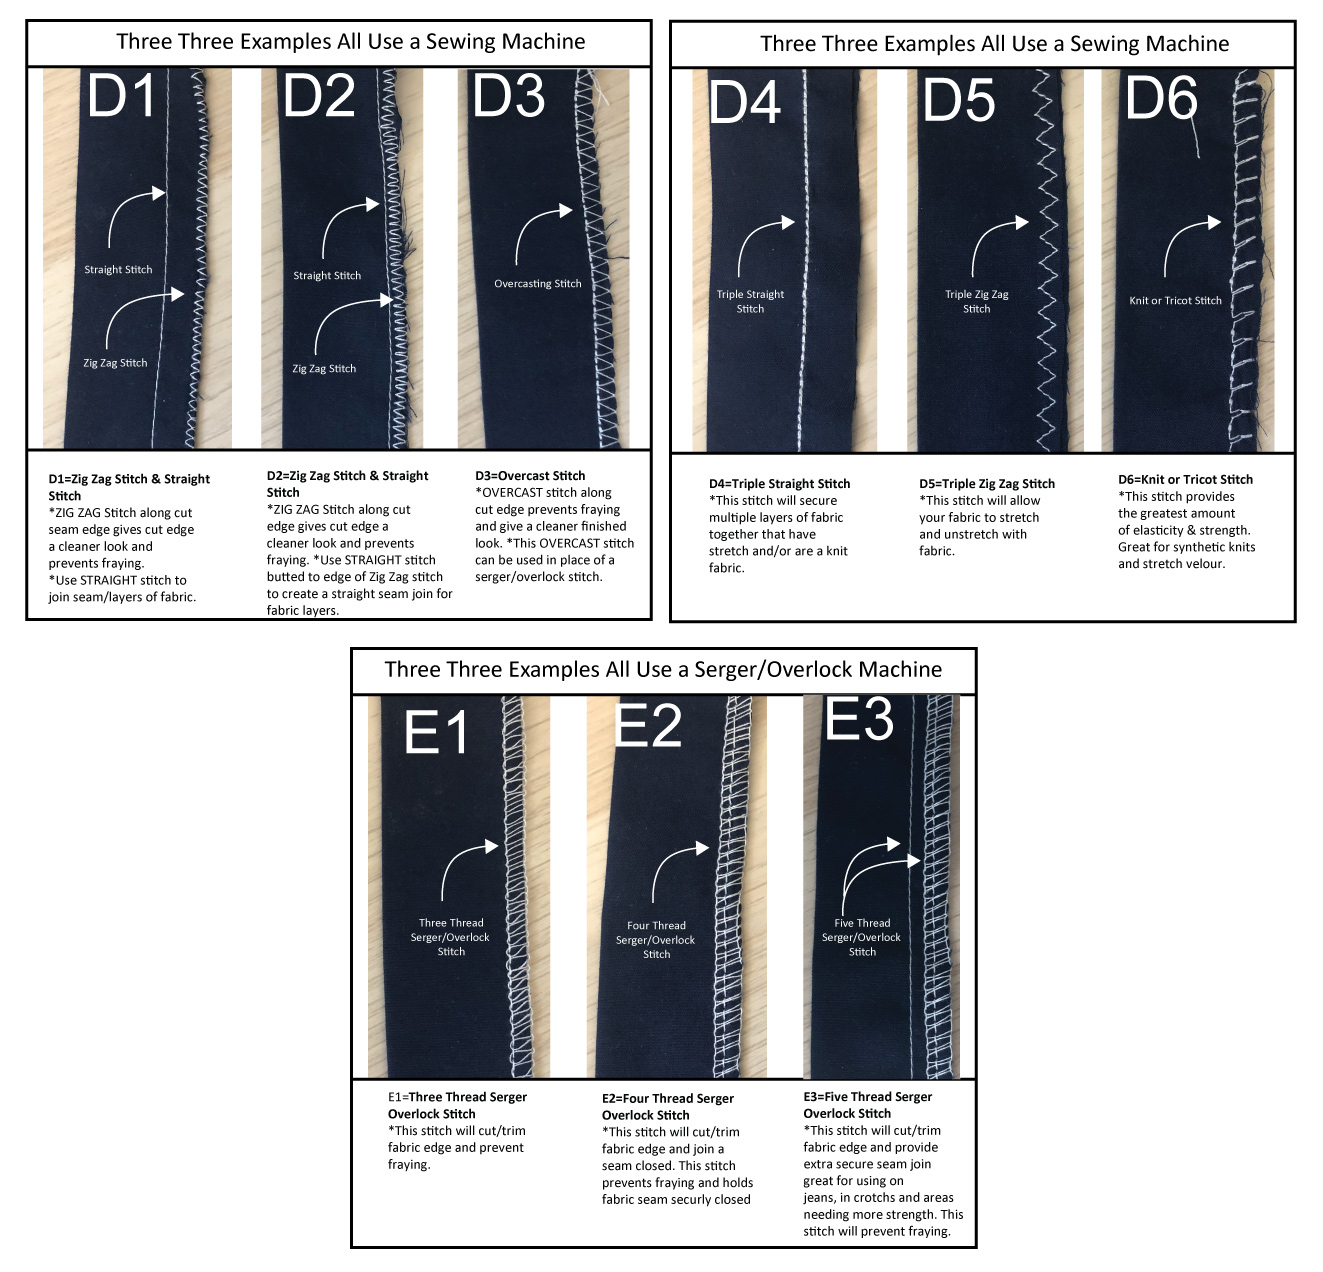
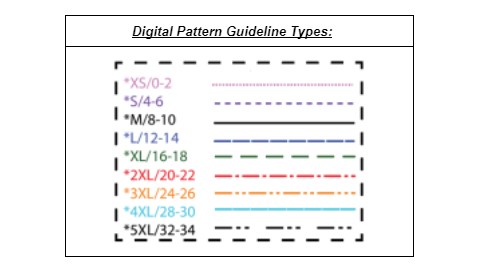
Machine Required: Serger or sewing machine
A sewing machine can be used in place of a serger.
*Optional seam edge finish examples below using serger and/or sewing machine.
DIGITAL PATTERN PIECES:
Downloadable PDF page tiled layouts. *Follow “Pattern Guideline Types” in the below cells for which lines to cut per size.
Before printing and cutting out all your pattern pieces, print PAGE 1 which contains the “SQUARESCALE” at 100% or full scale. Measure the square to confirm it measures 2 inches (5.09 cm) in both directions. If the square measures correctly in length and width, then go ahead and print out the remaining pages. Lay pages out next to each other in numerical order (as seen below in the image). Then butt or overlap pages together, lining up scissor lines and half squares next to each other. Then tape pages together to hold them in place. Once all pages have been taped together, your pattern pieces will be ready to cut out and prepare to layout on your fabric.
Letter & A4 Size PDF:
Pattern Colored Guidelines: Master Pattern Piece List:
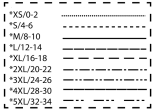
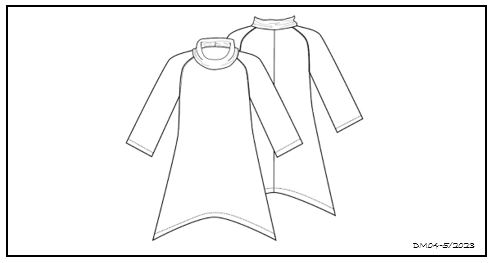
- FRONT
- BACK
- SLEEVE
- NECKBAND
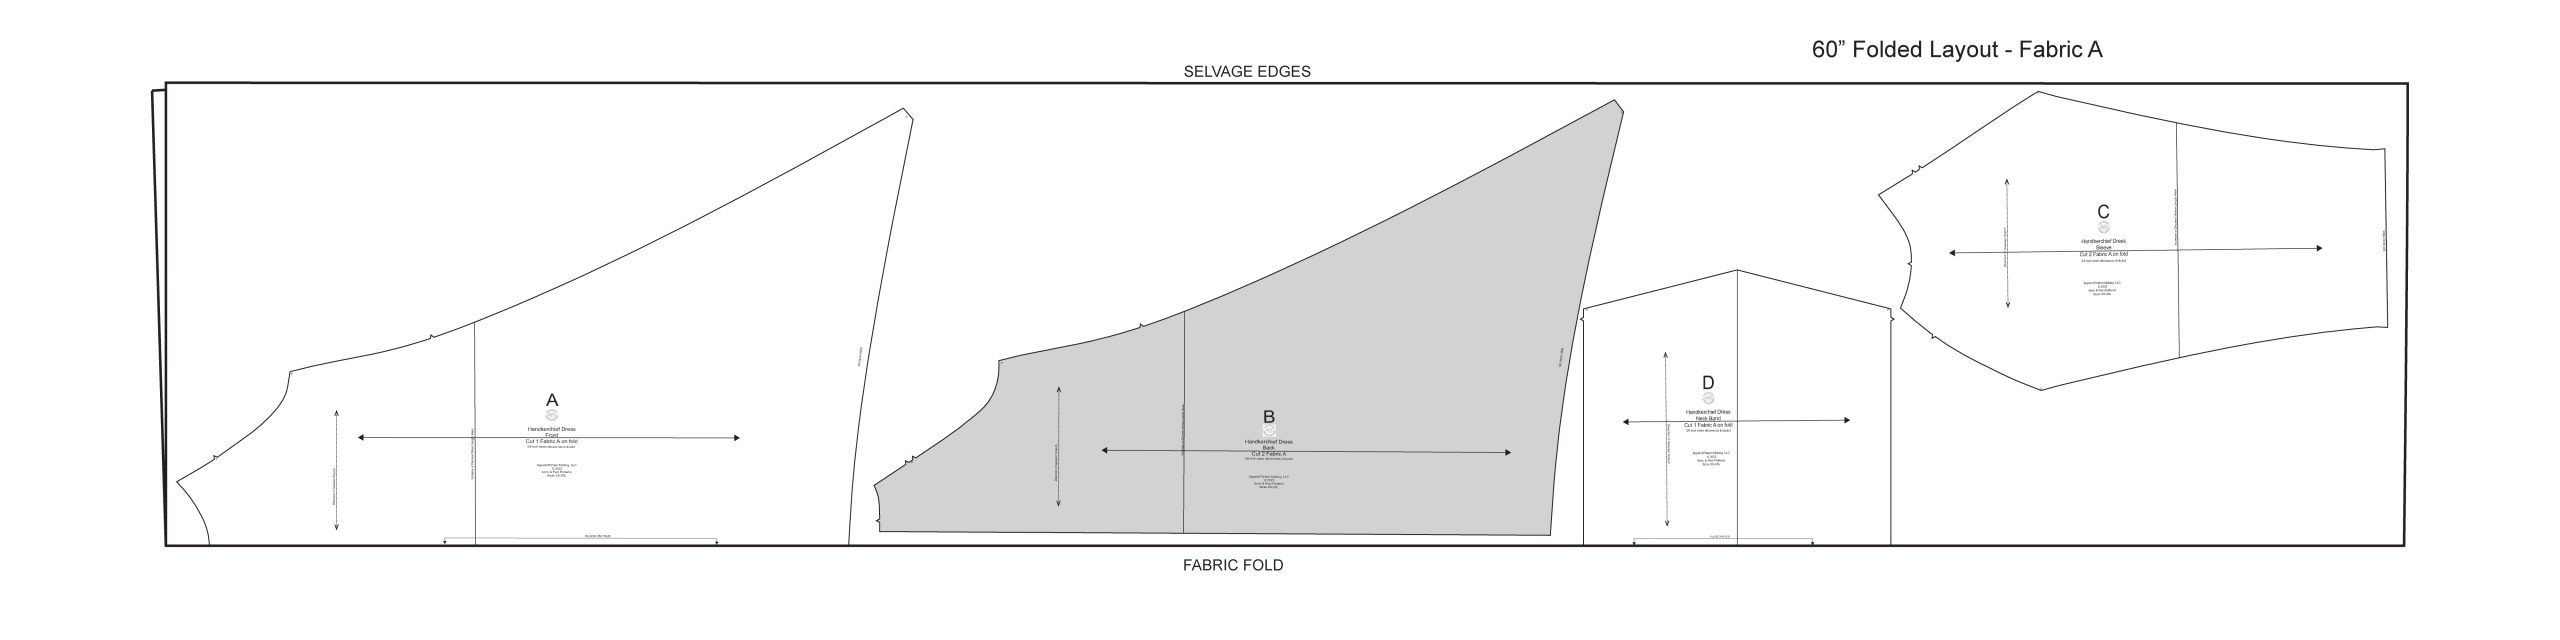
LAYOUT & CUTTING DIRECTIONS:
Fabric yardage should be laid out on a fold with selvages layered on top of each other. Lay out pattern pieces on your fabric with grain lines running parallel to your selvage. *See notations on pattern pieces for laying out that most stretch goes around the body and neck.
CUT PATTERN PIECES AS FOLLOWS:
- FRONT – Cut 1 Fabric A on fold
- BACK – Cut 2 Fabric A
- SLEEVE – Cut 2 Fabric A
- NECK BAND – Cut 1 Fabric A on fold
Instructions:
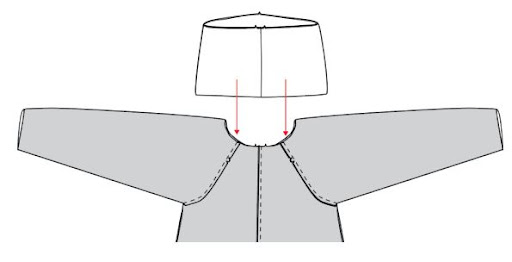
- Take the NECKBAND piece and fold it right sides together, matching the points. Sew the angled edges on each side of the point, pivoting around the point. This is the seam on the back of the neck. Due to the amount of stretch in suggested fabric and garment, consider using a stretch stitch throughout this garment as shown in OPTIONAL SEAM EDGE FINISHES section above.
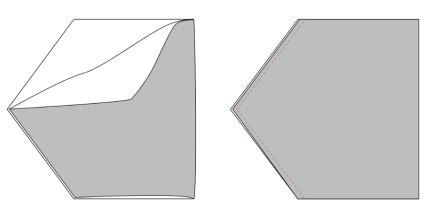
- Fold the NECKBAND piece back on itself wrong sides together to create a funnel tube, matching up notches and the seams you have just sewn. If desired, baste the two raw edges together to make sewing the NECKBAND to neck opening easier.

- Place the BACK right sides together and join along the center back seam. *If you prefer to serge or zig-zag raw edges, be sure to do that now.

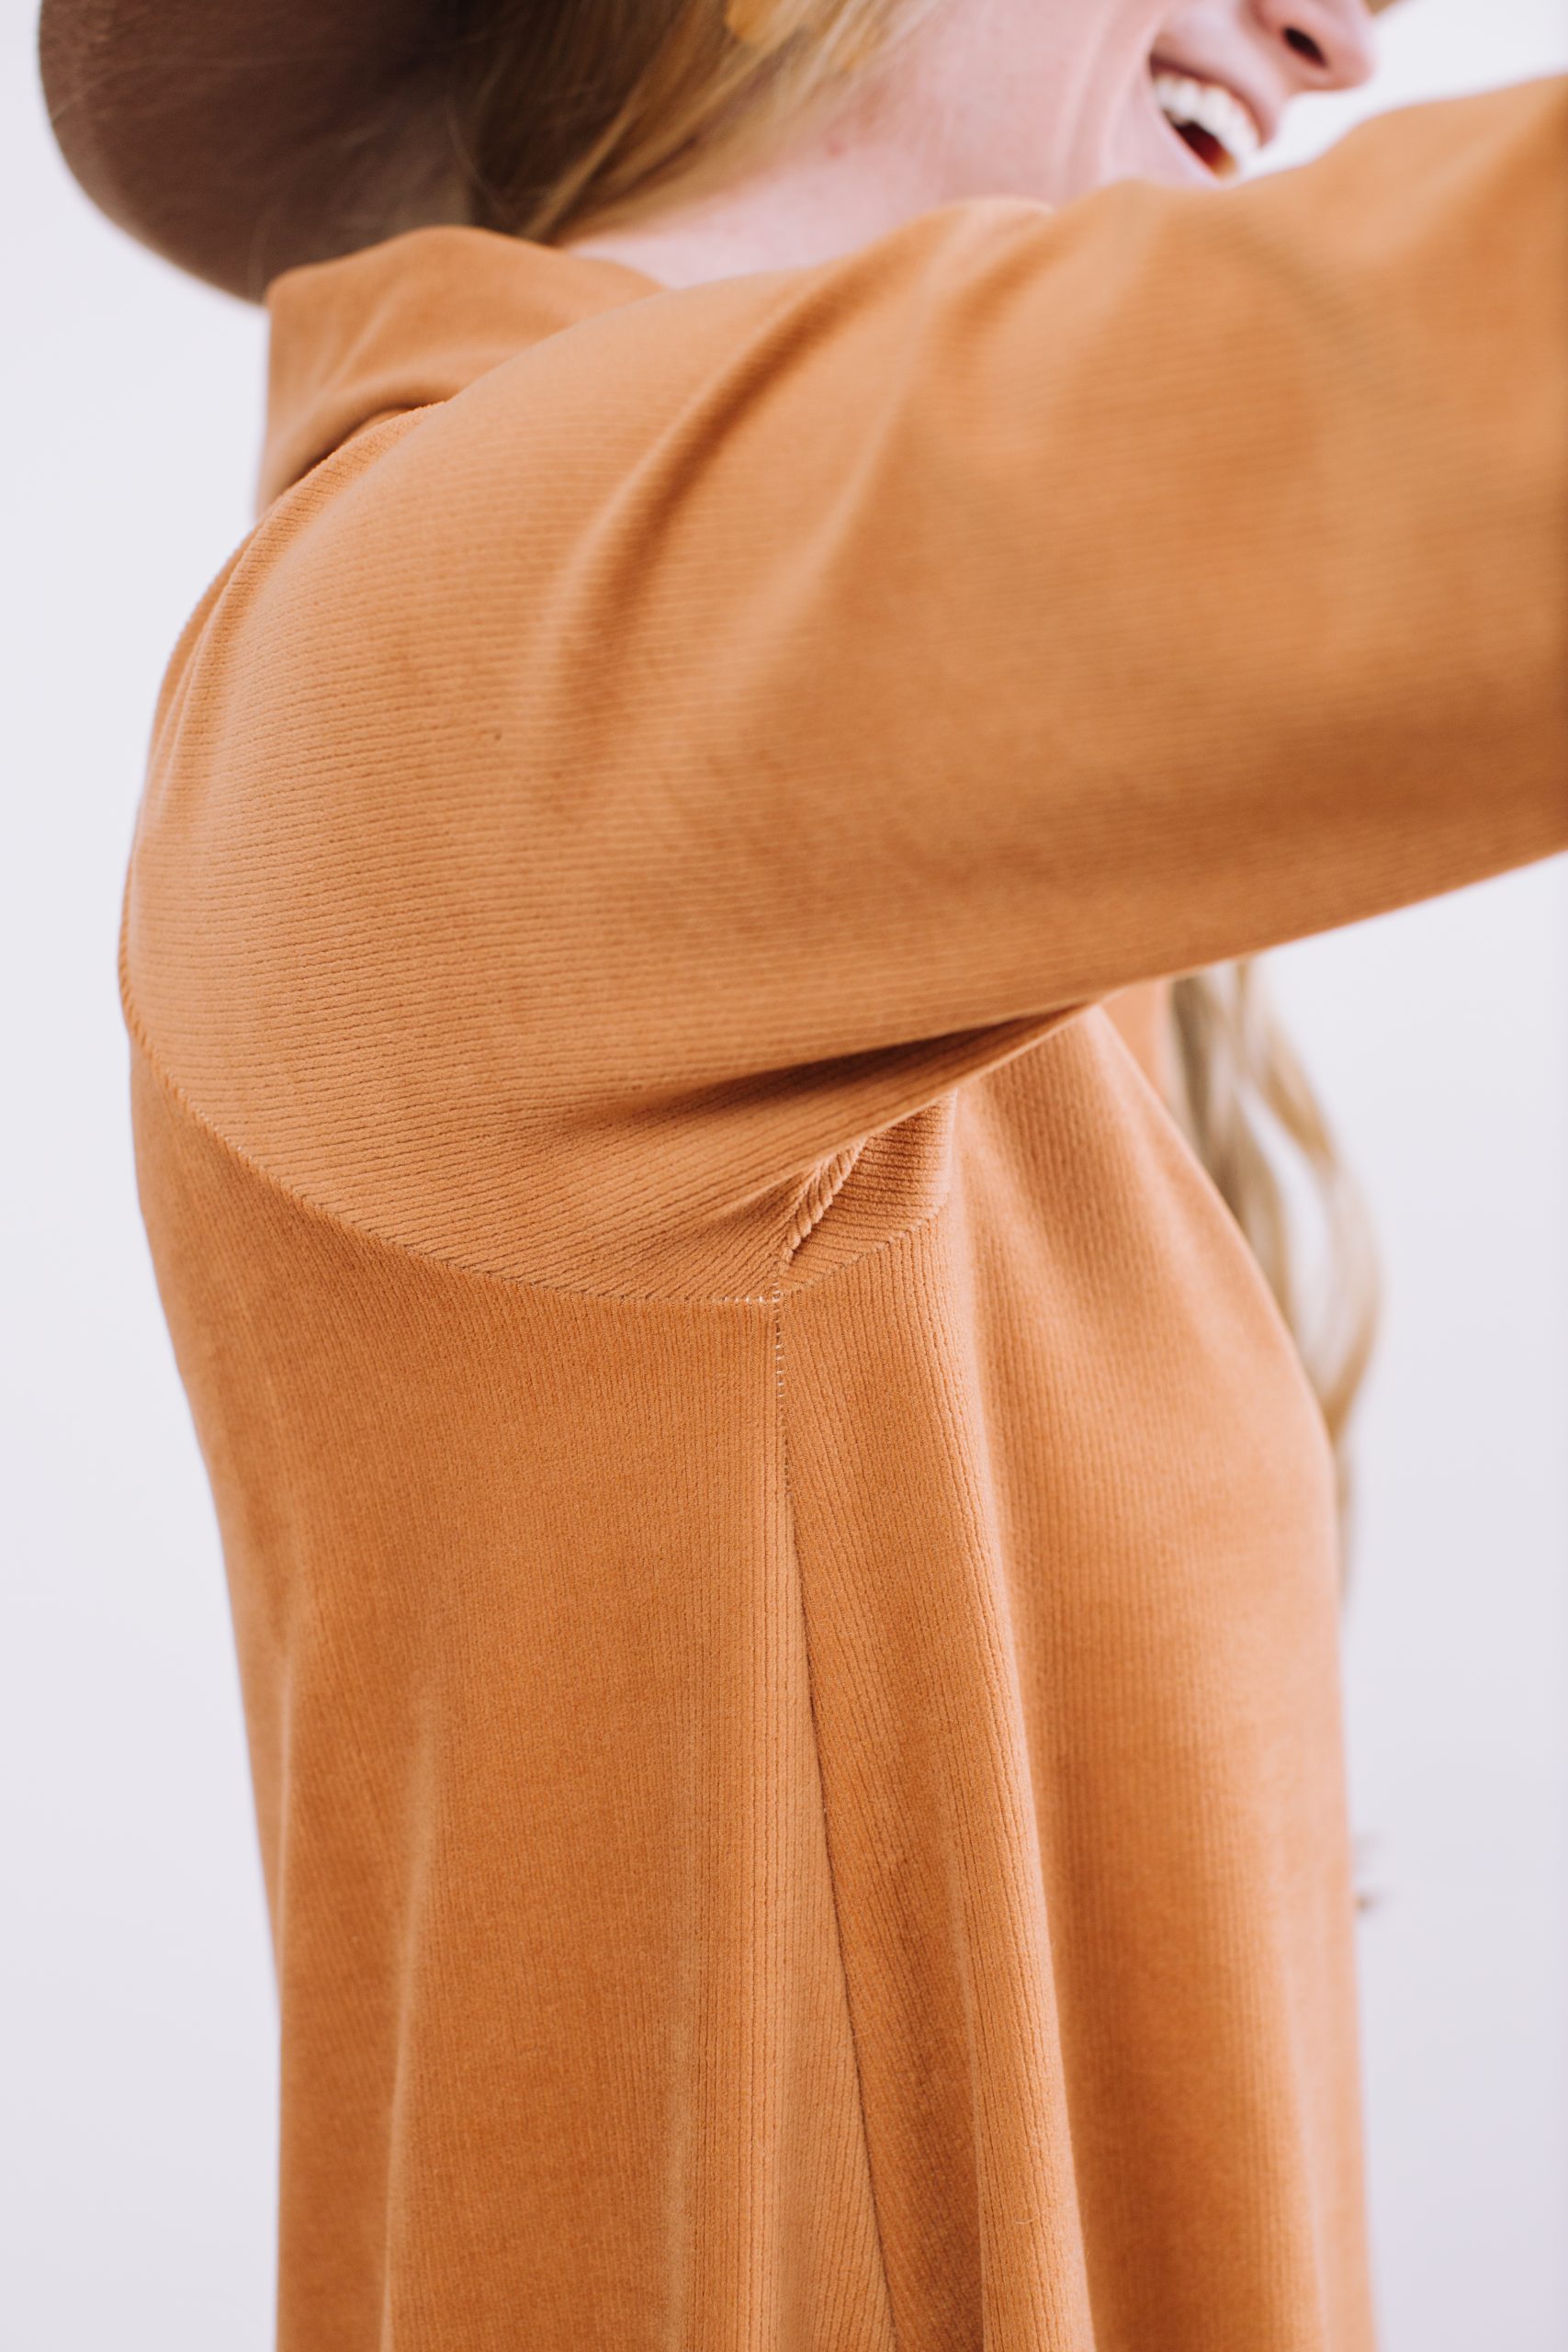
- Place the SLEEVE edge to the FRONT bodice edge matching notches with the right sides together. The FRONT body and front of the SLEEVE contains a single notch. Sew SLEEVE to each side of the FRONT body of the seam.
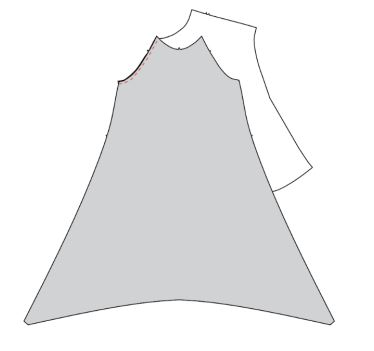
- Place the SLEEVE and BACK of the body right sides together and match notches. The BACK body and the back of the SLEEVE contain double notches. Sew SLEEVE to each side of BACK body of seam.
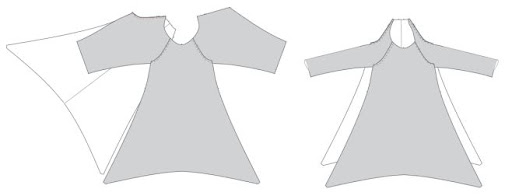
- Place NECKBAND into neck opening of dress with right sides of NECKBAND facing right sides of dress. The center front notch of the NECKBAND should match the notch on the center FRONT bodice. The double back notches on the NECKBAND piece should align with the double notches in the center BACK of the dress. Sew the NECKBAND piece to the dress. Be sure to use a stitch that allows this seam to stretch, similar to the overlock stitch, stretch stitch with zig-zag to allow the dress to go over the head.
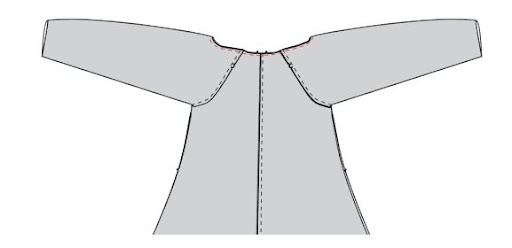
- Place FRONT and BACK right sides together, align the side seams from the raw hem of the SLEEVE through the armpit and down the side seam to the hemline. Sew both side seams from raw SLEEVE hem to raw dress hem.

- For a neat finish, zig-zag or serge the raw hem edges on the SLEEVES and the body hem. Note that the serged or zig-zag edge will be visible on the hem, so use a matching serger or zig-zag thread. Take care at the side seams to keep the angled point intact.
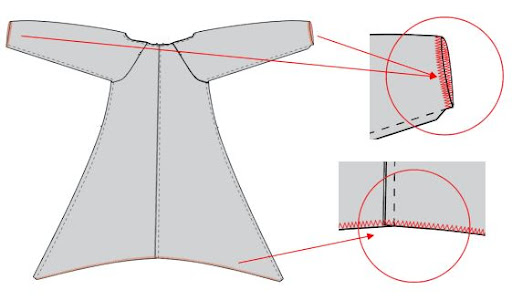
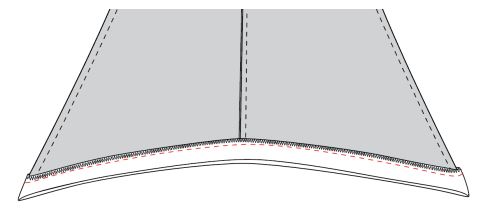
- There is a short, angled edge on the body hem allowance that needs to be sewn with a 3/8-inch (.95 cm) seam allowance. Once sewn, turn ends up creating a flat squared stitched corner.
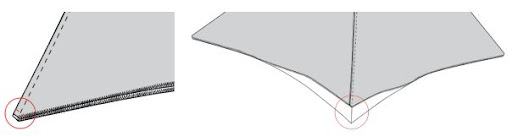
- Turn up the sleeve hems 5/8-inch (1.6 cm) and press. Topstitch 1/2-inch (1.3 cm) away from the folded edge, using an extra-long straight stitch or a zig-zag stitch. You may also choose to cover stitch or use a twin-needle topstitching here.
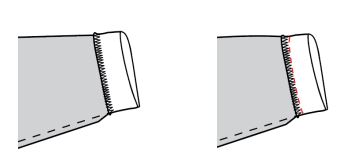
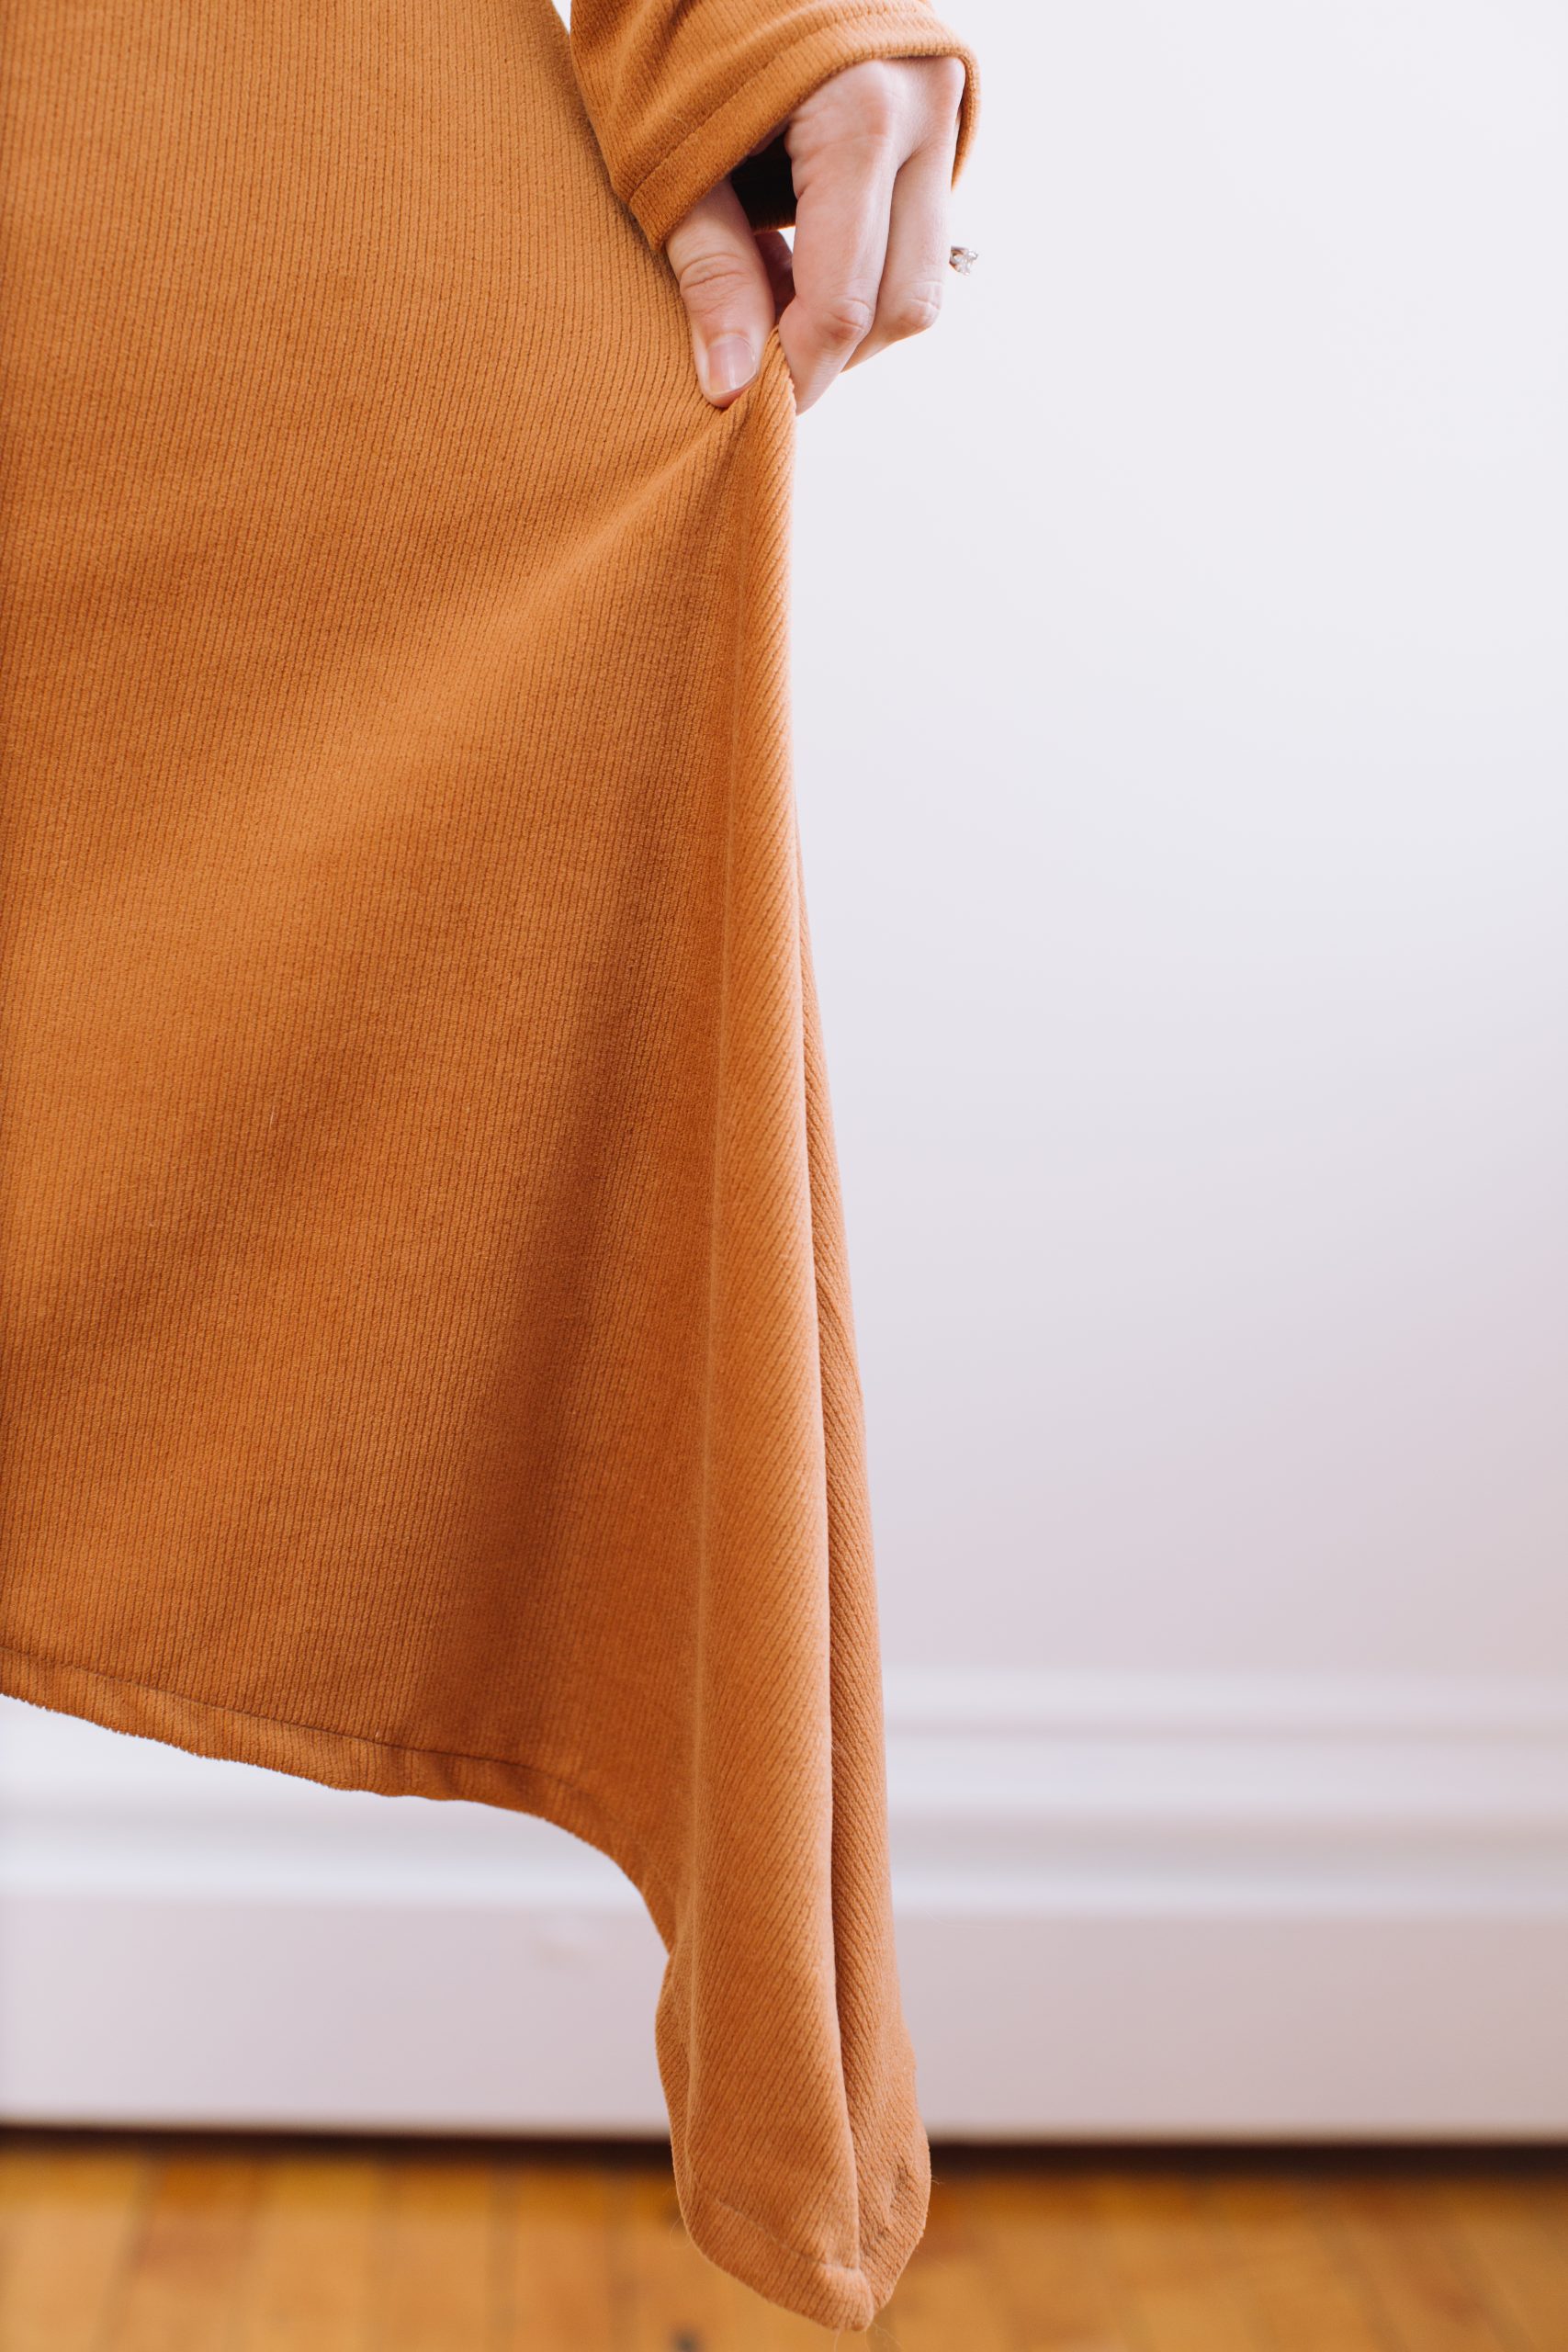
- Turn up the remainder of the handkerchief hem 5/8-inch (1.6 cm) and press. Topstitch 1/2-inch (1.3 cm) away from the folded edge, using an extra-long straight stitch or a zig zag stitch. You may also choose to cover stitch or use a twin-needle topstitching here. At the side seams, the angled bit of hem allowance should fold up and neatly cover the side seam allowance, resulting in an angled point at the side seam.
- Your garment is now finished. Enjoy wearing your new Handkerchief Dress!

I’m glad that there are marks where to lengthen or shorten the pattern pieces .
When they are not included it can be difficult to determine where a good place would be. I often need to shorten in length and sometimes between bust and waist.