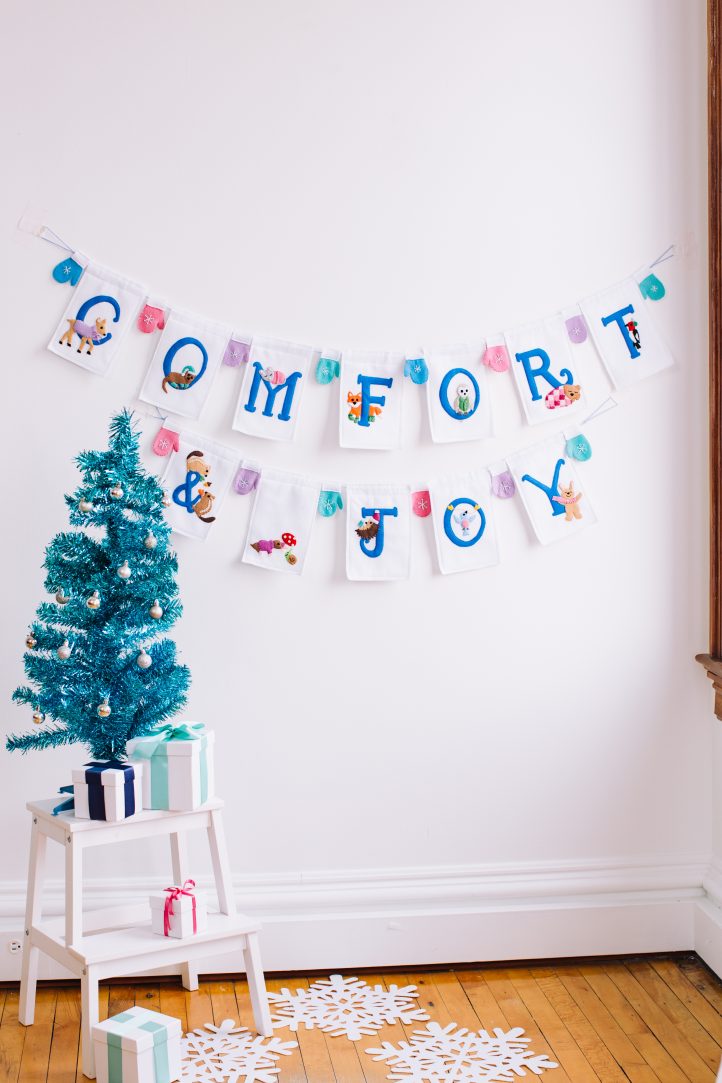
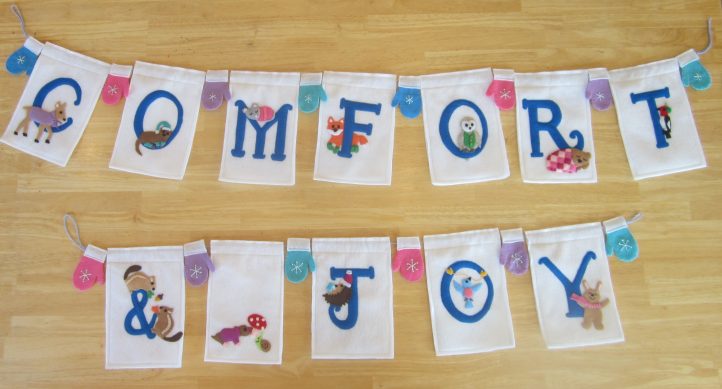
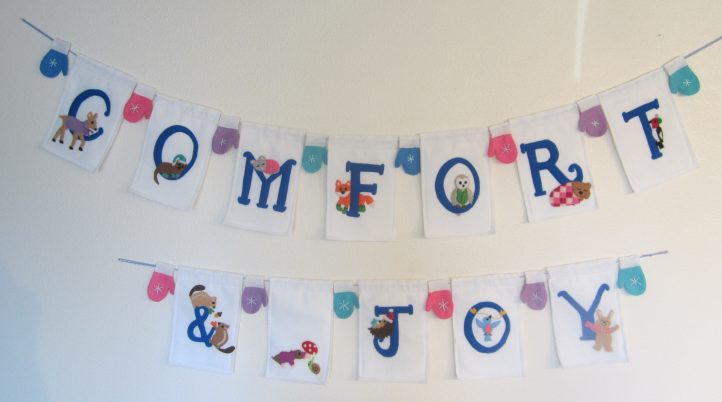
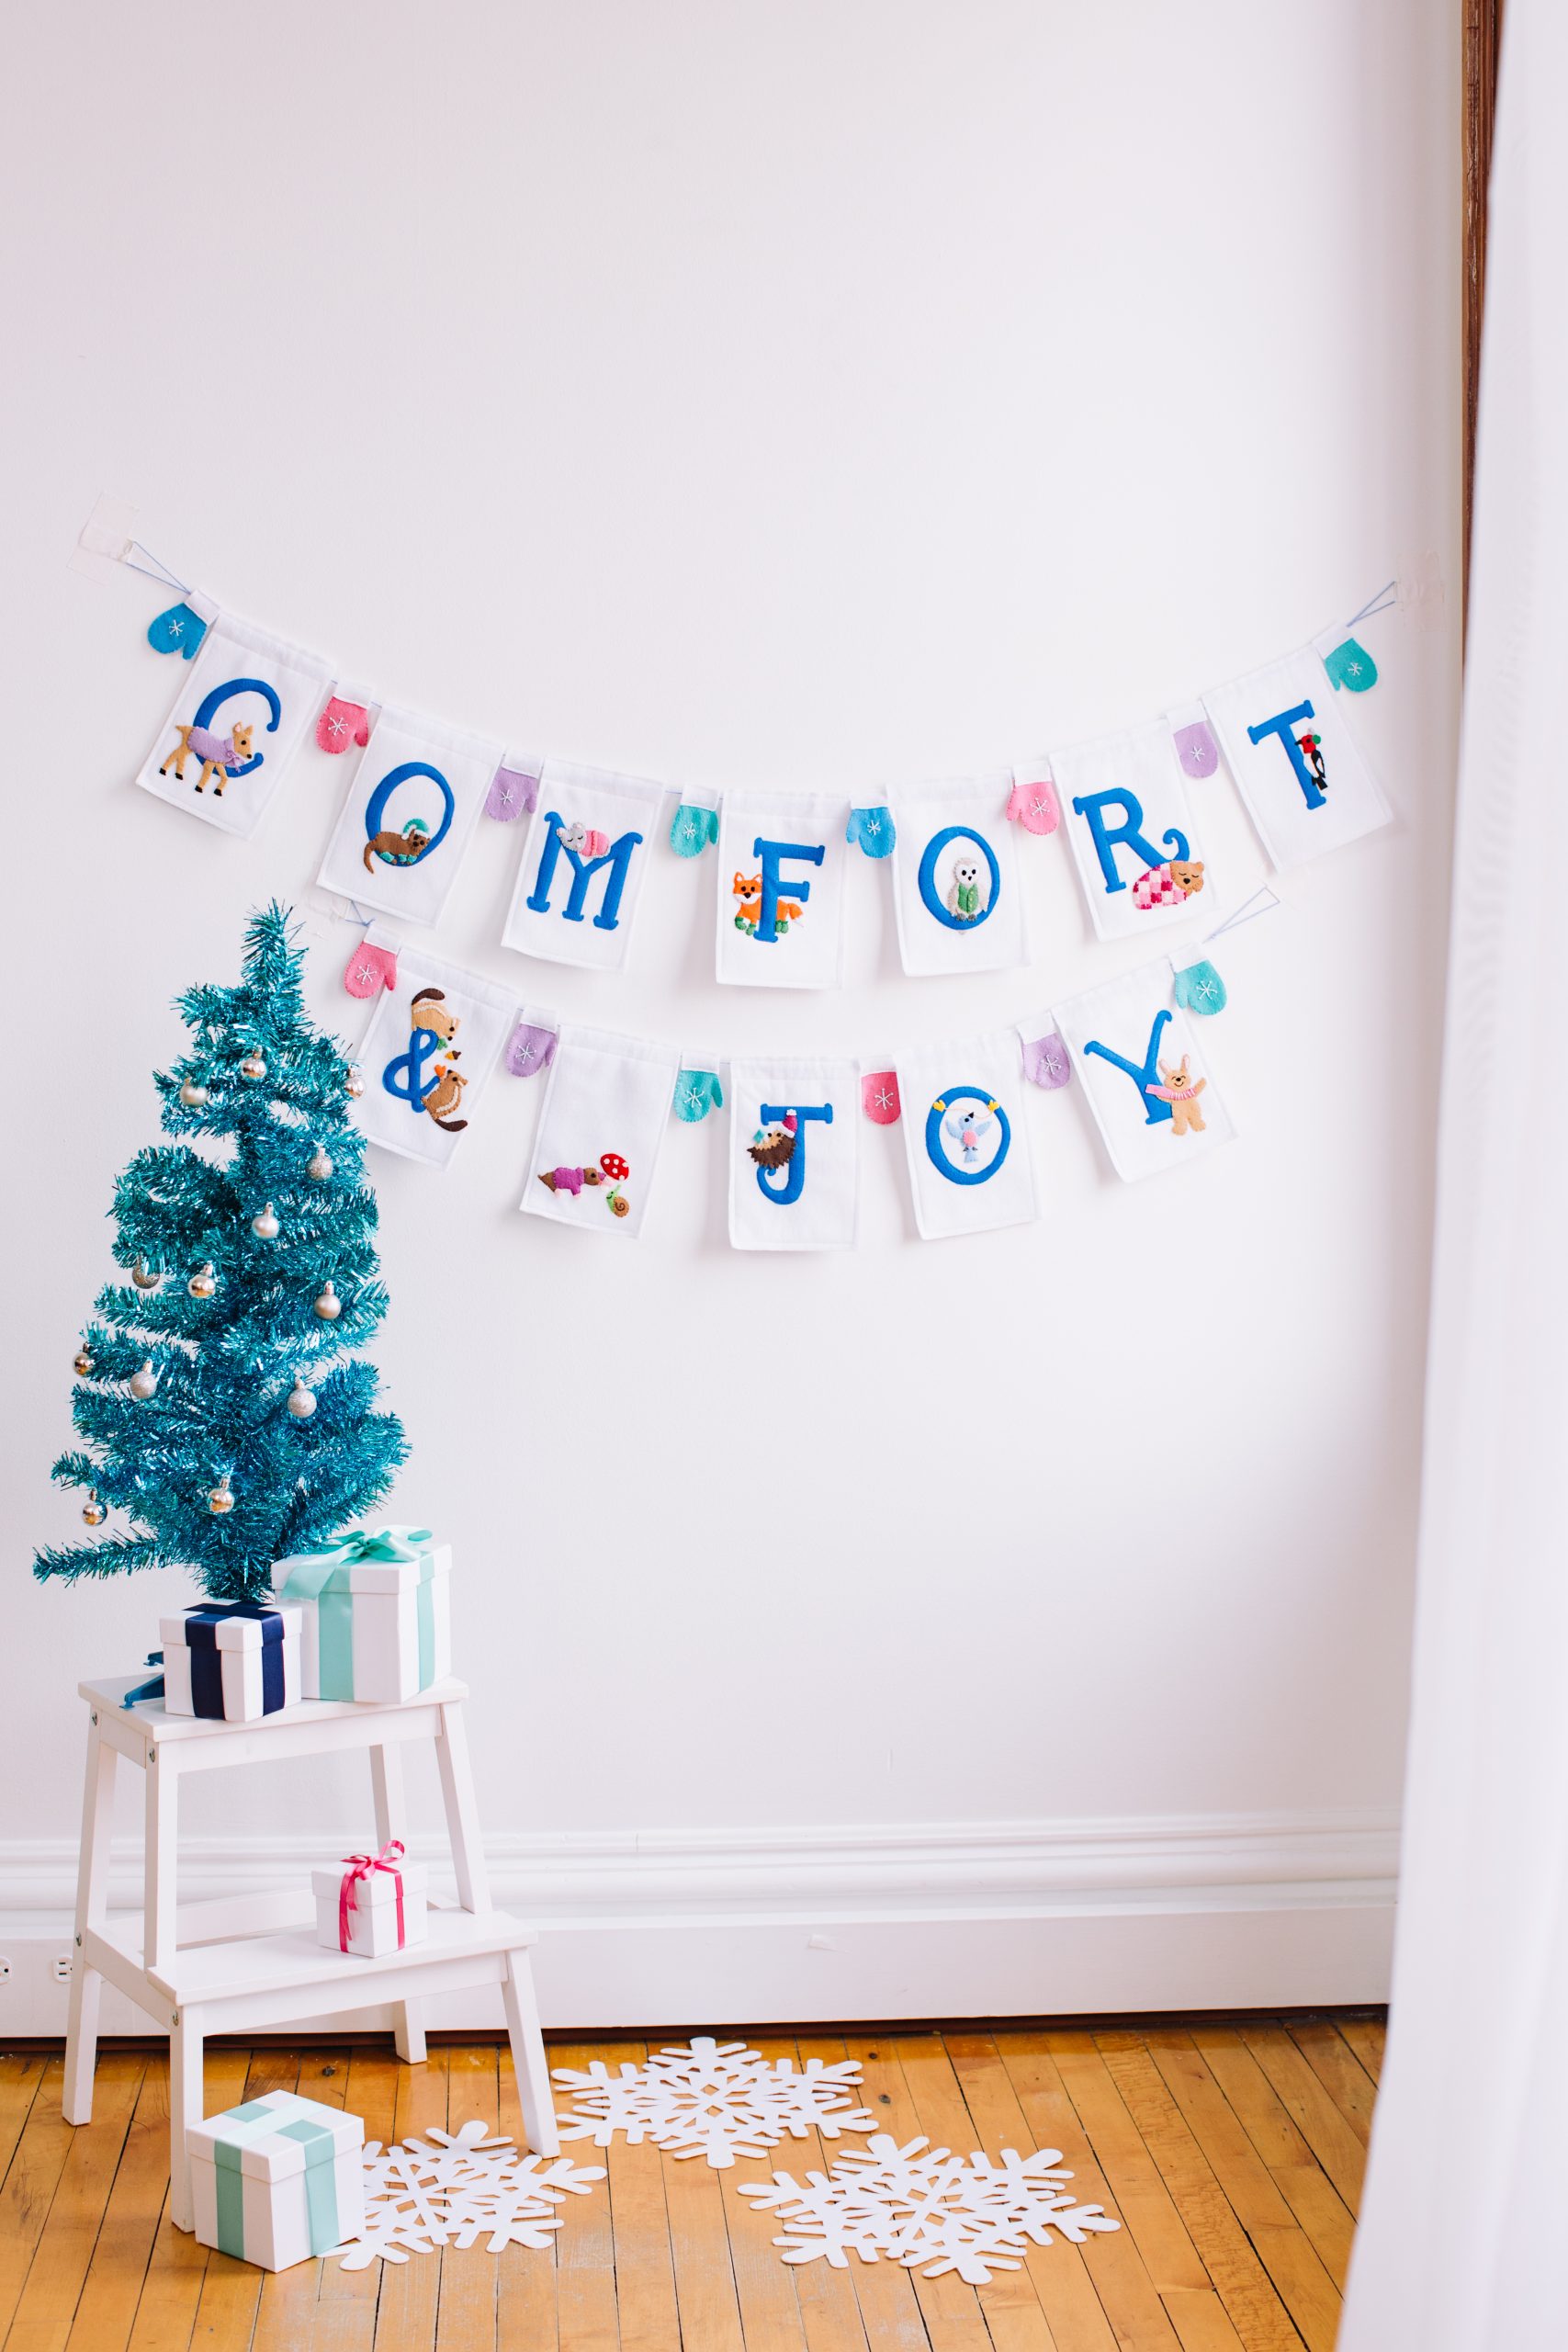
Add much needed holiday cheer to any dreary winter day with this adorable felt Christmas banner. A perfect way to show off your hand sewing skills, this holiday banner pattern features precious woodland animals like deer, squirrels, foxes and more. Short on time this winter? No worries! This project is designed to be worked on in small batches, so that you can sew on the go.
Skill Level: Easy
Finished Size: Approximately 2 yards wide by 3/4 yard tall
Estimated Time: 10-12 hours total
- Animals: 20-30 minutes each (total 4-6 hours)
- Mittens: 2 hours
- Cutting out and sewing letters: 2 hours
- Sewing animals to banner: 1 hour
- Banner backing and assembly: 1 hour
Materials:
- 13 pieces of 9 x 12-inch (or 3/4 yard of 72”-wide) white felt
- 3 pieces of 9 x 12-inch (or 1/4 yard of 72”-wide) blue felt for letters
- 4 pieces of 9 x 12-inch felt for mittens (one each of blue, bright pink, lavender, and teal)
- Scraps of light brown, medium brown, dark brown, light gray, dark gray, black, orange, red, and light blue felt for animals
- Assorted scraps of colorful felt for winter clothing (scarves, hats, etc.)
- Matching threads
- Embroidery needle and floss in pale blue (or white), dark brown, black, light purple, light orange, and pink
- 4 yards of string, cord, or non-stretchy yarn
- Small, sharp scissors
- Large safety pin
- PDF Templates – These are located at the bottom of this page. Please see printing instructions below.
PRINTING INSTRUCTIONS:
Note: To download the templates, click on the pattern download button at the bottom of the page. We recommend opening your pattern download using Adobe Acrobat.
Instructions:
GENERAL ANIMAL INSTRUCTIONS:
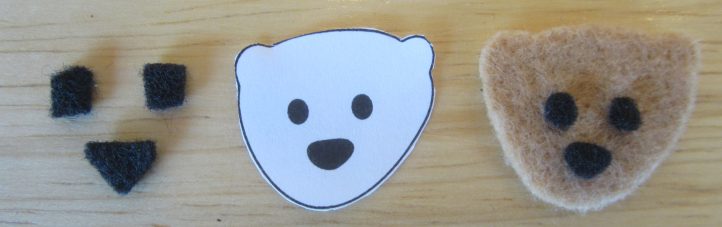
- To cut tiny eyes and noses from felt, cut a rectangle or triangle slightly larger than the eye or nose, then carefully round off the corners. Repeat trimming until the eye or nose is the desired size and shape, holding it up to the pattern for comparison.
- To attach eyes, noses, and clothing by whipstitching, poke the needle through the underside of the felt, very close to the edge of the piece.
- Push the needle down through the top of the piece.
- Continue stitching around the edges of the piece, always coming up from the underside of the felt and down through the top.
- If you prefer, you can create the eyes and noses using satin stitch embroidery (closely spaced straight stitches that fill an area).
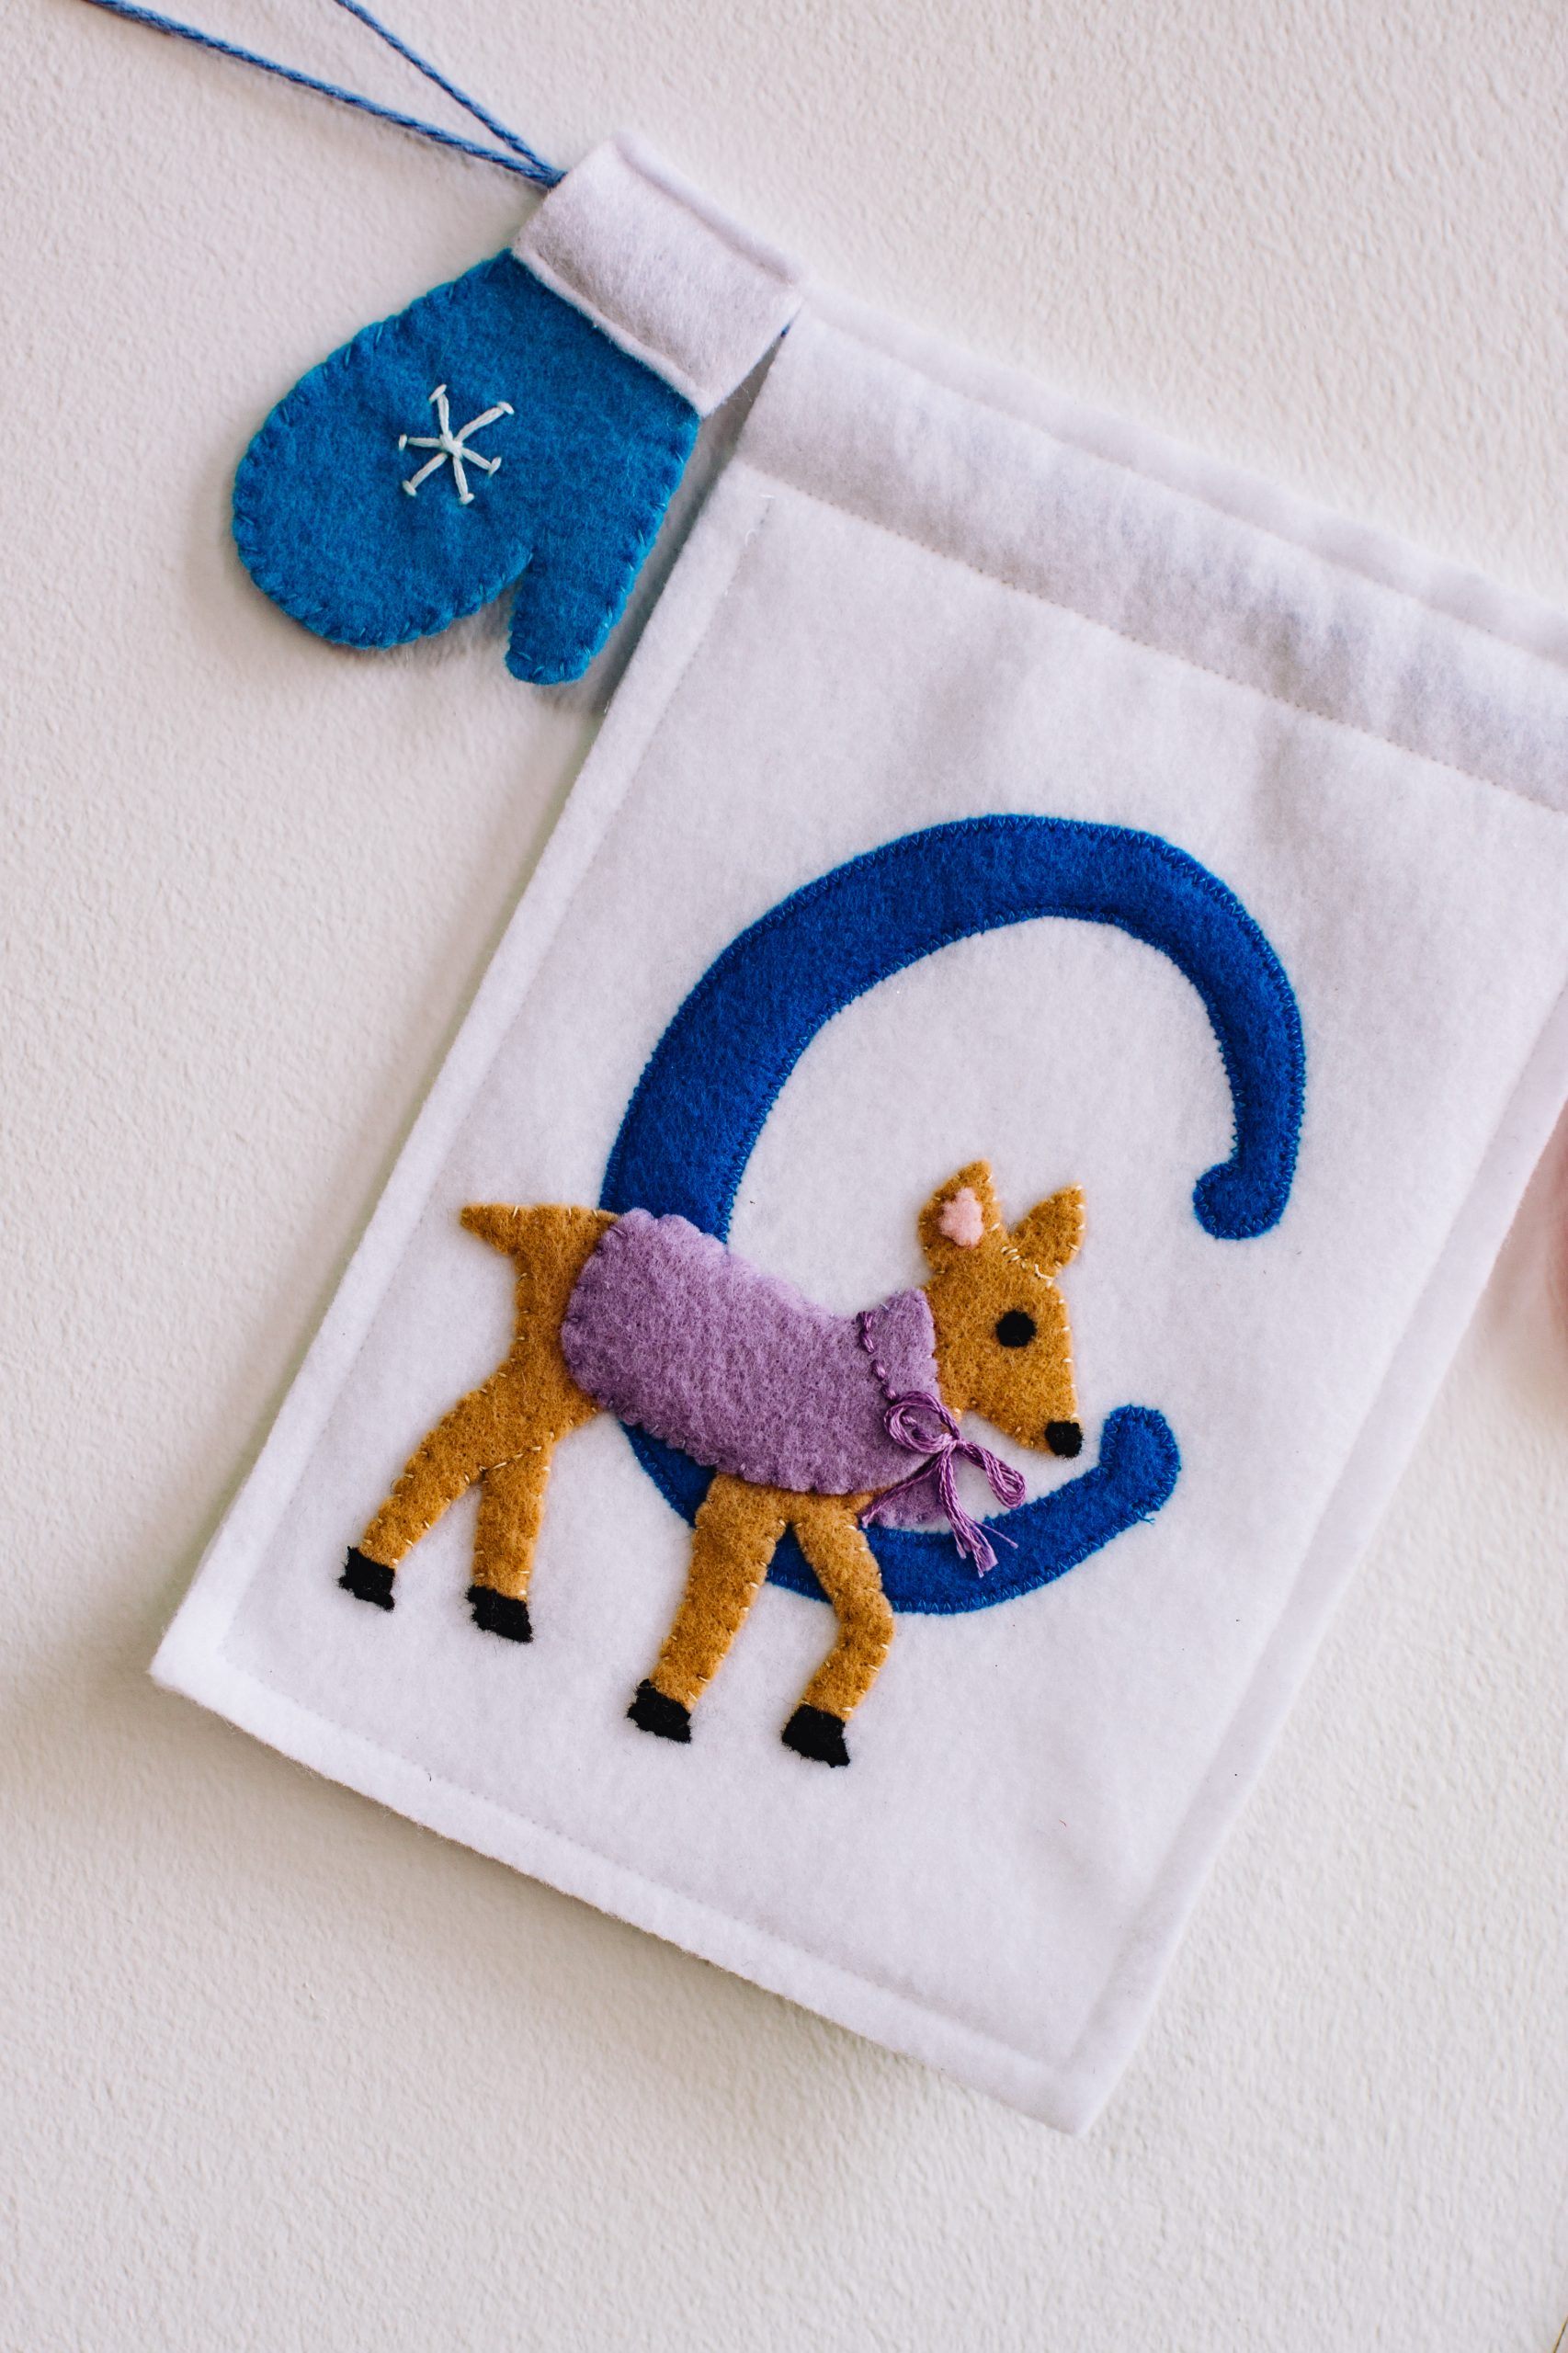
DEER IN CLOAK (C):
- Cut one deer body from light brown felt. Cut one eye, one nose, and four hooves from black felt. Cut one inner ear from light pink felt. Position the pieces on the deer body, then whipstitch in place with matching thread.
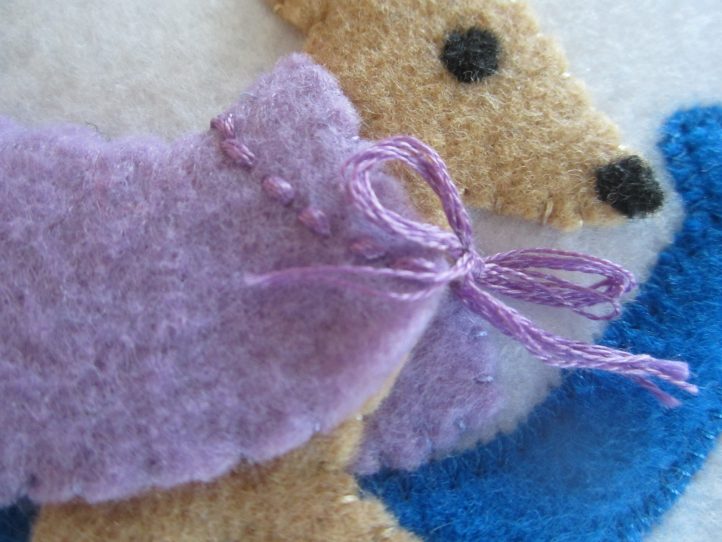
- Cut one cloak front and one cloak back from light purple felt. Use embroidery floss to backstitch across the neck of the cloak front.
- Tie a bow in a piece of purple embroidery floss, then gently pull the bow smaller until it’s about 1 inch wide. Trim the ends of the floss and stitch the bow to the front neck of the cloak.
- Position the cloak front on the deer body and whipstitch along the lower edge and sides. Position the cloak back with the left side slightly behind the deer, so that it’s just peeking out. Pin the cloak back in place. Flip the deer over and whipstitch the cloak back to the back of the deer, being careful not to stitch through the front.
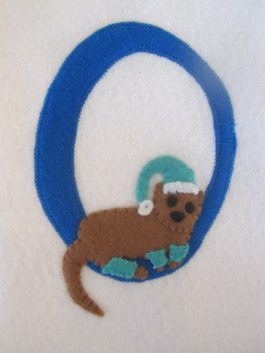
OTTER IN LEG WARMERS AND STOCKING CAP (O):
- Cut one otter body and one otter head from brown felt, and two eyes and a nose from black felt. Whipstitch the eyes and nose to the face.
- Position the otter head on the body and whipstitch in place.
- Cut the three leg warmers and the stocking cap from light blue felt. Cut one stocking cap trim and pompom from white felt. Whipstitch the trim to the lower edge of the cap, and stitch the pompom to the tip of the cap.
- Position the cap on the otter’s head and whipstitch in place. Whipstitch the three leg warmers to the otter’s legs.
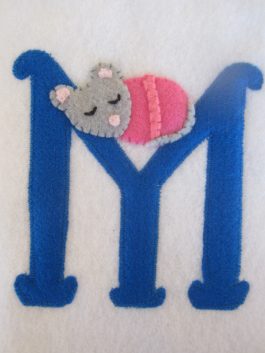
MOUSE IN SNUGGLE SUIT (M):
- Cut one mouse head and one tail from gray felt. Cut two inner ears and one nose from light pink felt. Cut one bodysuit from bright pink felt and one belt from darker or contrasting felt.
- Position the inner ears and nose on the mouse head and whipstitch in place.
- Use black embroidery floss to backstitch two small “u” shapes for sleeping eyes.
- Whipstitch the head to the left side of the bodysuit.
- Whipstitch the belt to the center of the bodysuit.
- Whipstitch the tail to the lower right side of the bodysuit.
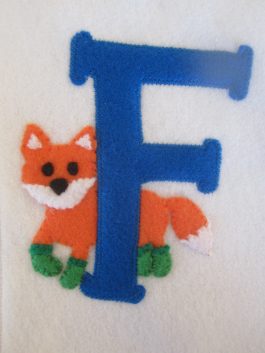
FOX WITH SOCKS (F):
- Cut one fox body from orange felt. Cut one fox face, one tail tip, and two inner ears from white felt. Cut two eyes and one nose from black felt.
- Position the white inner ears and face piece on the fox’s head and whipstitch in place. Position the black eyes and nose on the face and whipstitch in place.
- Position the white tail tip over the end of the tail and whipstitch in place.
- Cut one front sock and three rear socks from green felt. Optional cuffs: Cut four socks cuffs from a darker shade of felt and whipstitch them to the tops of the socks.
- Whipstitch the socks to the fox’s feet.
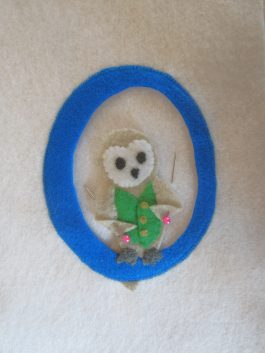
OWL IN VEST (O):
- Cut one owl body and two wings from light gray felt. Cut one face from white felt, two eyes and one beak from black felt, and two feet from dark gray felt.
- Position the eyes and beak on the white face and whipstitch in place. Position the face on the owl head and whipstitch in place.
- Cut a left vest and a right vest from green felt. Optional: Add three “buttons” to the right side of the vest using small pieces of yellow felt, or by sewing small knots with yellow or gold embroidery floss. Position the vest pieces on the owl body, with the right (button) side slightly overlapping the left side. Whipstitch the vest to the owl body.
- Position the wings on the sides of the owl body, then whipstitch where they overlap the body.
- Position the feet on the lower edge of the owl body, then whipstitch them in place along the top (straight) edges of the feet only.
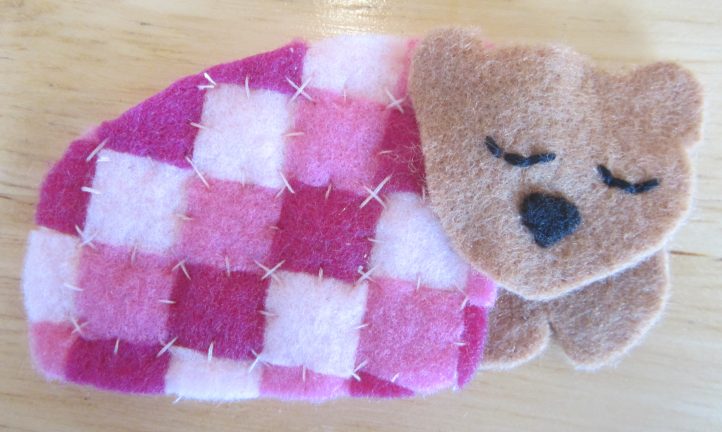
BEAR IN BLANKET (R):
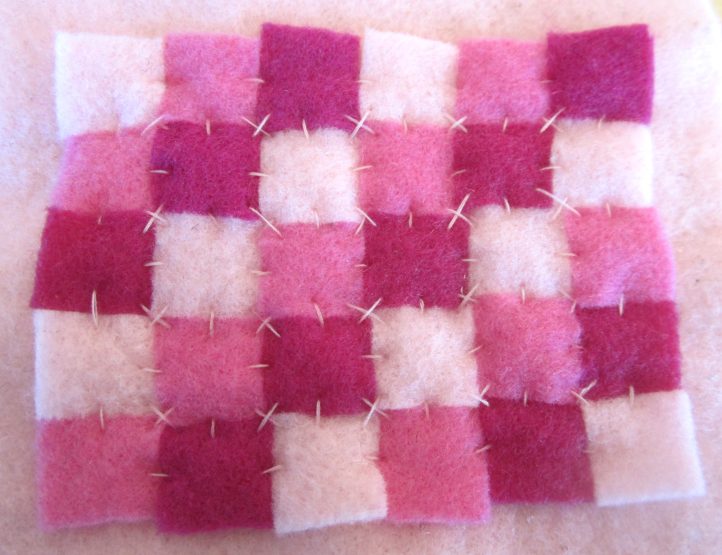
- Cut ten squares each from three different colors of felt (30 squares total) for the “quilt”.
- Position the squares in a 5 by 6 grid, alternating colors, on a scrap of felt. Hand stitch them in place with small X shaped stitches at the intersection of every four squares, and small straight stitches connecting the inner edges of each square (no need to stitch around the outside edges, as these will be trimmed off).
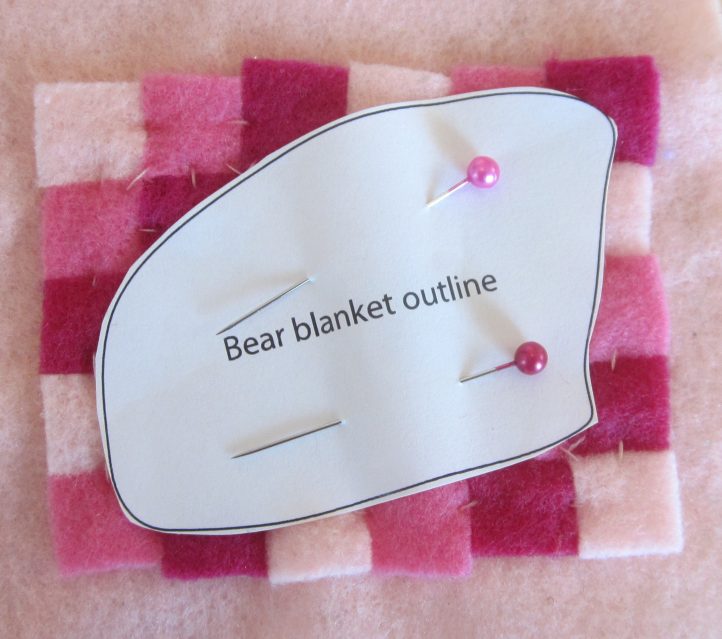
- Position the blanket pattern on the appliquéd squares, then pin the pattern in place and cut around it.
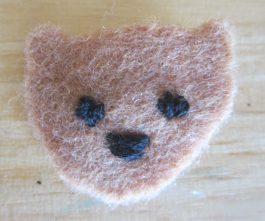
- Cut one bear head and one bear paw piece from brown felt. Position the nose on the bear head and whipstitch in place. Use black embroidery floss to backstitch two small “u” shapes for sleeping eyes.
- Position the bear paws behind the lower right corner of the blanket, and the bear head on top of the right side of the blanket. Whipstitch the bear head and paws to the blanket.
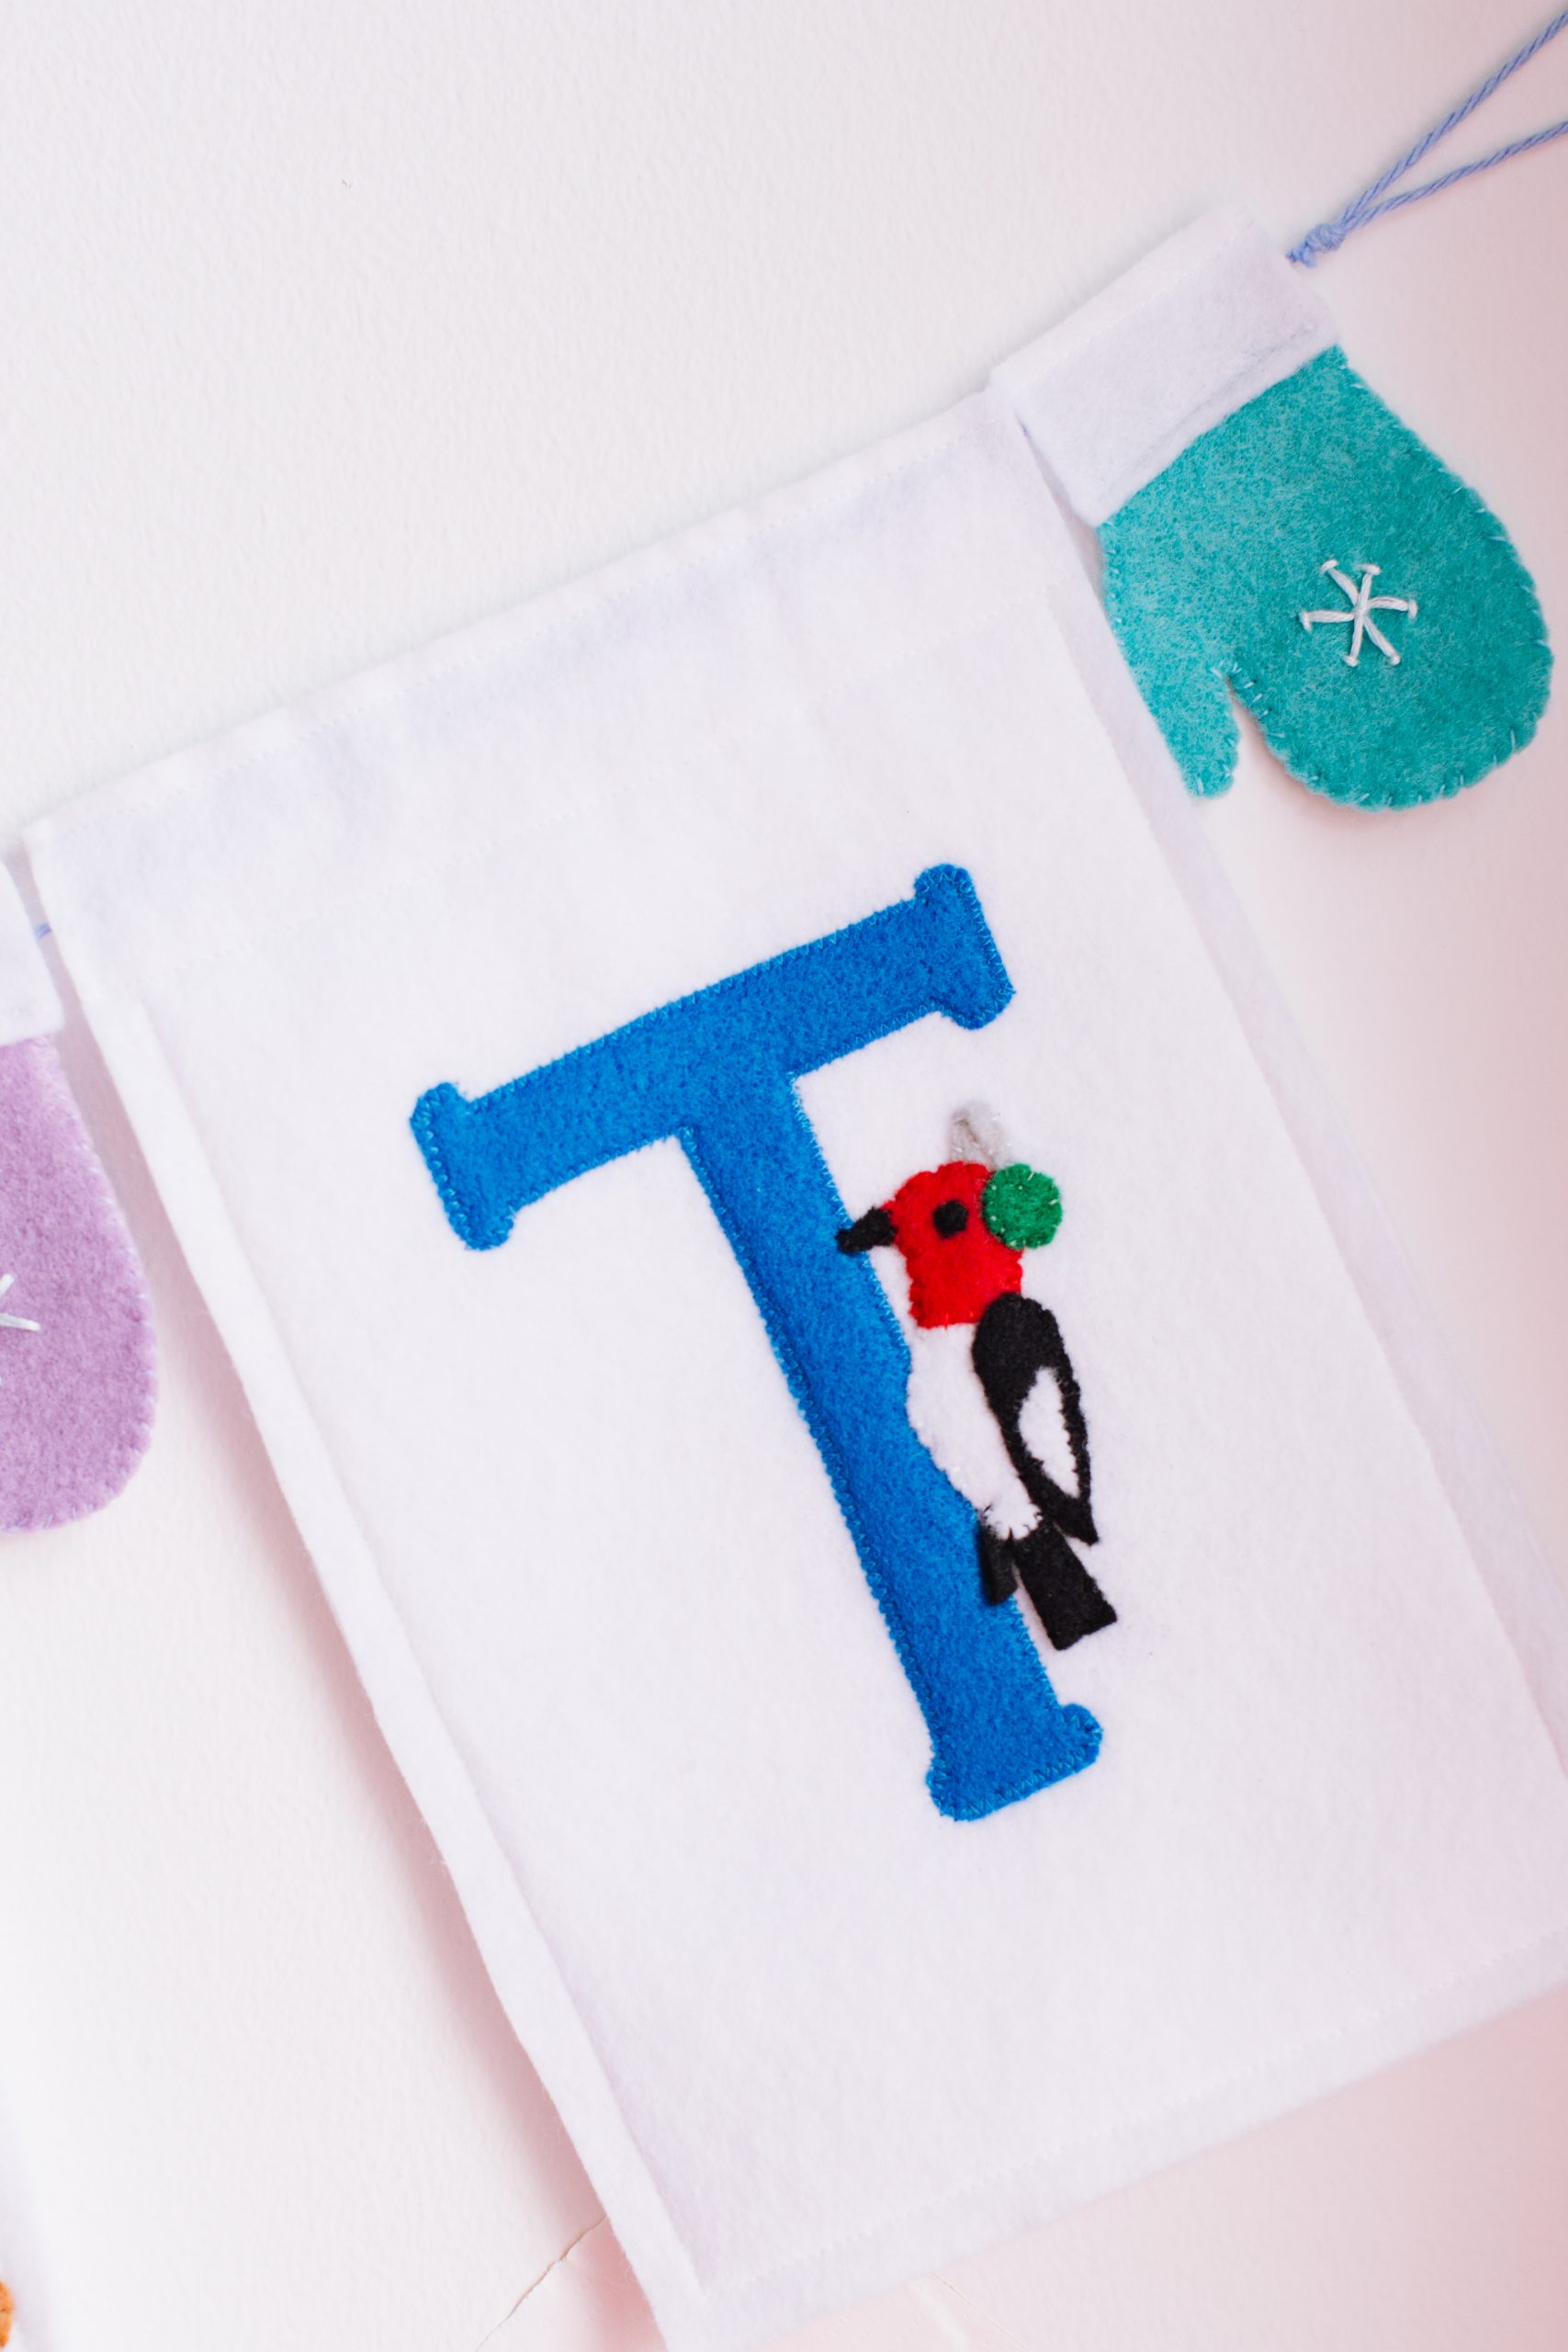
WOODPECKER WITH EARMUFFS (T):
- Cut one woodpecker head from red felt. Cut one body and one wing contrast from white felt. Cut one wing, one tail, one beak, and one eye from black felt. Cut one earmuff from dark green felt, and one earmuff band from gray felt.
- Position the eye and beak on the head and whipstitch them in place. Position the red head at the top of the white body, overlapping them slightly, and whipstitch them together.
- Position the white wing contrast on the black wing and whipstitch it in place. Position the wing over the right side of the body and whipstitch it in place. Place the upper end of the tail slightly behind the lower edge of the body and whipstitch it to the body.
- Sew one short end of the earmuff band to the woodpecker’s head, about halfway between the eye and the back of the head.
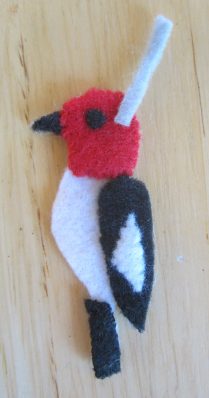
- Fold the other end of the earmuff band behind the woodpecker’s head. Secure the end with a few stitches.
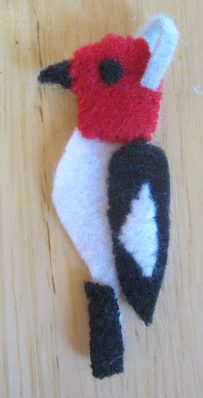
- Place the earmuff on the front of the head, covering the end of the band. Whipstitch in place.
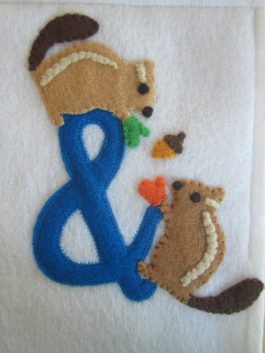
CHIPMUNKS IN MITTENS (&):
- Cut two chipmunk bodies from medium brown felt, two tails from dark brown felt, and two eye stripes and back stripes from light brown (or white) felt. Cut two eyes and two noses from black felt. Cut one mitten from green felt, and one from orange felt. Cut one acorn nut from orange or gold felt, and one acorn cap from brown felt.
- Flip half of the chipmunk pieces over and set them aside.
- Whipstitch the eye, nose, and stripes to one chipmunk, then sew the tail to the lower back of the chipmunk’s body, overlapping them slightly.
- Place the mitten over the chipmunk’s front paw, then whipstitch along the straight edge of the mitten.
- Make the second chipmunk facing the opposite direction.
- Place the acorn top over the upper edge of the acorn and whipstitch it in place.
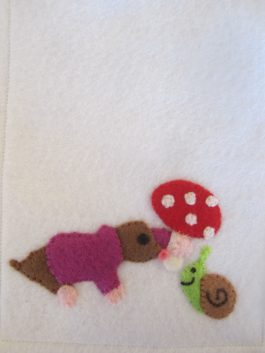
MOLE IN SWEATER (SPACE):
Mushroom Umbrella:
- Cut one mushroom cap from red felt. Cut one mushroom stem and five mushroom spots from white felt.
- Position the spots on the mushroom cap and whipstitch in place.
- Place the mushroom cap on the stem’s upper edge and whipstitch them together.
Mole:
- Cut one mole body from brown felt, one eye from black felt, one nose from bright pink felt, and three claws from light pink felt. Cut one sweater and one back sleeve from purple or magenta felt.
- Whipstitch the eye and nose to the mole’s face. Whipstitch one claw to the rear leg.
- Position the sweater on the mole body and whipstitch along the sides. Tuck a claw under the end of the sweater’s front leg and whipstitch it in place.
- Place the mushroom stem on top of the back sleeve and whipstitch. Whipstitch one claw (with the toes facing left, as if holding the stem) to the front of the mushroom stem.
- Position the end of the back sleeve behind the mole’s head and whipstitch in place.
Snail:
- Cut one snail body from light green felt and one snail shell from brown felt.
- Separate out two strands of black embroidery floss to backstitch the mouth and satin stitch the eye.
- Backstitch the shell spiral with brown embroidery floss (use all six strands of floss).
- Whipstitch the shell to the snail body.
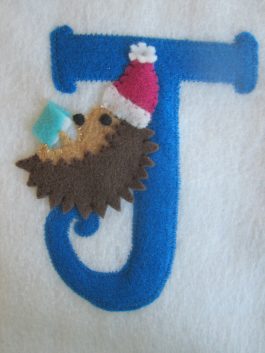
HEDGEHOG IN HAT (J):
- Cut one hedgehog body from light brown felt, and one hedgehog spike set from dark brown felt. Cut one eye and one nose from black felt. Cut one hat from magenta felt, and one hat trim and pompom from white felt.
- Whipstitch the eye and nose to the hedgehog body. Position the spikes on the lower edge of the body and whipstitch in place.
- Whipstitch the trim to the lower edge of the hat and the pompom to the tip of the hat. Position the hat on the hedgehog’s head, then whipstitch the lower edge of the hat to the hedgehog.
- Cut one book cover from blue felt and one book page from white felt. Fold the cover in half and insert book page inside. Whipstitch along the spine of the book.
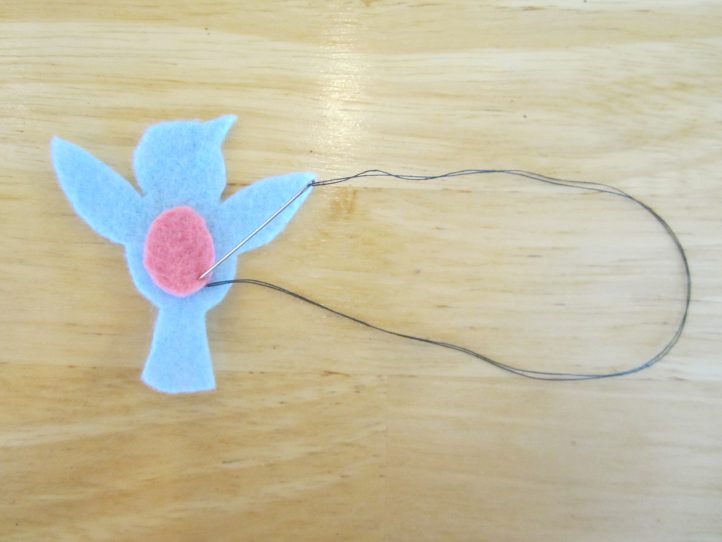
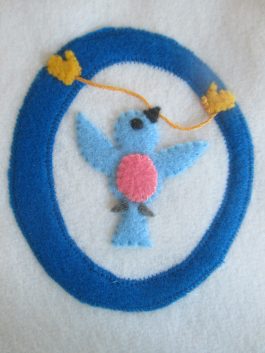
BLUEBIRD WITH STRING OF MITTENS (O):
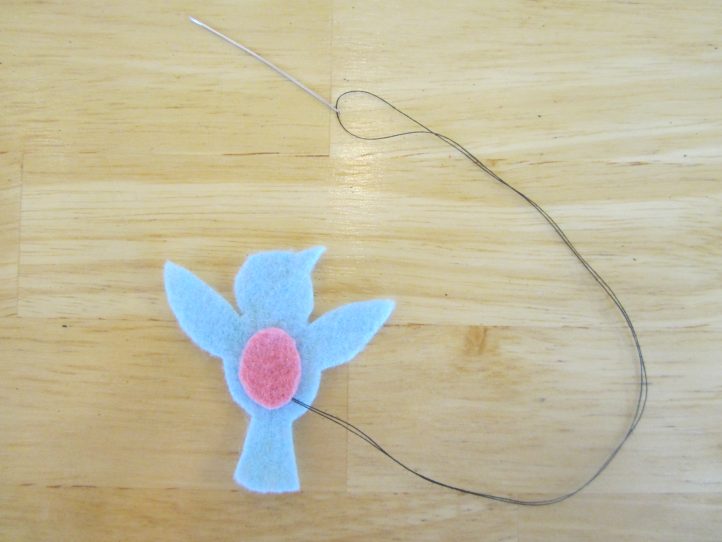
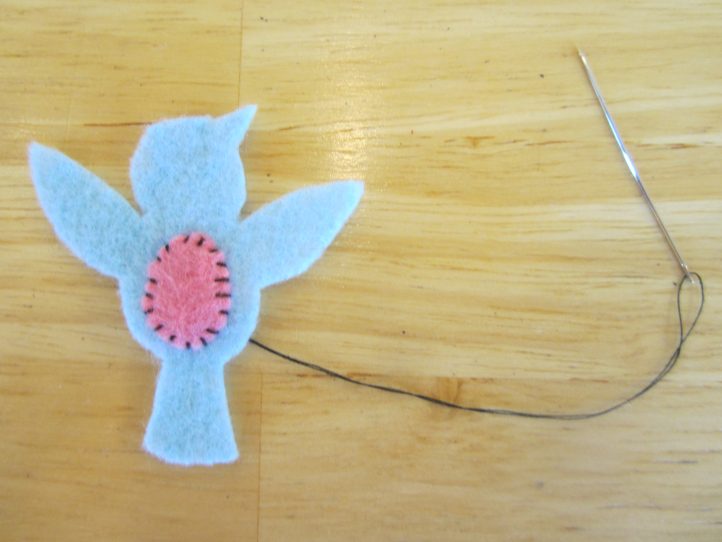
- Cut one bluebird body from blue felt, two bluebird legs from gray felt, one tummy from bright pink felt, and one eye and one beak from black felt. Position the pieces on the bluebird body, then whipstitch in place.
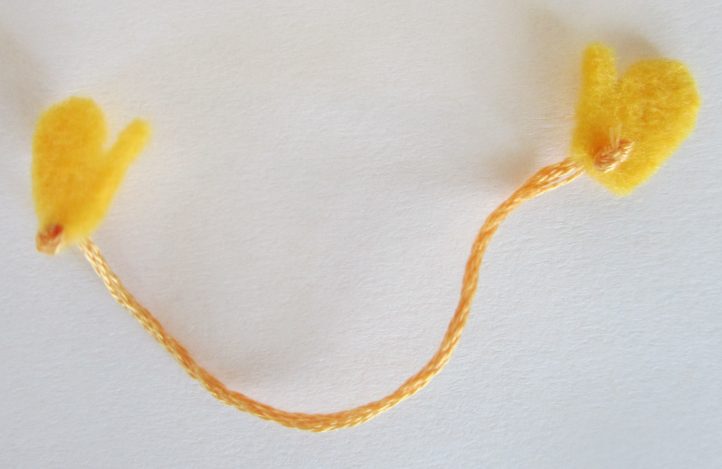
- Cut two mittens from light orange felt. Flip one over to make a pair of left and right mittens.
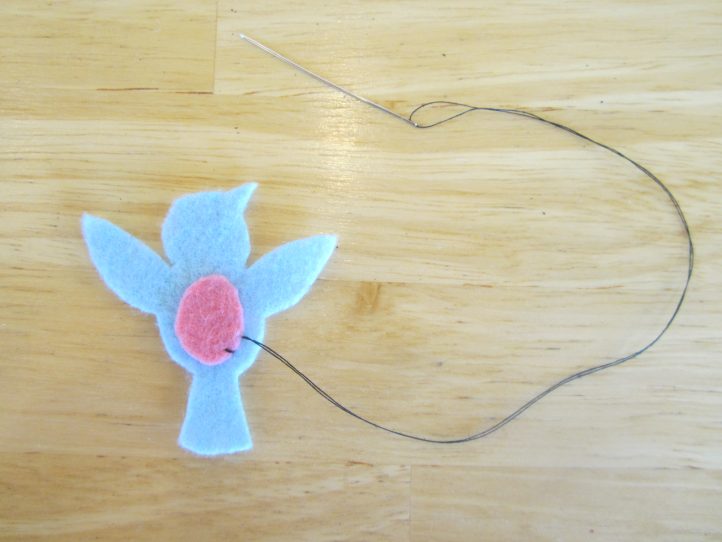
- Tie a double knot at the end of a piece of light orange embroidery floss. Trim the excess close to the knot. Pull the embroidery needle through the underside of the left mitten, at the center of the straight edge, until the knot is snug against the mitten.
- Put the needle through the topside of the right mitten, leaving a 2 1/2 inch string of floss between the two mittens. Knot the end of the floss and trim the tail.
RABBIT IN SCARF (Y):
- Cut one rabbit body from light brown felt. Cut two inner ears from light pink felt. Cut one nose from black or dark brown felt. Cut one scarf from bright pink felt.
- Whipstitch the inner ears and nose to the rabbit’s face.
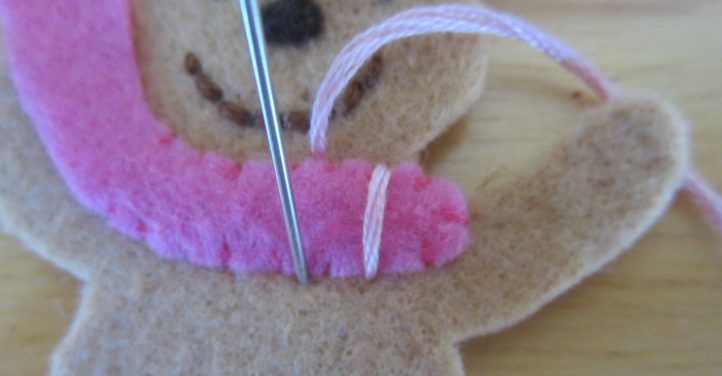
- Using dark brown embroidery floss, backstitch two small upside-down u-shapes for eyes and a larger u-shape for a smiling mouth.
- Cut three small slits, each 1/4 inch deep, into the straight end of the scarf to form a fringe.
- Position the scarf on the rabbit’s neck and whipstitch around the top, bottom, and right sides, leaving the left side free.
- Using contrasting embroidery floss, stitch across the scarf from top to bottom about seven times, forming stripes.
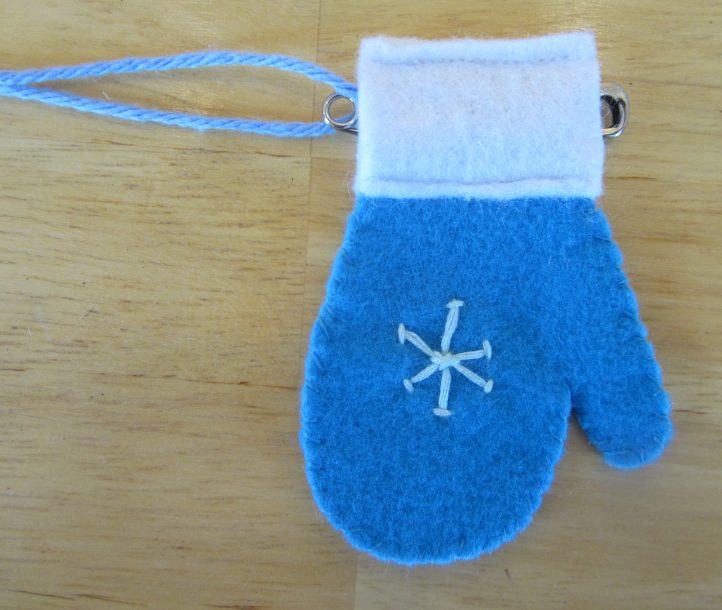
MITTENS:
- Cut eight mittens (from the templates located below) each from bright pink, lavender, and teal felt as well as four mittens from blue felt, so that you have seven pairs facing opposite directions. Set aside one mitten from each pair for the backing.
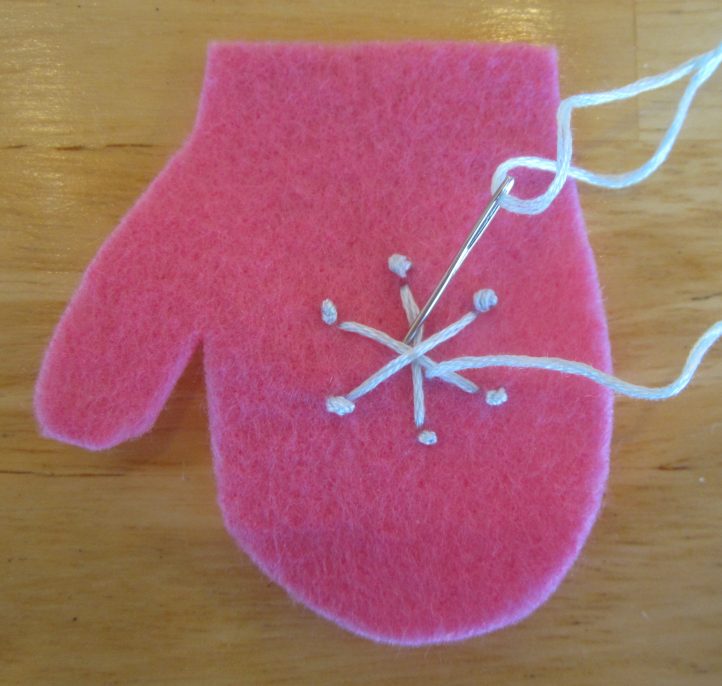
- Cut out the snowflake stitch guide pattern, and pin it to the center of a mitten front.
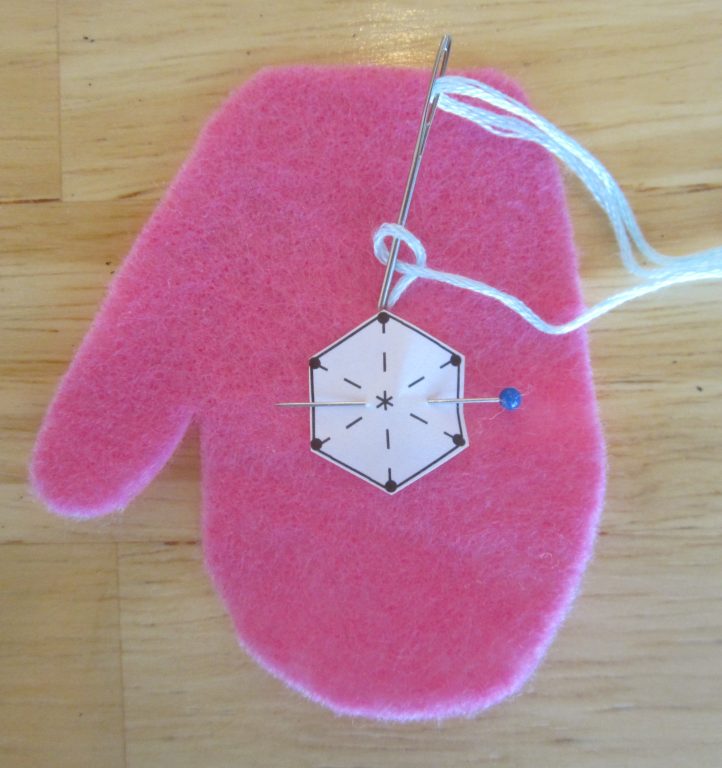
- Using light blue (or white) embroidery floss, stitch small knots at each of the six tips. (To create a knot, make a small loop of embroidery floss, then put the needle through the middle of the loop, gently pulling it tight.)
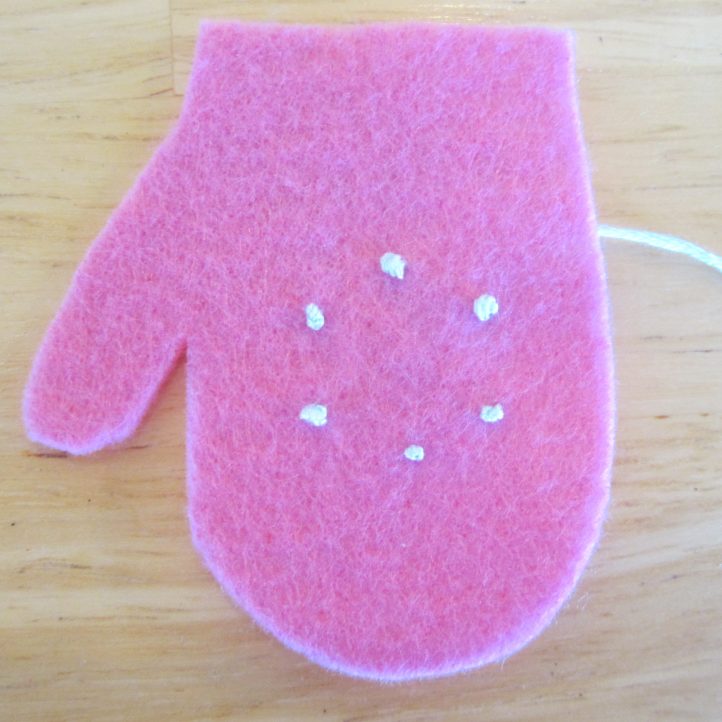
- Remove the pattern. Connect opposite pairs of dots with long straight stitches.
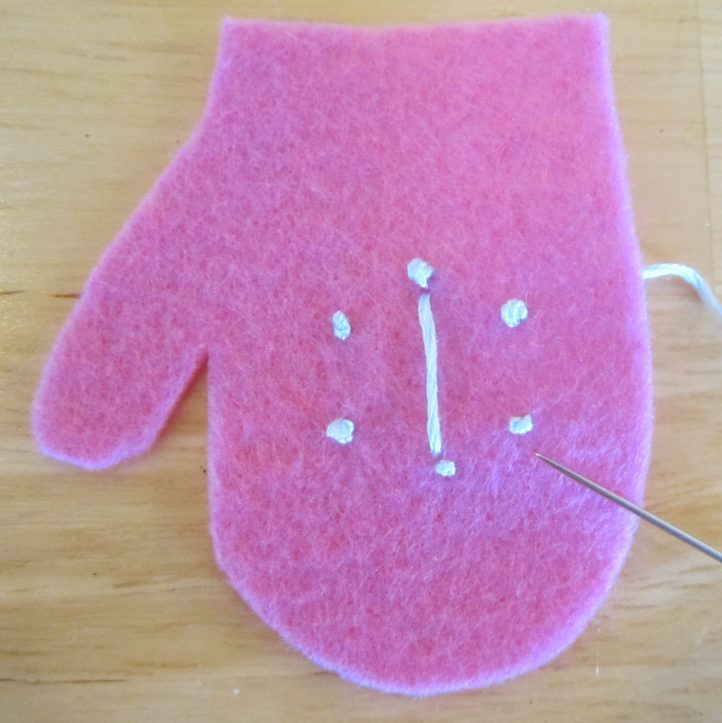
- Stitch a small X across the center of the snowflake to hold the large stitches in place. Repeat for the rest of the mitten fronts.
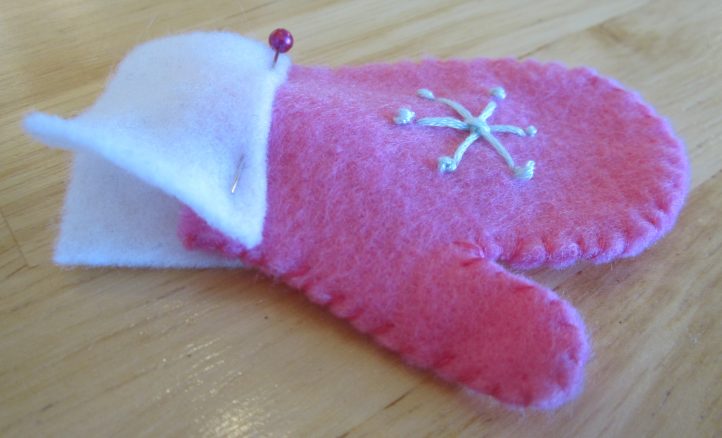
- Place an embroidered mitten front and its matching back wrong sides together. Whipstitch around the curved edges.
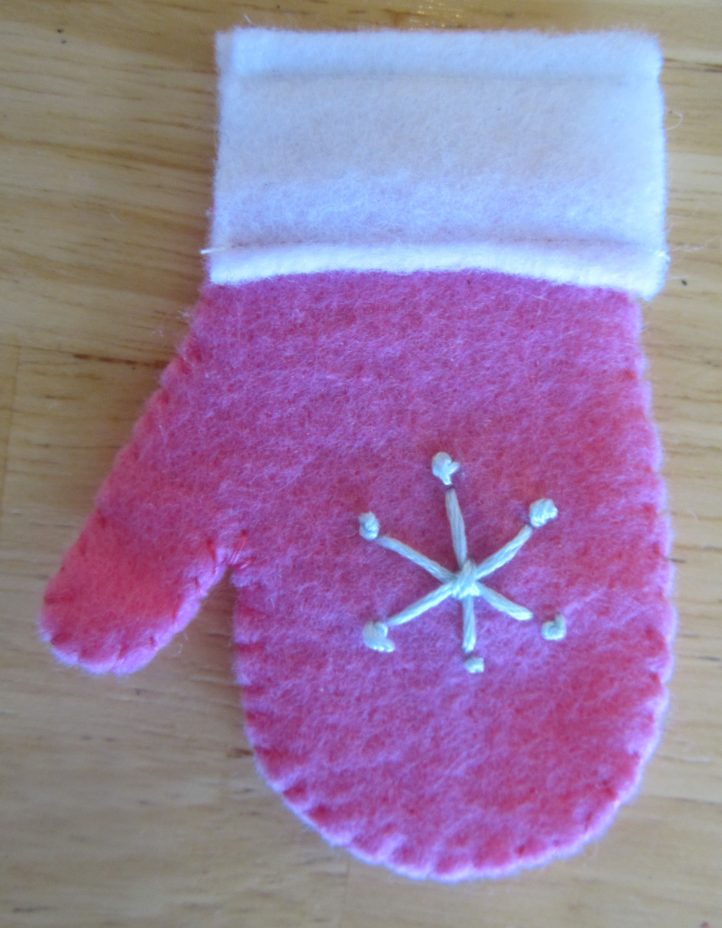
- Cut 28 mitten cuffs from white felt. Place the upper edge of a mitten between two cuffs, overlapping them about 3/8 inch.
- Using white thread, machine straight stitch (or hand backstitch) across the lower edge of the cuff with scant 1/4 inch seam allowance, catching the upper edge of the mitten. Stitch across the upper edge of the cuff, forming a casing.
BANNER PIECES AND LETTERS:
- Cut twelve pieces of 9 x 12 white felt in half widthwise, creating twenty-four 6 x 9 inch rectangles. (Or cut twenty-four 6 x 9-inch rectangles from 3/4 yard of white felt.) Set aside twelve pieces for the banner backing.
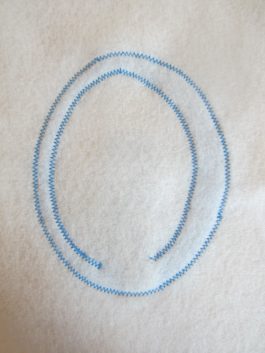
- From blue felt, cut one each of characters C, M, F, R, T, &, J, and Y, as well as three copies of the letter O.
- Position the owl on the lower inside edge of the letter O so that the feet overlap the lower edge of the O, and the tail goes behind the letter O and peeks out beneath it. Whipstitch the owl feet to the O.
- Position the fox behind the letter F and pin them together.
- Center each letter on one of the white felt rectangles, with the lower edge of the letter 2 inches from the bottom of the banner piece.
- Zig-zag stitch (or hand whipstitch) around each letter using blue thread. Note: For the O with the owl, pin the owl’s wings out of the way and leave the lower part of the inner edge of the O unstitched, so they do not get stitched over with blue thread.
ANIMALS ON THE BANNER:
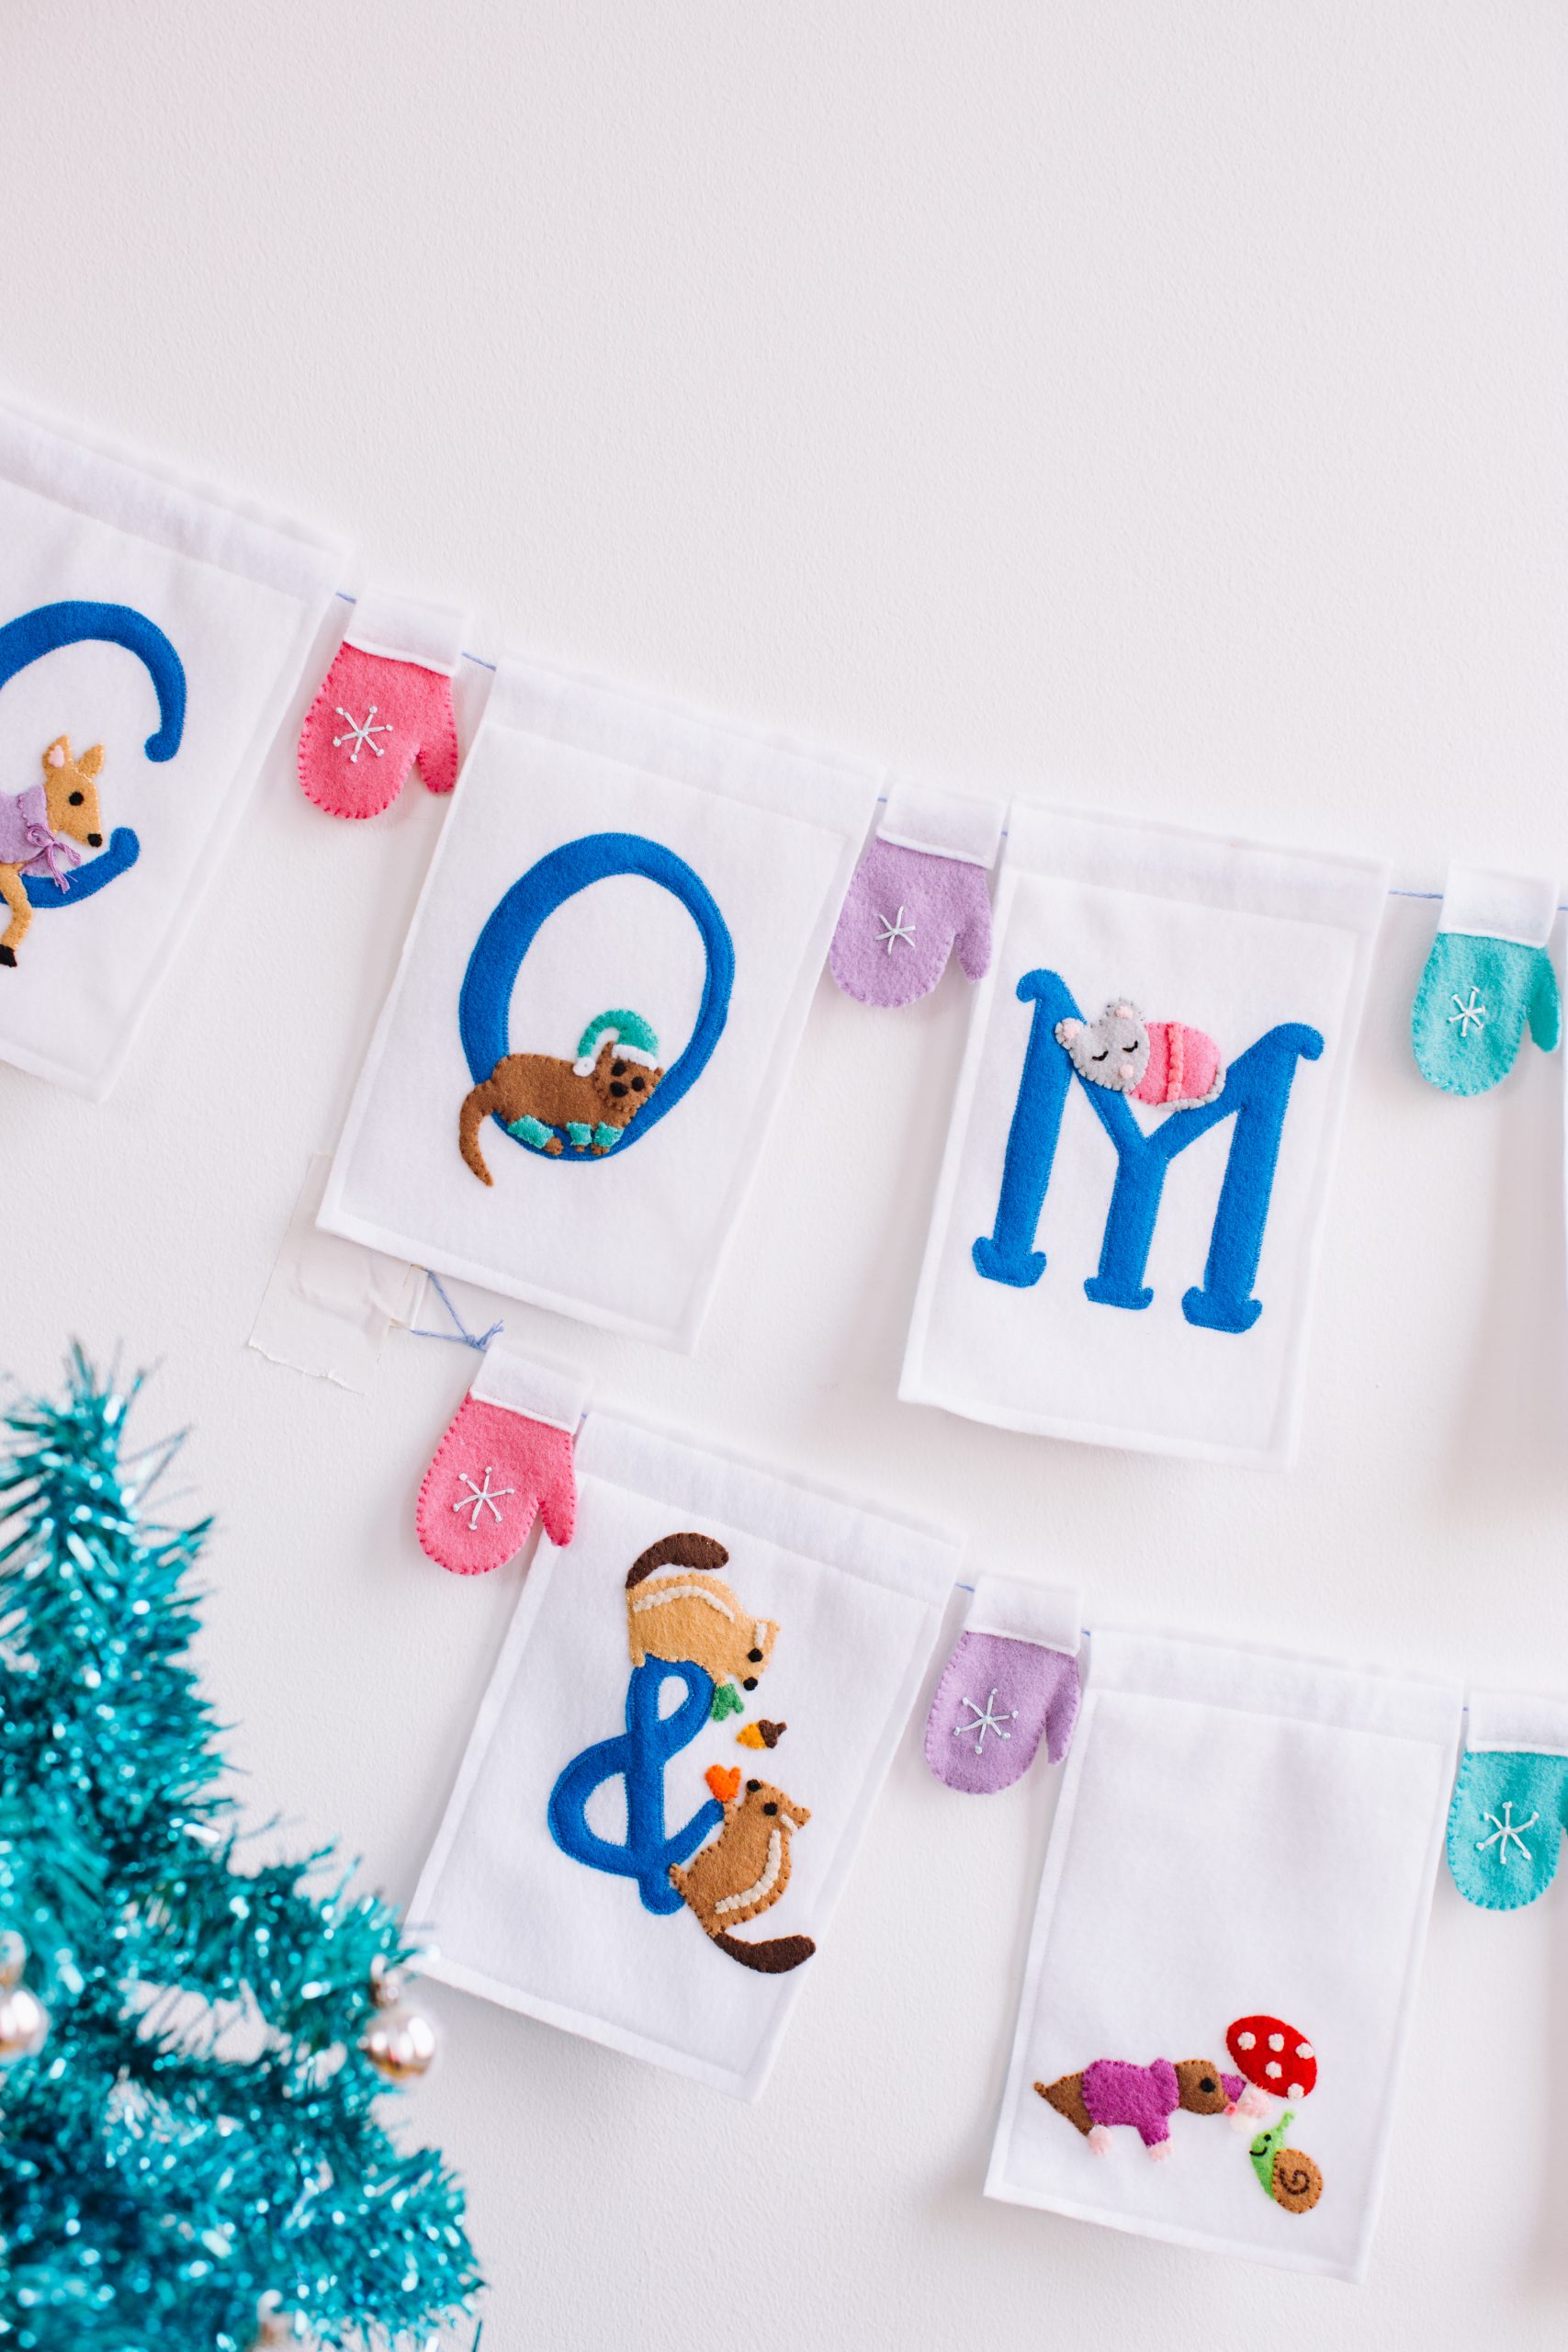
- Position the deer walking in front of the letter C.
- Place the otter on the lower inside edge of the first letter O.
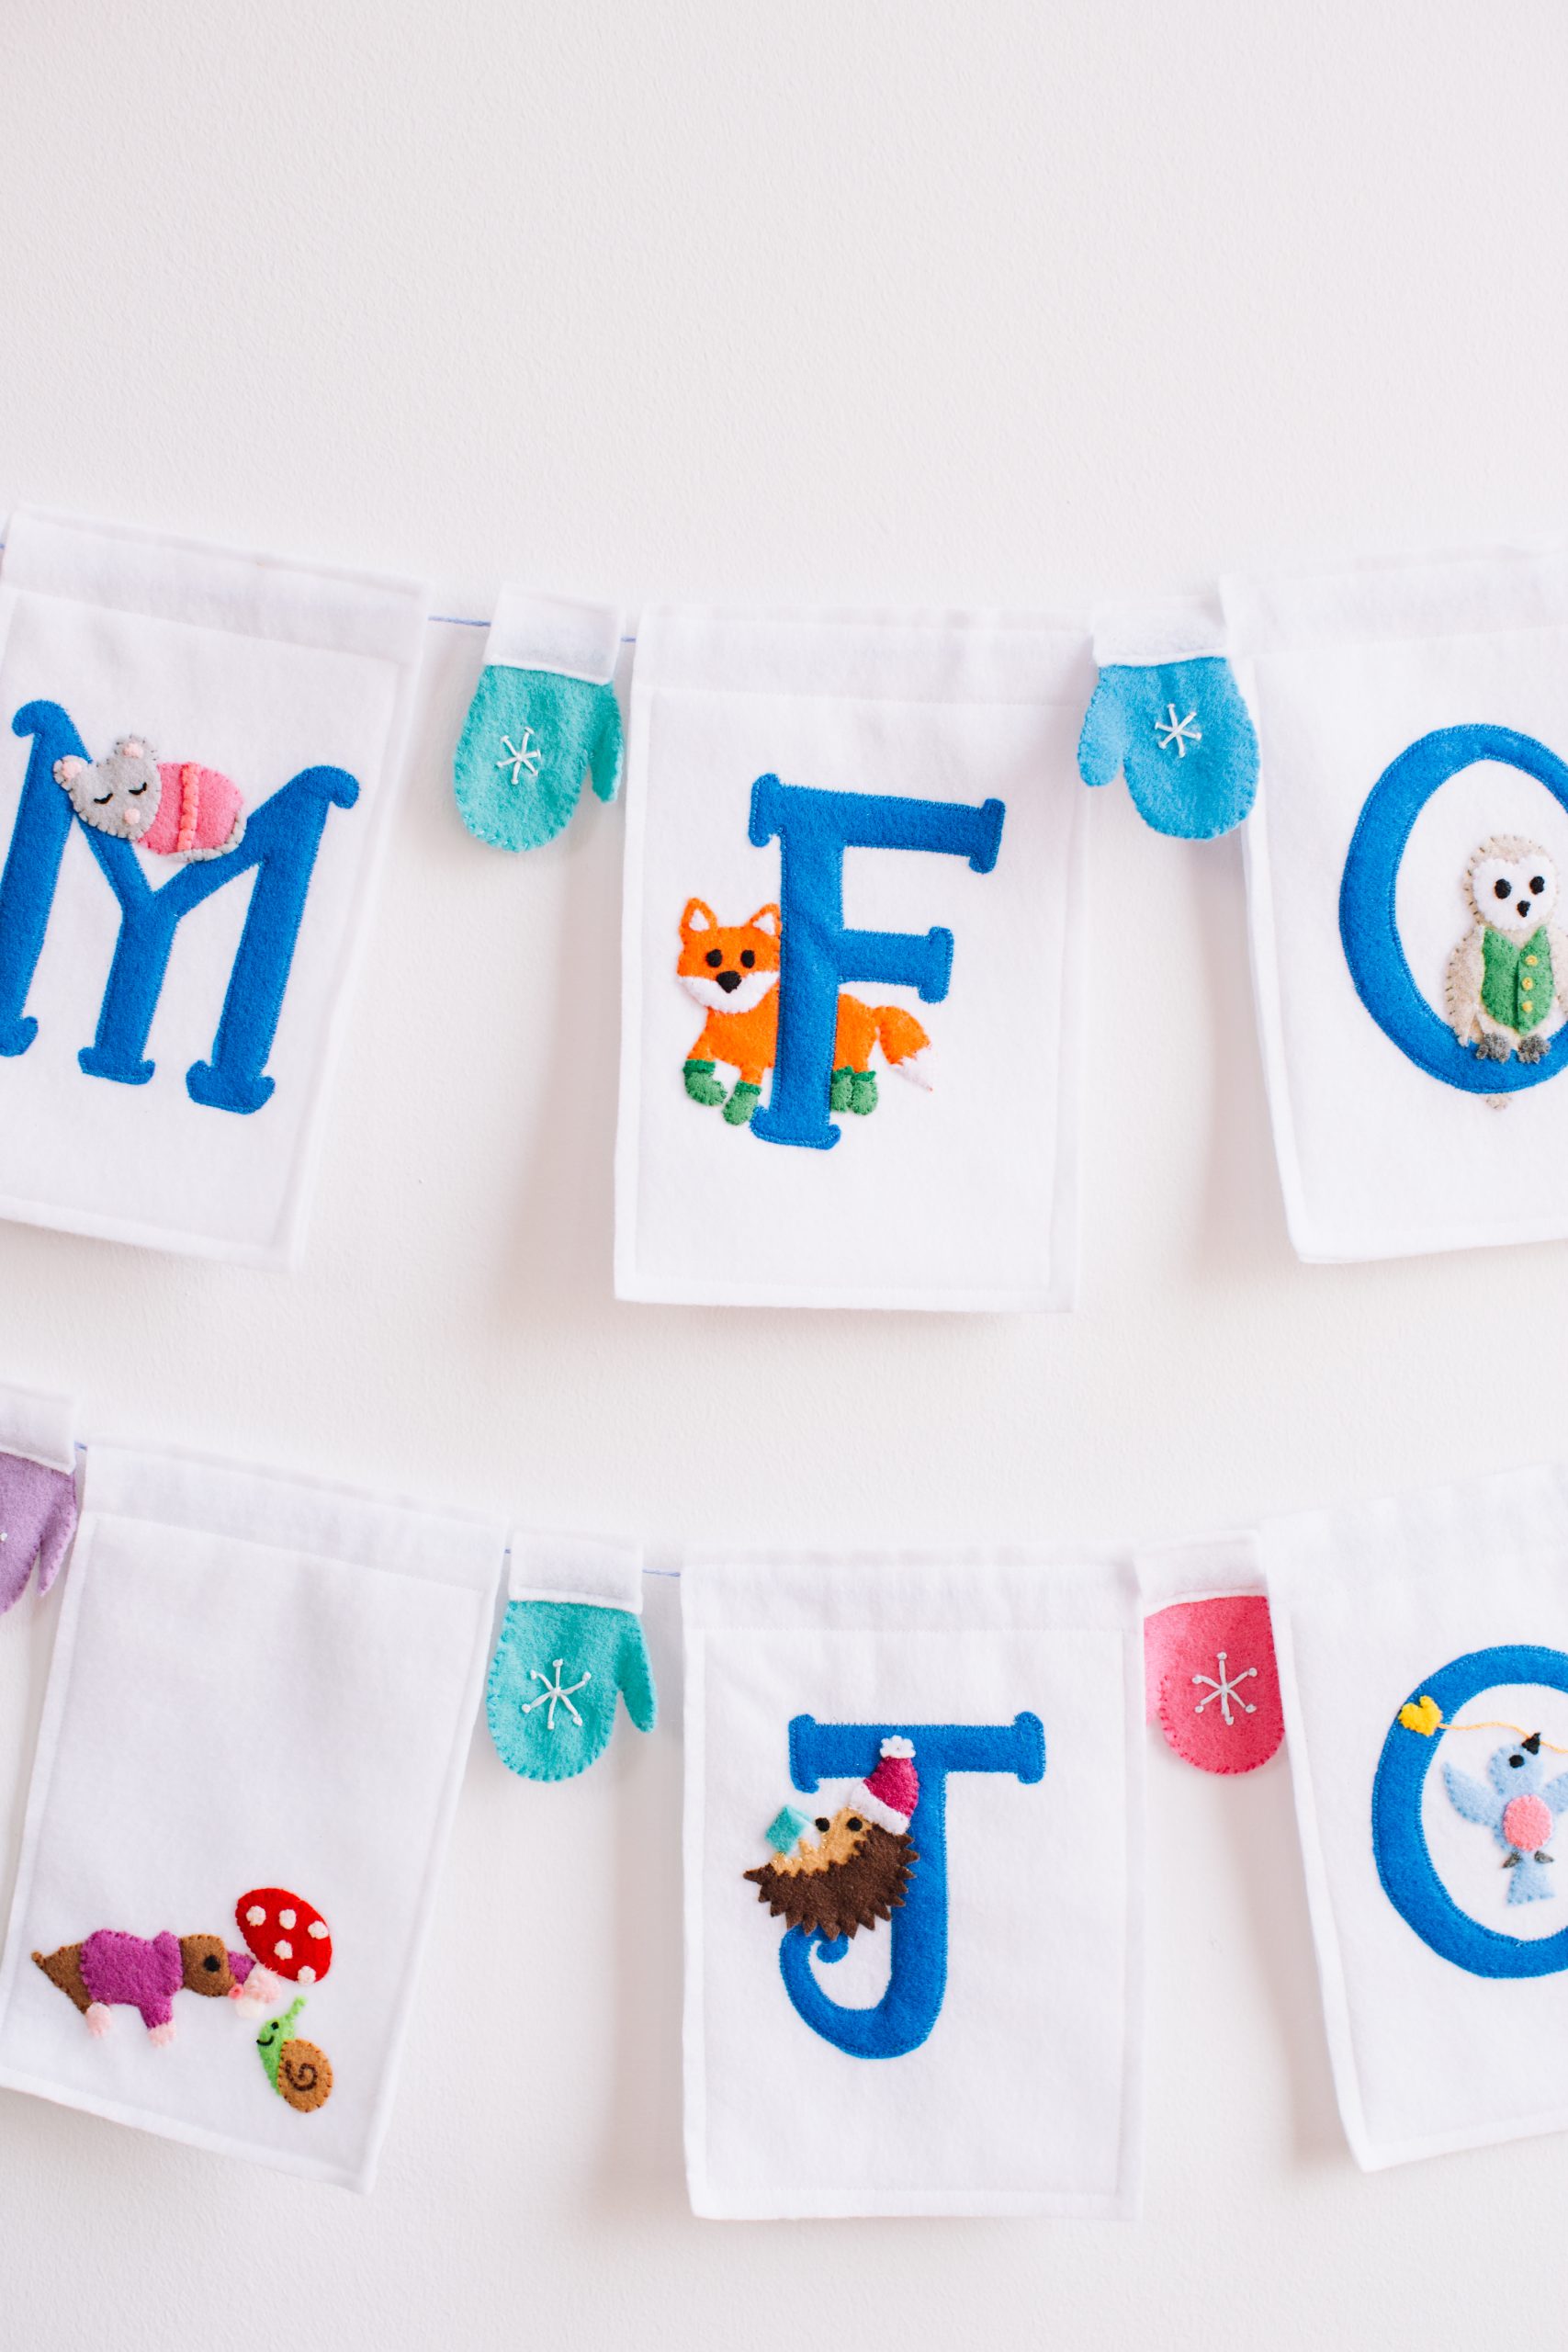
- Snuggle the mouse into the middle of the top of the letter M.
- Note that the fox and owl are already positioned behind the F and the next letter O.
- Put the bear near the base of the letter R.
- Position the woodpecker on the right side of the straight edge of the letter T, as if the T is a tree trunk.
- Arrange the right-facing chipmunk on top of the ampersand, and the left-facing chipmunk on the lower right side of the ampersand. Position the acorn between the chipmunks’ mittens, as if being tossed from one to the other.
- Place the mole with the mushroom umbrella near the lower left corner of the plain white panel, at least 1/2 inch away from the edges. Place the snail near the lower right corner.
- Balance the hedgehog on the curved end of the letter J. Tuck the book behind the hedgehog’s upper paw.
- Arrange the two light orange mittens on the sides of the third letter O. Place the bluebird in the center of the O, making sure the beak covers a bit of the light orange embroidery floss, as if the bird is catching the mitten string in its beak.
- Place the rabbit to the right of the letter Y.
- Pin all the animals (and accessories) in place, then whipstitch them to the banner using matching thread.
BANNER BACKING:
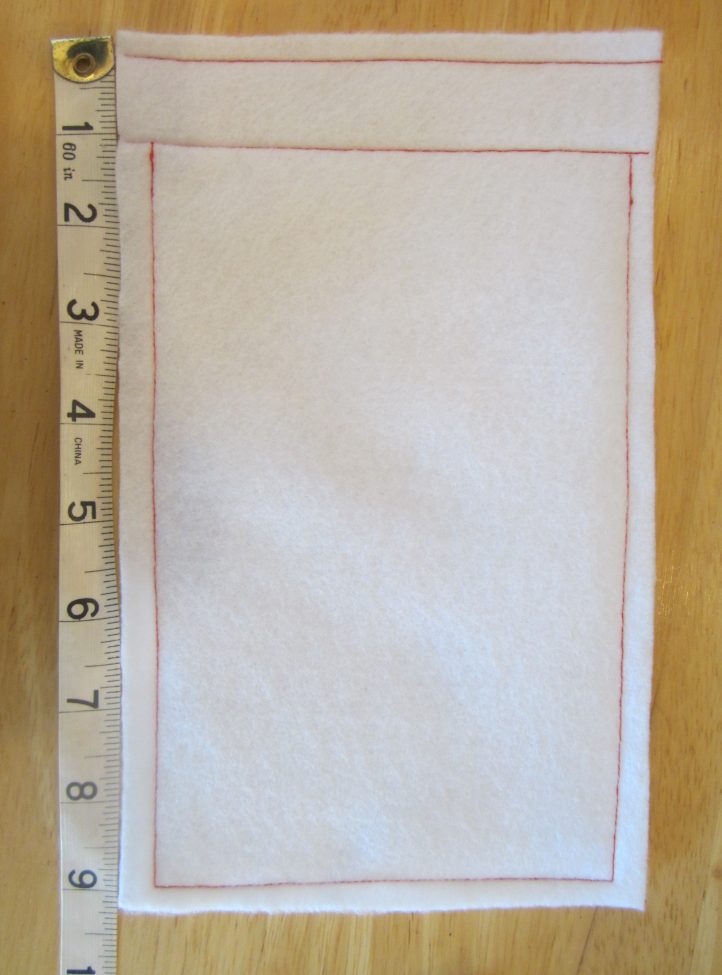
- Place one letter banner and one backing wrong sides together, then machine stitch (or hand backstitch) along the top edge using 1/4 inch seam allowance. (Note: Use white thread; red thread shown here for visibility.)
- Stitch a parallel line 1 inch below the top edge, forming the casing to string the banner. Stitch along the sides and lower edge.
- Repeat for the remaining banner pieces.
ASSEMBLY:
Note: If you prefer, you can leave the 4-yard cord uncut and string all the pieces as a single, long banner.
- Lay out the banner pieces and mittens in order, alternating banner pieces and mittens.
- Cut a 2 1/4-yard piece and a 1 3/4-yard piece of cord, string, or non-stretchy yarn.
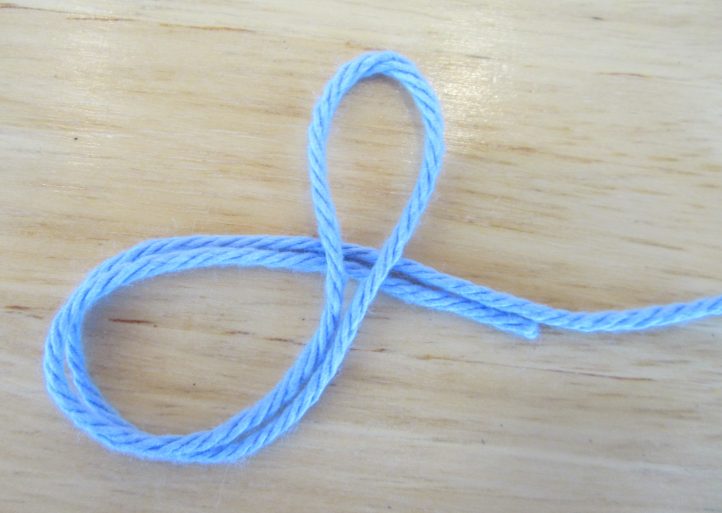
- Make a 6-inch loop in one end of the longer cord.

- Fold the loop over, forming a second loop.
- Pull the original loop through the new loop.
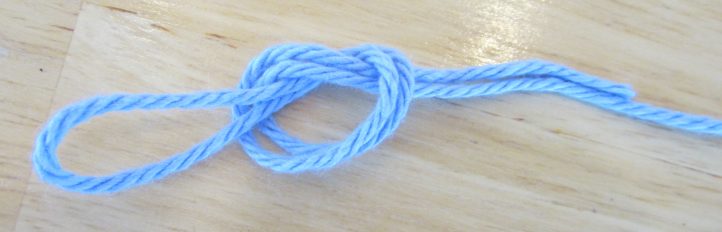
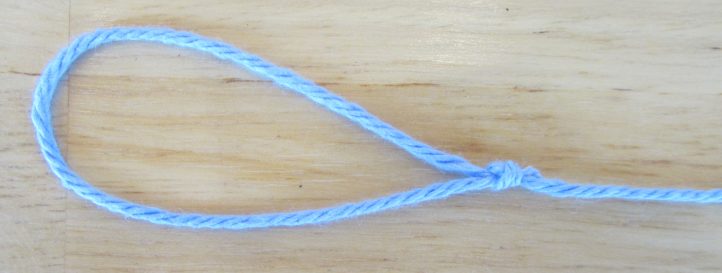
- Keep pulling until a snug knot forms.

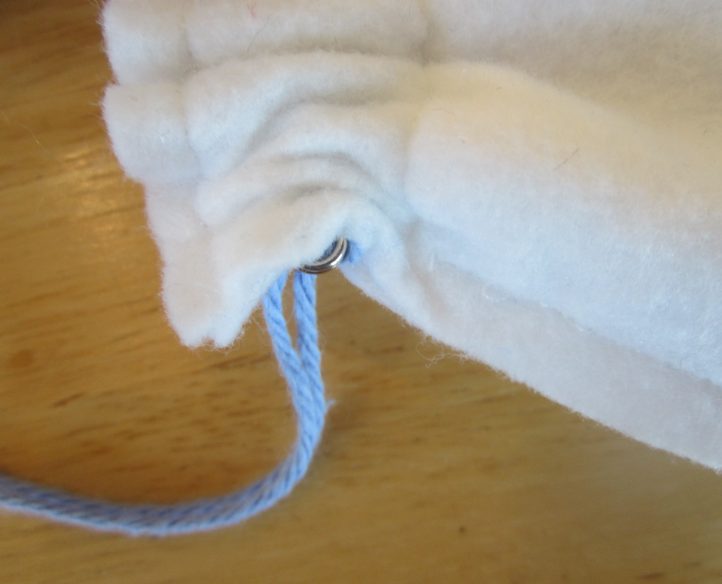
- Trim off the excess tail.
- Attach a large safety pin to the loop. Insert the safety pin into the casing cuff of the first mitten and pull it out the other side. Then insert the pin into the casing of the first banner section and push the pin through, gently scrunching up the casing as needed.
- Continue pushing the safety pin through the casings until all the mittens and letters for the word “COMFORT” are strung.
- Remove the safety pin, trim the cord to the desired length, and tie a second loop the same way as the first.
- String the “& JOY” banner pieces the same way on the shorter cord.
- Display the completed banner and enjoy!
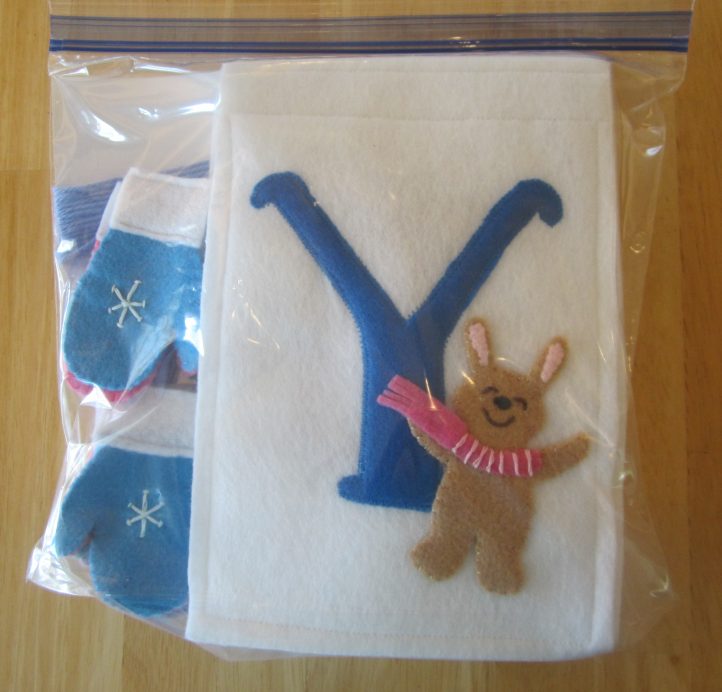
SEASONAL STORAGE TIP:
Gently pull the cords out of the banner, then wrap them around an index card to prevent tangling. Stack the banner pieces and put them in a gallon-size zip bag.

This is one of the cutest projects I have ever seen! Each animal has their personality. Adorable! Thank you, Christy Jones!
Agreed! We’re so glad you liked this pattern, Lori 🙂 Thank you for the kind comment! – Ashley, We Like Sewing