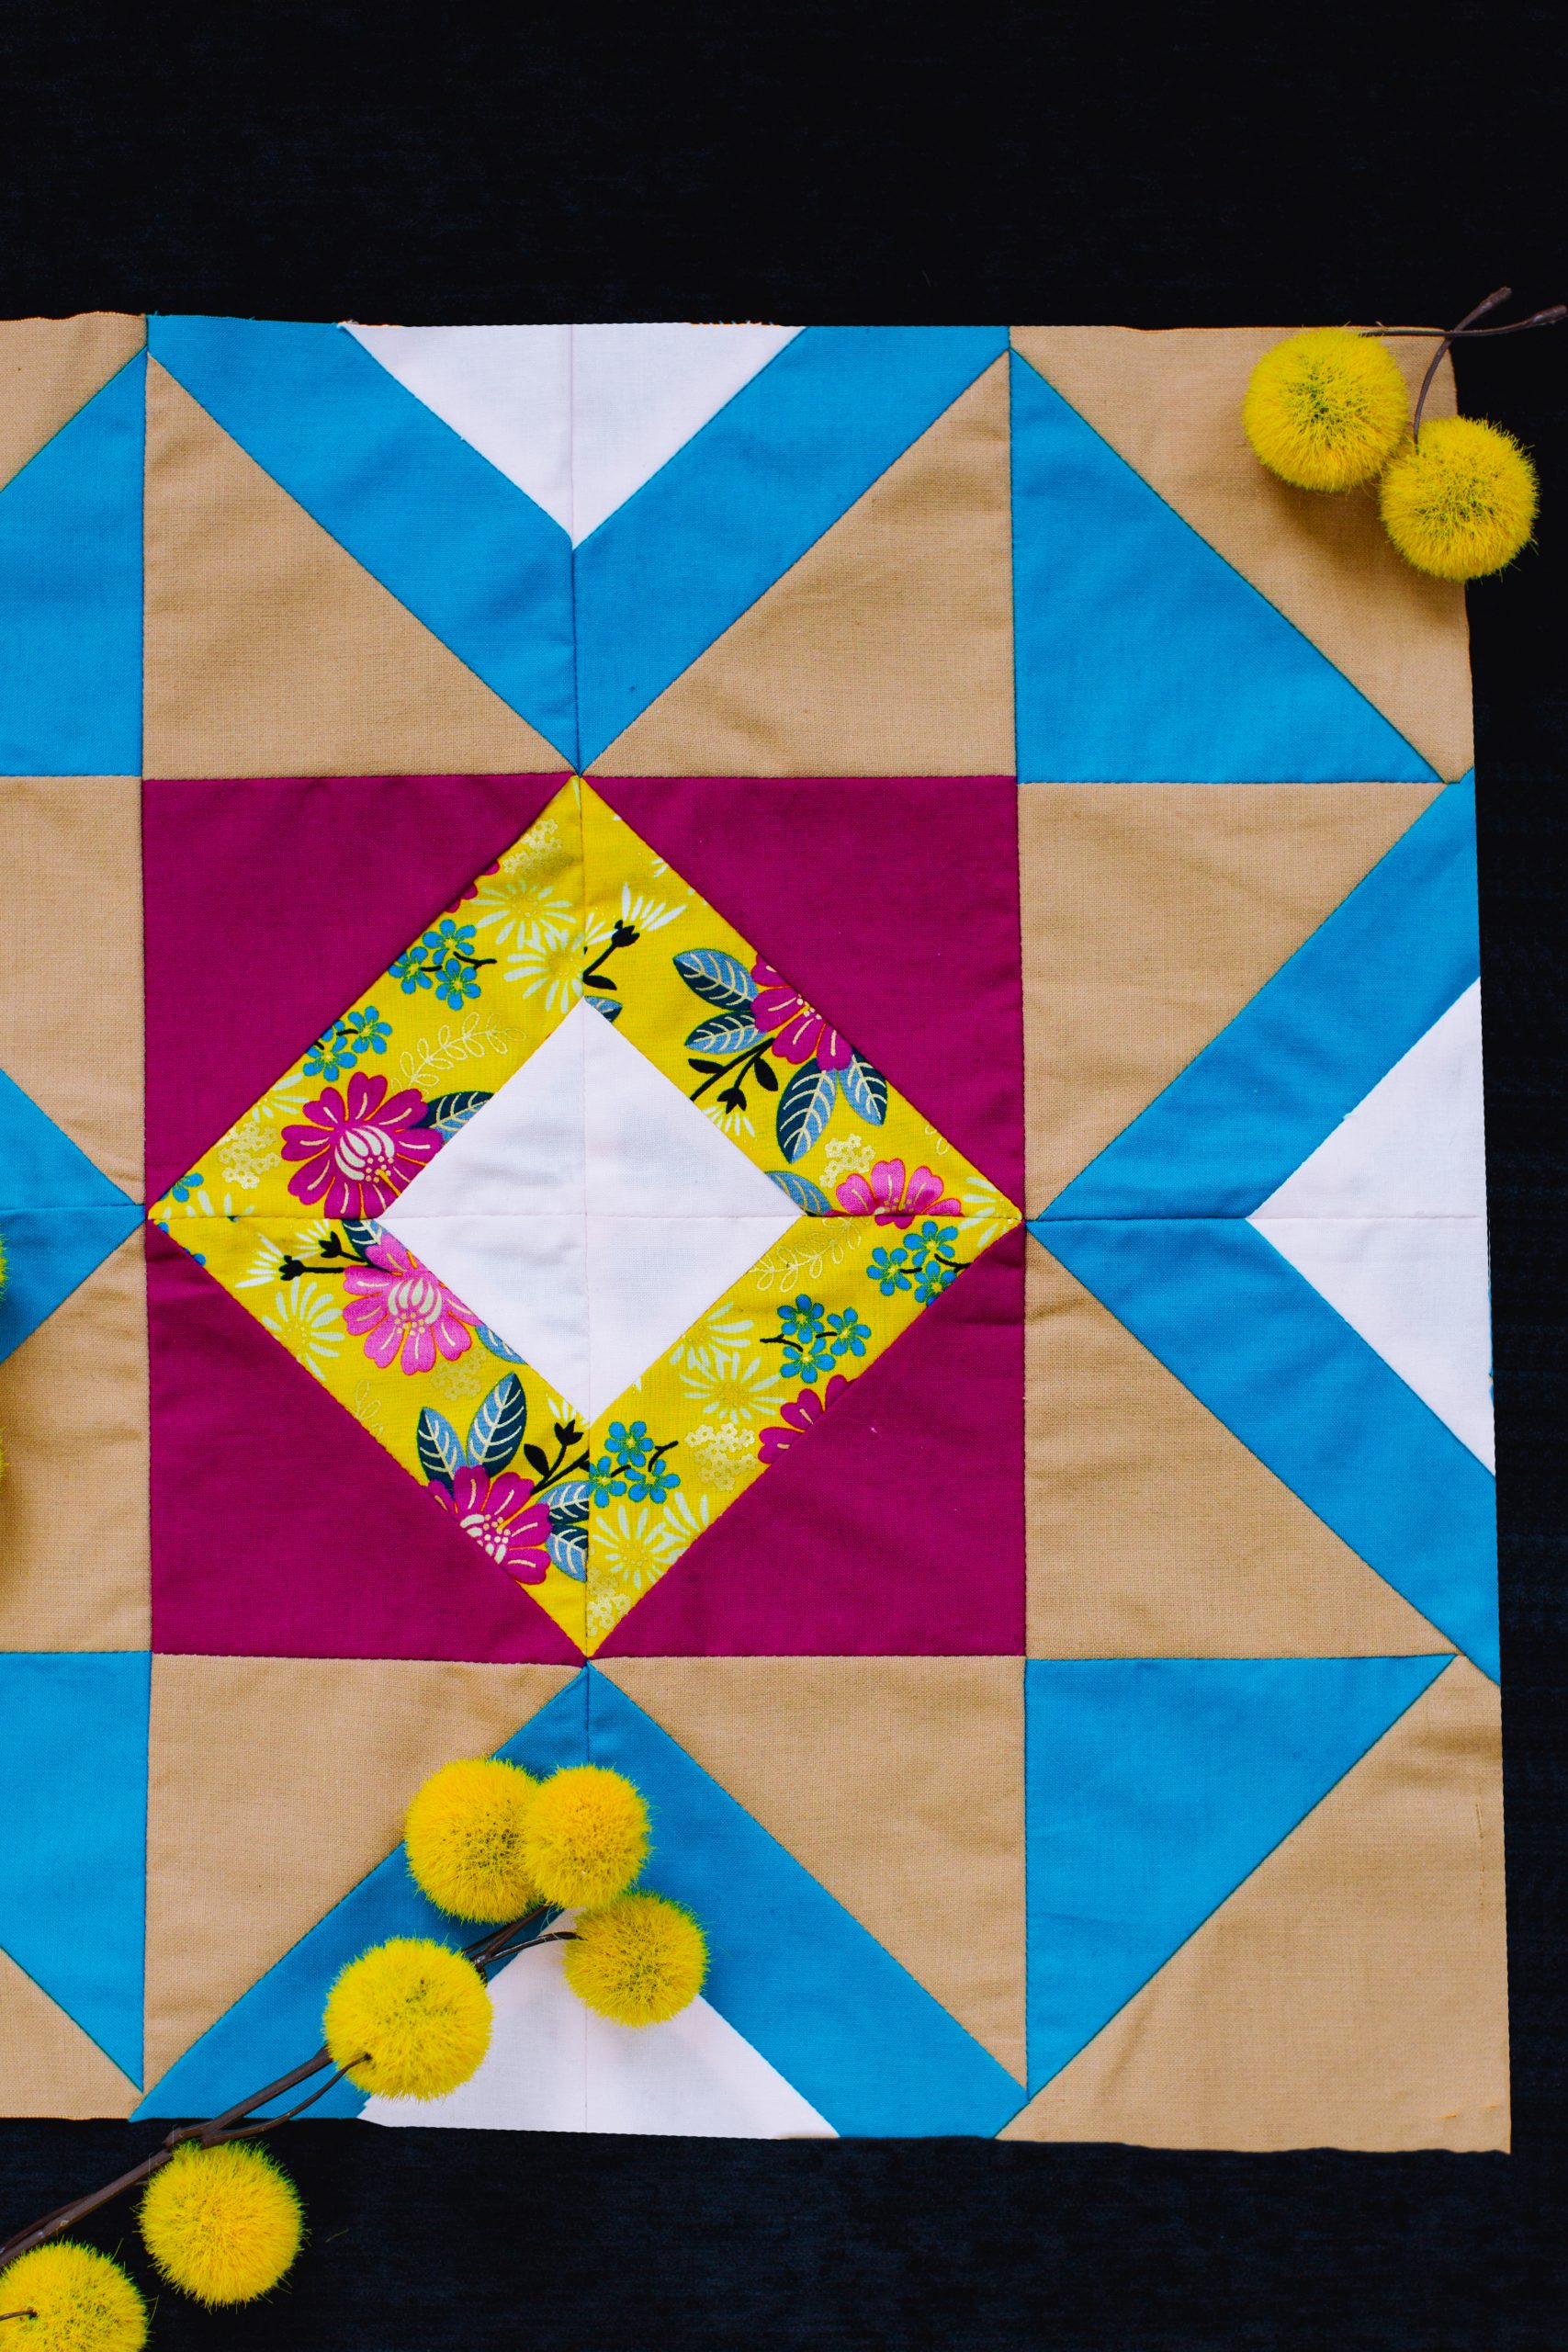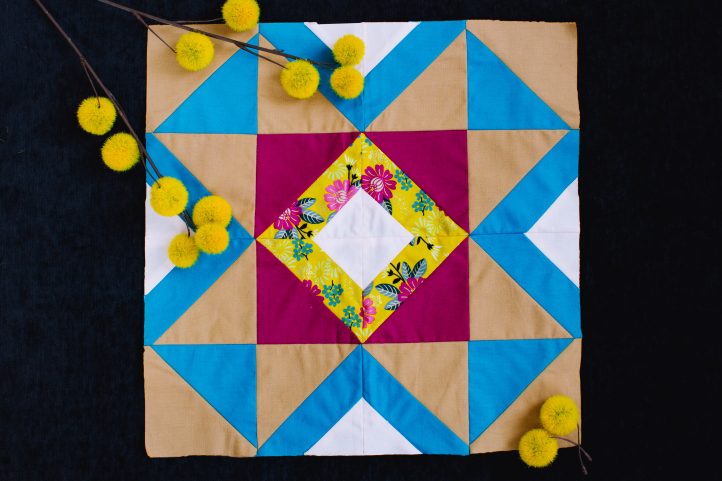
Can’t get enough of quilting classics? Don’t miss this traditional Dutch windmill quilt block from designer Janice Bailor. Made using precuts like fat quarters and fat eighths, this classic quilt block pattern is made in autumnal hues of cerulean, latte, and burgundy for a truly stunning contrast of colors. This large quilt block (finishing at an approximate 16”x16” square) can be made into a rich jewel tone throw quilt for fall or an eye-catching pillow for your living room.
Skill Level: Easy
Finished Dimensions: 16 1/2” square quilt block
Seam Allowances: 1/4” patchwork
DESIGNER NOTES: “RST” means Right Sides of fabric Together. “HST” means Half-Square Triangle.
Materials:
- Fabric (for one block):
- Blue – 1 fat quarter or 1/2 yd
- Tan- 1 fat quarter or 1/2 yd
- Yellow – 1 fat eighth or 1/4 yd
- Purple – 1 fat eighth or 1/4 yd
- Pink – 1 fat eighth or 1/4 yd
- Fabric (for 16 blocks, makes a Throw Quilt, 74” square):
- Feature Fabrics – 1 pack 10” Layer Cake and 1 pack 5” Charm Squares
- Sashing – 1 yard
- Backing – 5 yards
- Binding – 1 yard
- Walking foot
- Rotary cutter, mat and acrylic ruler
- Basic sewing and quilting notions
Cutting Instructions:
- Line up selvages and press all fabrics to remove any creasing or wrinkles.
- Neaten and trim the cut edges along the WOF (Width of Fabric) with a rotary cutter, ruler and cutting mat as required to create an even edge.
- From the newly trimmed edge, use the cutting mat grid and acrylic ruler to cut:
- Blue fabric: 1-10” sq; 2- 5” sq /block
- Tan fabric: 1-10” sq; 2- 5” sq /block
- Yellow fabric: 2- 5” sq /block
- Purple fabric: 2- 5” sq /block
- Pink fabric: cut 12 – 2 1/2” squares/block
Sewing Instructions:
PIECING THE HALF-SQUARE TRIANGLES:
Two-at-a-Time Half-Square Triangles:
- To create the 2-at-a-time half-square triangles, pair one Yellow 5” background square with one Purple 5” colored square RST.
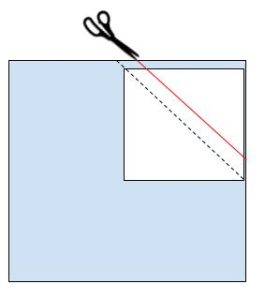
- Using a ruler and pencil, draw a diagonal line from one corner to the opposite corner on the Yellow square. Pin in place.
- Sew 1/4” down each side of the diagonal line. Repeat as necessary for the remaining Yellow and Purple, then Blue and Tan 5” pairs. See Figure 1.

- Cut each 5” square along the diagonal line and press open to the darker fabric. Trim to a neat 4 1/2” square using the diagonal line on the grid ruler to remove excess from all sides as necessary to create 8 Two-at-a-Time half-square triangle (HST) units per block, or 4 each of the Yellow and Purple, and 4 each of the Blue and Tan combinations.
Eight-at-a-Time Half-Square Triangles:
- To create eight-at-a-time half-square triangles, pair one Blue 10” square with one Tan 10” background square RST.
- Using a ruler and pencil, draw a diagonal line from each corner to the opposite corner on the Tan square. Pin in place.
- Sew 1/4” down each side of the diagonal lines.
- Cut the square apart along each diagonal line, as well as on the horizontal and vertical axes. See Figure 2.
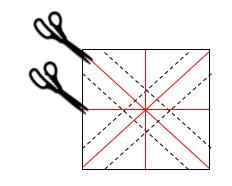
- Press all half-square triangles open to the darkest side of the fabric. Trim to a neat 4 1/2” square using the diagonal line on the grid ruler to remove excess from all sides as necessary.
CREATING THE HALF-SQUARE TRIANGLE INSETS:
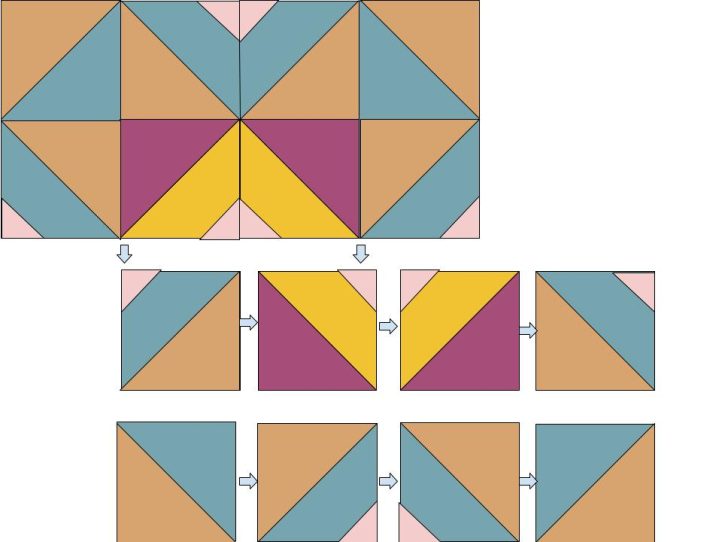
- To create the Half-Square Triangle insets, begin by drawing a diagonal line from one corner to the opposite corner of all 12 Pink 2 1/2” squares.
- Arrange eight (8) of the Pink 2 1/2” squares RST on the Blue corner of eight (8) of the Blue and Tan HST units. Pin in place.
- Sew down diagonal lines. See Figure 3 below. Trim off outside corners 1/4” from the seam and press open. Repeat for all eight Blue and Tan HST insets.
- Arrange four (4) of the Pink 2 1/2” squares RST on the Yellow corner of four (4) of the Yellow and Purple HST units. Pin in place.
- Sew down diagonal lines. See Figure 3. Trim off outside corners 1/4” from the seam and press open. Repeat for all four Yellow and Purple HST insets.
- Trim all HST units to 4 1/2” square.
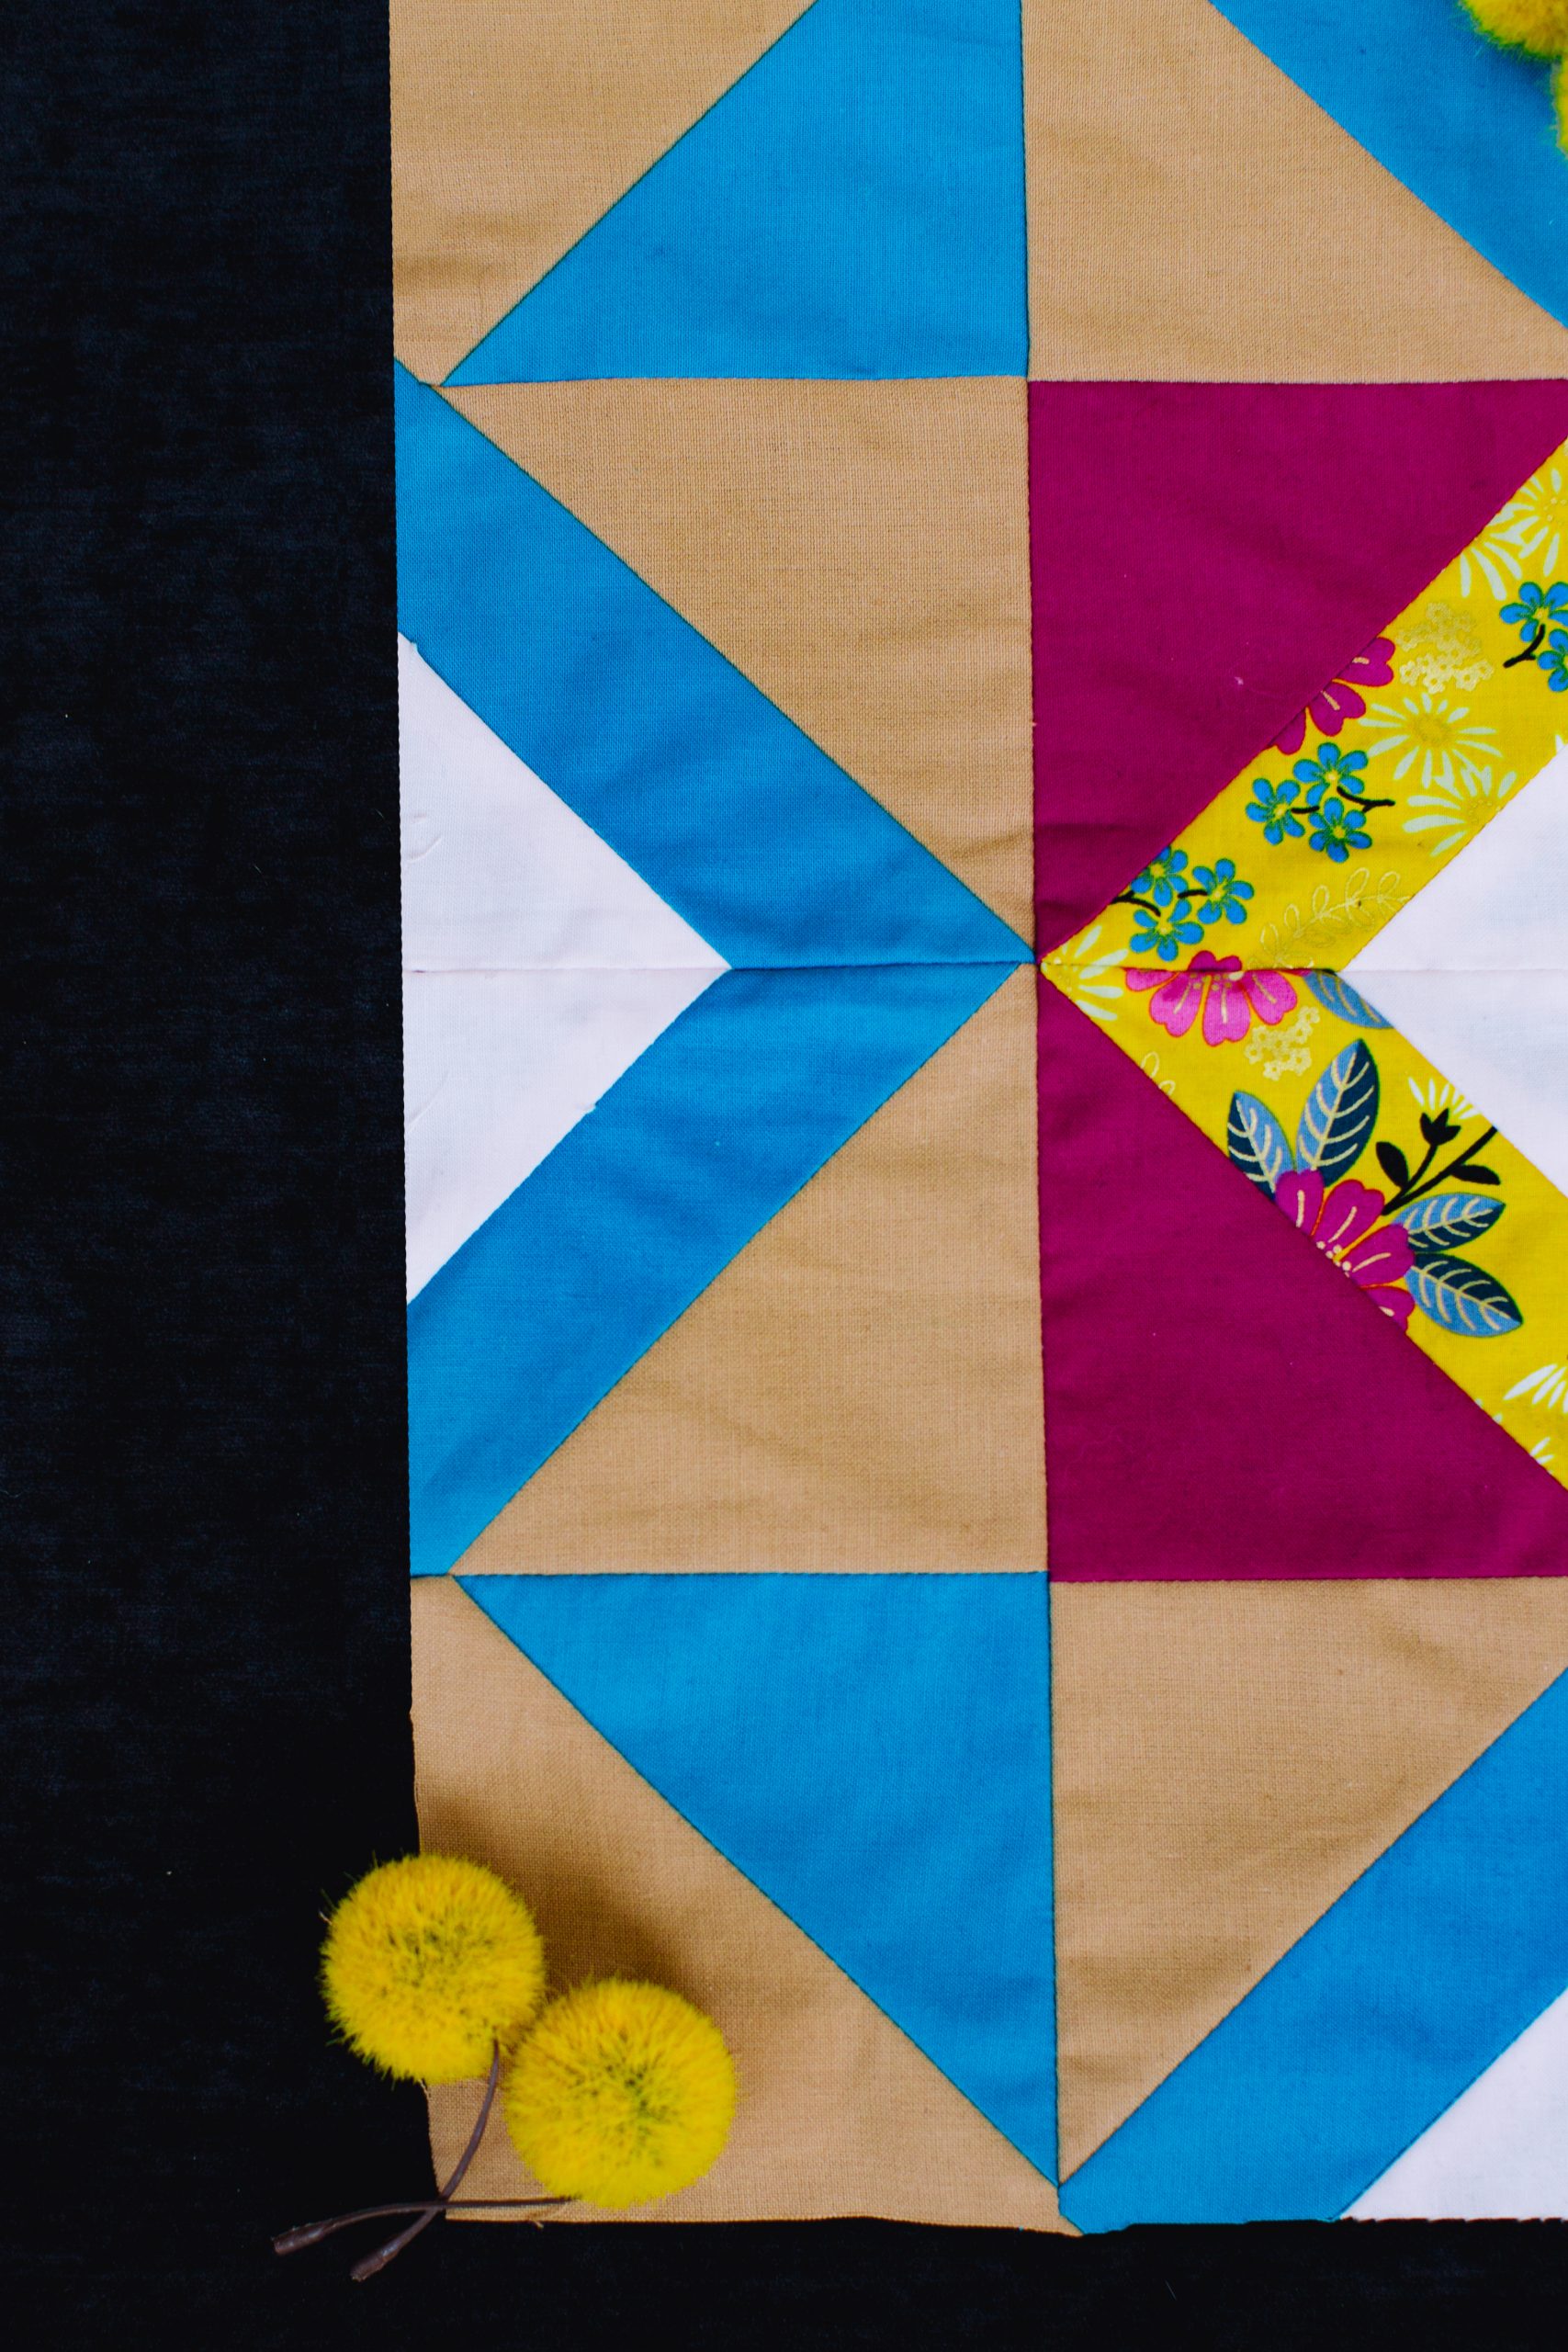
LAYOUT AND BLOCK ASSEMBLY:
- Arrange completed 4 1/2” blocks into rows as shown in Figures 4a and 4b.
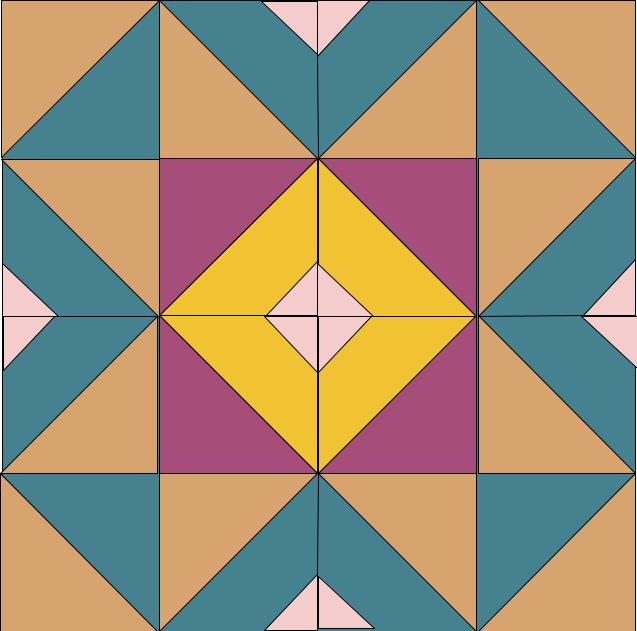
- Begin by sewing all blocks by rows as shown, RST. Press seams flat or to darker sides of the fabric upon completing the row.
- Assemble all rows, then begin joining rows to complete the block. Press all seams flat.
- Trim the outer perimeter of the entire block to neaten it to a 16 1/2” square.
- Repeat steps above as necessary to make the remaining 8 blocks for the 74” square Throw Quilt if desired.
OPTIONAL SASHING BETWEEN MULTIPLE BLOCKS:
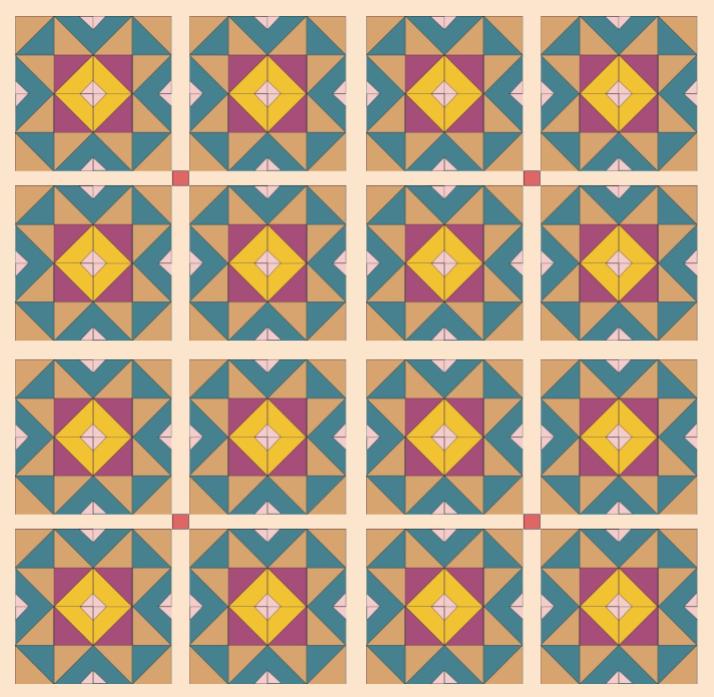
- To join sixteen (16) blocks to create a 74” by 74” throw quilt, cut one yard of sashing fabric into 2 1/2” by WOF.
- Use 2 1/2” sashing to join blocks as desired, adding small 2 1/2” square inserts for additional interest as desired.
- Rim the entire edge of the quilt blocks with an additional 2 1/2” sashing to complete the quilt top as shown in Figure 5.
QUILTING AND FINISHING:
- Cut a piece of batting and backing approximately 2-3” wider and longer on all sides than your finished quilt top.
- Assemble the quilt sandwich for the quilt by laying out the backing (right side down), batting in the center and quilt on top, right side up. Baste and quilt as desired and trim edges. The cover quilt has been quilted in a grid pattern following the seam lines of the piecing.
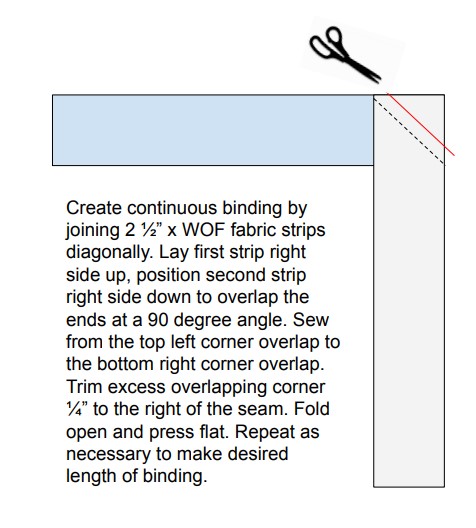
- Prepare the binding by cutting 2 1/2” in by WOF strips of fabric and attach all strips together by stitching diagonally together. Press strips wrong sides together in half lengthwise along the entire length of the binding to complete. (See diagram of this process below)
- For the Wall Hanging, insert a loop of fabric across the top length of the block or two pockets of fabric in each corner for hanging.
- Attach binding to the quilt sandwich by lining up all raw edges, mitering the corners as you go.
- To miter corners, sew into the corner stopping a 1/4”from the end, backstitch, and remove the quilt from the sewing machine.
- With the quilt lying flat, fold the binding up and away from the quilt, making the binding straight with the unsewn side.
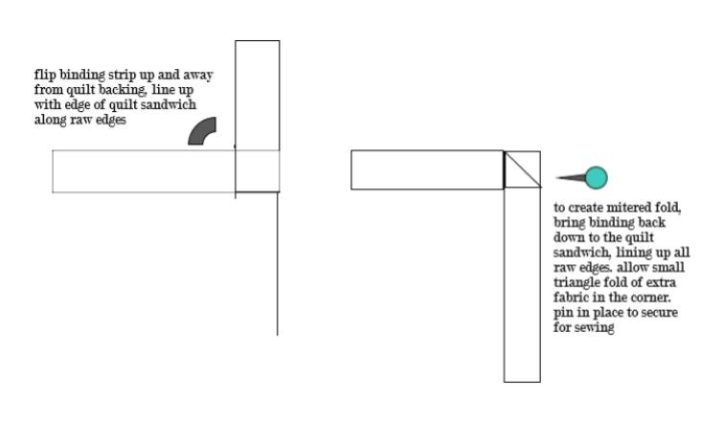
- Fold the binding down to the sewn side, leaving a diagonal fold on the underside of the binding and pin fold in place.
- Place the quilt back into the sewing machine and sew down the fold and continue sewing binding.
- Make a miter at each corner, adjusting the amount of fold as necessary.
- Join the binding ends together where they meet and attach to the quilt sandwich.
- Press and fold the binding over to the opposite side of the quilt to finish. Tuck the mitered corner flat, pinning into place as necessary.
- Finish the binding with your preferred method, either by hand stitching in place or by machine stitching.