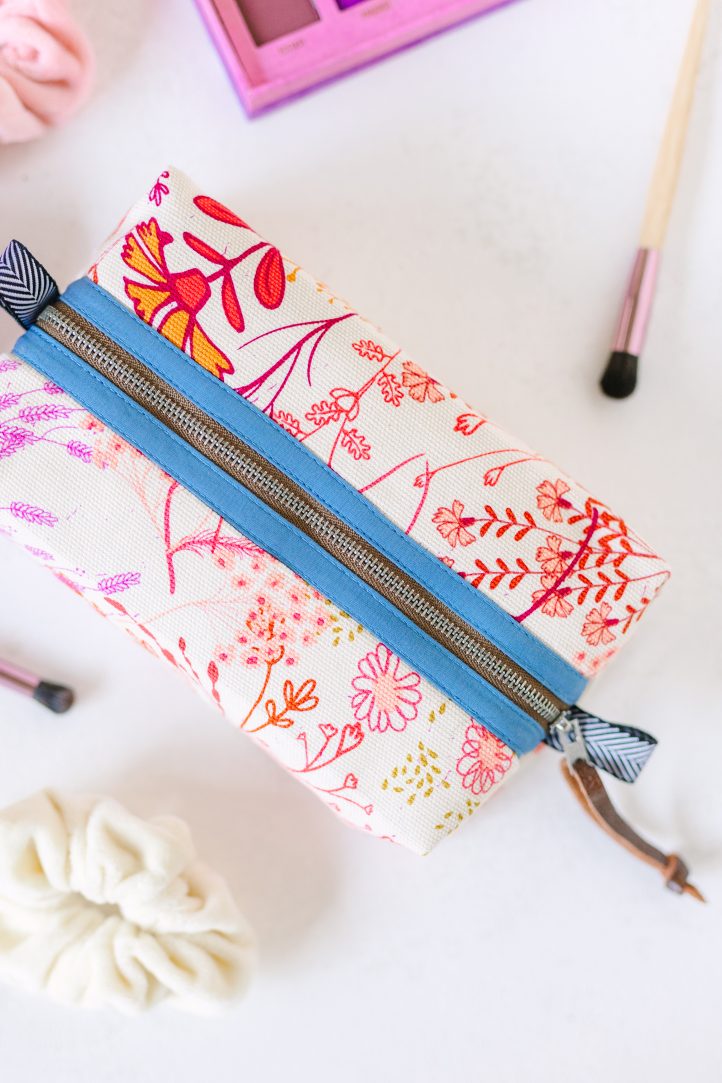
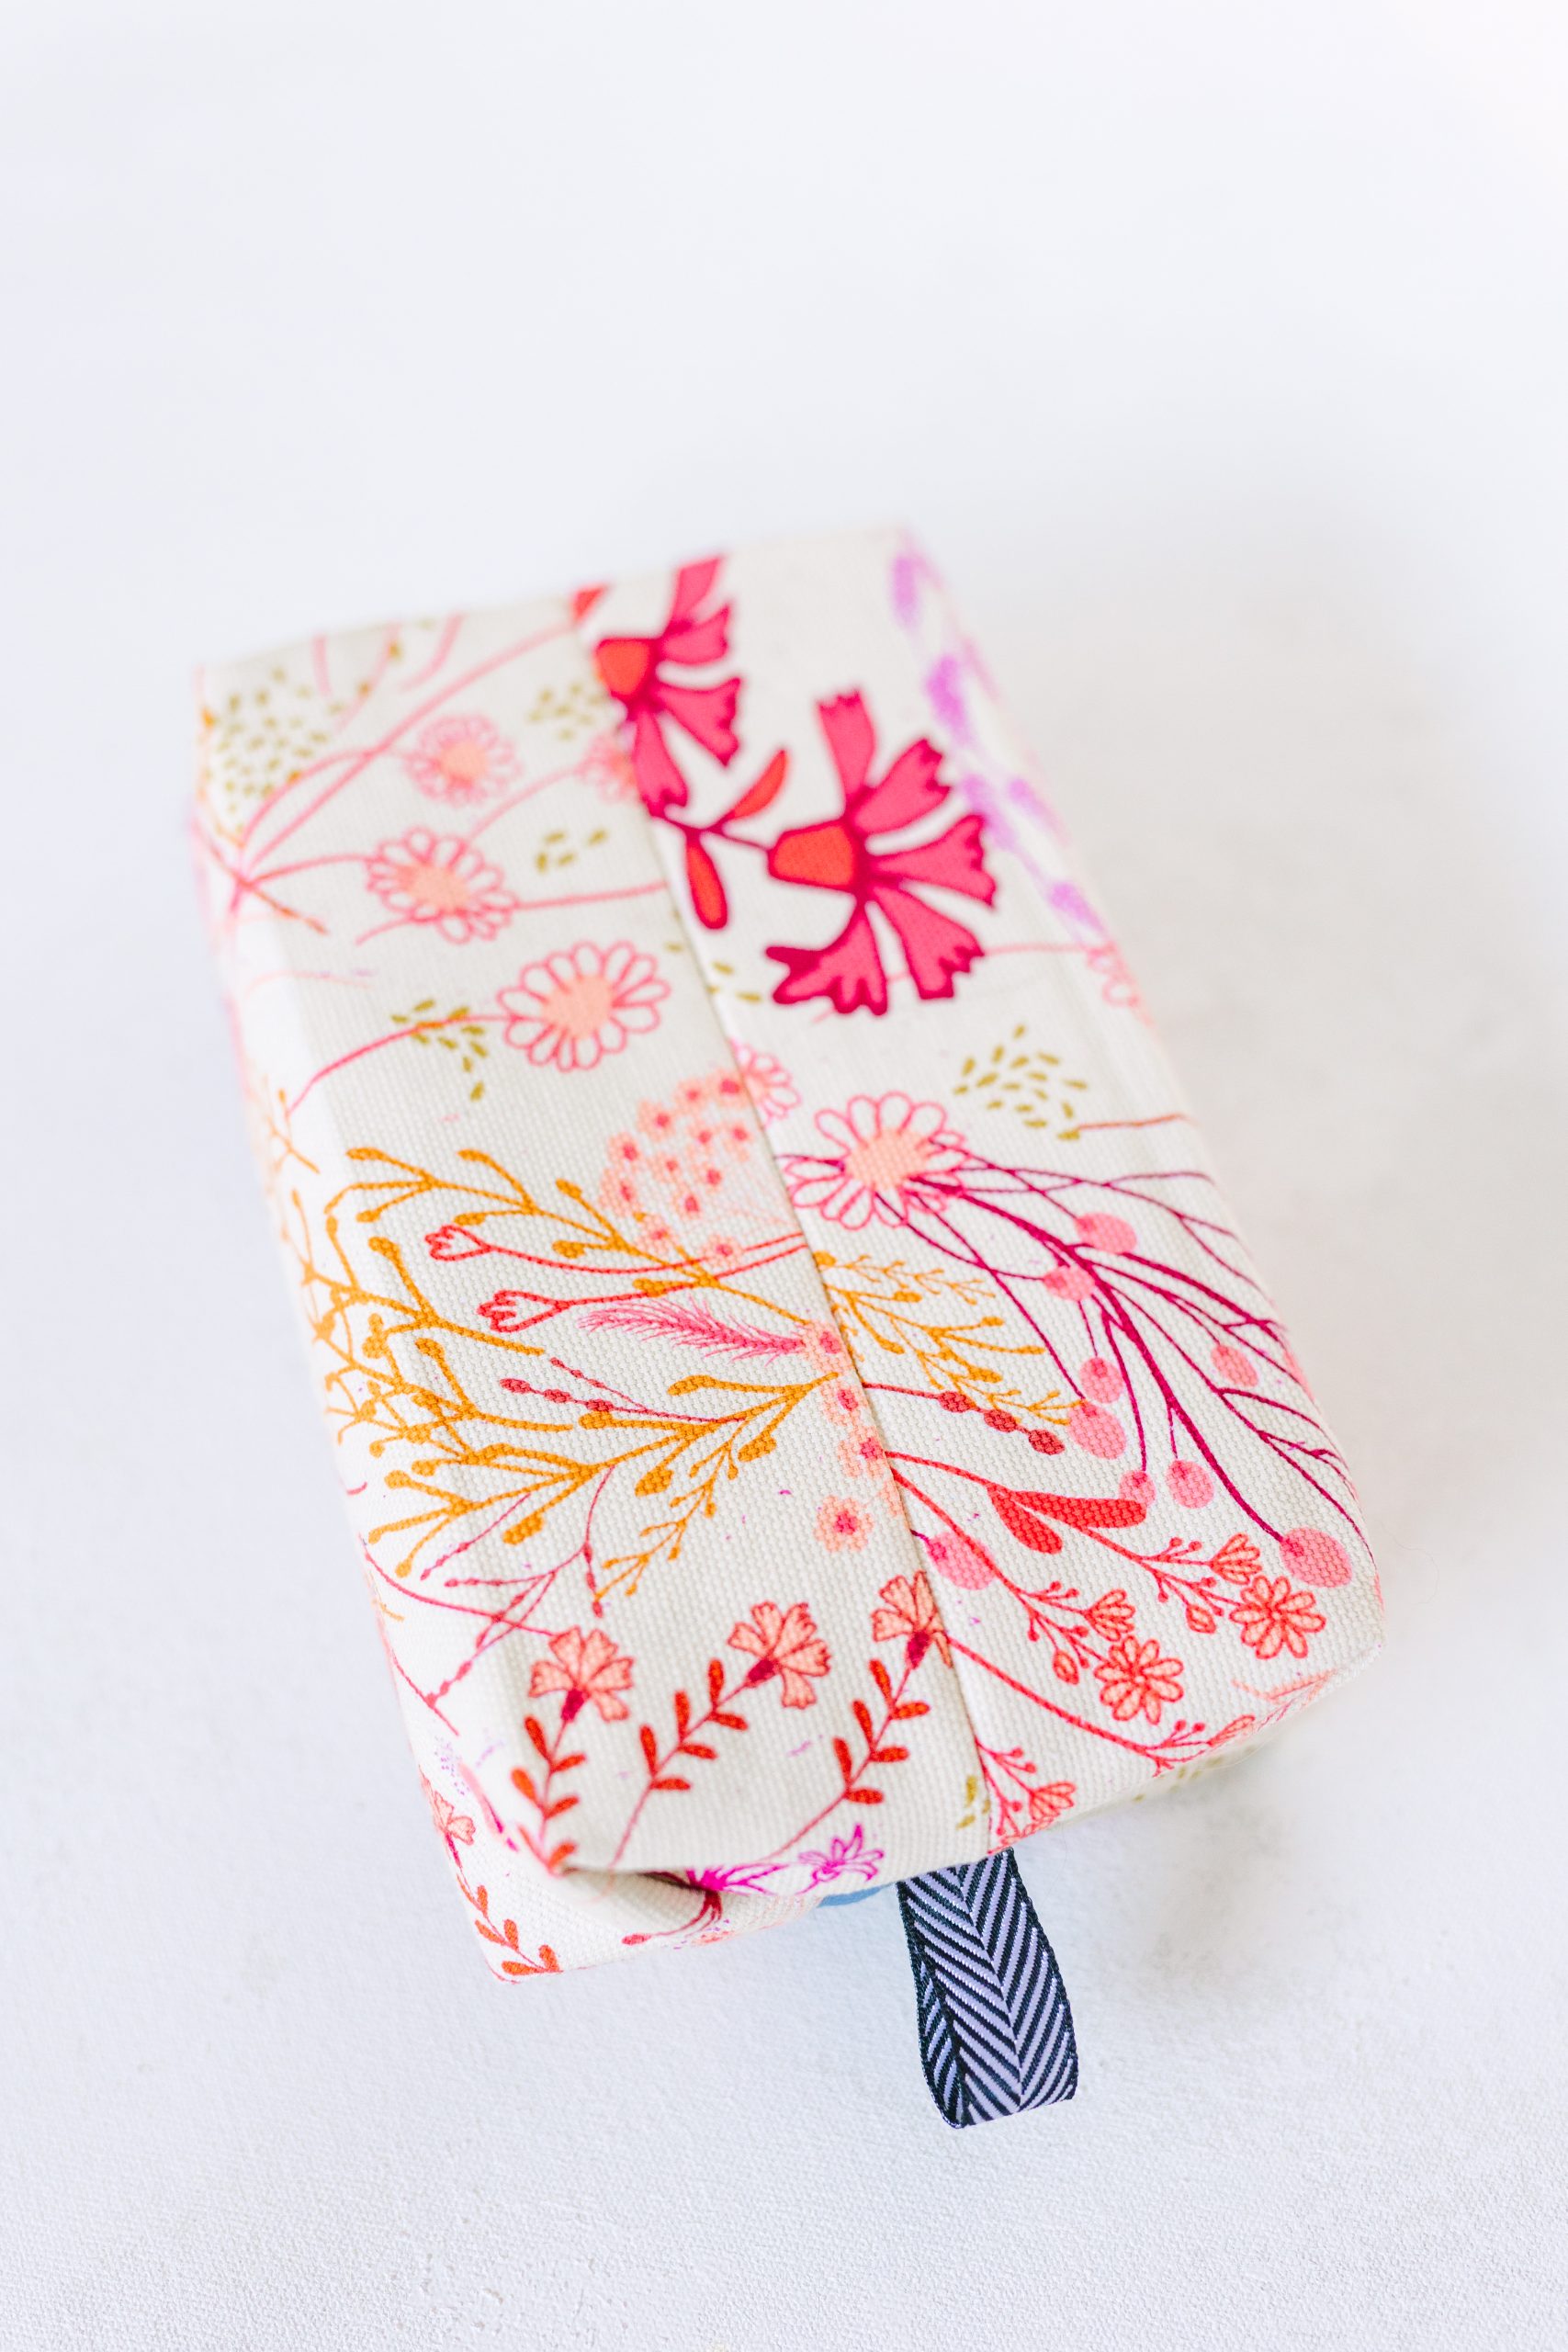
Love working with precuts? Then don’t miss this must-make mini travel bag for your upcoming summer getaways! This boxy zipper pouch is made using pretty printed fat quarters and fat eights and is designed to hold your makeup, sunscreen, charging cords and other travel necessities. Featuring an outside of sturdy canvas, this easy sewing pattern is an excellent project to practice skills like inserting zippers and finishing with bias tape.
DESIGNER NOTES:
- Please read all instructions and assembly requirements before beginning the pattern.
- Seam allowances are all 1/4” unless otherwise stated and have already been added.
Materials:
- Fabric:
- Fat quarter canvas for the outer. The designer used Meadow One from the Season of Tribute collection (La Vie En Rose) by Pat Bravo for Art Gallery Fabrics.
- Fat quarter lining fabric. The designer chose Ocean Breeze from the Nature Elements collection by Art Gallery Fabrics.
- Fat eighth solid fabric which coordinates with your exterior choice for the zipper trim. The designer used Parisian Blue from the Pure Elements collection by Art Gallery Fabrics.
- Interfacing:
- Fat eighth G740 or similar very thin fusible interfacing (Vlieseline)*
- *G740 is a whisper thin fusible with a weight similar to cheesecloth.
- Fat quarter H630 fusible fleece (Vlieseline)
- Fat eighth G740 or similar very thin fusible interfacing (Vlieseline)*
- 9“ metal closed bottom zipper
- Small amount (about 10”-12”) bias tape
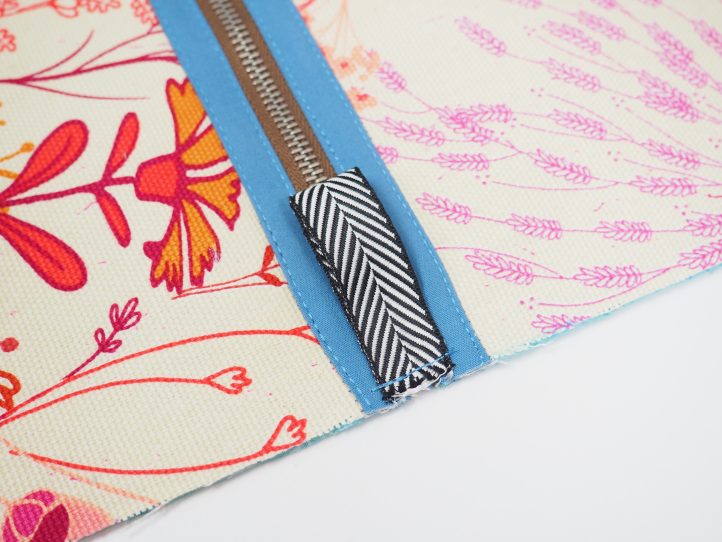
- 1/4” wide x 8” long piece of leather for the zipper pull. You could also use ribbon or cord.
- 8” of 1/2” wide ribbon for the zipper pull ends
- Clear drying glue suitable for fabric
- Coordinating threads for all fabrics and trims
- TIP: Always coordinate all of your threads to fabrics. Sometimes this means using a different color thread in the top of the machine to the bobbin. It is a bit of extra work but well worth it in terms of style.
- Scissors
- Fabric markers
- Zipper foot
- Basic sewing notions
Cutting Instructions:
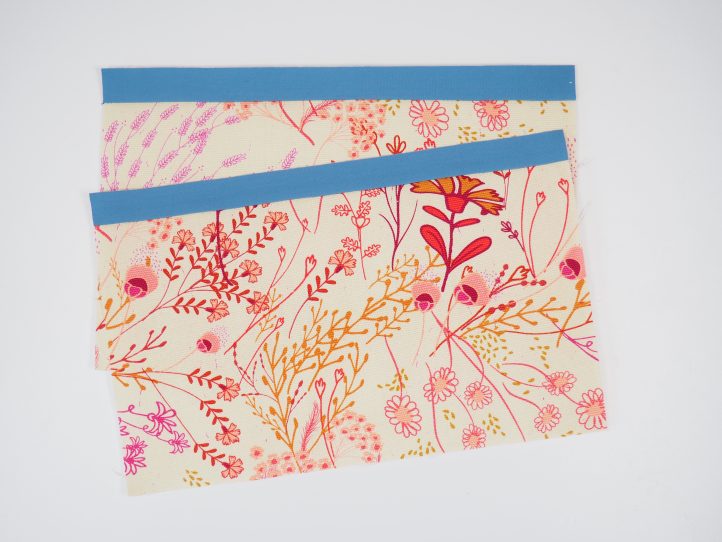
- From the canvas:
- 2 pieces 10 1/2” wide x 6 1/2” tall for the front and back exterior panels
- From the lining:
- 2 pieces 10 1/2” wide x 7” tall for the front and back lining panels
- From the trim fabric:
- 2 pieces 1” wide x 10 1/2” long for the zipper trim
- From the G740:
- 2 pieces 1” wide x 10 1/2” long for the zipper trim interfacing
- From the H630 fusible fleece:
- 2 pieces 10” wide x 6” tall
Sewing Instructions:
- Fuse the G740 interfacing to the wrong side of the zipper trim pieces. Fuse the H630 fusible fleece centrally to the wrong side of the outer panels. TIP: The designer used canvas and quilting cotton for the outer and they are both vastly different weights. You can even them up a bit by adding the thin G740 interfacing to the quilting cotton.
- Attach a piece of zipper trim to the upper long edge of the outer panels.
- Press the seams upwards towards the trims.
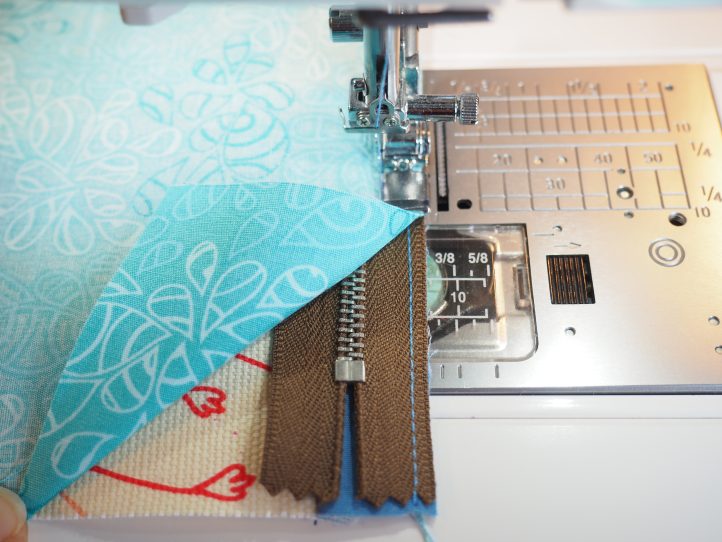
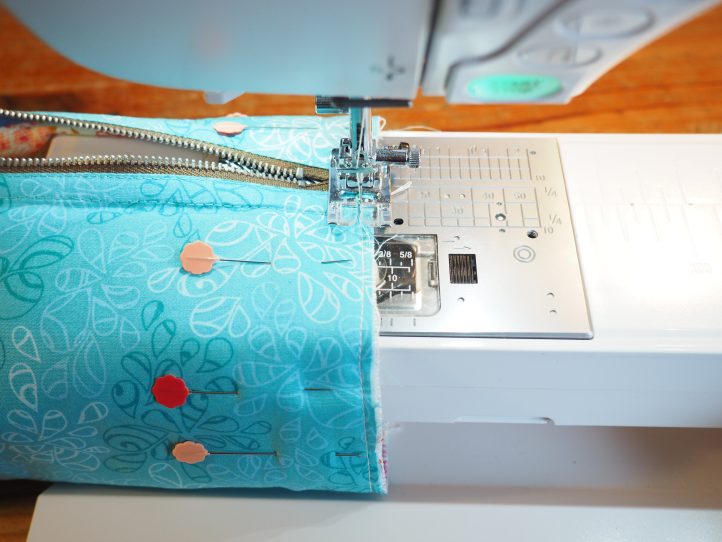
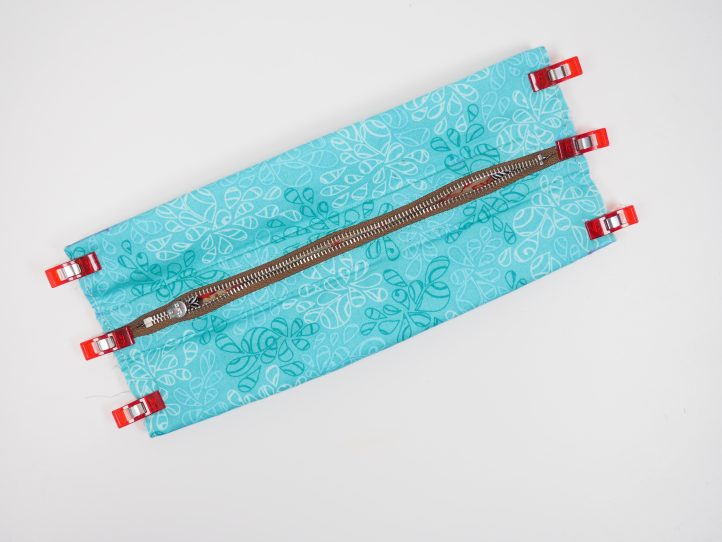
- You need the zipper, an exterior panel and a piece of lining next. With the right sides together, pin or clip the zipper centrally to the exterior panel and baste the zipper on. TIP: This extra step of basting the zipper on means that it cannot shift when you attach the lining. It is one less thing to worry about.
- Lay the lining panel onto the zipper, right sides together, and the zipper will be sandwiched in between the lining and the outer panel. Sew along the zip flip the layers the right way out and finger press.
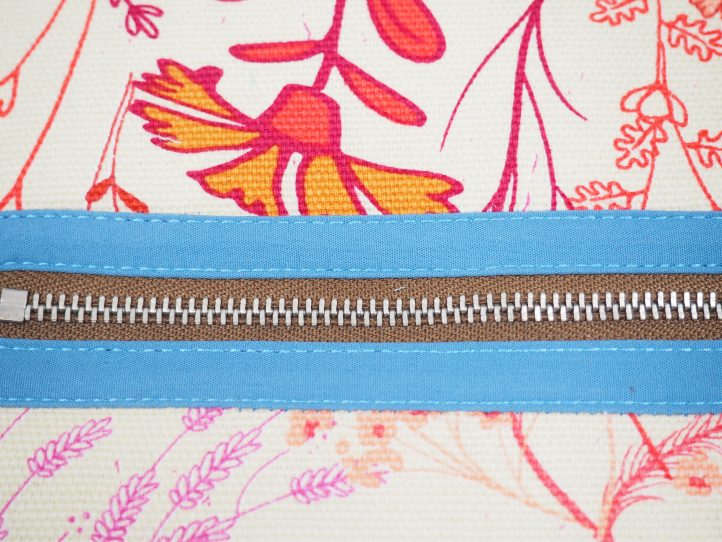
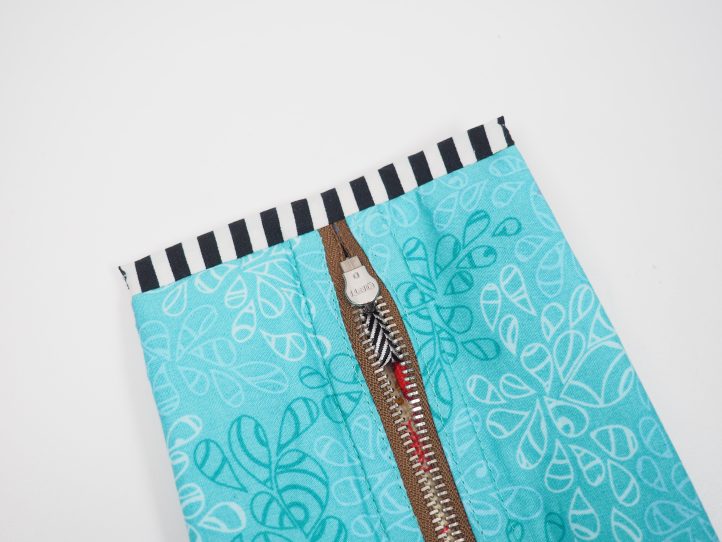
- Topstitch along the zip quite narrowly (1/8”) and the same along the bottom edge of the zipper trim.
- Repeat all of this for the other panels on the other side of the zip.
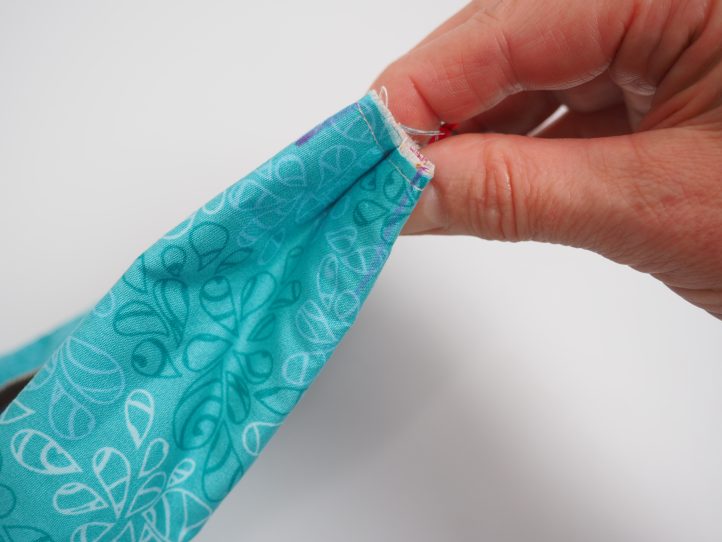
- Cut the ribbon in half to make two pieces and then fold each in half to form a loop. Attach one to each end of the zip.
- Open the zipper about 2/3 of the way.
- Bring the outer panels together, right sides facing and pin or clip the bottom edge to hold fabrics in place. Do the same for the lining and sew the bottom edge for both. Press the seams open. TIP: Pressing the bottom seams open will make them easier to match up. They have to be pretty precise because they will be visible on the ends from the outside of your pouch.
- You now have a curious figure eight of lining and outer panels.
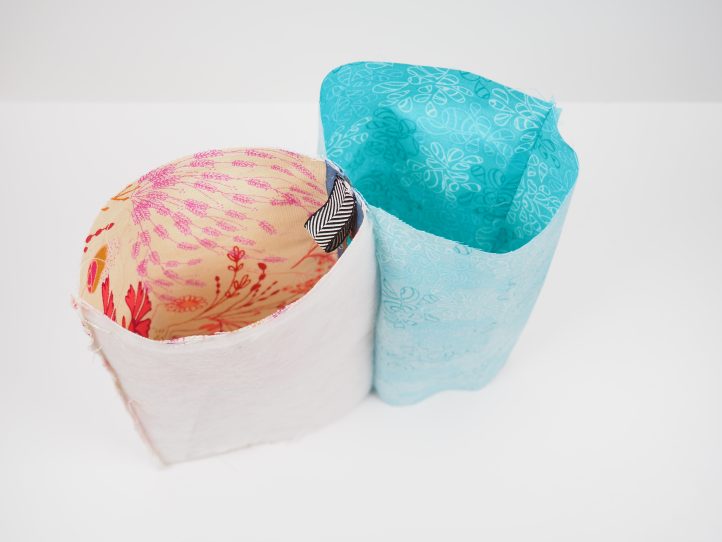
- Reach inside the zipper, wiggle it all the way open and pull the panels out so that the lining is outermost (the pouch is inside out). TIP: It will almost always try to go the right way out first but keep turning until it is inside out.
- Center the bottom outer and lining seams neatly and baste the ends all around edges so that the layers stay together. This will be quite important in the next steps.
- Bring the zip over the bottom layer seam so that the layers are all perfect.

- Clip the layers together. Do the same on the other end, too.
- Measure in 1” on the top and bottom from each corner and make a mark.
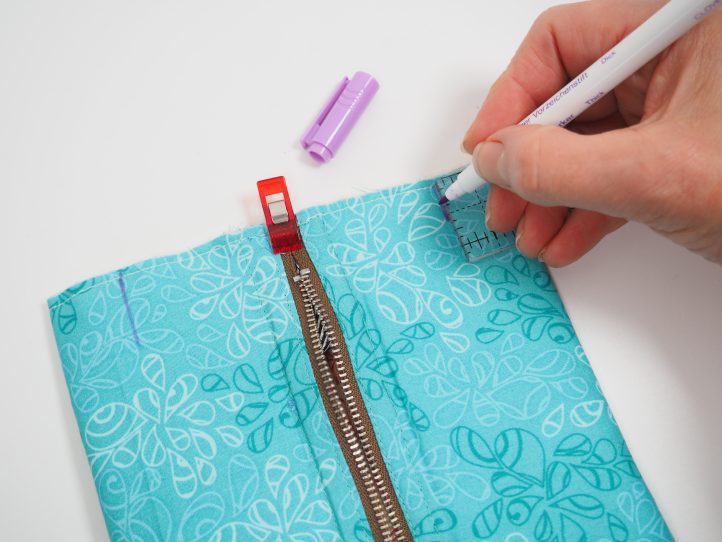
- Turn the pouch over and do the same on the back.
- Now pleat the corners by bringing the sides in towards the zipper and matching the marks.
- Do this on all of the corners. Make very sure that all of the parts of the pleat are going to be caught in the seam. Canvas loves to fray and it doesn’t take too kindly to being unpicked too often. It is worth taking the time to be absolutely sure now.
- Sew straight across both ends through all layers to secure the pleats. It pays to slightly increase the seam allowance for this bit to 1/2”. TIP: This is the magic that will box your pouch without you doing anything else.
- Make sure that the boxed ends are perfect and all of the seams are caught and then neaten the raw edges and bind with your bias tape.
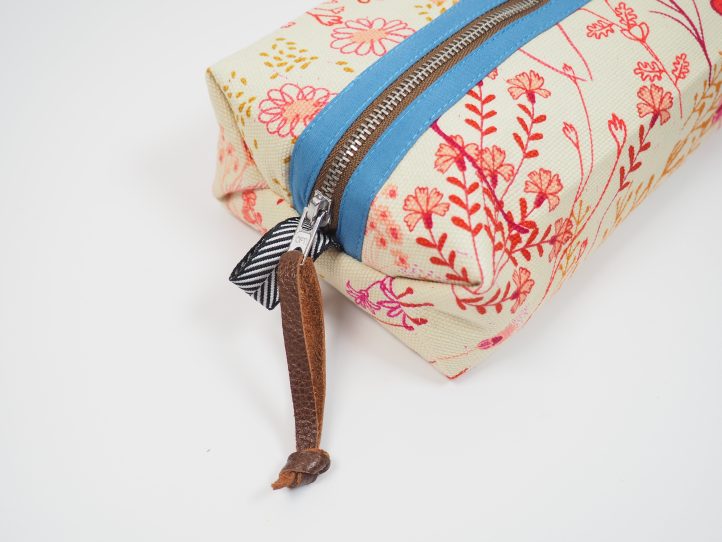
- Turn the pouch the right way out and gently persuade the corners out so that you have a boxy pouch.
- Decorate the zipper pull with the thin strip of leather or cord.

Love this pattern
We’re so glad you enjoyed this pattern, L.L. 🙂 Have a great day! – Ashley, WeLikeSewing