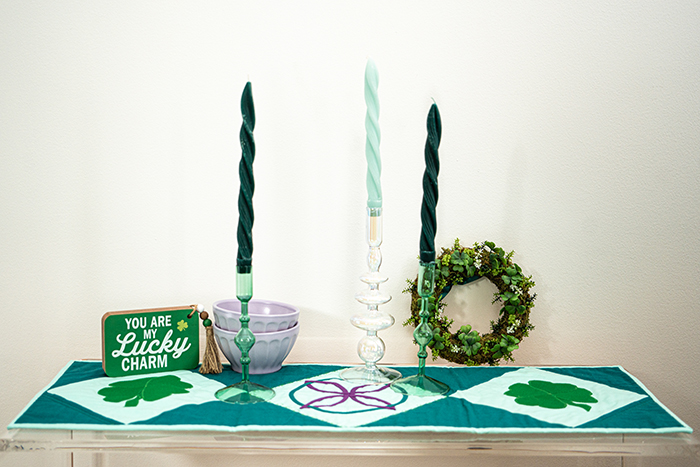
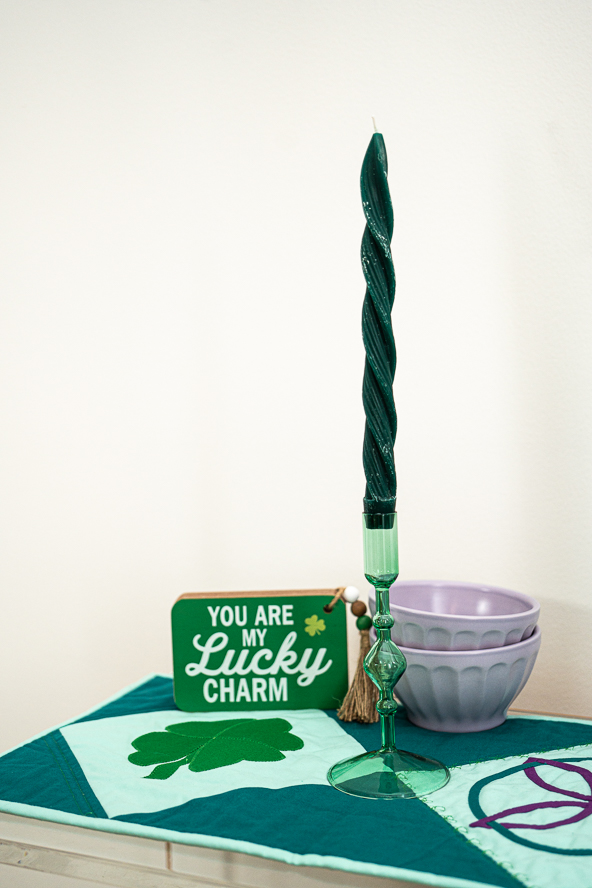
St. Patrick’s Day is on the horizon, so decorate your dining room with a gorgeous table runner inspired by the Emerald Isle. This St. Patrick’s Day table runner pattern from Zoe Ballard is designed for beginners and is fat quarter friendly. Featuring clover and Celtic knot quilt blocks, this quilted holiday table runner will help you set a whimsical and colorful tablescape for your St. Patrick’s Day festivities.
Finished Size: ~36 1/2” (14.4 cm) x 12 1/2” (4.9 cm)
Skill Level: Beginner
Designer Note:
- 1/4” (.64 cm) seam allowance used throughout
Materials:
- 1/2 yard (.46 m) dark green (bias tape, set-in and corner triangles)
- 1/2 yard (.46 m) light green (background squares and binding)
- Fat quarter bright green (clover appliqué)
- Fat quarter purple (bias tape)
- 39” (99.1 cm) x 15” (38.1 cm) batting
- 42” (106.7 cm) x 19” (48.3 cm) backing
- 6mm (1/4”) fusible bias tape maker
- 5mm (3/16”) fusible tape
- Fusible adhesive (e.g. Heat n Bond lite)
- PDF Templates – These are located at the bottom of this page. Please see printing instructions below.
PRINTING INSTRUCTIONS:
Note: To download the templates, click on the pattern download button at the bottom of the page. We recommend opening your pattern download using Adobe Acrobat.
Instructions:
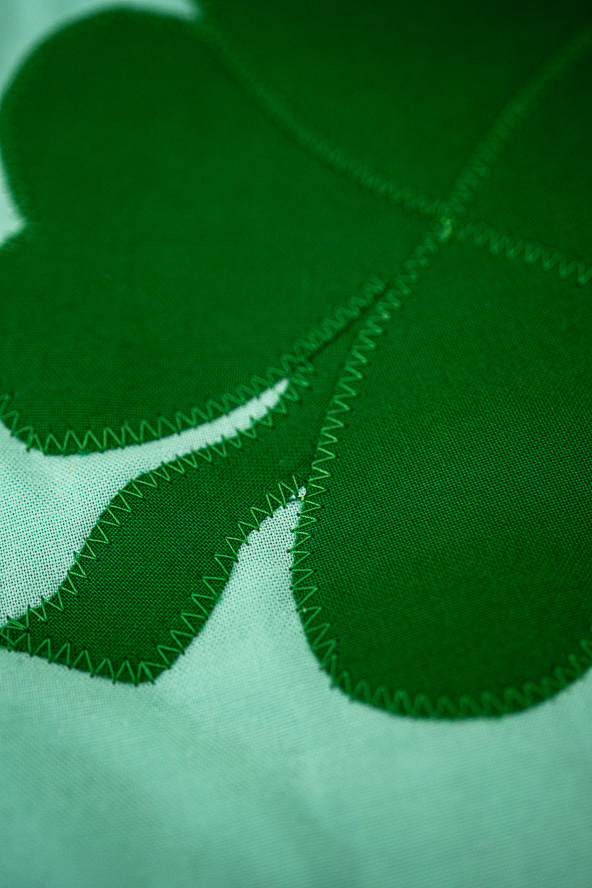
MAKING THE CLOVERS:
- Use the template to make 8 leaf patches and two stems.
- On the paper side of the fusible adhesive, draw eight heart-shaped leaves and two stems (Templates 1 and 2).
- Cut the shapes out roughly and follow the instructions on the pack to adhere to the back of the fabric. Cut the shapes out accurately.
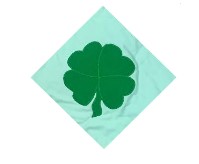
MAKING THE CLOVER BLOCKS:
- Cut two 10” (25.4 cm) squares of light green fabric and find the center.
- Peel the backing paper off the leaves and stems. If the paper does not come off easily, then score the back of the paper with a pin and remove from the middle.
- With a background square on-point, place four leaves and a stem around the center so the points meet in the middle, overlapping at the edges, making a four leaf clover shape with the stem covered by the points.
- Press with a warm iron to adhere to the background fabric.
- Use an appliqué stitch, for example, a zig-zag, to secure the patches to the background fabric.
- Trim the block so it is 9” (23 cm) square.
- Repeat for the other background square.
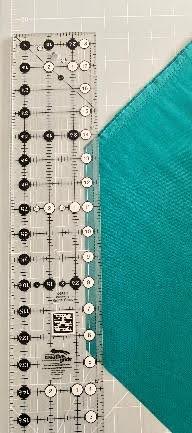
MAKING THE FUSIBLE BIAS:
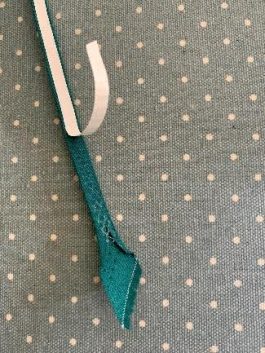
- To make the bias, straighten one edge of the fabric that you used for the leaf/stem fabric. Unfold the fabric and keep it on your straightening side (right or left). Place the 45 degree line of your ruler on the straightened edge and cut the corner of the fabric along the edge of the ruler. Flip the fabric so it is on your cutting side and the straight edge is vertical. Cut 5/8“ (1.6 cm) widths of fabric until you get some decent lengths, ~10-15” (25.4-38.1 cm) strips, to make up to about 20” (51 cm) of bias for the outer circle and ~50” (127 cm) of bias for the knot.

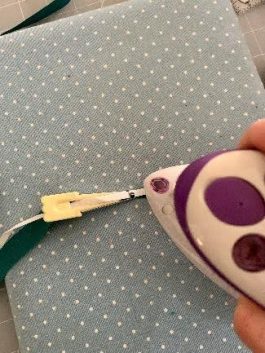
- To attach the fusible tape to the bias fabric, feed the bias fabric through the 6mm (1/4“) bias tape maker. Then feed the fusible tape through the tape maker. Using the tip of a warm iron, press the tape to the fabric. Move the tape maker back and press the next exposed part. Take care that the fabric being fed through does not twist; if it does, cut the bias tape already made and feed the fabric and tape through the tape maker again.
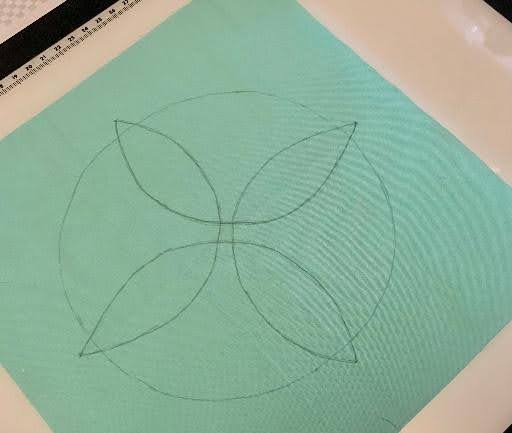
Cut one 10” (25.4 cm) square of light green fabric and find the center.
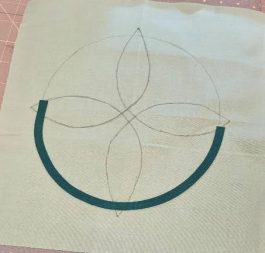
Use a pencil to trace the knot design onto the front of the background fabric.
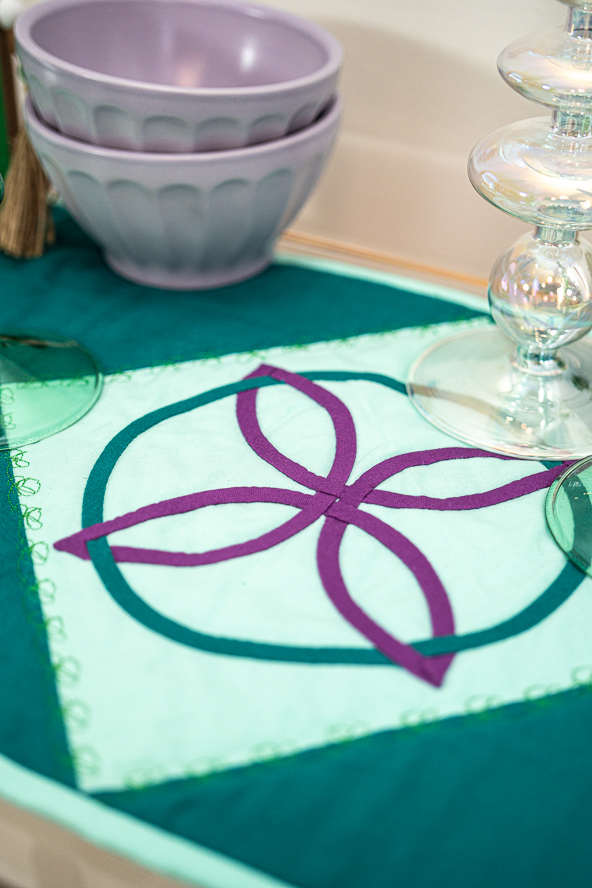
MAKING THE KNOT SQUARE:
- Starting with the circle at a place where the purple bias will cross and cover the end, remove the backing paper and start pressing the tape to the background with a warm iron following the pattern. If you have to use more than one piece of bias, make sure to stop and trim where the purple fabric will cross.
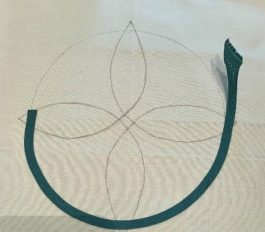
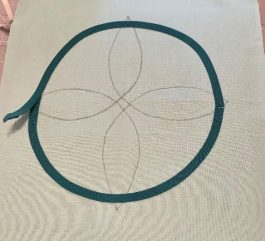
- Starting where the bias tape will cross, remove the backing paper and start pressing the tape to the background with a warm iron following the pattern, curving around the rounded sections and making small folds to get around the corners. Trim the strip when the start is reached again. If you have to use more than one piece of bias, make sure to stop and trim where the purple fabric will cross.
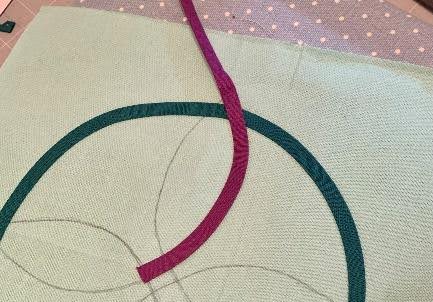
- Where some of the bias tape crosses over each other, press the iron to the tape, lift the top strip and cut it. Press the iron to the tape underneath and lift it. Place the cut sections under the whole strip and press with an iron to attach it. Repeat for some other sections to achieve an interwoven effect.
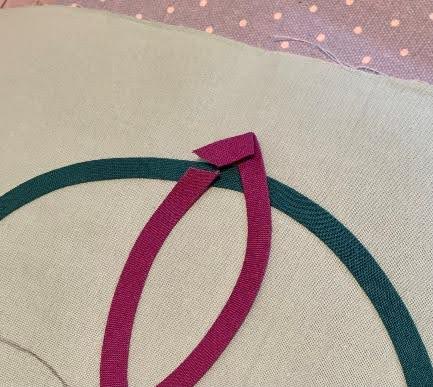
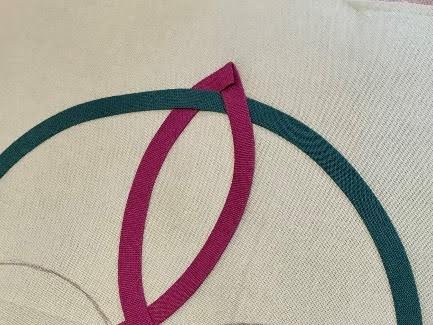
- Hand stitch both sides of the bias tape to the background.
- Trim the block so it is 9” (23 cm) square.
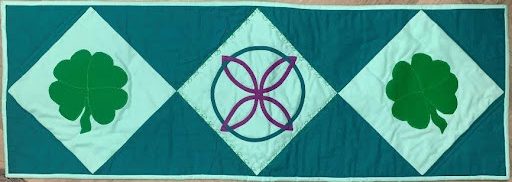
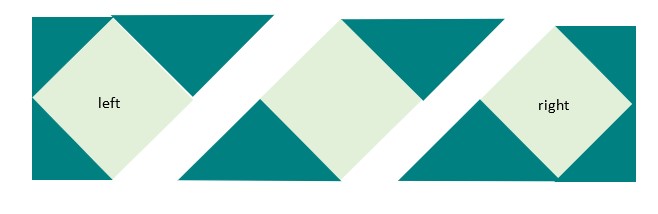
MAKING THE QUILT TOP:
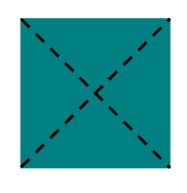
- Cut two 7” (17.8 cm) squares from the dark green fabric and cut both squares on one diagonal. (Set-in Triangles)

- Cut one 13 3/8” (34 cm) square from dark green fabric and cut on two diagonals. (Corner triangles)
- Using a corner triangle, find the middle of the long edge and match it to the middle of the top left of one clover square. Stitch and press the seam towards the triangle. Repeat to stitch a second corner to the bottom left of the clover square.
- Repeat to stitch corner triangles to the top and bottom RIGHT of the second clover square.

- Using a set-in triangle point down, find the middle of the left short edge and match it to the middle of the top right of the left-hand clover square. Stitch and press the seam towards the set-in triangle.
- Repeat to stitch a set-in triangle to the BOTTOM left of the second clover square.
- Repeat to stitch set-in triangles to the top right and bottom left of the knot square. Press the seams towards the knot square.
- Stitch the three sections together, nesting the seams.
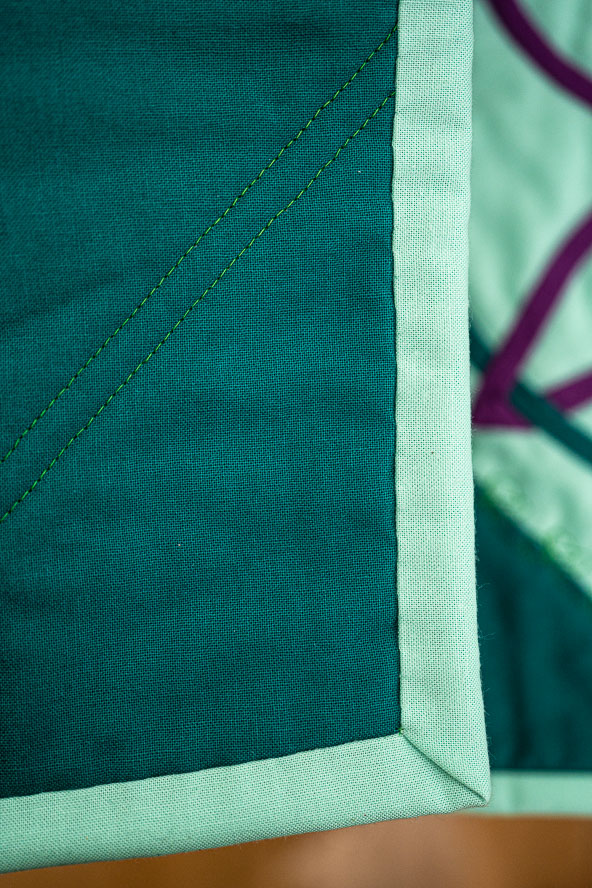
QUILTING:
- Layer the backing, batting and quilt top and quilt as desired. The designer used an embroidery stitch around the knot square and echo quilting on the corners.
BINDING:
- Double fold bind the runner.

I like the clovers and the Celtic knot! There are so many different styles of the Celtic knot maybe you could talk about the meaning and history?
That’s a great idea for a future article, Sandy! Thank you for sharing 🙂 – Ashley, We Like Sewing