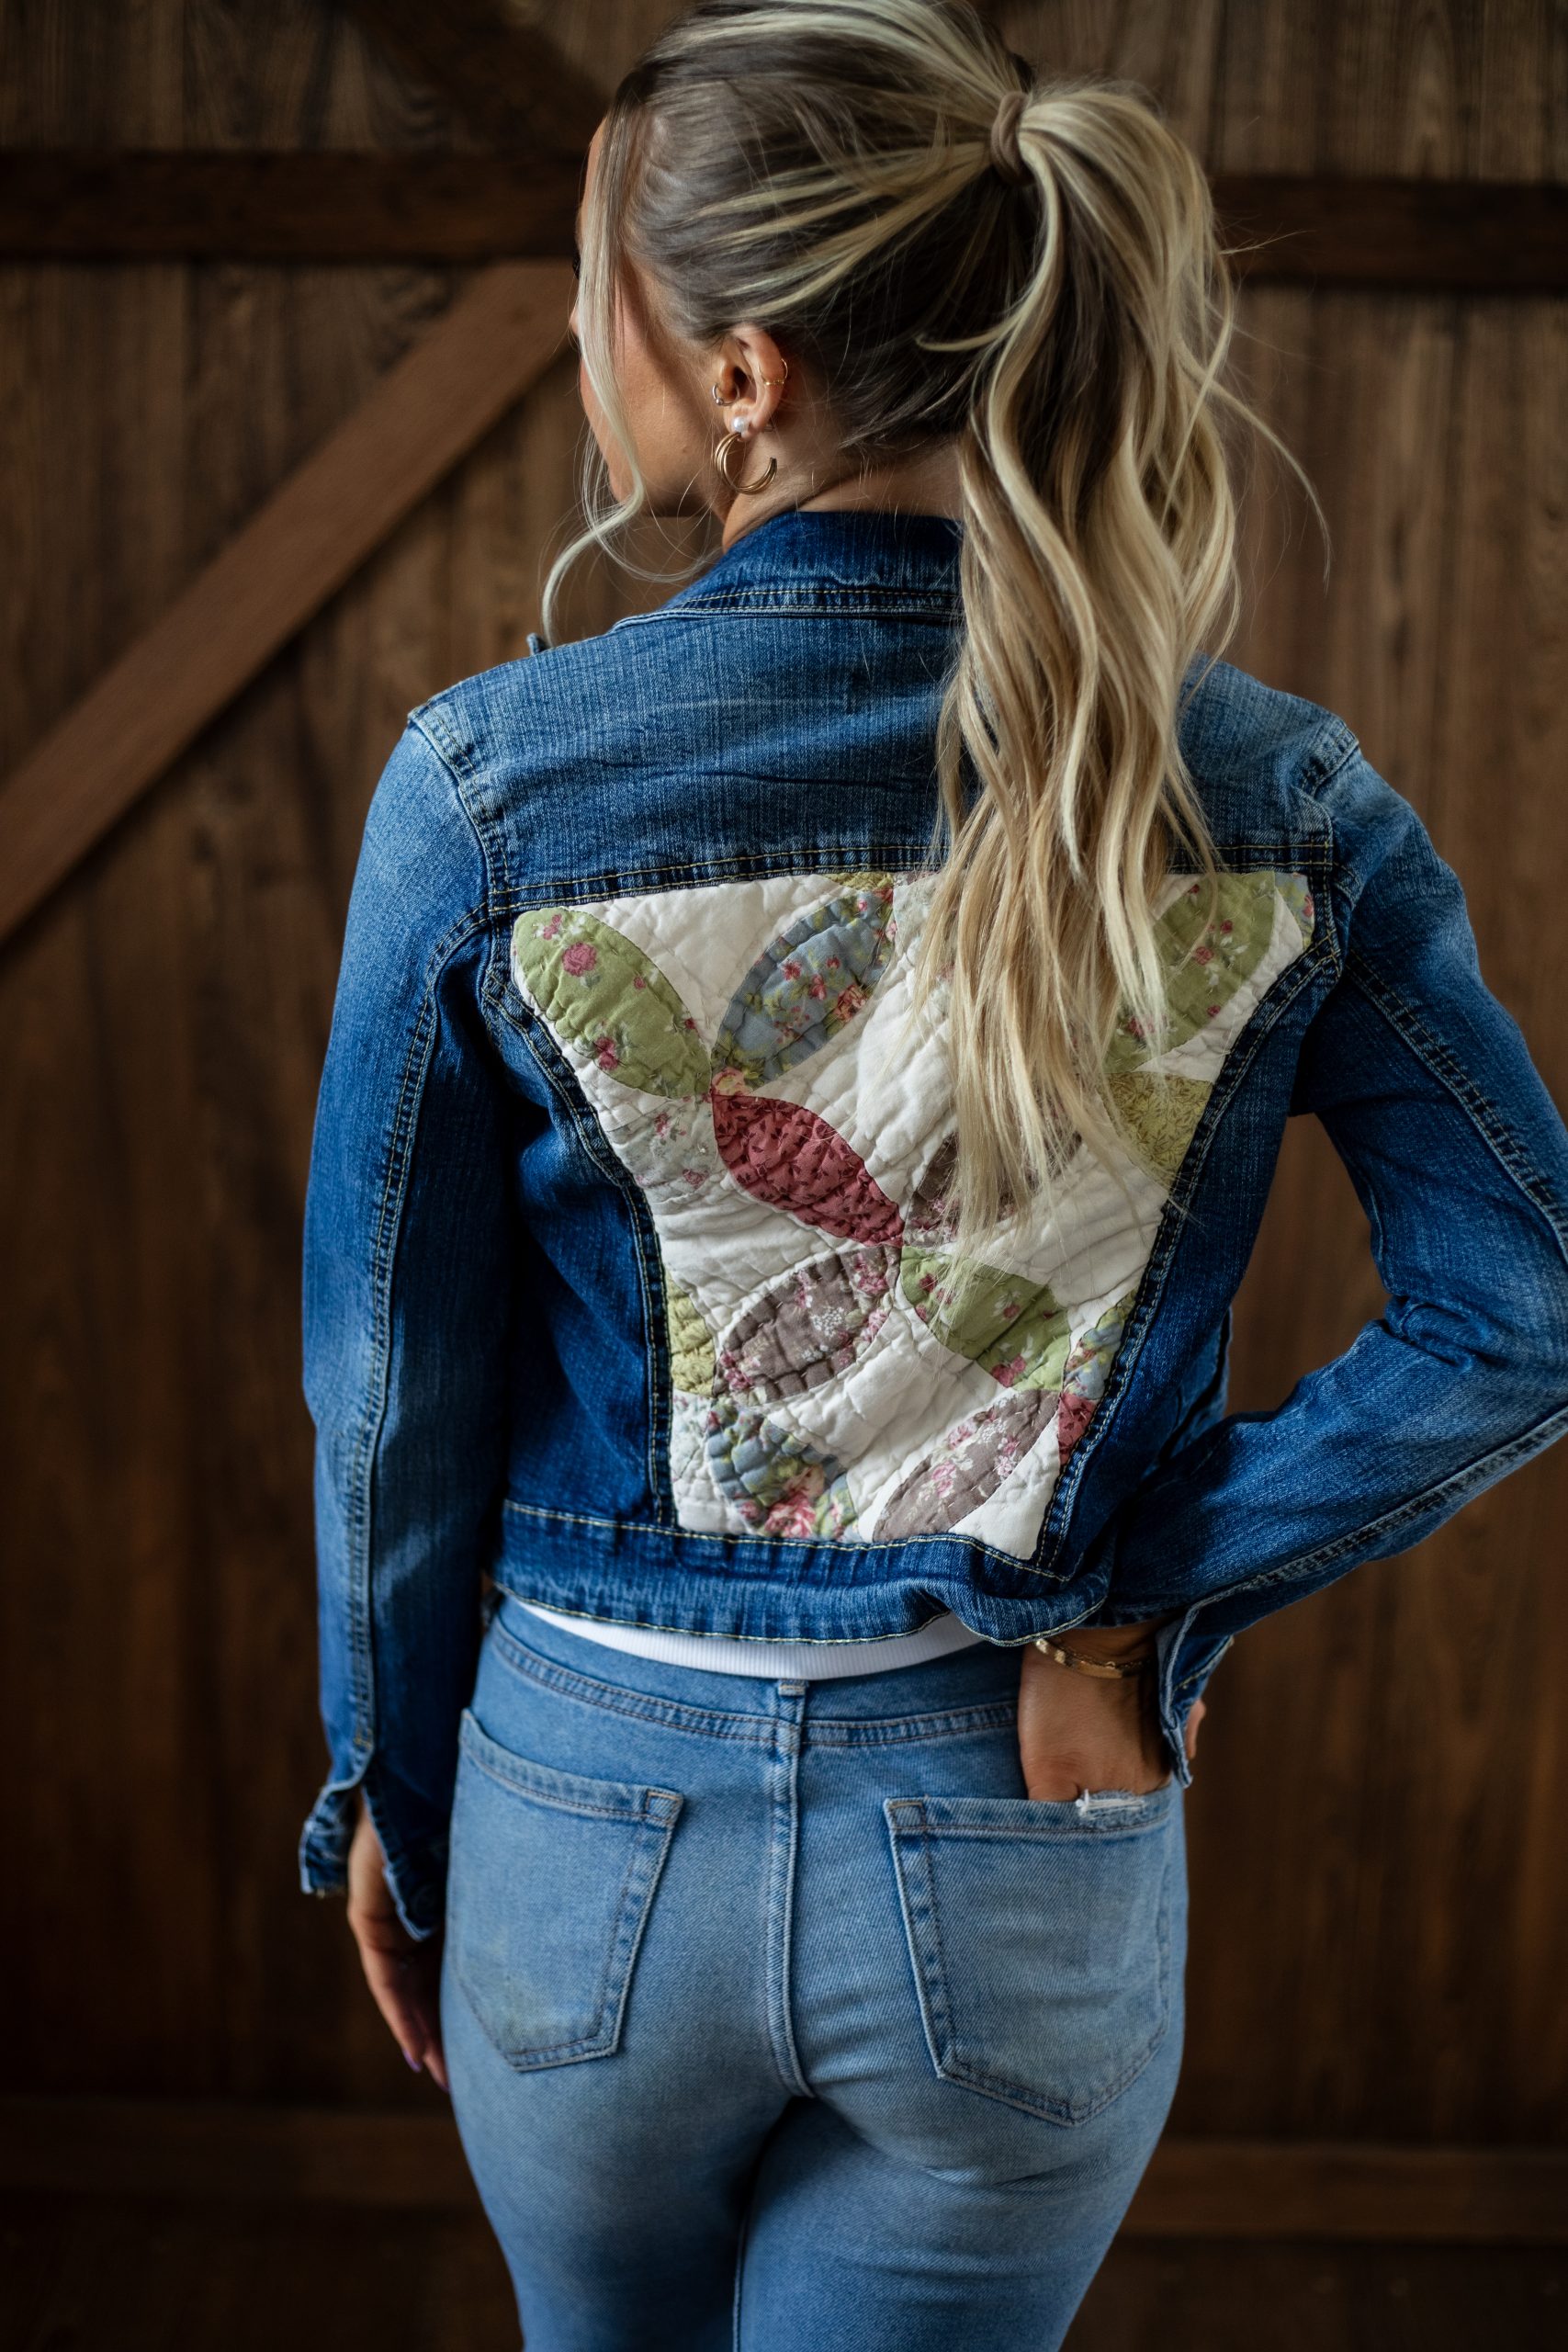
Quilted clothing and quilted accents on clothes have been trending for months, which is why we’re so excited to share this denim jacket refashion from Stephanie Woodson. Update a thrifted, plain denim jacket by adding a colorful quilted panel. This sewing project is great for those new to refashioning and can be made with an existing quilt, block or pillowcase, or you can sew up a quilted panel of your own creation.
Skill Level: Beginner
Time: 2-3 hours
Finished Size: Dependent on jean jacket size
Seam Allowances: N/A
Materials:
- Quilt or quilt scrap larger than the jean jacket back panel. Quilted pillowcase shown in this example; you can also sew a quilt from scratch if desired!
- Jean jacket
Tools:
- Iron
- Pins
- Hand sewing needle
- Scissors
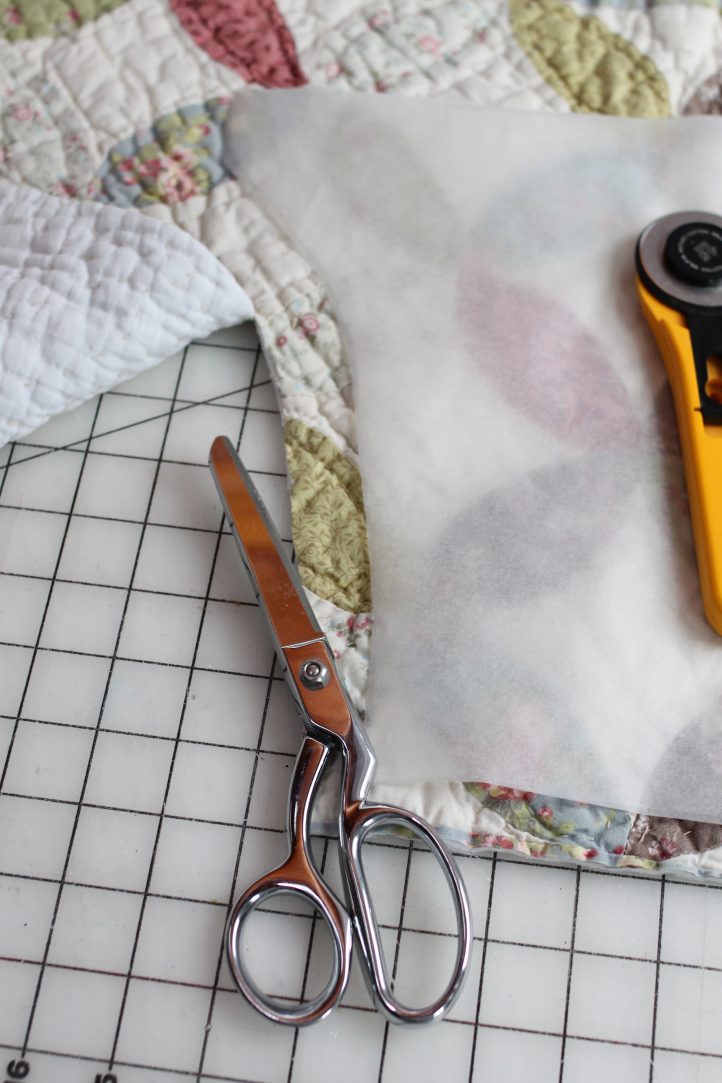
- Tracing paper (optional)
Instructions:
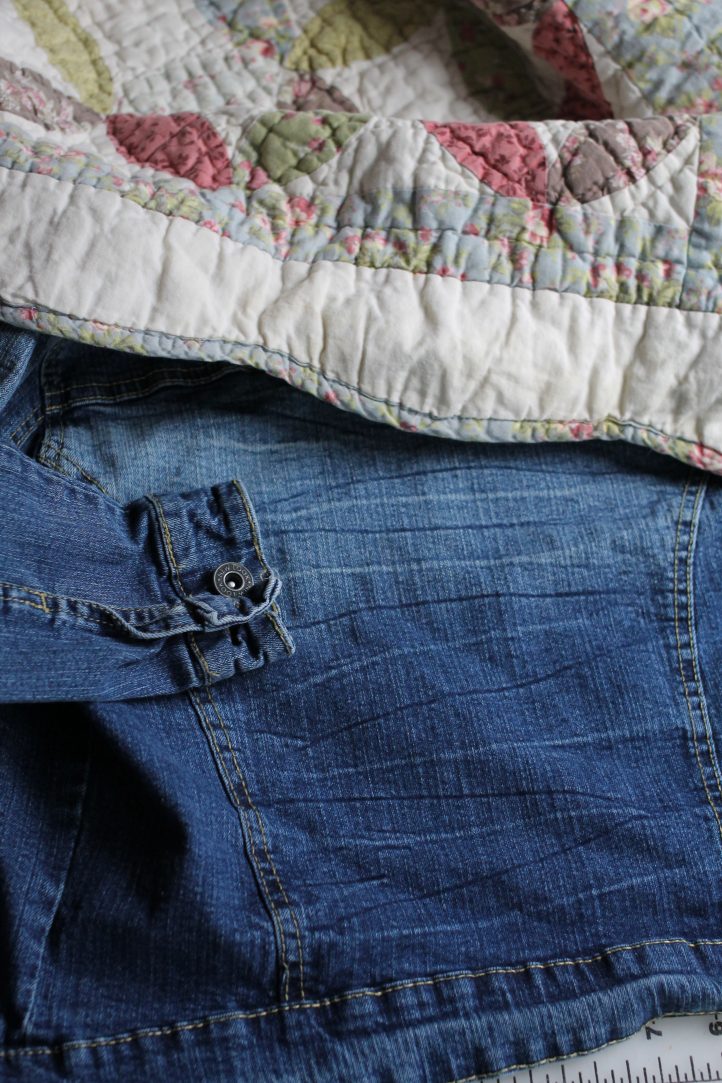
Be sure to wash and dry both the jean jacket and the quilt however you plan to wash and dry the finished piece! When choosing a jean jacket, you’re looking for one with a wide back piece, not multiple panels. Make sure it fits comfortably and isn’t too snug; the fit will be a little tighter with another layer over the back but not significantly adjusting the shape of the jacket.
CUTTING:
Cut borders from the quilt if not using. If upcycled a pillowcase, cut off the pillow overlap fabric at the back (not the quilt’s back).
PIECING:
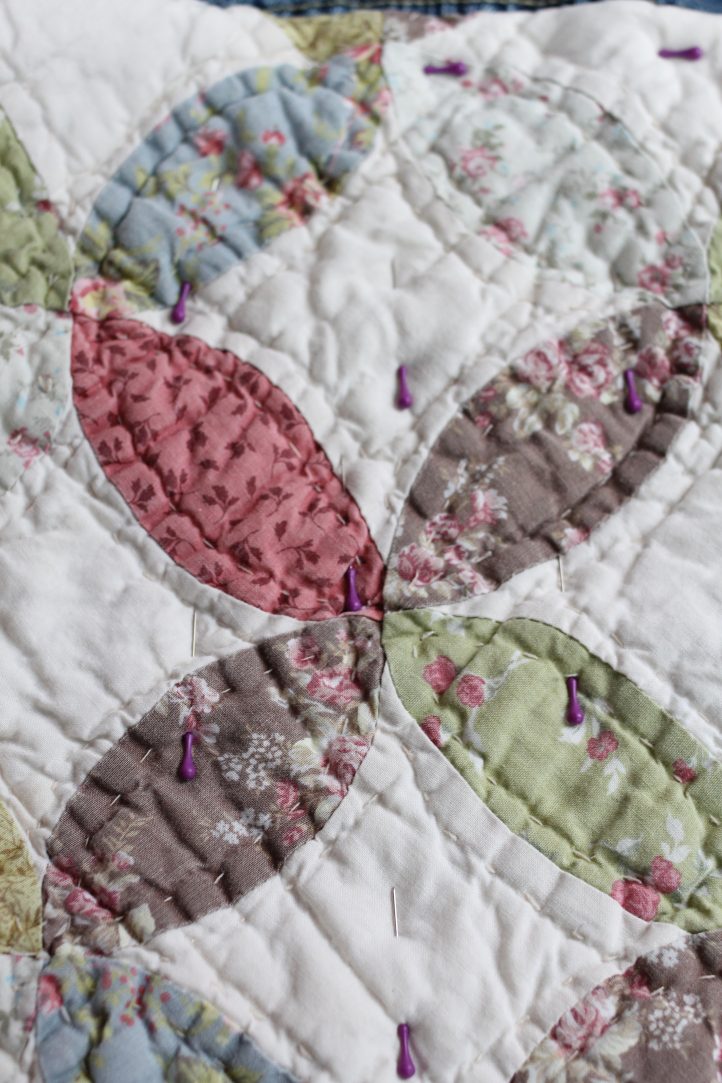
- Use tracing paper to trace out the exact shape of the back panel, no seam allowance or borders added.

- Use the tracing paper piece to center the design that will be on the jacket back panel and make sure you like what will be showing. Then cut a new pattern piece from the quilt – leaving a wide, 1 1/2” inch seam allowance around all sides.
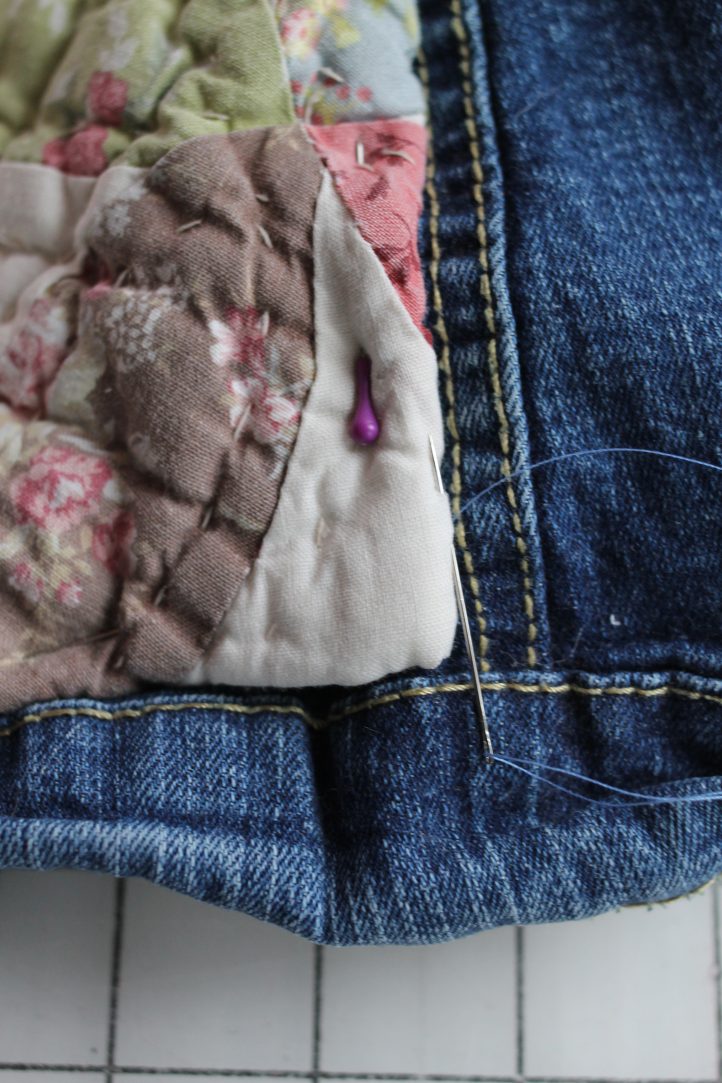
- Lay your new shaped quilt pattern piece on the back of your jacket and pin it down, starting from the center and moving outwards. When you get to the edges, tuck that 1 1/2” seam allowance underneath, so no raw edges are showing, and pin.

- Pin the entire piece down and make sure there are no gaps, bumps, or crooked designs.
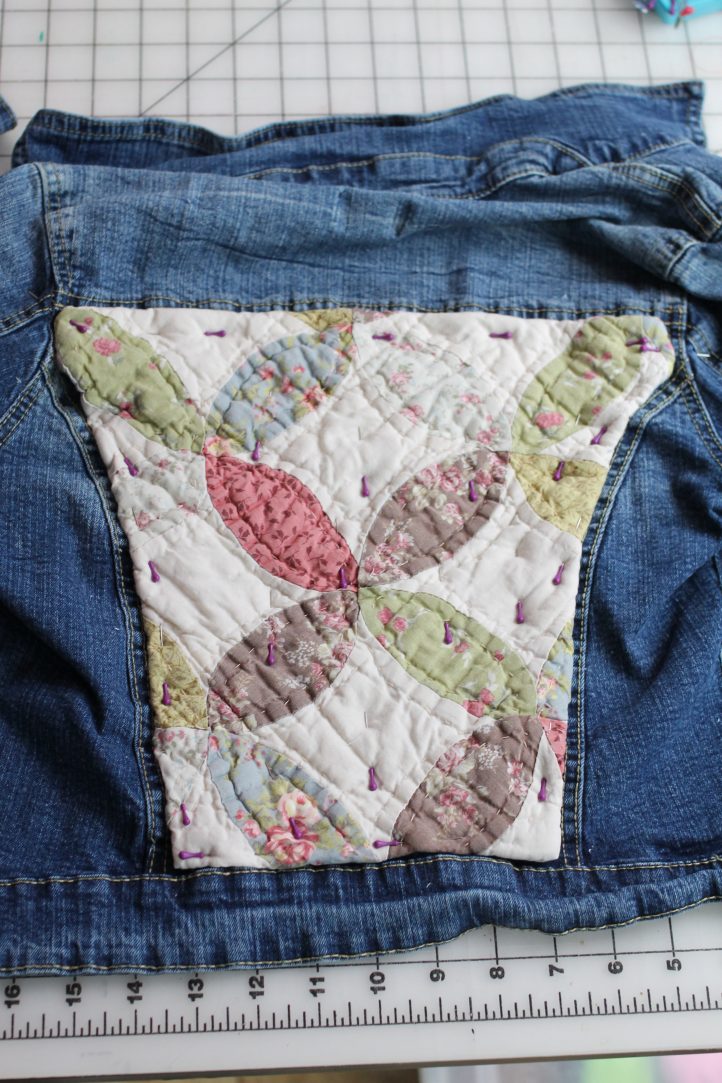
- Use a slip stitch to attach the quilt piece to the back of the jean jacket, going slowly and adjusting the seam allowance as necessary. You may want to trim some of the seam allowance at the corners, depending how thick the quilt is, and then press the entire jacket. There should be no obvious stitches on the interior of the jacket – and you’re ready to go!
A few alternative options are to continue hand quilting the quilt to the jacket, adding additional pieces to the collar or front, or adding lace and trim on top of the quilt piece!