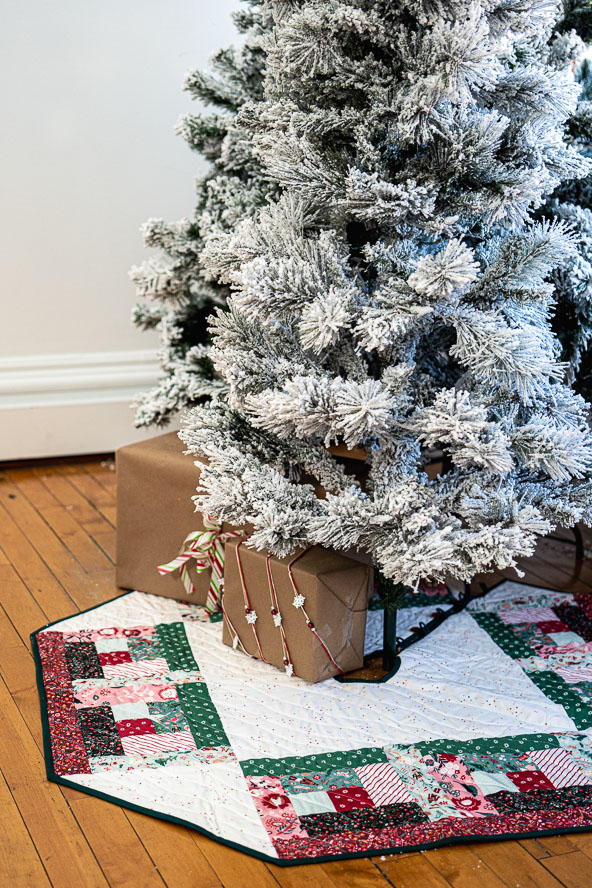
Give your elegantly wrapped Christmas gifts a gorgeous backdrop by sewing your own quilted tree skirt. Made using fat quarters in quaint holiday prints, this tree skirt pattern can also be made with fabric scraps and features the traditional log cabin quilt block to give your skirt a cozy country feel. Finish your DIY tree skirt with coordinating binding and secure your design around the base of your Christmas tree with helpful button closures.
Designer Notes:
- Please read all instructions and assembly requirements before beginning the pattern.
- Seam allowances are all 1/4” and have already been added.
Materials:
- Fabric: Note: All fabrics are from Art Gallery Fabrics collections.
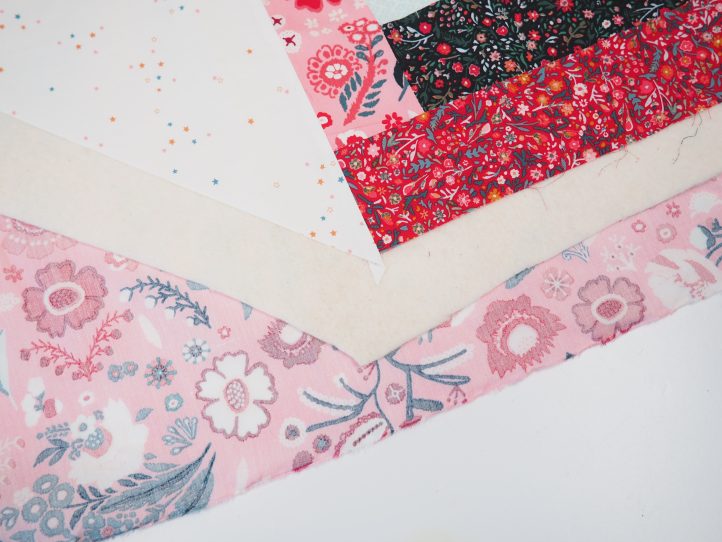
- Fat Quarter Pack of muted Christmas prints. The designer loves Wintertale by Katarina Roccella for AGF.
- TIP: We actually need nine FQs from the pack so choose ones with a smaller scale pattern, which look better on the strips needed to make the blocks.
- 3/4 yd. coordinating blender for the background fabric. The designer used Twinkle Little Star from the Wintertale collection by Katarina Roccella for AGF.
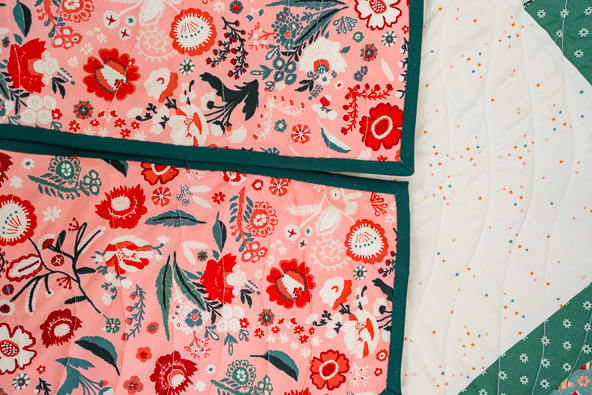
- 1 1/4 yd. backing fabric. The designer used Festive Bouquet from the Wintertale collection by Katarina Roccella for AGF.
- 1/2 yd. solid fabric for binding. Evergreen from the Pure Elements collection by AGF is perfect.
- Fat Quarter Pack of muted Christmas prints. The designer loves Wintertale by Katarina Roccella for AGF.
- Interfacing:
- 1 1/4 yd. thin wadding. The designer used #279 80/20 cotton mix batting by Vlieseline.
- 5x 3/4” coordinating buttons (these do not have to match)
- Scissors
- Fabric markers
- Extra feet for your sewing machine (walking foot [dual feed foot], for example)
Cutting Instructions:
From the Fat Quarters:
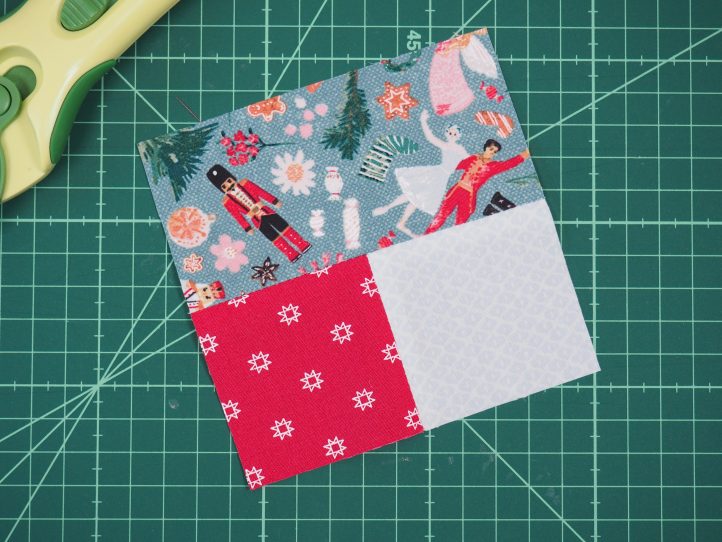
- 8 pieces 2 1/4” sq. from one of the FQ fabrics for the Log Cabin center squares.
To construct the blocks, start with one strip from each of the eight remaining FQs (the red star one doesn’t count). Cut 2 1/4” x WOFQ (width of FQ) and we will be making things easier and practically math-free by concentrating on the width rather than the length. The length will be cut after each addition to the block. Keep cutting strips as you need them. The blocks are then squared up and trimmed at the end.
TIP: The further out on the block you go, the less you will get from a strip.
From the background fabric:
- 1 piece cut 19 3/4” sq. for the tree skirt center.
- 2 squares cut 10 3/4” sq. and sub-cut diagonally for the cornerstones.
From the backing fabric:
- 1 piece cut 42” sq.
From the binding fabric:
- Bias tape cut 1 1/2” wide and joined to make a continuous strip 5 1/4 yds. long.
- Bias tape cut 1” wide x 15” long to make the button loops.
From the batting:
- 1 piece cut 41” sq.
Sewing Instructions:
MAKING:
- Traditional (there are many variations) log cabin blocks are easy and they follow a certain pattern of construction, which means that the pieces sort of spiral out from the center. You can make the blocks in a few ways, all light on one side and dark on the other or mix it all up and make them scrappy.
- To begin, take the center square and one of your strips. Lay the square onto one end of the strip, right sides facing and sew a seam.
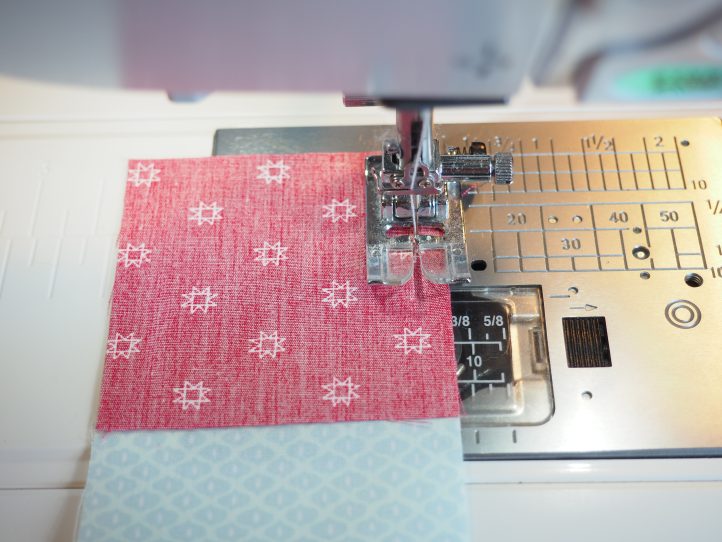
- TIP: This method allows for chain piecing, which really makes those blocks grow quickly.
- Trim so that both pieces are the same size as the starting square.
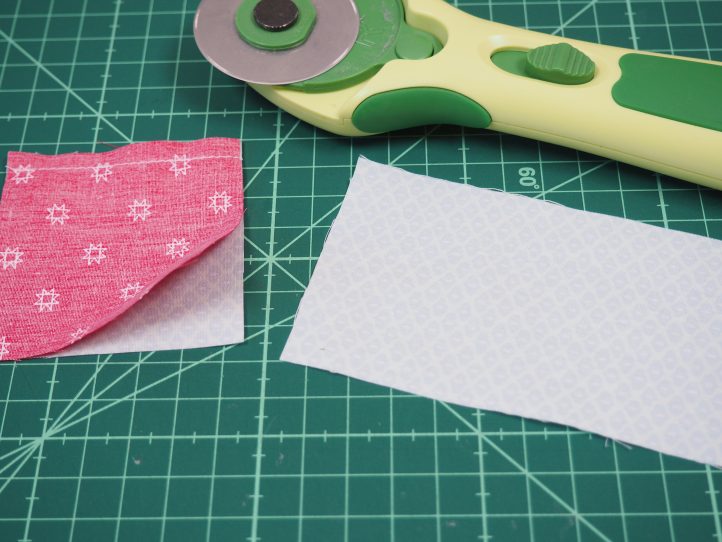
- Open the two pieces out and press seam open.

- Take another strip and lay what you have so far, right sides together, onto the strip and sew the seam.

- Trim, open out and press.
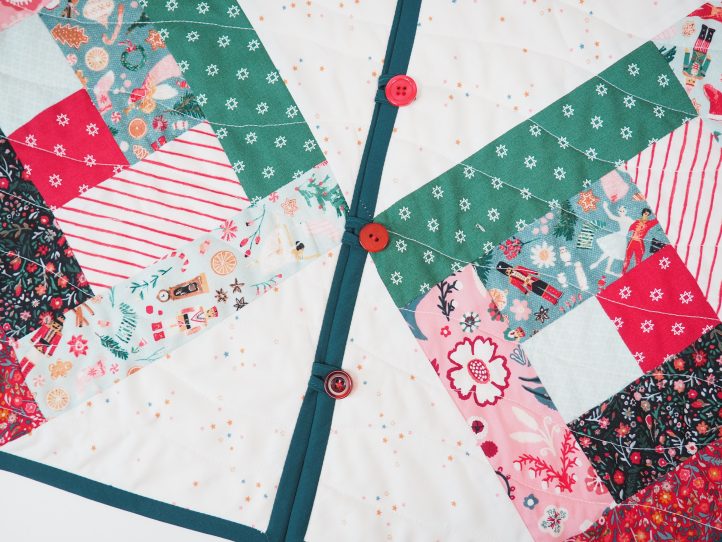
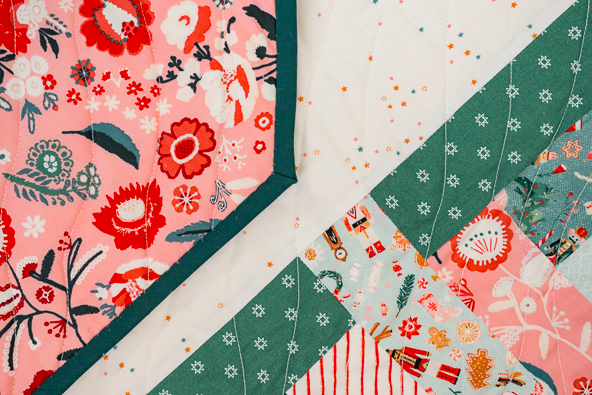
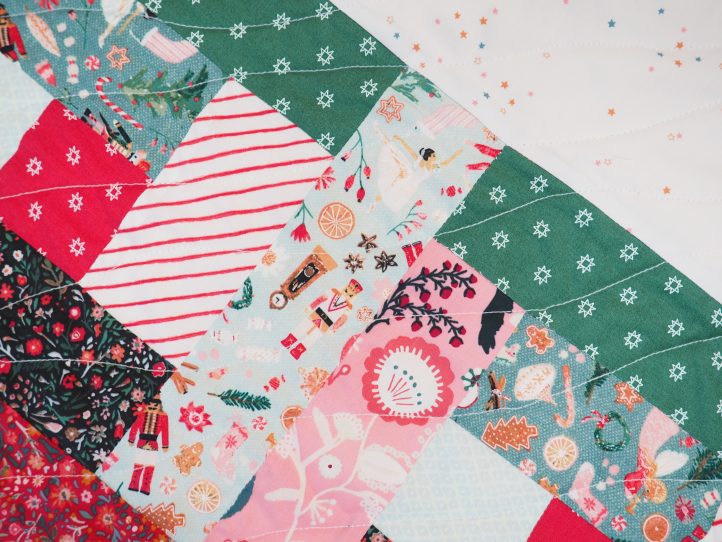
- Keep doing this until you have a block, using the main photo as an idea for strip placement.
- TIP: You can make the block larger by adding more and more strips but for now, we need a block which measures 10” sq.
- Make 8 log cabin blocks in all and press blocks carefully, then trim them to 10”.
- Attach the blocks together to make four rows of 2 blocks with two strips. One strip in between block sides and one strip at the right side of the other 10″ block, then press well.
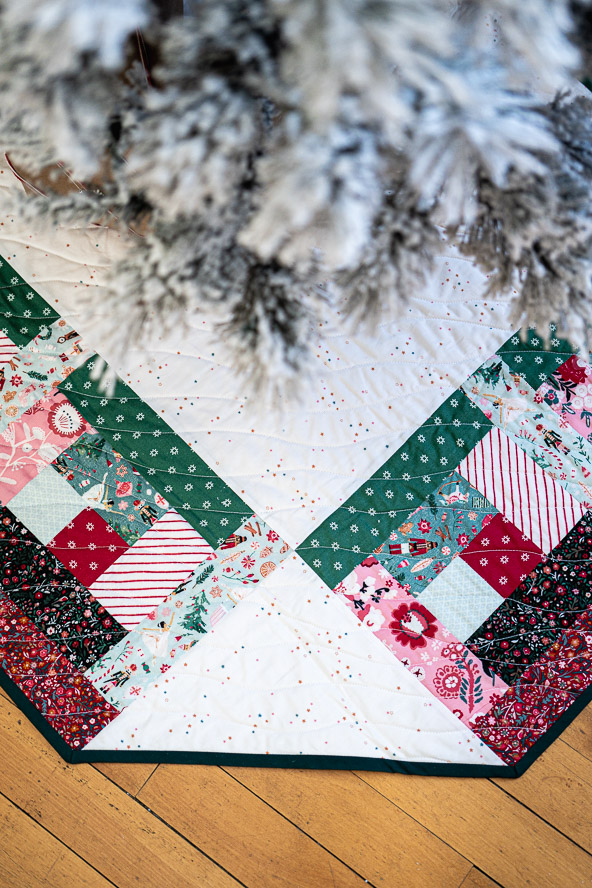
- Bring in the center background fabric square and attach a row of blocks to the top and attach the last long strip to the bottom of the block rows.
- For the sides, attach one of the sub-cut cornerstone triangles to each end of a row of log cabin blocks.
- Press the backing fabric and make a quilt sandwich by laying the backing fabric face down. Center the batting on top of that and then the pieced top goes right side up on top of that.
- Pin so that no movement is possible and quilt with your favorite design. The designer loves a random diagonal wave.
- When the quilting is done, trim the skirt all around so that all three layers match the pieced top.
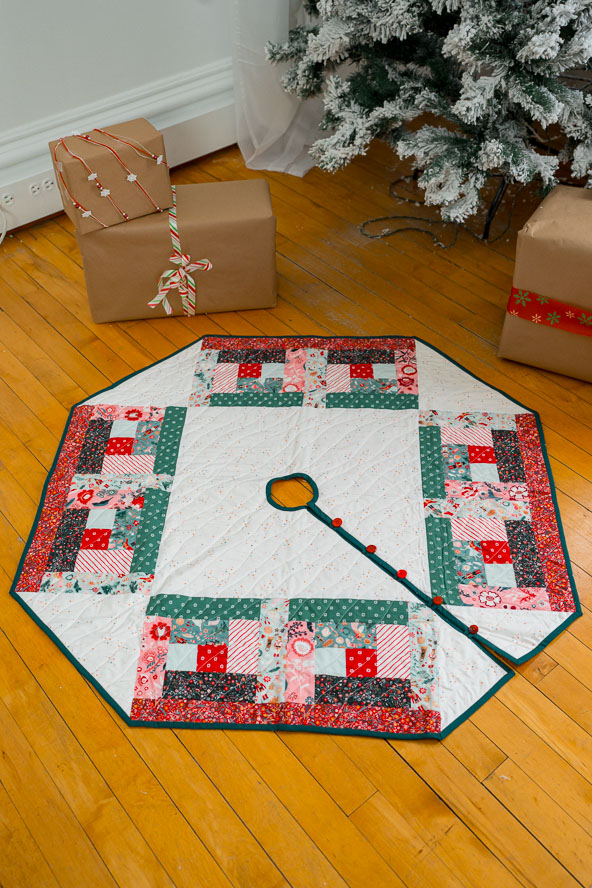
- TIP: You can leave it at this point and simply bind to make a festive table topper.
- To make your quilt into a tree skirt, find the center of the skirt (fold in quarters and mark the center point) and cut from one corner right up to the center point.

- Next find something round that is about 3 1/2” diameter. Place your ‘round thing’ on the center mark and draw around it with removable marker.

- TIP: The designer used a glass jar, which worked out great because I could see the center marks through it. That plus measuring carefully means that it is more likely to be precise.
- Cut the center circle out right on the line that you drew.
- TIP: This center circle fits most tree trunk sizes but if you have an artificial tree and you know that the trunk is larger, simply choose a slightly larger round thing. You have a bit of room to play with.
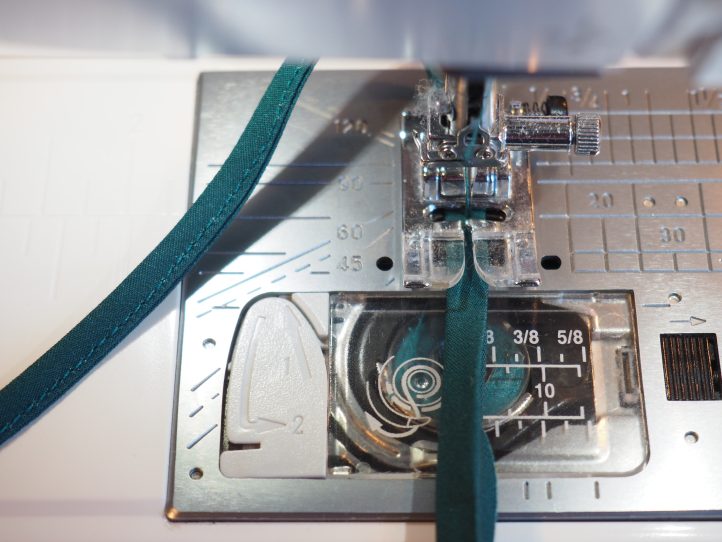
- You will need your bias tape next so let’s make that. You have one long strip so far. Fold the long strip in half along the length with the wrong sides facing and press. Open the strip out and fold the two long raw edges to the center crease (wrong sides facing) and press again. The bias tape is ready to be attached or topstitched now.
- Do exactly the same thing to make the button loops and then topstitch the strip closed on one side. Cut the button loop strip into 5 pieces 3” long.
- Attach the button loops along the cut section of the quilt at 3” intervals.

- Finally, bind the tree skirt with your bias tape and attach the buttons in line with the loops.