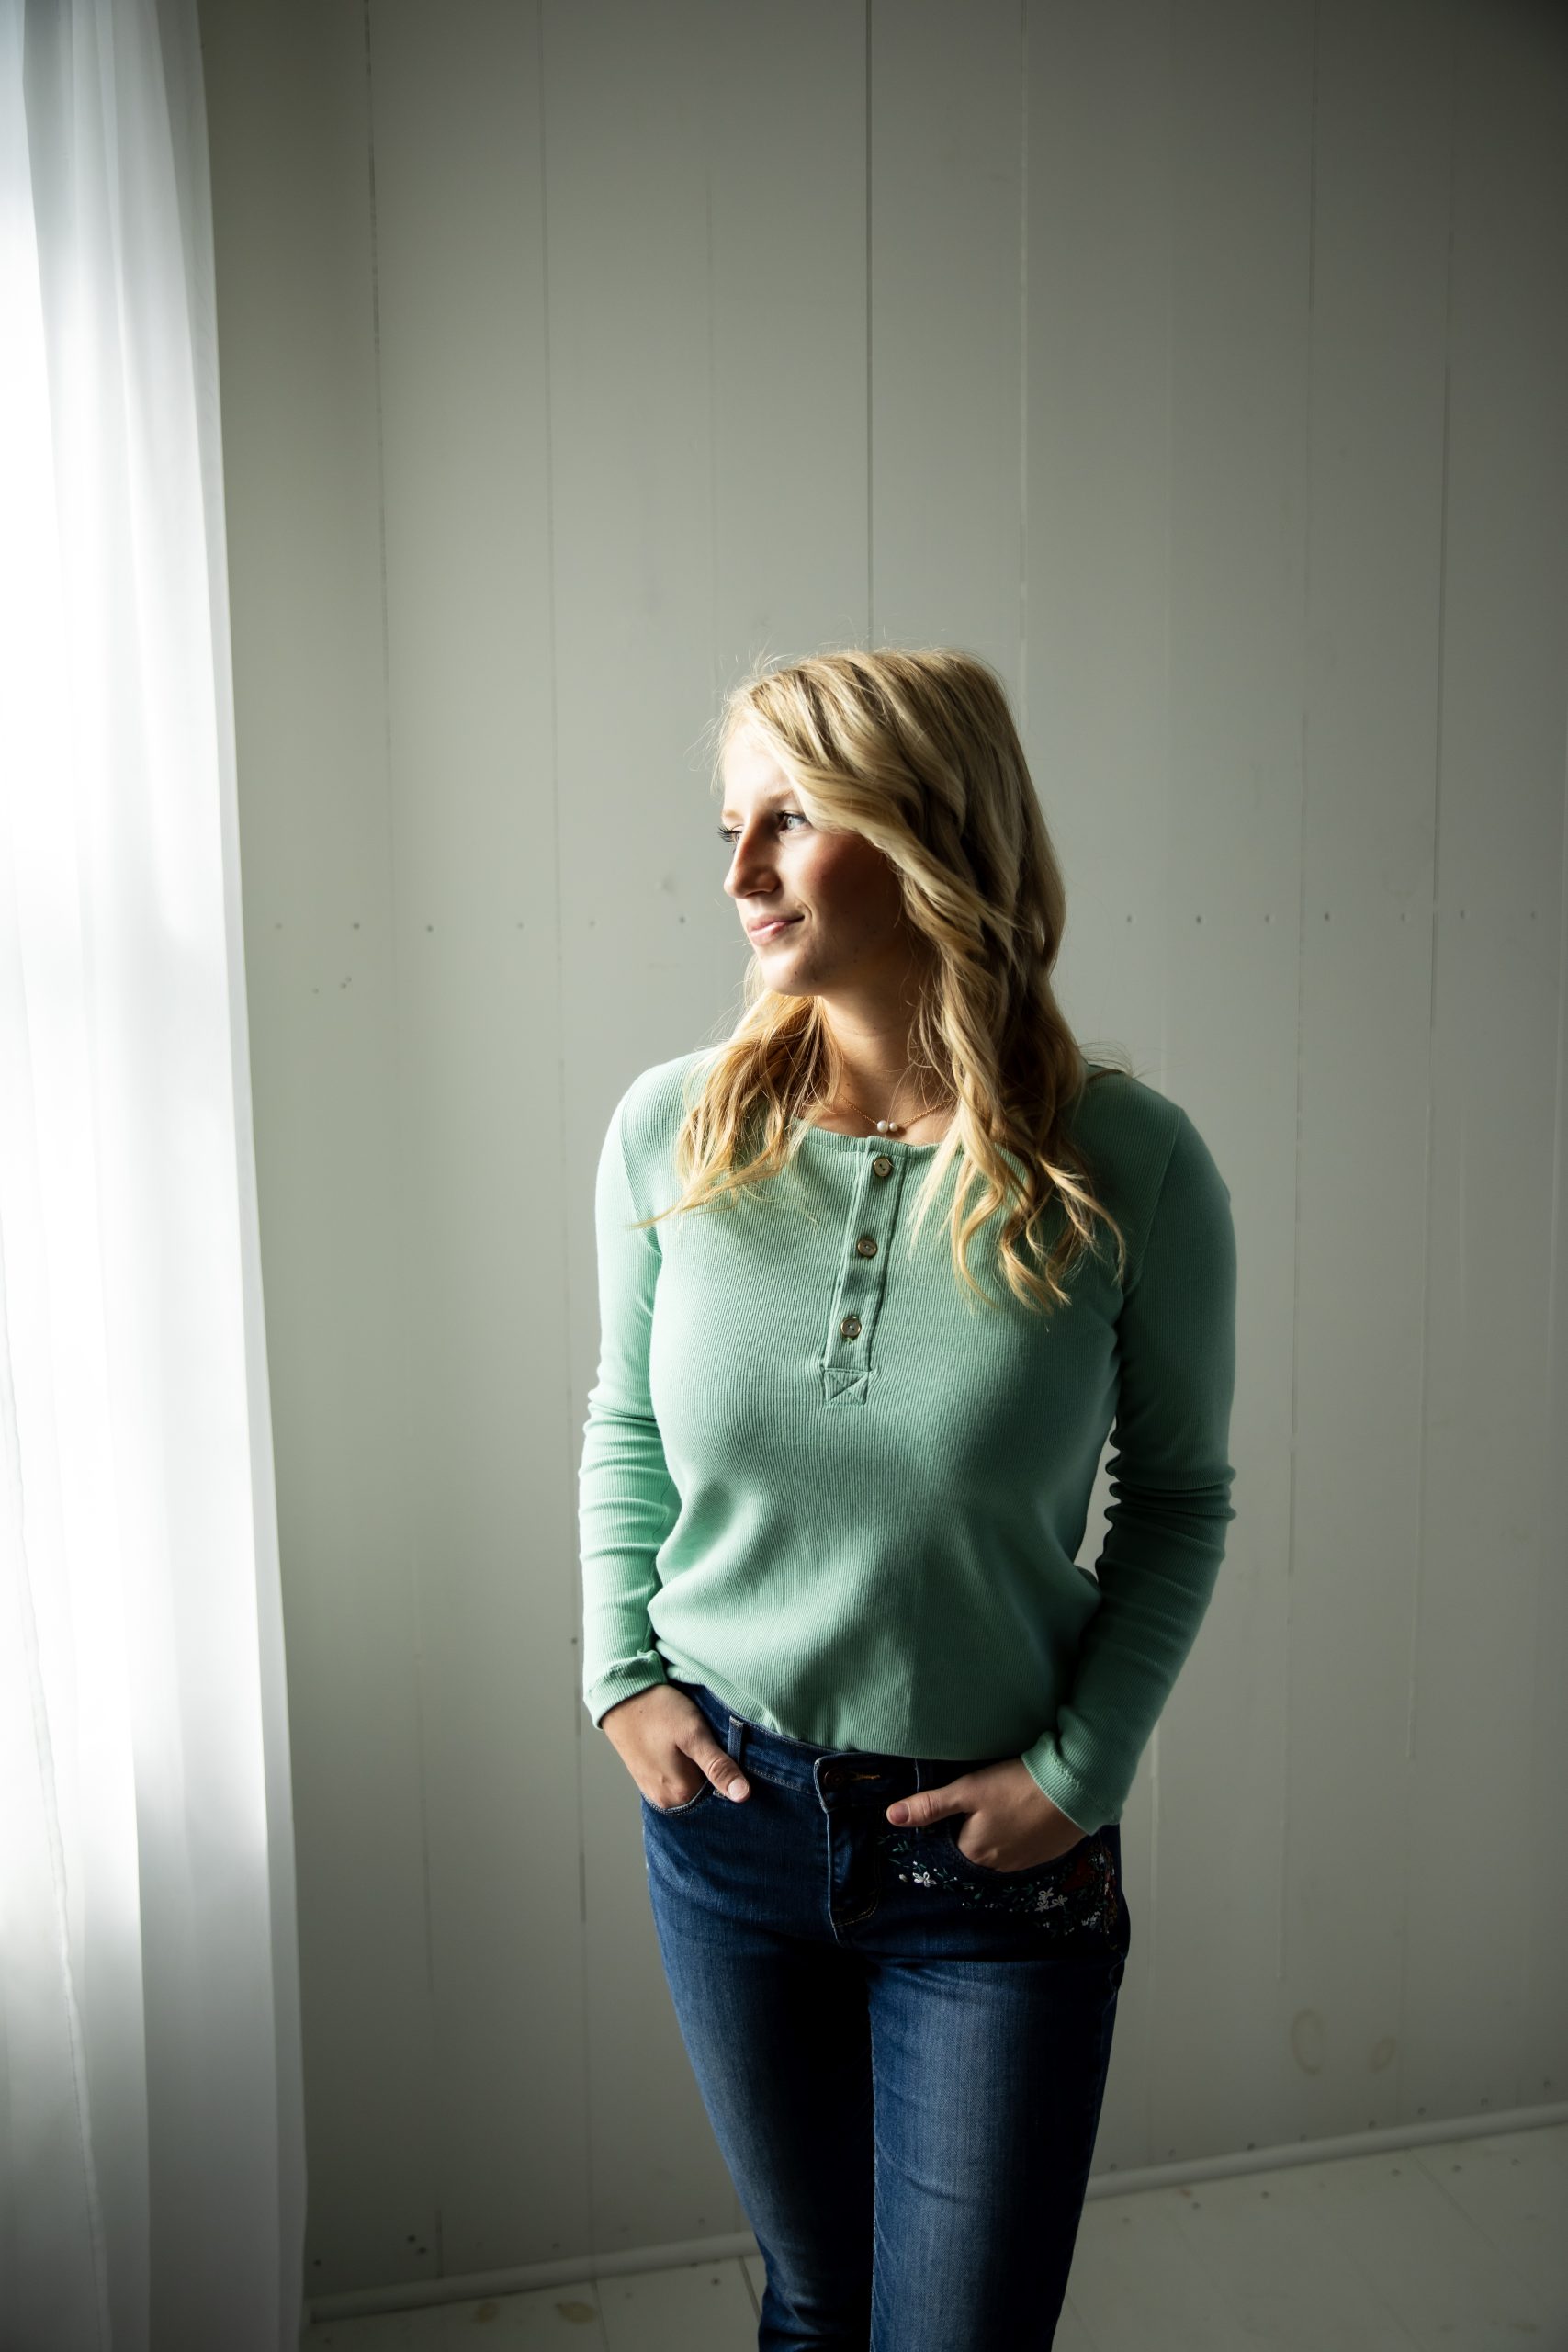
Build up your selection of wardrobe classics with this pretty long-sleeved Henley top. Designed by Lauren Merciris, this Henley top pattern features a button placket at the neckline and works best with fabrics like cotton and jersey. Complete your Henley with some eye-catching buttons that color-match your main fabric, like the gorgeous gold-rimmed buttons that complement the spring mint shade of our photographed sample.
Designer Notes: All the seam allowances are included: 1 cm / 0.4 in (3/8 inch), and 2 cm / 0.8 in (3/4 inch) for the hems.
Materials:
- Fabric and material requirements (fabric width 150 cm / 59 in.)
- Fabric 1: Jersey bi-stretch, wool, stretch and thin fabric
- Fabric 2: Cotton, poplin
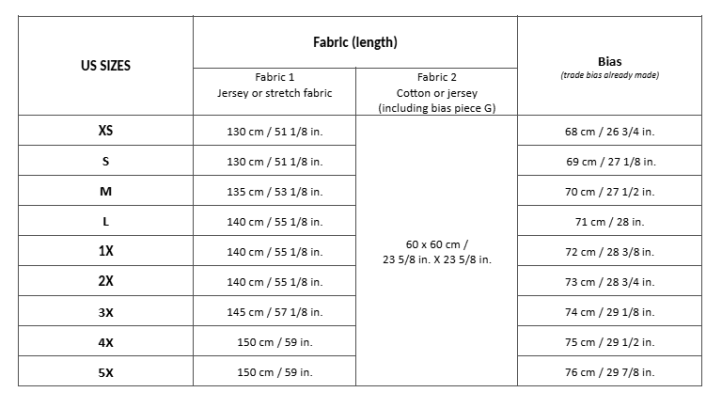
- Iron-on interfacing
- Cotton or jersey bias (to make or to use already made)
- 3 or 4 small buttons of 10 mm / 0.4 in (3/8 inch) diameter
- PDF Pattern – This is located at the bottom of this page. Please see printing instructions below.
PRINTING INSTRUCTIONS:
To download the PDF pattern, click on the download button at the bottom of the page. We recommend opening your download using Adobe Acrobat.
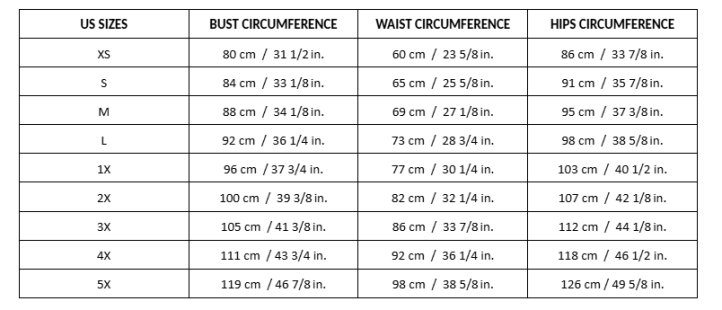
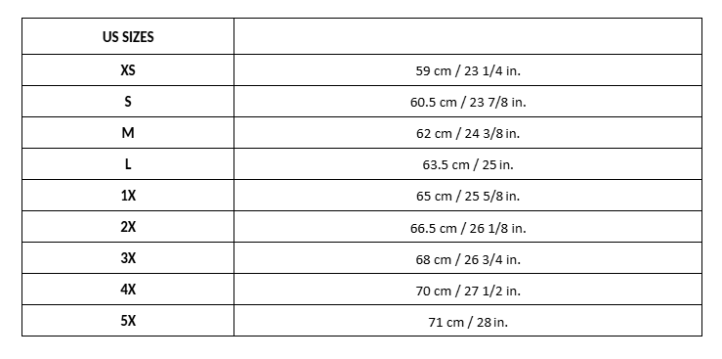
SIZE CHART (cm=centimeters/in=inches):
FINISHED GARMENT LENGTH (FROM SHOULDERS TO HEMS IN CM/INCHES):
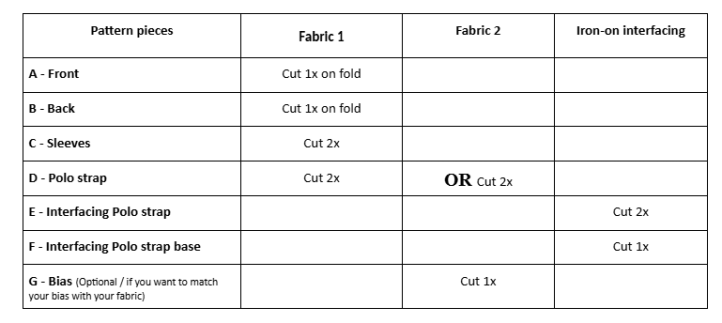
PATTERN PIECES:
Cutting Instructions:
- Lay the fabric.
- Fabric 1 for all sizes: Fold the two selvage edges back to the middle of the fabric, and adjust the width to obtain 1 fold on the left and 1 fold on the right (right sides together).
- Once the Front and Back are cut, fold your Fabric 1, right sides together for the sleeves.
- Fabric 2 for all sizes: No need to fold for the bias. Need to fold the fabric right sides together for piece D.
- Iron-on interfacing.
- Lay the pieces on the fabric.
- Lay out the pattern pieces on the different fabrics, respecting the grainline, and cut out each piece as many times as the pattern indicates.
- Mark all the markers on the reverse side of the parts, except on the right side for the polo strap on the front of the top. Use a heat-erasable pen.
Sewing Instructions:
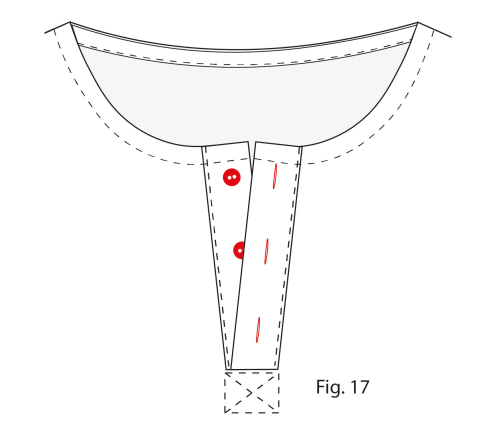
ASSEMBLING THE POLO STRAPS:
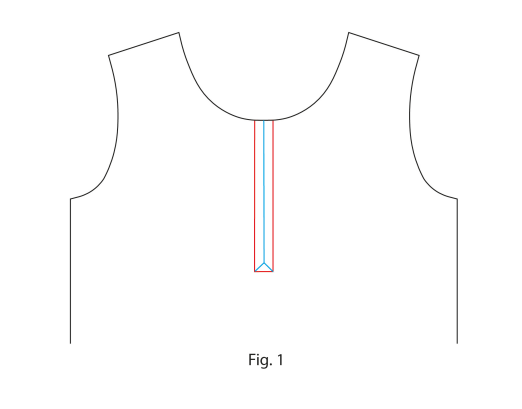
Marking the Front:
- Place the (A – Front) right side out.
- Mark the position of the polo strap as indicated by the markings on the pattern using removable pens.
- On the reverse side, place the (F – Interfacing Polo Strap Base), covering the triangle, at the bottom of the polo strap.
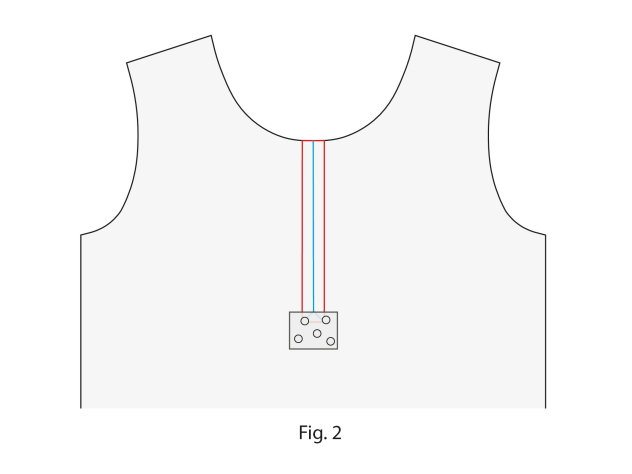
- Iron to maintain.
Assembling the Polo Strap:
- Place the two pieces of (D – Polo strap) on the wrong sides in front of you.
- Iron-on on the X part with one of the interfacing polo strap pieces. Do the same for the other polo strap.
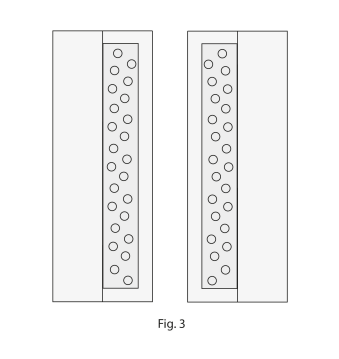
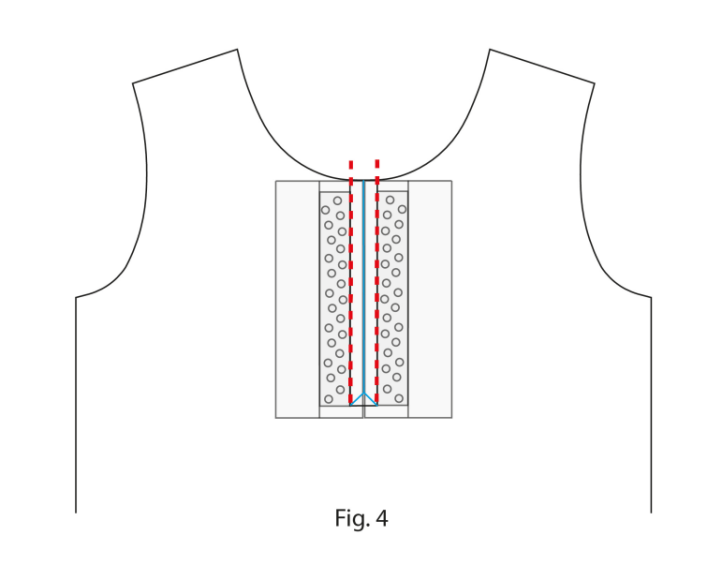
- In the front, pin, right sides together, the two polo straps, the X parts toward the middle front, along the middle blue line. (The red lines on either side correspond to the seam allowances of the polo tabs).
- Sew along the red lines on each side, taking care to stop at the same place. Make a backstitch on each side.
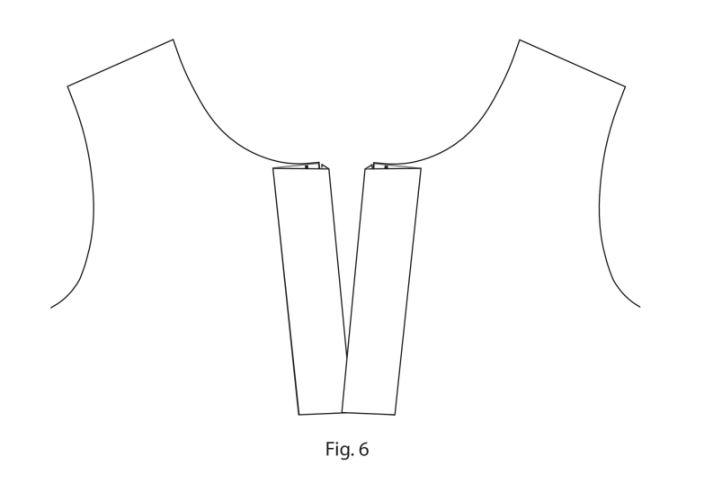
- With sharp scissors, cut along the middle line, then each side of the small triangle at the base, close to the last stitch of the sides.
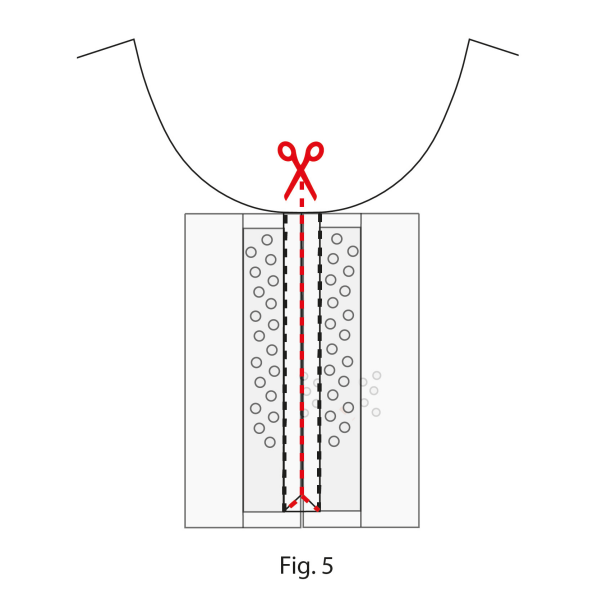
- Trim the seam allowances if needed.
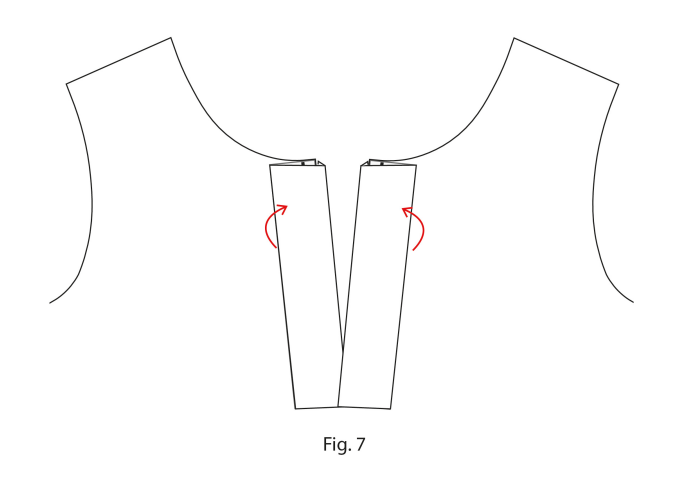
- At the raw edge of the polo straps, pre-shape the seam allowance by ironing it inwards.
- Fold the straps in half, wrong sides together, and press the fold with an iron. Use a ruler to check that the straps have the same width along their entire length.
- With the wrong side of the garment facing you, press the seam allowance of the first seam towards the strap with an iron.
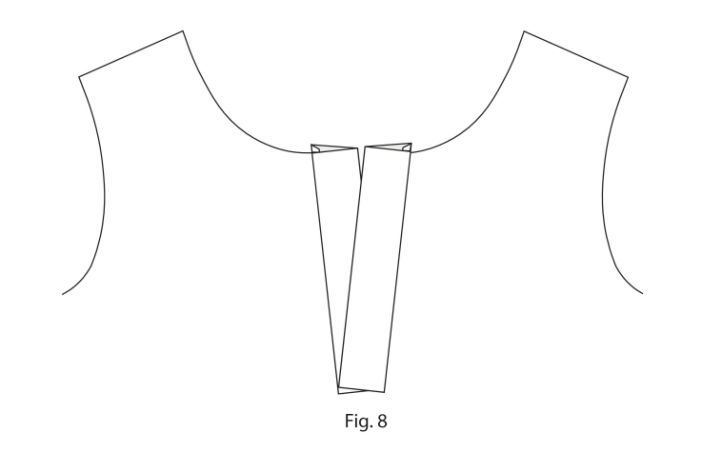
- Pin the preformed edge of the strap so that it covers the first seam. Do the same for the second strap.
- On the right side, place the left strap on top of the right strap, making sure they overlap.
- Baste the edges of the straps together with a hand stitch.
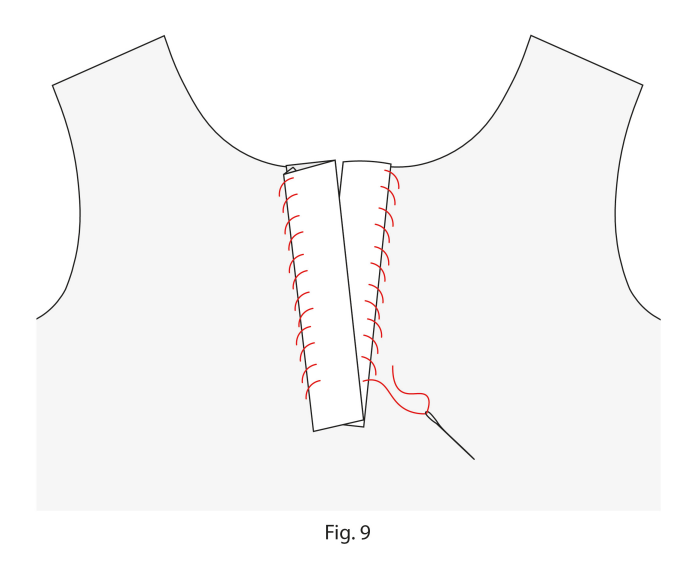
- On the right side of each strap, topstitch 2 mm / 0.08 in (1/8’’) from the edge using an elongated straight stitch. Remove the basting threads and iron.
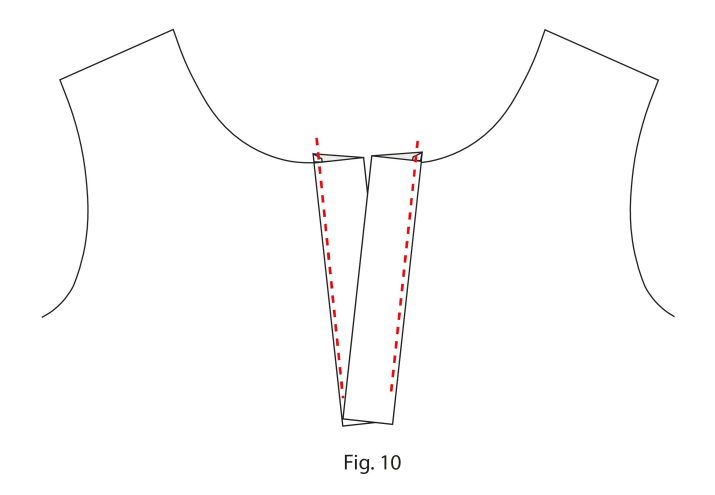
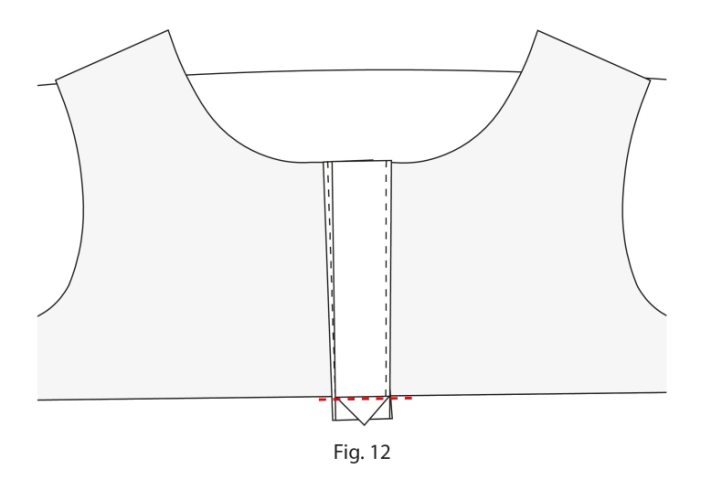
- On the right side, place the two straps on top of each other and carefully turn the bottom ends of both straps to the wrong side of the garment.
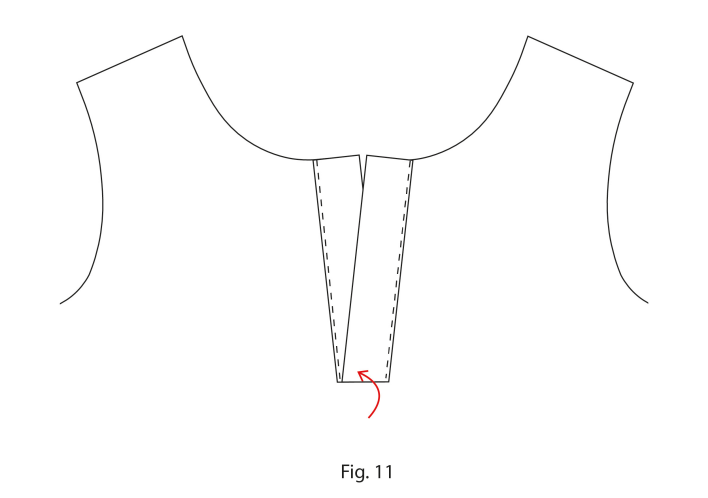
- Fold the front of the garment right sides together to the bottom of the strap and sew the bottom of the two straps together as well as the small overlapping triangle. Overlock all the layers together or zigzag stitch to prevent the edges from fraying.
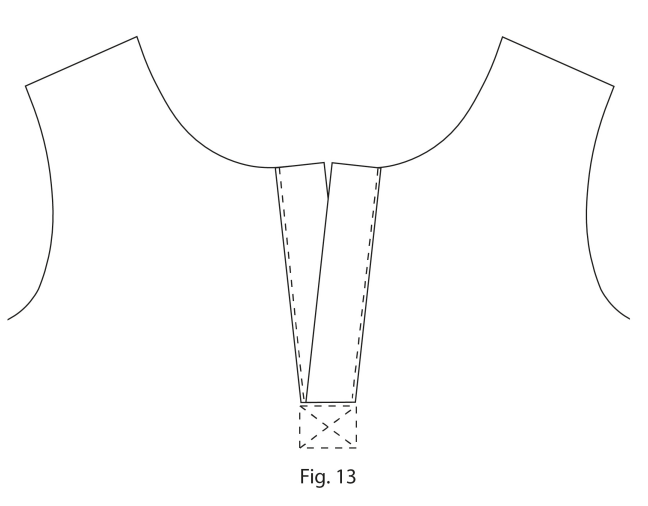
- Iron and secure everything by sewing a cross at the bottom of the tab. (Mark the cross beforehand with a removable pencil for a neat result).
ASSEMBLING THE FRONT AND THE BACK:
- Place the (A – Front) and the (B – Back) right sides together.
- Pin the entire sides and along the shoulders.
- Sew with an overlock at 1 cm / 0.4 in (3/8 inch seam). If you don’t have an overlock machine, you can stitch with the stretch stitch of your sewing machine and use a zig-zag stitch to enclose the seam allowances.
- Iron to flatten the seams towards the back.
ASSEMBLING THE SLEEVES:
- Join each side of the (C – Sleeves) right sides together and pin.
- Sew with an overlock at 1 cm / 0.4 in (3/8 inch seam).
- Iron to flatten the seams to the front.
- Turn the top inside out.
- Insert the sleeves right side in through the sleeve openings and match the seams and markings.
- Pin all around the armhole, distributing the ease evenly.
- Sew with an overlock at 1 cm / 0.4 in (3/8 inch seam).
THE NECKLINE:
Bias to Match the Fabric (Optional):
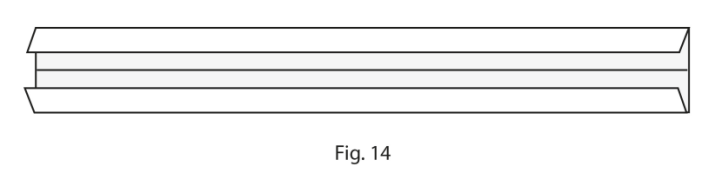
- If you want to use your fabric to create your bias, lay your (G – Bias) wrong side in front of you and trace a line in the middle of the entire length.
- Fold the two edges on the sides back to the line in the middle, and iron to obtain 1 fold on the left and 1 fold on the right.
Bias:
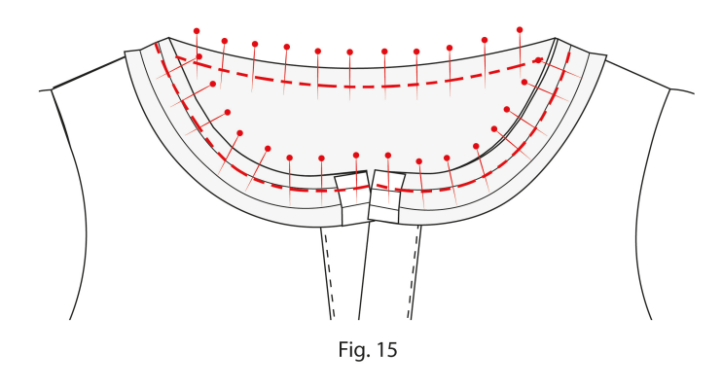
- Unfold the edge of the bias, and fold over one end of the bias 0.5 cm / 0.2 in (1/4 inch) to the wrong side. Apply it at the start of one polo strap, right sides together and pin.
- Apply the unfolded bias right sides together along the entire neckline edge. Pin (preferably position the bias fold if pre-folded on the seam line so that you can sew in the fold).
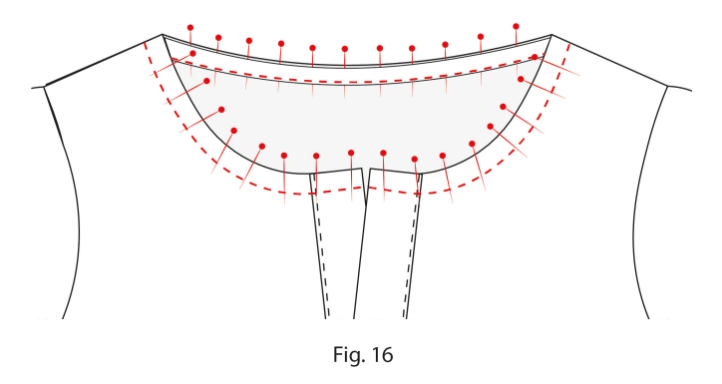
- Once you’ve gone all the way round the neckline, fold the other end over to the wrong side, placing it at the end of the other polo strap.
- Sew at 1 cm / 0.4 in (3/8 inch seam).
- Edge and trim.
- Fold the bias, and refold it to the wrong side of the neckline and pin it in place.
- Sew the bias at 0.1 mm / 0.04 in. from the edge of the bias fold or hand stitch to the wrong side using soft stitches.
- At the ends of the bias binding, hand sew with a few stitches to secure the bias binding to the fabric.
- Iron to flatten.
THE HEMS:
- Overlock all around the bottom of the top, and all around the bottom of the sleeves.
- Tuck in 2 cm / 0.8 in (3/4 in) on the wrong side and pin.
- Sew with a stretch stitch or use a small zig zag stitch all around the bottom and all around the sleeves at 2 cm / 0.8 in (3/4 in) from the edge.
- Iron to flatten.
THE BUTTONS:
- On the left polo placket, position the buttons as desired, ensuring that the intervals are of equal length. Mark the position of the buttonholes on the right polo placket.
- Make the buttonholes on the left polo strap (the one that folds over), with a buttonhole foot.
- Sew your buttons onto the right polo strap (the one underneath).