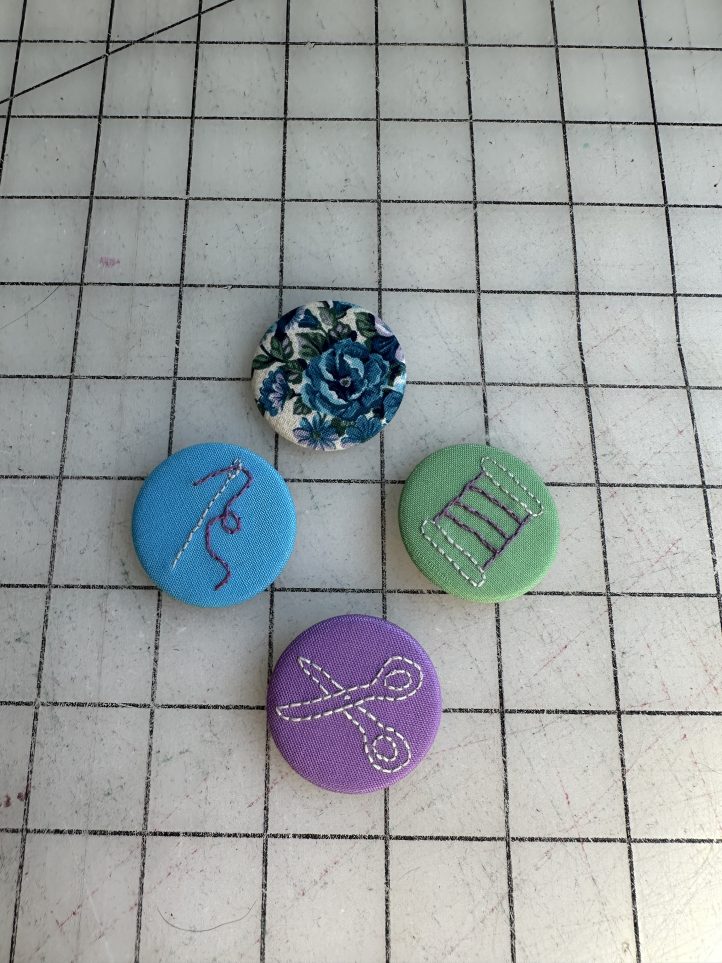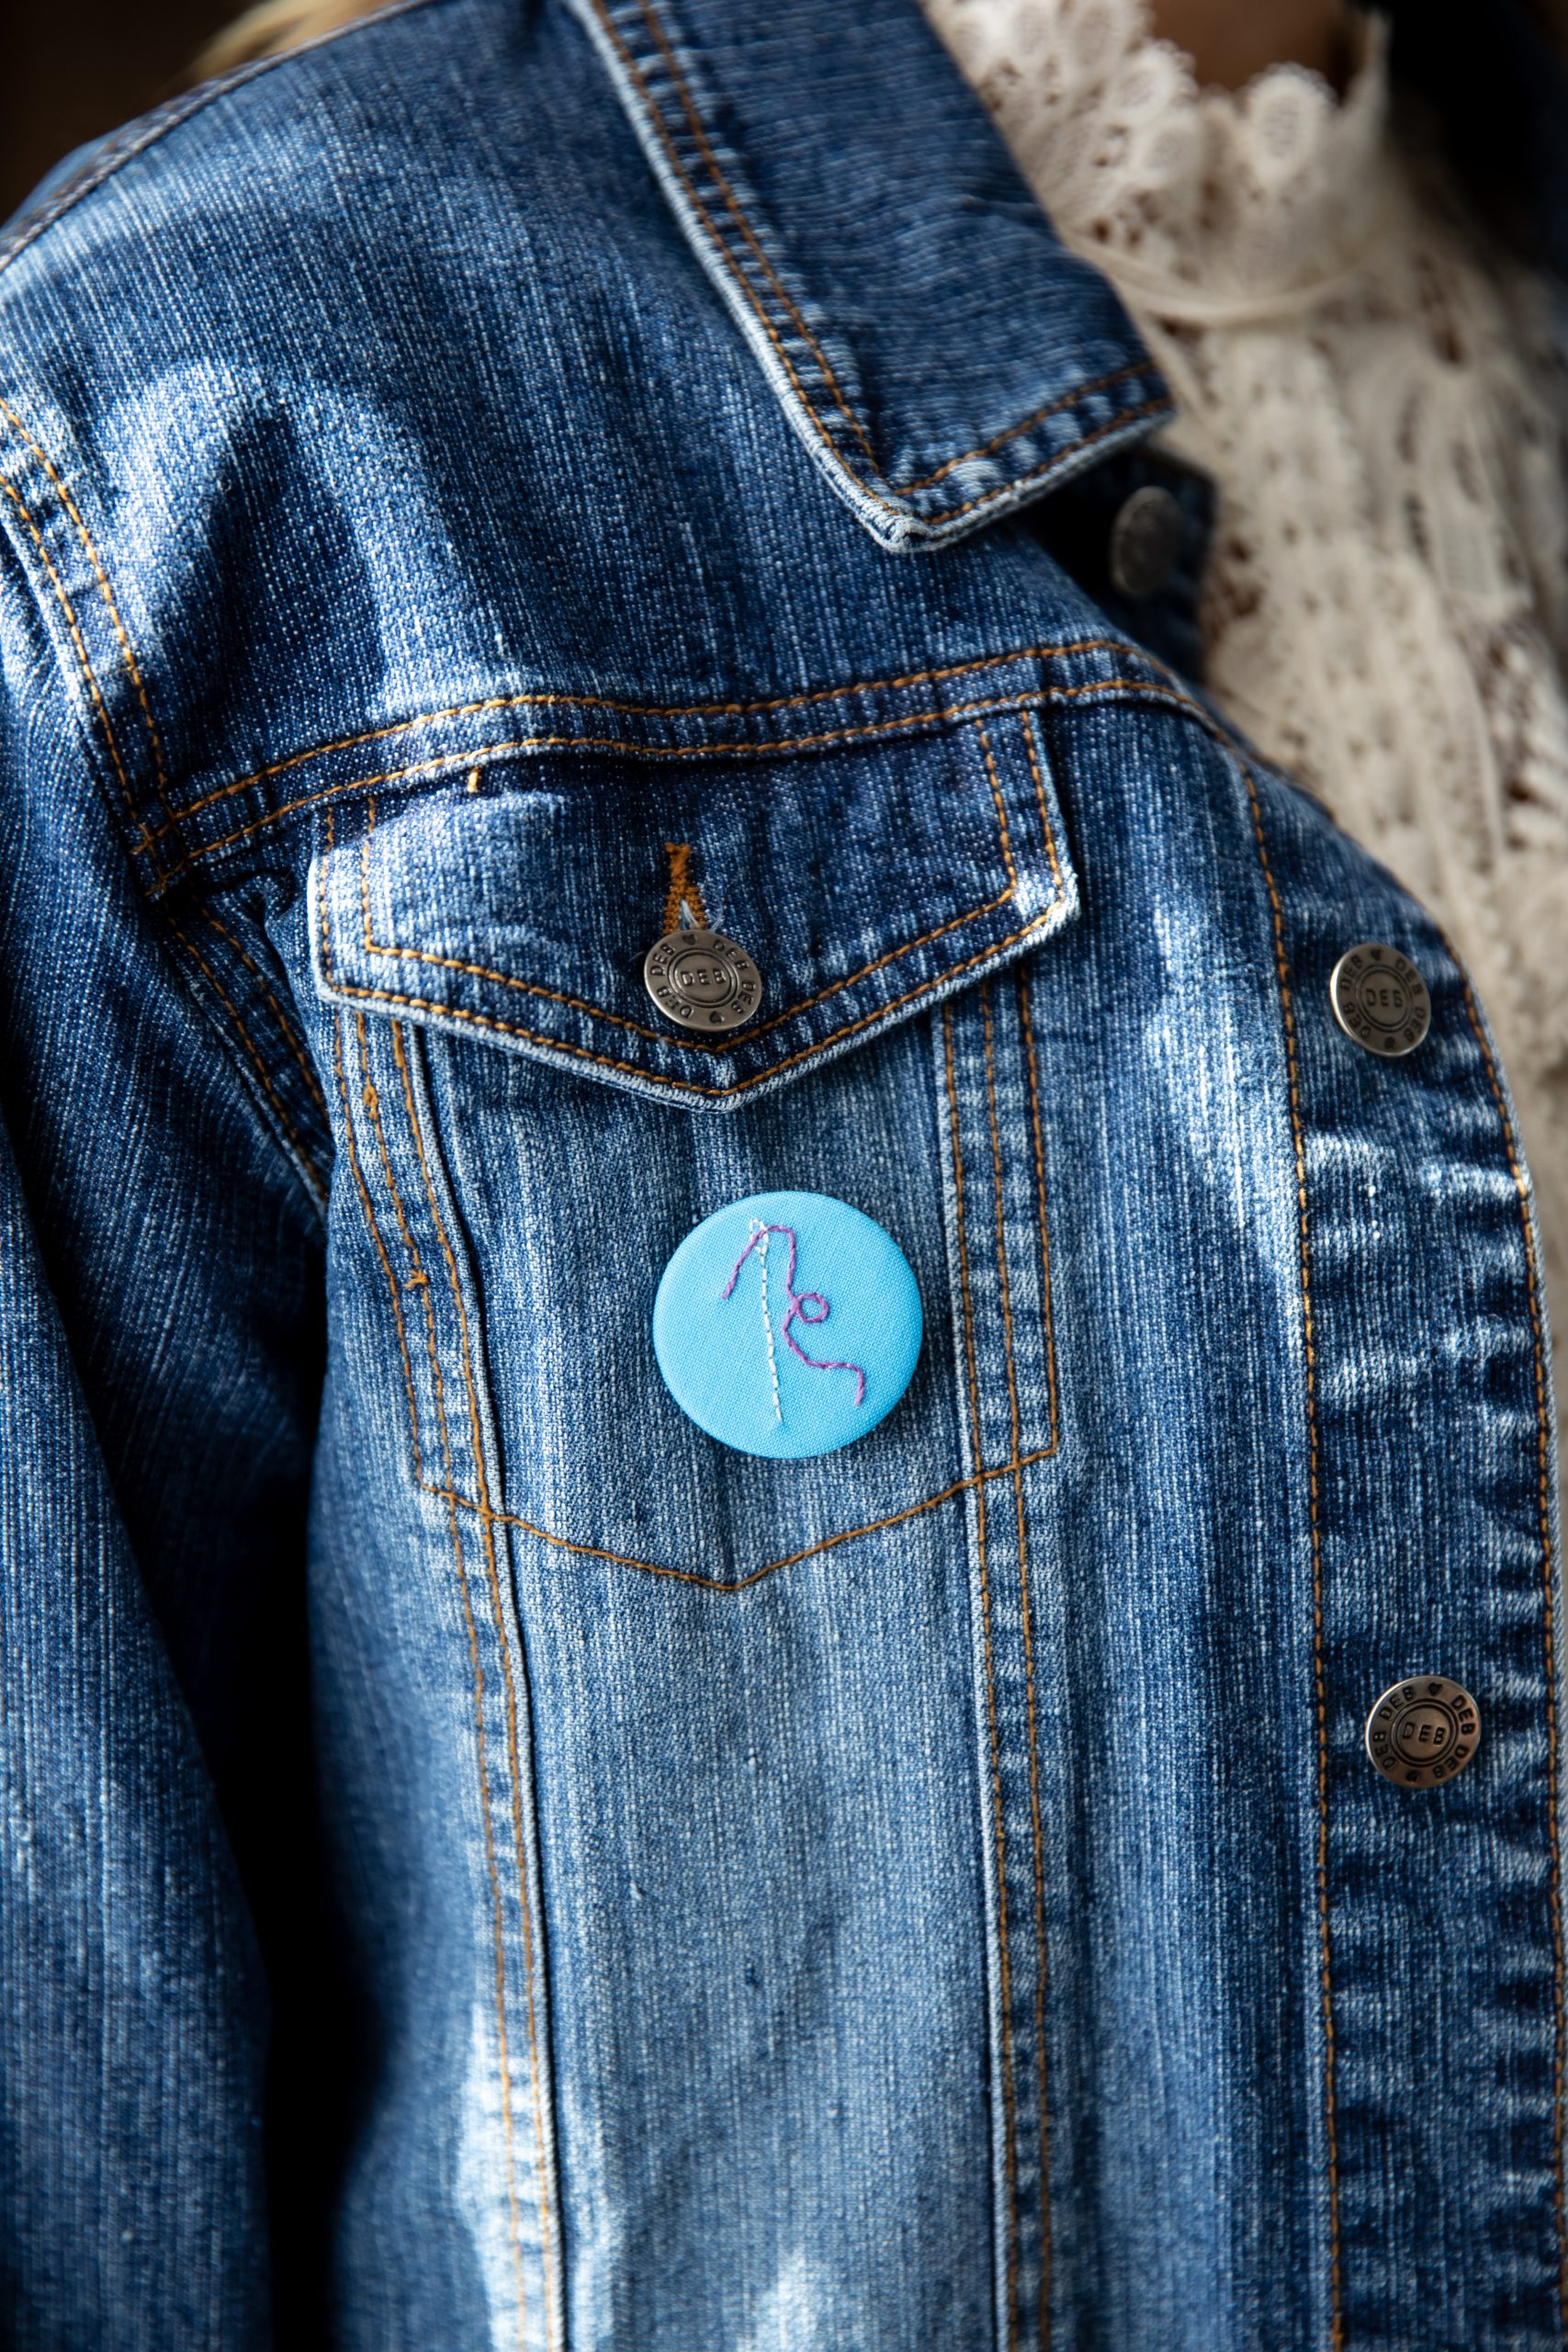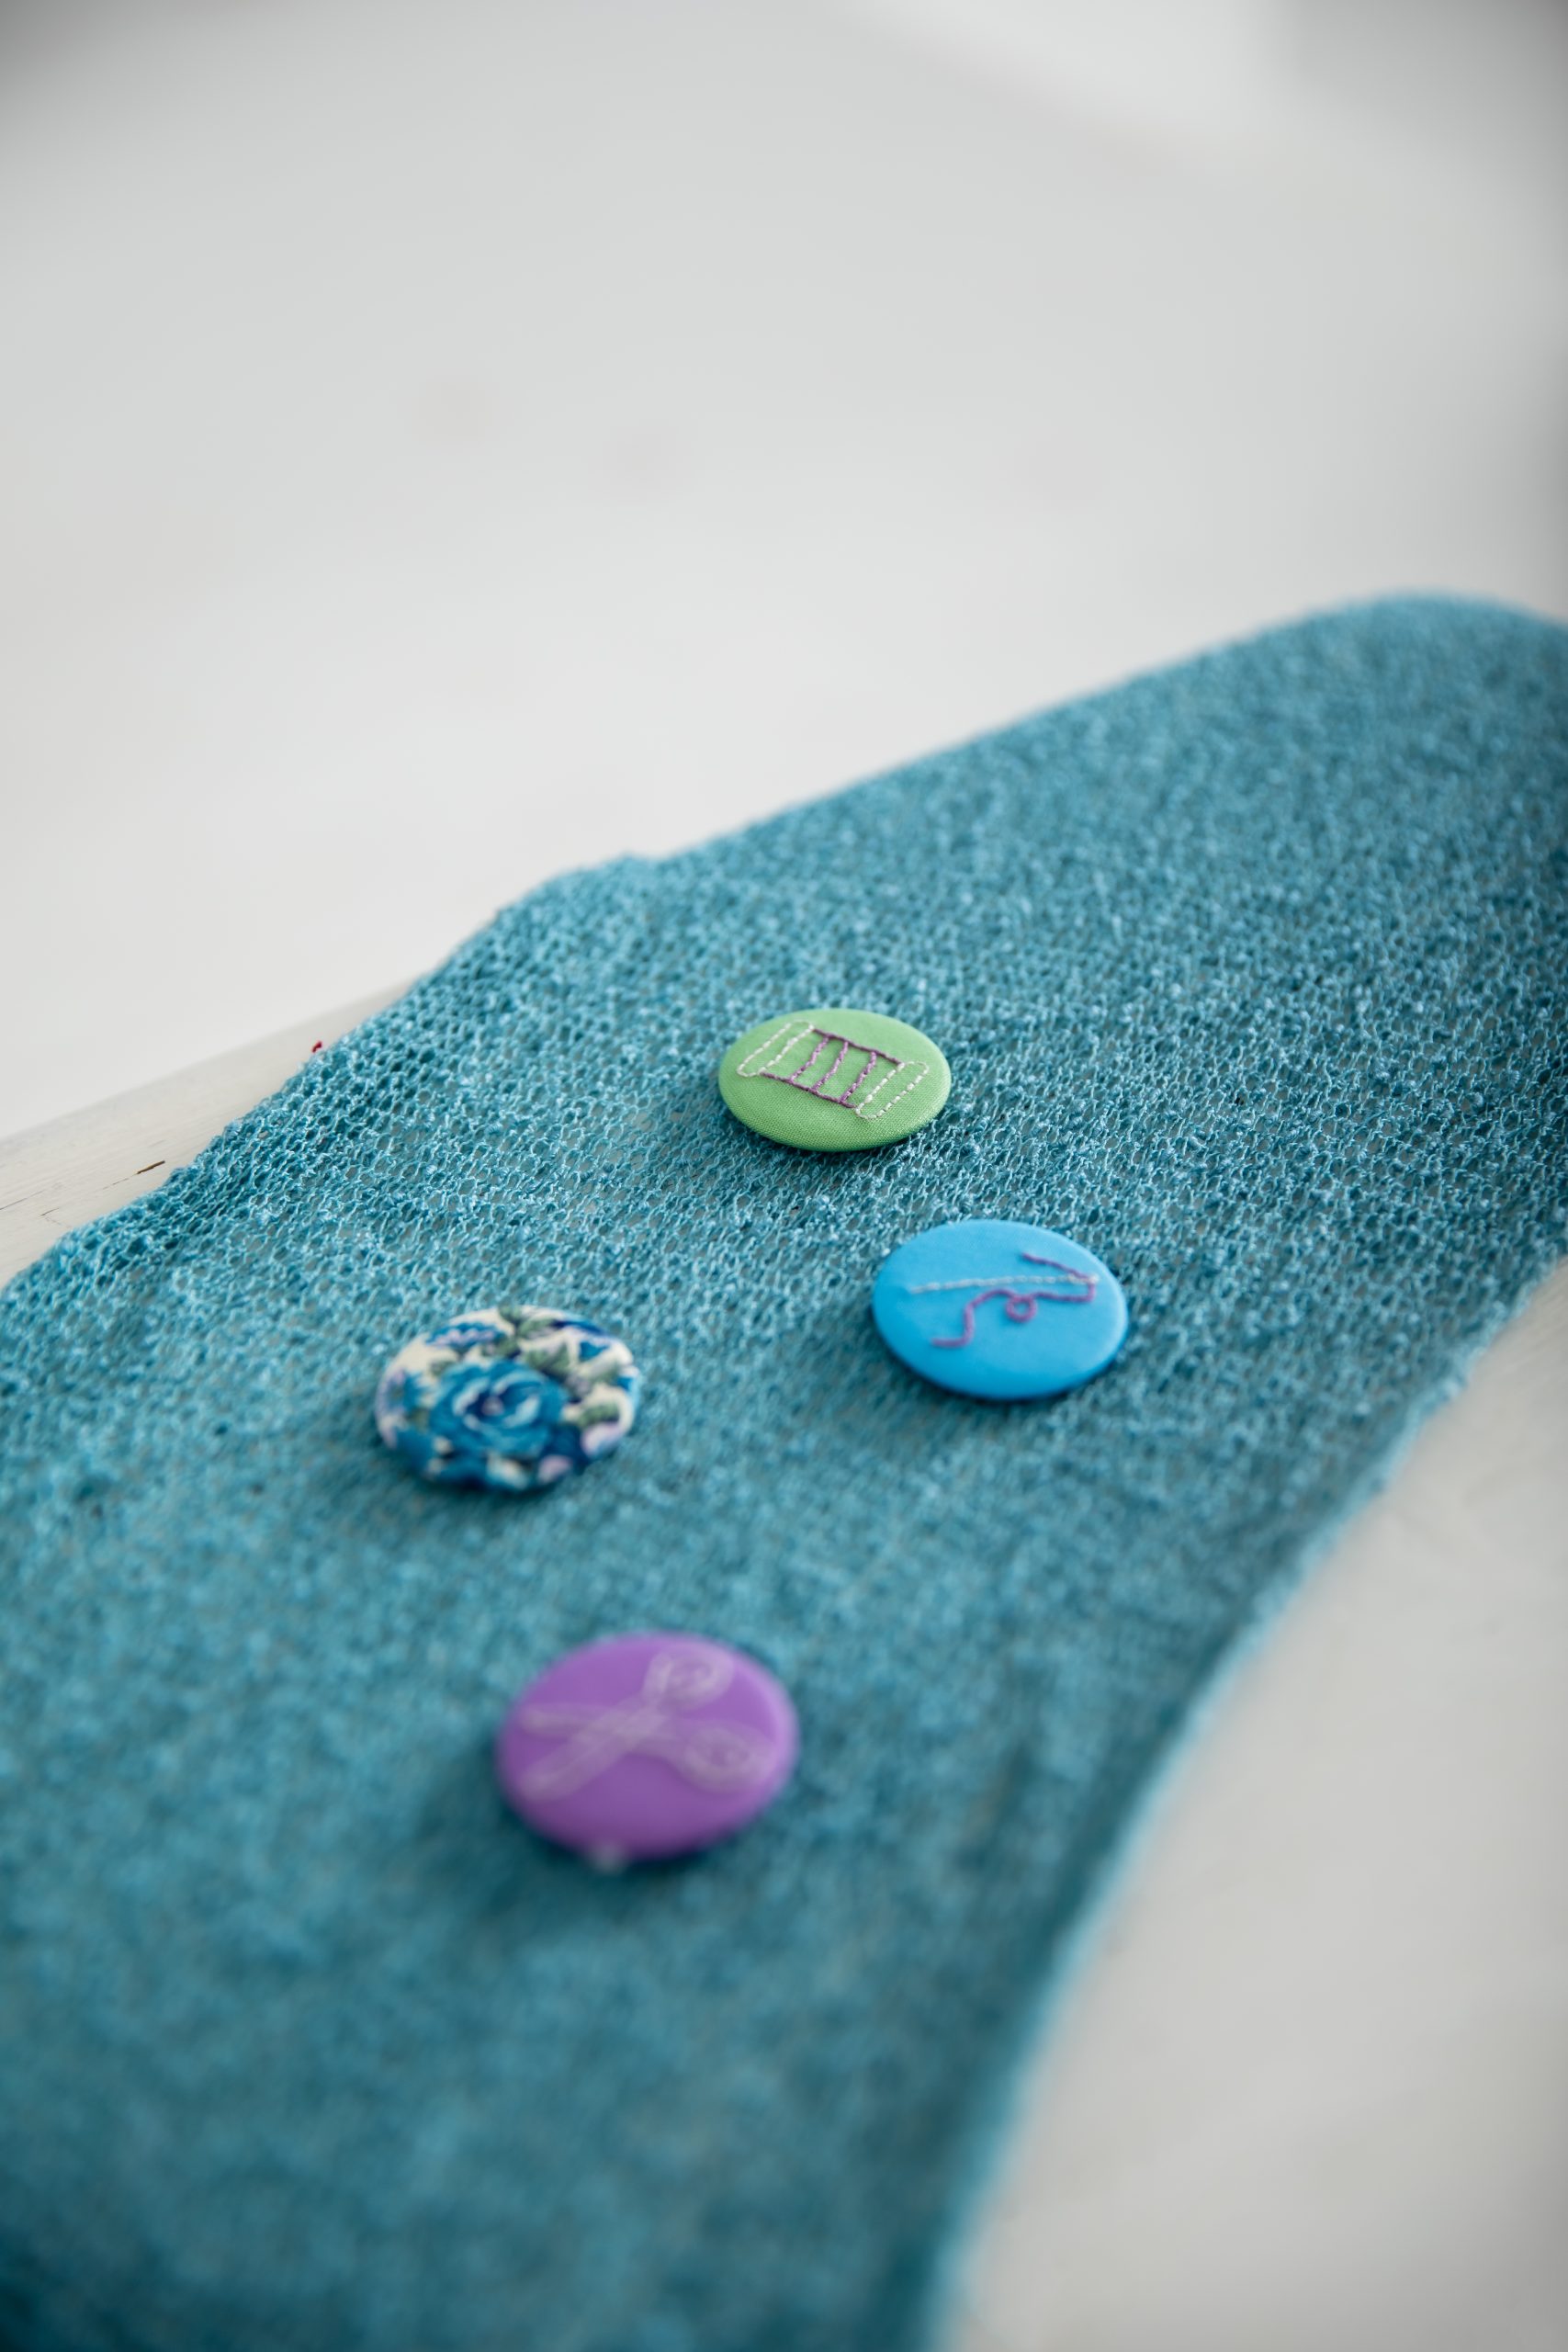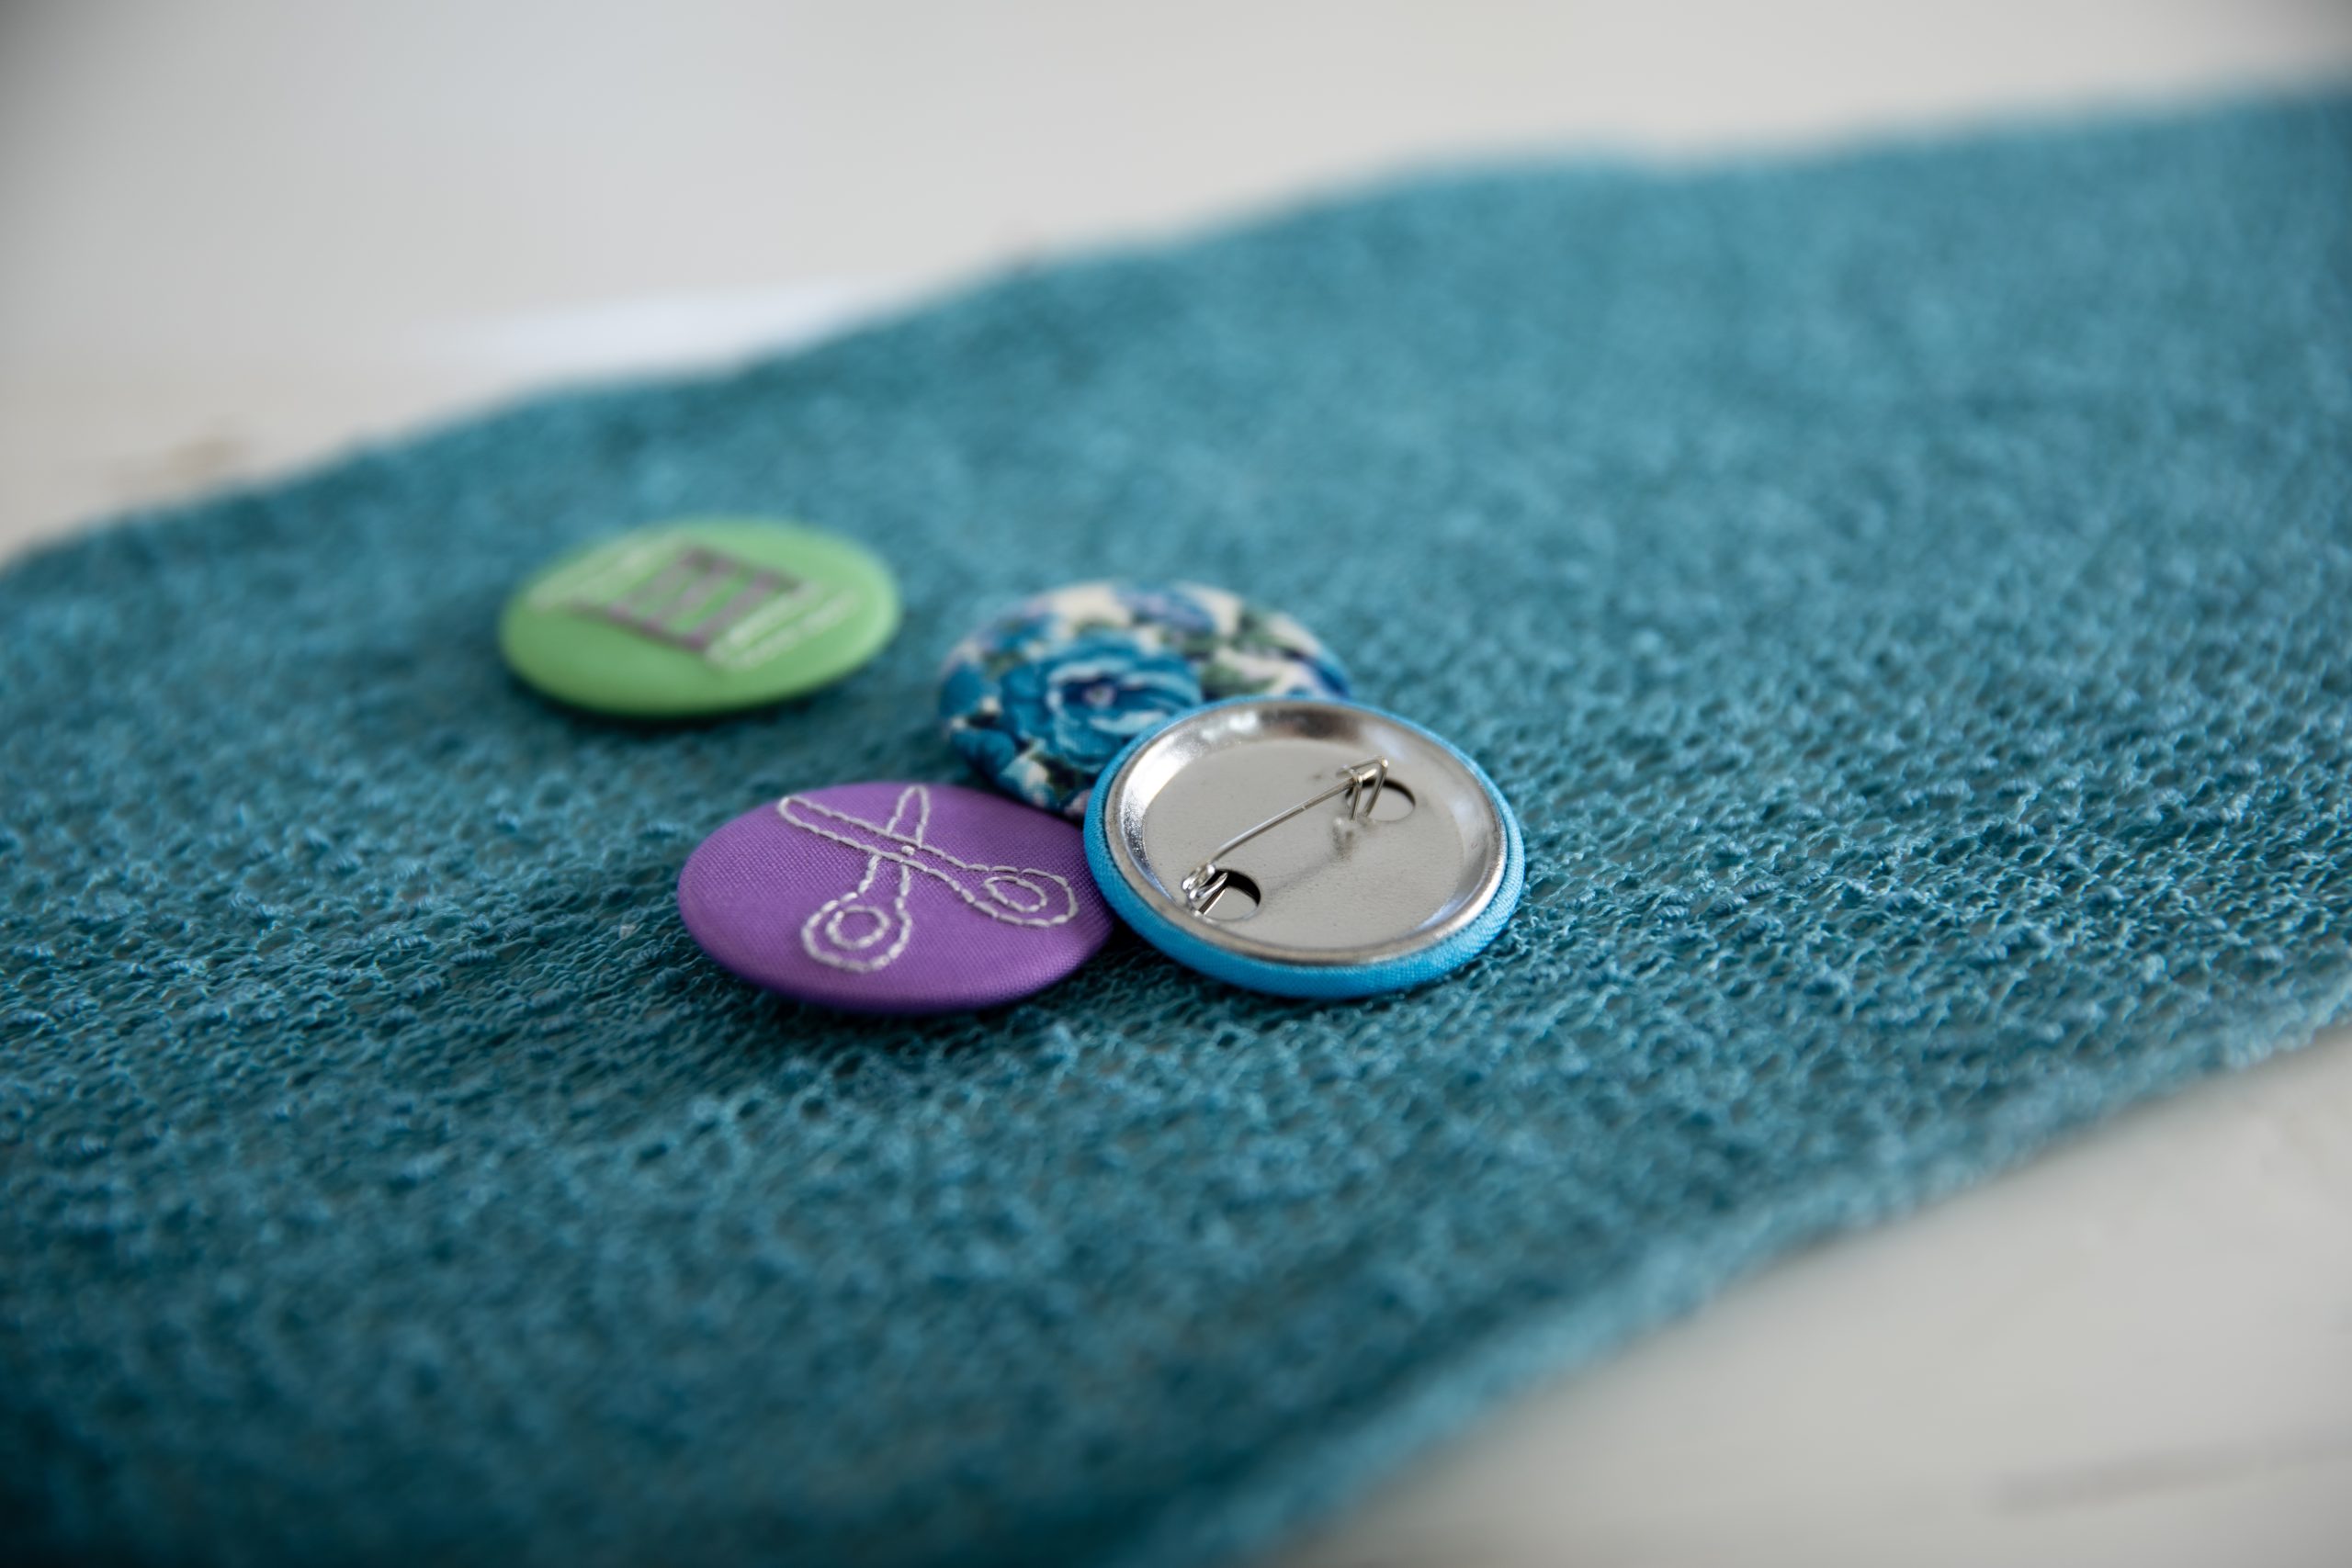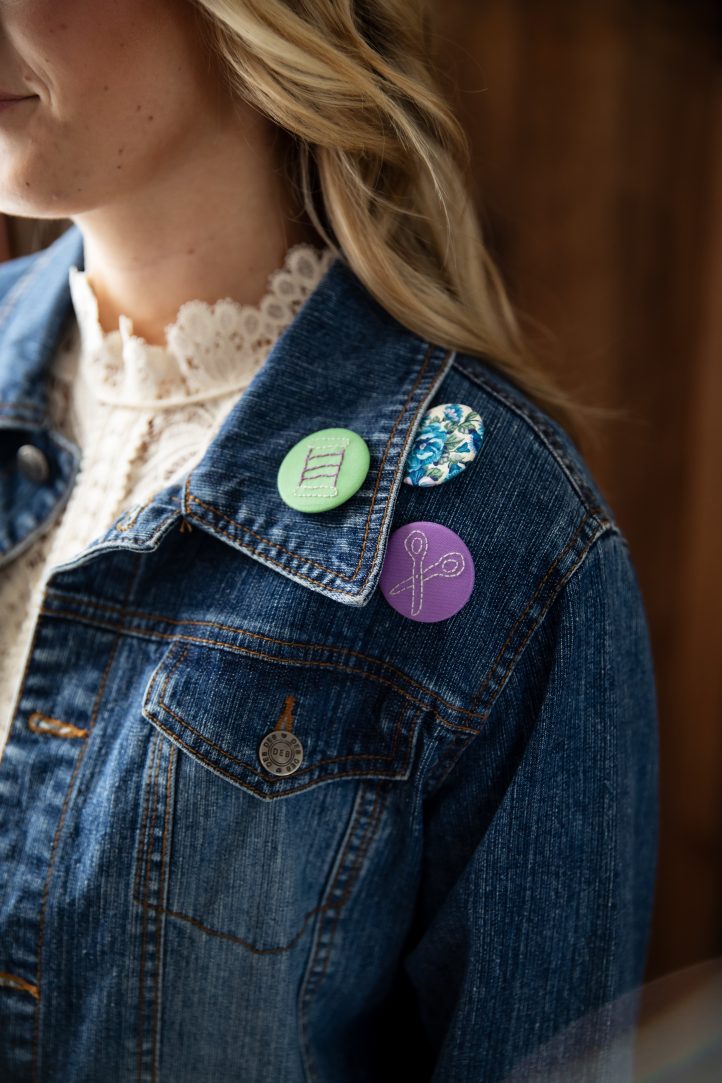
Challenge your hand embroidery skills by learning how to make your own embroidered pinback buttons. New from Stephanie Woodson, this small sewing project features three embroidery designs: a thread spool, scissors, and a needle and thread. We love the idea of making this fun project with your sewing circle and its beginner-friendly nature makes it a playful pattern for teens and other new sewists.
Skill Level: Beginner
Time: 1 hour per button
Finished Size: 1.45 inches – 37 mm
Seam Allowance: N/A
Materials:
Note: Materials listed are for 1 button.
- 1 scrap of quilting cotton at least 5 inches x 5 inches
- 1 scrap of fusible interfacing at least 5 inches x 5 inches
- Embroidery floss
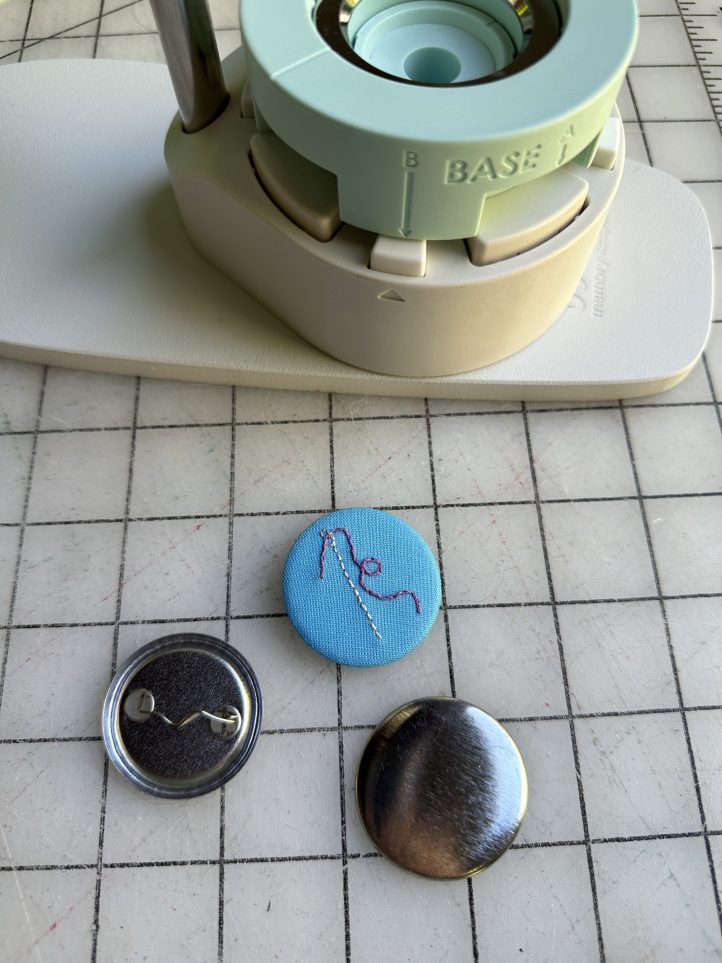
- Button maker
- Button blanks
- 3.5 inch or smaller embroidery hoop
- PDF Pattern/Stitch Chart – These are located at the bottom of this page. See printing instructions below.
Tools:
- Iron
- Marking utensil for pattern transfer
- Scissors
- Lightbox (optional)
- Gluestick (optional)
PRINTING INSTRUCTIONS:
To download the PDF pattern/stitch chart, click on the download button at the bottom of the page. We recommend opening your download using Adobe Acrobat.
Sewing Instructions:
- Prep your fabrics so your fusible interfacing is slightly smaller than the quilting cotton scrap and use your iron to adhere the interfacing to the wrong side of the fabric.

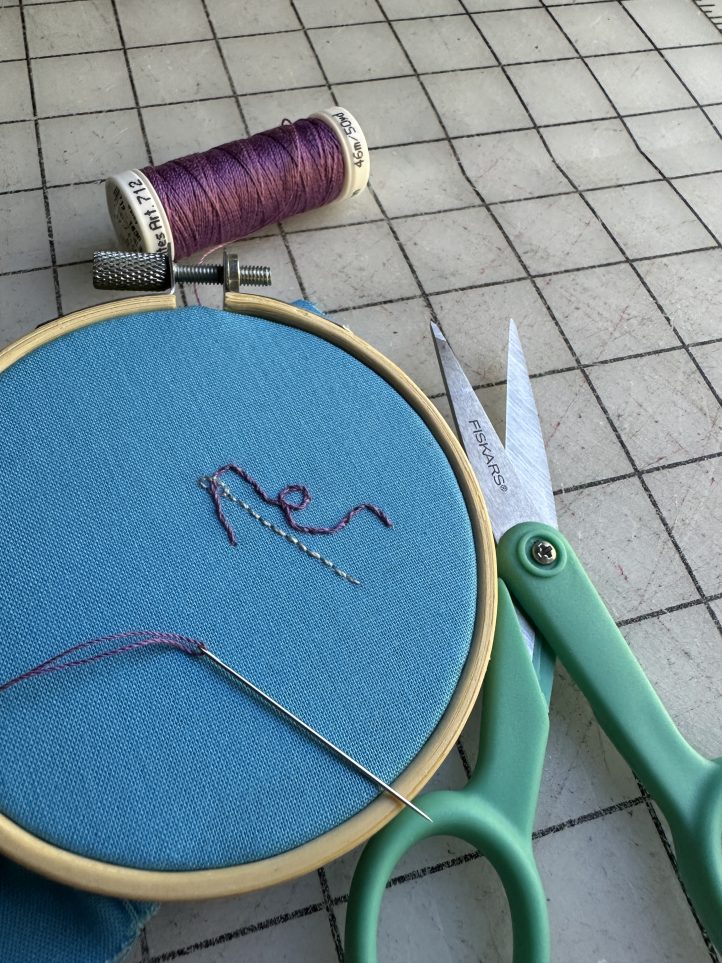
- Print out the pattern and either hold it up to a window or use a lightbox to trace it onto the right side of the fabric.

- Hand embroider the design and remove from the hoop – see stitch chart PDF below for suggested stitches. Press with an iron if needed.
- Cut out the correct size circle for your button maker, centering your embroidered design.
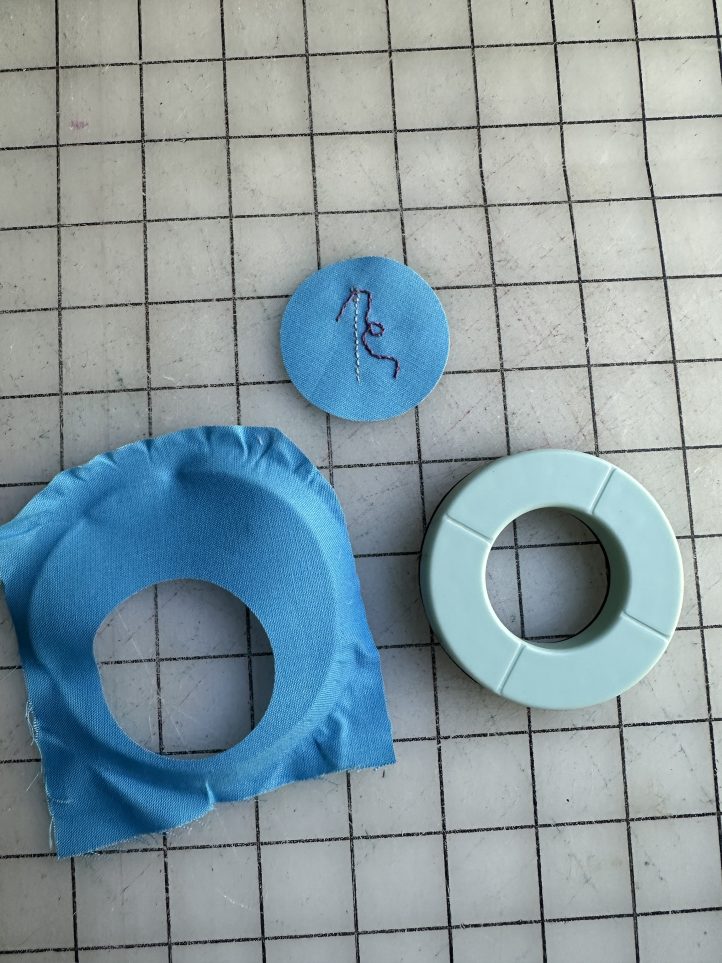
- Insert into the button maker, using the glue stick to adhere the fabric to the base if your stitching is making it slide around, and finish the button!