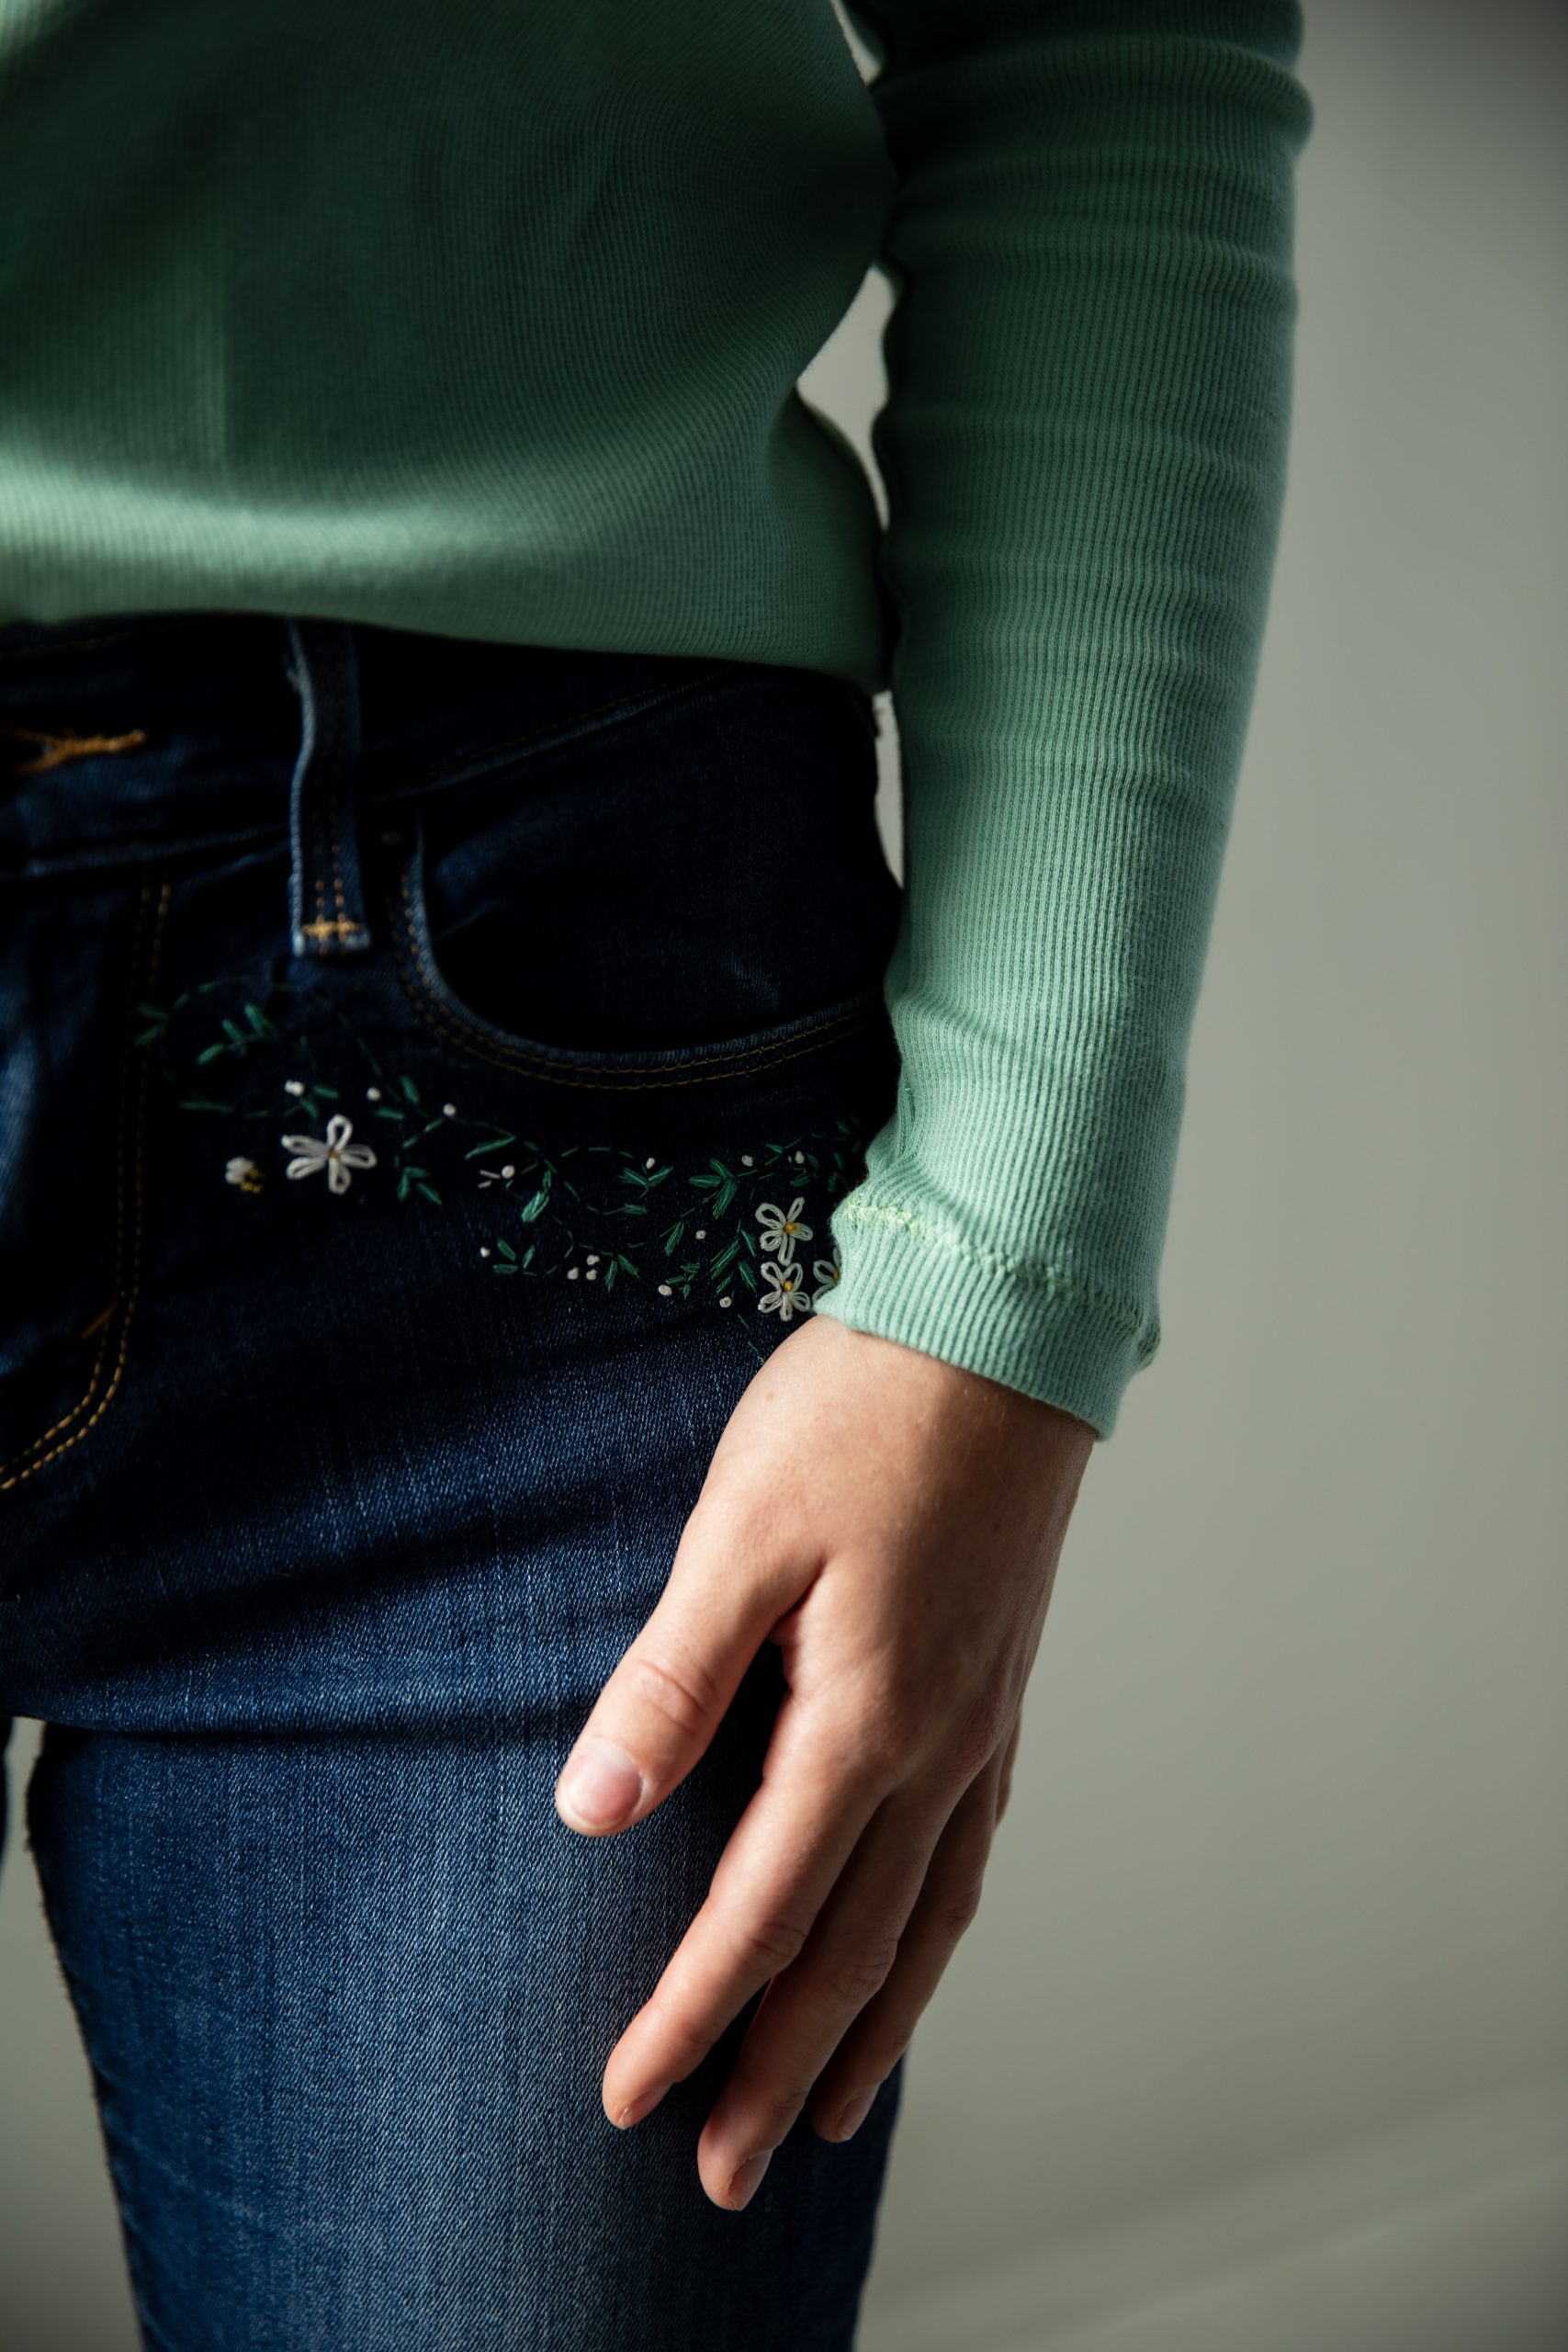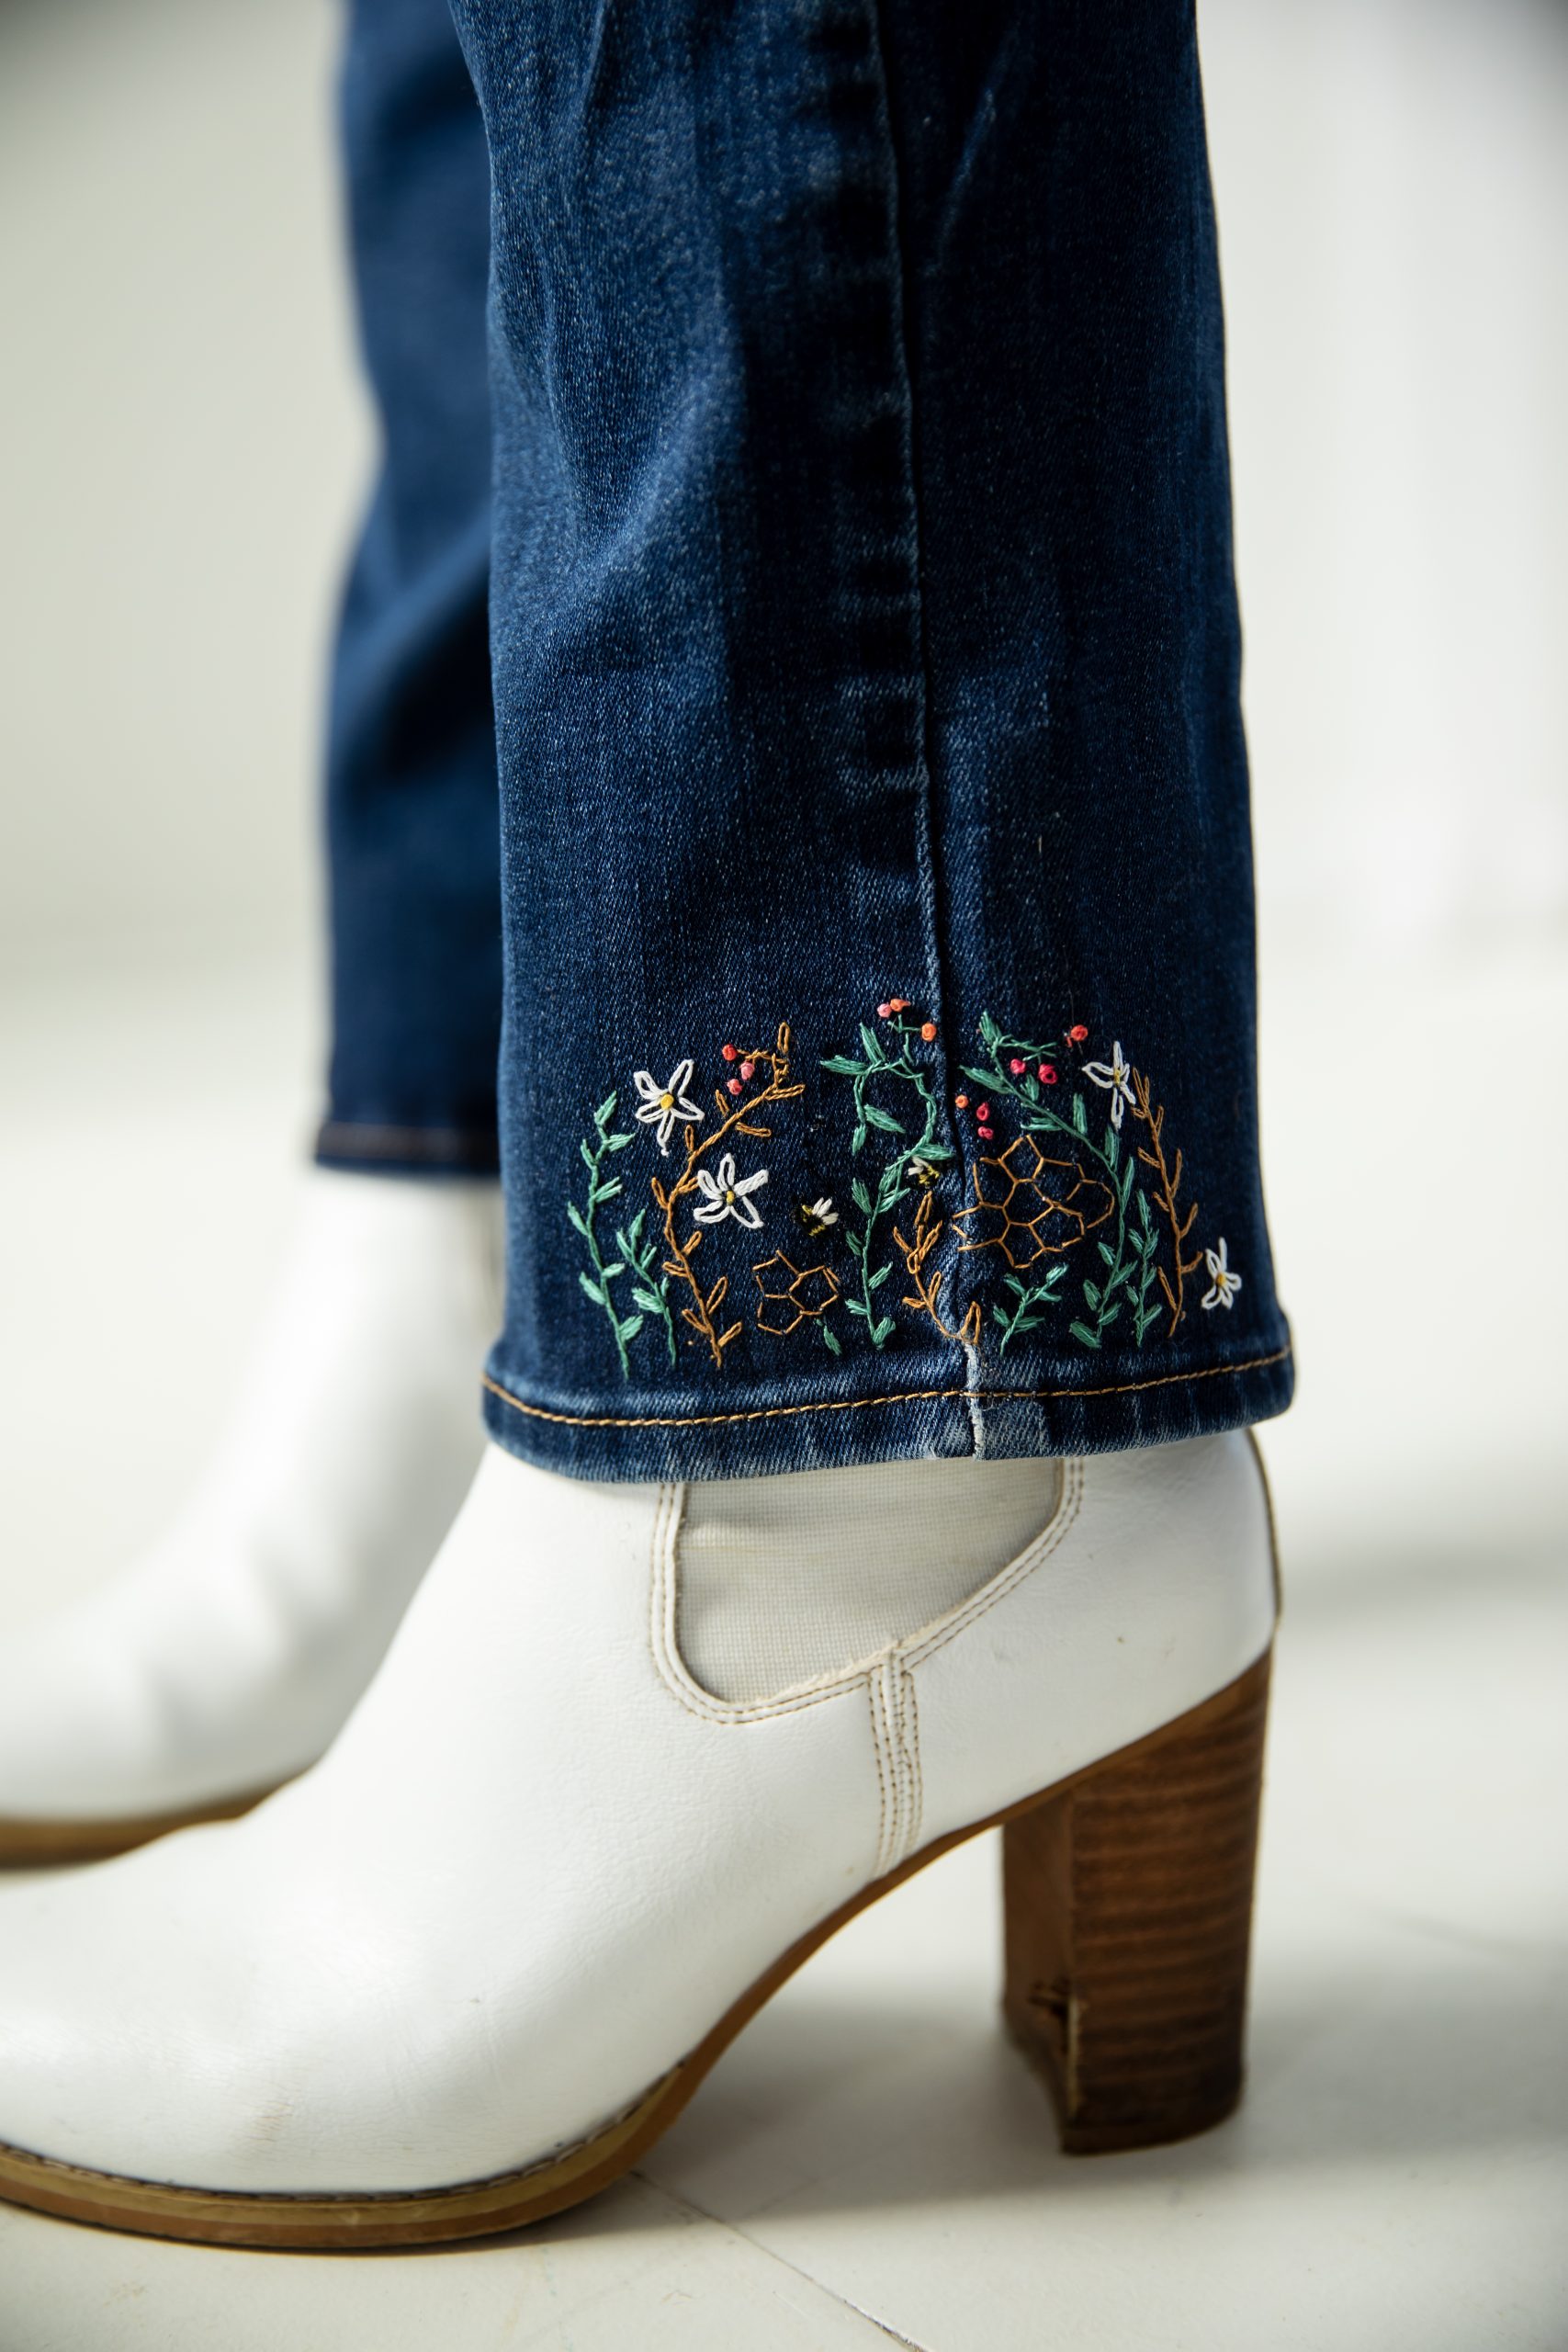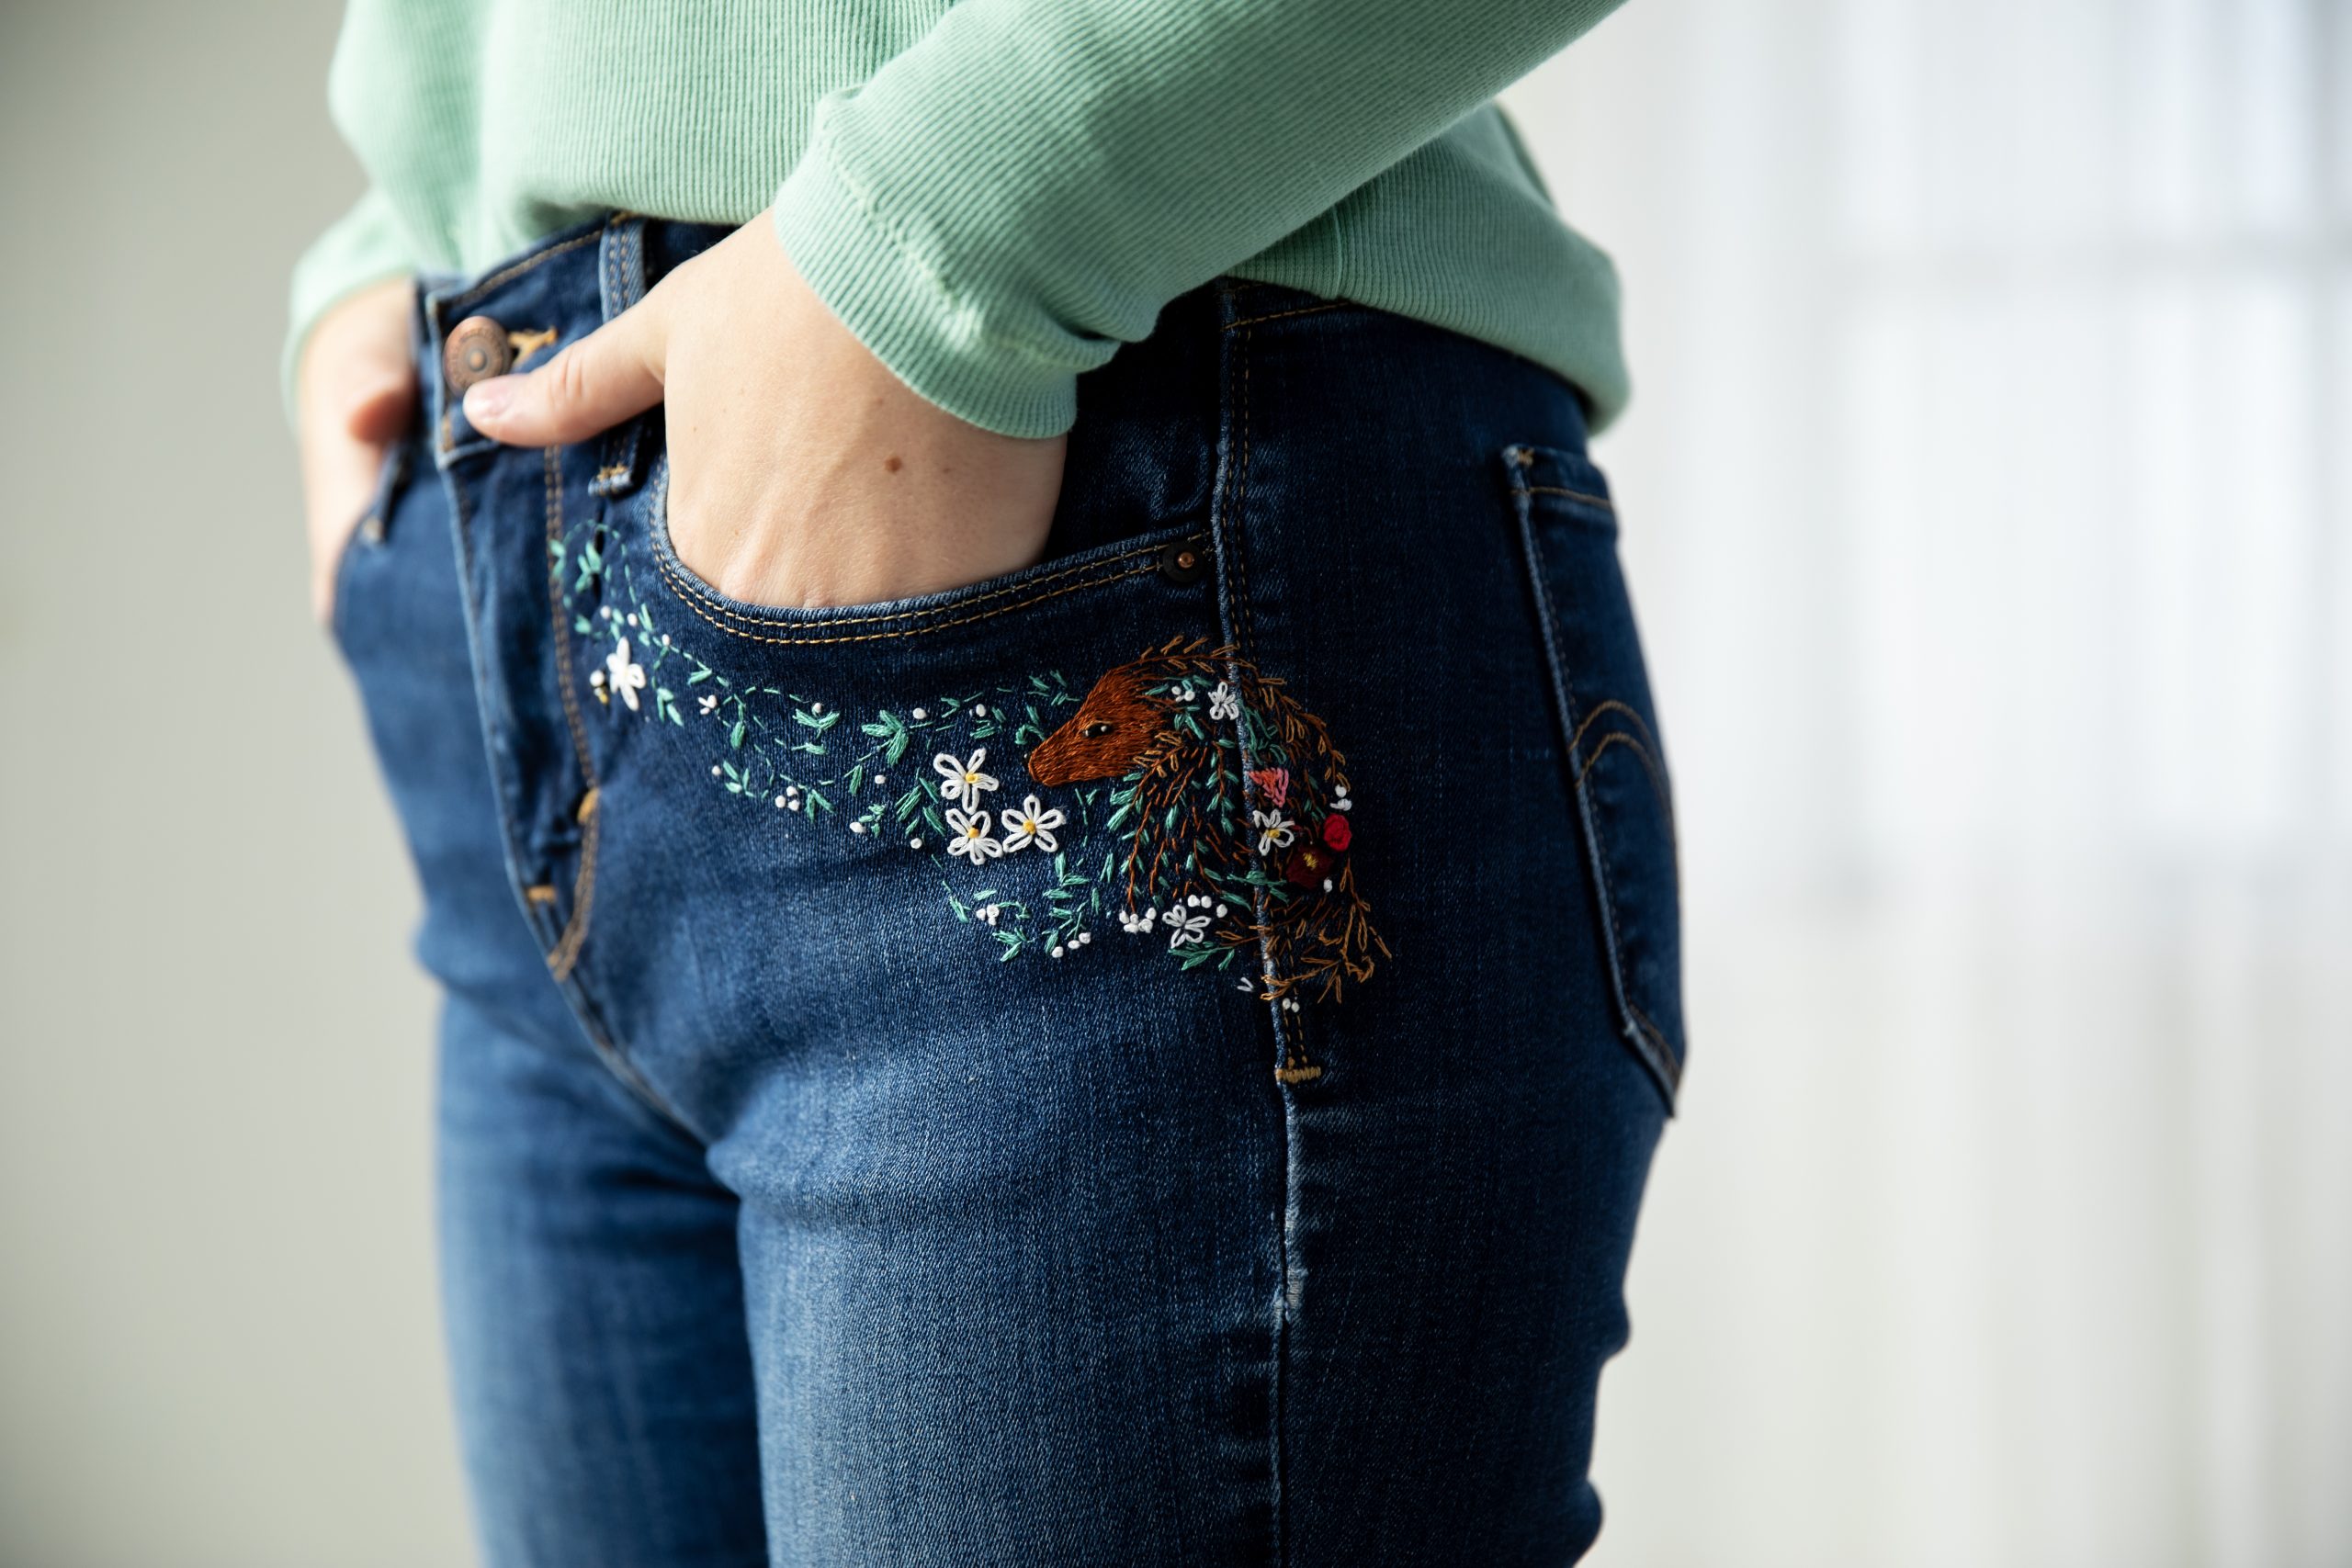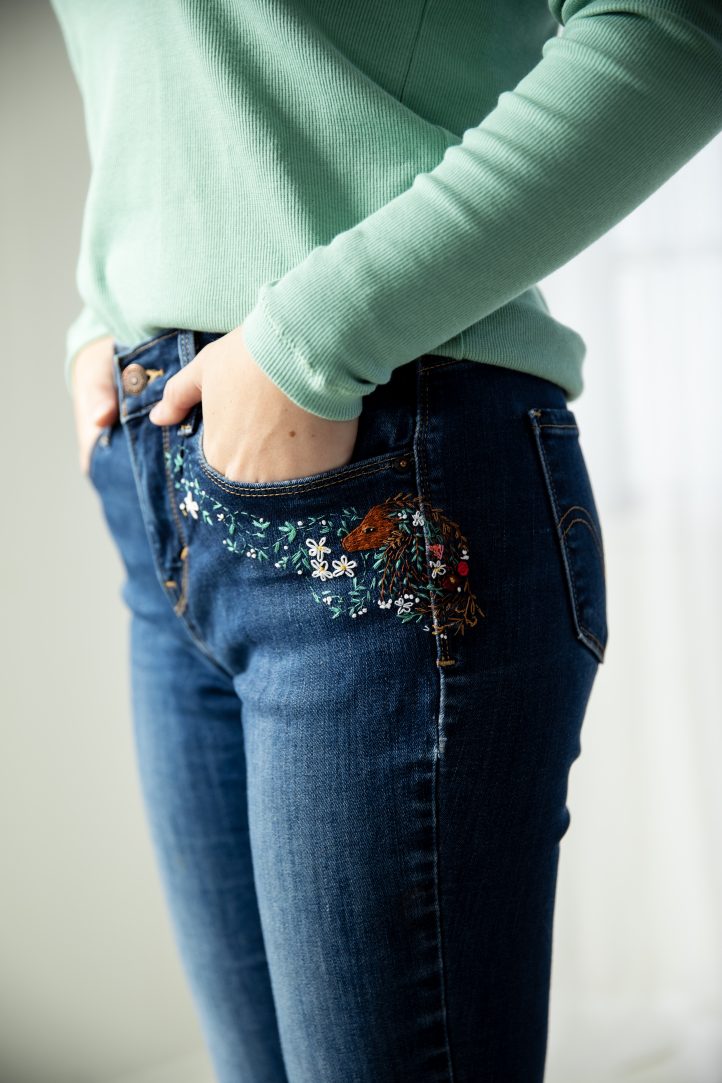
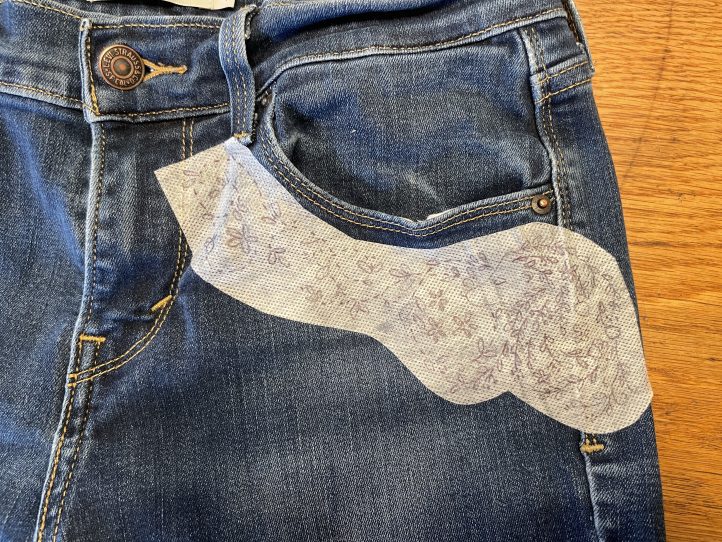
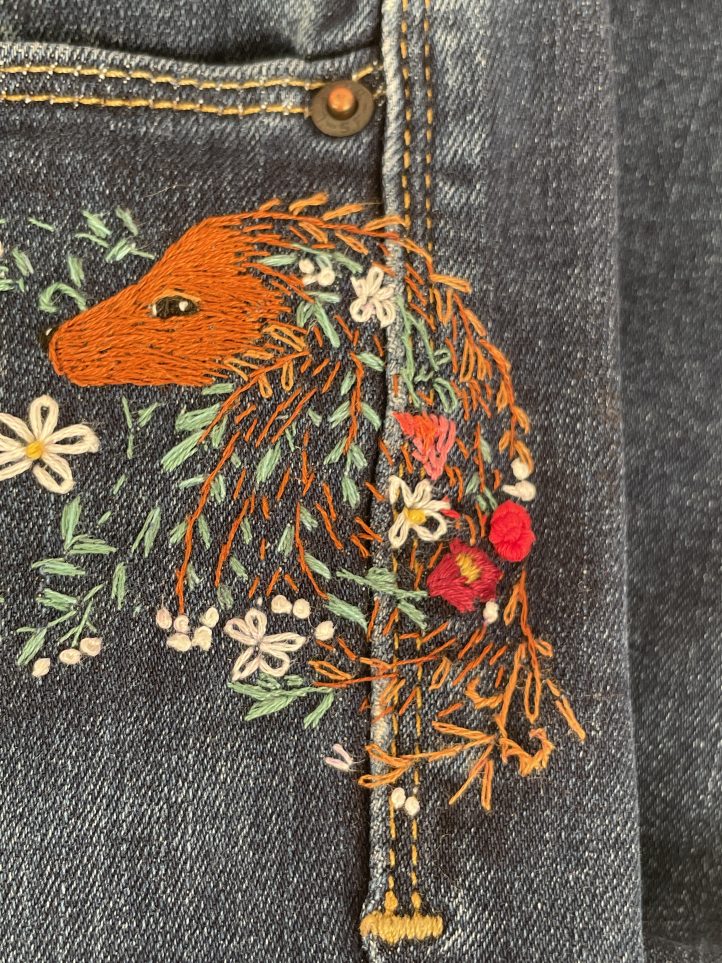
Add a little personality to a pair of plain jeans with this gorgeous embroidery project from Jennifer Carson. Featuring a printable PDF pattern, this embroidery project shows you how to add a delightful hedgehog, buzzing bees, and delicate flowers to your jeans, both around the pockets and hems. This spring embroidery pattern can easily be transferred to other clothing items, like a classic denim jacket or the front of a retro messenger bag.
Materials:
- Sulky Stick and Stitch printable sheets – Note: These can be found online at Sulky’s website.
- Embroidery floss in two shades of green for the leaves/stems, golden brown and golden yellow for the hedgehog and vines/leaves in the hedgehog, white, black, bright yellow for bee, and your choice of color(s) for flowers. Jennifer used a variegated thread for one of the flowers.
- Embroidery needle and scissors
- Optional: Thimble
- A pair of jeans
- PDF Patterns – These are located at the bottom of this page. Please see printing instructions below.
PRINTING INSTRUCTIONS:
Note: To download the patterns, click on the pattern download button at the bottom of the page. We recommend opening your pattern download using Adobe Acrobat.
Sewing Instructions:
INSTRUCTIONS FOR THE JEAN POCKET EMBROIDERY:
- Trace or copy and print PDF patterns onto the Sulky Stick and Stitch. Cut your pattern for the top pocket out, peel the backing paper off, and place it onto your jeans. It’s important to remember when embroidering on the front to keep the pocket fabric up and out of the way. This may mean clipping or pinning the pocket up. If you want to use an embroidery hoop, you can, but it was pretty easy for the designer to keep the fabric taught just by holding it in her hands because of the weight of the denim.
- Using a single strand of your darker green embroidery floss, embroider the dotted vine lines with a running stitch, and the leaves attached to it with a satin stitch, or a leaf stitch. The designer chose to keep it simple, but if you are an experienced embroiderer, have fun with it!
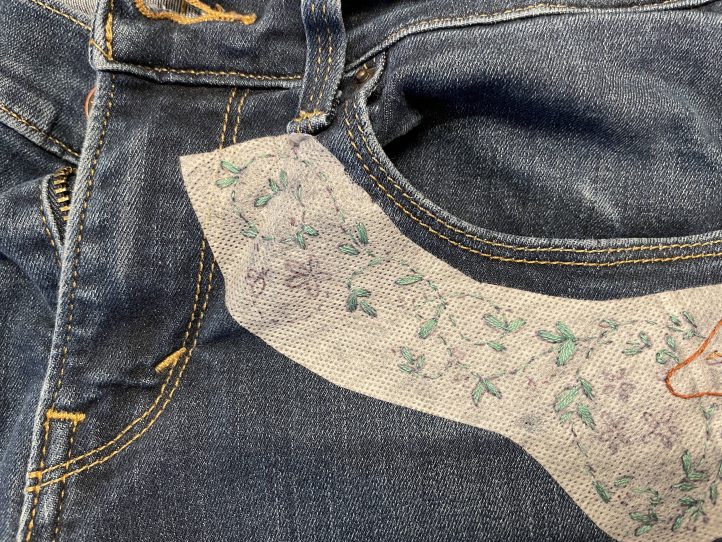
- Using a single strand of your golden brown floss, embroider the outline of the hedgehog face and stems that make up his body using a stem stitch. Choose some of the leaves to satin stitch in your darker green. For the remainder of your leaves, use a single lazy daisy stitch and one strand of your golden yellow floss. Also, outline the top of the hedgehog eye with a stem stitch, and its ear with some straight stitches angling from its ear toward its back, in the golden yellow floss.
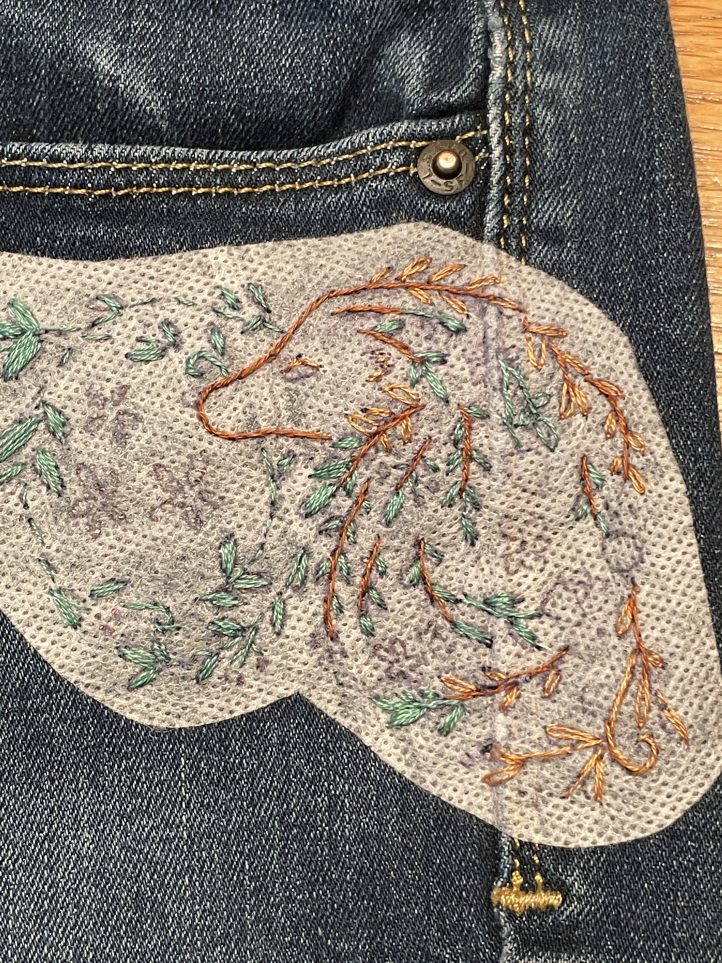
- Add a highlight in each green leaf with one strand of your lighter green and a straight stitch.
- With one strand of your brighter yellow floss, make French knots in the center of your flowers and use a satin stitch to fill in the yellow parts of your bees.
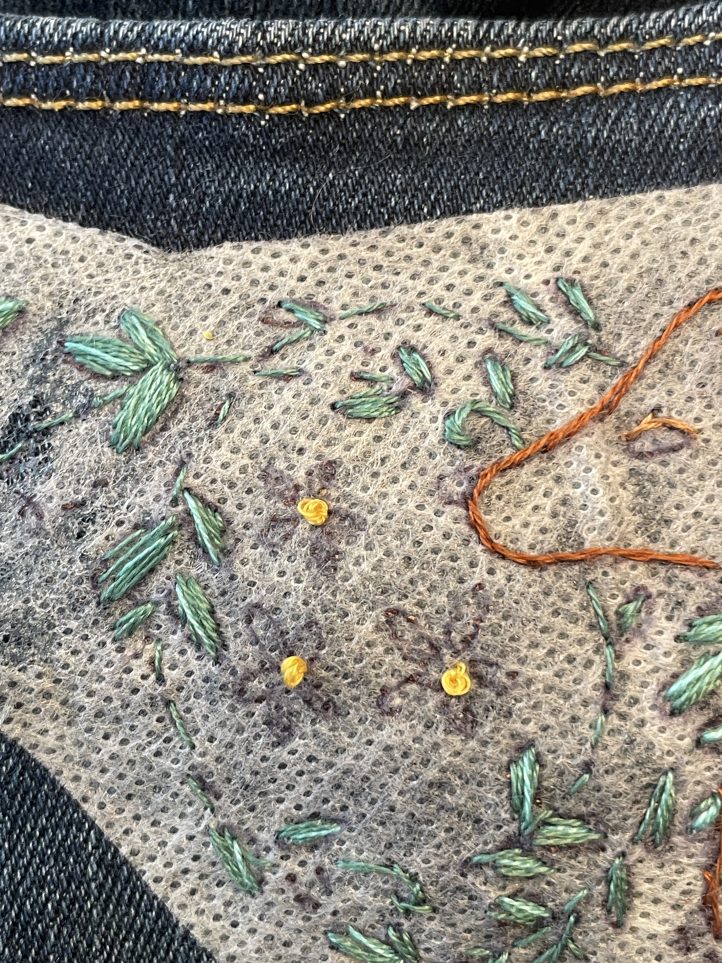
- With two strands of white floss, embroider the daisy flowers with a lazy daisy stitch.
- Make French knots for the small white flowers that dot the vine. Embroider the bee’s wings with a couple of straight stitches.
- For the top-most flower in the hedgehog’s body, Jennifer used one strand of a variegated thread and a fly stitch.
- For the maroon flower in the photo, she used a satin stitch.
- For the rose in the photo, she used a cast on stitch.
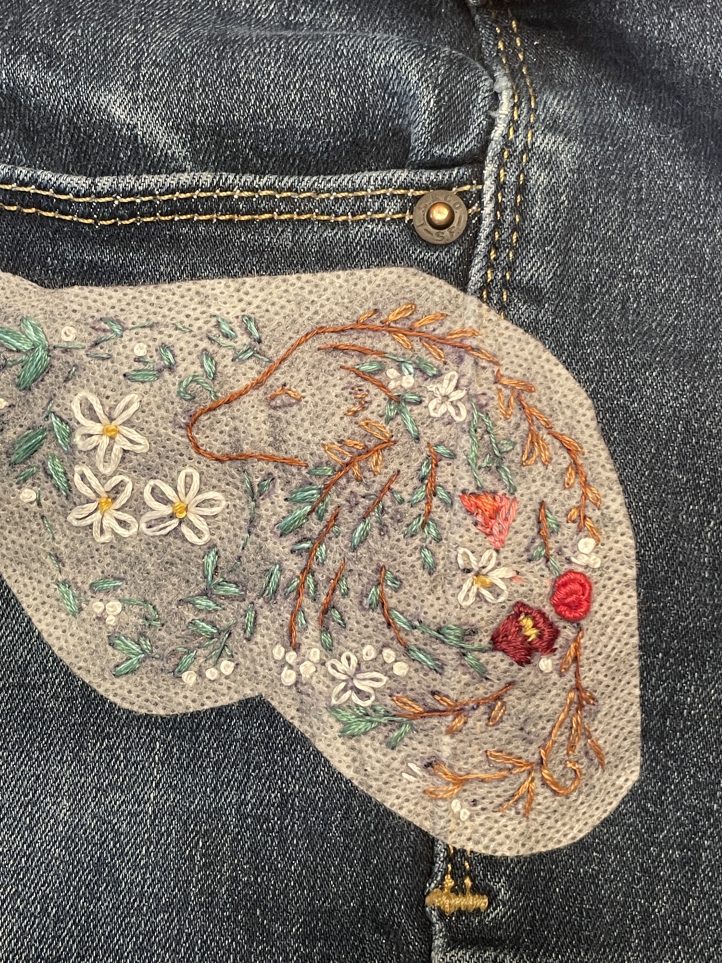
- Use a satin stitch and the black floss (one strand) to embroider the black sections of your bees. Make a French knot for your bee’s head.
- You’ll want to use a satin stitch to embroider the hedgehog’s eye, again with just one strand of black floss. Use one strand of white floss and a straight stitch to put a highlight in his nose, in the inside corner of his eye, and a French knot in his eye.

- To finish embroidering your hedgehog, fill in his face with straight stitches and one strand of the golden brown floss. When his face is filled in, make a few random straight stitches in his body to connect it all together.
INSTRUCTIONS FOR THE JEAN HEM EMBROIDERY:
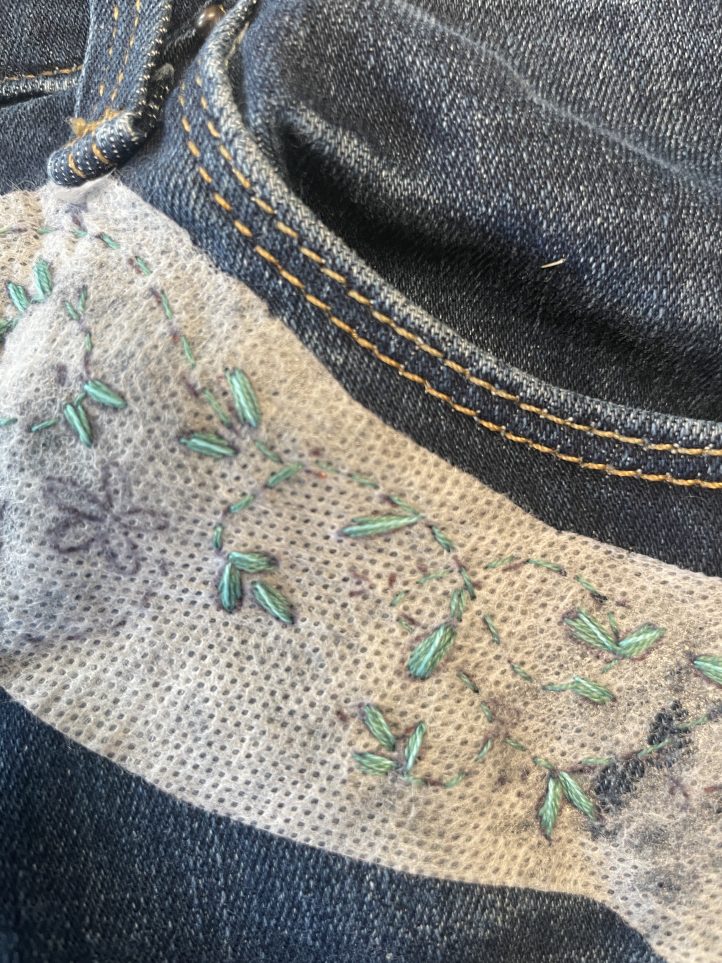
- Since you’ve already printed or traced your pattern onto the Stick and Stitch, cut the design out, peel the backing paper off, and place your hem design just above the hem on your pant leg.
- Using a single strand of your darker green embroidery floss, embroider six of the stems of the plants with a stem stitch and the leaves attached to them with a satin stitch, or a leaf stitch. For the other stems, use your golden-yellow thread. On the golden yellow stems, embroider those leaves with a single lazy daisy stitch.
- Using one strand of your golden yellow floss, stitch the honeycomb shapes with a straight stitch.
- Add a highlight in each green leaf with one strand of your lighter green and a straight stitch.
- Embroider French knots using one or two of your flower colors and one strand of floss to make tiny flowers at the top of your stems.
- Embroider French knots for the centers of your daisies using a single strand of yellow floss. Use a satin stitch to embroider the yellow parts of your bees.
- Use a satin stitch and the black floss (one strand) to embroider the black sections of your bees. Make a French knot for your bee’s head.
- Using two strands of white floss, embroider your daisies with the lazy daisy stitch. Give your bees wings using two straight stitches.
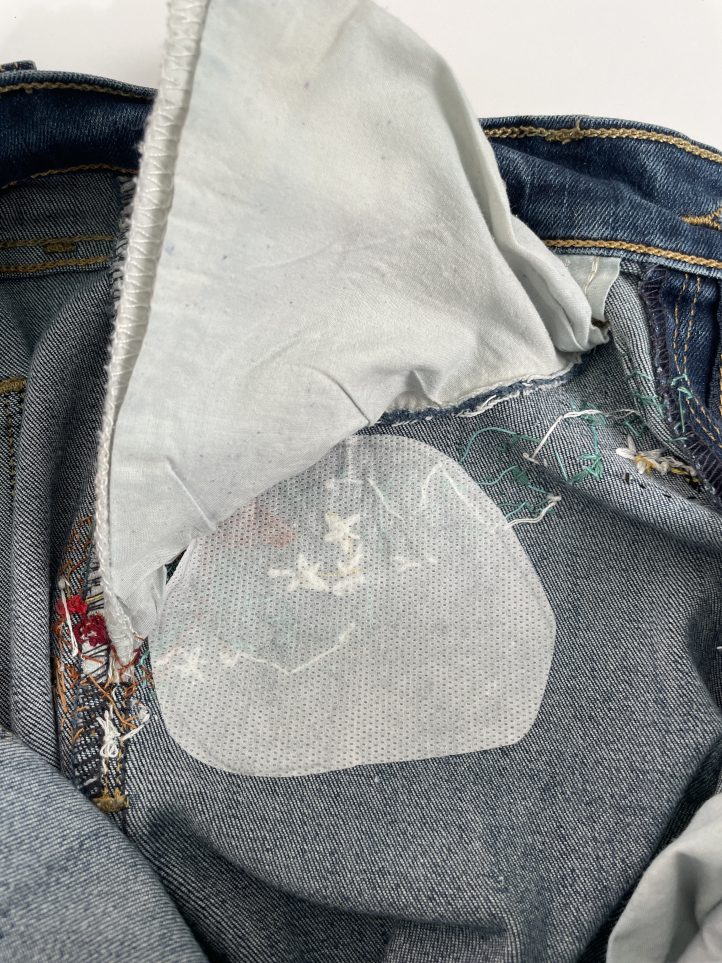
- Optional: You may want to iron on a piece of interfacing on the inside of your jeans to cover the embroidery stitches.
- You may also want a longer embroidery around the hem. If this is the case, print the hem pattern again and lengthen the design!
- When you are finished embroidering, rinse the Stick and Stitch out with warm (not hot!) water. Dry your jeans and enjoy!