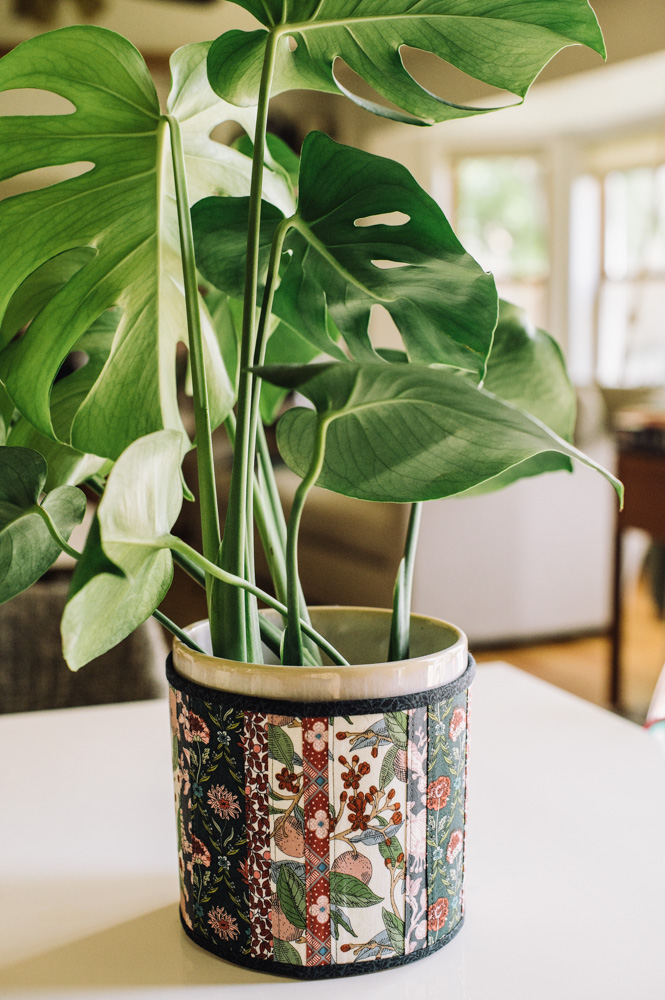
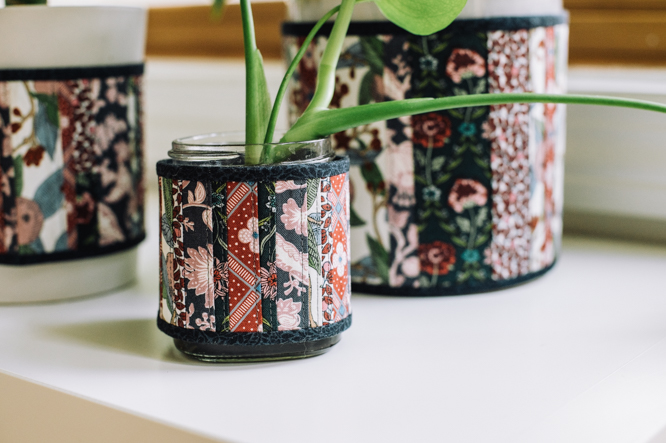
Elevate your living space by covering boring planter pots with boho-inspired plant cozies! Make this stylish home decor project using fat eighths and fat quarters or fabric scraps to create a truly unique design while clearing out your fabric stash. This tutorial shows you how to make three differently sized plant cozies and teaches you how to add binding to your project, so that your plant cozies are sturdy with neat finishes. Add a little color to your indoor greenery by designing these colorful and whimsical sewing projects.
Finished Sizes:
- Small plant wrap: 11″ x 2.75″
- Medium plant wrap: 16.75″ x 3.75″
- Large plant wrap: 19.5″ x 5.25″
Materials:
- 4 fat eighths to cut various sized strips from
- 1 fat quarter for backing and to cut various sized strips from
- 1 fat quarter for binding
- Coordinating polyester thread (example uses Gutermann Sew All)
- Fusible heavy-weight stabilizer (example uses Vlieseline Iron-on Decovil. Pellon Peltex 71F is a great substitute.)
- Rotary cutter, ruler, and mat
- Sewing machine with 1/4″ straight stitch foot and blind hem foot
- 10″ approx. of 20 mm wide (.79″) & Hook & Loop Fastener Tape
- General sewing supplies
Designer Notes:
- Sample plant wrap fabrics: The Summer House Collection (Liberty Fabrics)
- What follows is a method that you can use to create any size plant wrap that you’d like to make. For this tutorial, the designer made wraps in three sizes and the measurements for these sizes are included. Be sure to measure your plant pot and check they’ll fit before making, or use the method to create them in the size that you require.
Abbreviations:
- WS – Wrong side
- RST – right sides together
- WST – wrong sides together
Cutting Instructions:
Notes:
- All pieces are rectangles, cut to measurements using a quilting ruler, cutting mat, and rotary cutter according to the measurements provided.
- Seam allowances are included in all measurements.
FUSIBLE HEAVY-WEIGHT STABILIZER:
To determine what size to cut the fusible heavy-weight stabilizer and the backing fabric, measure the pot’s circumference and add 1.5″ to the measurement, and measure the pot’s height.
For example:
- The designer’s small pot’s circumference was 9.5″.
- 9.5″+1.5″ = 11″.
- The pot’s height was 2.75″
- The size to cut is 11″ x 2.75″.
To make wraps in the same sizes as designer’s:
- Cut 1 piece 11″ x 2.65″ (small plant wrap)
- Cut 1 piece 16.75″ x 3.75″ (medium plant wrap)
- Cut 1 piece 19.5″ x 5.25″ (large plant wrap)
BACKING FABRIC:
This is cut to the same size as the fusible heavy-weight stabilizer.
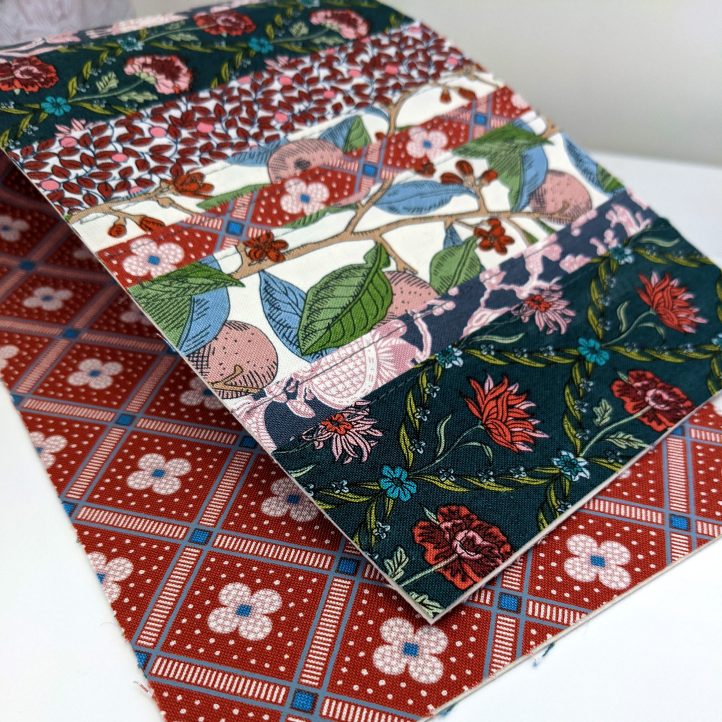
EXTERIOR:
This is a great project to use up your scraps! To create a lively plant wrap, the designer used 6 coordinating prints but you can use whatever you have on hand. The beauty of this project is that it’s totally customizable and every wrap will turn out unique!
The designer cut strips of different widths for each plant wrap. Ensure that the height of the strips is a bit longer than the height of your finished plant wrap.
For the small plant wrap, the designer cut 1″ and 0.75″ wide strips (and 3.5″ high).
For the medium plant wrap, the designer cut 1.5″, 1″, and 0.75″ wide strips (and 4.25″ high).
For the large plant wrap, the designer cut 2″, 1.5″, and 1″ wide strips (and 5.75″ high).
How many strips you’ll need depends on how wide you cut them and how you decide to combine the different widths. For the best results, be intuitive and let your imagination and creativity run wild! The designer cut a bunch of strips in different widths and then combined them intuitively at the sewing machine, cutting and adding more strips as required until the entire surface was covered.

Binding Instructions:
To work out how much binding you’ll need, measure the long and short edges of your stabilizer, add all four measurements together, and add 5″ to your total.
For example, the designer’s small plant wrap measures: 11″+ 11″+ 2.75″+ 2.75″= + 5″ = 32.5″ (so that’s how much binding she needed to bind the small plant wrap).
Cut 1″ wide strips from one fat quarter to the total length required. The designer cut 7″ x 1″ strips from a full fat quarter (19.5″ wide).
TO MAKE THE BINDING:
- Place 2 binding strips RST. Sew together at one of the short ends. Continue sewing strips together until the desired length is reached. Press the seams open.
- Fold the strip in half lengthwise with WST and press. Unfold and then fold the raw edges into the center crease on the wrong side. Press both sides. Fold in half lengthwise again and press. Set aside for binding the plant wrap’s edges.
Tip: Use a spray starch as you press for very crisp edges (this makes it easier to sew on).
ATTACH THE BINDING:
Note: Apply these steps after completing the “Exterior” steps.
- Unfold the binding. Fold one short edge 1/2″ down to the WS, and finger press. Increase the stitch length on the sewing machine to help sew through multiple layers. See Diagram 1 from Binding Diagrams PDF.
- Place the plant wrap with the exterior facing up. With the binding strip WS facing up, position the folded short end on the binding in the middle of one short edge of the plant wrap. Align the long edge of the binding with the edge of the plant wrap. Either hold in place with binding clips or use your fingers (The designer found this easier than clips; just take care not to stretch the binding as you sew).
- Machine sew the binding to the plant wrap, stitching just inside the first folded line with the straight stitch foot. See Diagram 2.
- Approximately 1″ before the corner, stop sewing and lift machine foot (ensuring needle is down in the work so you don’t lose your place). Fold the strip at a 45° angle away from the plant wrap. Finger press and unfold. See Diagrams 3 and 4.
- Sew to the 45° fold, backstitch, and cut your threads.
- Fold the binding back along the 45° fold and then make a horizontal fold to align with the edge of the plant wrap, finger pressing the fold. See Diagram 5.
- Hold the binding in place along the next edge of the plant wrap, and start machine sewing from the very top edge.
- Continue stitching each side and corner in the same way.
- When you reach the starting point, overlap the binding by 1/2″ and backstitch to finish. Trim the end of the binding (The designer tends to cut a diagonal line to remove excess bulk).
- With the exterior of the plant wrap facing down, bring the binding over to the back of the plant wrap and fold neatly into place, covering the stitched line. Press the binding and mitre each corner and use binding clips to hold it in place.
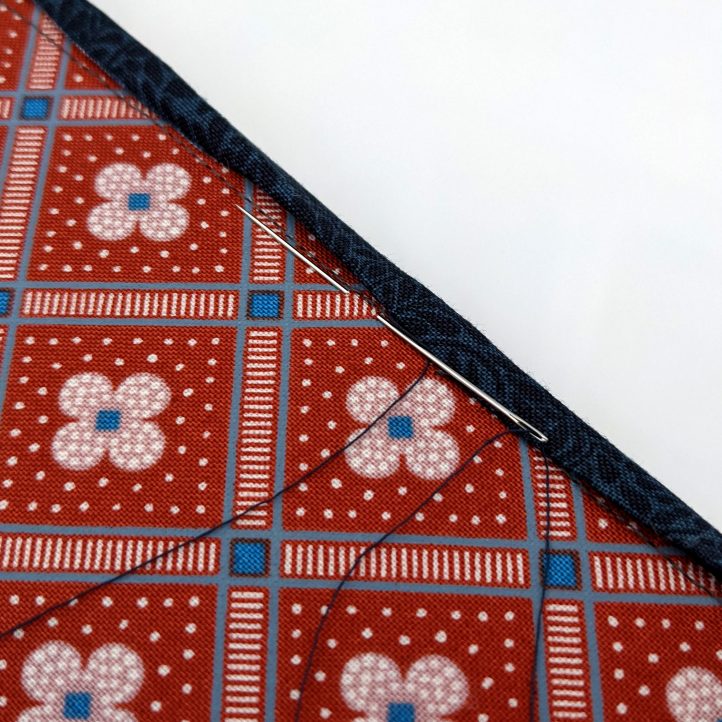
- Hand sew the binding to the back of the plant wrap using ladder stitch, going through the lining fabric and folded edge of the binding. Make the stitches around 1/8 – 1.4″ long. See Diagram 6.
Piecing Instructions:
Notes:
- All seam allowances are 1/4″ unless otherwise noted.
- Backstitch at the beginning and end of each seam to secure the stitches.
- Topstitch 1/8” away from the seams using a 3 mm stitch (.25″).
EXTERIOR:
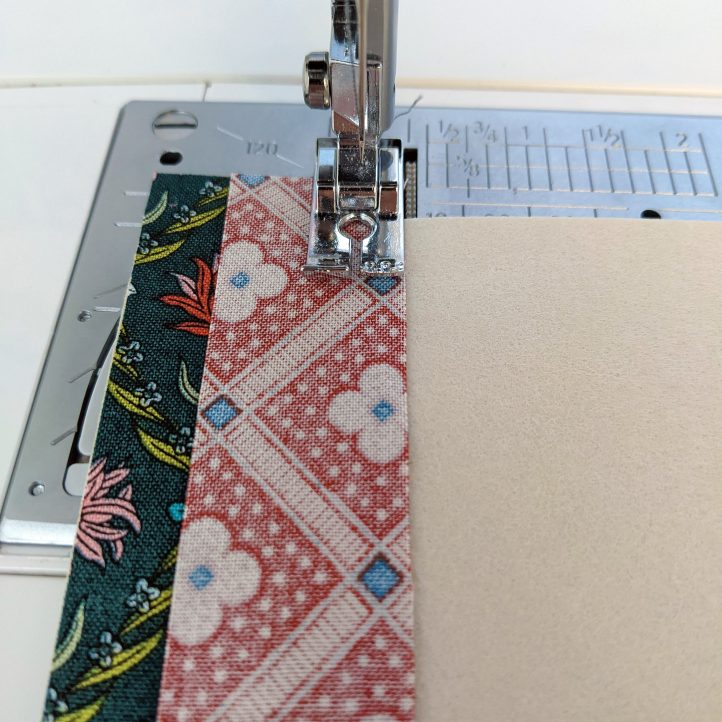
- Line up the first fabric strip to the short edge of the stabilizer, WS of fabric to non-stick side of stabilizer.
- Place another fabric strip RST on top of the first, lining up the long edges of the strips. Sew down the long edge, joining the pieces together.
- Finger press the pieces open and then place your third fabric strip RST on top of the second strip.
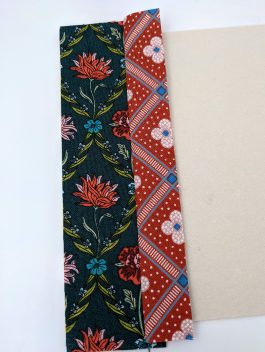
- Sew and finger press open. You should now have three strips sewn down onto the stabilizer. Top Tip: Use a seam roller and a dab of glue stick (the washable kind for paper crafts) to hold your fabric in place as you sew. Note: Make sure to sew through dry glue only so you don’t gum up your needle.
- Keep adding strips until the entire piece of stabilizer is covered in fabric.

- To quilt the pieces, either use the quilt as you go method, quilting each piece before you add on the next strip, or topstitch all of the pieces at the end. The designer top stitched each seam at the end using the blind hem foot to ensure neat finish.
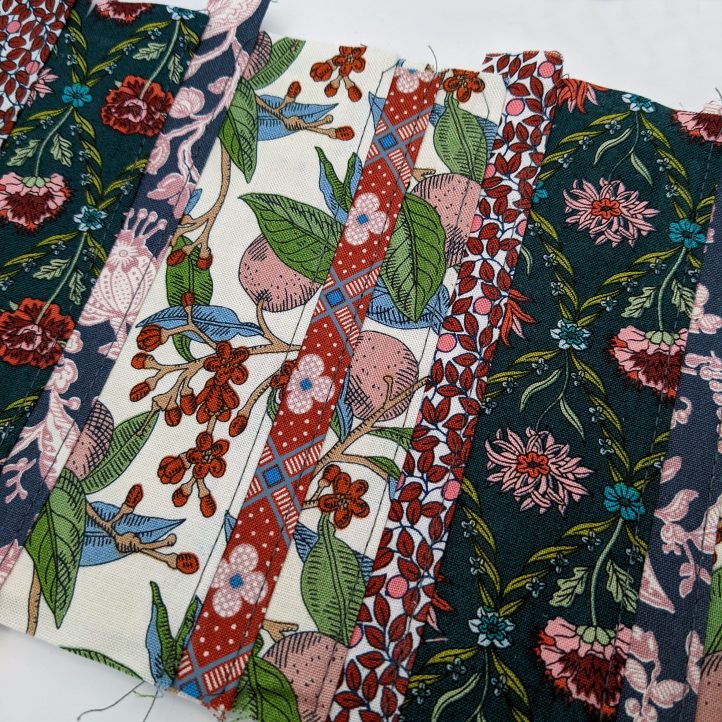
- Trim the excess fabric from around the edges. Take care not to cut the stabilizer by mistake.
- Iron the backing fabric onto the fusible back of the stabilizer, WST.
- Attach the binding to the raw edges (see Attach the Binding instructions above).
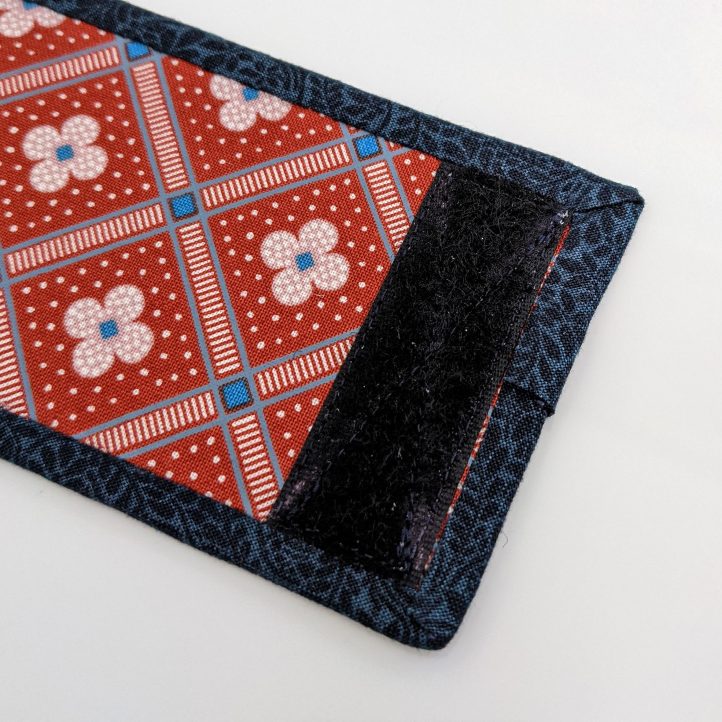
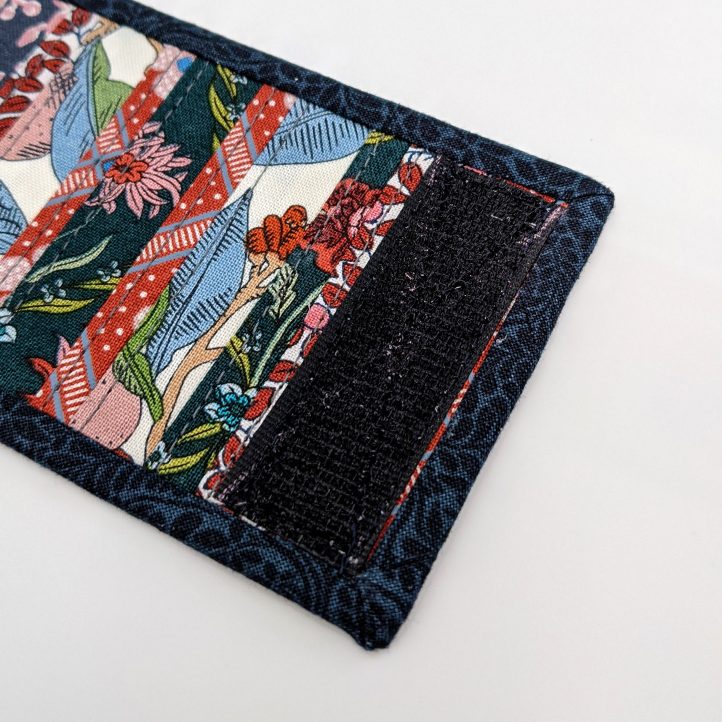
- Measure and cut the hook and loop fastener tape. Sew the hook side of the tape to one end on the RS of the plant wrap and the loop tape to the other end of the wrap on the WS.
Repeat these steps for all three plant wraps. Now that you’ve completed your plant wraps, it’s time to put them on display.
Cancel my auto renewal!
Please cancel my renewal and quit charging my credit card!
This will be a great May Day, Easter and Mother Day – Father’s Day Project.
Just coordinate fabric for each Special Day.