
We love maxi skirts for their versatility, comfort and built-in style, which is why we’re so excited to share this new sewing pattern from designer Lauren Merciris. This simple fall maxi skirt pattern, featured in a rich goldenrod yellow, can be made in two ways: with an elastic waistband or with front button closures. Easy to dress up or down, this fall skirt pattern can be paired with heels, flats or sneakers so that you always look chic while on the go.
Designer Note: Seam allowances included of 1 cm and 3 cm for the hemline.
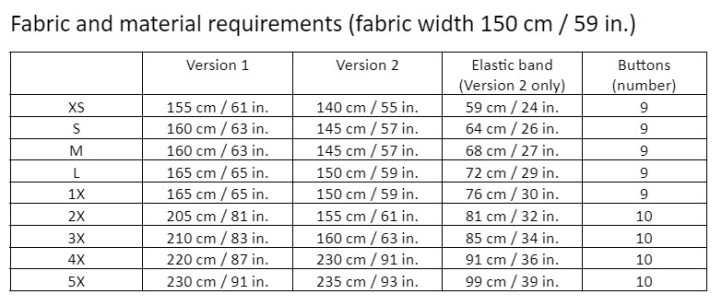
Materials:
- PDF Pattern – This is located at the bottom of this page. Please see printing instructions below.
PRINTING INSTRUCTIONS:
Note: To download the pattern, click on the pattern download button at the bottom of the page. We recommend opening your pattern download using Adobe Acrobat.
Instructions:
VERSION 1: BUTTONED SKIRT VERSION:
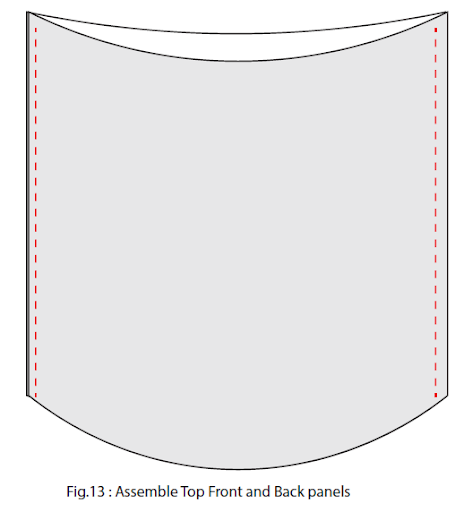
- Assemble Top Panel Sides. Sew the sides of the Top Front panels (Part A) with the sides of the Top Back panel (Part B), right sides together. Overlock seam allowances together (or machine zig-zag stitch to trap fibers). Press the seam allowances towards the back.

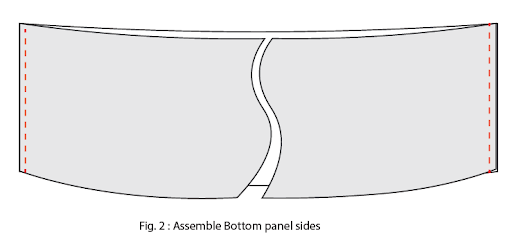
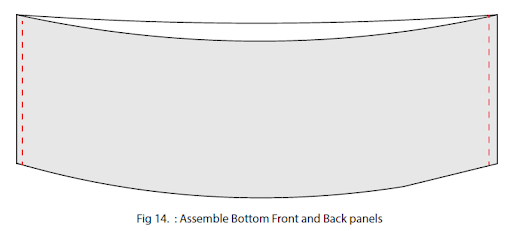
- Assemble Bottom Panel Sides. Sew the front bottom panel sides (Part C) to the back bottom panel sides (Part D), right sides together. Overlock the seam allowances together and press towards the back.
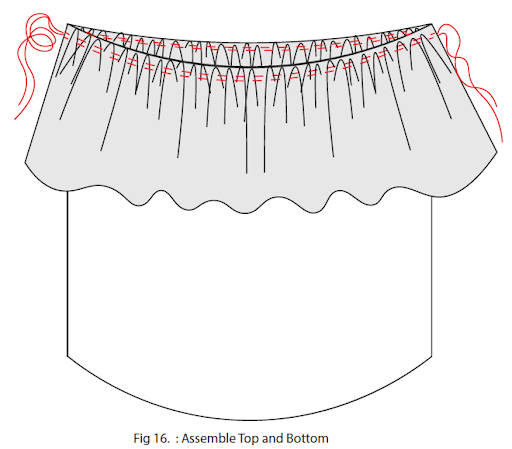
- Assemble Top and Bottom Panels.
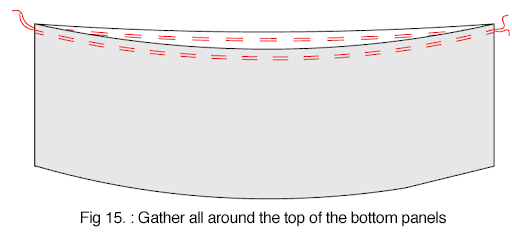
- Gather the entire top of the bottom panels.
- To do this, thread 1 or 2 gathering threads by hand in the seam allowance or thread a machine thread with a stitch length greater than 5 in the seam allowance.
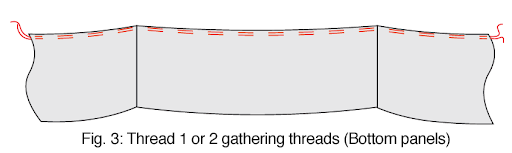
- Once the gathering thread(s) have been made, pull the bobbin thread(s) slightly at the ends to gather fabric. Reduce the width of each panel to that of the top panels.
- Join the top of the Bottom panel with the bottom of the Top panel, right sides together, matching the seams. Distribute the gathers evenly, pin carefully and sew at 1 cm (3/8 in.)
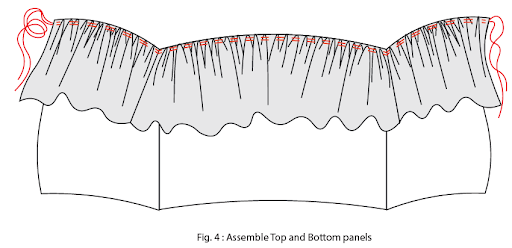
- Remove gathering threads. Overlock the seam allowances and lightly press the gathers, with the seam allowances facing upwards.
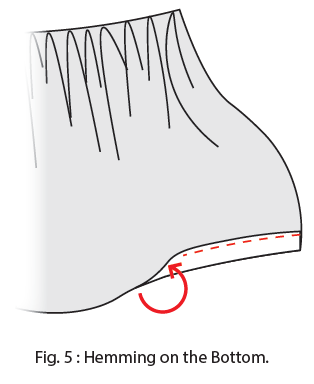
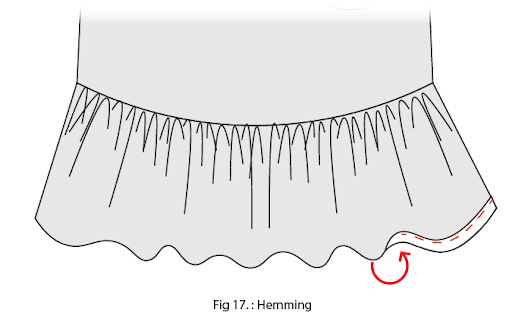
- Hemming. Overlock the entire skirt hem, and fold over to the wrong side by 3 cm (1 3/16 in.). Pin, press and sew at 2.8 cm (1 1/8 in.).
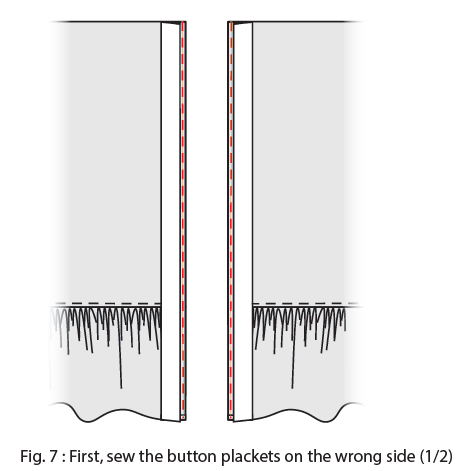
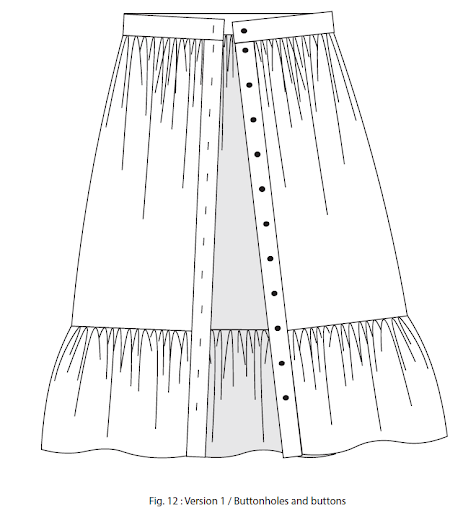
- Button Plackets.
- Fold the 2 button plackets (Parts E) wrong sides together lengthwise (see fold mark) and press to hold the fold.
- Fold the 1 cm (3/8 in) margin on the wrong side along the entire length of one side of the placket. Repeat for the second placket.
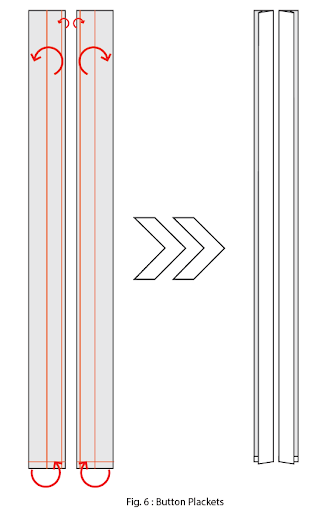
- Place the unfolded side on the wrong side of the skirt (right sides together) and pin in place.
- Fold in the 1 cm (3/8 in.) seam allowance at the bottom of the placket to match the hem length. Sew at 1 cm (3/8 in.).
- Turn the placket right side out. The folded side should be positioned on the previous seam. Pin and sew 1 to 2 mm (1/32 to 1/16 in.) from the edge of the placket, as well as at the bottom of the placket.
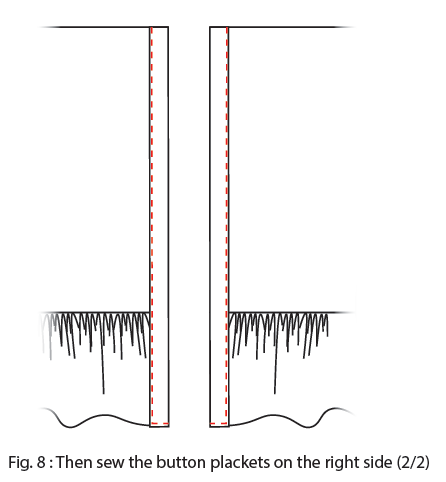
- Tip: To prevent your placket from slipping under the machine foot, feel free to hand-build the entire length of the placket. Machine stitch over the top, to hold the placket in place. Then remove the thread from the frame.
- Do the same for the second placket.
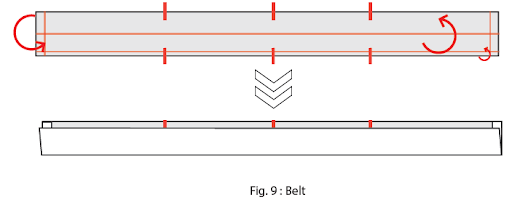
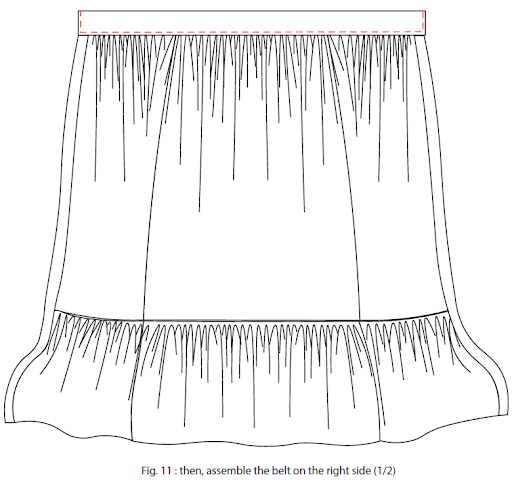
- Belt.
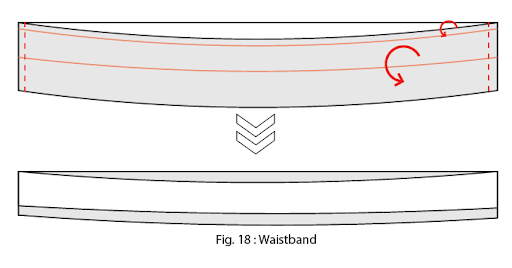
- Apply fusible interfacing to the wrong side of the waistband (Part F) and press.
- Fold the waistband in half lengthwise, inside out, according to the mark. Tuck in a 1 cm (3/8 in.) margin on the ends of the belt, as well as on one of the lengths.
- Gather the entire top of the skirt (in the same way as for assembling the 2 panels), so as to reduce the width of the top of the skirt to that of the waistband.
- Place the waistband and gathered skirt top right sides together (unfolded side), matching the seams with the markings. Trim gathers, pin and sew to 1 cm (3/8 in.).
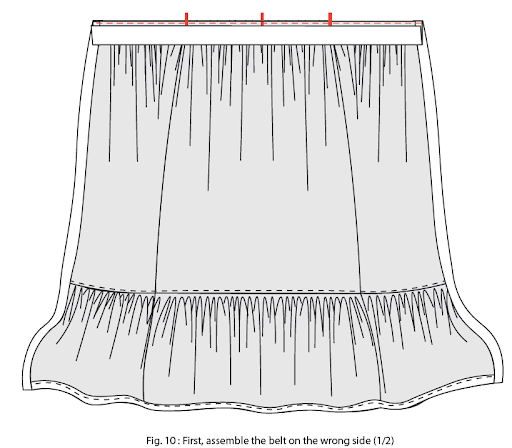
- Remove gathering threads. Press the finished seam.
- Turn the waistband right side out onto the skirt and position the folded edge on the previous seam. Pin to hold the entire waistband in place, including the folded ends. (The edge of the button placket should be flush with the end of the waistband).
- Sew the waistband 1 mm (1/32 in.) from the edge on the right side and on the ends. Press.
- Buttonholes and Buttons.
- Measure the diameter of the buttons. Add 2 mm (1/16 in.) and mark the location of the buttons on the Button Placket (Parts E) right side for Buttonholes.
- The waistband button must be aligned with the others.
- Position the second button 2 cm (13/16 in.) from the waistband and then separate each buttonhole by about 9 cm (3 9/16 in.). Machine buttonholes using a special buttonhole foot.
- Position button plackets one on top of the other to mark button positions.
- Sew buttons by hand.
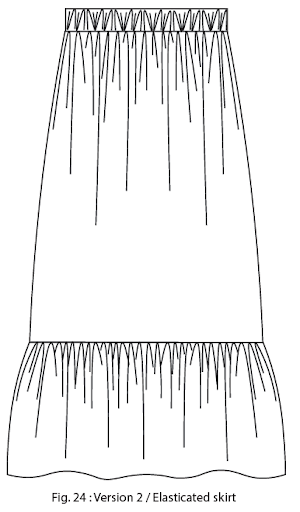
VERSION 2: ELASTICATED SKIRT VERSION:
- Assemble front and back panels. Sew the sides of the 2 top panels (Parts B), right sides together. Overlock the seam allowances together and press towards the back. Repeat for the 2 Bottom panels (Parts D).
- Assemble Top and Bottom Panels.
- Gather all around the top of the bottom panels.
- To do this, thread 1 or 2 gathering threads by hand into the seam allowance or thread a machine thread with a stitch length greater than 5 into the seam allowance.
- Gather all around the top of the bottom panels.
- Hemming. Overlock the entire skirt hem, and fold over to the wrong side by 3 cm (1 3/16 in.). Pin, press and sew at 2.8 cm (1 1/8 in.).
- Assemble Waistband.
- Sew right sides together on the short sides of the 2 belt pieces (Parts G). Press seam allowances open. Fold the belt in half lengthwise, right sides together. Inset one edge by 1 cm (3/8 in.) (corresponding to the seam allowance).
- Gather the entire contour of the top panels to match the length of the waistband, matching the side seams.
- Place the waistband and gathered skirt top right sides together (unfolded side), matching the seams. Trim gathers, pin and sew to 1 cm (3/8 in.), leaving an opening of approx. 5 cm (2 in.) (to slide the elastic through).
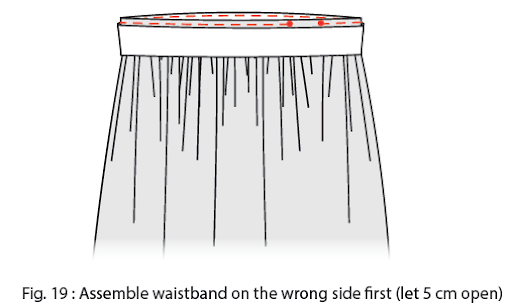
- Remove gathering threads. Iron the seam. Turn the waistband right side out onto the skirt and position the folded edge on the previous seam. Pin to hold the entire waistband in place.
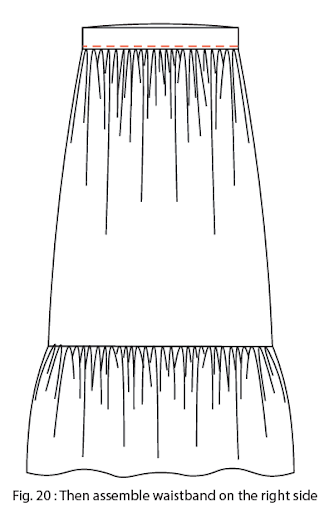
- Sew the waistband 1 mm (1/32 in.) from the edge on the right side and on the ends, leaving the space unstitched.
- Press.
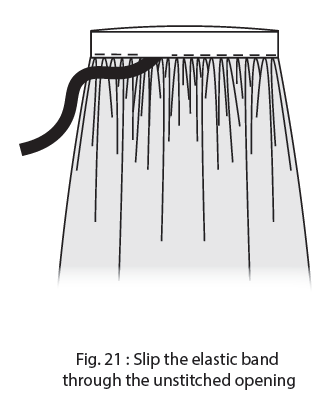
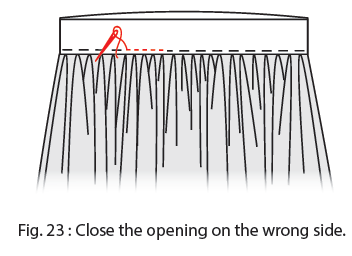
- Slip the elastic through the unstitched opening, using a pair of safety pliers. Sew the 2 ends of the elastic together, stretching them through the opening.
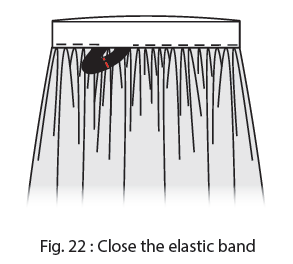
- Pin the unstitched area and sew to close.
- Sew right sides together on the short sides of the 2 belt pieces (Parts G). Press seam allowances open. Fold the belt in half lengthwise, right sides together. Inset one edge by 1 cm (3/8 in.) (corresponding to the seam allowance).