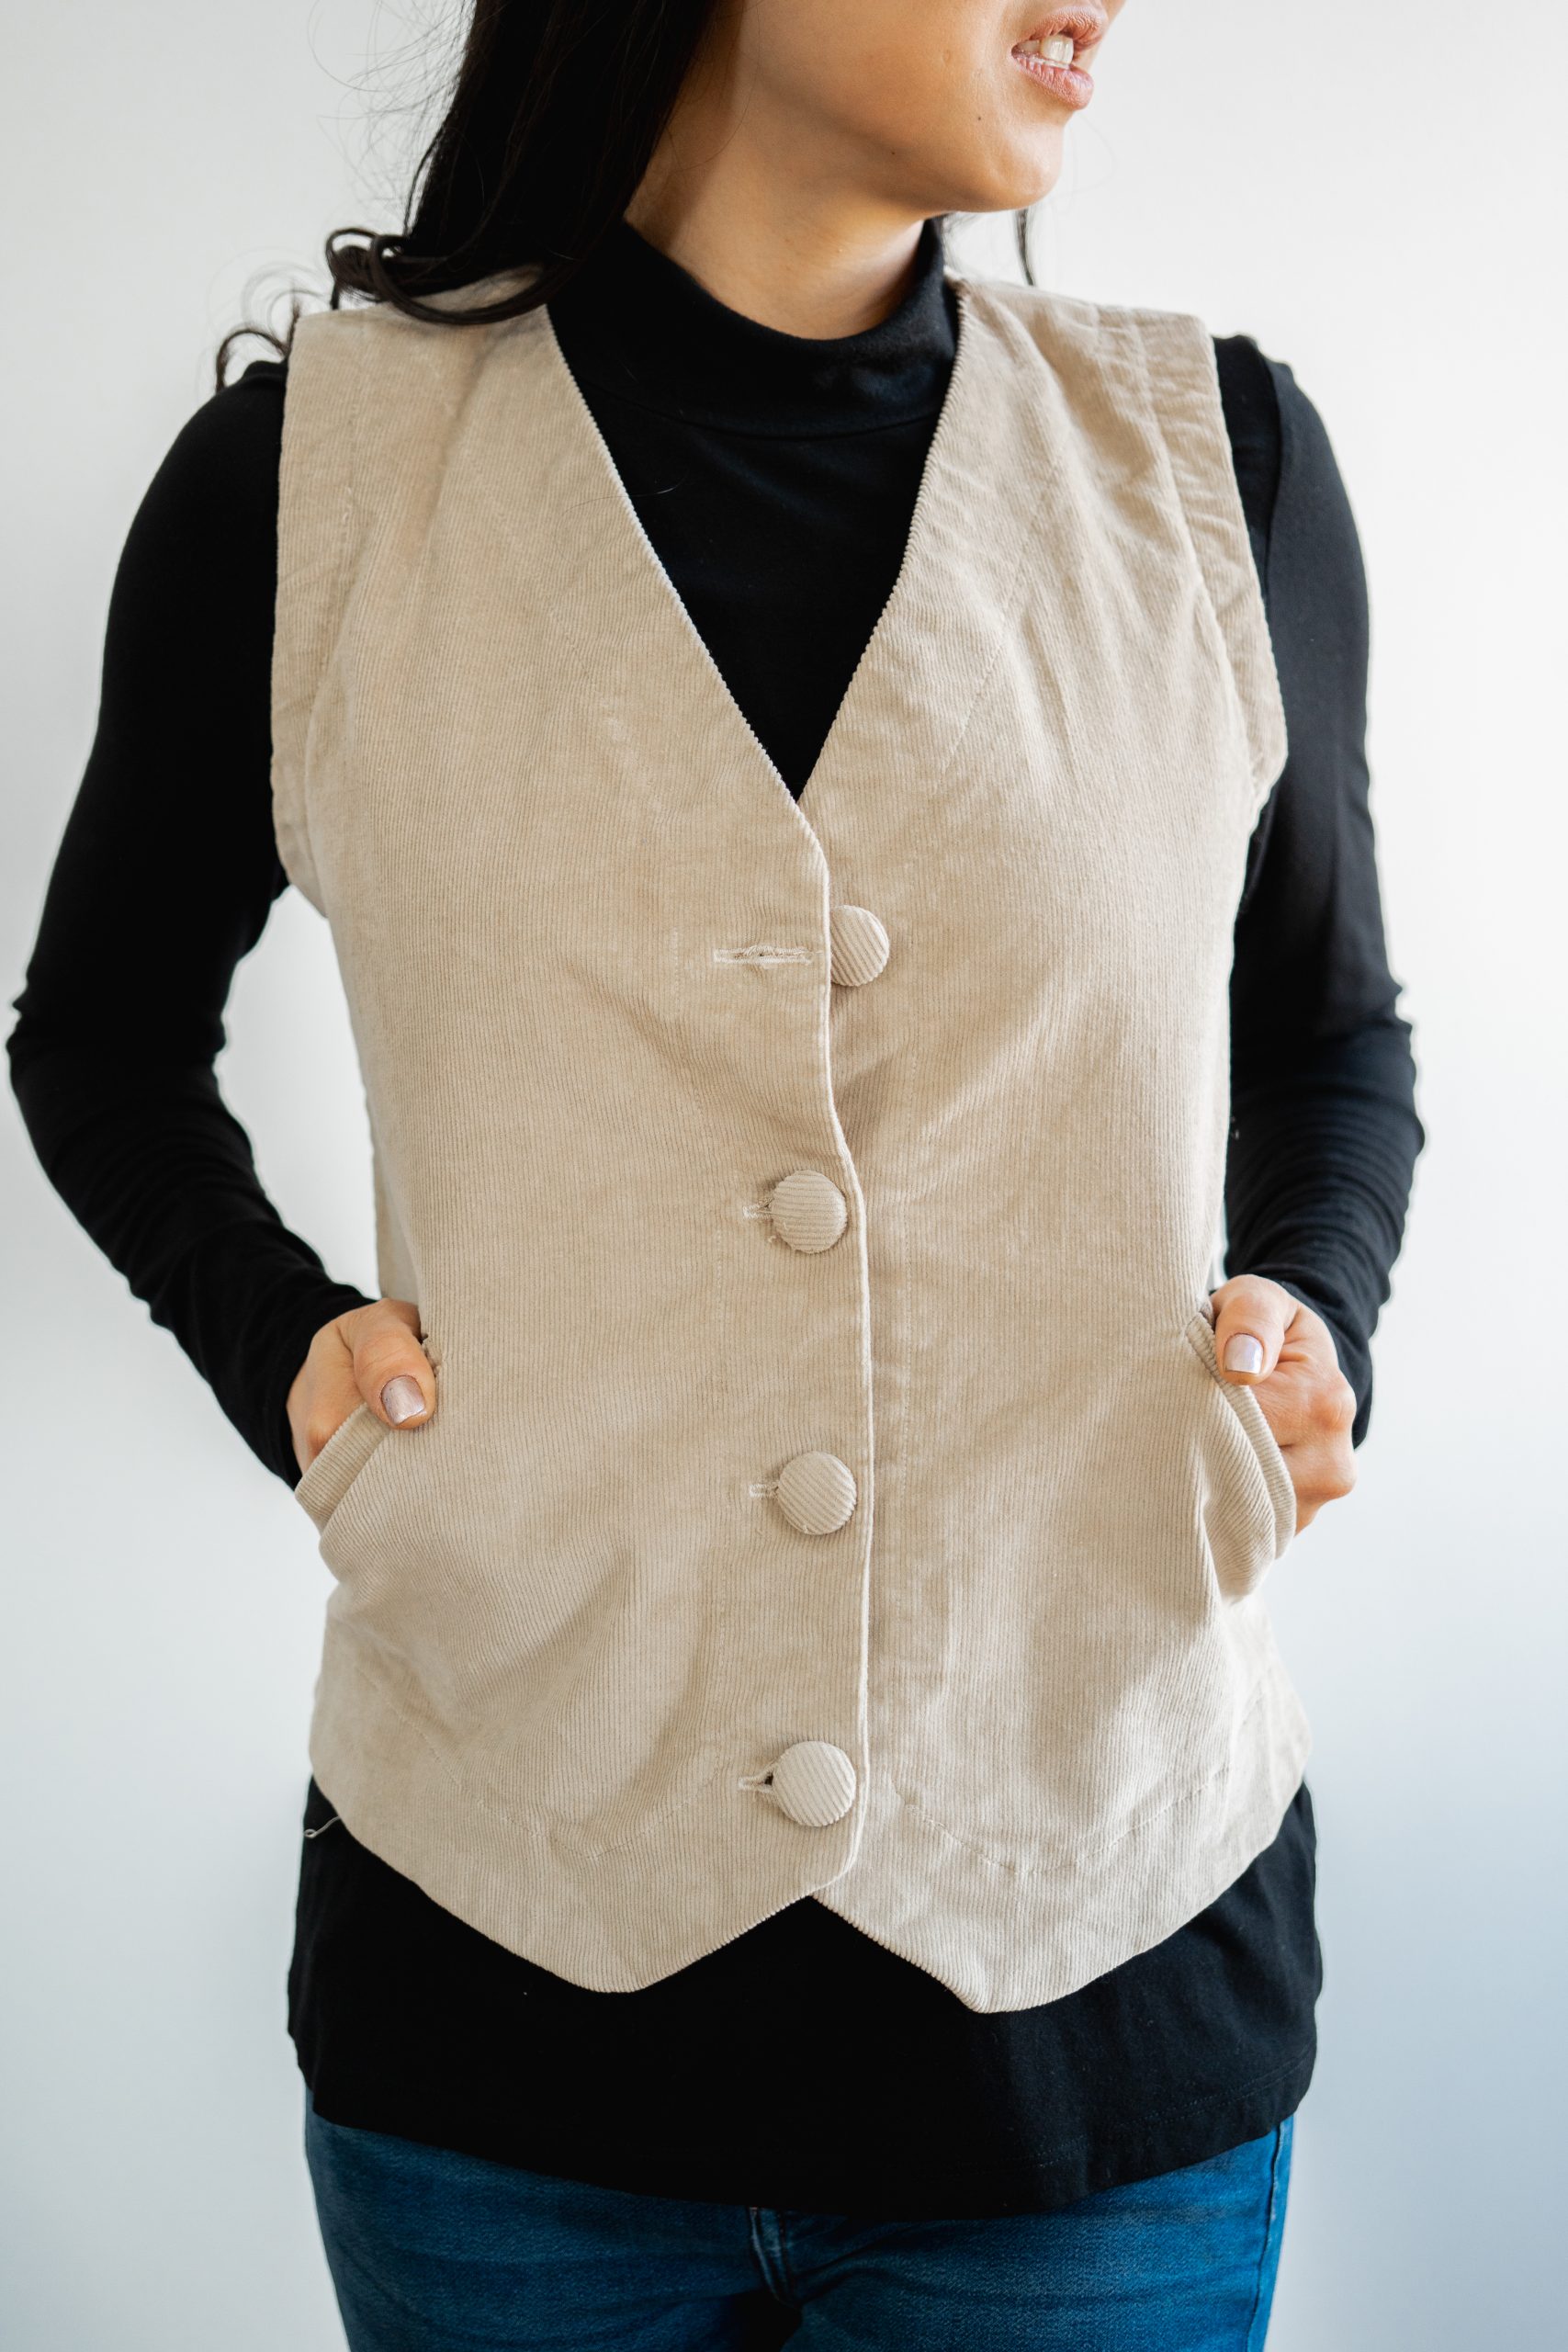
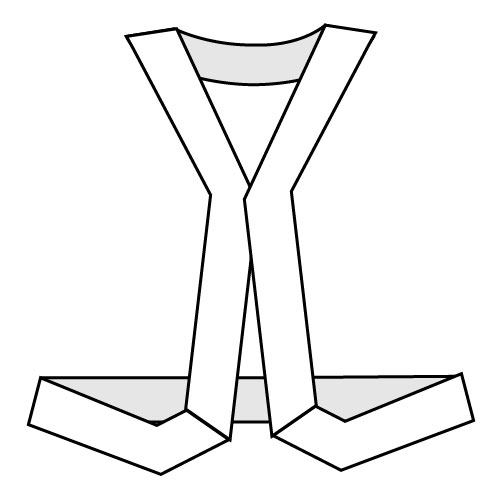
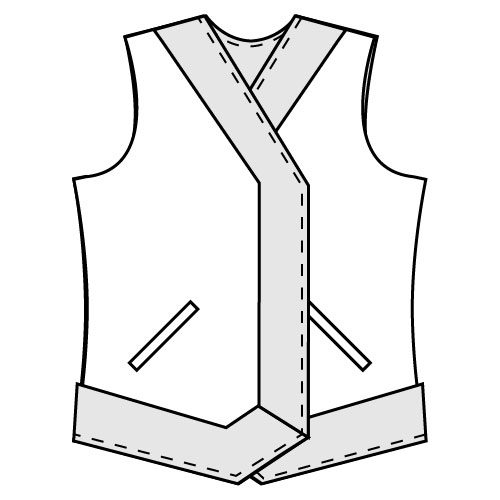
If your go-to style is preppy chic, then you won’t want to miss this classic women’s fitted vest pattern. Made in soft ecru corduroy, this vest sewing pattern features matching buttons and welt pockets lined with a playful print. This sewing pattern also has a waist tie on the back of the vest, so that it can be easily fitted to the wearer’s body. Wear your vest with a t-shirt in warmer weather or layer over a long-sleeve tee or turtleneck during the fall and winter.
Designer Note: Seam allowance 5/8” unless otherwise noted.
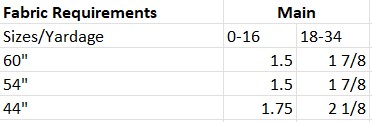
Materials:
- Fabric (see Fabric Requirements below)
- (4) 3/4″-1″ buttons
- (1) 3/4″ Slider
- 2 yards- 1″ single fold bias tape
- PDF Pattern – This is located at the bottom of this page. Please see printing instructions below.
FINISHED GARMENT MEASUREMENTS:


PRINTING INSTRUCTIONS:
Note: To download the pattern, click on the pattern download button at the bottom of the page. We recommend opening your pattern download using Adobe Acrobat.
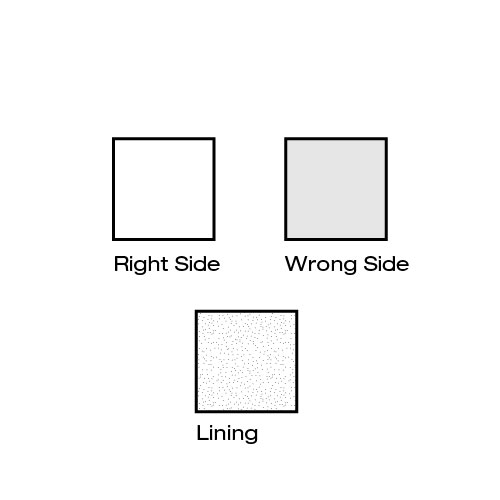
Color Key:
Sewing Instructions:
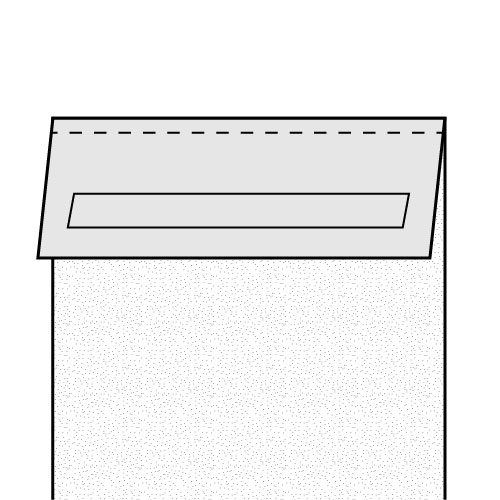
- Transfer welt pocket markings to both front pieces and Welt Pocket pieces. Place the welt pocket accent and pocket bag with right sides together along lower edge. Stitch pieces together.
- Press seam allowance towards the pocket accent and topstitch in place 1/8” from the folded edge.
- Working on a flat surface, place the vest front with right sides up. Place the welt pocket accent with right side down, lining up the rectangles.

- Tip: Lining up the rectangles of the welt pocket can be difficult. Place a pin in each corner to match with the corner on the vest front. This step doesn’t need to be perfect, close enough is good enough.
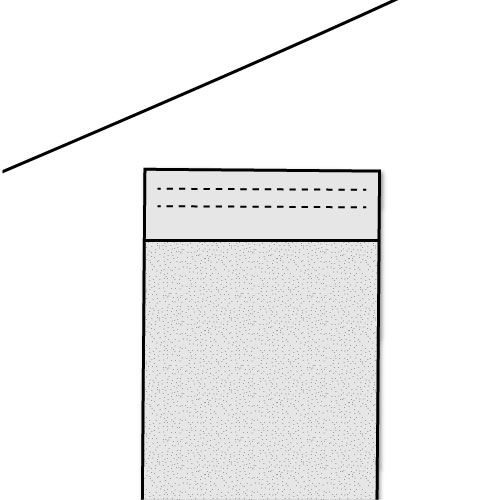
- Stitch together along the top and bottom of rectangle locking stitches on both ends.
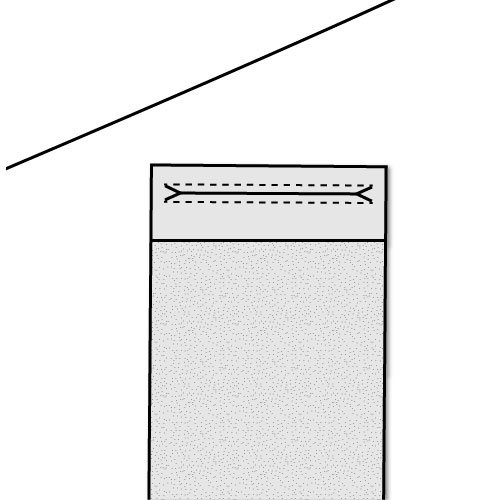
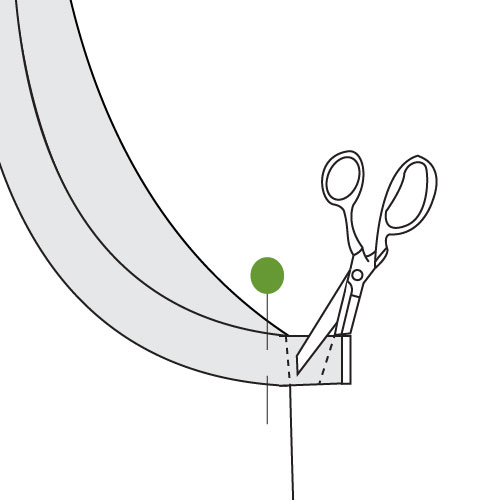
- Carefully cut through both the vest front and welt pocket accent parallel to the two lines of stitching. Stop cutting 1/2” from the end and clip at an angle towards the end of the stitched line, but not through. Repeat with other end.
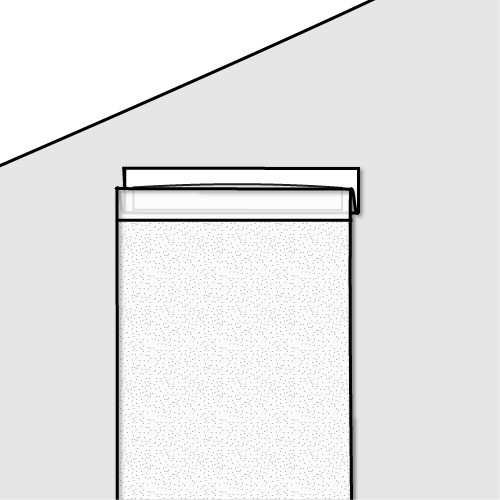
- Push the pocket through the welt opening towards the wrong side of the cape vest front. Press the folded edges well. Fold the accent and pocket up towards the opening so that the folded edge lines up with the top of the opening. Press fold well.
- From the right side of the vest, pin the fold in place. With the front piece right side up, fold the left side of the front towards the welt pocket opening exposing the folded pocket edge and triangle created when clipping into the welt pocket opening. Stitch the triangle to the folded pocket layers as close to the edge of the vest front as possible without catching the front.
- Repeat with remaining side of welt opening. Working from the wrong side, fold the bottom edge of the pocket up towards the top edge of the pocket piece with right sides together. Sew the pocket pieces together along the sides and top, making sure the vest front is folded out of the way to not be caught in the stitches.

- Repeat with second welt pocket.
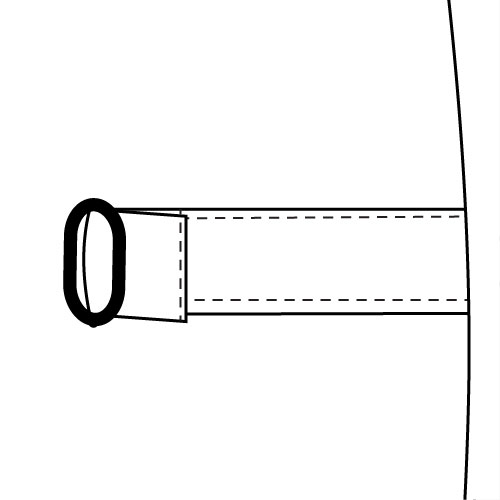
- Fold waist tie with right sides together along the long edge. Stitch together across one of the short ends and down the long side. Trim seam allowance and clip the corner. Turn the waist tie right sides out and press well. Topstitch around outside edge of waist tie. Repeat with remaining waist tie.
- With wrong sides together create a French seam, by placing the front and back together along side seams. Stitch in place using a 3/8″ seam allowance.

- Trim the seam allowance to 1/8″. Turn vest wrong side out and press seams.
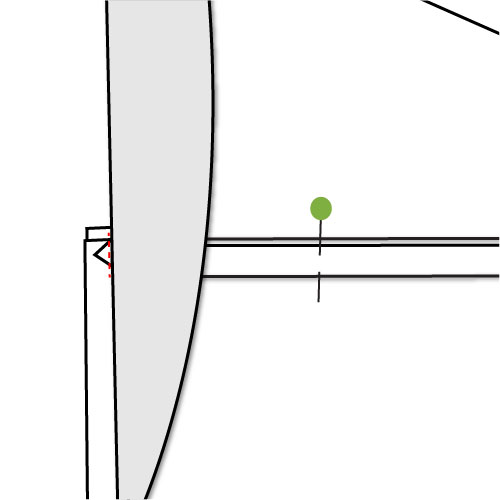
- Insert raw end of waist tie into the side seam at the notch and pin in place. The waist tie will now be sandwiched between the front and back of the vest. With the vest right sides together, stitch the side seam in place using a 1/4″ seam allowance.

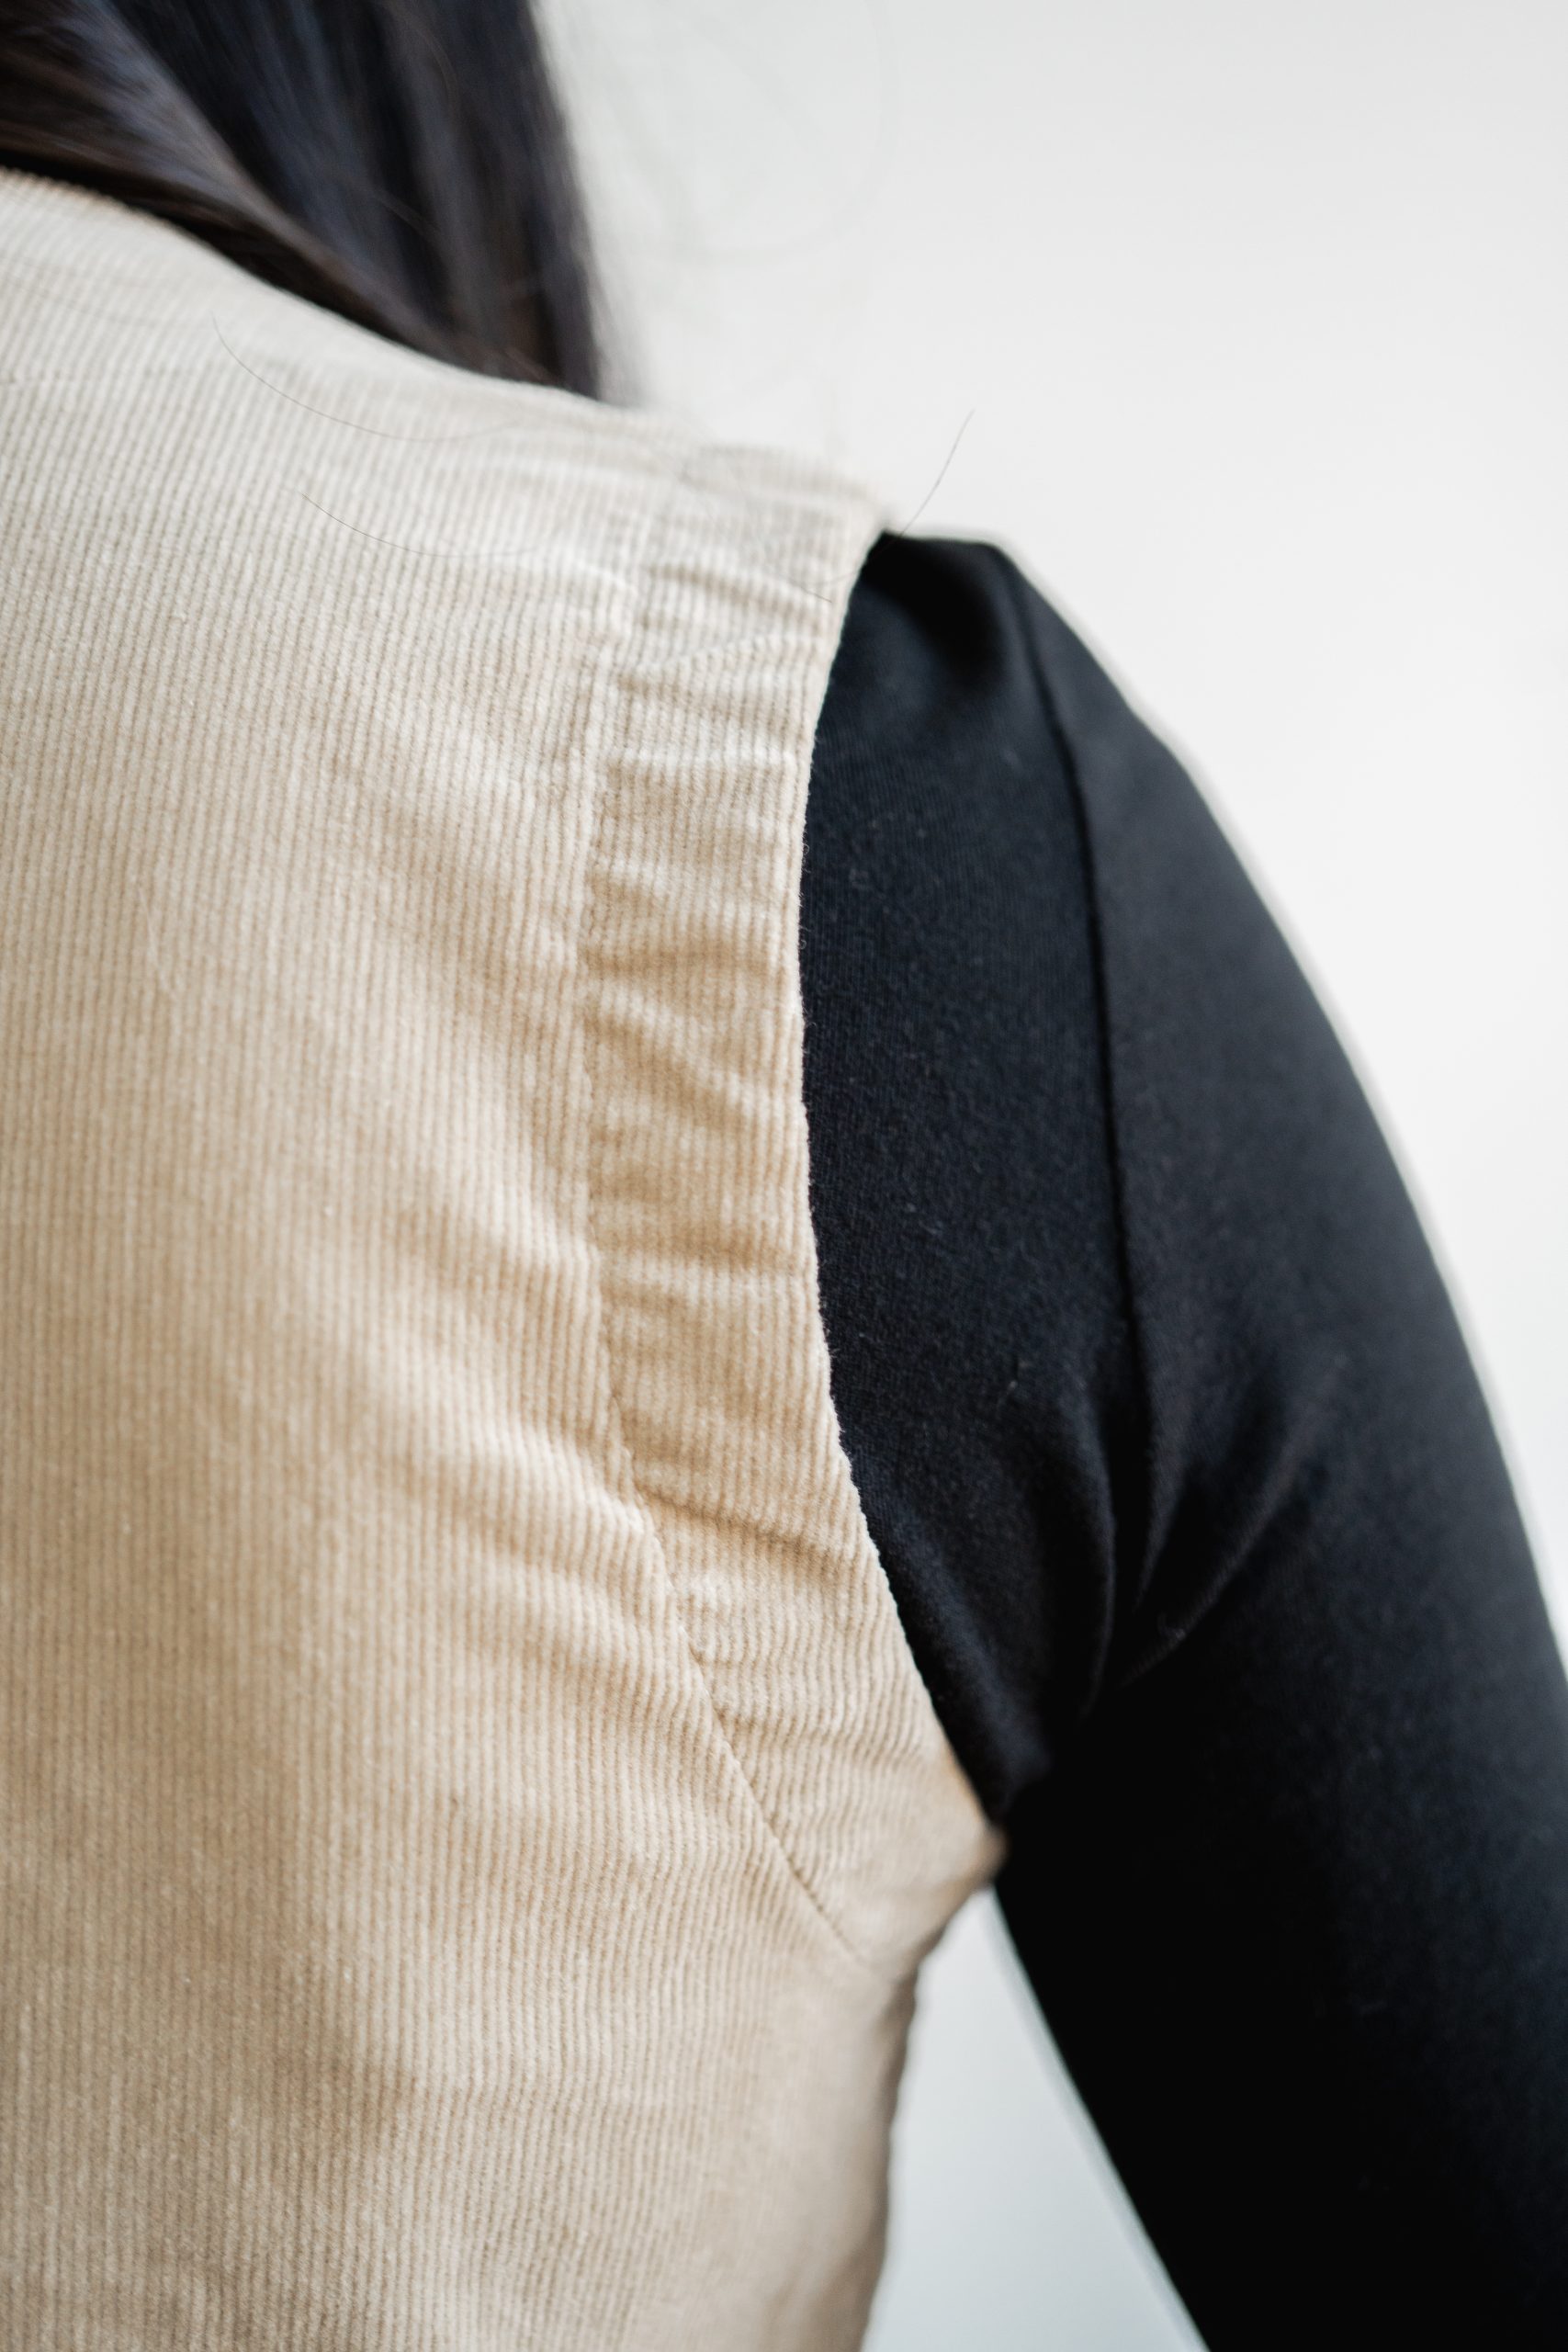
- Repeat French seams along shoulder seams.
- Feed one waist tie through the slider and fold over the center bar. Overlap the end of the strap by 2″ and stitch in place along the end.
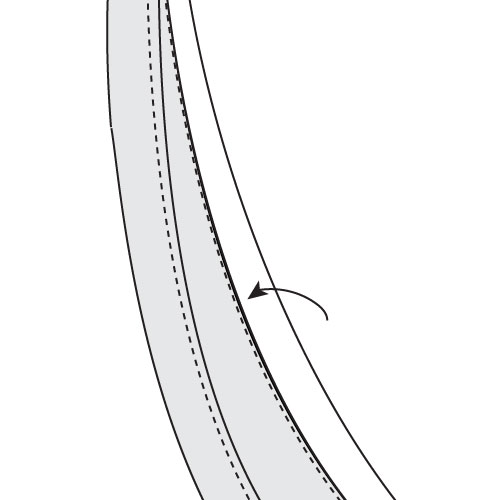
- Pin the center of the bias tape on the shoulder seam, right sides facing. Distribute the rest of the bias tape around the armhole and pin in place. Make sure to leave about 1 inch hanging free on each side of the underarm seam. Sew the bias tape to the vest with a 1/4” seam allowance. Stop sewing 1 inch from the underarm seam.
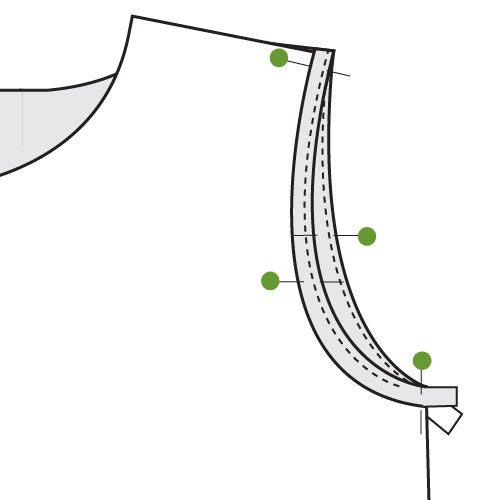
- Cross the tails of the bias tape and mark where they intersect, line shown in red.
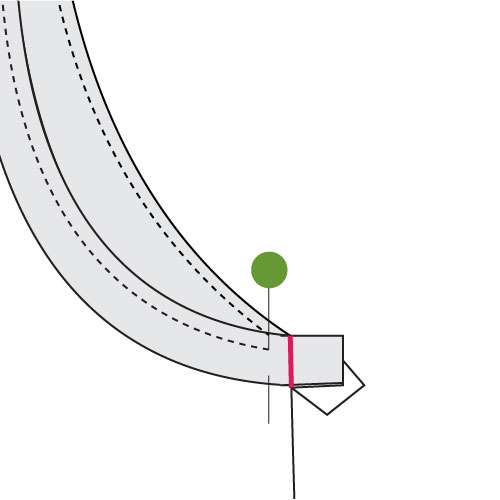
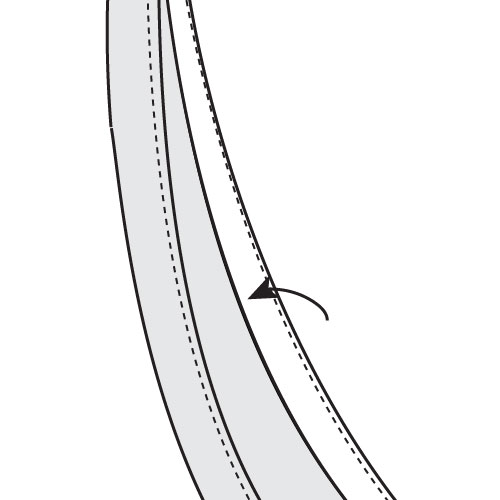
- Sew the tails right sides together on the line you marked in the previous step. Trim the excess bias binding and press seam allowance open.
- Trim seam allowance of the bias tape to 1/8” and clip the curve.

- Understitch the seam allowance of the vest to the bias tape. Press the bias tape to the inside of the garment.
- Take the raw edge of the bias tape and fold the seam allowance under 1/4”, lining it up with the previous stitch lines. Press well.
- Bring the bias tape completely to the wrong side of the shirt. The seam and understitching will now be inside the armhole as well. Stitch the binding down along the folded edge. Repeat with other armhole.
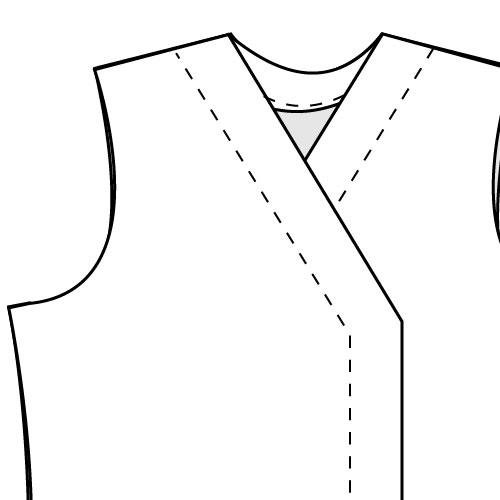
- With right sides together, stitch the shoulder seam of center front and back neck facing pieces. Trim seam allowance and press open. The remaining facing will be stitched together following the same steps. Stitch the center front facing to the hem front facing, then stitch the lower front facing to the hem back facing. All facing pieces are now connected.
- Fold the inside raw edge of the facing toward the wrong side 1/4” and press well. Alternatively, finish raw edge with serger or zig zag stitch.
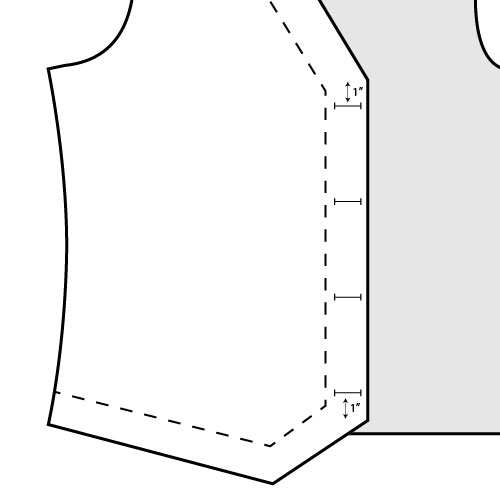
- Place the vest right side up and align the facing pieces with the shoulder seams, side seams, center front, and center back. Stitch the facing to the vest.
- Trim seam allowance and clip corners.
- Press seam allowance and facing away from the vest and press well. Understitch the seam allowance in place along facing stitched inside edge. Turn facing towards the wrong side along seam and press well. Stitch facing in place 1/8” from inside folded edge.
- Working on the wearer’s right front, mark the top buttonhole 1 inch below the center front point. Mark the bottom button 1” above the lower center front point. Distribute the two remaining buttonholes along the center front. Stitch the buttonholes in place along markings.
- Using the buttonholes as a reference, mark the button placement on the wearer’s left front and stitch the buttons in place.