
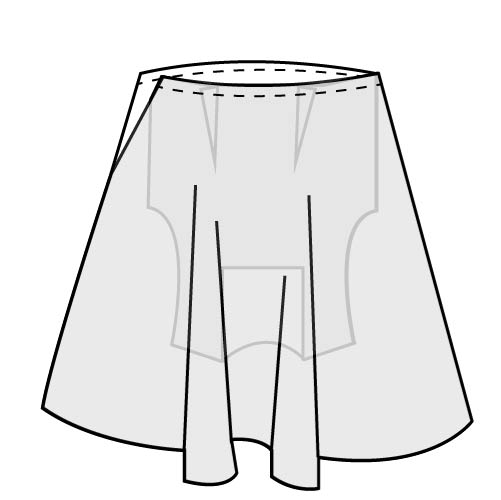
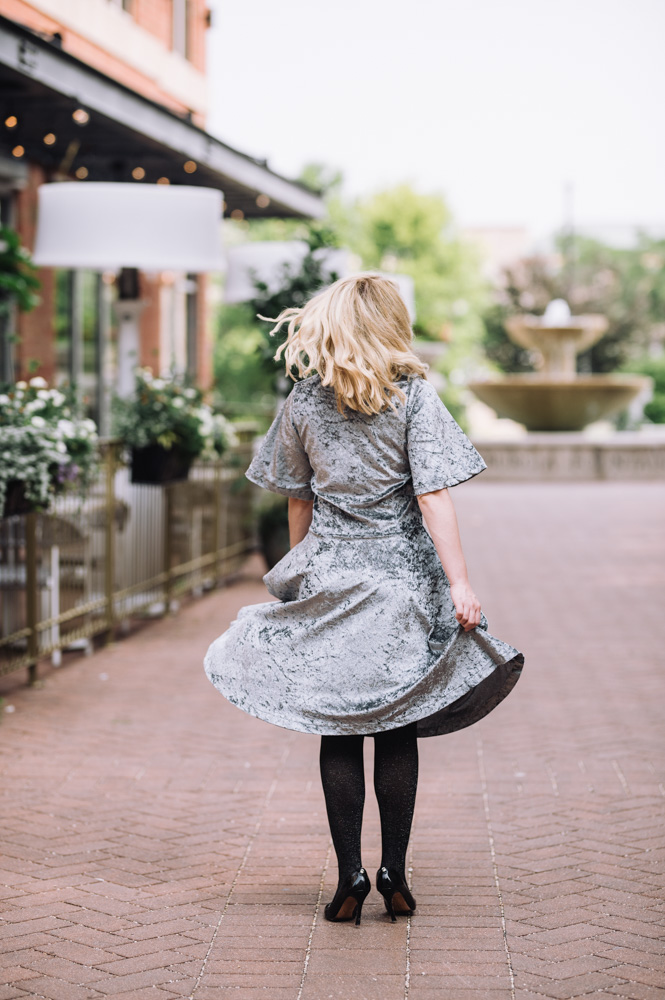
Make jaws drop at your upcoming holiday party or Christmas celebration with this gorgeous winter dress pattern. Featuring a square neckline and flowy silhouette, this holiday dress is a little bit New York society girl with a sprinkle of boho chic and a dash of vintage charm. This figure-flattering dress design is ideal for luxe woven winter fabrics like crushed velvet, so that you can shine in a dress that’s uniquely you! Show off your sewing skills by designing a dress that’s a total showstopper with this tutorial.
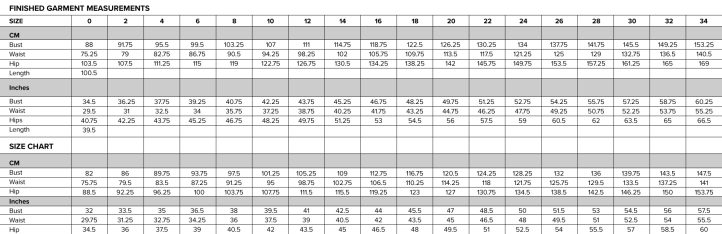
Pattern Sizes: 0-34
Materials:
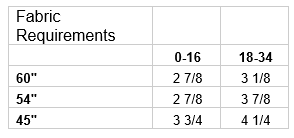
- Light to medium weight woven fabric
- 5/8 yard of lining fabric
- 9″ invisible zipper

Sewing Instructions:
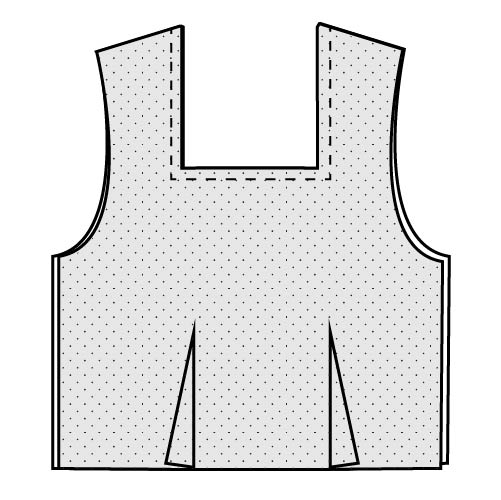
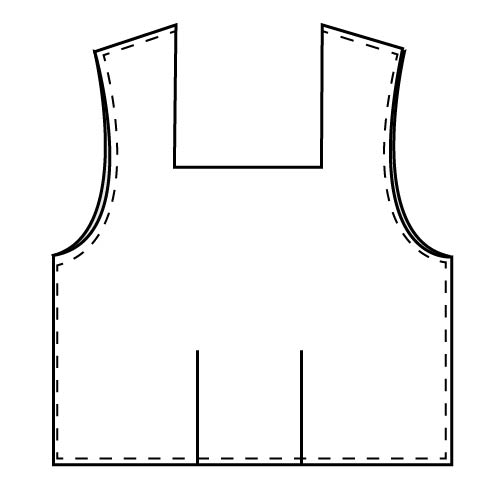
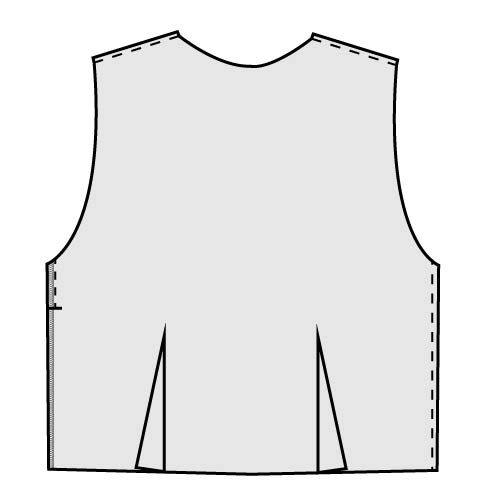
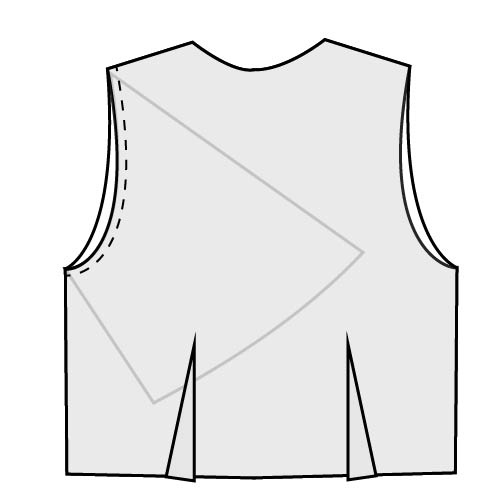
- Fold the front piece with right sides together, matching up the dart legs. Sew along dart lines until reaching the point and leave long tails. Tie the end of the stitches together to secure the dart. Press the dart towards the side seam. Repeat with second dart on the front, both back darts, and darts on front lining.
- Place the front and front lining pieces right sides together. Sew the two pieces together along the neckline.
- Trim the seam allowance and clip up to (but not through) the stitching line at the corner.
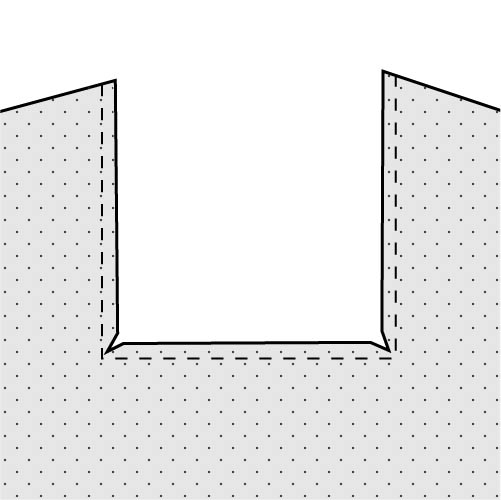
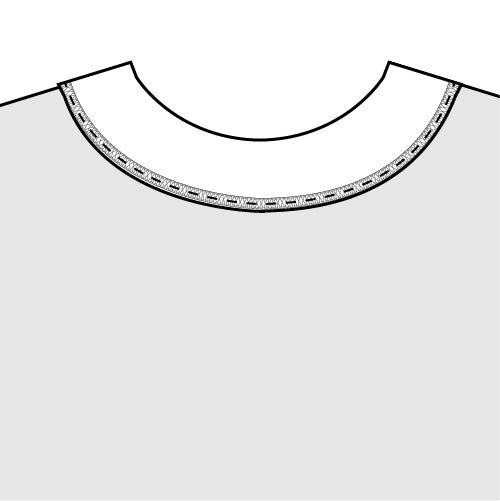
- Turn the front piece right sides out and press along the neckline. Baste the front and lining pieces together along the shoulder seam, armhole, side seams, and bottom edge.
- Finish the bottom edge of the back facing with either a zig zag stitch or serger. Place the facing with right sides together on the back neckline. Sew the facing to the back piece along the neckline.
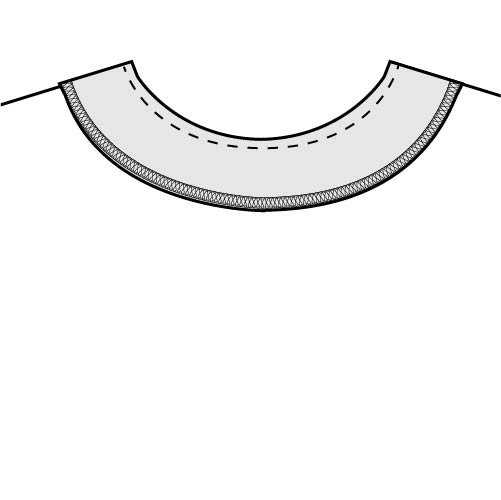
- Trim the seam allowance, clip the curve, flip the facing towards the wrong side, and press well. Sew the facing to the back piece along the finished bottom edge. Note: All inside seams are finished with French seams.
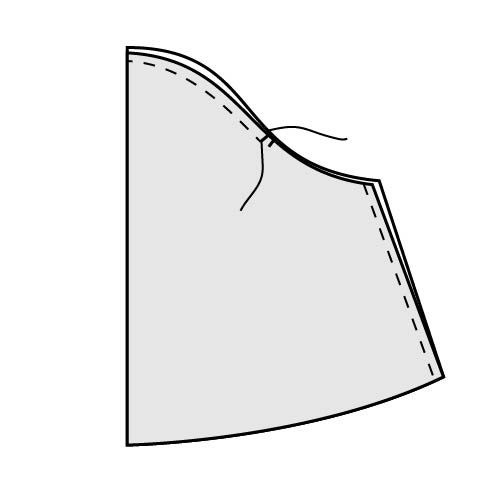
- With wrong sides together, sew the front and back pieces together at the shoulder seams and wearer’s left side seam with 3/8” seam allowance. The zipper will be attached to the right side, so finish the raw side seam edge of both the front and back pieces separately with either a zig zag stitch or serger.
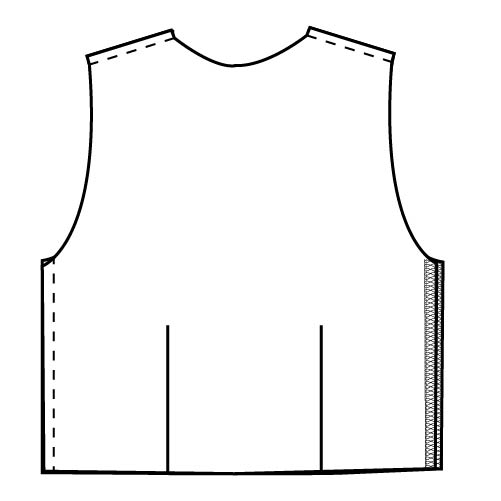
- Trim the seam allowance of the shoulder seams and wearer’s left side seam to 1/8”. Turn the bodice wrong sides out, lining up the side and shoulder seams, and press well. Sew the front and back together along the shoulder and wearer’s left side seam with 1/4” seam allowance. With right sides together, sew the open side seams together from the underarm point down to the notch with 5/8” seam allowance, locking the stitches.
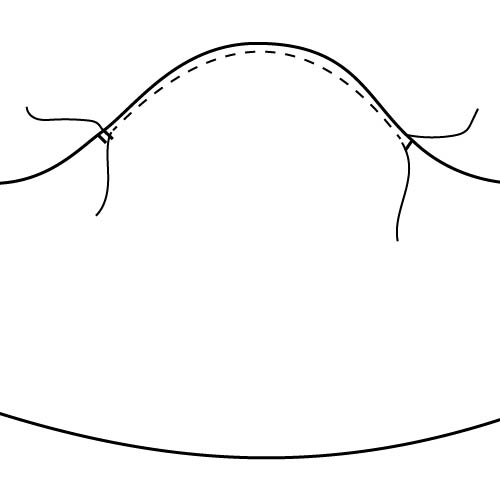
- Sew a gathering stitch 1/4” from the edge between the two notches on the sleeve. The gathering is used to ease the sleeve into the armscye. This is a very slight gather that is distributed between the notches and the shoulder point.
- The sleeves are finished with French seams as well. With wrong sides together, sew the sleeve together along the underarm seam with 3/8” seam allowance.

- Trim the seam allowance to 1/8” and flip so that wrong sides are together and press well. Sew the underarm seam together with 1/4” seam.
- Turn the bodice right sides out and the sleeve wrong sides out. Insert the sleeve into the bodice, matching up the underarm seams, shoulder seam and notch, and the front and back notches. Ease the sleeve into the armhole opening between the notches. Sew the sleeve to the bodice with 3/8” seam allowance.

- Trim seam allowance to 1/8” and turn the bodice so that the wrong sides are out and push the sleeve into the body of the bodice. Sew around the armhole with 1/4” seam allowance.
- Repeat with second sleeve.
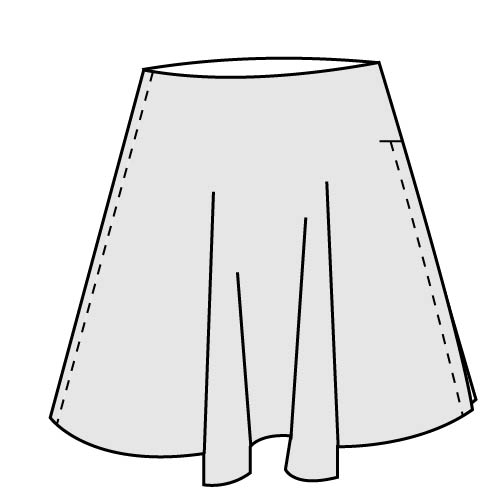
- With wrong sides together, sew the two skirt pieces together along one side seam with 3/8” seam allowance. The zipper will be attached to the other side seam. Finish the raw edges separately with either a zig zag stitch or serger.
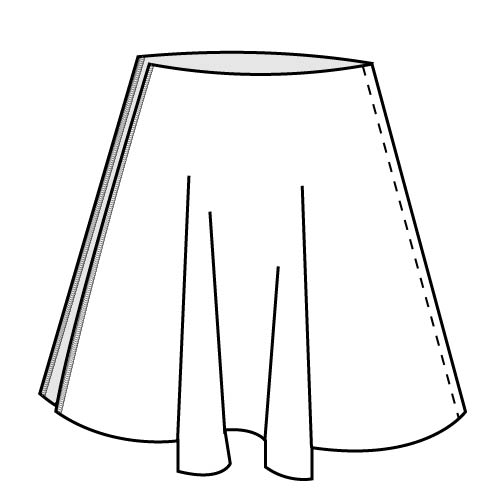
- Trim seam allowance to 1/8”, turn the skirt right sides together, and press the seam well. Sew the open side seam together from the notch to the bottom hem with 5/8” seam allowance. Sew the other side seam with 1/4” seam allowance, locking the stitches at the notch.
- Turn the skirt right sides out and the bodice wrong sides out. Insert the bodice into the skirt, matching up center front, center back, and side seams. Sew the bodice to the skirt with 3/8” seam allowance, starting at the open side seam and continuing around to the other side of the seam.
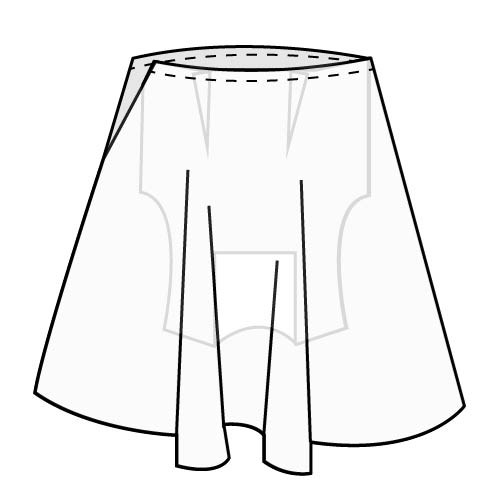
- Trim the seam allowance to 1/8” and turn the dress wrong sides out. Push the bodice into the skirt so that right sides are together and press well. Sew the waist seam with 1/4” seam allowance and press the seam allowance towards the skirt.
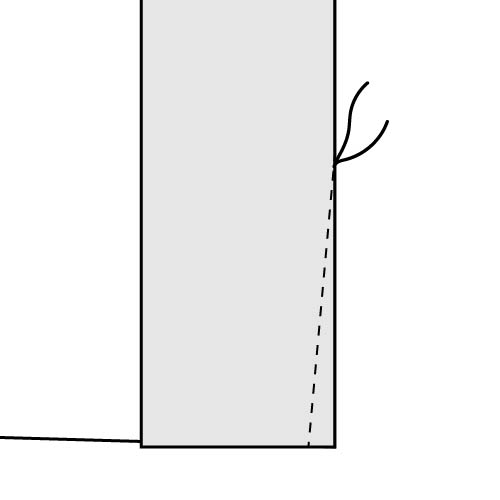
- Remove the zipper from the package and press the zipper tape. With the dress right sides out, mark the notches on the fabric with either chalk or fabric marker. Lay the dress with the open side seam up. With the zipper open and facing down, line up the edge of the zipper tape with the side seam. Line up the zipper, stopping just below the notch marked on the dress, and pin in place up to the notch marked on the skirt. Using a zipper foot, sew the zipper in place along the teeth, starting at the top notch and sew up to the bottom notch but not further. Check that the zipper opens and closes before moving onto the next step.
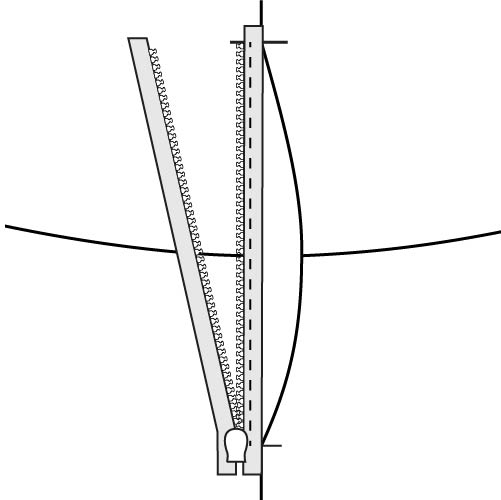
- Repeat with the other side of the zipper. Make sure the zipper and dress look the same as in the illustration. This is to ensure the zipper isn’t twisted.
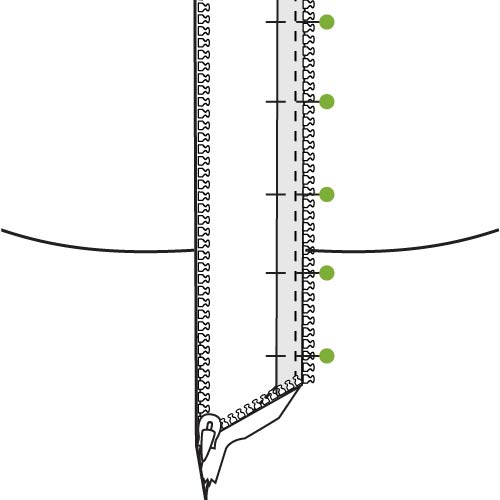
- Push the rest of the zipper into the dress and trim if needed.
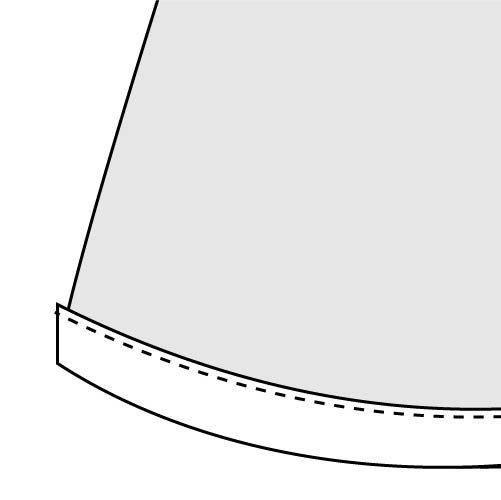
- Hemming: The skirt and sleeves are hemmed the same way. Fold the hem towards the wrong side 1/4” and press. Fold another 1” and press well. Sew the hem down 1/8” from the inside folded edge. Repeat with both sleeve hems.


i love this!