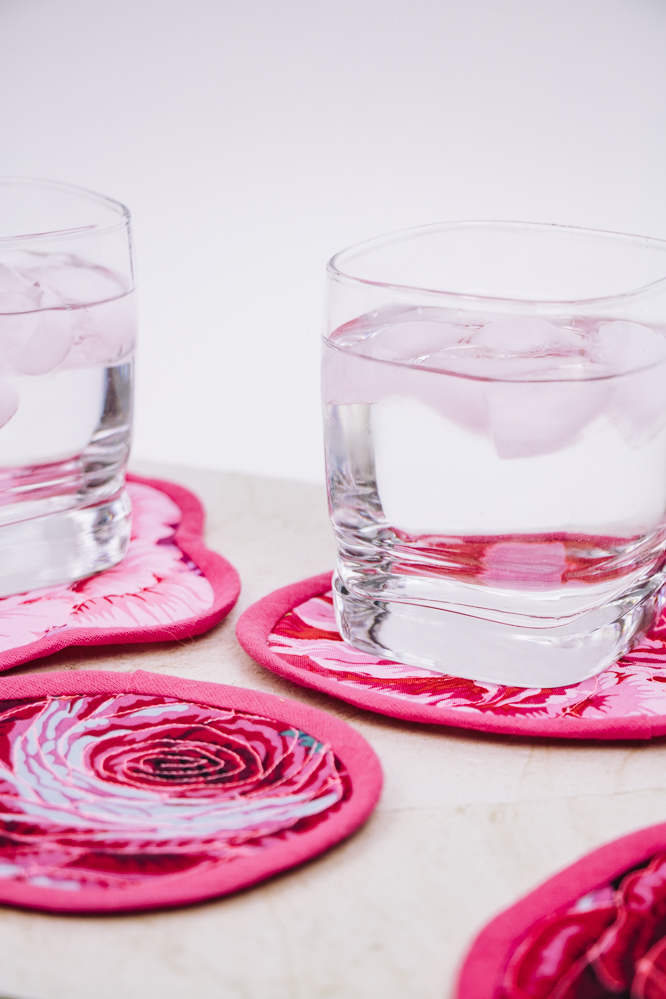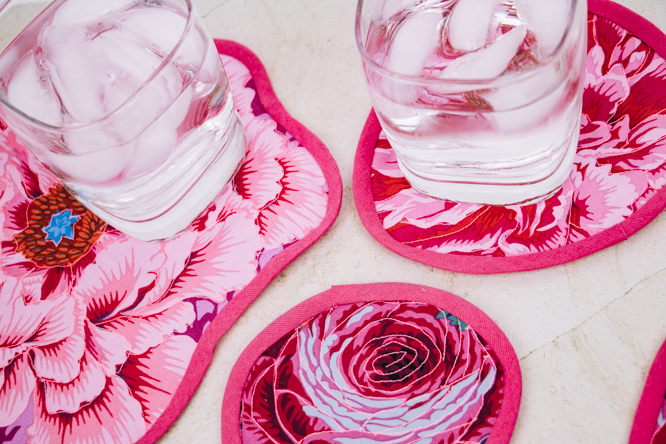
Have you ever loved a fabric print so much that you create an entire design around it? Designer Sophie Tarrant was inspired to make these stunning floral coasters by a beautiful flower print from Philip Jacobs. Showcasing flowers like peony and rose, this spring home décor project shows you how to highlight printed fabrics and create a design around them instead of using a standard circular coaster. Choose your favorite spring flower and add these showstoppers to your living space.
Materials:
- Fabric:
- One fat quarter Philip Jacobs Brocade Peony cotton in shade Hot
- One fat quarter Philip Jacobs Glory Rose cotton in shade Maroon
- Additional: any cotton print for backing
- Heat resistant batting
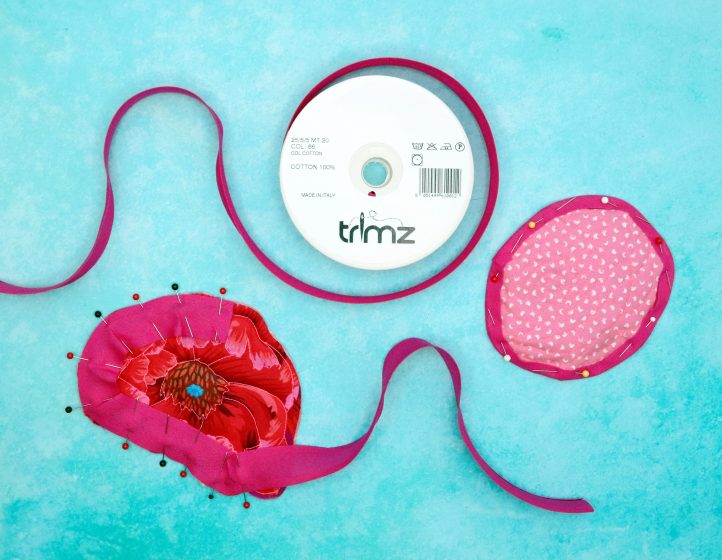
- Sewing thread: bright pink
- Bias tape: bright pink single-fold bias tape (you can also make your own bias tape from fabric scraps if you prefer)
Tools:
- Dressmaker’s shears
- Pins
- Sewing machine
- Free motion foot (optional)
- Hand sewing needle
Designer Notes:
It’s important to use the correct type of batting when making coasters, potholders, oven mitts, or any other project that will need to protect you and your surfaces from extremely hot (or cold) temperatures. This is why we’ve chosen to use heat resistant batting in our makes – it’s made of synthetic fibers and has great insulating properties, making it the ideal choice.
Instructions:
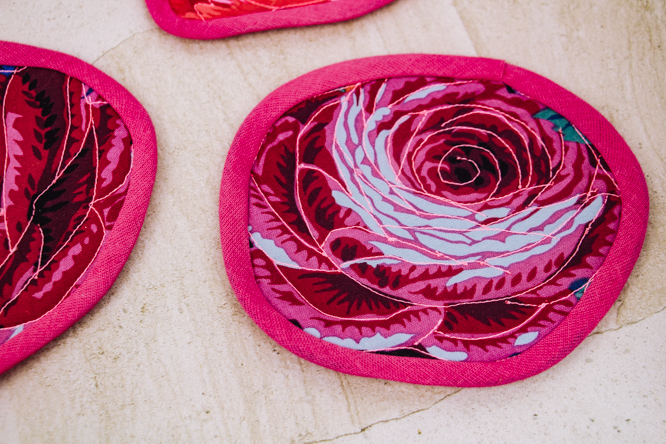
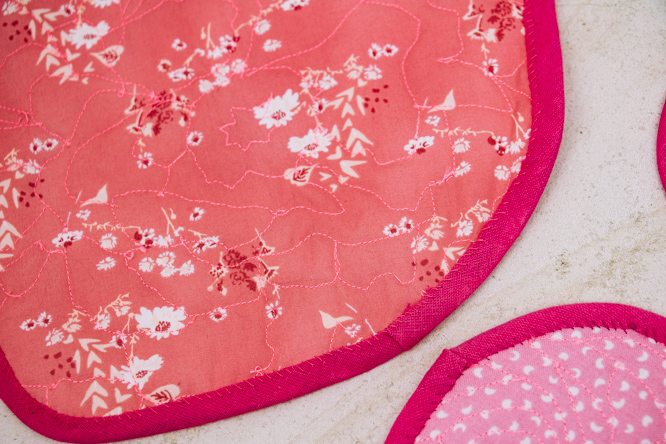
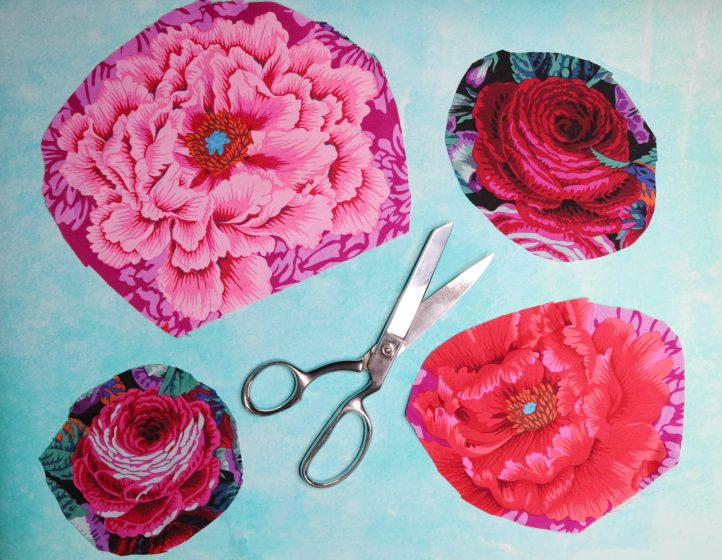
- Start by laying out your fabrics and choosing which floral motifs you’d like to make coasters out of. The perfect designs will be whole blooms that can be cut out easily and are the right size to create a coaster (around 4” in diameter). Roughly cut them out, leaving a small border all around.
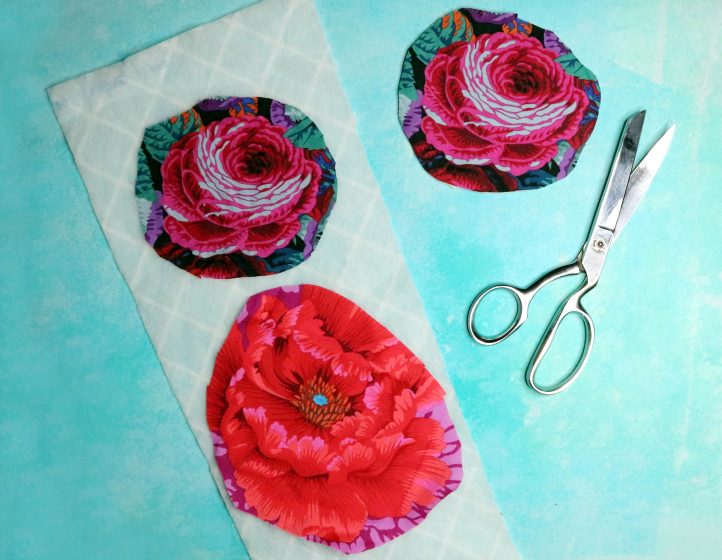
- Lay your backing fabric with right side facing down, then place a layer of heat resistant batting on top. Lay your flower motifs on top of it, with right side facing up. Draw and cut around each flower, then pin the layers together. Each one should now be a ‘sandwich’, with your backing and flower motif fabrics on the outside (with right sides of both facing out) and your batting in-between. Trim closely around the edge of each flower motif to remove any excess, cutting through all three layers at once.
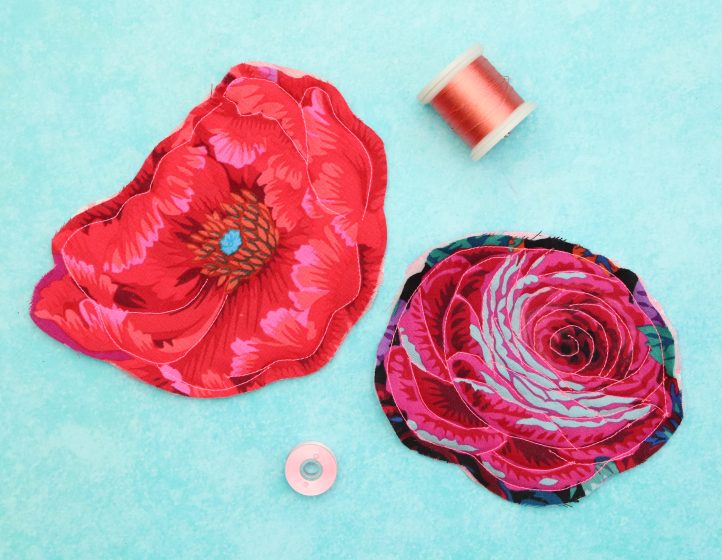
- Load a spool of bright pink thread into your sewing machine, and set your machine to work a straight stitch. If possible, lower your feed dogs and swap to a free motion foot – this will let you move the fabric freely beneath the needle in any direction, allowing you to ‘draw’ with the thread. Top stitch all over the flower, following the lines of the design and quilting through all the layers to join them together.
- With your coasters quilted, it’s time to finish them off with some edging. For each one, cut a length of bias tape that’s around 2” longer than the circumference of the coaster. Position the tape around the edge and align them together, then pin into place. Fold the cut edges under by 0.5” and overlap them, then trim any excess. Work a straight machine top stitch all around, sewing around 0.25” in from the edge of the coaster. Once stitched, fold the bias tape round to the back of the coaster to enclose the raw edges within and pin into position of motif, then fold bias tape again to sandwich raw edge of bias tape (Note: This will depend on whether or not you are using pre-folded bias tape). Hand stitch the edge of the bias tape into place to finish.