We’re all about the details and if you’re like us, you’ve been seeing embroidered tees and sweatshirts all over online shops from Etsy. Save your budget and learn how to hand embroider your own tees with this article from Stephanie Woodson! Stephanie walks you through the sweet and simple process of how to add delicate embroidered details to a plain t-shirt, so that you can customize your clothes in no time.
Skill Level: Beginner
Time: 2-3 hours
Finished Size: Dependent on project
Seam Allowances: N/A
Materials:
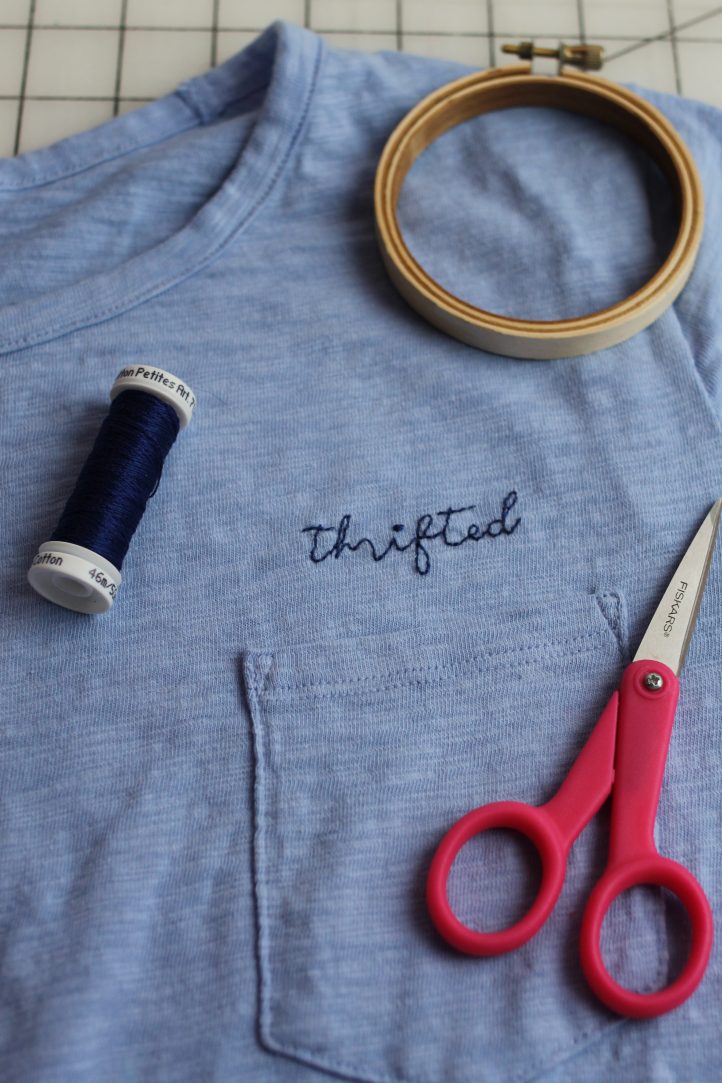
- T-shirt
Tools:
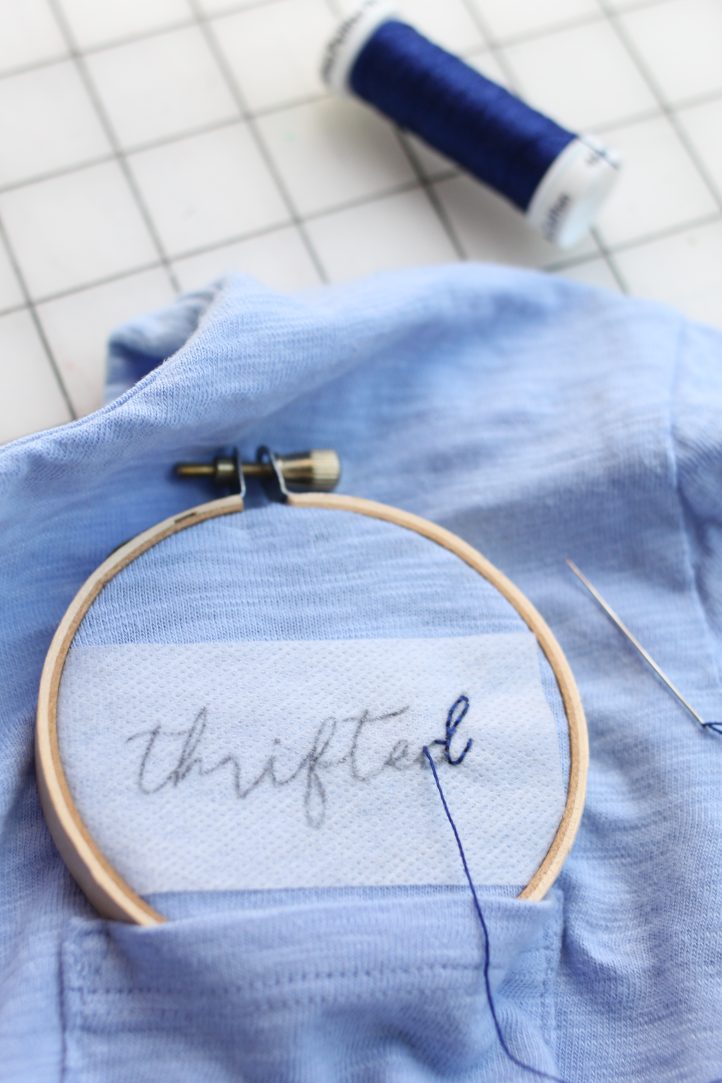
- Wash away fusible transfer material – Stick N Stitch from Sulky used here
- Hand sewing needle
- Scissors
- Embroidery floss
- Hoop larger than the text
- Pencil
Before You Start:
- Be sure to wash and dry the t-shirt however you plan to wash and dry the finished piece! Depending on the color and brand, you may also want to gently hand wash and dry the embroidery floss pieces so the color doesn’t run.
- The t-shirt weight and stretchiness are a large factor in how easy or difficult hand embroidery on t-shirts feels; the thicker and less stretchy a shirt is, the easier it will be to stitch on. The thinner and more stretchy the t-shirt is, the more challenging it will be to stitch without distorting the material or ripping holes.
- The fusible transfer material helps stabilize the fabric while you stitch without slipping around.
- Another factor is to stick to simple stitches – the denser or more complicated a stitch is, the more challenging it will be on knit fabric.
Instructions:
- Find or print the text or design you want (dafont.com is a free resource for text, shown here) and trace or print the design out on fusible transfer paper. You can print directly on Stick N Stitch, but for small projects, it may be quicker to trace and save the rest of the page.

- Peel off the transfer paper backing and smooth it down, and then place the hoop around it. Tighten to keep fabric taut but not as tight as possible, which will distort the fabric.

- Stitch over your design! A simple back stitch is shown here – a running back stitch, running stitch, and chain stitch all work well for text based designs and outline stitching.
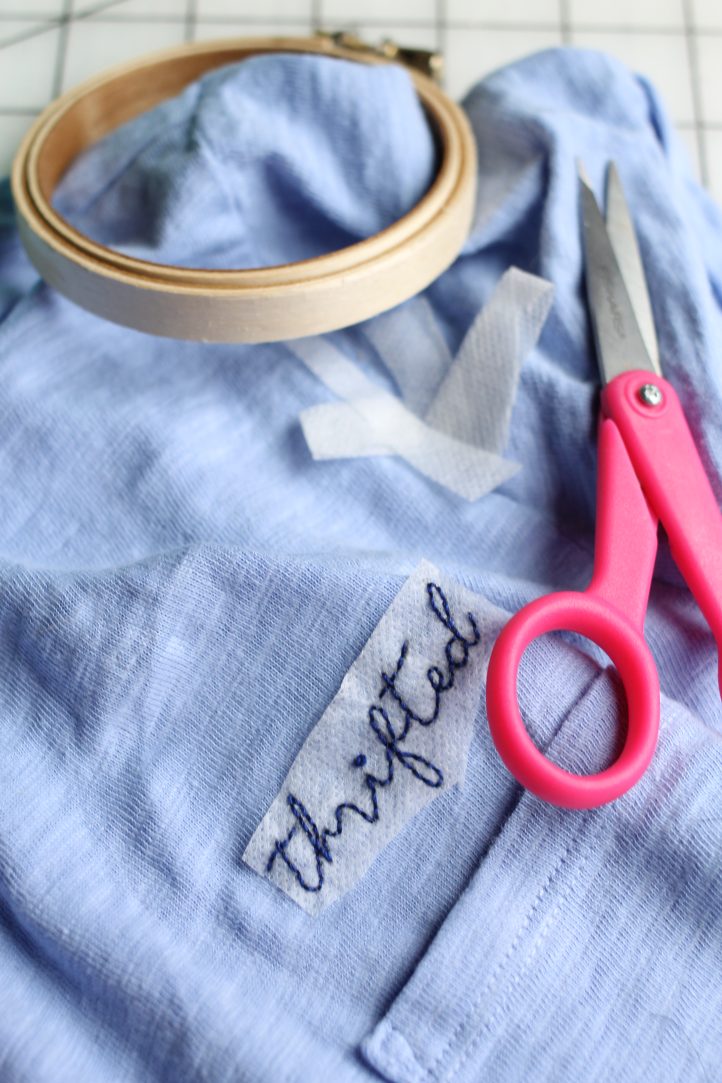
- Once you’re finished stitching, take the hoop off and trim away the excess transfer material – being careful not to cut through the t-shirt or embroidery floss.
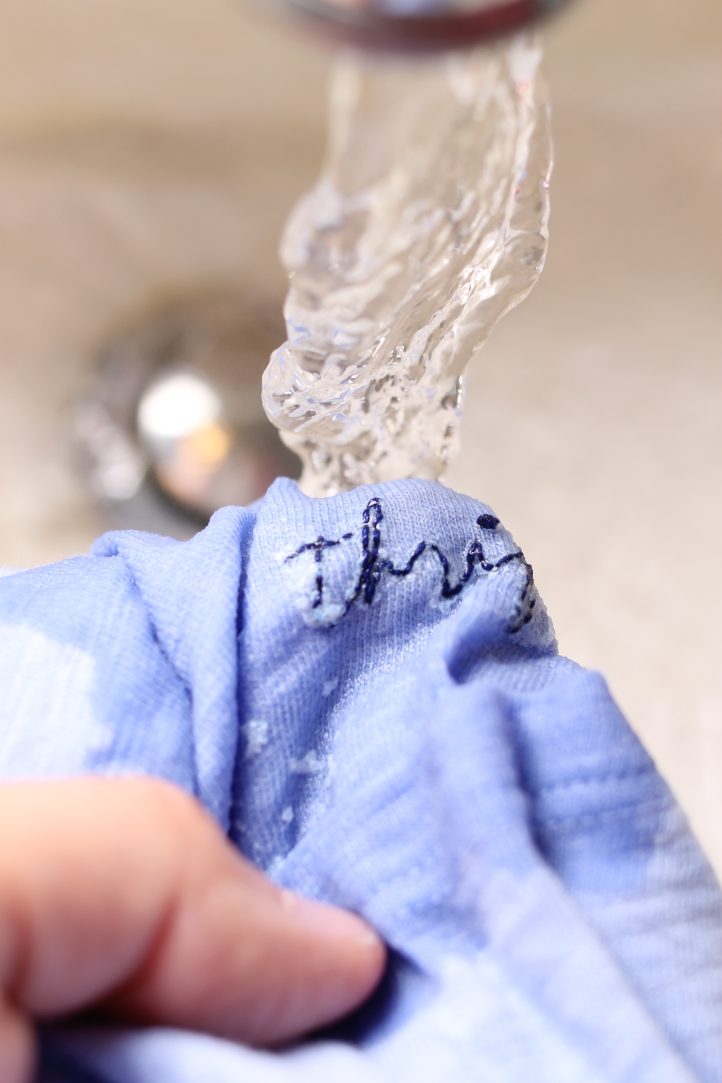
- Use warm water to rinse away the fusible transfer material and let dry. Do not wring the material, just air dry. You’re done!
If the wearer has sensitive skin, you can add optional embroidery backing like Sulky’s Tender Touch, which will cover the interior/backside stitches.