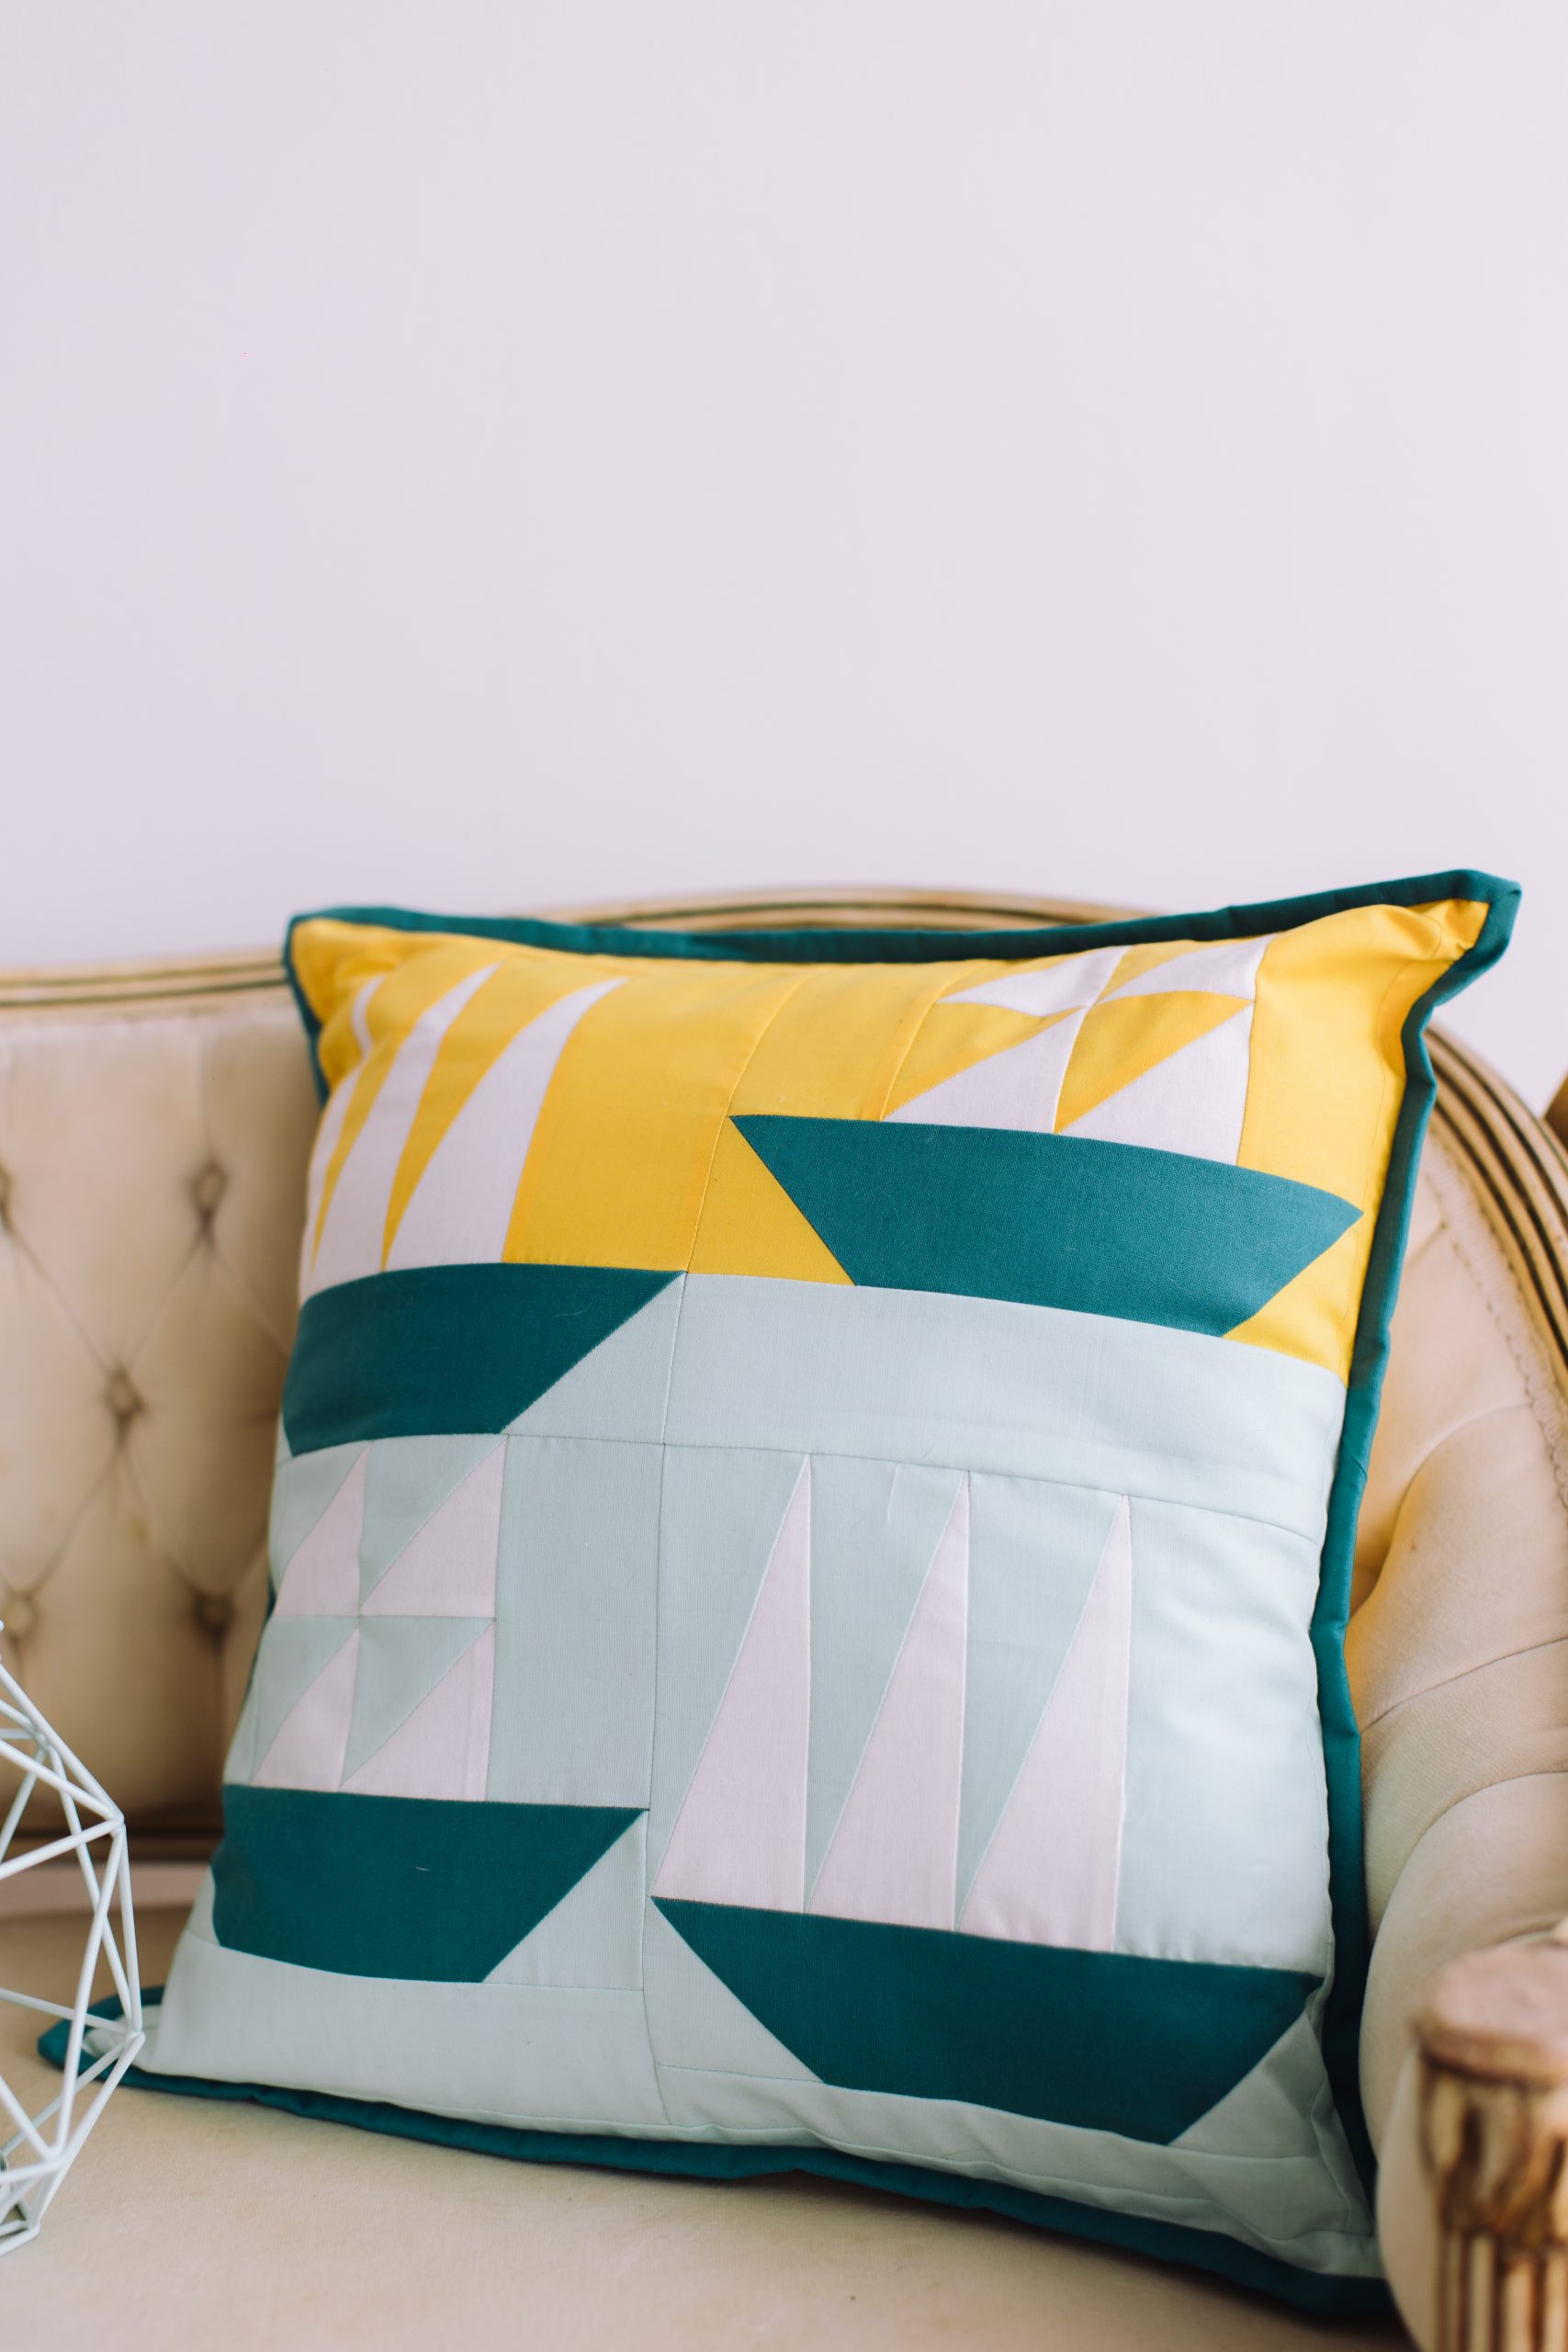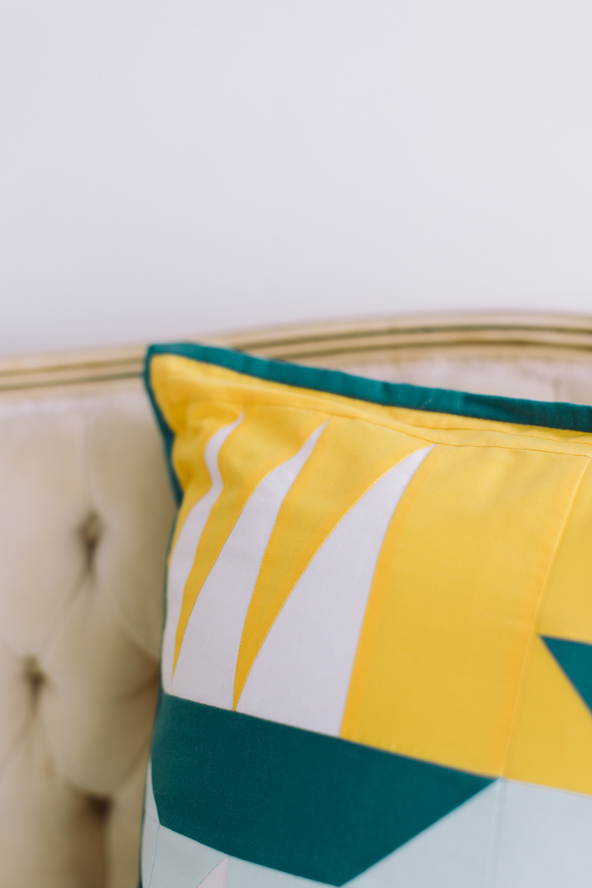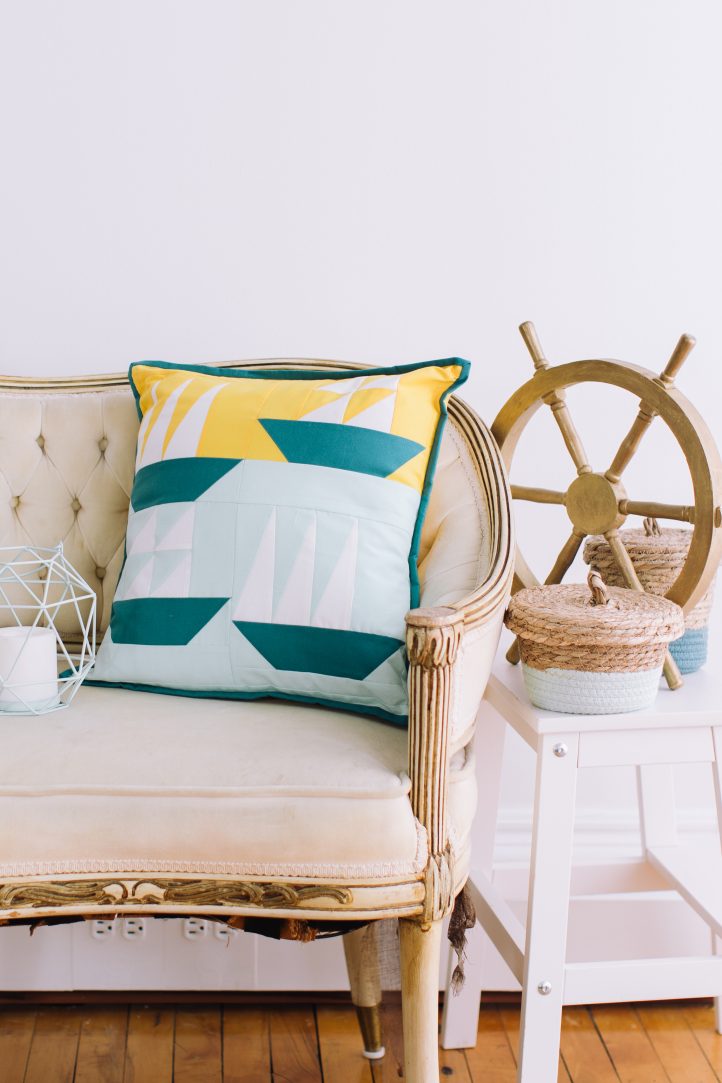
Ahoy there! Give your living room or sunroom a charming nautical feel with this quilted summer throw pillow. Featuring two boat designs, this fat quarter throw pillow finishes at approximately 17” x 17” and would look perfect on your couch or arm chair. This throw pillow pattern also has an envelope back, so that you can easily insert a cushion or pillow form to finish filling out your design. If you love nautical décor for summer, you won’t be able to resist this pretty quilted design.
Skill Level: Intermediate
Finished Size: ~17” x 17”
DESIGNER NOTES:
- Scant 1/4” seam allowance used throughout.
- WOF – Width of fabric
Materials:
- Fabric A: White – fat quarter
- Fabric B: Yellow – 1/2 yard
- Fabric C: Light green/blue – fat quarter
- Fabric D: Dark green/blue – 1/2 yard
- 18” cushion pad
- Basic sewing and quilting notions
Cutting Instructions:
TALL SAILS:

- Three A White 2 5/8” x 7 1/4” – cut on one diagonal (Half Rectangle Triangle – HRT).
- Two B Yellow 2 5/8” x 7 1/4” – cut on one diagonal (HRT).
- Two C Light green/blue 2 5/8” x 7 1/4” – cut on one diagonal (HRT).
- Two C Light green/blue 2 7/8” squares – cut on one diagonal (Half Square Triangle – HST).
- Two D Dark green/blue rectangle 2 1/2” x 9 1/4”.
- One B Yellow rectangle – measure and cut after the sails are stitched.
- One C Light green/blue – measure and cut after the sails are stitched; this measurement depends on your seam allowances in the sails.
- One B Yellow or C Light green/blue – measure and cut after the 1/4 block is made; this measurement depends on your seam allowances in the sails.
FOUR SAILS:
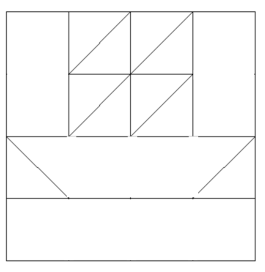
- Four A White 2 7/8” squares – cut on one diagonal (HST).
- Two B Yellow 2 1/2” x 4 1/2” rectangles.
- Three B Yellow 2 7/8” squares – cut on one diagonal (HST).
- Two C Light green/blue 2 1/2” x 4 1/2” rectangles.
- Three C Light green/blue 2 7/8” squares – cut on one diagonal (HST).
- Two C Light green/blue 2 1/2” x 8 1/2” rectangles.
- Two D Dark green/blue rectangle 2 1/2” x 9 1/4”.
BORDERS:
- Three B Yellow strips – measure and cut after the four 1/4 squares are stitched together to make the unfinished block up to 17 1/2”. See method below.
- Three B Light green/blue strips – measure and cut after the four 1/4 squares are stitched together to make the unfinished block up to 17 1/2”. See method below.
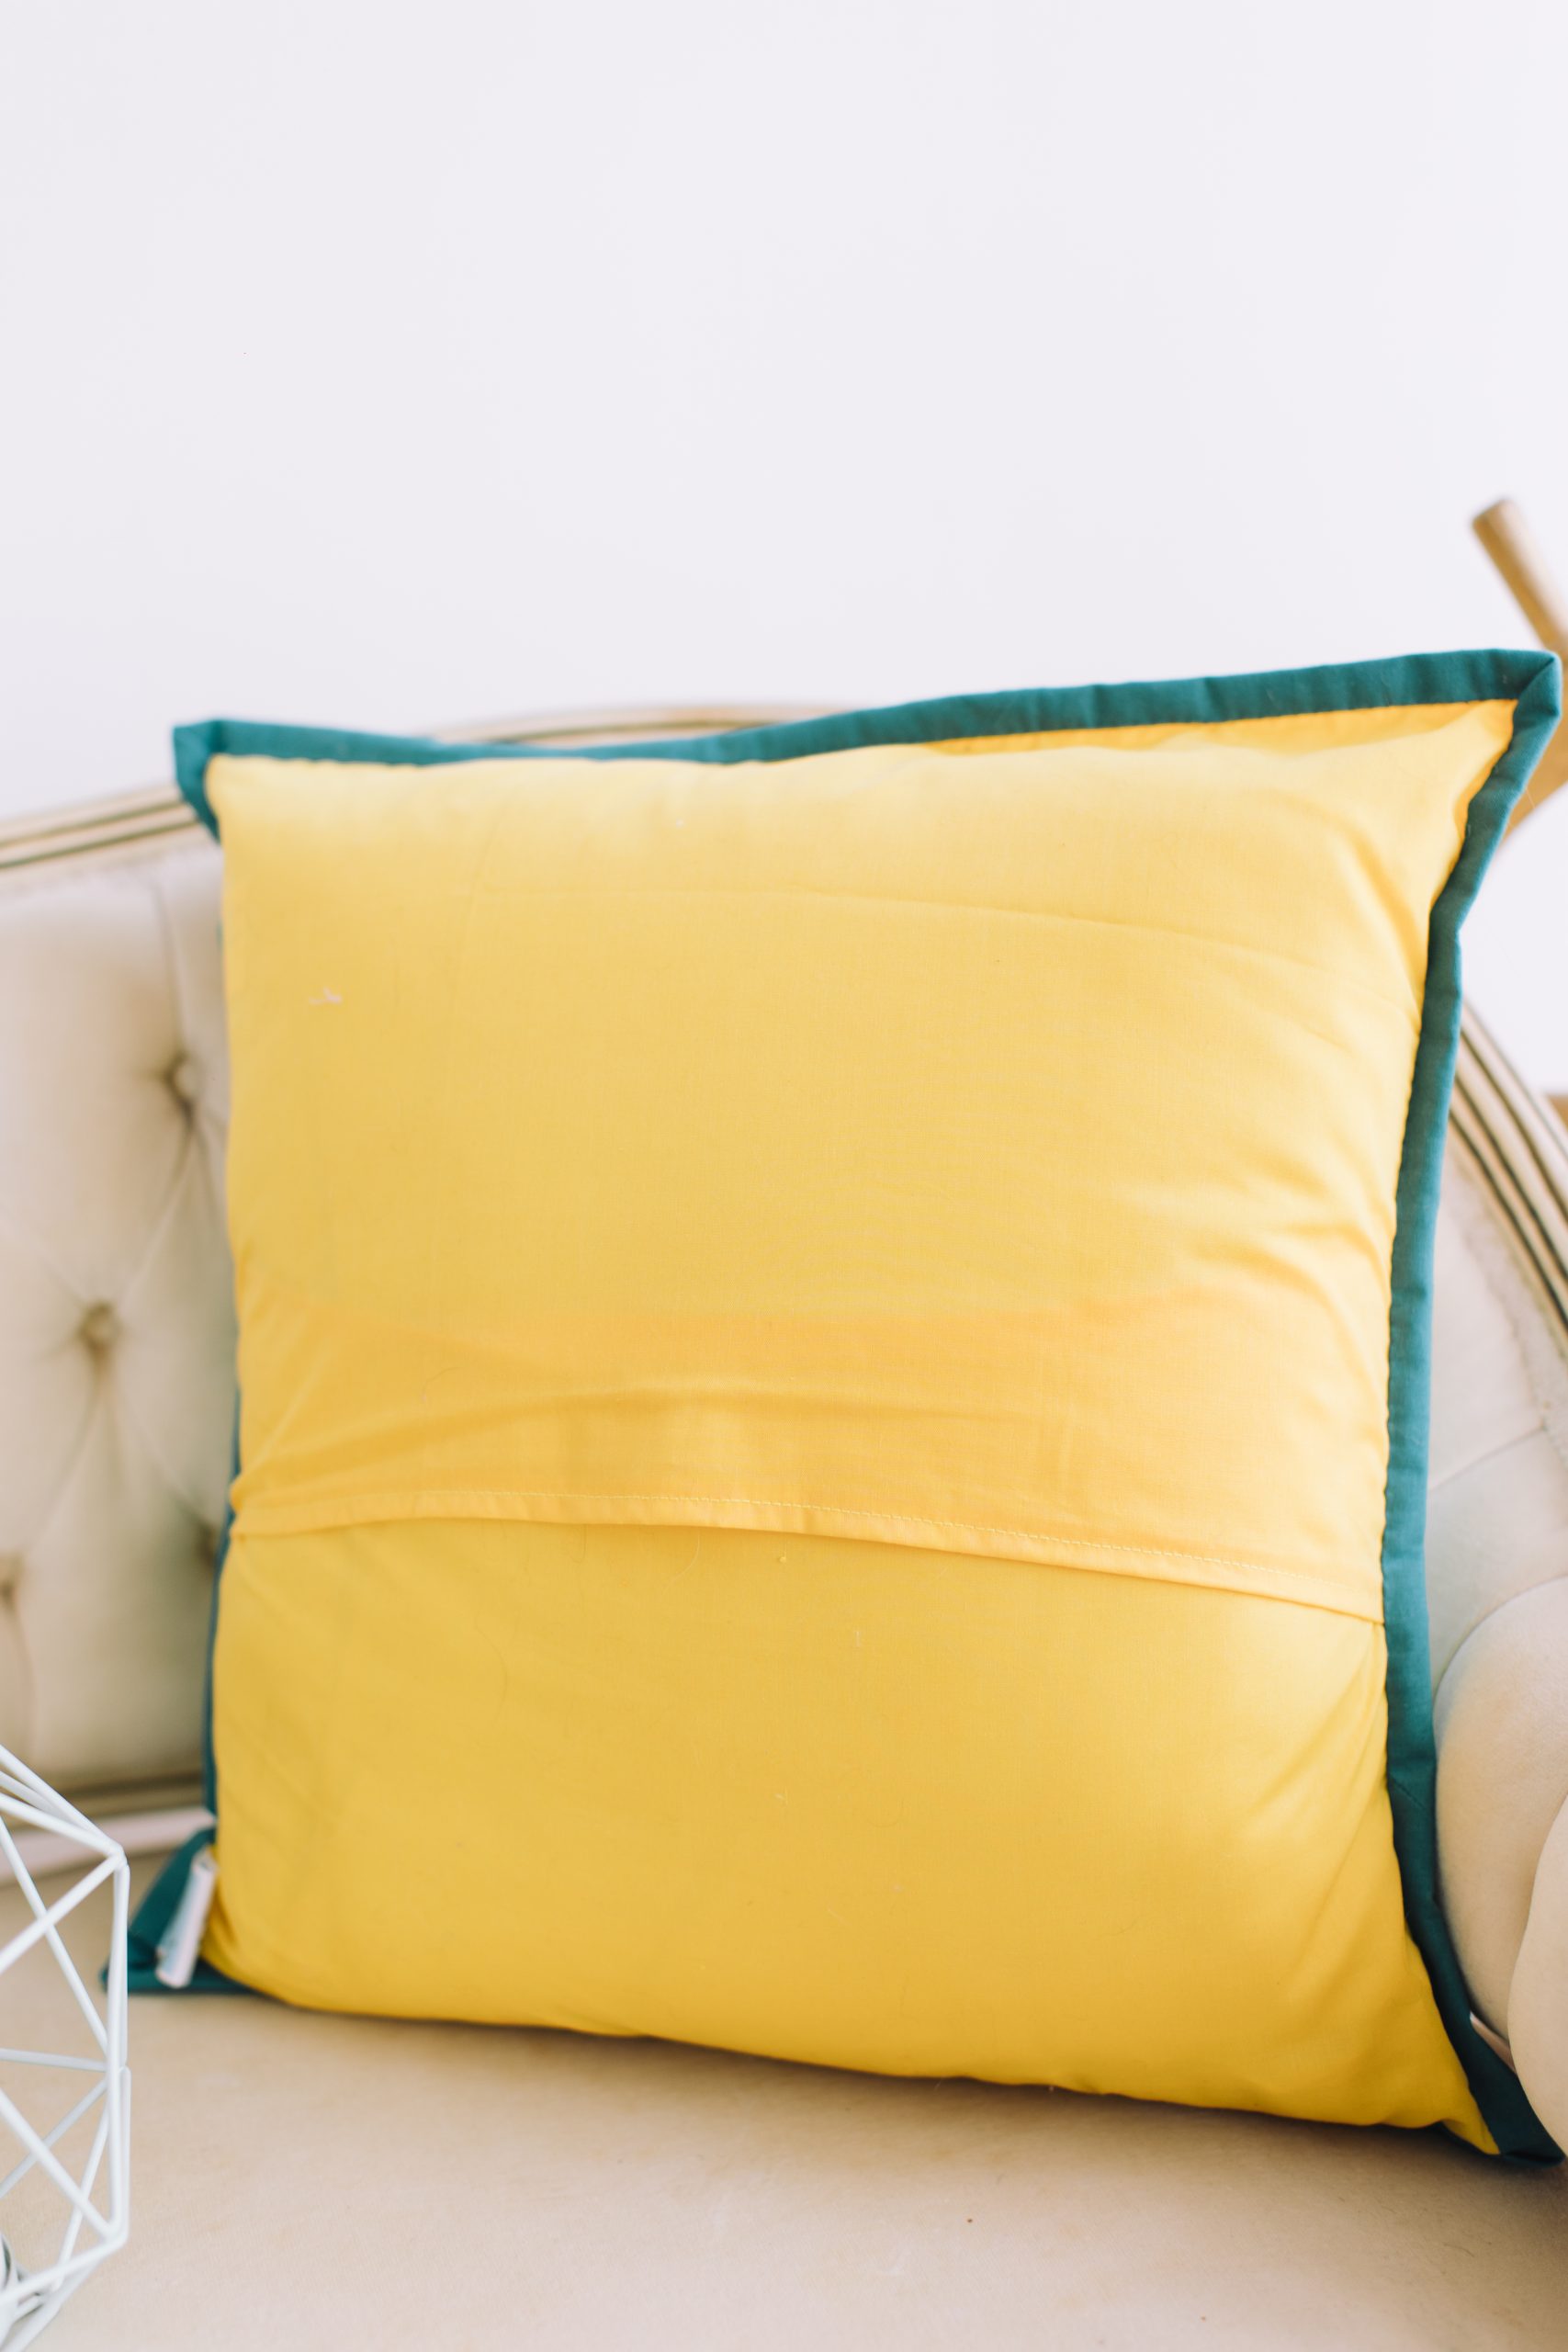
ENVELOPE BACK:
- Two B Yellow 12” x 17 1/2” rectangles.
BINDING:
- Four D Dark green/blue 2 1/2” x WOF.
Sewing Instructions:
MAKING THE CUSHION FRONT:
Tall Ships:
- Place an A White HRT and B Yellow HRT right sides together along the cut diagonal line. Stitch using a scant 1/4” seam allowance. Press the seam towards the darker fabric.

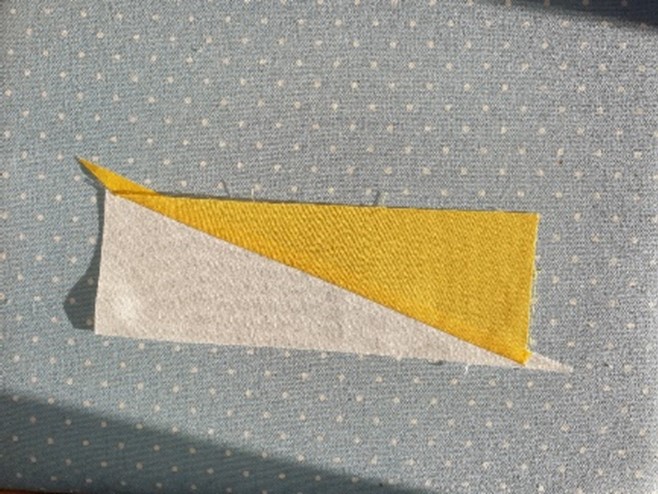
- Trim the blocks by placing the 1/4” mark of the ruler on the diagonal seam, 1/4” away from the edge of the rectangle. Repeat for the opposite side.

- Make two more white/yellow sails.
- With right sides together, stitch the three sails together. Measure the width and length and cut a B Yellow rectangle to make the row 8 1/2” x height of the sails.
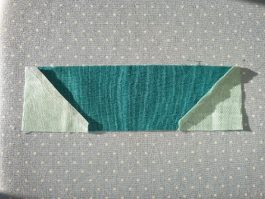
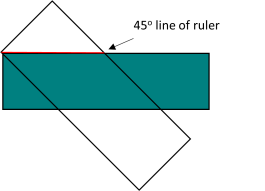
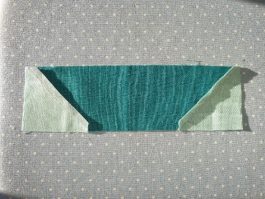
- Cut both sides of the D Dark green/blue rectangle 2 1/2” x 9 1/4” at 45o to make the boat hull shape.

- With right sides together, stitch a C Light green/blue HST to both 45o cut lines. Press towards the dark fabric.
- With right sides together, stitch the hull section to the sail section. Measure the width and length. Make it up to 8 1/2” square by adding a strip of B Yellow to the top if necessary.
- Repeat to make the second Tall Ship square with C Light green/blue and A White sails adding a C Light green/blue strip to the bottom of the block if necessary.
Four Sails:
- With right sides together, stitch one A White HST and one C Light green HST along the diagonal using a scant 1/4” seam allowance. Press the seam towards the darker fabric. Repeat to make three more sails. With right sides together, stitch the sails into a square of four.
- With right sides together, stitch the two C Light green/blue 2 1/2” x 4 1/2” rectangles to the left and right side of the sail square. Press the seams to the darker fabric.
- Cut both sides of the D Dark green/blue rectangle 2 1/2” x 9 1/4” at 45o to make the boat hull shape.
- With right sides together, stitch a C Light green/blue HST to both 45o cut lines. Press towards the dark fabric.
- With right sides together, stitch the top of the hull to the bottom of the sails. Press the seam to the darker fabric.
- With right sides together, stitch a C Light green/blue 2 1/2” x 8 1/2” rectangle to the bottom of the hull. Press the seam to the Light green/blue rectangle.
- Repeat to make the second Four Sails 1/4 square with a B Yellow background.
- With right sides together, stitch the Tall Ships and Four Sails with B Yellow background. Press the seam in one direction.
- With right sides together, stitch the Four Sails and Tall Ships the Light green/blue background. Press the seam in the opposite direction.
- With right sides together, stitch the bottom of the B Yellow background ships to the top of the C Light green/blue background ships. Press the seam to the top of the block.
Adding a Border:
- Make the cushion front up to 17 1/2” unfinished by adding a border.
- To calculate the width of the border:
- 17 1/2 – width of cushion front
- Divide this number by 2 and add 1/2”
- E.g. 17 1/2 – 16 = 1 1/2“
- 1 1/2 ➗ 2 = 3/4”
- 3/4” + 1/2” = 1 1/4” width
- Measure the length of the B Yellow background and add 1/4”. Cut two strips at the correct width.
- Measure the length of the C Light green/blue background and add 1/4”. Cut two strips at the correct width.
- With right sides together, stitch the top of a C Light green/blue strip to the bottom of a B Yellow strip. Press towards the C Light green/blue strip. Repeat for the next border.
- With right sides together, stitch the border strips to the left and right of the cushion front, nesting the seams. Press the seams to the borders.
- Measure the length of the cushion front to calculate the width of the top and bottom borders in the same way. Cut one strip of yellow and one strip of Light green/blue 17 1/2” x the correct width. With right sides together, stitch the B Yellow strip to the top of the cushion front and the C Light green/blue strip to the bottom. Press the seam towards the borders.
MAKING THE ENVELOPE BACK:
- Hem one long edge of each B Yellow rectangle by folding over 1/4” to the wrong side and pressing. Fold again to enclose the raw edge and press. Top stitch to secure the hemmed edge.
- With the cushion front right side down, place the bottom envelope rectangle right side up so the raw edges meet at the bottom and sides and the hemmed edge is towards the centre. Place the top envelope rectangle right side up so the raw edges meet at the top and sides and the hemmed edge is towards the center.
- Pin and baste around the edges to keep the rectangles in place.
PUTTING THE CUSHION TOGETHER:
- Double fold bind the cushion to enclose the raw edges.
- Insert an 18” cushion pad to create a plump throw cushion.