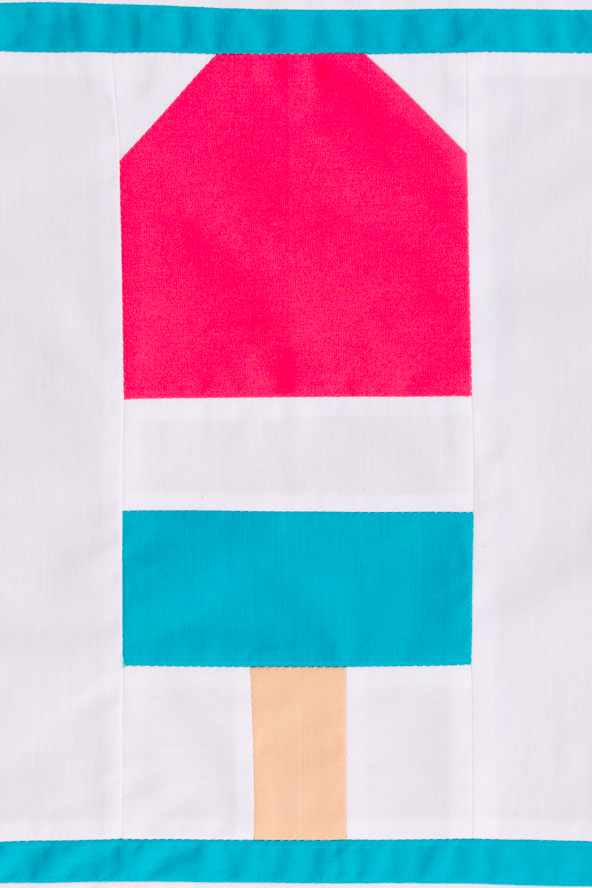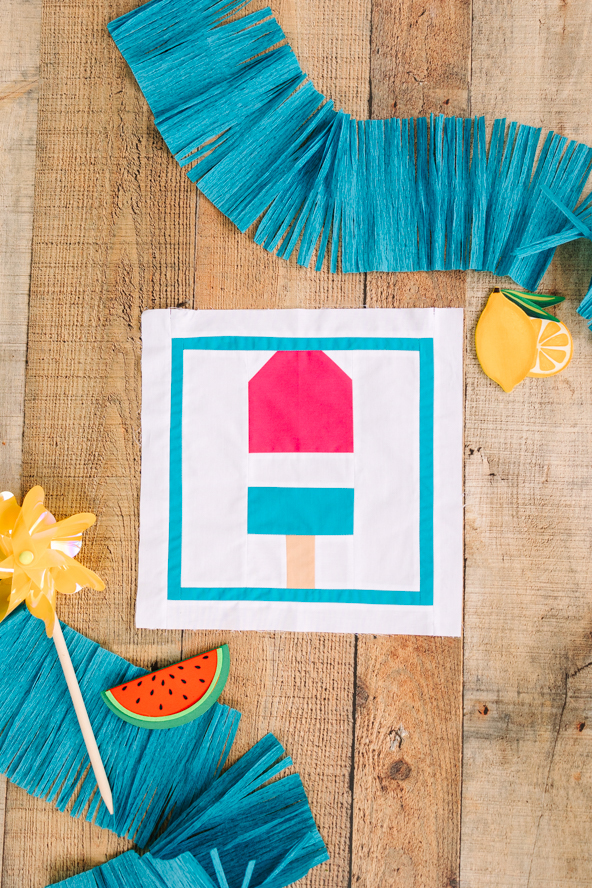
We’re a little obsessed with the clean, vintage design of this whimsical summer quilt block! This ice pop quilt block pattern is a charming project for your summer quilting and is perfect for seasonal mini quilts, throw pillows or table runners. Finishing at a 12” x 12” square, this quilt block pattern can be made using fat quarters and fat eighths if you prefer to work with precuts. Use scrap fabric in retro colors for a delightful vintage vibe or stick with simple solids for a modern look.
DESIGNER NOTES:
- The designer has made their popsicle block with solids for a clean and modern look but you can also use prints for a totally different vibe.
- All fabrics are from the Pure Elements collection by Art Gallery Fabrics.
- You will have enough left over for more than one block. The designer has listed these sizes below because they are the minimums that you can usually purchase. It is a great scrap make though!
- Please read all instructions and assemble requirements before beginning the pattern. Seam allowances are all 1/4” and have already been added.
Materials:
- Fabric:
- Fat quarter white solid. The designer used Snow from the Pure Elements collection.
- 10” sq. pink solid. The designer used Cherry Lip-Gloss.
- Fat eighth turquoise solid. The designer used Cozumel Blue.
- 10” sq. tan solid. The designer used Toasty Walnut.
- Basic sewing and quilting notions
Cutting Instructions:
To make a block 12” sq.:
- From the white solid:
- 2 pieces 3” wide x 9 1/2” long for the left and right side pieces
- 1 piece 4 1/2” wide x 1 3/4” tall for the middle stripe on the popsicle
- 2 pieces 2” wide x 2 1/2” tall for either side of the stick
- 2 pieces 1 3/4” sq. to snowball the upper corners of the popsicle
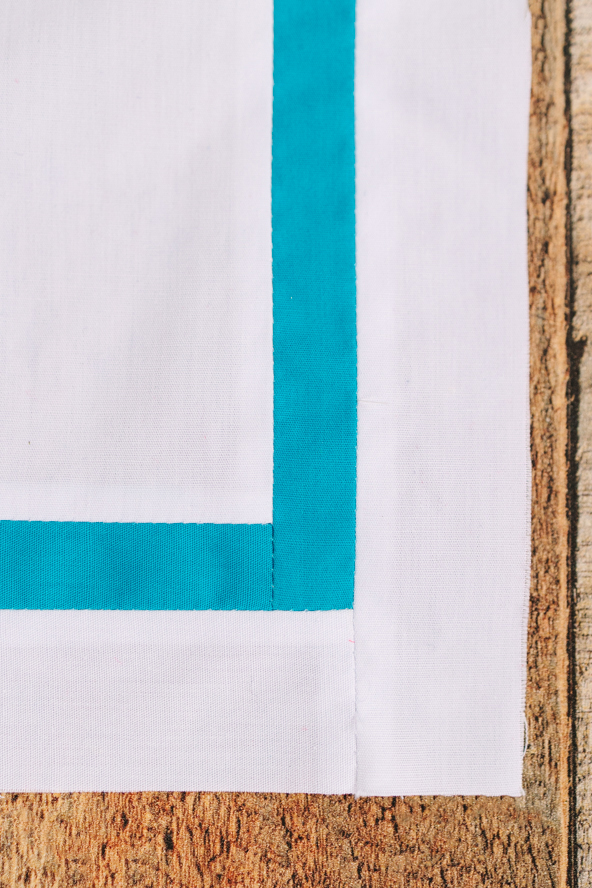
- 2 pieces 1 1/2” wide x 10 1/2” long for the outer sashes on the top and bottom of the block
- 2 pieces 1 1/2” wide x 12 1/2” long for the outer sashes on the left and right of the block
- From the pink solid:
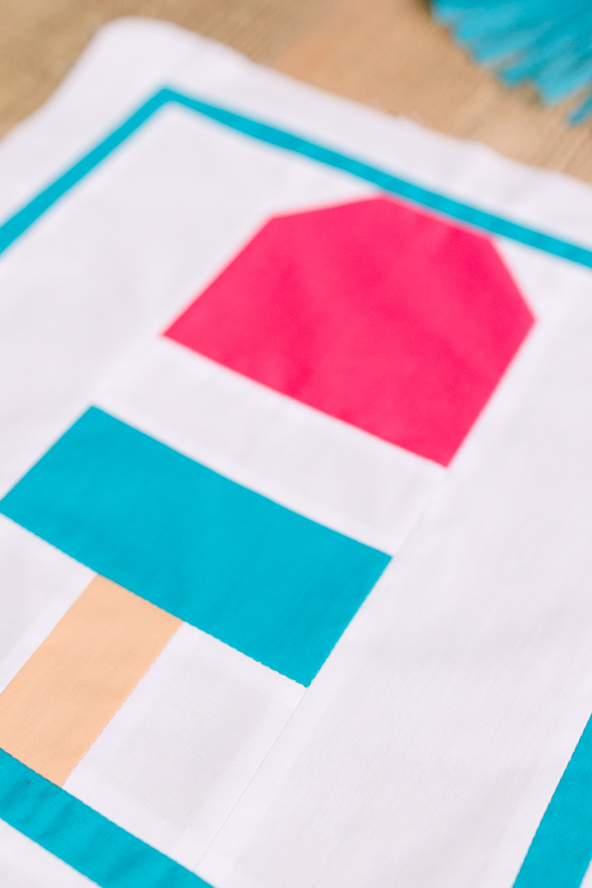
- 1 piece 4 1/2” sq. for the popsicle top
- From the turquoise solid:
- 1 piece 4 1/2” wide x 2 1/4” tall for the lower popsicle stripe
- 2 strips 1” wide x 9 1/2” long for the inner sashes on the top and bottom of the block
- 2 strips 1” wide x 10 1/2” long for the inner sashes on the left and right hand sides of the block
- From the tan solid:
- 1 piece 1 1/2” wide x 2 1/2” tall for the stick
Sewing Instructions:
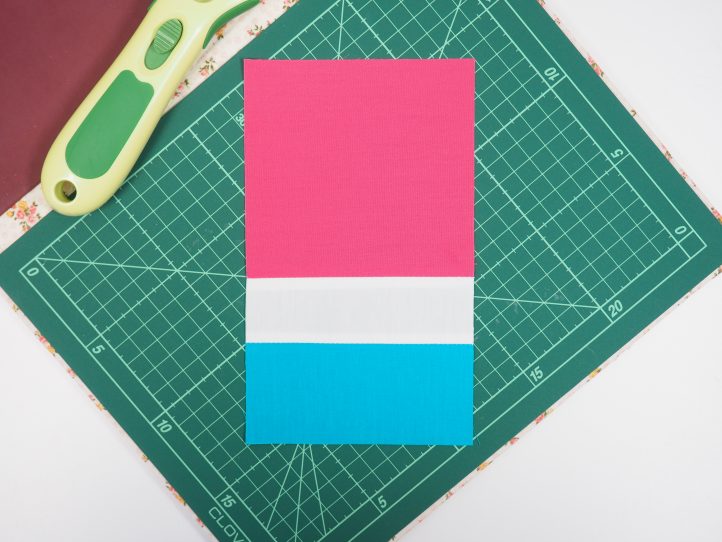
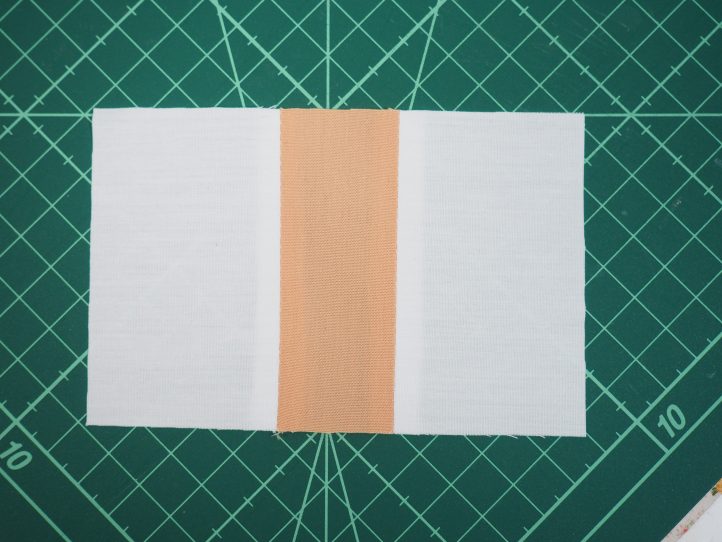
- Begin by joining the pink, white, and turquoise strips together. Press the seams open. TIP: Pressing open or closed? This is quite an old debate which is now a bit superfluous with modern sewing machines in the mix. When quilting was done by hand, the seams were pressed to the side to strengthen them and to stop the contents (which could be anything from old clothing to newspaper) from coming out. Nowadays (we are fast-forwarding about 200 years here), we have sewing machines with consistent stitches, strong threads and ‘proper’ batting. The designer prefers to usually press the seams open because it reduces bulk.
- Take the two snowball squares and lay one in the top left hand corner of the pink section. Sew across diagonally. TIP: Even though it is only a small seam, the designer always draws a diagonal line to follow.
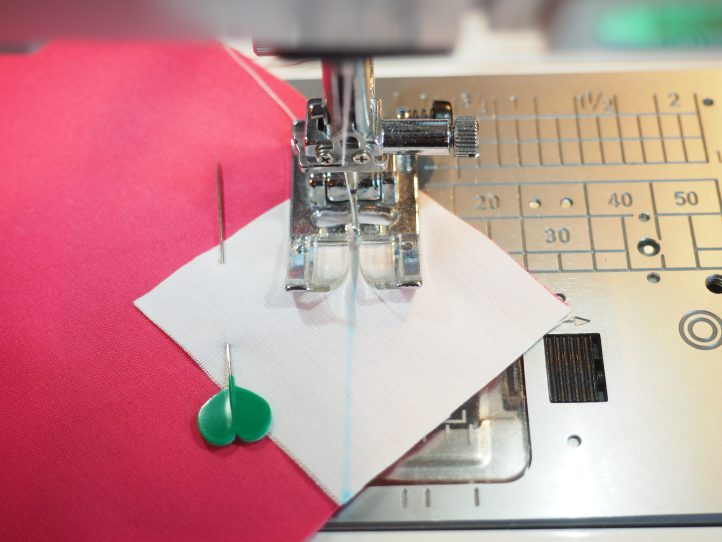
- Trim 1/4” under your seam.
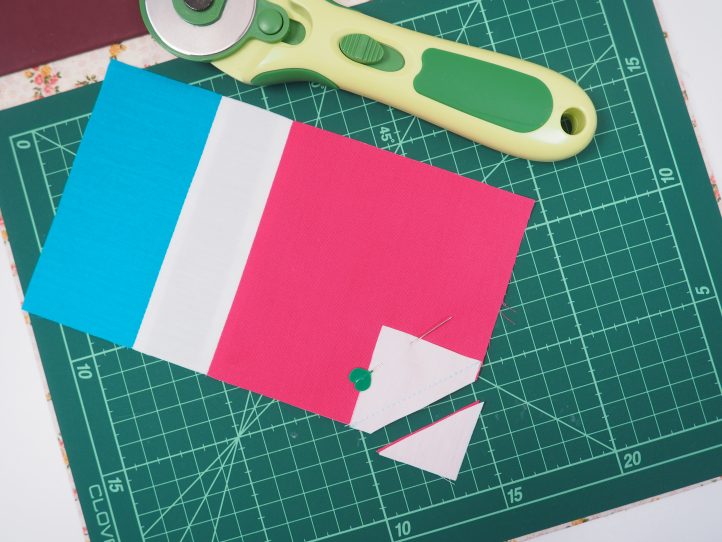
- Flip the layers open and press the seam open.
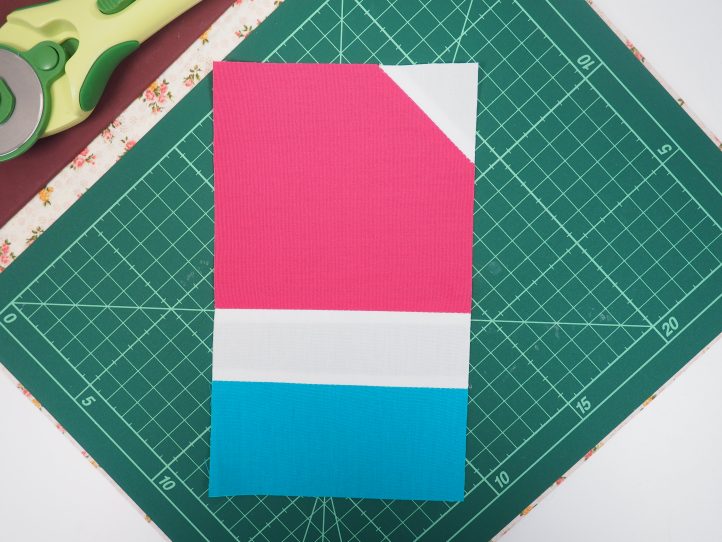
- Repeat for the other side.
- The stick comes next. Add a white panel on either side of the brown strip.
- Press both seams open and attach this to the main popsicle and press.
- A white strip goes on both sides of the popsicle.
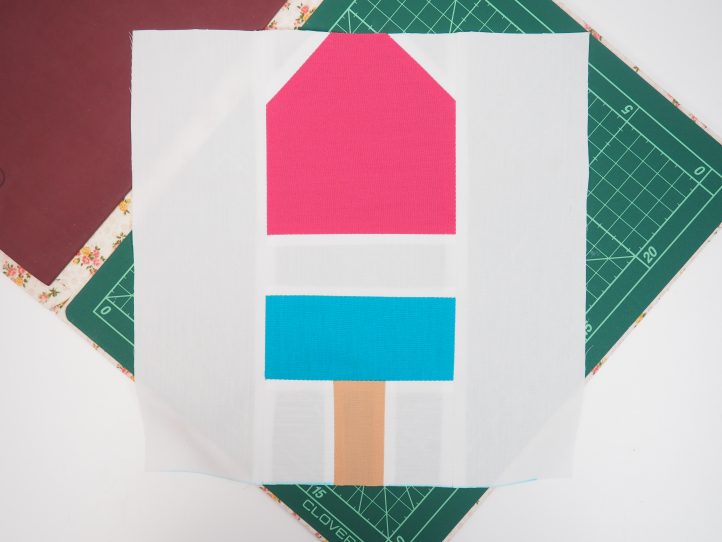
- Press and trim what you have so far to 9 1/2” square.
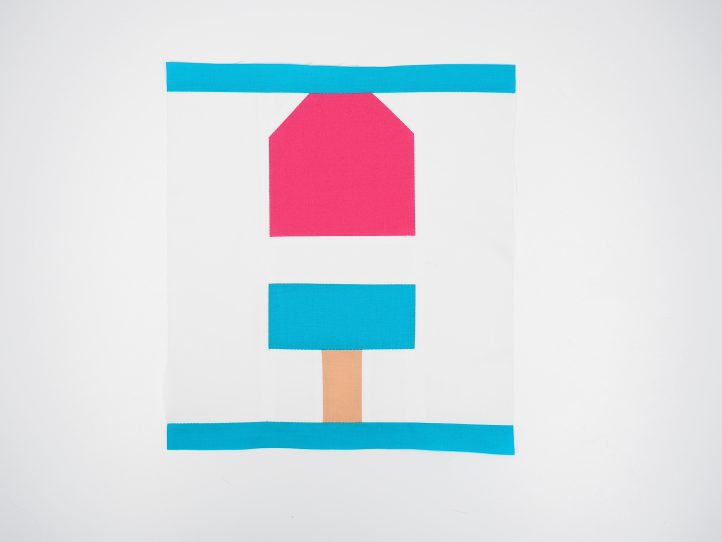
- The blue sashes come next, on the top and bottom of the block, followed by the blue sashes on the left and right hand sides. Press everything well.
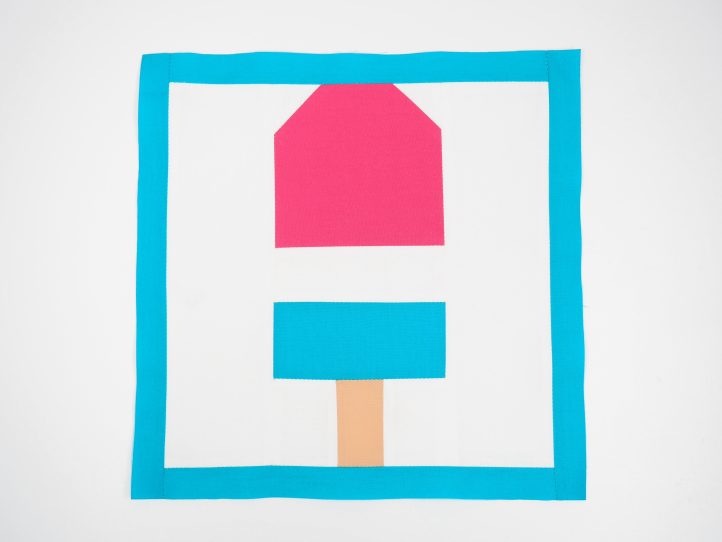
- Finally, the white outer sashes on top and bottom and then on the left and right. TIP: The sashes are added in this order so that the corners are neat and orderly.
- The outer sashes are slightly wider than needed for ease of handling and also to allow you to trim your block to 12” when you are finished.
- Trim your block to 12” and press again. TIP: If you are making a project with more than one block, you can vary the colored sash to pink or blue to bring in some lovely summer variation.
- TIP: This makes a great summer table runner and if you would rather stop at one block, you can use what you have now as a front pocket on a summer bag or a cute table mat.