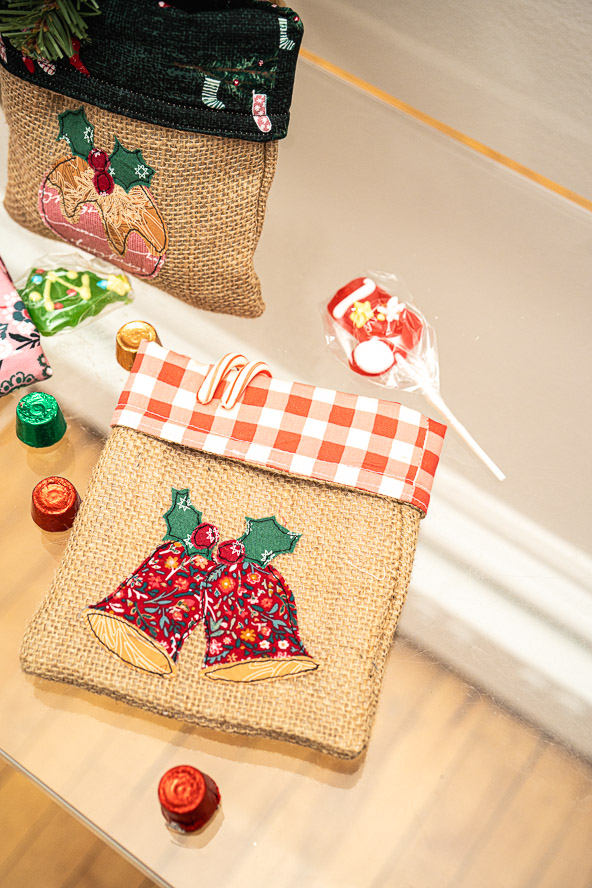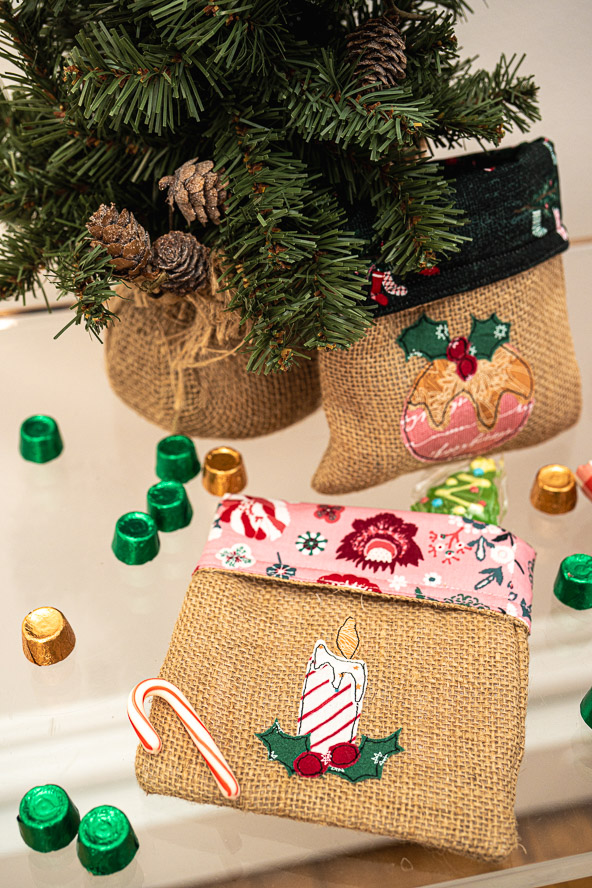
Love rustic chic holiday décor? Then you’ve got to see these beautiful burlap treat sacks! Perfect for gift giving and party favors this holiday season, these sewn Christmas gift bags are wonderful for holding stocking stuffers, candy and other treats. Use up your leftover holiday prints to create the fun Christmas motifs featured on the front of your bags while lining your treat sacks with fat eights in coordinating winter designs.
Designer Notes:
- Please read all instructions and assembly requirements before beginning the pattern.
- Seam allowances are all 1/4” and have already been added.
Materials:
- Fabric: *Note: All fabrics (except burlap) are by Art Gallery Fabrics.
- Scraps of pretty Christmas fabrics. The designer used a selection from the Wintertale FQ collection by Katarina Roccella for AGF.
- Some scraps of other colors are handy too. Have a look in your stash for candle colors and flame colors. The designer used AGF Floral Elements.
- 3x Fat Eighths Coordinating fabric for lining. The designer loves Small Plaid of my Dreams by Maureen Cracknell for AGF and chose coral for one of the sacks and two of the FQs from the Wintertale FQ pack for the third.
- 1/3 yd. natural burlap fabric for the bag exteriors
- Interfacing:
- FQ Bondaweb (Vlieseline) or similar product for appliqué
- 1/3 yd. G740 or similar fusible interfacing
- TIP: This is similar to fine cheesecloth in weight and has glue on one side.
- Black thread for the appliqué
- Scissors
- Fabric markers
- Extra feet for your sewing machine (darning foot, for example)
- PDF Template – This is located at the bottom of this page. Please see printing instructions below.
PRINTING INSTRUCTIONS:
Note: To download the template, click on the pattern download button at the bottom of the page. We recommend opening your pattern download using Adobe Acrobat.
Cutting Instructions:
From the Fat Quarters and scraps (for the appliqué):
- Using the templates, choose suitable fabrics for the pieces, using the main photo as a guide.
From the burlap:
- Cut 6 pieces 6 1/2” wide x 8 3/4” tall for the bag exterior panels.
From the lining fabric:
- From each of the three lining fabrics, cut two pieces 6 1/2” wide x 8 3/4” tall.
From the G740 interfacing:
- Cut 6 pieces 6 1/2” wide x 8 3/4” tall for the burlap interfacing.
Sewing Instructions:
PREPARATION:
- Fuse the G740 interfacing to one side of each of the burlap pieces. This will give it some body and stop it from moving about (and fraying) quite so much. This makes it easier to work with and it will sit better on the table.
- Whichever side you interface will become the ‘wrong side’.
- The Bondaweb for the appliqué has a smooth (paper) side and a rough (glue) side. Using the smooth side, trace the appliqué components from the template.
- Cut the pieces out roughly and iron to fuse them to the wrong side of the chosen fabrics.

- Cut each piece out exactly now and build the appliqué motifs onto the right side of one of the pieces of burlap. To get this just right, the burlap is aligned with the two short ends top and bottom. Build the appliqué motif 1” up from the bottom edge in the middle. Iron to fuse the appliqué pieces into place.
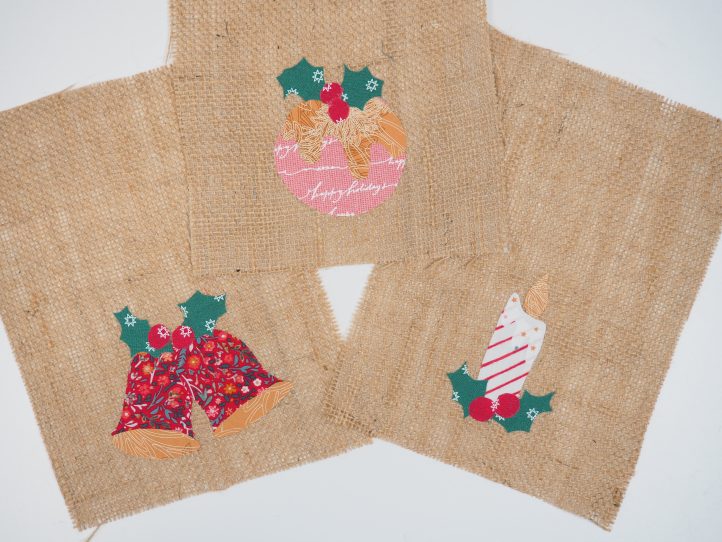
- TIP: Whichever piece of burlap you choose for the appliqué will become the bag front. Put the other three pieces (the back panels and two lining panels) aside for the time being.
- Set your machine up for Free Motion Embroidery (FME). Most modern machines can do this and you need to either drop the feed dogs or set the stitch length to zero. Consult your own machine manual for details. Thread your machine with black thread and use a darning foot.
- Embroider the motifs about 1/8” in from the edge of each and don’t try to be super neat.

- Trim the threads away from the front and the back.
- TIP: The embroidery will not unravel if you use a tiny stitch length such as a #2 or smaller.
- Repeat for the other motifs.
MAKING:
- To make a bag, you will need an appliquéd front panel and the plain burlap back panel. Pin the panels right sides together. Sew the two long sides and across the bottom edge and leave the top edge open.
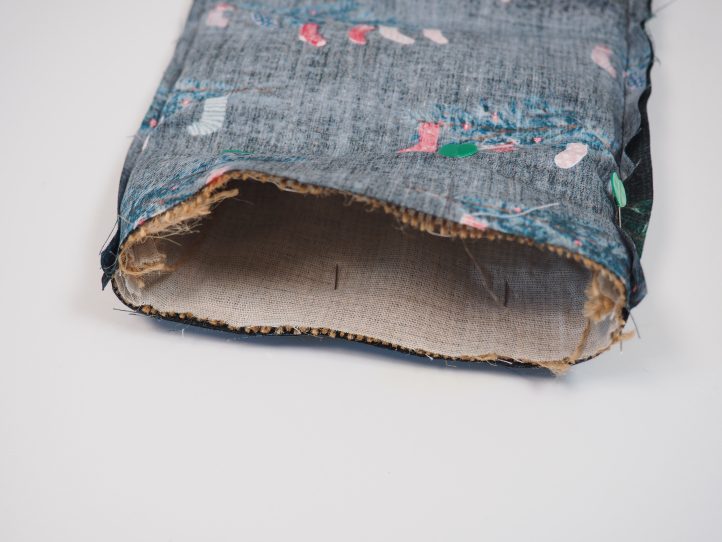
- Do the same with two matching lining panels but this time, leave a 2 1/2” gap in the bottom seam.
- Clip across the corners to reduce bulk and turn the bag exterior the right way out. Gently poke the corners out to make them nice and sharp.

- With the burlap exterior the right way out and the lining inside out, pull the lining on over the outer so that the right sides are facing. Make sure that the side seams match as perfectly as possible. Pin or clip the top edge.
- Sew right around the top edge leaving no gaps.
- Turn the bag the right way out through the gap in the lining and close the gap. Stuff the lining down into the bag and make sure that the lining/exterior edge is perfect. Press the edge and topstitch twice around with matching thread.
- TIP: You can either use a twin needle for this or simply go around twice. The first pass at about 1/8” and the second, 1/4” under that.
- Fold the bag top over by 2 1/2” and it is ready to be loaded with treats!
- TIP: You can also put a cord around the bag to keep it closed until needed. Simply tie a piece of nice, Christmas colored cord around the top, just under the fold over.
- Repeat for the other two bags.