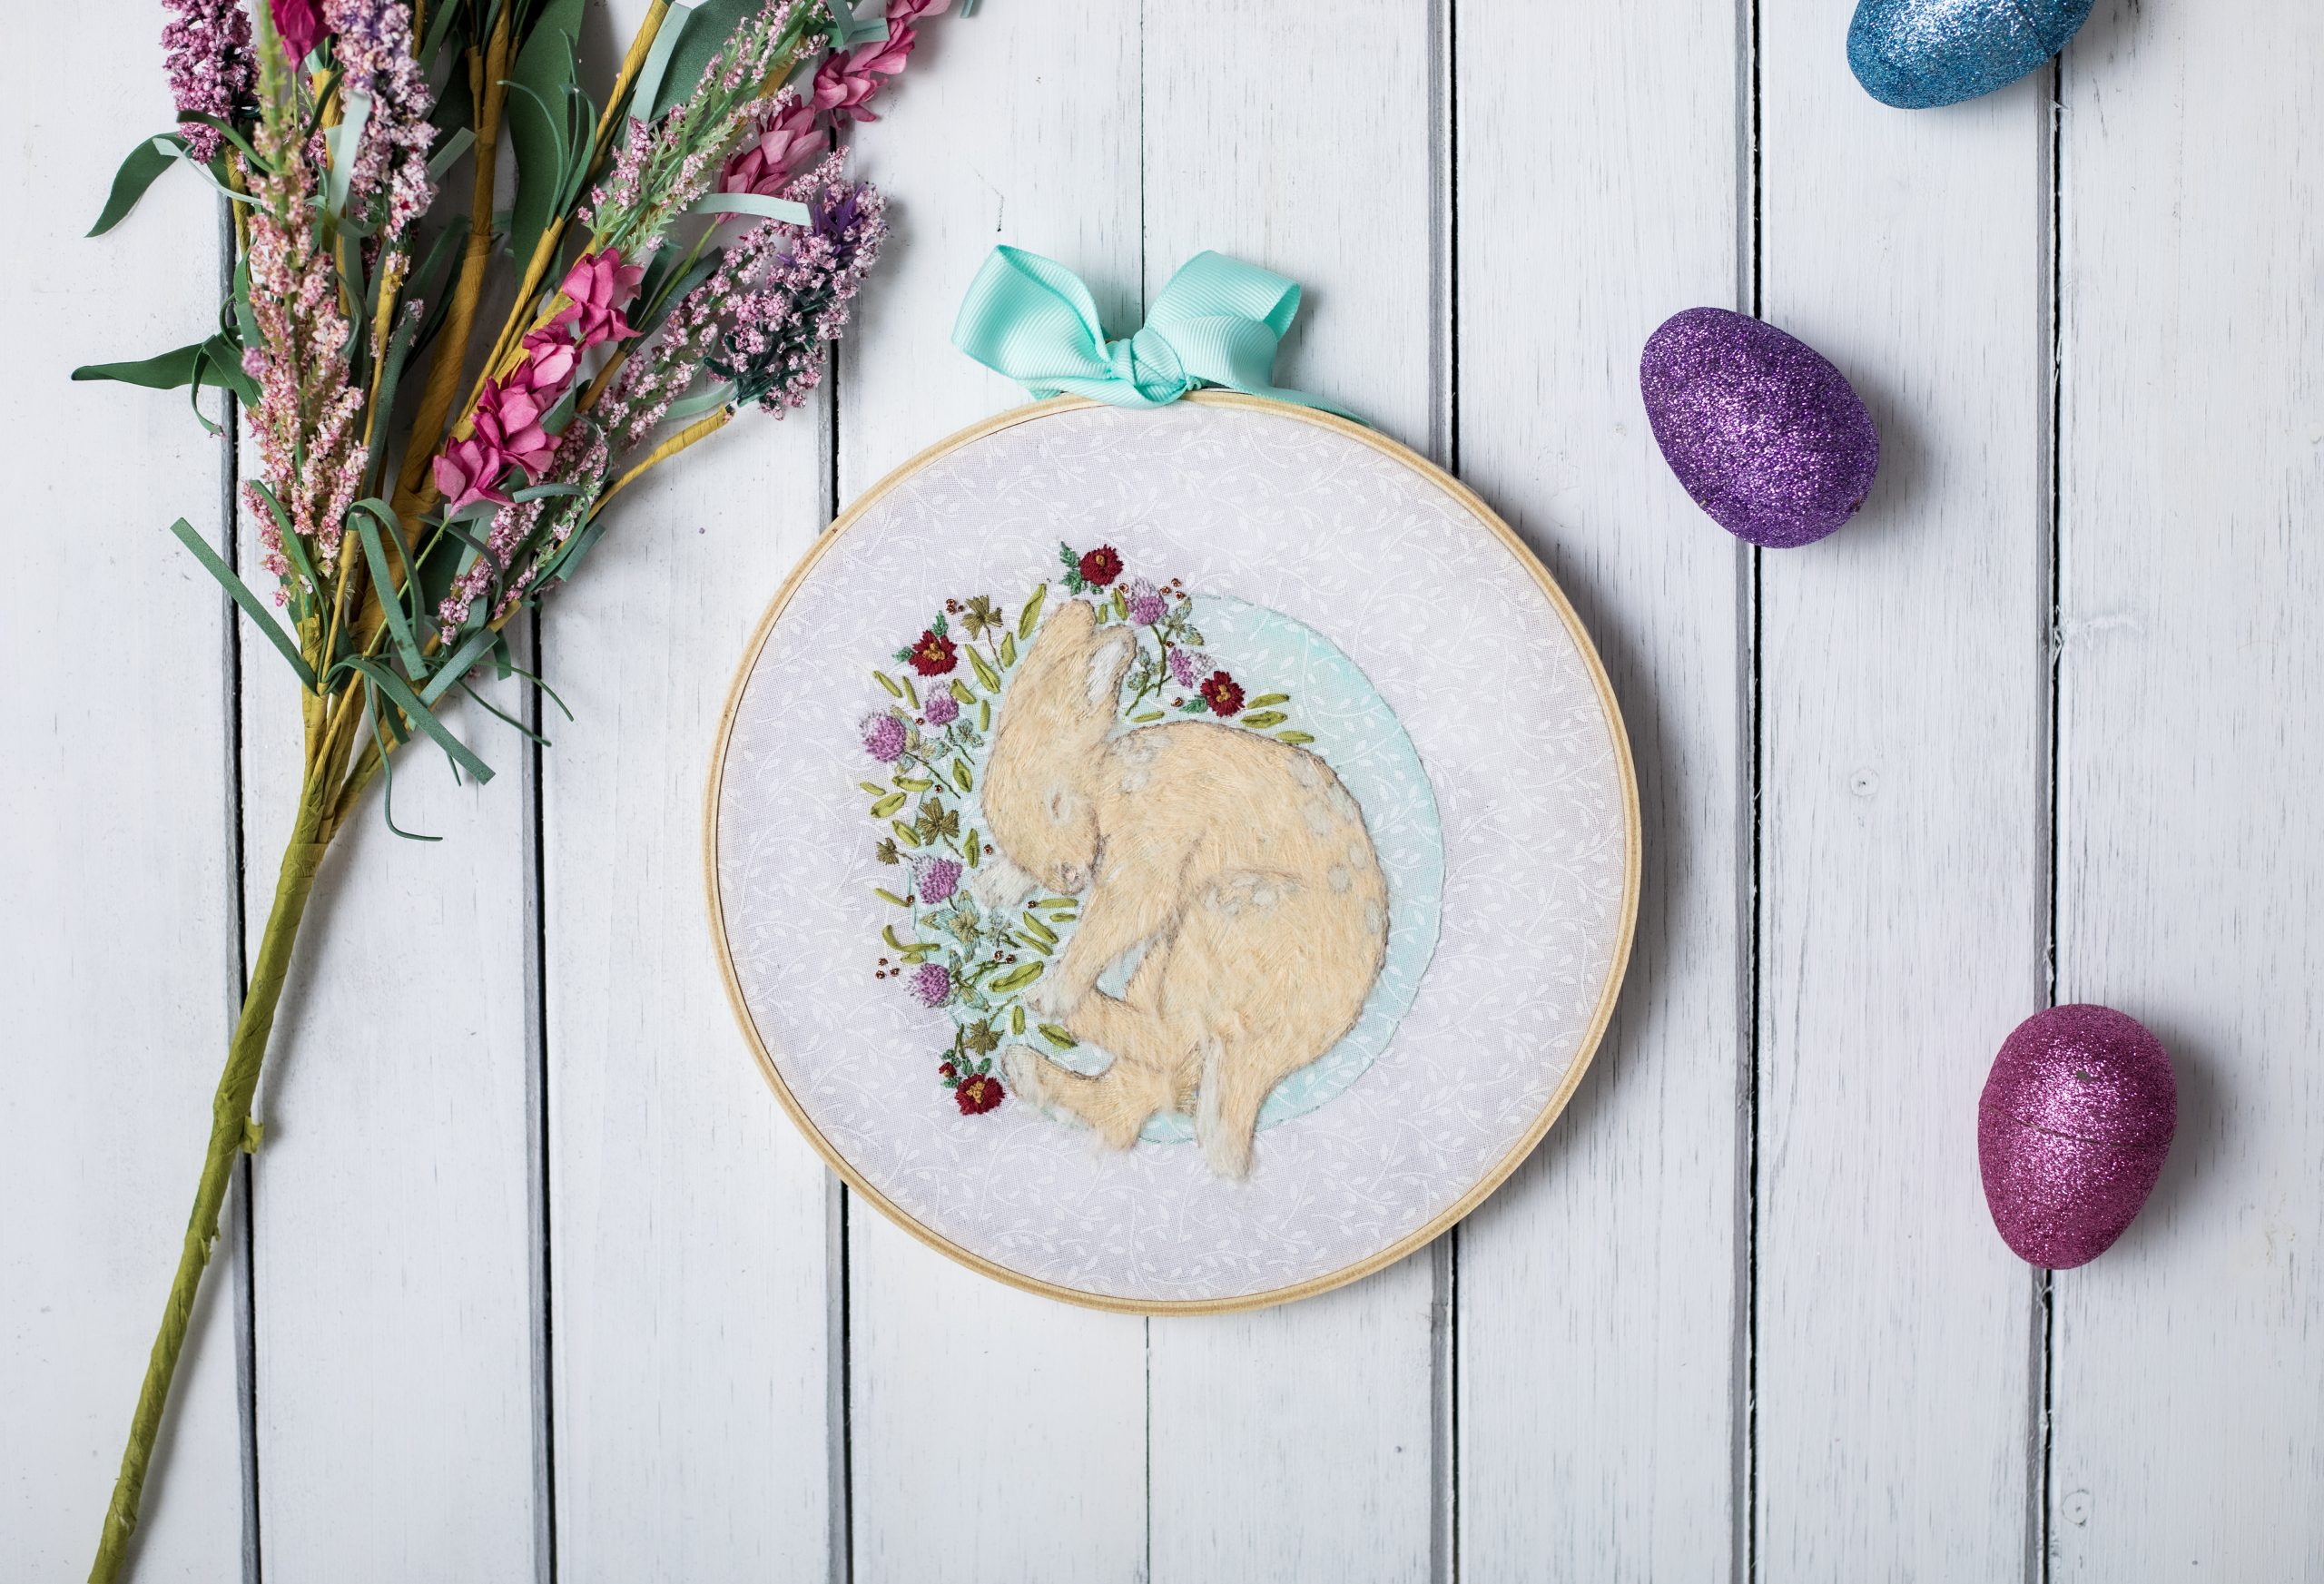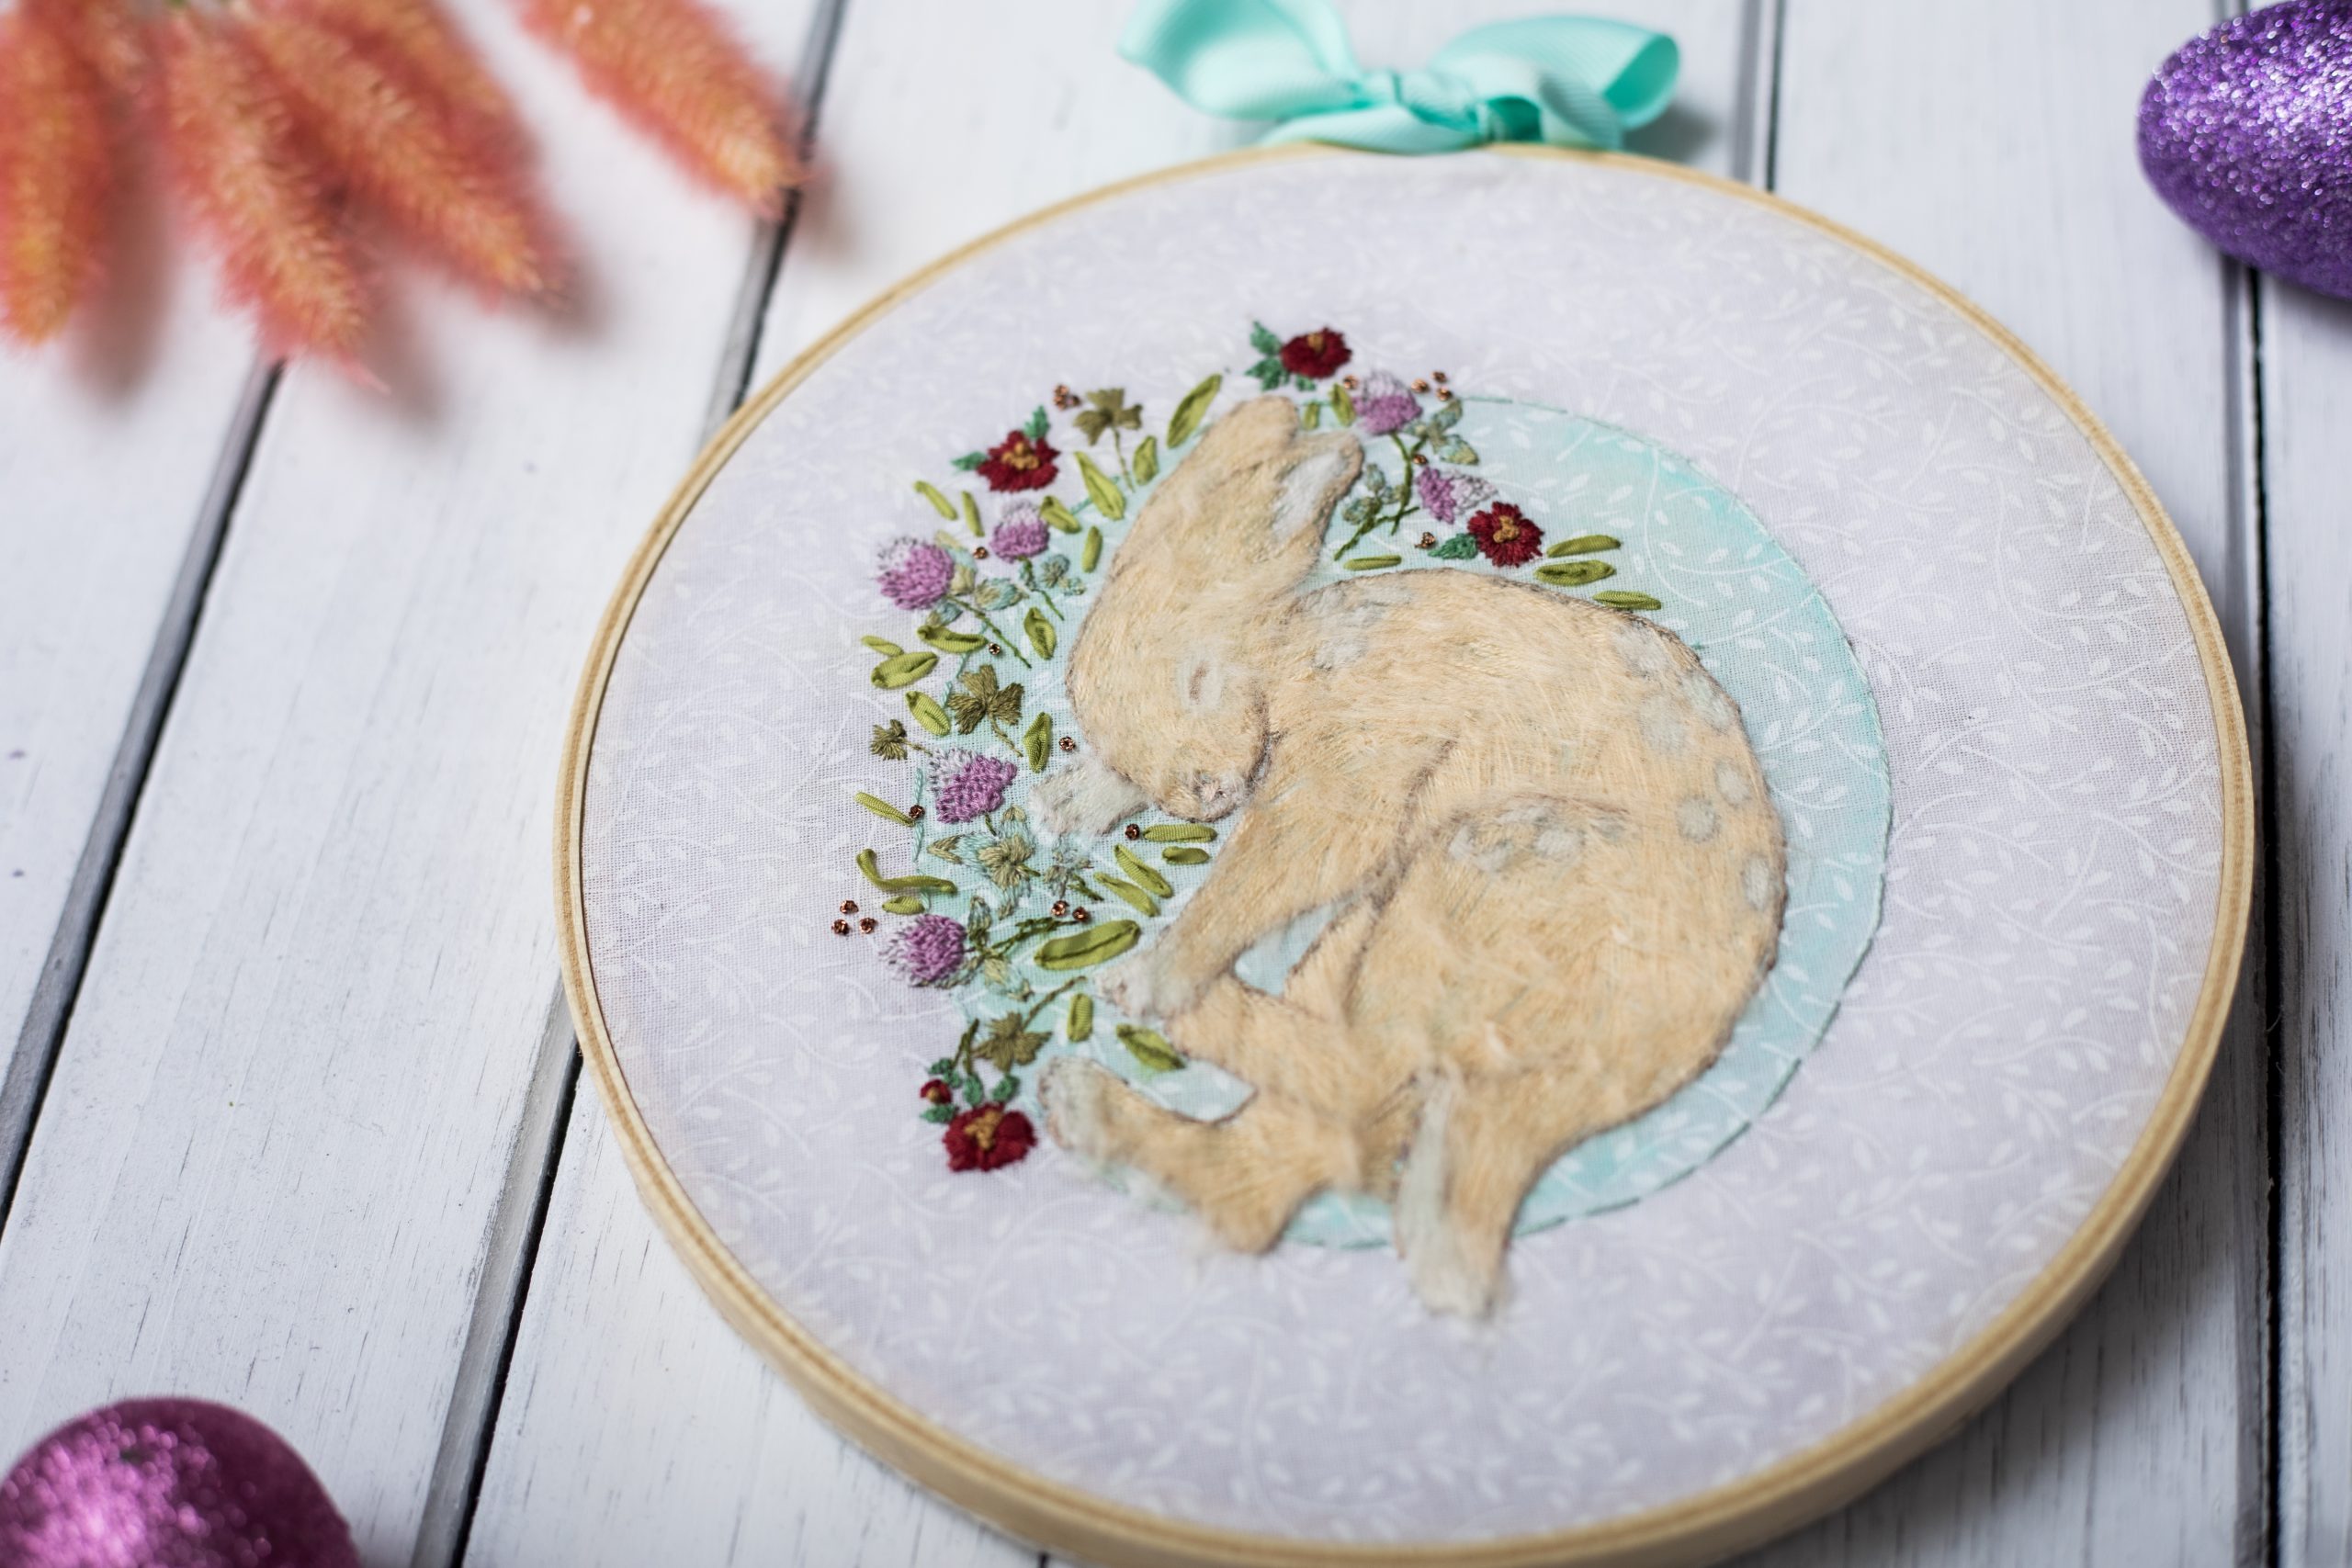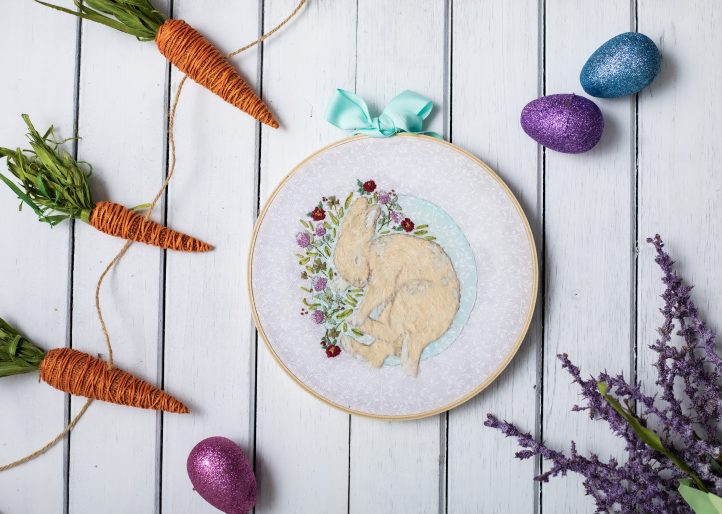
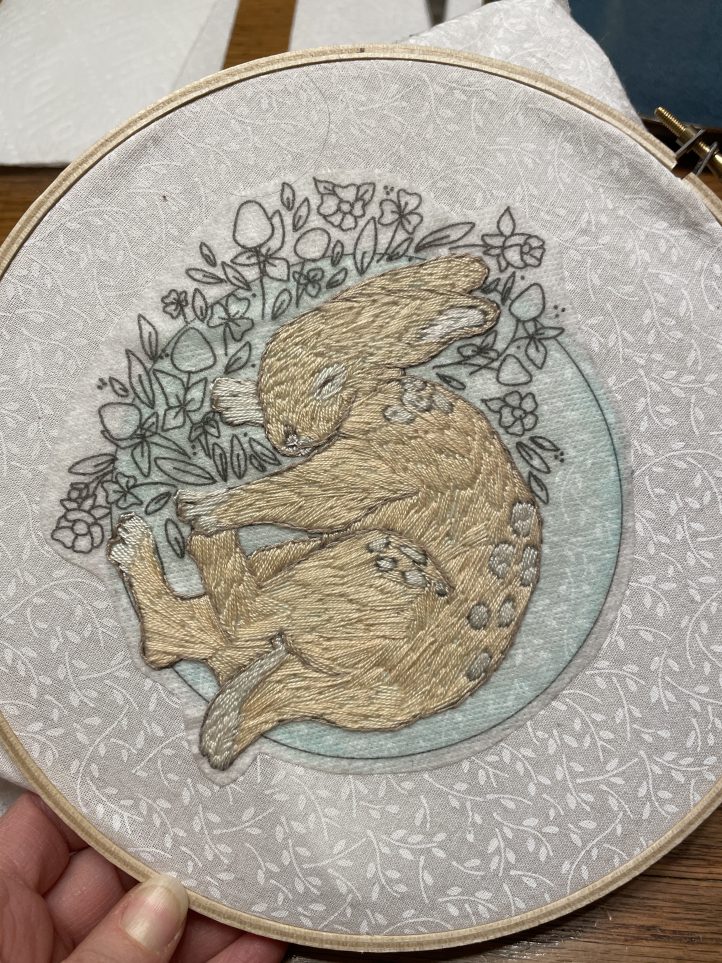
Embroidery patterns don’t get cuter than this! Celebrate the arrival of Easter with a precious embroidery pattern from Jennifer Carson. Displaying a delicate sleeping bunny, this showstopping design is accented with a bed of tiny purple flowers. Finish your embroidery hoop with some pastel grosgrain ribbon and display your pattern as delightful Easter wall décor.
Materials:
- Cotton fabric 12” x 12”
- Watercolor pencil in mint green
- Liquitex Acrylic fabric medium
- 8” embroidery hoop
- Soft paintbrush
- DMC embroidery floss: # 3864, 819, 504, 469, 3013, 3012, 24, 3836, 3828, 221, 320
- 4mm Pure Silk, ribbon in Pale Grass
- DMC Diamont D301 (copper)
- Sulky Threads, Filaine 3401 and 3122
- Filaine wire brush
- Sulky Stick n Stitch
- PDF Pattern – This is located at the bottom of this page. Please see printing instructions below.
PRINTING INSTRUCTIONS:
Note: To download the pattern, click on the pattern download button at the bottom of the page. We recommend opening your pattern download using Adobe Acrobat.
Instructions:
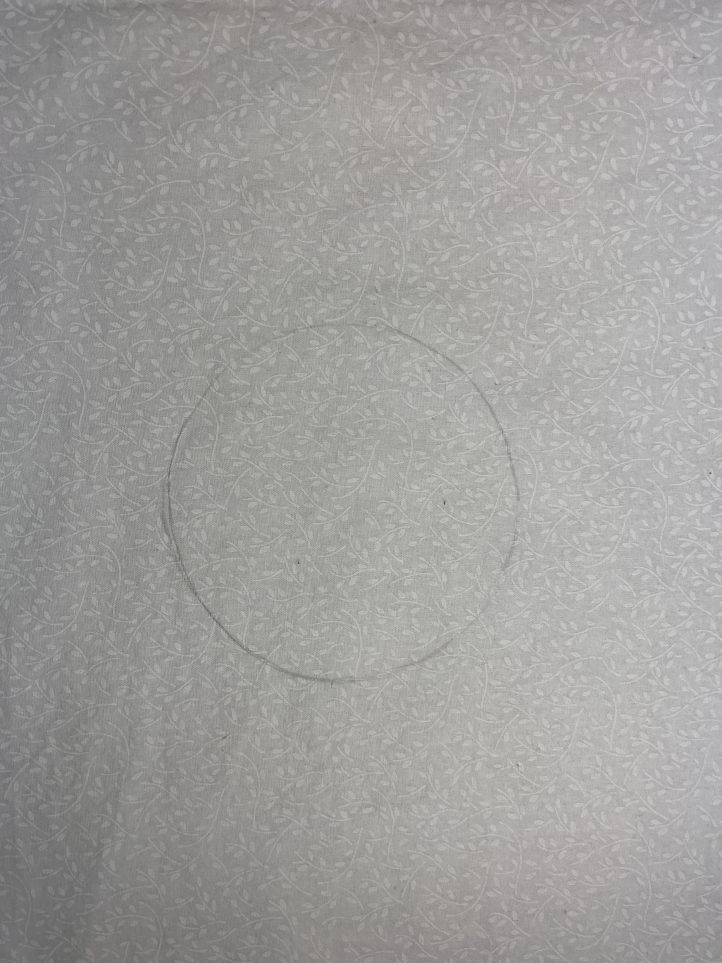
- Begin by cutting a piece of cotton fabric 12” x 12” square. This is your base fabric to embroider onto.
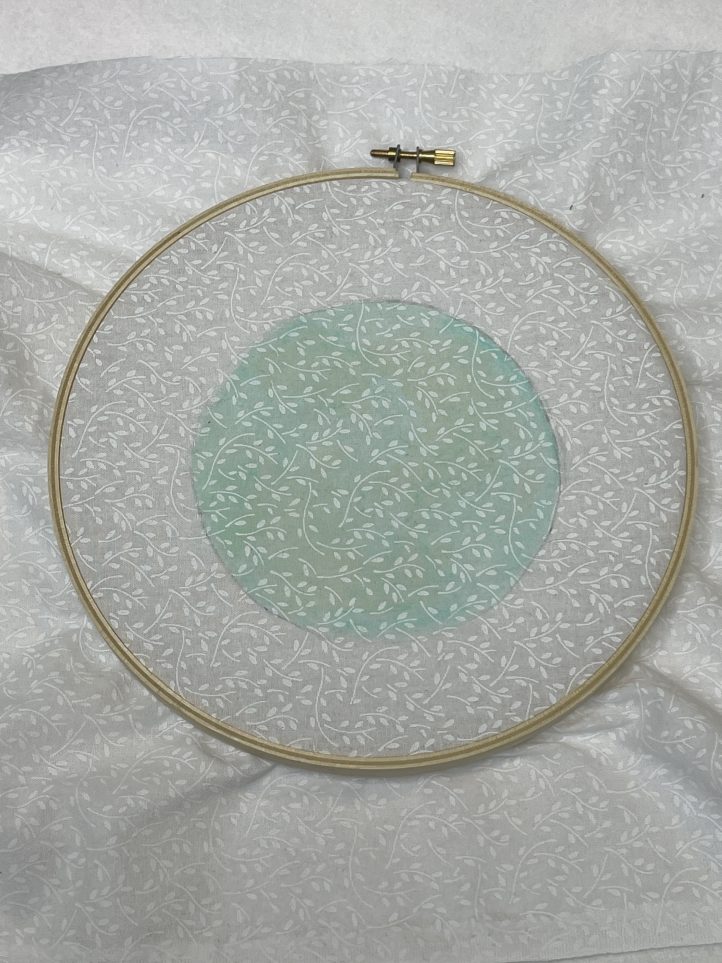
- In the center of your square, trace the circle from the sleepy bunny embroidery pattern lightly with a washable pencil. Color the circle in with your watercolor pencil.
- With a soft paint brush, paint a light layer of fabric medium. If you find there are a few spots that don’t have enough color, you can add more with your watercolor pencil now. If you’d like a lighter color, add a bit of water, but don’t get it too runny—You don’t want the color to run out of the circle you drew.

- Let it dry overnight. Then center your circle in the 8” embroidery hoop.
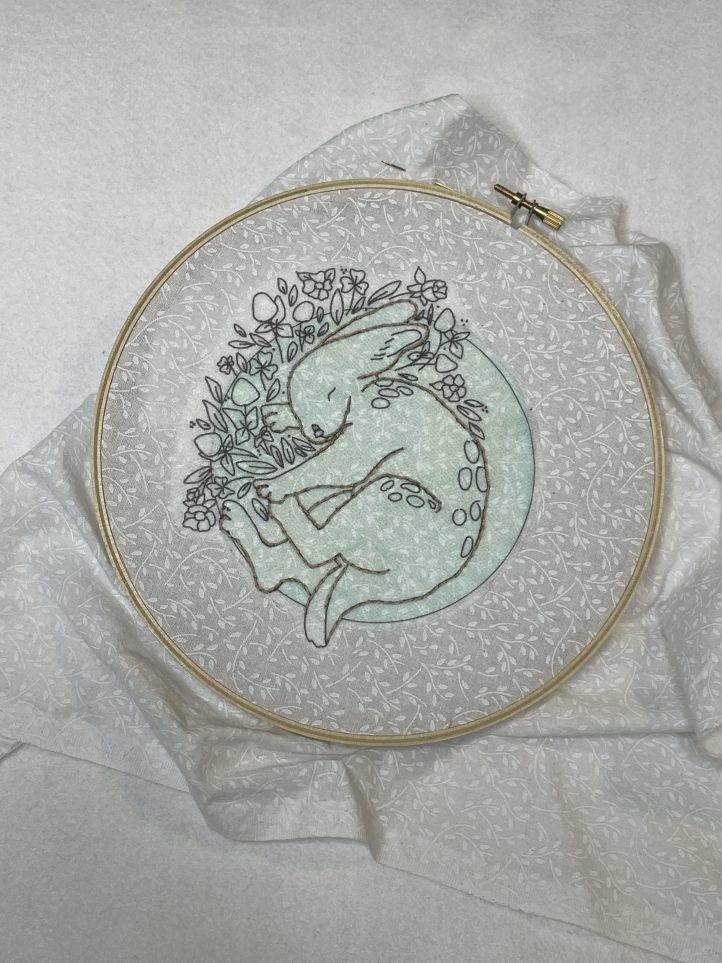
- Print or trace the sleepy bunny design from the sleepy bunny embroidery pattern onto the Sulky Stich n’ Stick. Cut the design out of the transfer paper close to the circle. Peel the backing paper off and stick it to the front of your embroidery base, using the circle to help place it correctly.
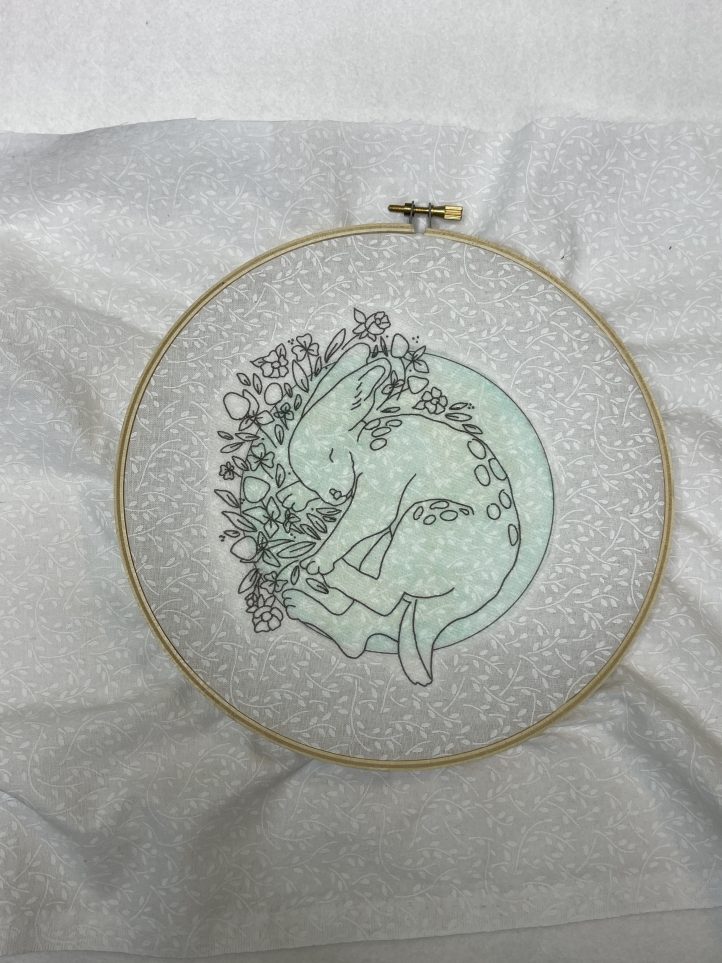
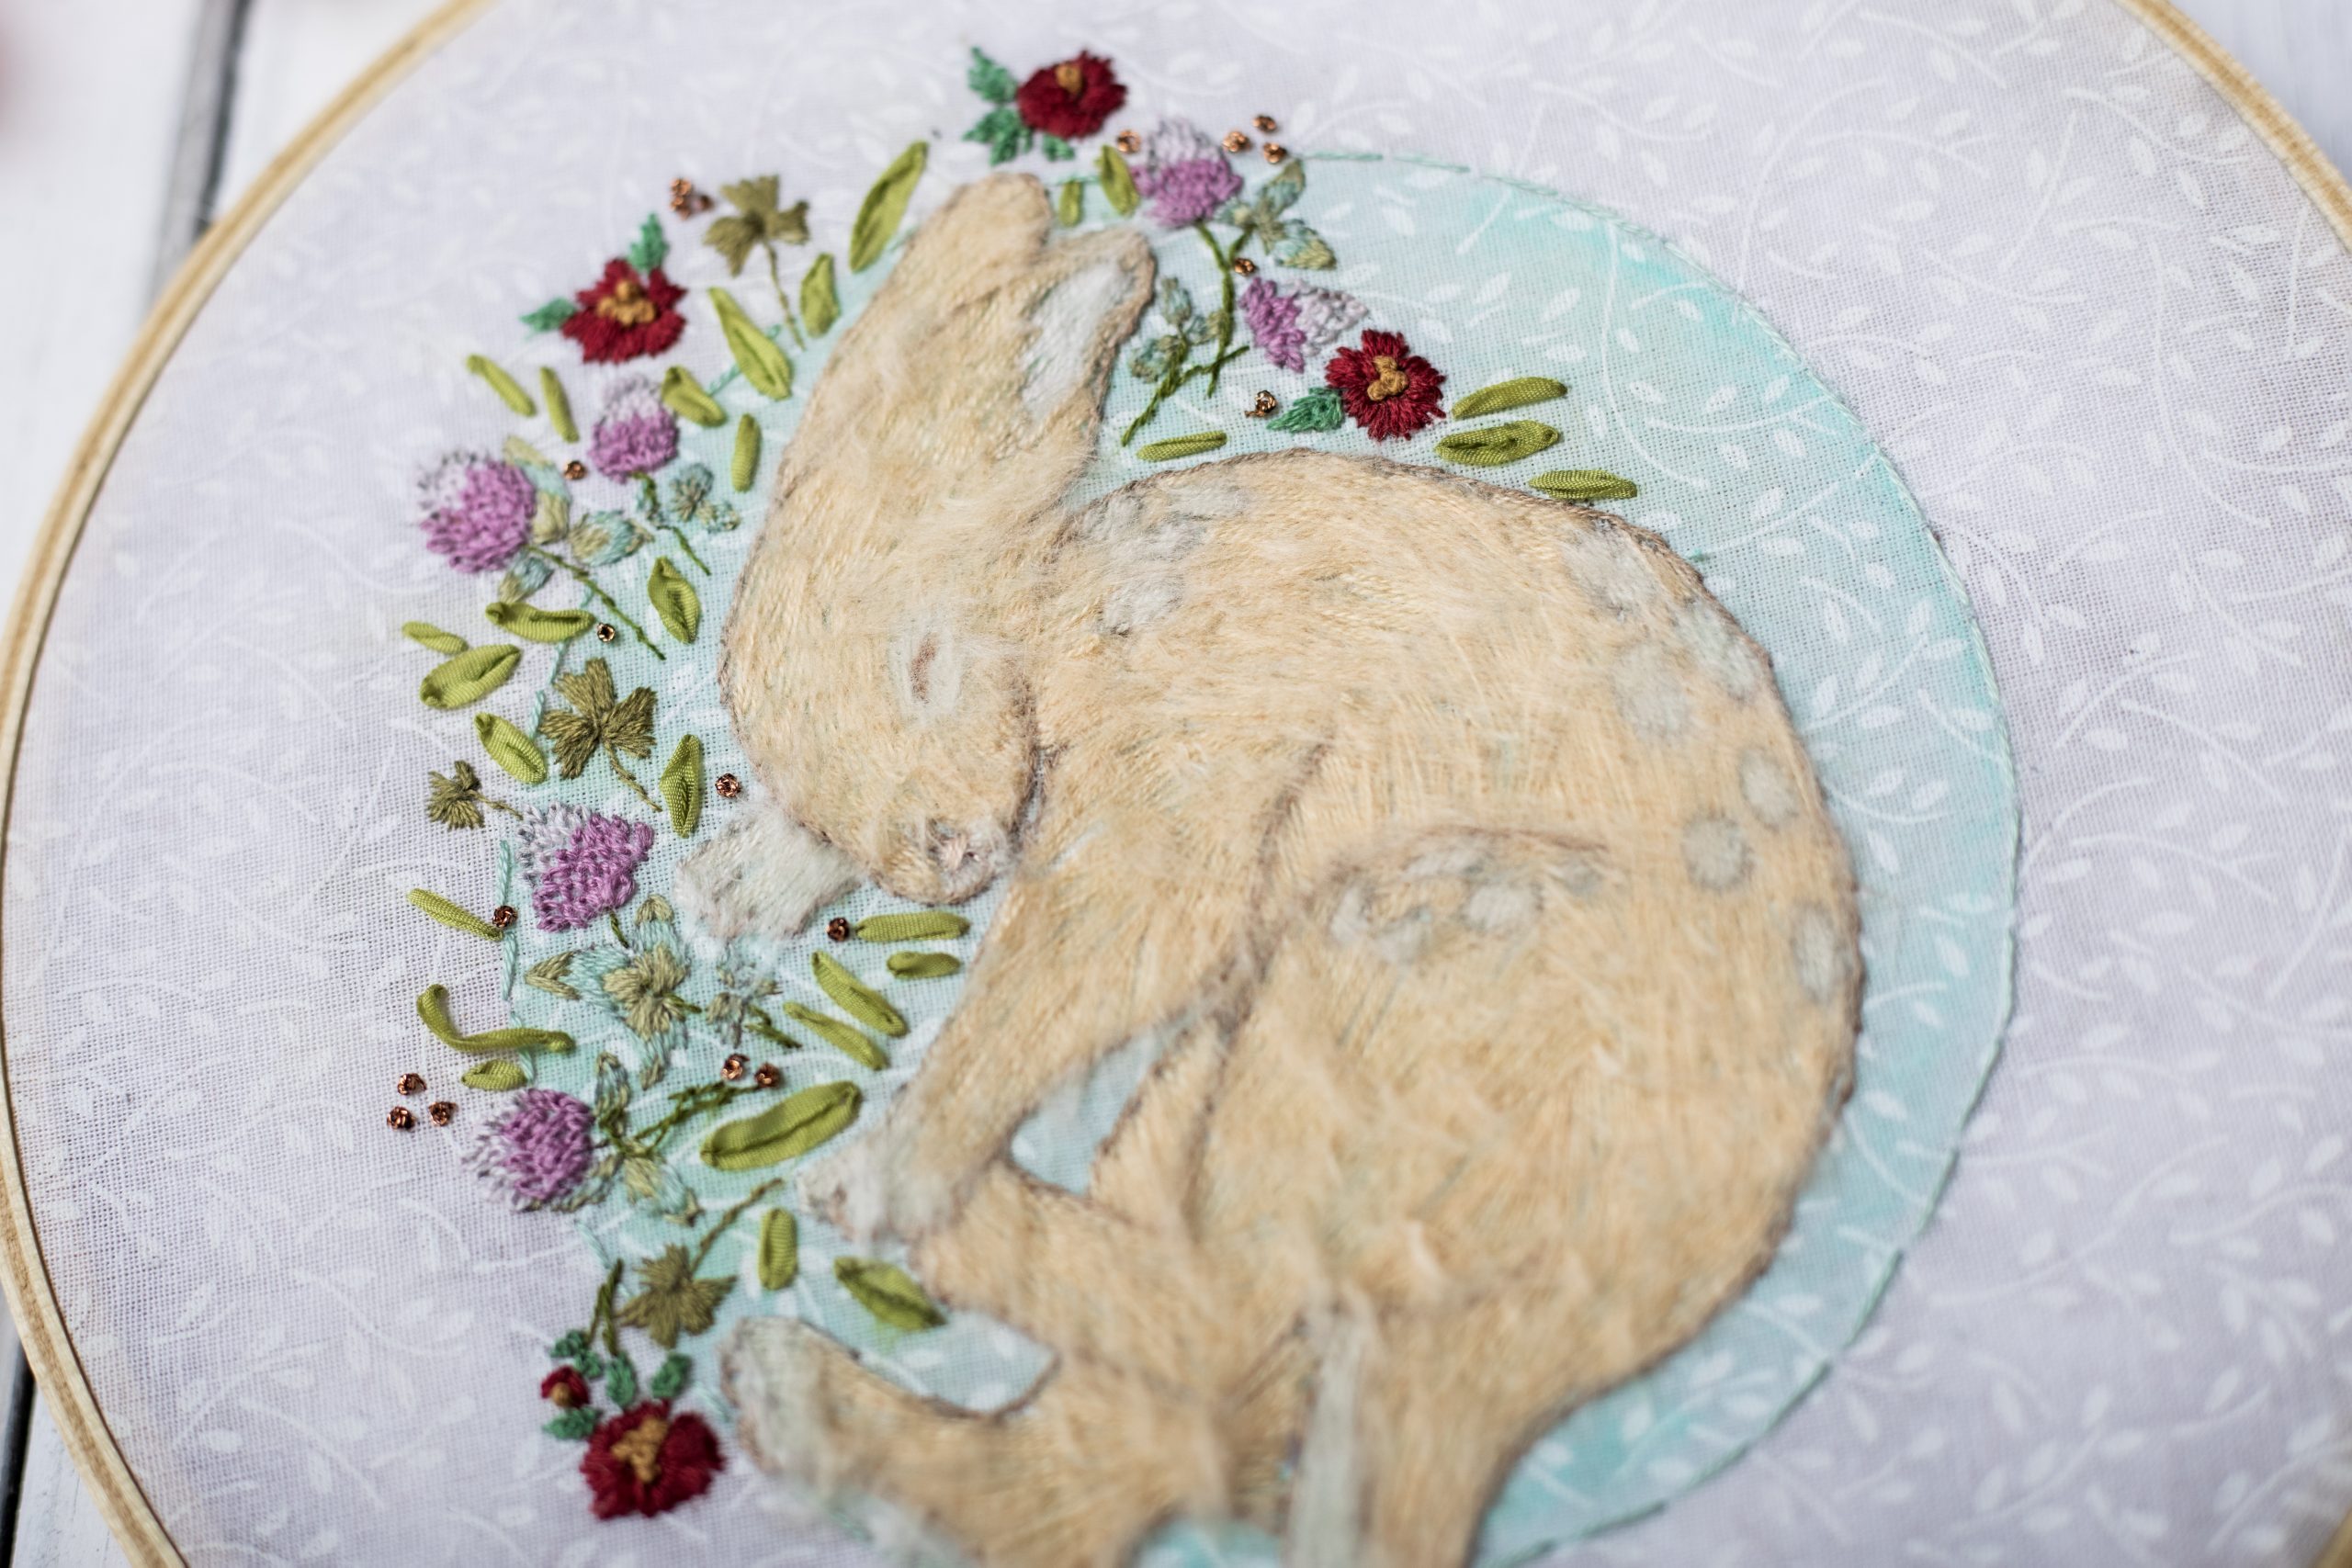
- Using two strands of DMC# 3864, outline the bunny using a stem or outline stitch. You’ll see there are a few spots where the designer didn’t outline, because Jennifer wanted to keep it white—these spots are the top of the paws and the tip of the tail.
- Using a fill stitch, fill in the nose and inside of the ear with DMC#819, using one strand. Then fill in the white spots and the tail with Filaine # 3401. Later the designer decided to do the paws as well as around the top of the eye with this light Filaine color, too. Basically, you can stitch your bunny in any color pattern you’d like to.

- Now fill in the entire bunny with Filaine #3122. Think about how the fur grows on the animal as you stitch so that the stitch seems to lay naturally, like their fur.
- Embroider the shamrocks using one strand of DMC #3012 using a satin stitch for the leaves, and a stem stitch for the stem. This color was also used for the clover stems. Embroider the clover stems while you have this color threaded.
- For the single leaves, use the 4mm Pure Silk ribbon in Pale Grass using a ribbon stitch (Examples can be found in The Spruce’s “Working Ribbon Stitch for Ribbon Embroidery” by Mollie Johanson). Or fill in with your own choice of embroidery floss. If you use the ribbon, you may also want to add a center line in some of the leaves using one strand of floss in your choice of green.
- For the clover leaves, Jennifer used one strand of DMC #504 and #3013. She used the paler color in the middle, and the darker color on the leaf tip and the base. She stitched these using a short and long stitch.
- For the clover flower, the designer used two strands of DMC #24 and #3836. She started at the top with the lighter color and a detached chain stitch in rows to resemble clover petals. Then she switched to the darker color and continued to fill the clover shape in with the detached chain stitches.
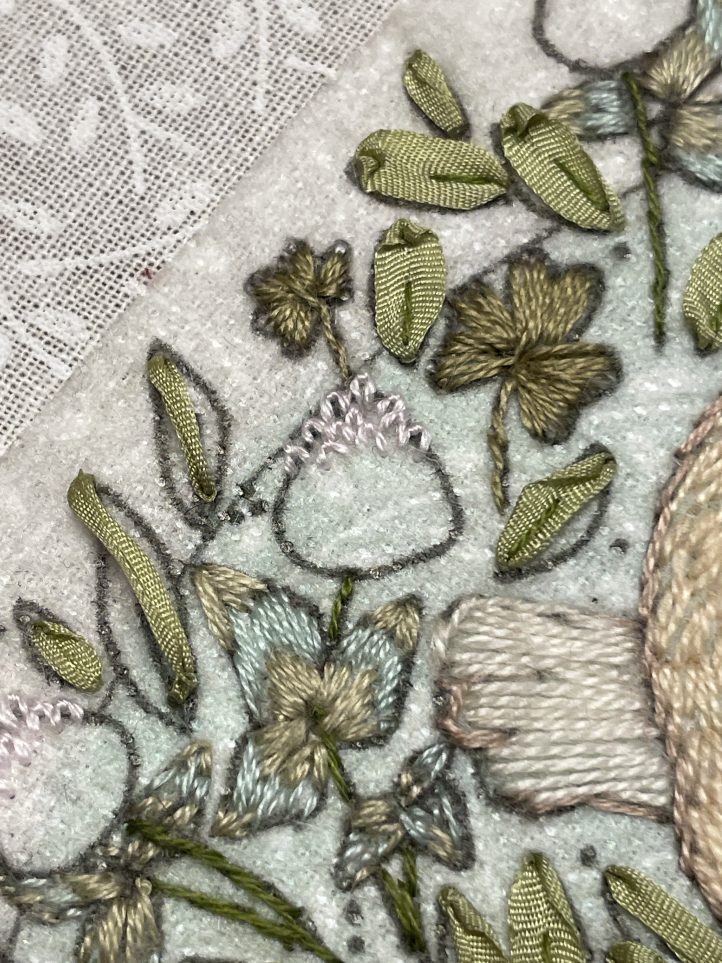
- For the flowers, Jennifer used a French knot stitch for the centers with two strands of DMC #3828. Then to fill in each petal, she used a satin stitch with two strands of DMC#221. Stitch each petal separately.
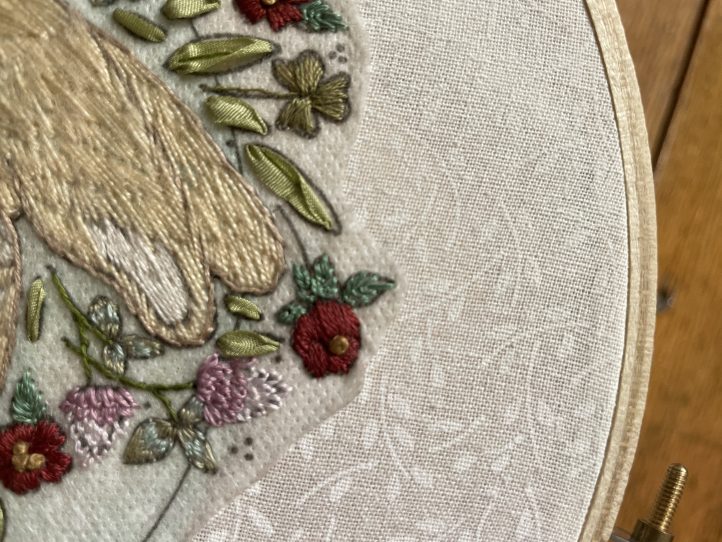
- For the flower petals, the designer used two strands of DMC #320 and a fly stitch.
- With one strand of Diamont D301, add French knots here and there where there are small dots in the pattern, or wherever you’d like to! This is optional, but it adds a little bling.
- With warm water, wash out the transfer paper. Make sure you rinse it well, otherwise your Filaine will be stiff. Let dry overnight.
- When embroidery is dry, use the Filaine wire brush to brush out the bunny fur and make him fuzzy.
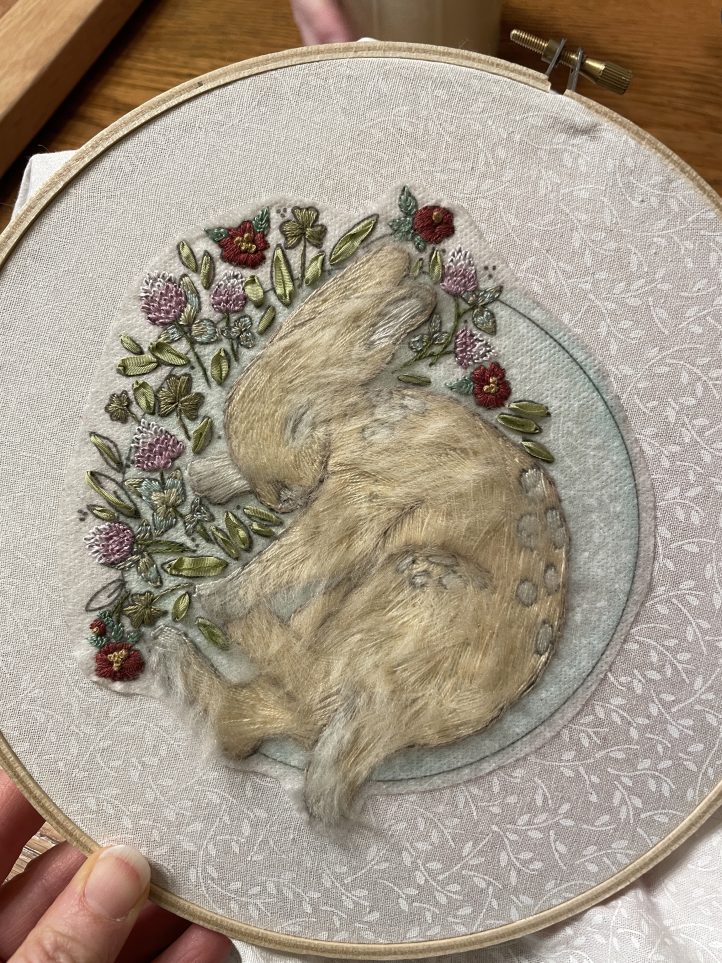
- Using a running stitch and two strands of embroidery floss, outline the circle. Jennifer chose to use a color similar to the mint green paint but thought that the copper Diamont D301 would be fun too!
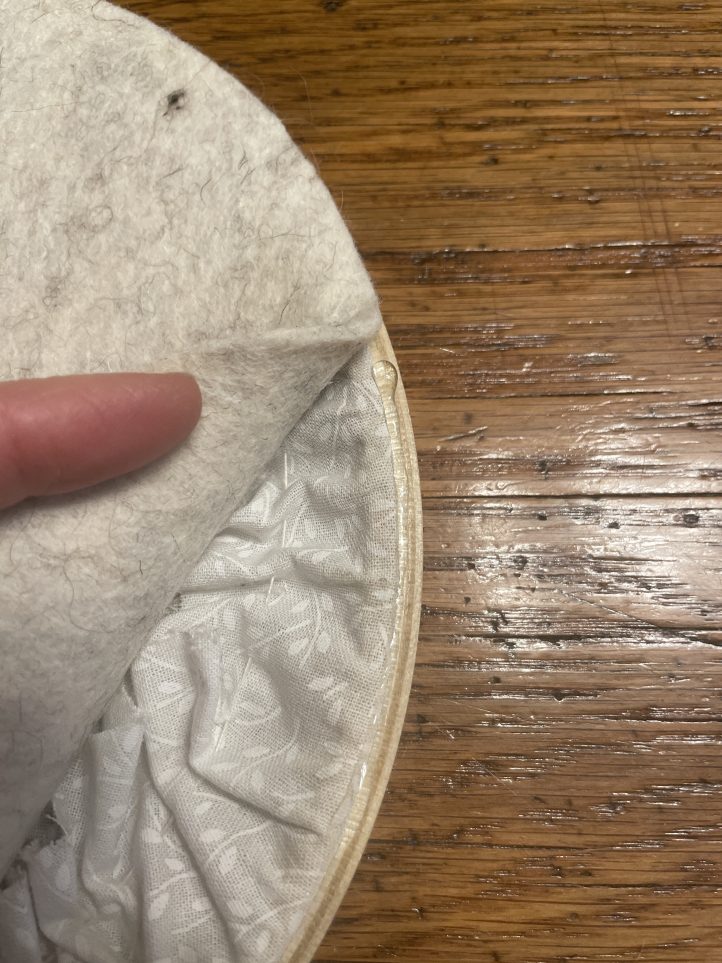
- To finish, trim the base fabric around the hoop, leaving about 2”. With sewing thread and a needle, gather the leftover fabric gently so that it doesn’t hang out of the hoop. Now trace your hoop onto wool felt. Cut the circle out of the felt and hot glue to the back of your hoop to enclose all your work.
- To hang, take a bit of ribbon and tie a bow around the hoop fastener. Then use an overhand knot to tie the two ribbon legs together. Hang and enjoy!