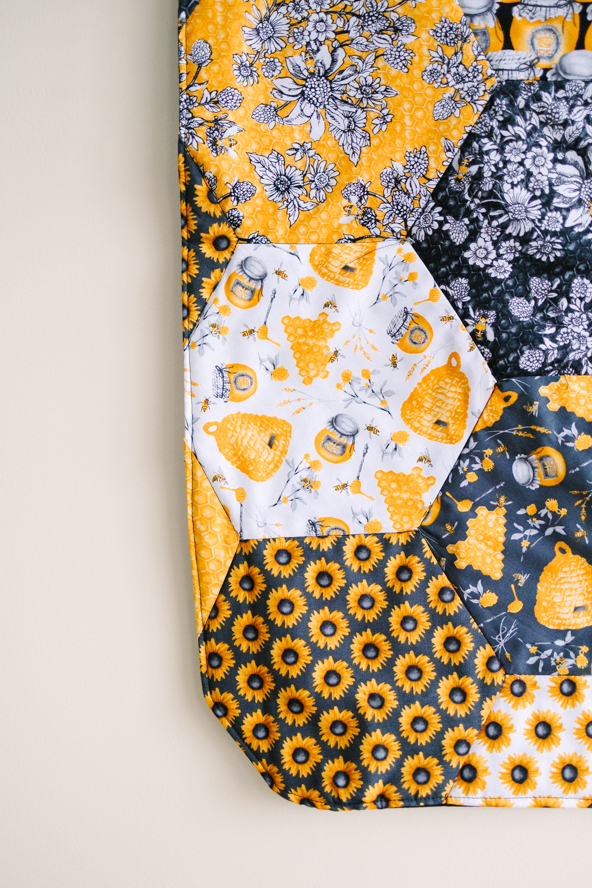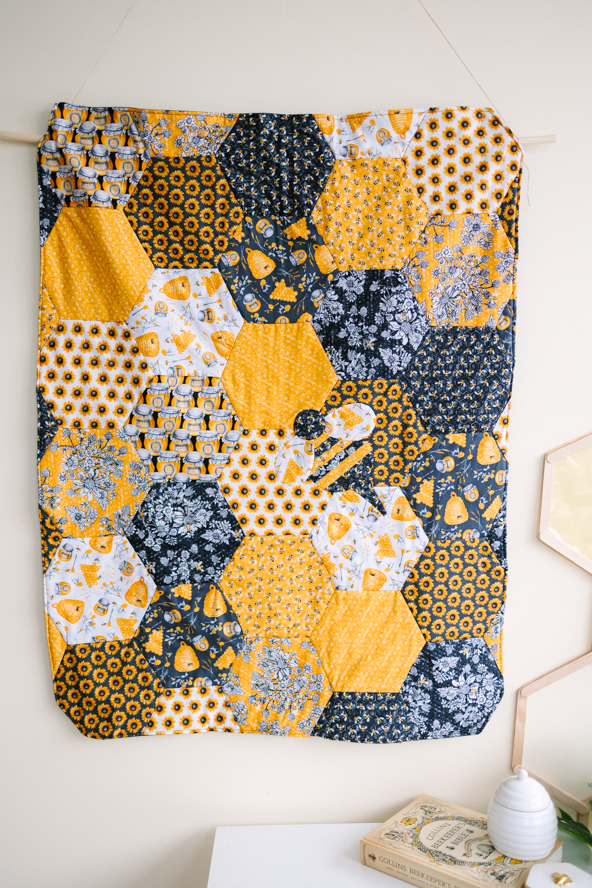
We know you’ll be completely charmed by this sweet summer charm pack wall hanging. Designed as a small wall quilt to brighten blank spaces, this charm pack pattern features a lovely honeycomb design for its blocks and includes a paper pieced honey bee. This quilted wall hanging is a wonderful way to show off your favorite summer prints in shades of gold, black and white. Keep busy as a bee with your summer quilting by adding this pattern to the top of your “to-make” list.
Finished Size: 32” x 42”
DESIGNER NOTES:
- 1/4” seam allowance included on the cells and partial cells.
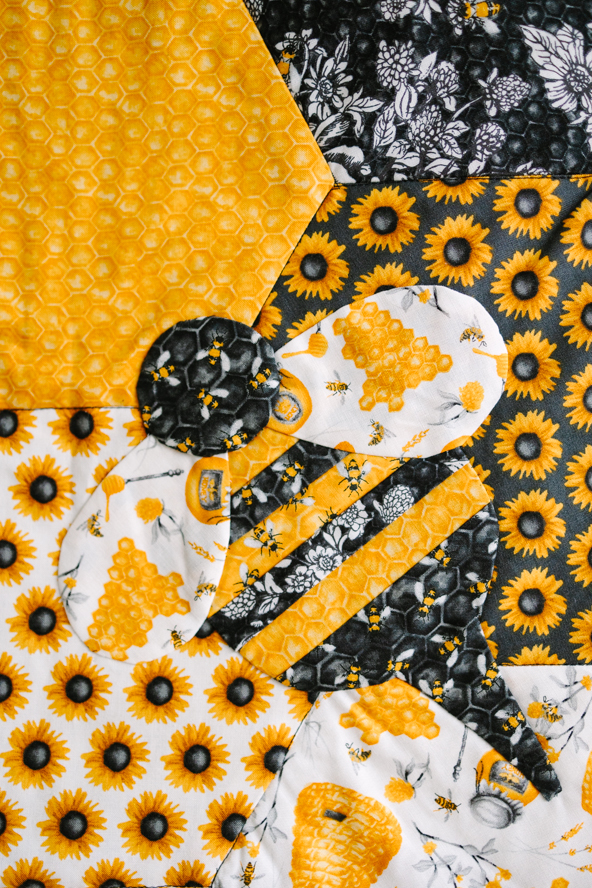
- NO seam allowance included on the Bee parts, because they were assembled using the paper piecing method. Use the templates to cut out freezer paper, iron to the fabric, then cut the fabric out adding a 1/4” seam allowance on all sides.
Materials:
- 1 charm pack of 42 10” squares
- 1 yd backing fabric
- 1 crib size batting package, low loft. The designer used an 80% cotton/20% acrylic blend.
- Coordinating sewing thread
- Freezer paper for paper piecing
- PDF Templates – These are located at the bottom of this page. Please see printing instructions below.
PRINTING INSTRUCTIONS:
Note: To download the templates, click on the pattern download button at the bottom of the page. We recommend opening your pattern download using Adobe Acrobat.
Cutting Instructions:
- Using the templates provided, cut 28 Cells, 4 Half Cells, and 10 Side Fills. (Note: These are located at the bottom of this page)
- Cut backing fabric and batting 33” x 43”.
- Out of remaining backing fabric, cut a rod pocket piece that is 4” x 32” (short edges will need to be turned in).
- Out of the scraps, cut out 1 Bee Head with a black/dark background and 2 Bee Wings with a white/light background.
- For the Bee Body, out of remaining fabric, cut a 5” square out and two pieces 5” x 1 1/4” out of a dark/black background, and three pieces 5” x 1 1/4” out of a gold/light background. Cut out the Bee Body after these pieces are assembled as described below.
Sewing Instructions:
WALL HANGING:
- Following the assembly diagram, sew all the cells and cell parts together, using 1/4” seam allowance and pressing seams open.
- For the rod pocket, make a rolled 1/2” hem on each short side.
- Fold in half lengthwise with right sides together, and seam together with a 1/2” seam allowance.
- Turn right side out and press. Set aside.
- Layer the backing fabric, quilt top and batting together, with the right sides of the fabrics together.
- Sew around all four sides, leaving a 6” opening to turn the work.
- Trim excess fabric away from the corners, grade all seams, turn right side out and press.
- Topstitch all the way around closing the opening as you come to it.
QUILTING:
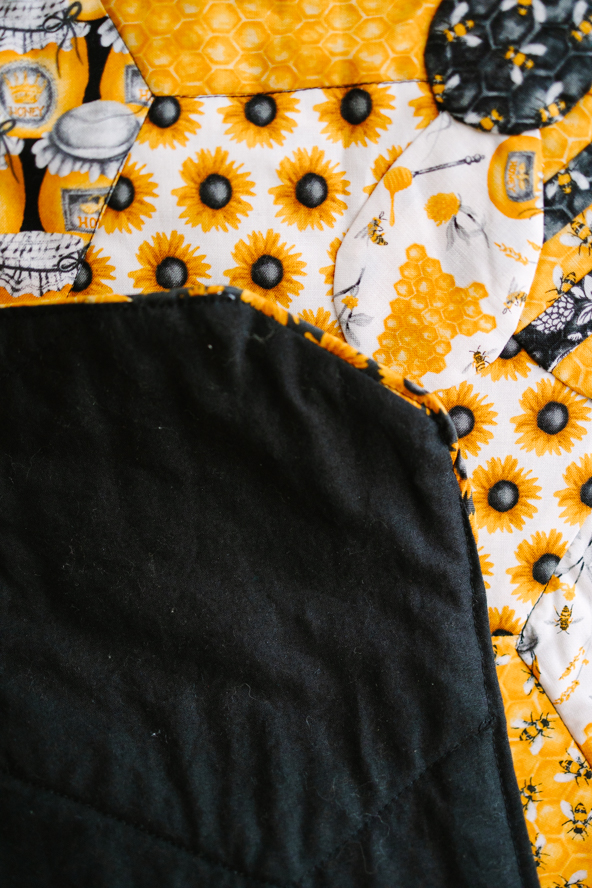
- With black thread, stitch in the ditch around each hexagon. The designer worked from top to bottom along the side edges first, then went back and filled in by stitching each horizontal line.
BEE:
- With a 1/4” seam allowance, stitch the Bee Body pieces with the 5” square, then alternating light and dark strips.
- Press seam allowances open.
- Cut Bee Body out of this fabric, with the 5” square towards the stinger.
- Run a hand basting thread around each piece of the Bee, within the seam allowance, and adjust so that the seam allowance lays flat around all of the curves.
- Press each seam allowance into place and remove freezer paper.
- Hand stitch each Bee part onto the wall hanging as shown in photo, or wherever you desire. You can always make more with the scraps if your hive looks underpopulated!
- Attach rod pocket by hand across top of wall hanging, 2” below top edge.