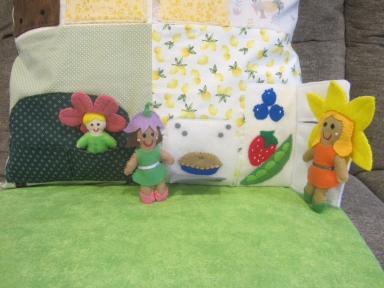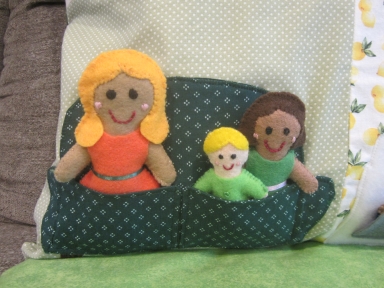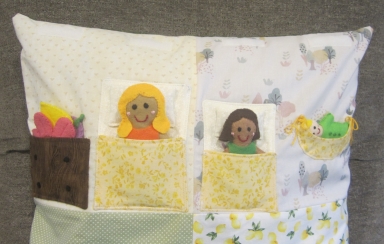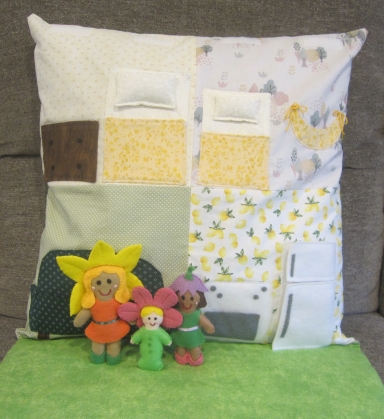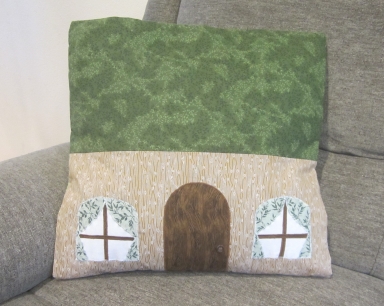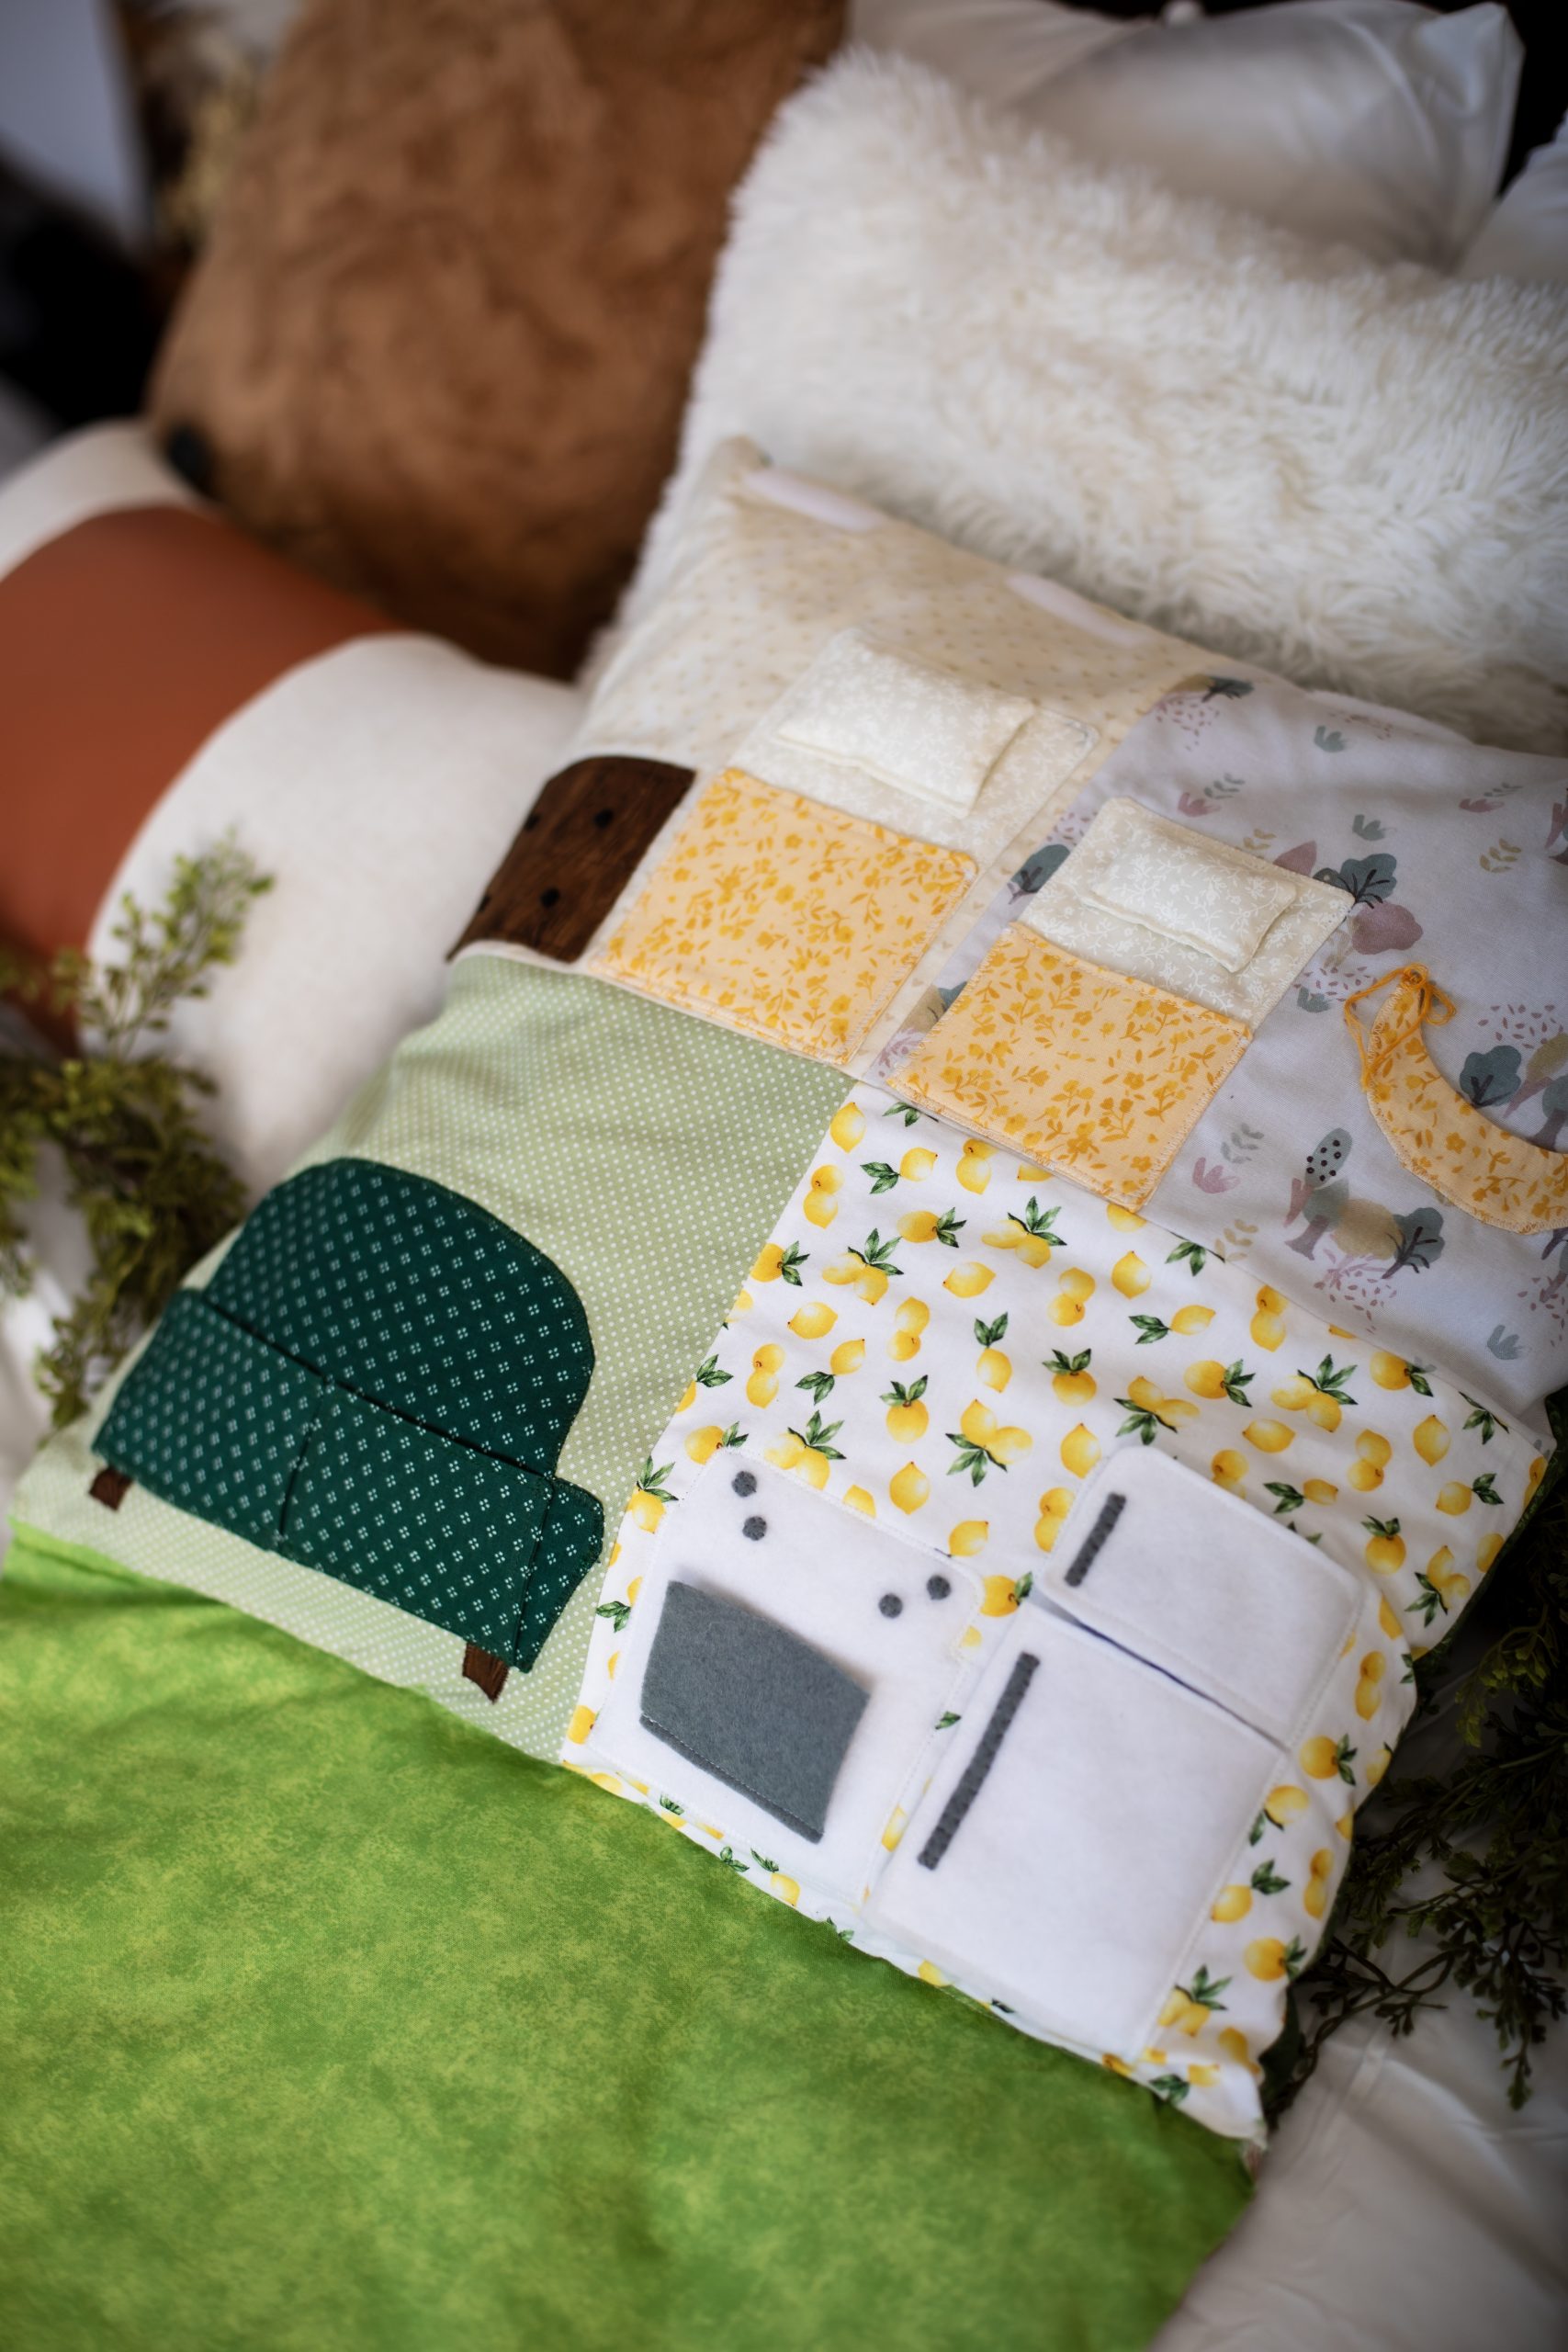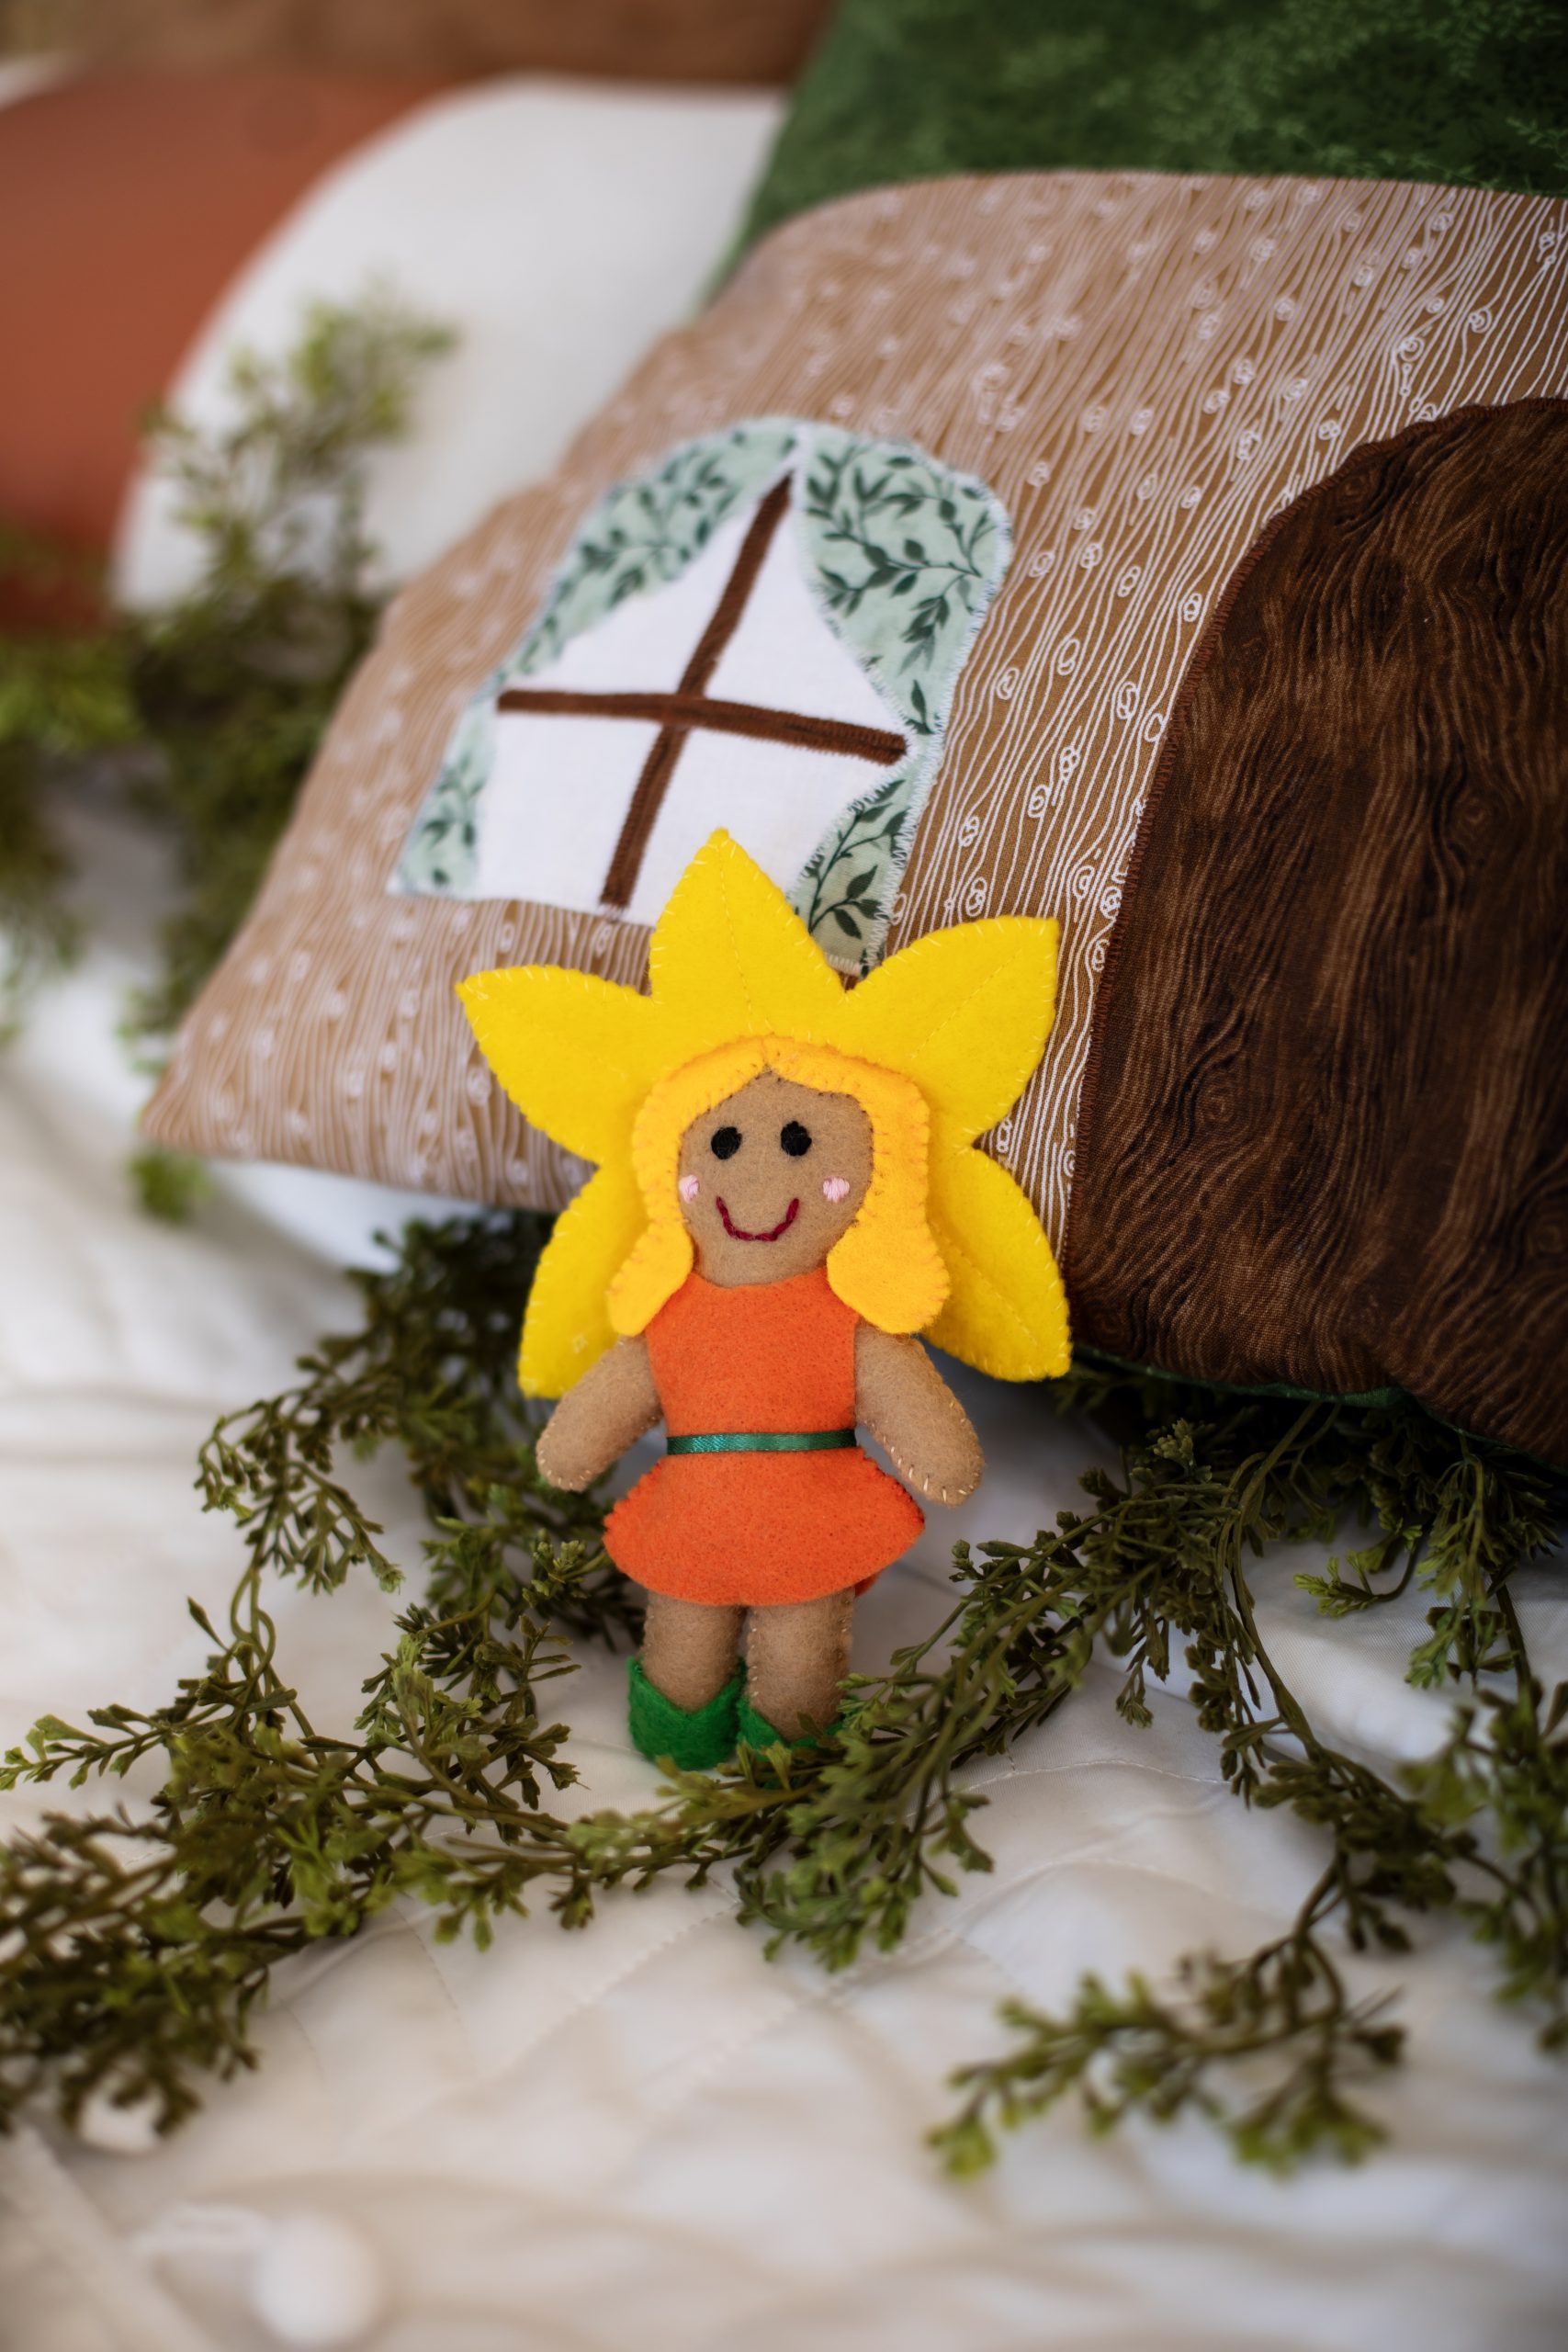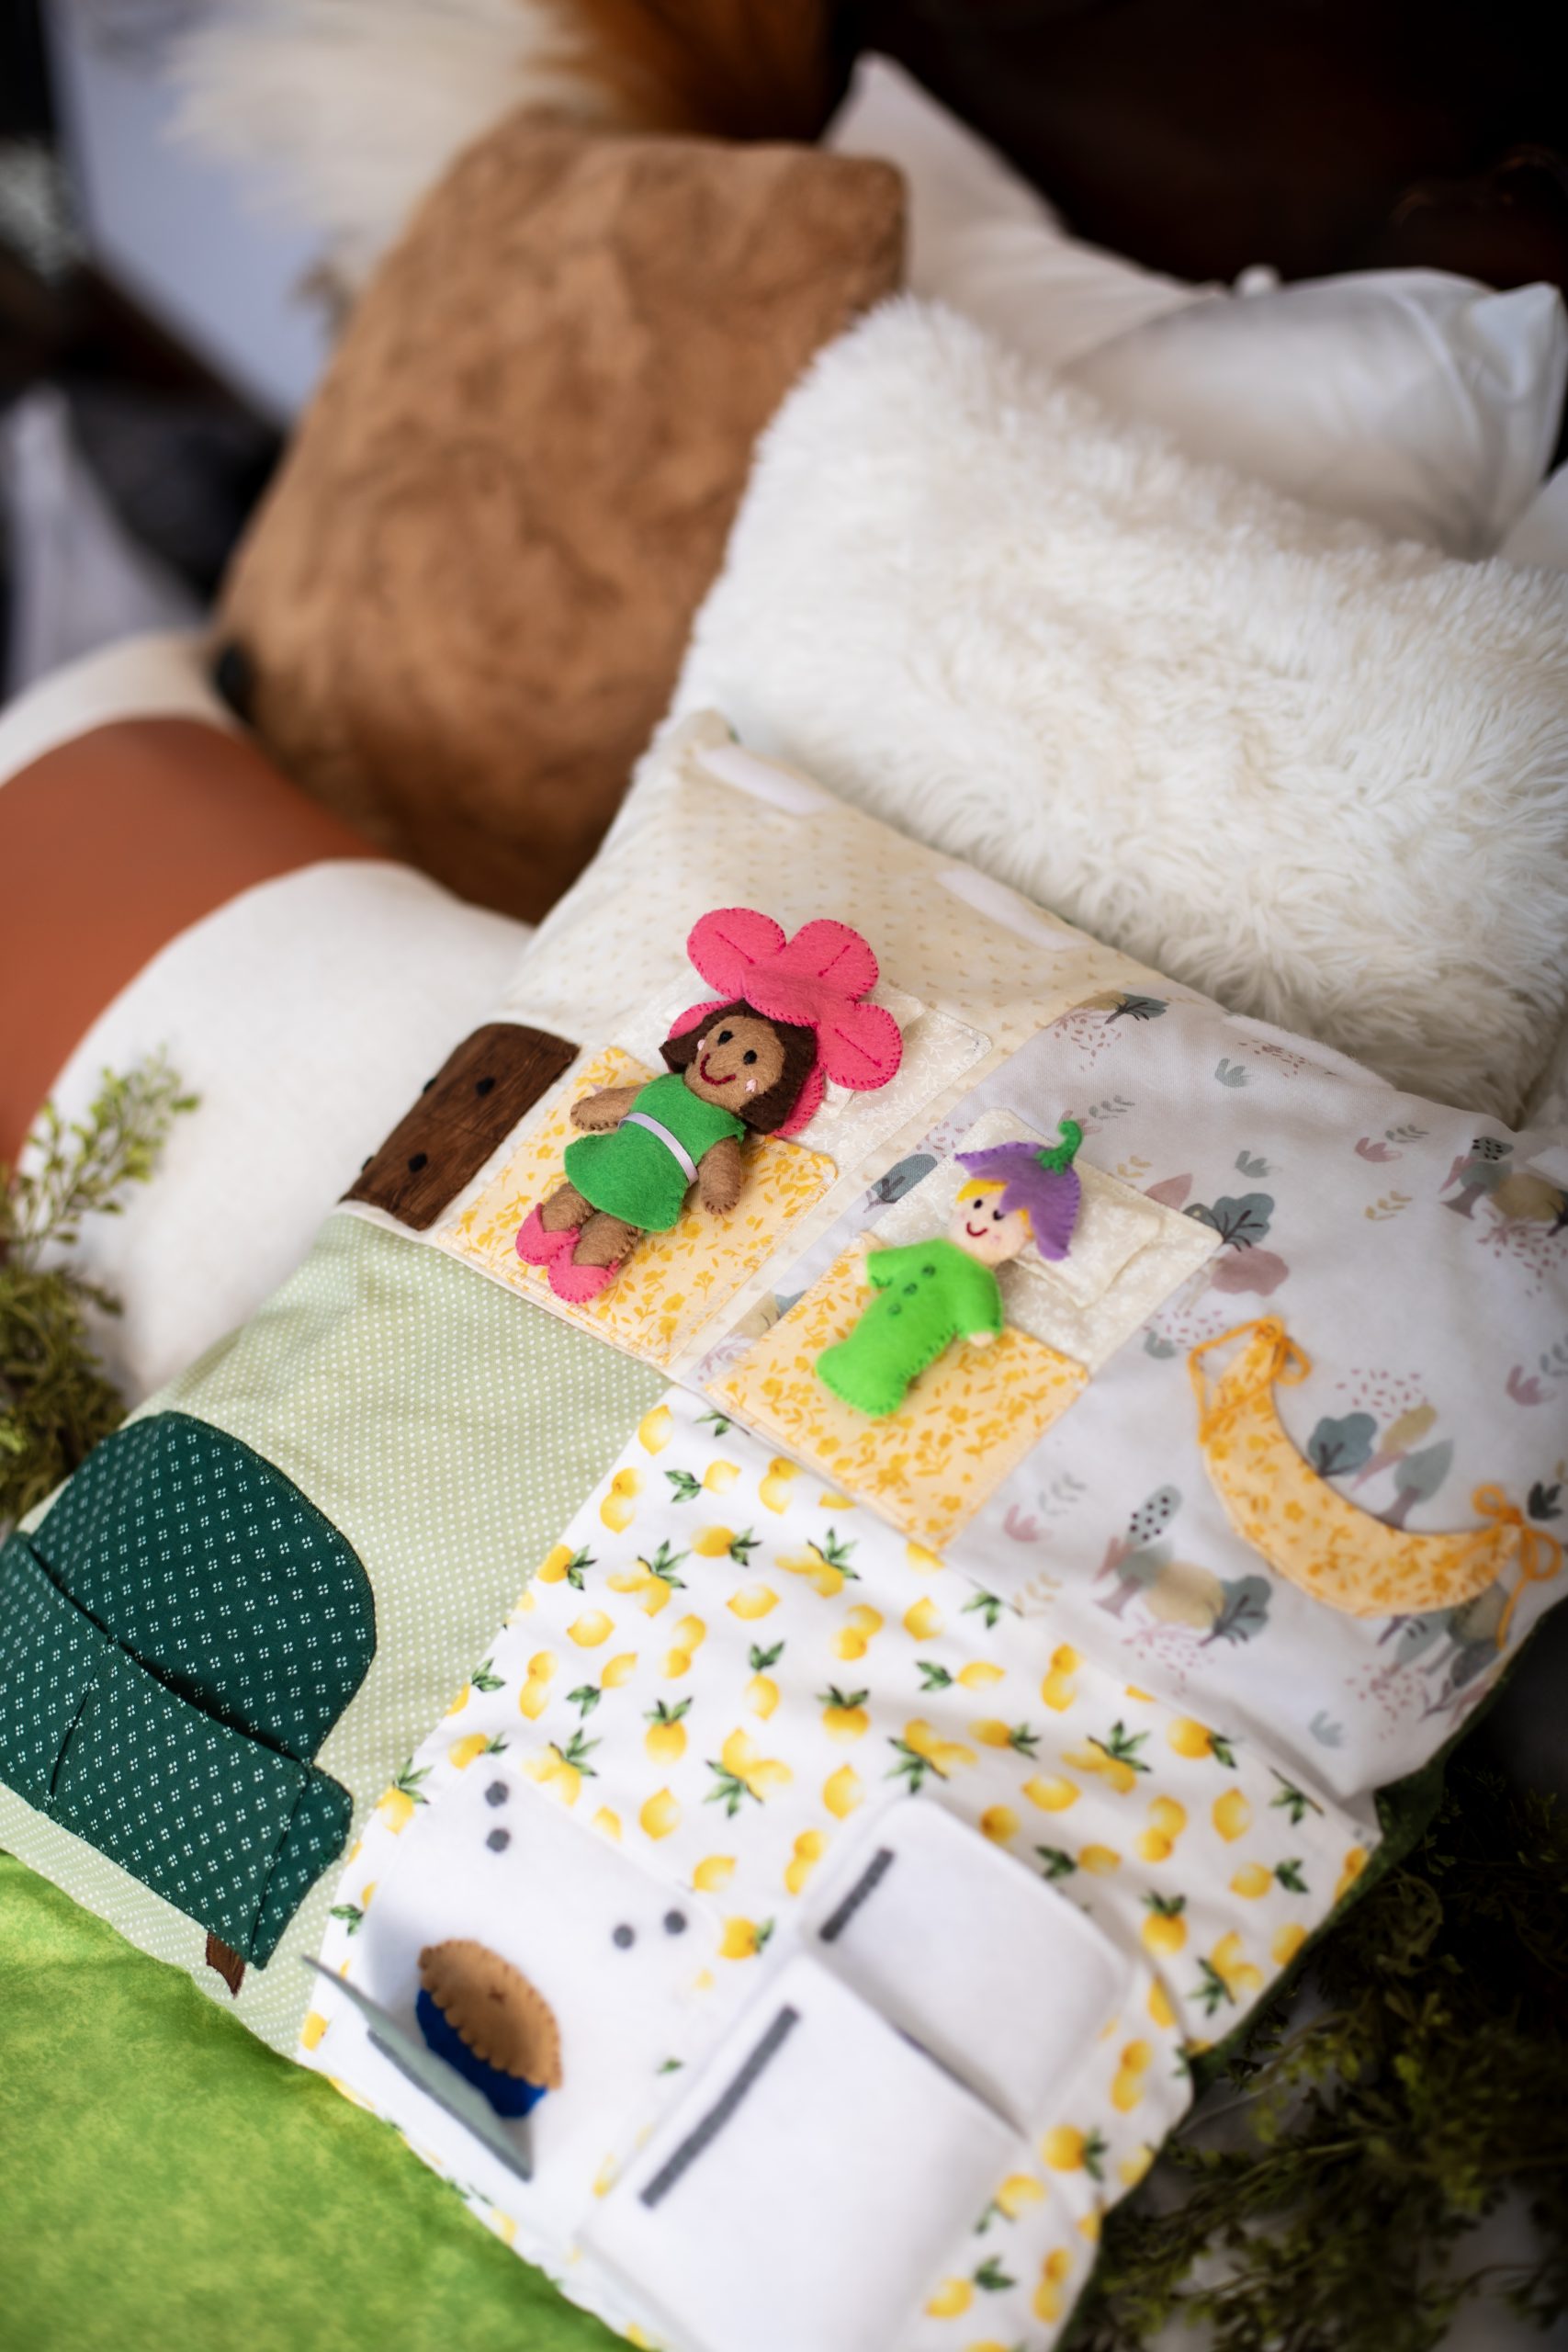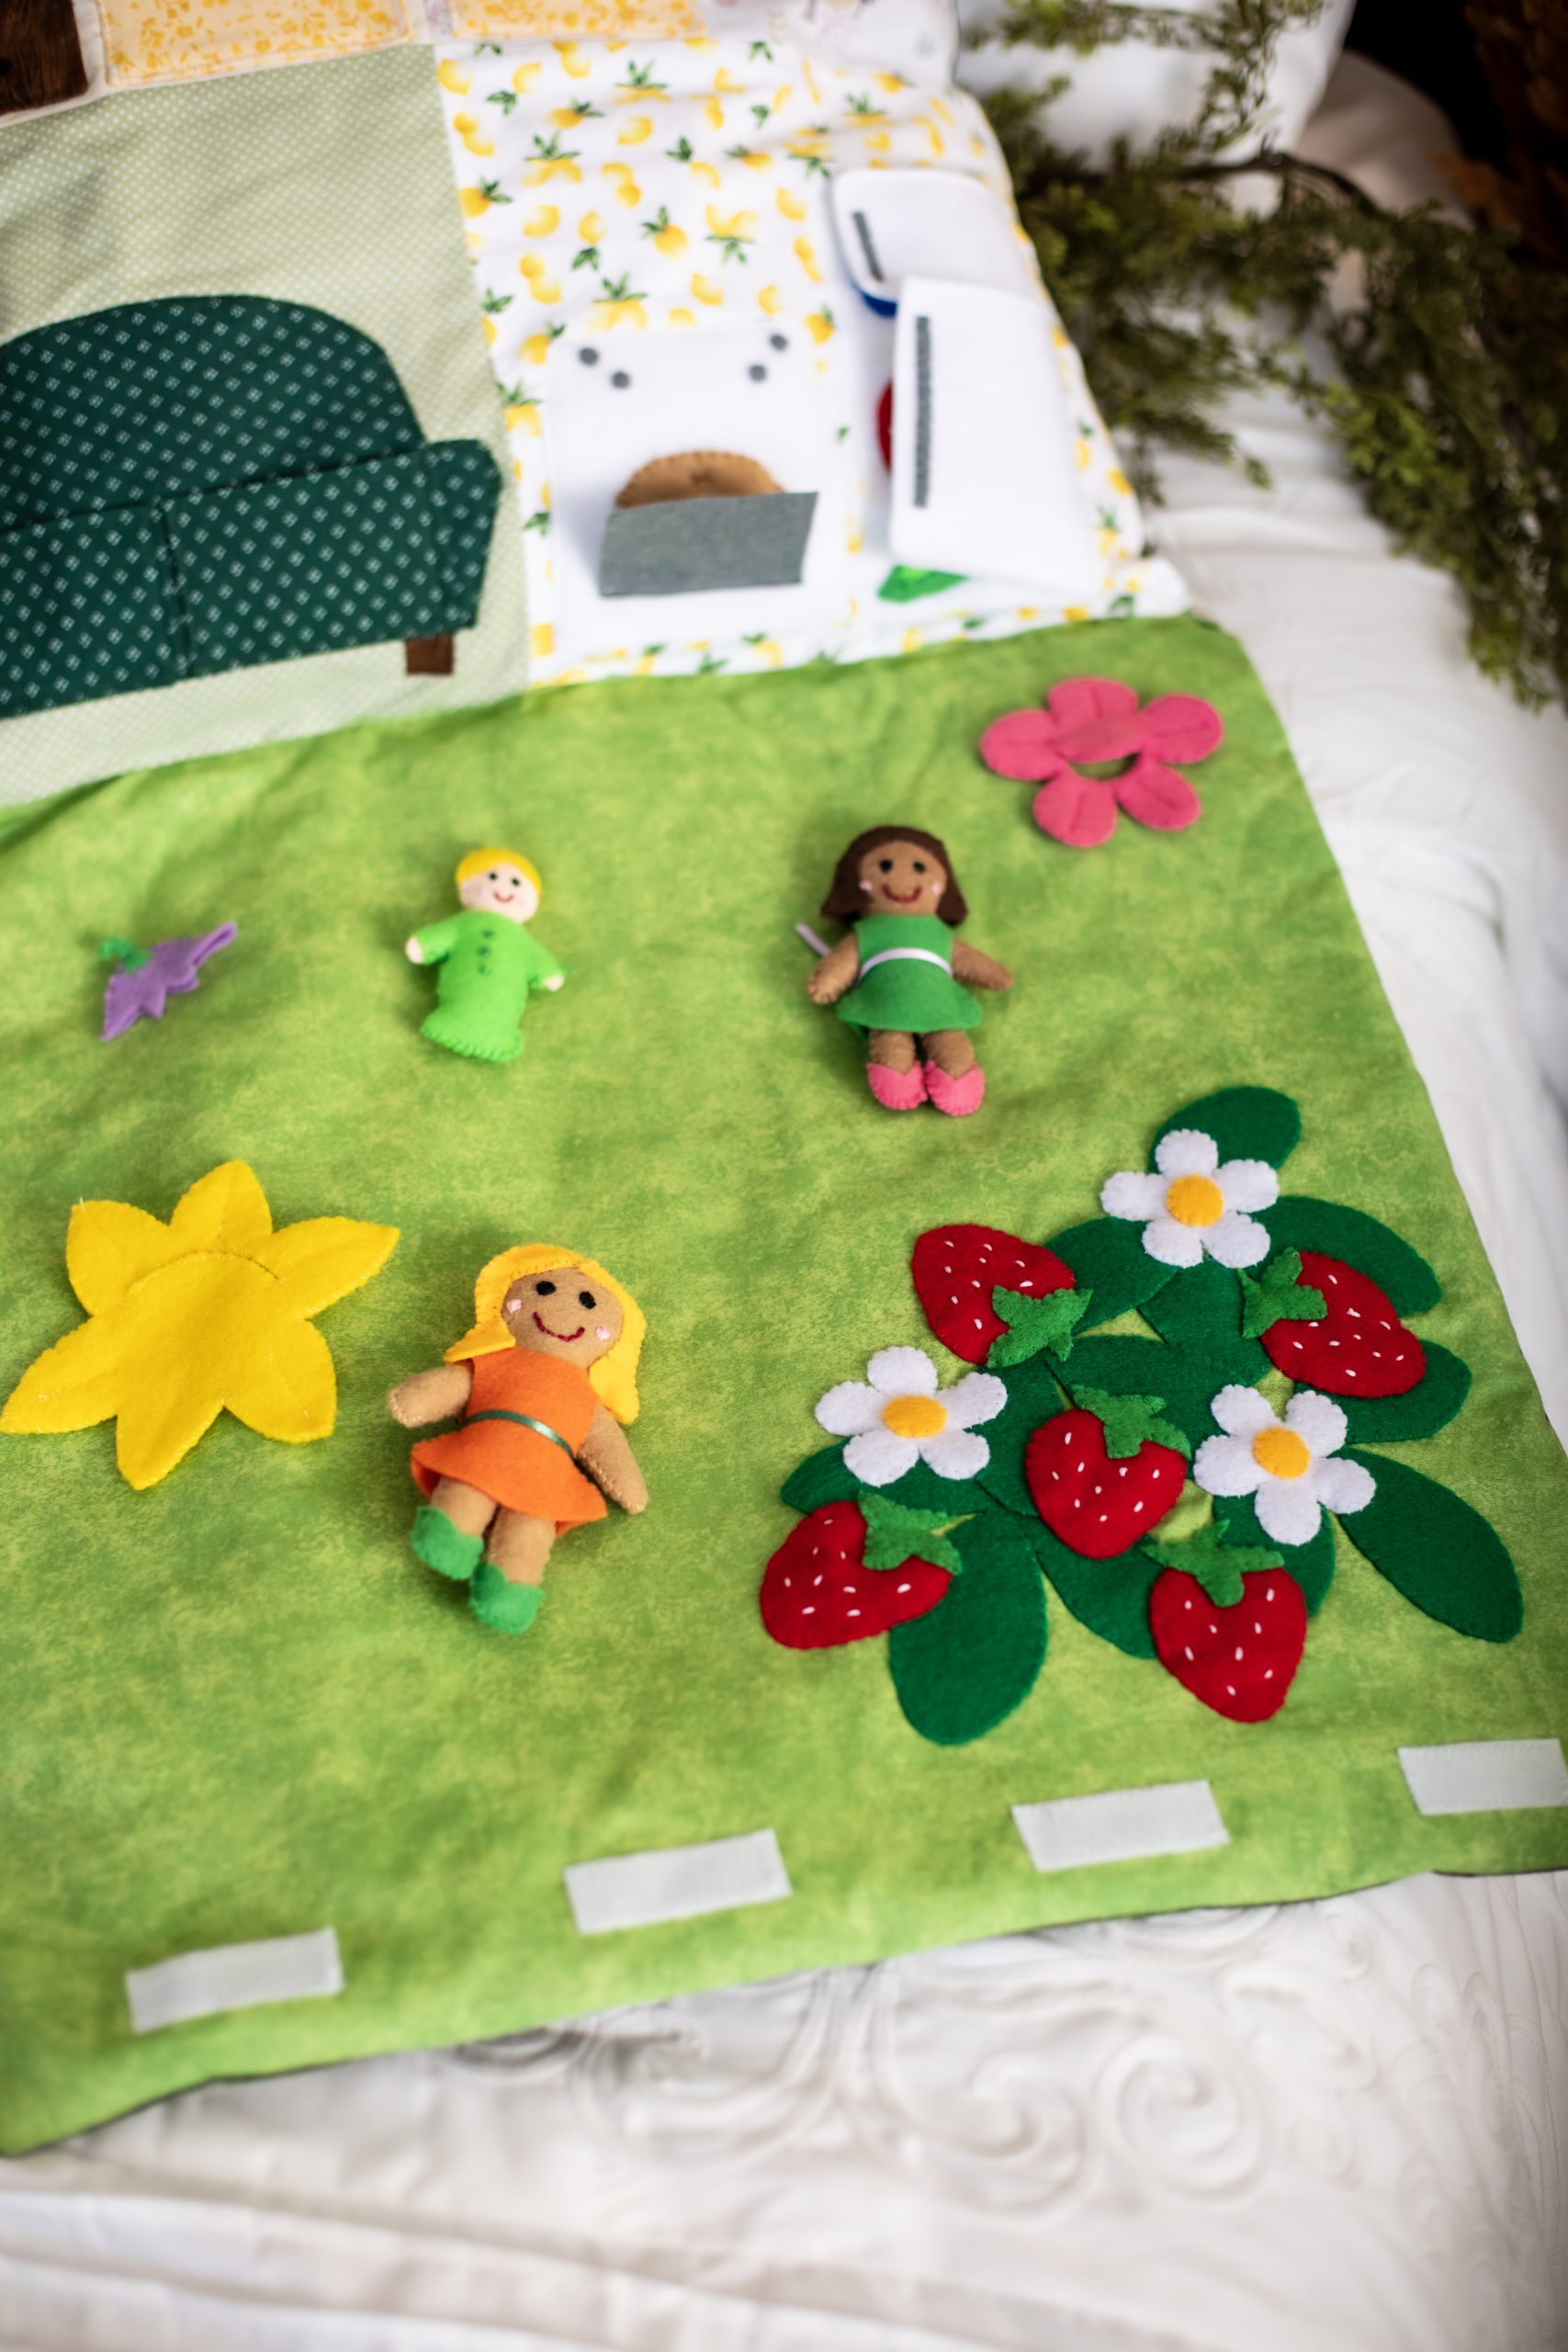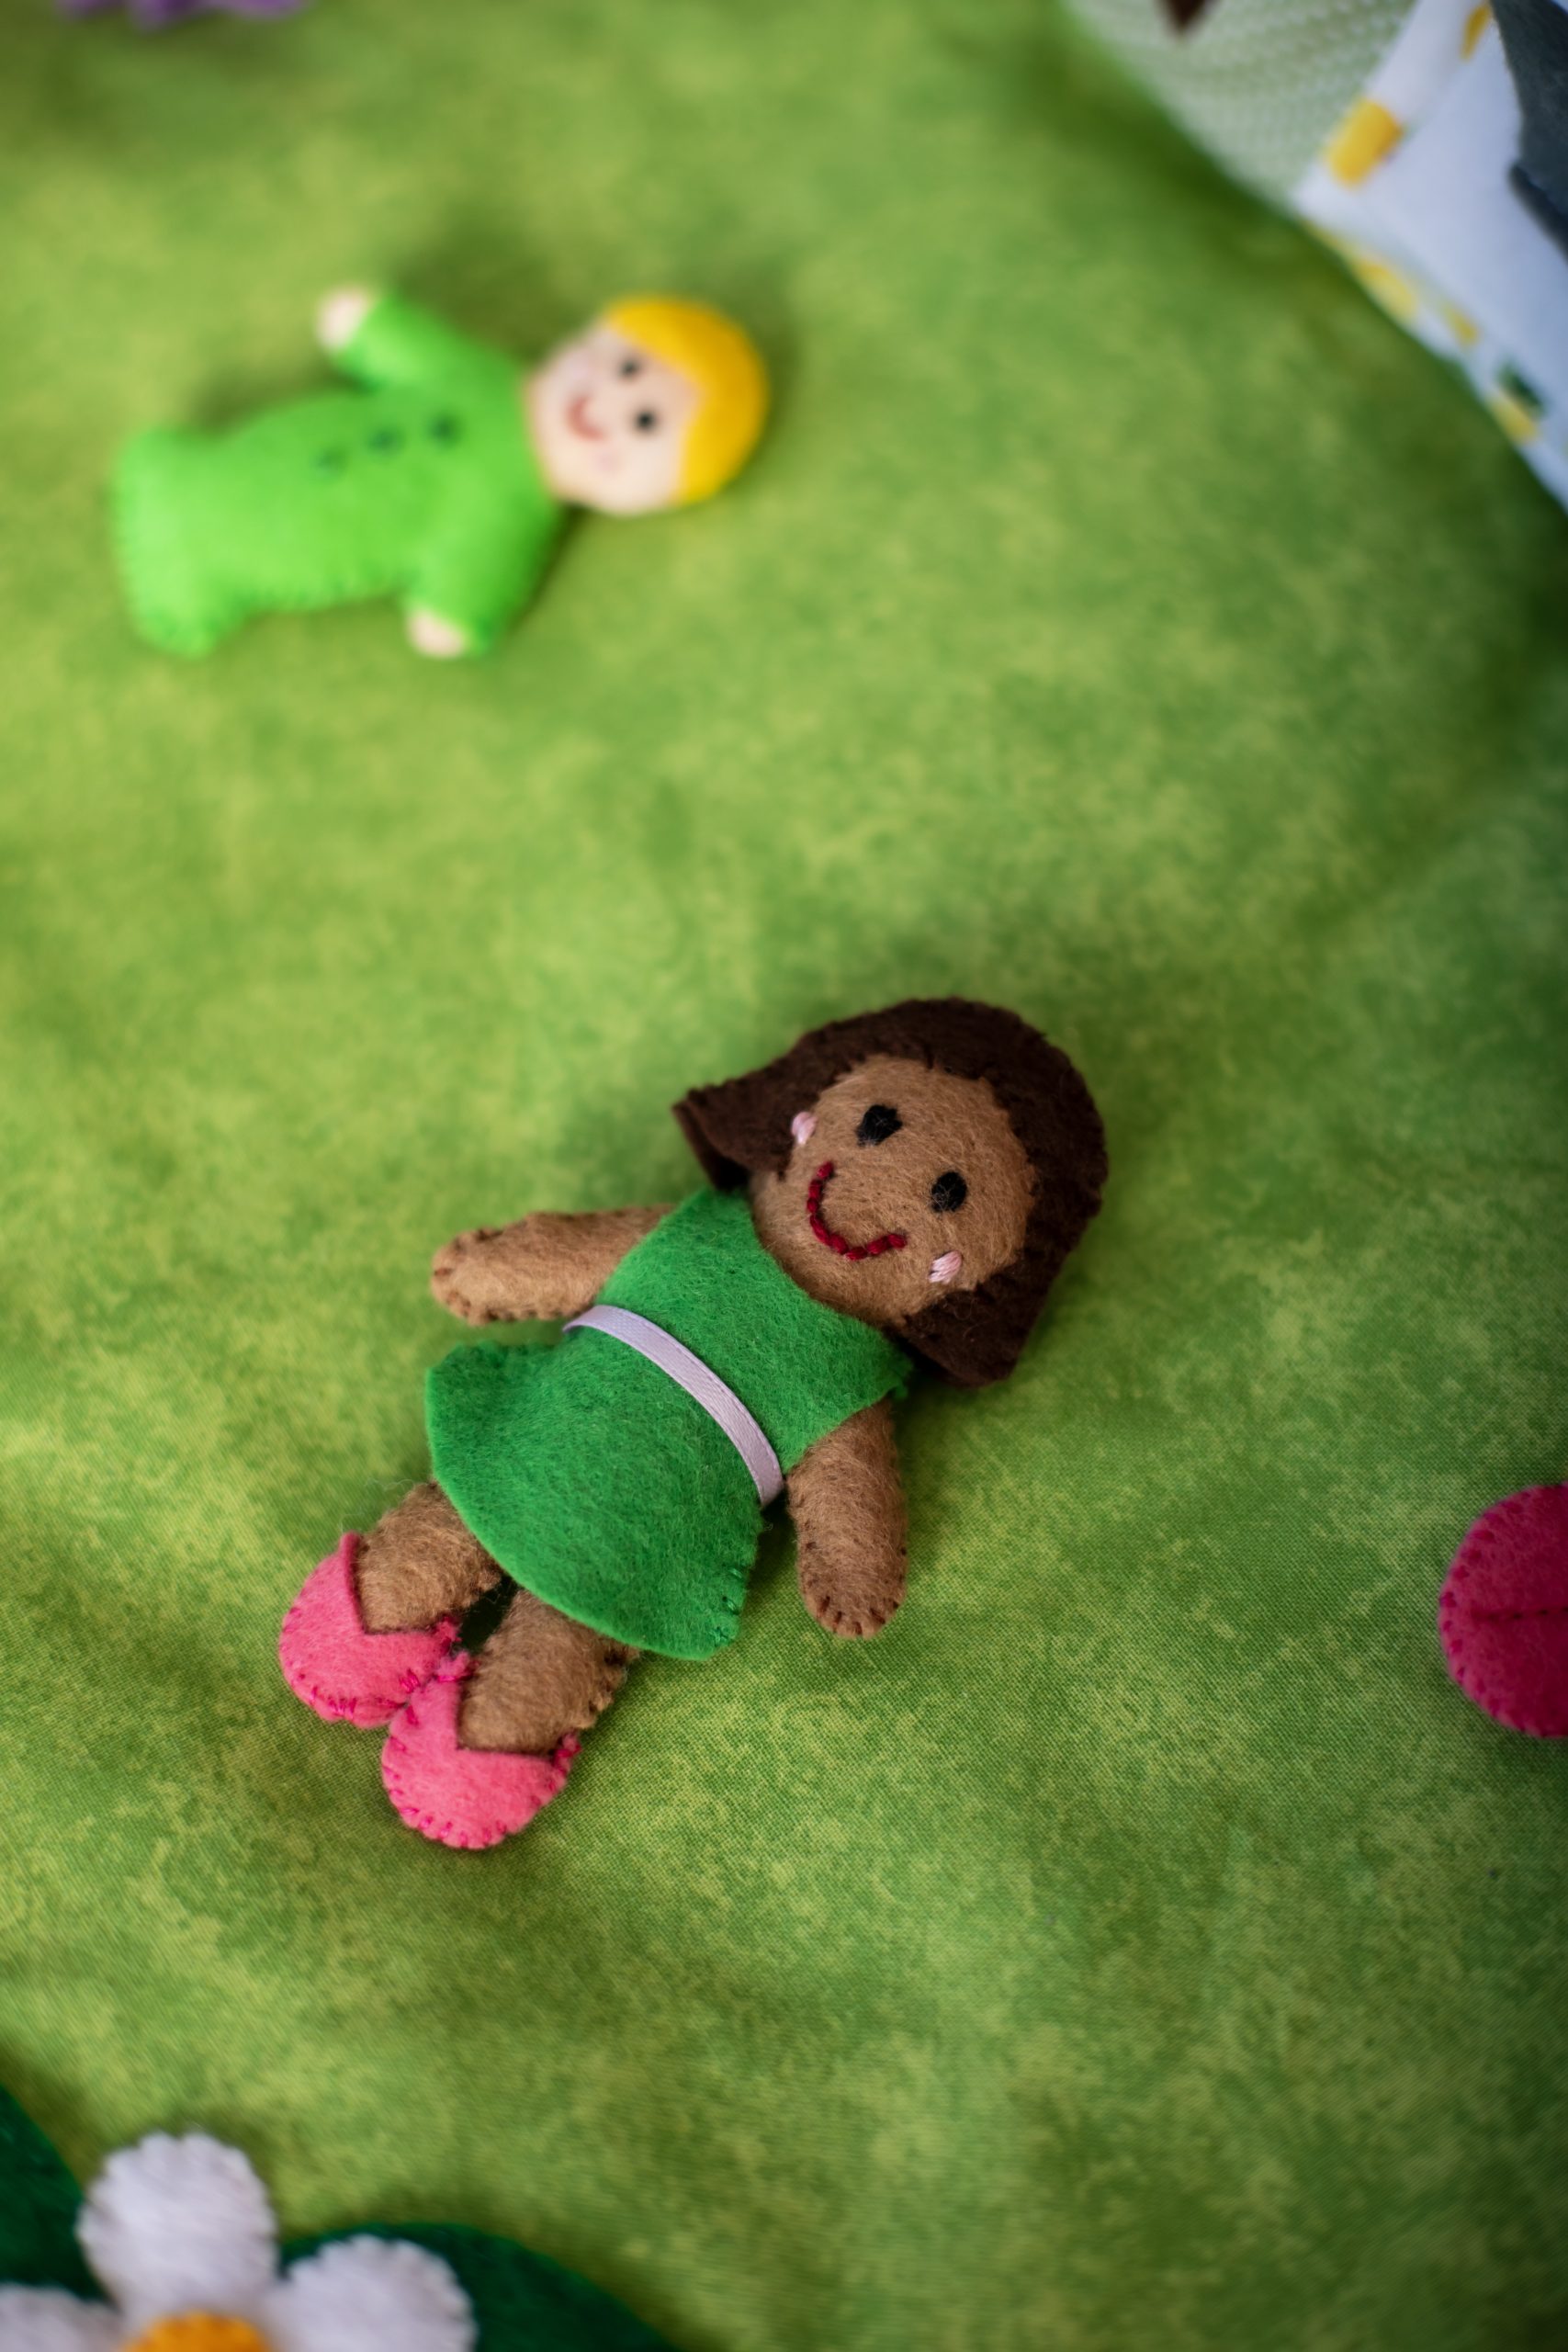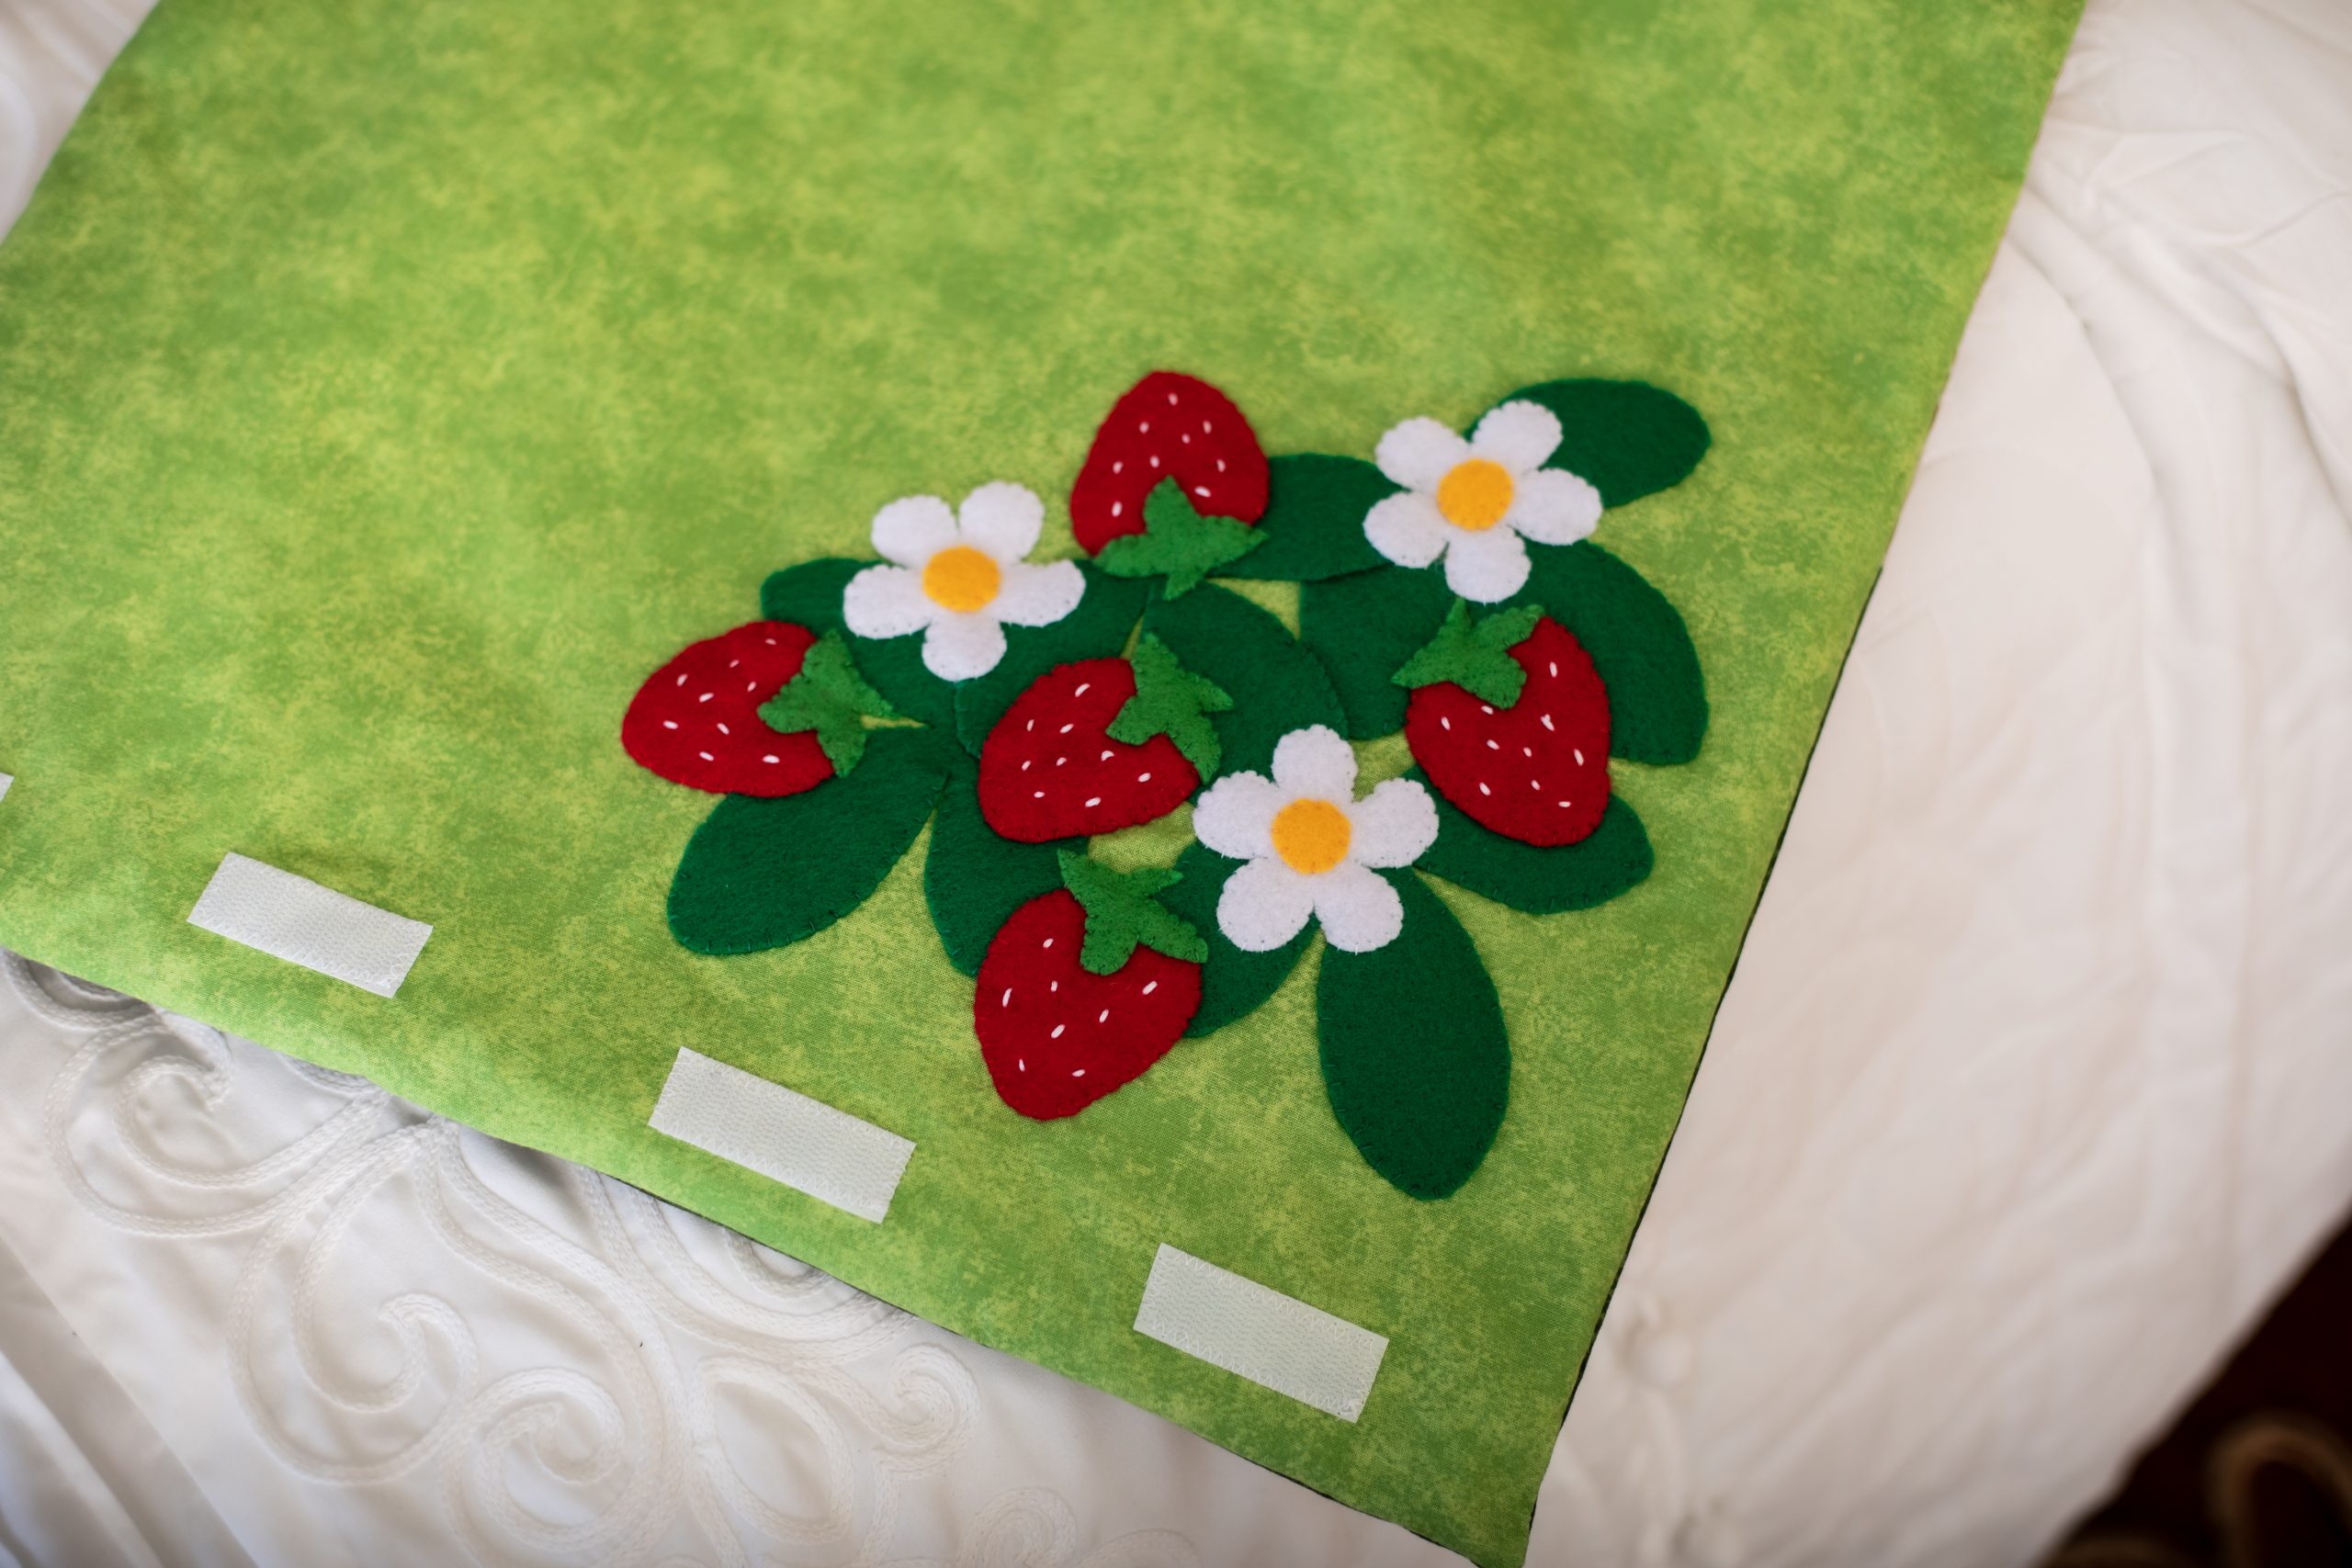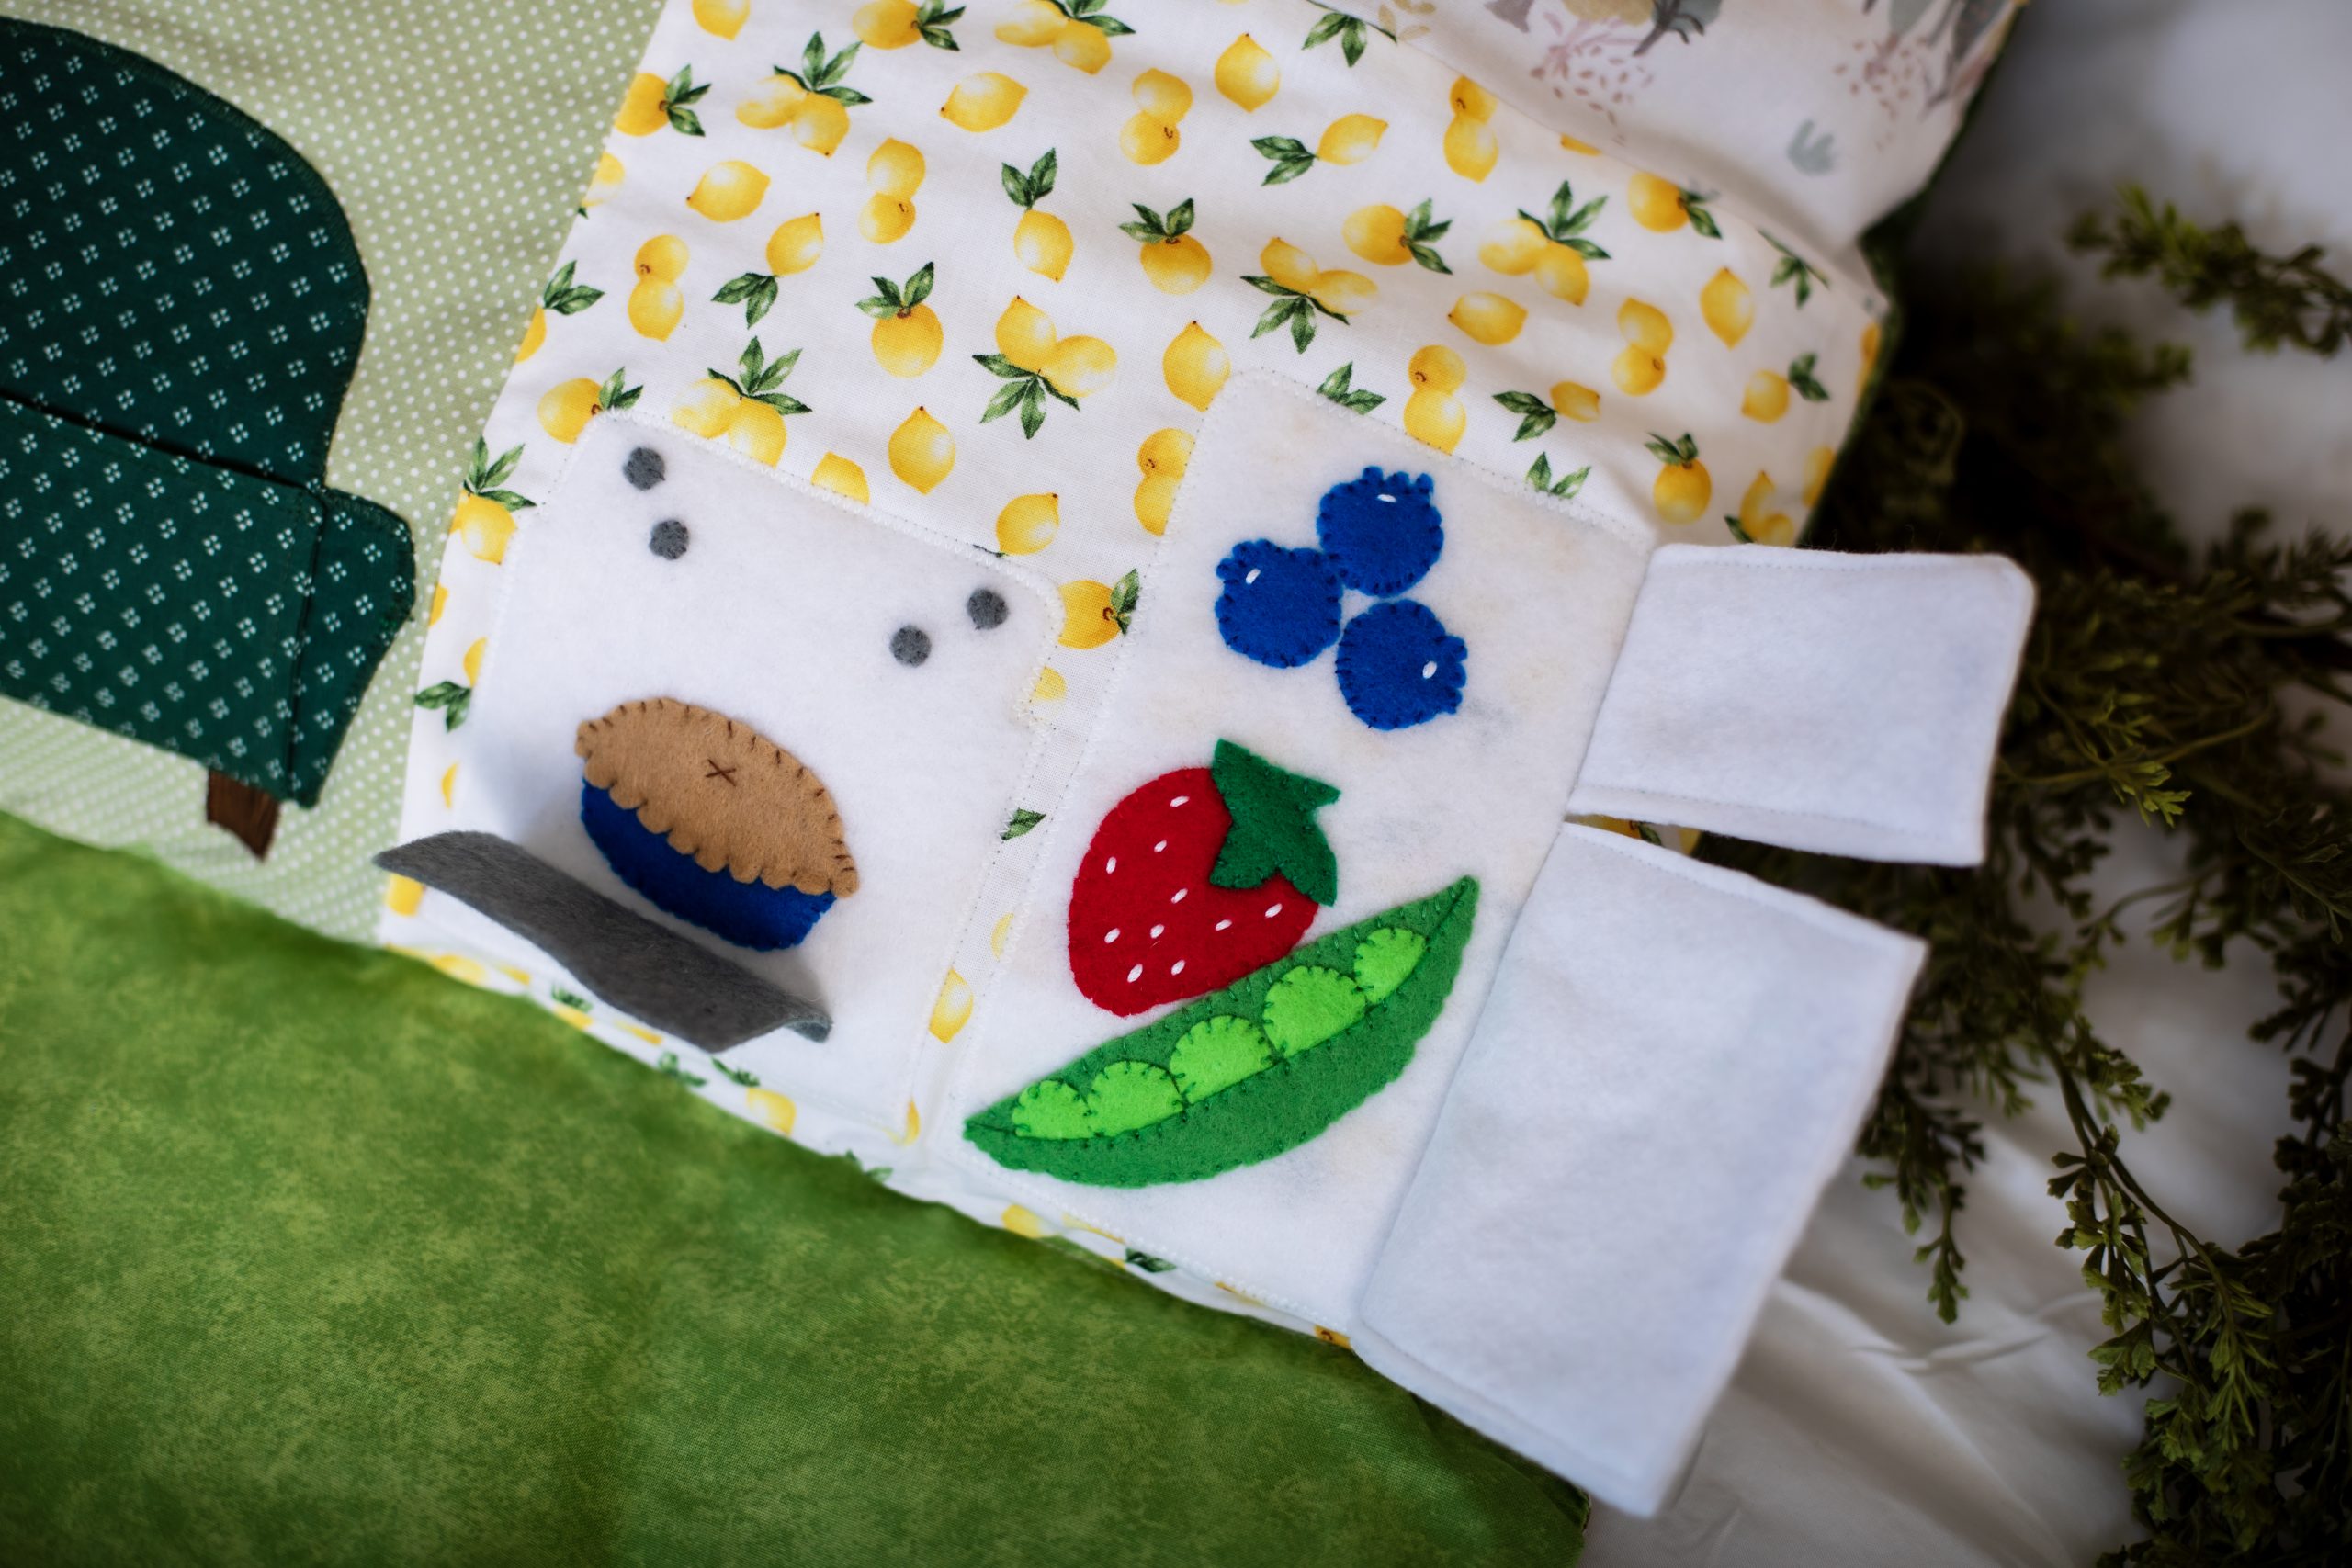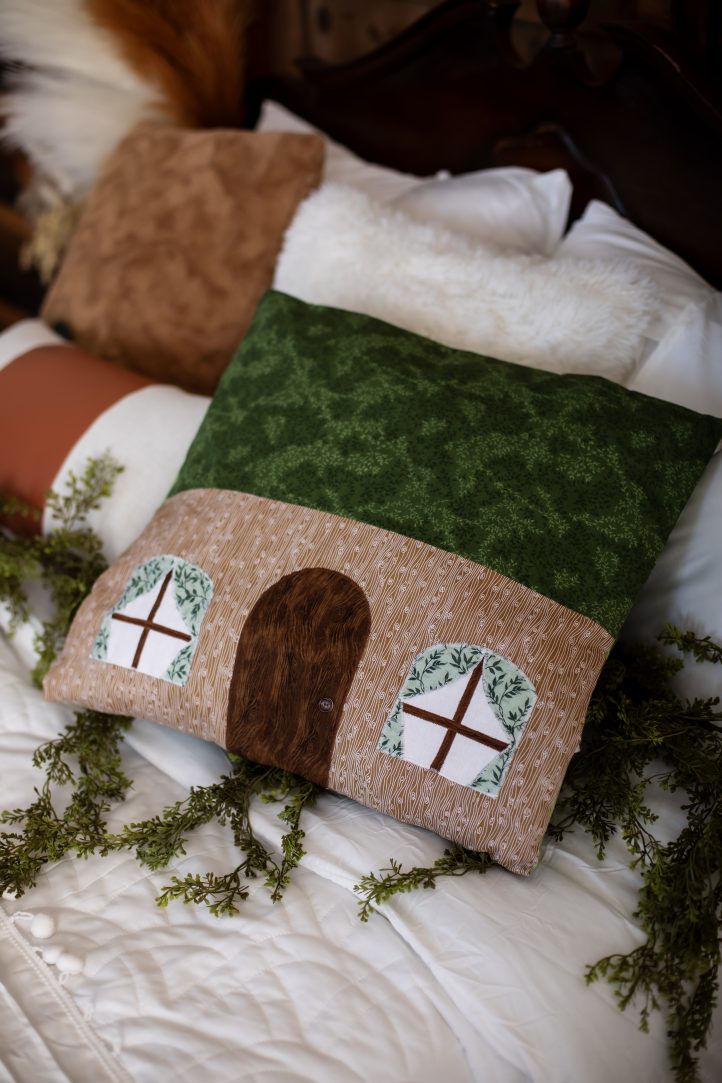
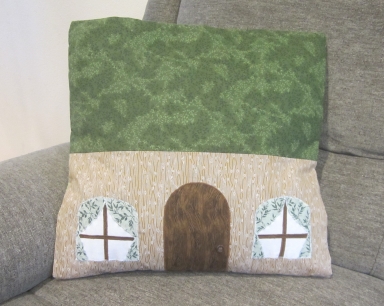
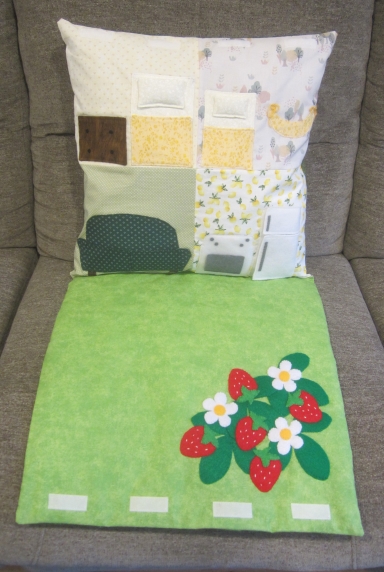
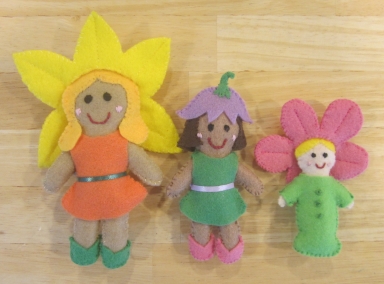
Design an enchanting woodland cottage for your children with this fun kid-friendly sewing pattern! Created by Christy Jones, this playhouse pillow pattern opens to a fabric dollhouse that includes a kitchen and bedroom, as well as a sweet strawberry patch. Finish your fabric playset pillow with a set of tiny felt dolls wearing flower hats and watch as your little ones spend hours weaving magical stories with this delightful sewing pattern.
Skill Level: Intermediate
Estimated Time: 12 hours for playhouse pillow; 1 1/2 hours per doll
Designer Notes: Use 1/4-inch seam allowance unless specified. A fairly flat pillow form will work better for the playhouse than a thick, puffy one. If your pillow form is very fluffy, you may want to remove some of the stuffing.
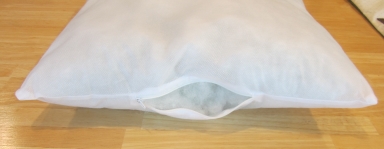
Materials:
- 18-inch by 18-inch pillow form
- 18-inch by 18-inch piece of mid-loft batting
- 3/4 yard leaf print cotton for roof and pillow front
- 3/8 yard light wood print or light brown cotton for house
- 1/8 yard dark wood print or dark brown for door, window bars, dresser, and couch legs
- 1/4 yard green cotton for yard
- 3/8 yard (or fat quarters) each of 4 small cotton prints for “wallpaper”
- 1/4 yard (or fat quarter) cotton for sofa
- 1/8 yard for curtains (or use scraps of sofa fabric)
- 1/8 yard white cotton for beds and pillows
- Small scraps of plain white cotton for windows (or use same fabric as beds)
- 1/8 yard for blankets and baby bed (Optional: Matching floss or ribbon for baby bed bows)
- 2 sheets (approx. 9 x 12 inches) or 1 sheet of thick, premium white felt for oven, refrigerator, and strawberry blossoms
- 1 sheet (approx. 9 x 12 inches) of skin-colored felt for dolls
- 1 sheet of brown felt, or scraps of assorted hair-colored felt
- 1 sheet each of red, orange, light orange, yellow, light green, medium green, dark green, gray, medium blue, light purple, and bright pink felt
- 1/4 yard each of green and lavender 1/8”-wide ribbon for doll sashes (Optional)
- Matching threads
- White, black, light pink, and dark pink embroidery floss
- Stuffing for dolls
- 1/4 yard sew-on hook and loop tape
- 1 button (approx. 1/2 inch diameter) for doorknob
- Fine-tipped washable black fabric marker or tailor’s chalk
- PDF Patterns – These are located at the bottom of this page. Please see printing instructions below.
PRINTING INSTRUCTIONS:
Note: To download the patterns, click on the pattern download button at the bottom of the page. We recommend opening your pattern download using Adobe Acrobat.
Sewing Instructions:
PLAYHOUSE INTERIOR:
Wallpaper:
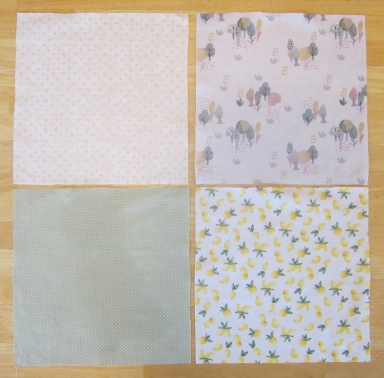
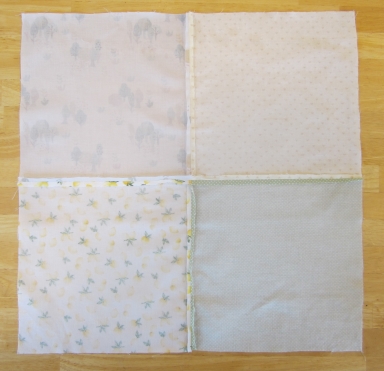
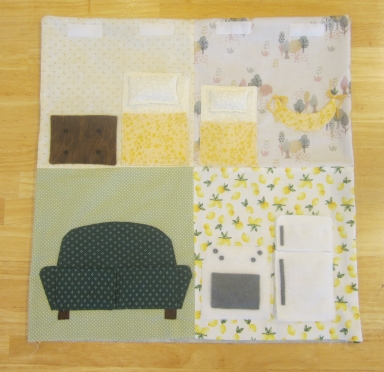
- Cut a 10-inch square from each of the 4 wallpaper fabrics. Lay them out, right side up, with the bedroom fabrics at the top and the living room and kitchen fabrics at the bottom.
- Flip the right-side bedroom fabric face down onto the left-side bedroom fabric, lining them up along the edges. Pin them together along the right side only.
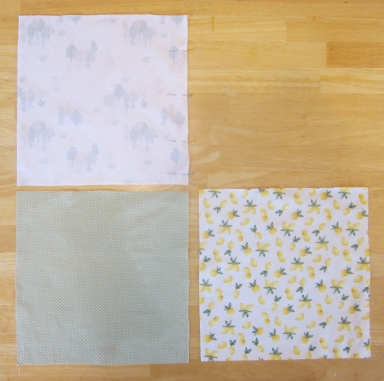
- Stitch the bedroom fabrics together along the right side only, then press the seam open.
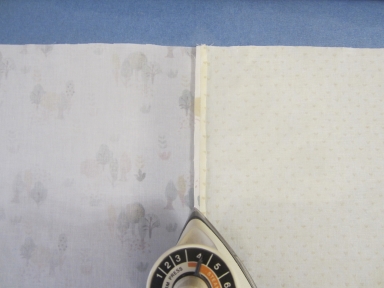
- Sew the living room and kitchen wallpaper fabrics together the same way.
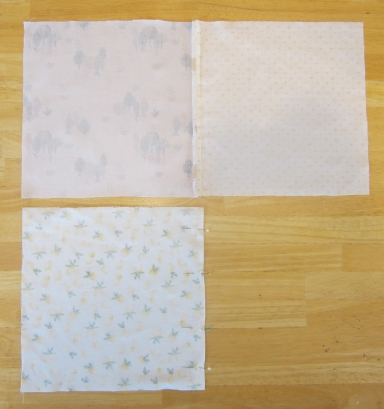
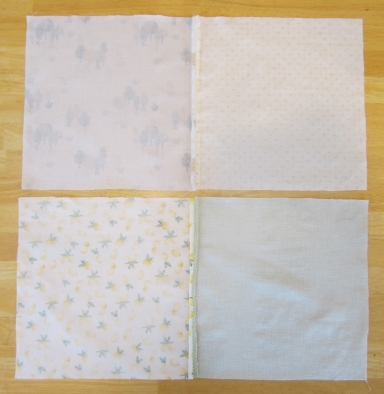
- Flip the fabrics right side up, then turn the bedroom fabrics face down onto the downstairs fabrics, so that the lower edge of the bedroom fabrics lines up with the top edge of the downstairs fabrics. Pin the pieces together along this edge only.
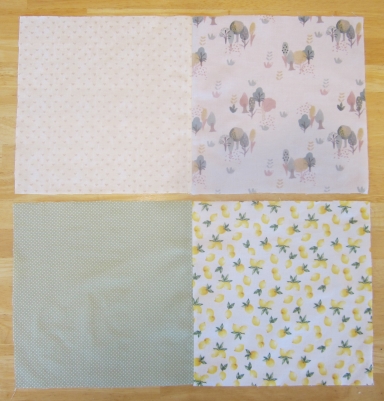
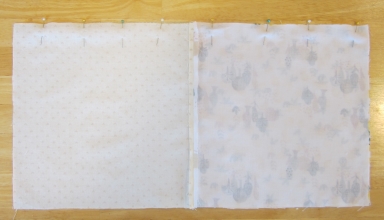
- Stitch the pieces together along the pinned edge, then press the seam open.
- Cut 4 pieces of hook and loop tape, each 2 inches long. Set aside the 4 pieces of hook tape to use for the yard.
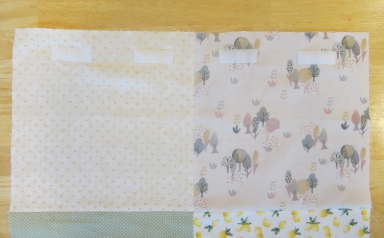
- Place the wallpaper fabrics right side up. Position a piece of loop tape near each upper corner of the bedroom wallpaper, 1 inch from the top of the fabric and 2 inches from the side.
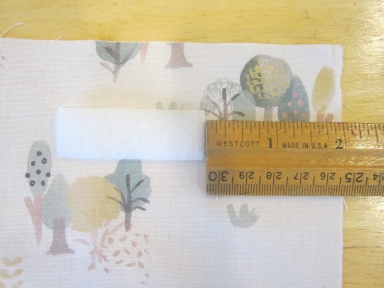

- Position another piece of loop tape 2 1/4 inches from the corner pieces. Pin all the loop tape pieces in place.
- Zigzag stitch around each piece of loop tape.
Make the Beds:
Note: The “big bed” patterns accommodate 5-inch dolls, and the “small bed” patterns fit 4-inch dolls. Both beds are made the same way.
- Cut 2 beds from white fabric. Place them right sides together and stitch along the left, top, and right sides, leaving the lower edge open.
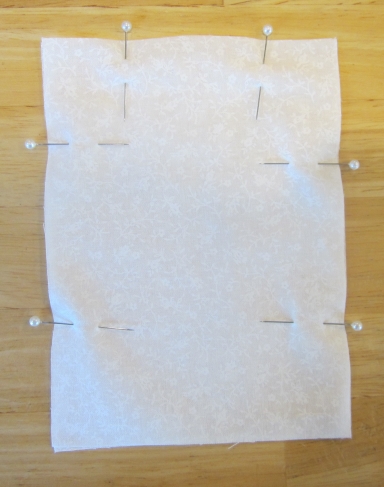
- Clip the upper corners, taking care not to cut the seams.
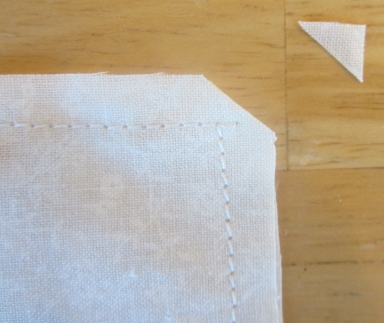
- Turn the fabric right side out, using the blunt end of a pencil or crochet hook to help gently push the corners fully out. Press the bed flat.
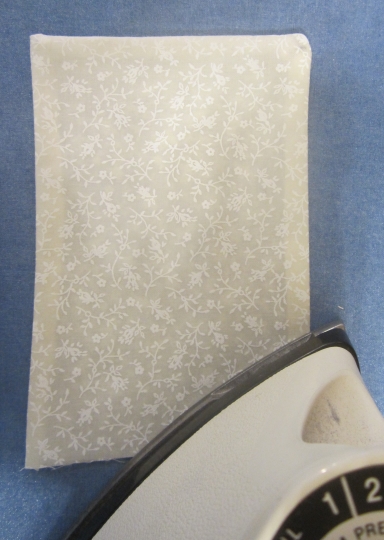
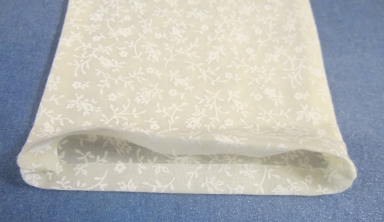
- Turn the open edges 1/4 inch toward the inside and press.
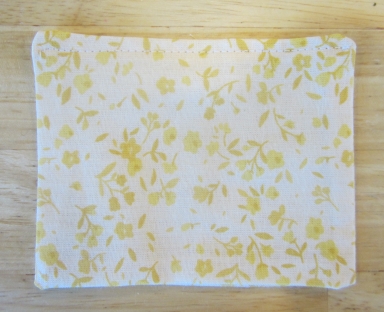
- Topstitch the opening closed.
- Cut 2 blankets. Sew them together the same way as the beds.
- Topstitch across the upper edge of the blanket.
Pillows:
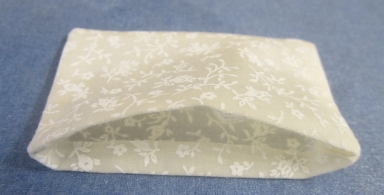
- Cut 2 pillow pieces from white fabric. Place them right sides together and stitch along the left, top, and right sides, leaving the lower edge open. Clip the corners.
- Turn the fabric right side out and press it flat.
- Turn the open edges 1/4 inch toward the inside and press.
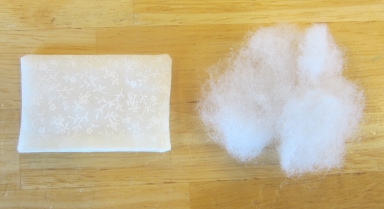
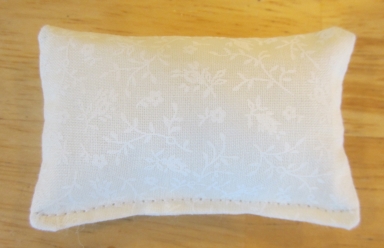
- Fill the pillow lightly with stuffing, then topstitch the opening closed.
- Position the pillow near the top of the bed and pin it in place.
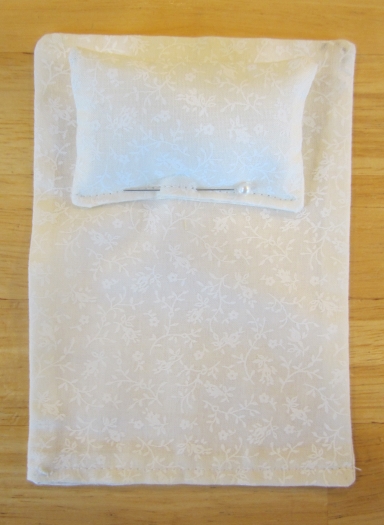
- Flip the bed over. Hand stitch the upper right corner of the pillow to the bed. Sew only through the bottom layer of the pillow, without stitching through to the front of the pillow. (Use white thread; red thread shown here for visibility.)
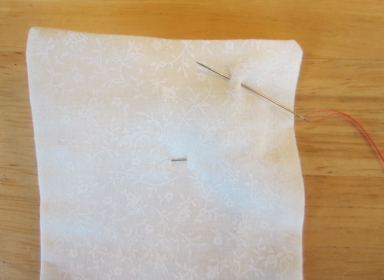
- Stitch the upper center of the pillow to the bed, continuing to sew through the bottom layer of the pillow only.
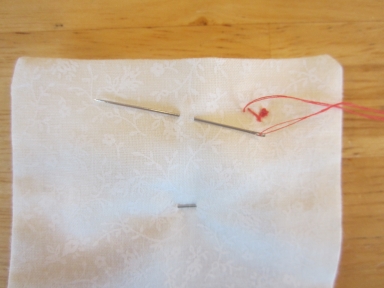
- Continue stitching each corner of the pillow, as well as the center of the lower long side, to the bed, until the pillow is securely attached.
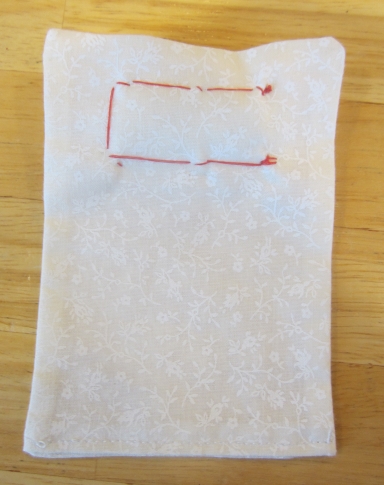
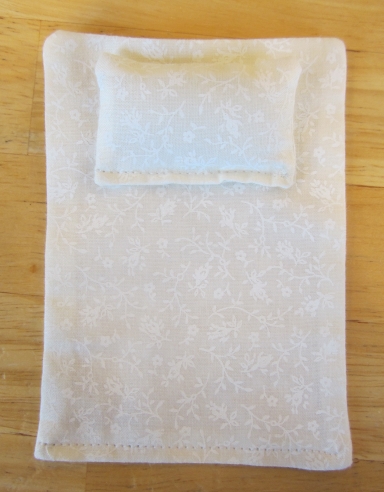
Dresser:
The “dresser” is actually another pocket where the dolls can store their hats when they go to bed. (The largest hat will need to be folded in half.)
- Cut 2 dressers from dark brown fabric, using the same pattern as the big blanket. Sew them together the same way as the big blanket.
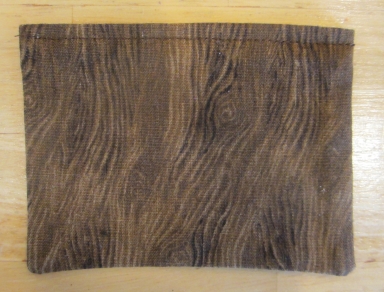
- Mark the horizontal center line of the dresser, with pins or chalk.
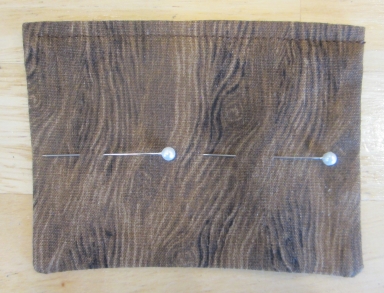
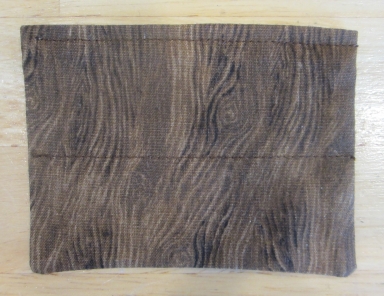
- Stitch across the center line to divide the dresser into “drawers”.
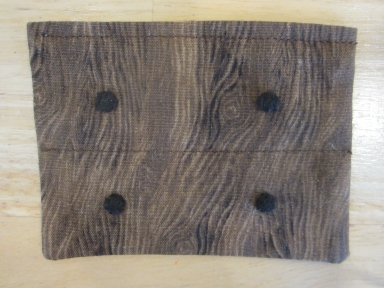
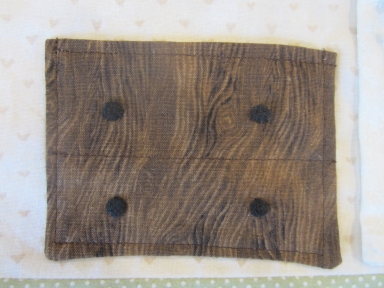
- Cut 4 dresser knobs from black felt. Position 2 knobs in each “drawer” area, spacing them evenly. Whipstitch the knobs in place.
Baby Bed:
- Cut 2 baby beds from blanket fabric. Place the baby beds right sides together and pin. Mark the area to be left open at the bottom of the baby bed (as shown on the pattern) with pins.
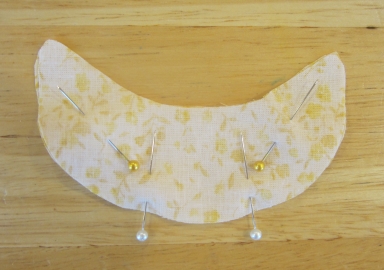
- Stitch around the baby bed, leaving the area at the bottom unstitched. Clip the corners and the curves.
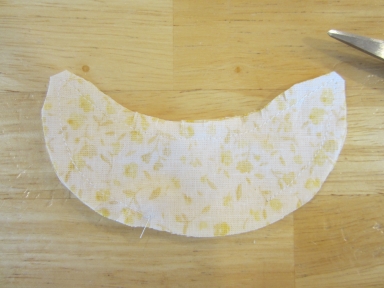
- Turn the baby bed right side out. Use a turning tool to gently poke the corners as fully right side out as possible. Turn the raw edges at the bottom of the baby bed to the inside of the bed and press. (The opening will get sewn closed when you attach the baby bed to the wallpaper.)
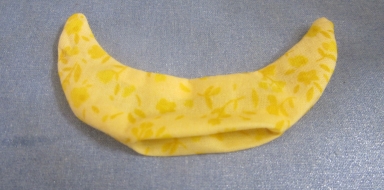
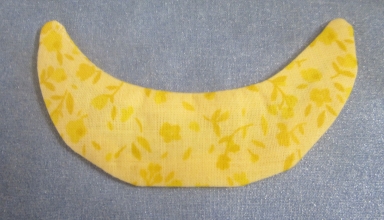
Sew the Beds and Dresser to the Wallpaper:
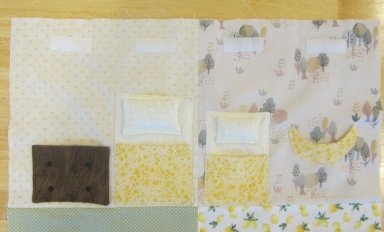
- Position the big, small, and baby beds, as well as the dresser, on the bedroom wallpaper fabric and pin them in place. Make sure to place everything at least 1 inch from the outer edges of the fabric, so that the furniture doesn’t get sewn into the seam when the house is assembled.
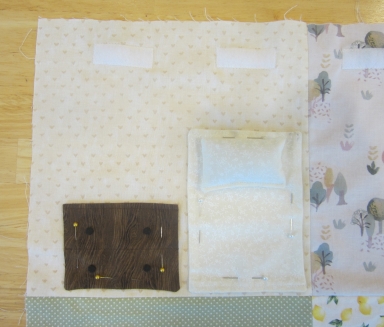
- Straight stitch around the side and lower edges of the dresser, close to the edges, using matching thread. Leave the top open to form a pocket.
- Zigzag stitch around the big and small beds using matching thread.
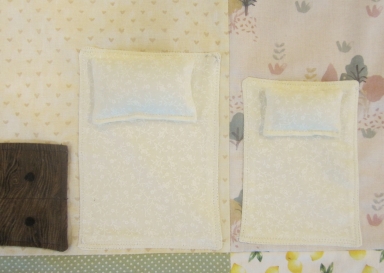
- Position the blankets on the big and small beds, lining up the lower edges. Pin the blankets in place.
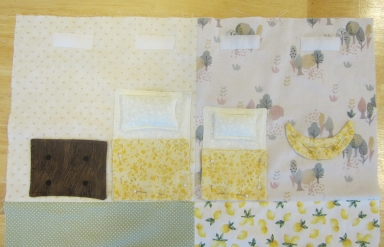
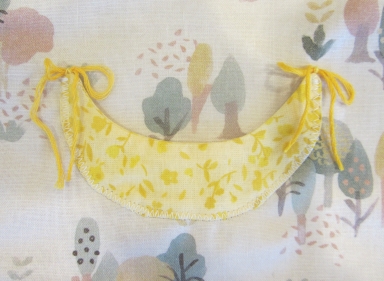
- Zigzag around the side and lower edges of the blankets using matching thread. Leave the top open to form a pocket. Zigzag stitch along the lower curve of the baby bed, leaving the top open.
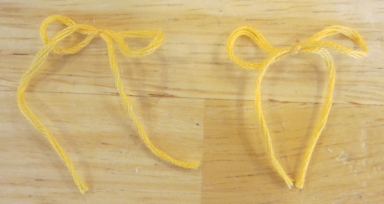
- Optional: Cut two 6-inch pieces of embroidery floss or narrow ribbon, and tie each piece in a bow.
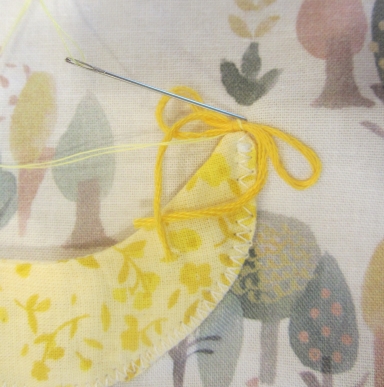
- Position a bow at each upper corner of the baby bed. Sew each bow in place using a few hand stitches.
Sofa:
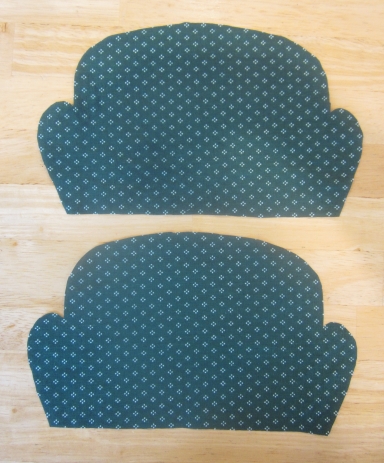
- Cut 2 sofas from sofa fabric.
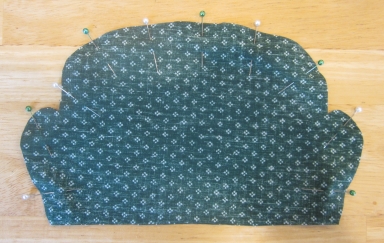
- Place the sofas right sides together, and pin them together along the curved edges, leaving the lower, straight edge open.
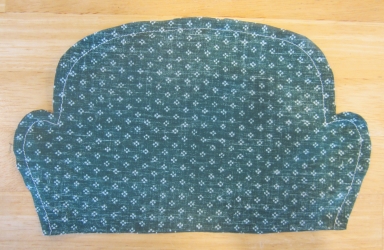
- Stitch the sofa along the curved edges, leaving the lower, straight edge open.
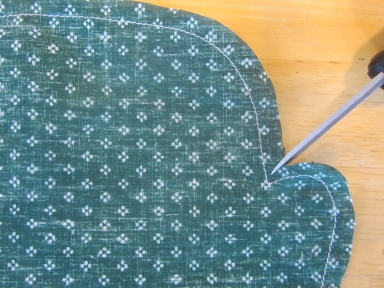
- Clip the curves and corners, taking care not to cut the seam allowance.
- Turn the sofa right side out and press it flat.
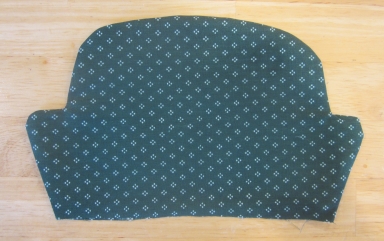
- Turn the open edges of the sofa under 1/4 inch toward the inside of the sofa and press.
- Cut 4 sofa seat pockets from the sofa fabric. Set 2 pieces aside. Place the other 2 pocket pieces right sides together, and pin them along the left, top, and right edges.
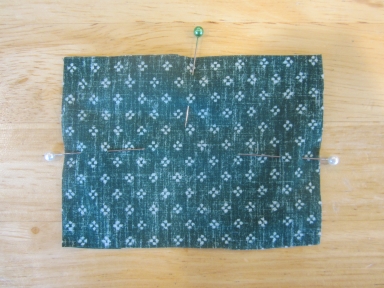
- Stitch around the edges of the pocket pieces, leaving the lower edge open. Clip the corners.
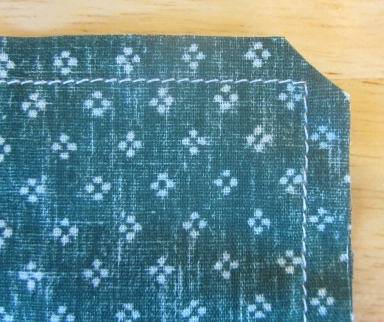
- Turn the pocket right side out and press.
- Turn the open edges of the sofa pocket under 1/4 inch toward the inside of the pocket and press.
- Topstitch the upper edge of the pocket.
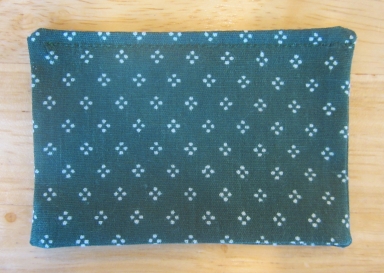
- Make a second sofa pocket the same way.
- Position the two pockets on the sofa, lining them up along the lower edges. Pin the pockets to the sofa.
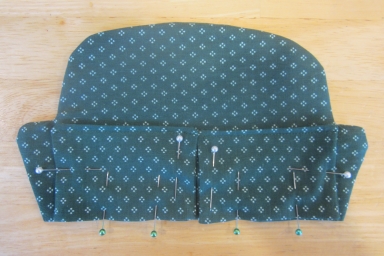
- Stitch the pockets to the sofa along the side and lower edges. Leave the top of the pockets open, so that the dolls can be inserted to “sit” on the sofa.
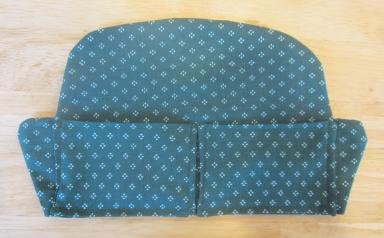
- Position the sofa 1 3/4 inches from the lower edge of the living room fabric, and as close to the kitchen wallpaper as possible.
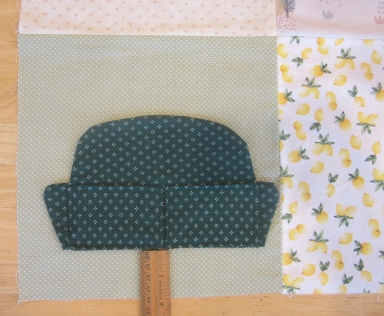
- Cut 2 sofa legs from dark brown fabric, and position them at the bottom of the sofa, tucking them slightly under the lower edge of the sofa.
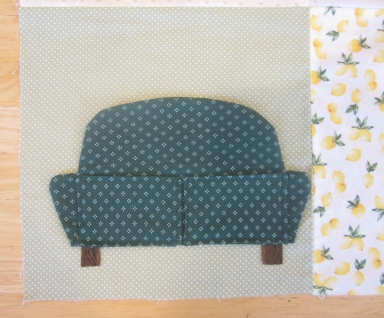
- Remove the sofa and pin the legs in place.
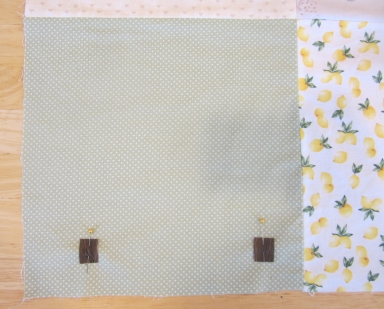
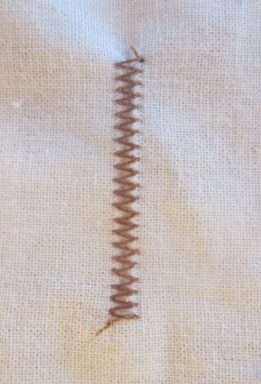
- Zigzag stitch around each sofa leg using matching thread and a closely spaced zigzag stitch, to prevent the raw edges from raveling. (You may want to test the zigzag spacing on a scrap of fabric.)
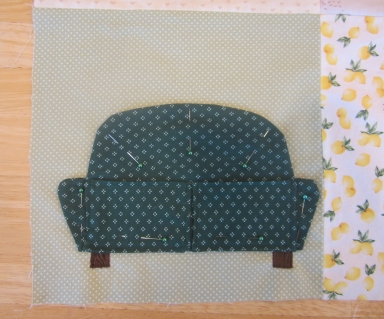
- Position the sofa on top of the legs again, and pin the sofa to the wallpaper.
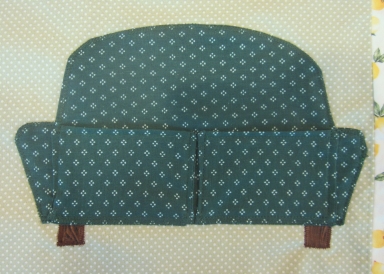
- Zigzag stitch around the outer edges of the sofa using matching thread.
Oven:
Note: Two layers of white felt make the oven thick enough to prevent the wallpaper from showing through. If you have thick premium felt, you can use a single layer.
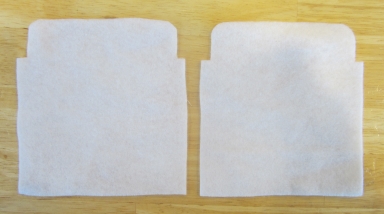
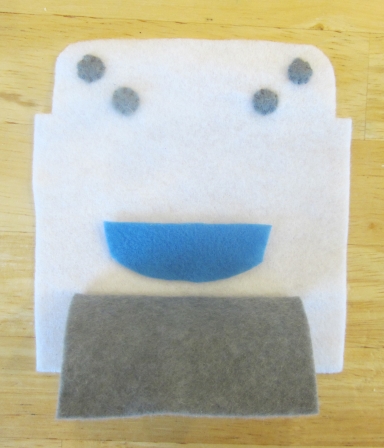
- Cut 2 ovens from white felt. Set 1 aside to the backing.
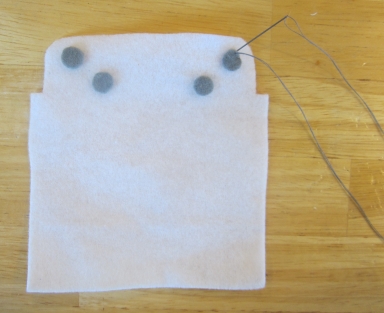
- Cut 4 oven knobs from gray felt and position them on the upper area of the oven. Whipstitch the knobs in place using gray thread.
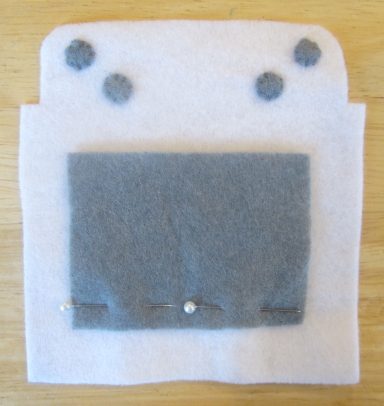
- Cut 1 oven door from gray felt. Position the door on the oven and pin it in place along the lower edge only.
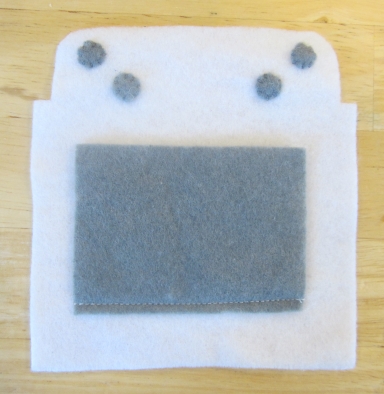
- Straight stitch along the lower edge of the oven door.
- Cut 1 pie pan from blue felt, and 1 pie from light brown felt.
- Open the oven door and position the pie pan and pie on the oven. Make sure they are positioned directly behind the oven door, so they will be hidden when the door is closed.
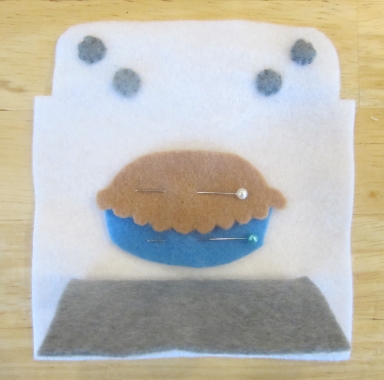
- Whipstitch around the pie pan and pie using matching threads.
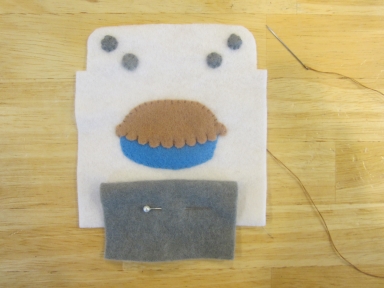
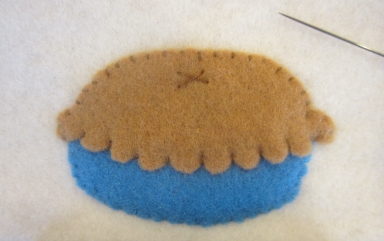
- Stitch a small “X” shape in the center top of the pie using brown thread.
- Position the oven backing, or the single-layer felt oven, on the kitchen wallpaper, 1 inch from the lower edge of the fabric, and close to the living room wallpaper seam. Position the detailed oven (if using two layers) on top of the blank one. Pin the oven in place.
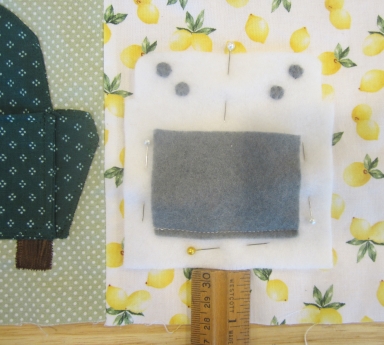
- Zigzag stitch around the oven using white thread.
Refrigerator:
Note: Two layers of white felt for the refrigerator and freezer doors make them thick enough to prevent the fridge contents from showing through. If you have thick premium felt, you can use a single layer.
- Cut 1 refrigerator from white felt. Place the freezer door pattern on the felt, lining it up with the top of the refrigerator. Mark the bottom of the freezer door with pins.
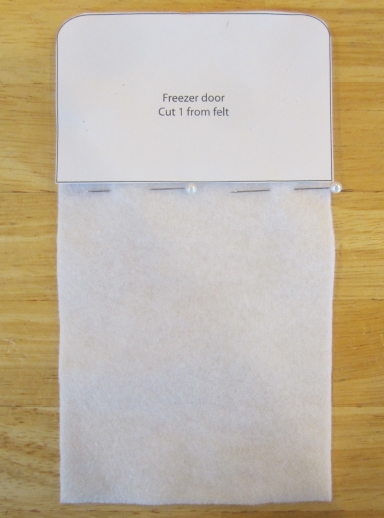
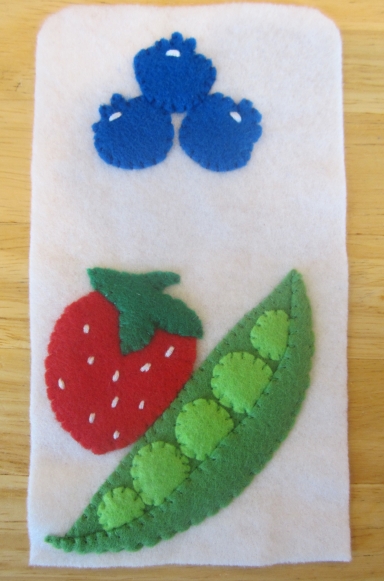
- Cut 3 blueberries from blue felt, 1 fridge strawberry from red felt, 1 fridge strawberry leaf from dark green felt, 1 peapod back and 1 peapod front from medium green felt, and 3 large peas and 2 small peas from light green felt.
- Note: Be sure to use the “fridge strawberry” pattern. The yard strawberries are larger and will not fit as nicely in the refrigerator.
- Arrange the 3 blueberries in the freezer area above the pin marking. Arrange the fridge strawberry, fridge strawberry leaf, and peapod back in the refrigerator area below the pin marking. Make sure to leave about 1/2 inch on the right side of the refrigerator empty, to leave room for the door to be sewn on. Pin the fruits in place.
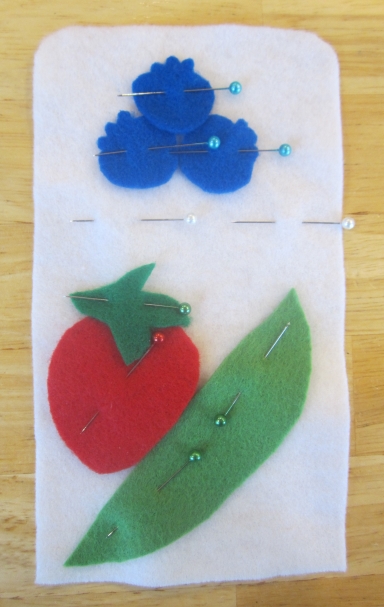
- Whipstitch around each fruit piece using matching thread. Remove all the pins.
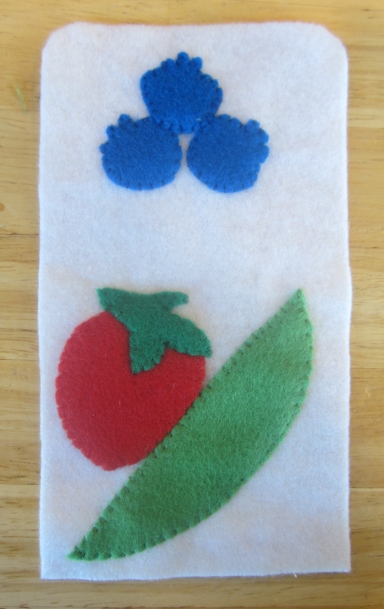
- Position the peas on the peapod back, with the small peas at the ends and the large peas in the middle. Pin the peas in place.
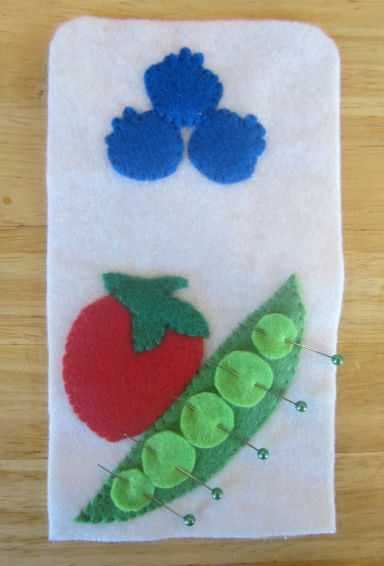
- Whipstitch around each pea using green thread.
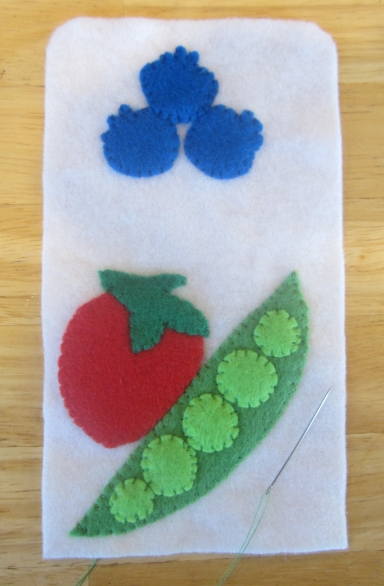
- Position the peapod front on top of the peas, lining the lower edge of the front up with the lower edge of the peapod back. Whipstitch the peapod front in place.
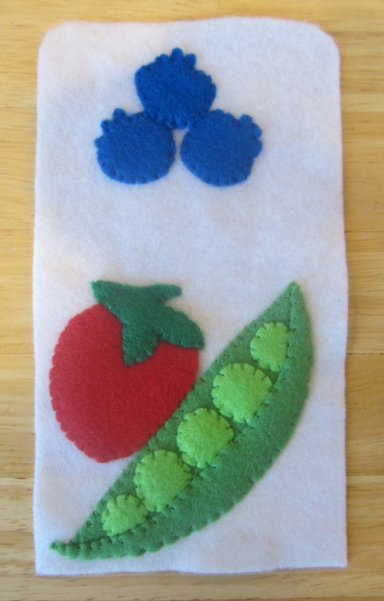
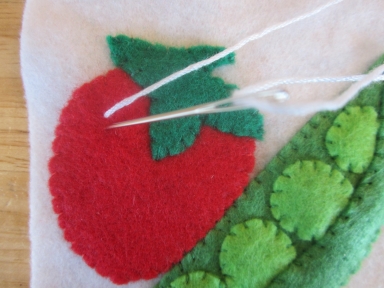
- Using white embroidery floss, stitch several small stitches randomly scattered across the strawberry to make seeds. (If the floss doesn’t stand out enough, go over each stitch a second time.) Use the same technique to stitch a “highlight” on each of the blueberries.
- Cut 2 freezer doors and 2 fridge doors from white felt. Set 1 freezer door and 1 fridge door aside to be the backing. (Or cut 1 freezer door and 1 fridge door if using thick felt.)
- Cut 1 freezer handle and 1 fridge handle from gray felt. Position each handle on the left side of the freezer door and fridge door. Whipstitch the handles in place using matching thread.
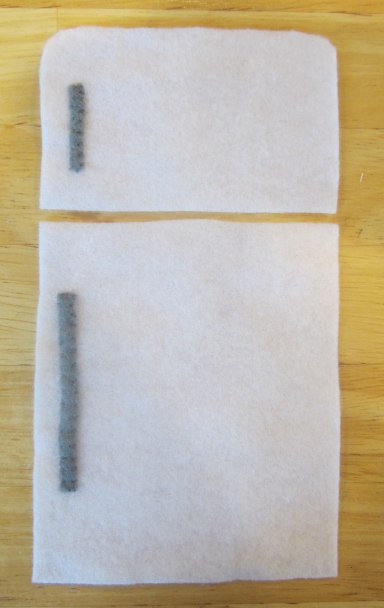
- Place the freezer door and fridge door on their backing pieces, lining them up along the edges. Straight stitch around each door, as close to the edge as possible, using white thread.
- Position the refrigerator on the kitchen wallpaper next to the oven, 1 inch from the lower edge of the fabric and at least 1 inch from the right edge. Pin the refrigerator in place.
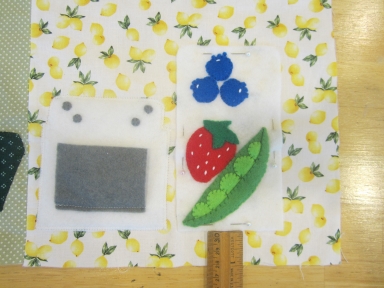
- Zigzag stitch around the refrigerator using white thread.
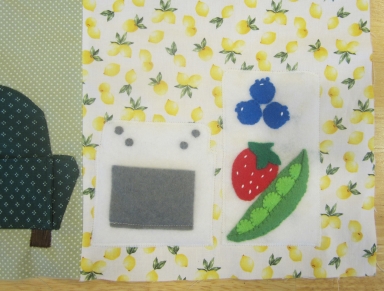
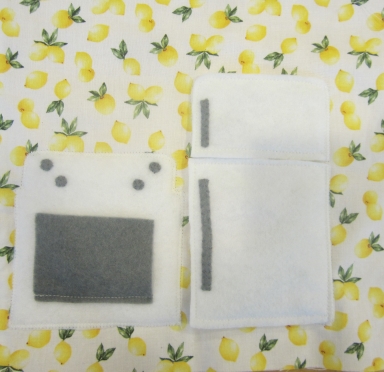
- Position the fridge and freezer doors on the refrigerator and pin them in place.
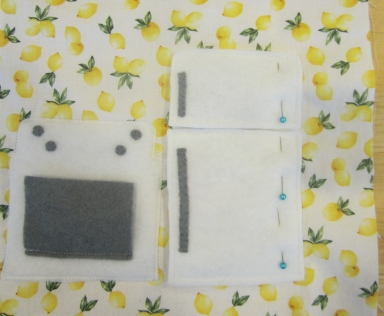
- Straight stitch the doors to the refrigerator along the right side only, leaving the other sides free to open and close.
PILLOW BACK:
- Cut a piece of leaf fabric 19 1/2 inches square.
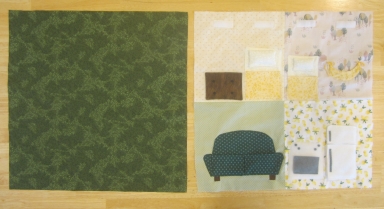
- Place the leaf fabric and the wallpaper fabrics right sides together. Pin them together along the top and side edges, leaving the lower edge open.
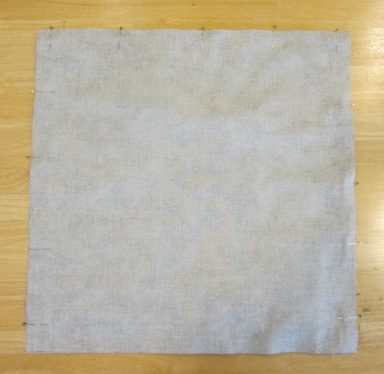
- Stitch along the pinned edges. Turn the fabric right side out.
PLAYHOUSE FRONT:
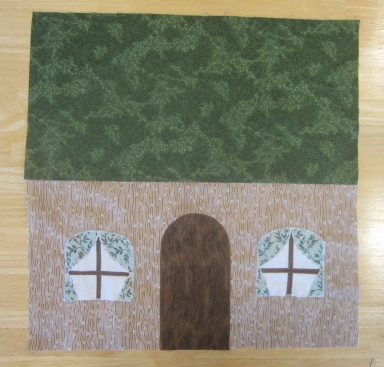
- Cut a rectangle of leaf fabric 10 inches high by 19 1/2 inches wide.
- Cut a rectangle of wood print or light brown fabric the same size.
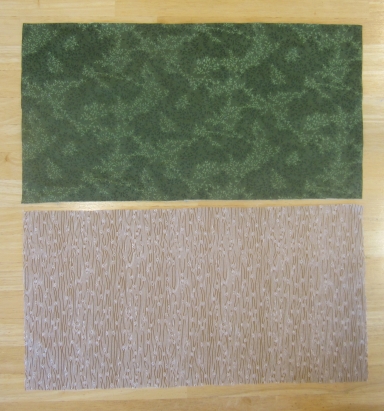
- Place the leaf fabric and wood print fabric right sides together, and pin them together along one long edge.
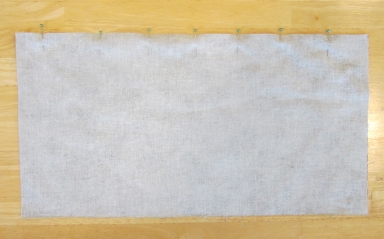
- Stitch the pieces together along the pinned edge. Press the seam open.
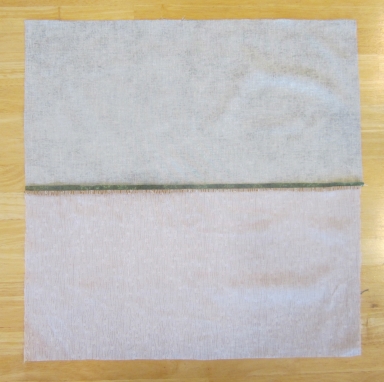
- Cut 1 door from dark brown fabric. Position it in the center of the wood print fabric, 7 3/4 inches from each side, lining up the lower edge of the door with the lower edge of the fabric. Pin the door in place.
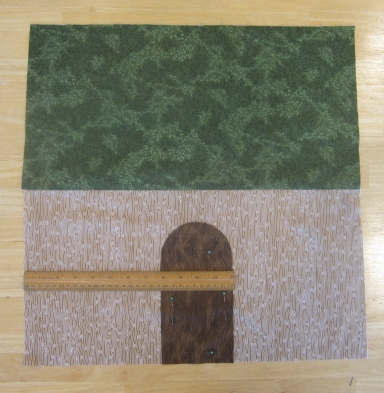
- Thread the sewing machine with brown thread and set it to a narrow, closely spaced zigzag stitch.
- Zigzag stitch around the sides and top of the door, leaving the lower edge unstitched. Stitch the doorknob button in the center about 1/2” from the side of the edge.
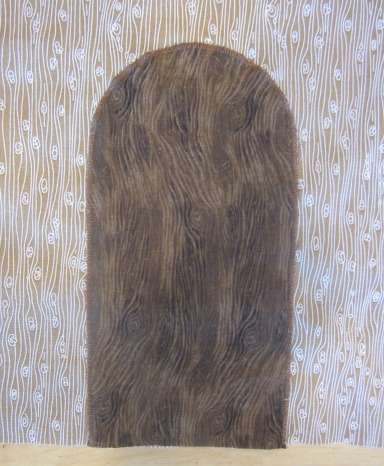
- Cut 2 windows from white fabric. Cut 2 vertical sash bars and 2 horizontal sash bars from dark brown fabric.
- Position a vertical bar in the center of each window and pin the bar in place.
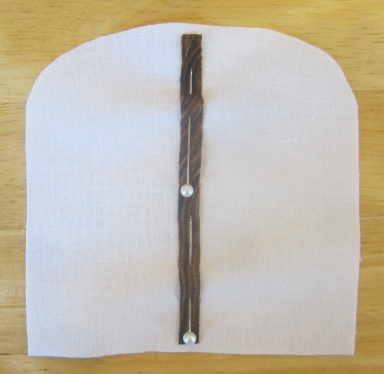
- Zigzag stitch around the edges of each vertical bar.
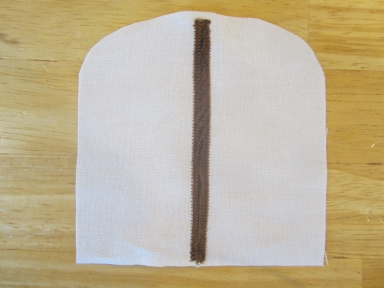
- Position a horizontal sash bar across the middle of each window. Zigzag stitch each horizontal bar in place.
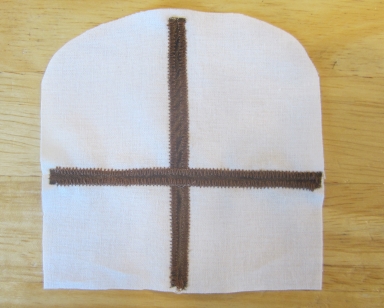
- Cut 2 left curtains and 2 right curtains from curtain fabric. Position the curtains on the windows and pin them in place.
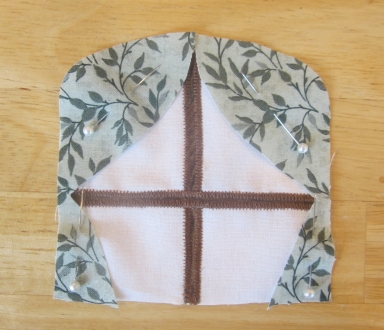
- Zigzag around the inner edges of the curtains only using a closely spaced zigzag stitch and matching thread. (The outer edges will get stitched when the windows are sewn to the playhouse.)
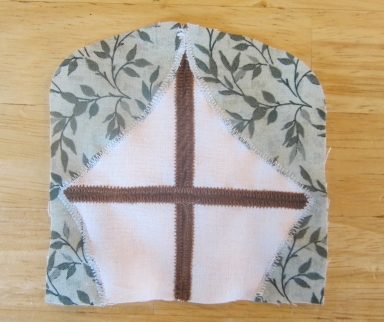
- Position a window on each side of the door, 1 1/2 inches from the door and 3 inches from the bottom edge of the house.
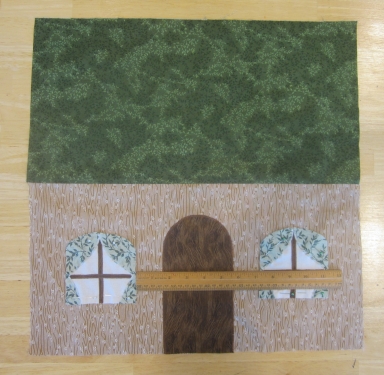
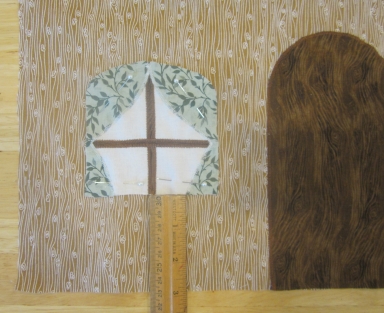
- Zigzag stitch around each window.
YARD:
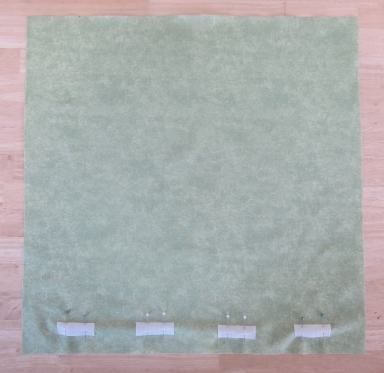
- Cut a 19 1/2 inch square of green fabric. Find the 4 pieces of 2-inch long hook tape you set aside when cutting the hook and loop tape for the wallpaper.
- Position the 4 pieces of hook tape on the lower edge of the green fabric using the same spacing as for the loop tape on the wallpaper.

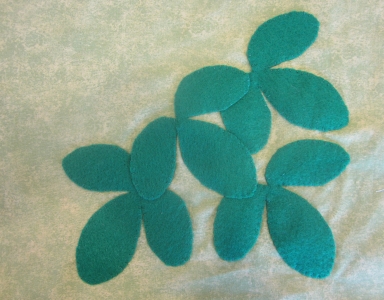
- Cut 4 strawberry leaves from dark green felt. Position the leaves in the lower right corner of the yard, at least 1 inch from the right edge and at least 1/2 inch from the hook tape. Overlap the leaves as desired.
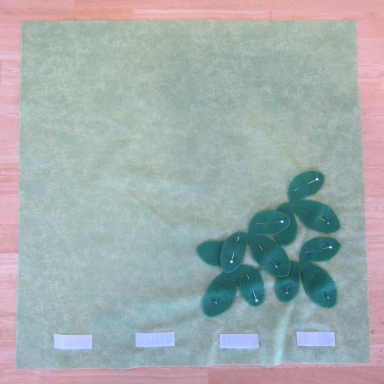
- Hand whipstitch or machine zigzag stitch the strawberry leaves around the edges of the strawberry leaves using matching thread.
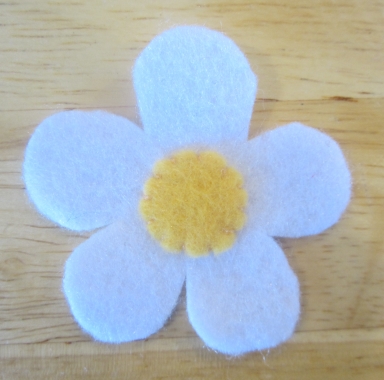
- Cut 3 yard strawberry blossoms from white felt. Cut 3 yard strawberry blossom centers from yellow felt. Position each center on a blossom and whipstitch the center in place.
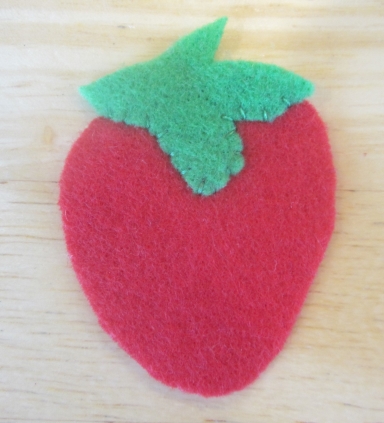
- Cut 5 yard strawberries from red felt and 5 yard strawberry stems from medium green felt. (Be sure to use the “yard strawberry” patterns, as the “fridge strawberry” pattern is smaller.) Position the stems on the strawberries and whipstitch the stem along the overlapping area.
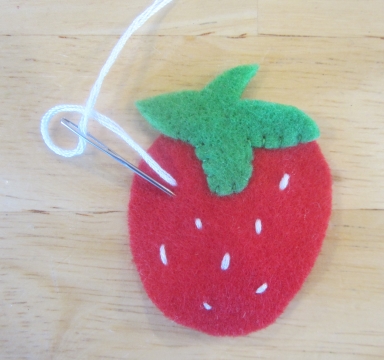
- Using white embroidery floss, stitch several small stitches randomly scattered across the strawberry to make seeds. (If the floss doesn’t stand out enough, go over each stitch a second time.)
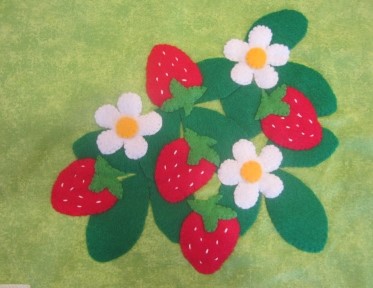
- Position the strawberries and strawberry blossoms on the strawberry leaves.
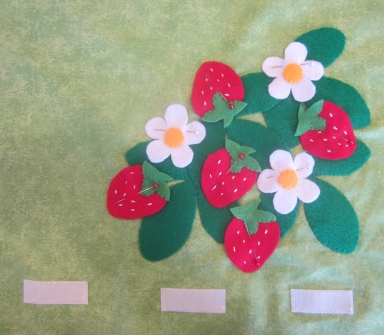
- Hand whipstitch or machine zigzag stitch the strawberries and blossoms in place using matching threads.
ASSEMBLY:
- Position the yard and the playhouse front so that the playhouse front is right side up, and the yard has the hook tape at the top.
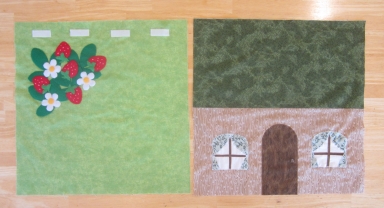
- Place the yard and playhouse front right sides together.
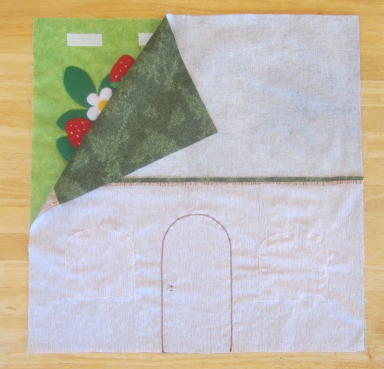
- Pin the yard and playhouse front together along the sides and the upper edge, leaving the lower edge unpinned. Stitch along the pinned edges.
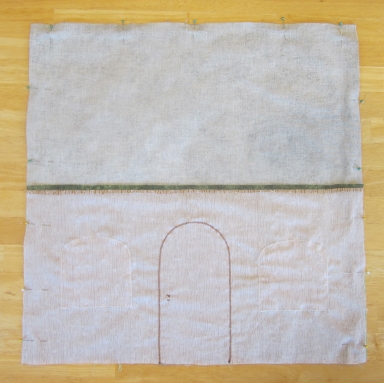
- Turn the yard and playhouse front right side out.
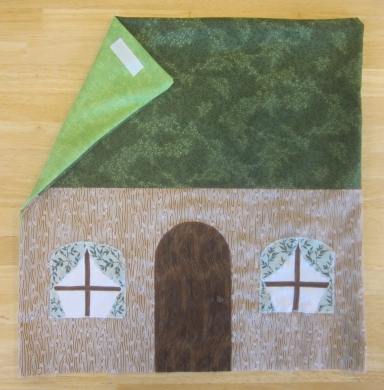
- Cut an 18-inch by 18-inch square of batting, and insert it into the yard/playhouse front.
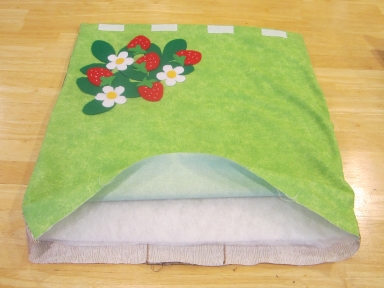
- Place the playhouse front and the plain, leaf fabric right sides together. Pin the yard, playhouse front, and plain leaf layers together, leaving the wallpaper layer unpinned.
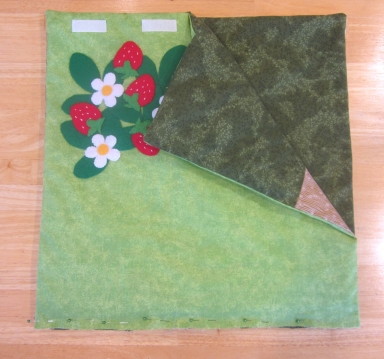
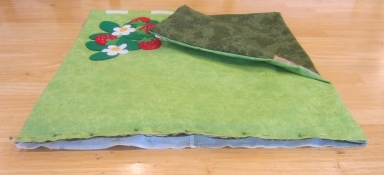
- Sew the yard, playhouse front, and pillow front layers together along the pinned edge, leaving the wallpaper layer unstitched. (This leaves an opening to insert the pillow.)
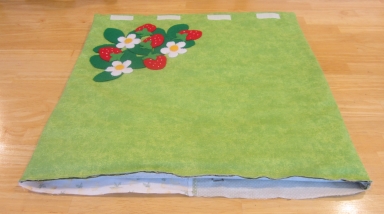
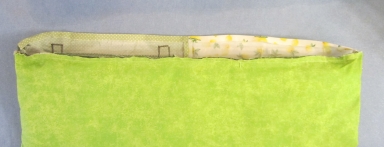
- Fold the wallpaper edge over 1/4 inch toward the wrong side and press it flat.
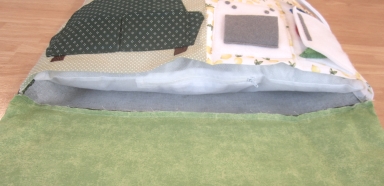
- Insert the pillow form through the opening between the wallpaper and the other layers.
- Hand sew the opening of the playhouse closed using whipstitch or a ladder stitch. To do a ladder stitch, thread a needle, doubling the thread, and knot the end. Insert the needle through the underside of the folded edge of the wallpaper fabric, hiding the knot.
- Insert the needle through the seam allowance of the yard layers, parallel to the edge.
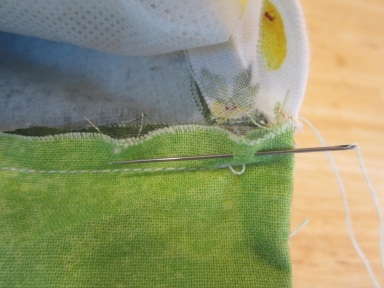
- Insert the needle through the folded edge of the wallpaper only, parallel to the edge. Take care not to poke through the upper layer of the wallpaper, so that the stitches don’t show through.
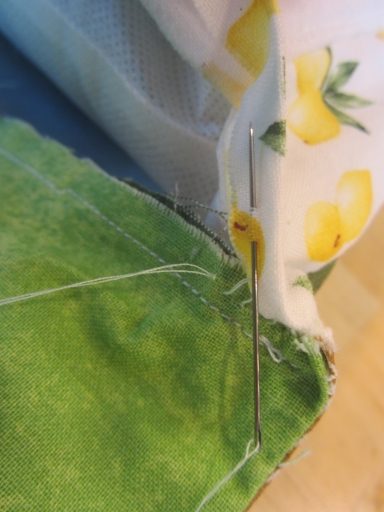
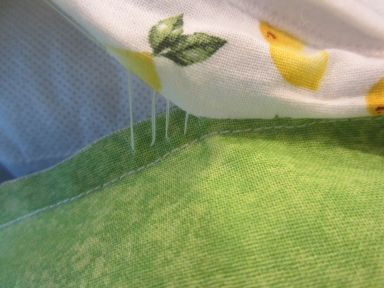
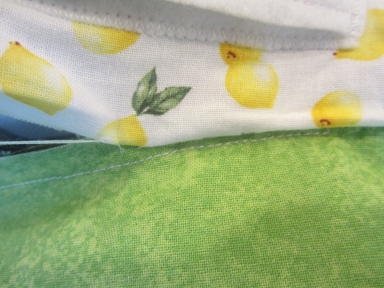
- Continue taking small stitches, parallel to the edge of the seam, alternating between the wallpaper fold and the yard seam. This forms a “ladder” of stitches. Gently pull the stitches tight as you go, closing the opening.
DOLLS:
Note: These instructions are the same for the 5-inch, 4-inch, or 3-inch dolls.
- Cut 2 doll bodies from skin-colored felt. Set 1 aside to be the back of the doll.
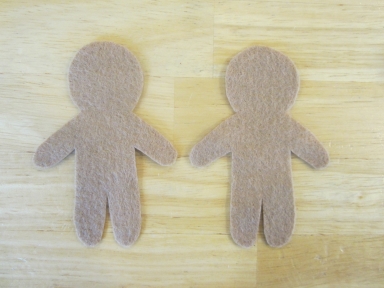
- Mark the face on the front of the doll, as shown on the pattern. Make sure to keep the markings small, to ensure they can be fully covered by the embroidery floss.
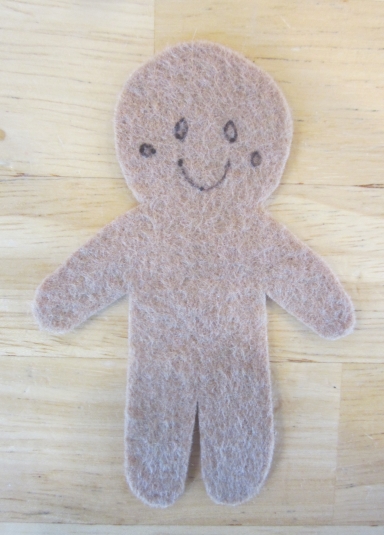
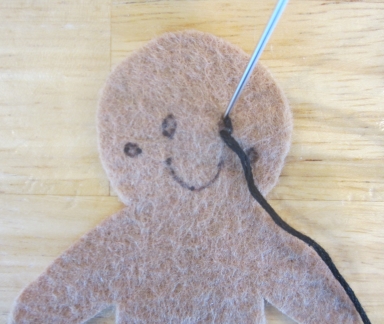
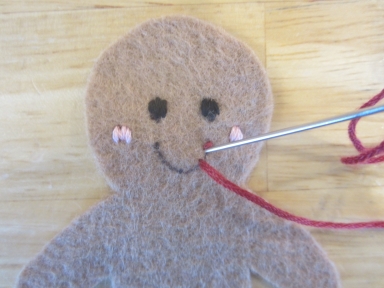
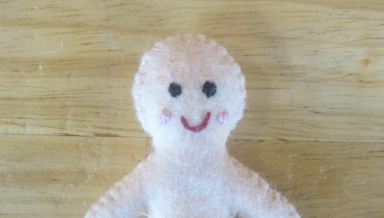
- Use black embroidery floss (all 6 strands) to stitch across the eye areas, and light pink embroidery floss to stitch across each cheek. Since the dolls are small, each eye and cheek should only need a few stitches.
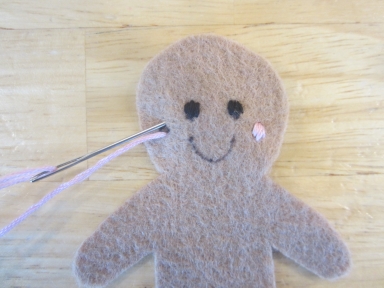
- Use dark pink embroidery floss to backstitch along the mouth. (Note: For the 3-inch doll, use only 3 strands of embroidery floss.)
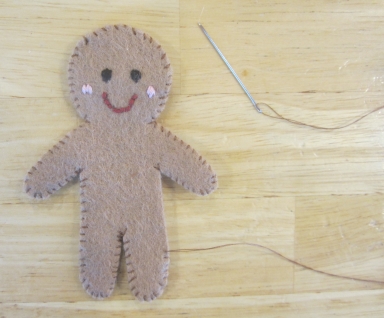
- Pin the doll front and doll back wrong sides together.
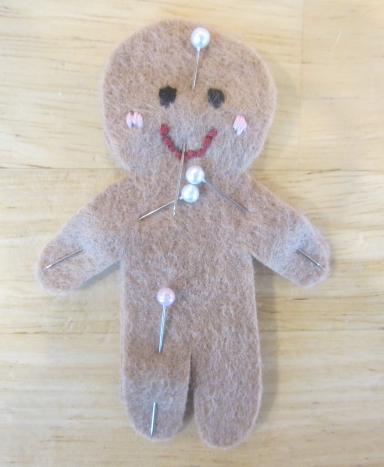
- Whipstitch around the edges of the doll using matching thread, leaving an opening in one side for stuffing.
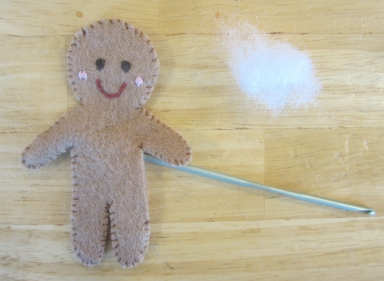
- Fill the doll with stuffing, using the blunt end of a pencil or crochet hook to gently push the stuffing into the arms and legs.
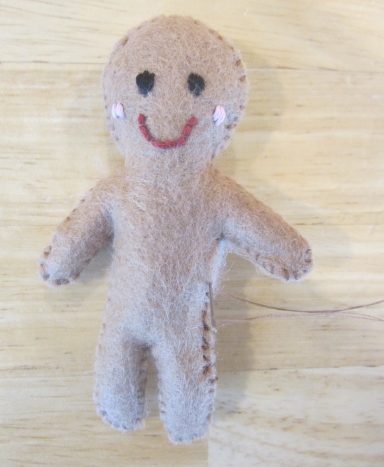
- Whipstitch the opening closed.
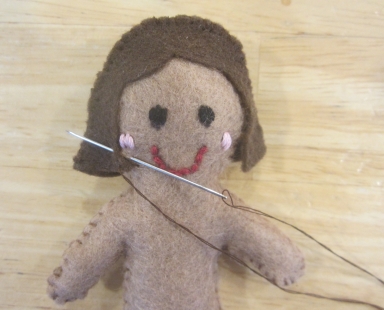
- Cut 1 doll hair front and 1 doll hair back from felt. Place the doll hair front and back wrong sides together, lining them up along the upper and side edges.
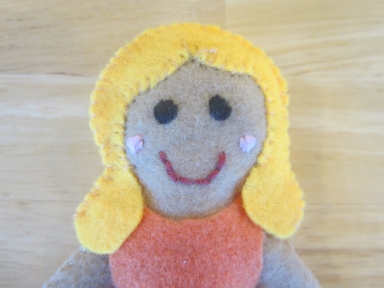
- Whipstitch the hair front and back along the sides. For the 5-inch doll’s long hair, leave the ends of the hair that will go over the shoulders unstitched.
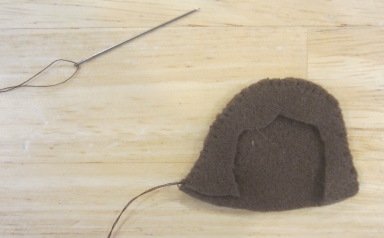
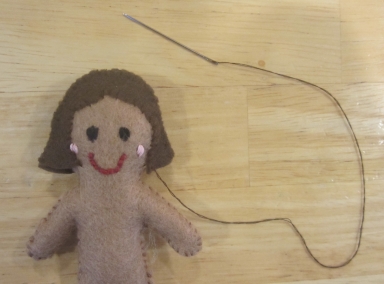
- Place the hair on the doll’s head, like a helmet, pulling it as far down as it will go. Whipstitch the hair to the head along the sides and top of the face.
- For the 3-inch doll’s short hair, also whipstitch the bottom of the back of the hair to the back of the doll’s head.
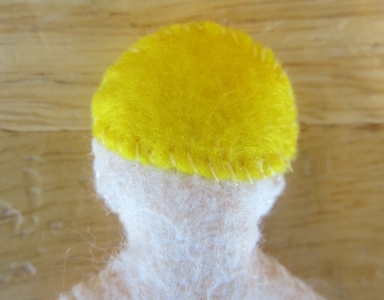
- For the 3-inch doll’s short hair, also whipstitch the bottom of the back of the hair to the back of the doll’s head.
Dresses and Shoes (for 5-inch and 4-inch Dolls):
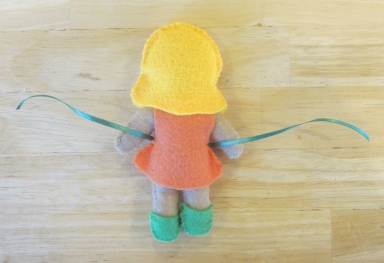
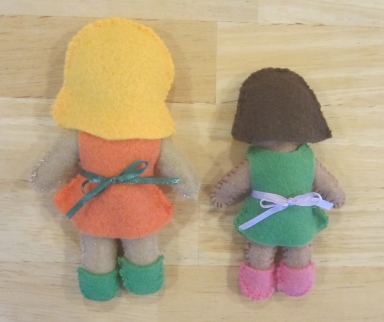
- Cut 2 dresses from felt (orange for 5-inch doll, medium green for 4-inch doll). Place one dress on the front of the doll, and one behind the doll, lining them up along the edges.
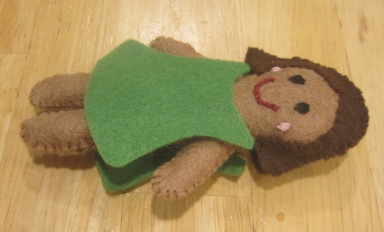
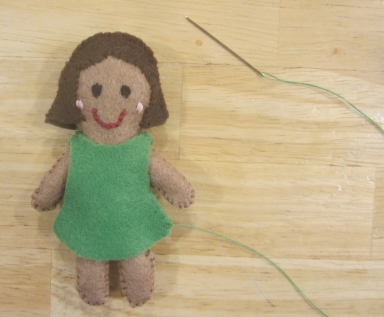
- Whipstitch the front and back of the dress together along the shoulders, and along the sides. Leave the neckline, armholes, and lower edge of the dress open.
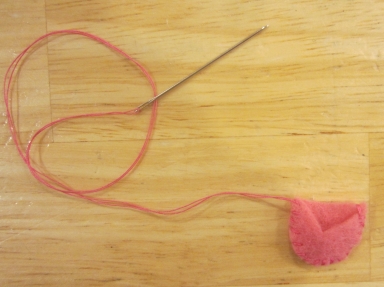
- Cut 2 shoe fronts and 2 shoe backs from felt (medium green for 5-inch doll, bright pink for 4-inch doll). Place each shoe front and shoe back together, lining them up along the edges. Whipstitch around the curved outside edge of each shoe using matching thread, leaving the top open.
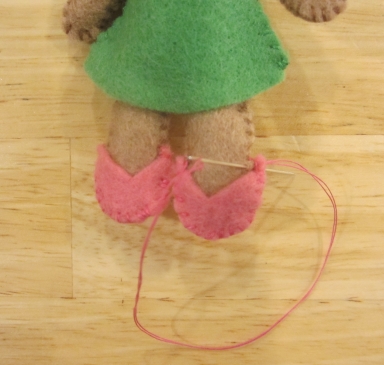
- Slide the shoes onto the doll’s feet. If desired, whipstitch the upper corners of each shoe to the doll, so that the shoes stay on and don’t get lost.
- Optional: Wrap a piece of 1/8 inch wide ribbon around the doll’s waist, tying it into a bow in the back to make a sash. Trim off any excess.
Bodysuit (3-inch Doll):
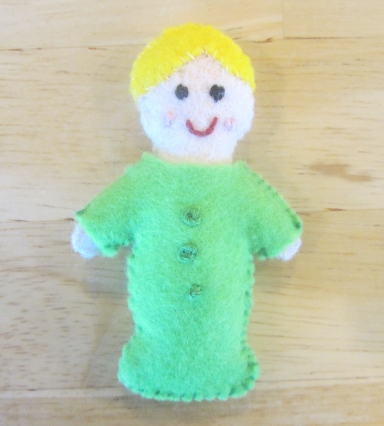
- Cut 2 bodysuits from light green felt. Set 1 aside to the back of the bodysuit.
- Make 3 small “buttons” in a vertical line on the bodysuit front using embroidery floss. (You can either do single-wrap French knots, or just 3 small straight stitches.)
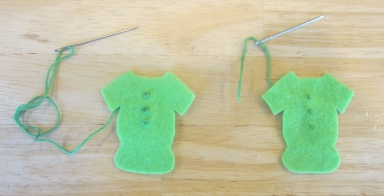
Left: French knot “buttons”; right: straight stitches
- Place the 3-inch doll on top of the bodysuit back, so that the bodysuit sticks out evenly all around the arms, sides, and lower edge of the doll.
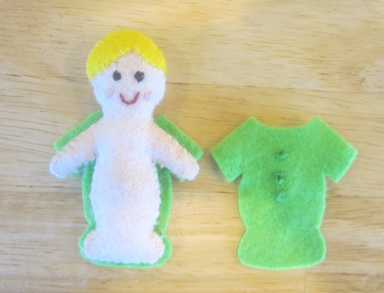
- Place the bodysuit front on top of the doll, lining up the bodysuit front and back along the edges. Whipstitch around the sides, lower edge, and shoulder seams of the bodysuit using matching thread, leaving the neck and hand areas open.
Flower Petal Hats (5-inch and 3-inch Dolls):
Note: The hats for the 5-inch and 3-inch dolls are made the same way.
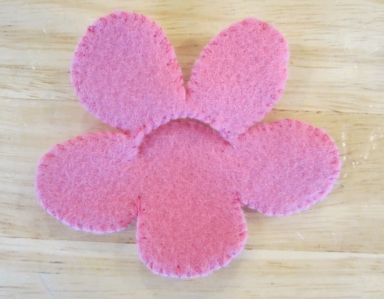
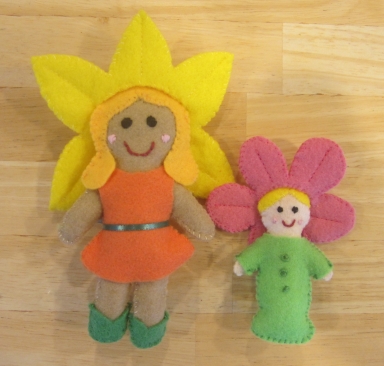
- Cut 2 petal hats from felt (yellow for 5-inch doll, bright pink for 3-inch doll). Be sure to cut the slit marked in the center of the pattern.
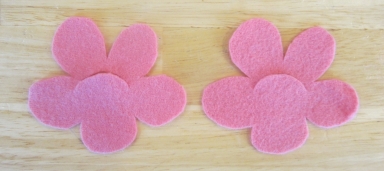
- Flip 1 hat over, then place the 2 petal hats on top of each other, lining them up along the edges. Pin them together.
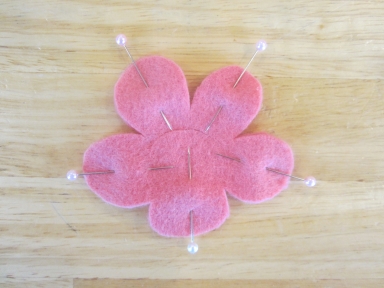
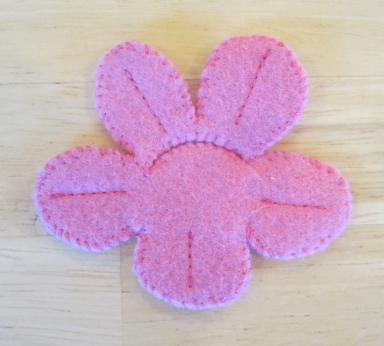
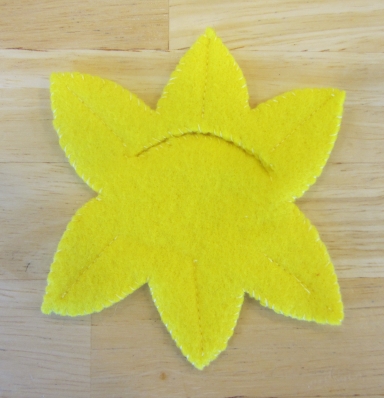
- Whipstitch around the edges of the felt using matching thread. Make sure to stitch the layers together along each side of the slit.
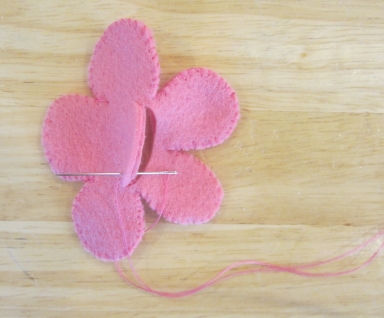
- Machine straight stitch along the center of each petal using matching thread.
Blossom Hat (4-inch Doll):
- Cut 2 blossom hats from lavender felt and 2 blossom hat stems from medium green felt. Flip 1 hat and 1 stem over to be the back of the hat. Position a stem on the top of each hat, making sure the stems align when the front and back hats are placed together.
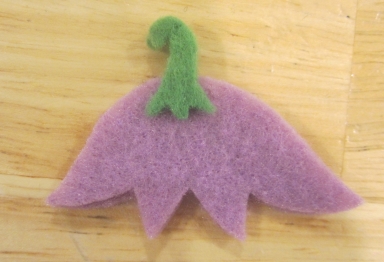
- Stitch the area of the stem that overlaps each hat piece in place.
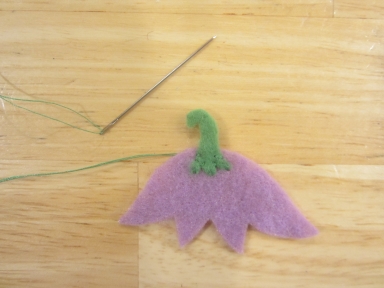
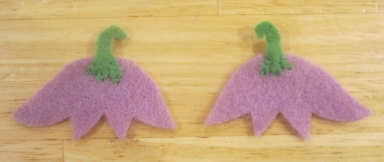
- Place the blossom hat front and back together, then whipstitch them together along the curved edge using matching thread. (Fold the stems out of the way as you stitch.)
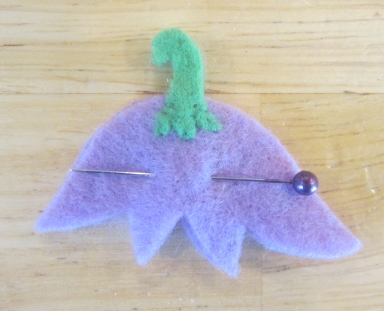
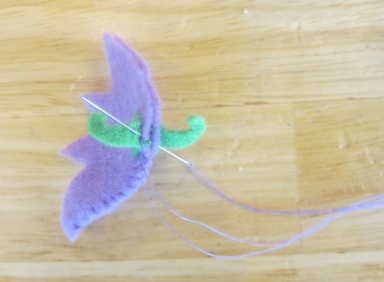
- Whipstitch the stems together using matching thread.
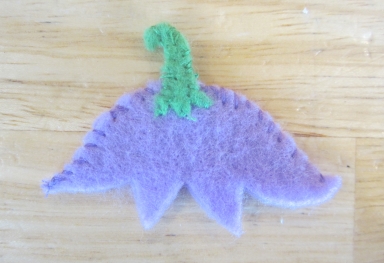
- Place the blossom hat on the 4-inch doll’s head.
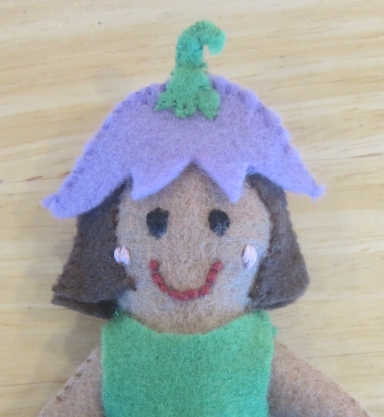
Now that the woodland playhouse pillow and the dolls are complete, the dolls are ready to play!
