All photos by Ashley Jones for Ampry Publishing. For these photos, vintage sewing patterns were used.
For new sewists, reading a sewing pattern can easily be overwhelming, especially once you open your pattern and see dashed lines, triangles, dots, and more. That’s why our editors are here to save the day! We’ve gathered the most common pattern markings that beginner sewists are most likely to encounter, all into one handy list. If you can’t tell your cutting lines from your grainlines, then you’re in the right place.
In this quick guide, we’ll cover the different lines you may see on your sewing patterns. We’ll also discuss symbols you find on patterns like triangles (notches) and dots or circles (used for transferring markings). Let us help you on your sewing journey by taking the guesswork out of deciphering pattern markings with our newest article. Before we begin, don’t forget to save this article to your Favorites, so that you can always find it when you need it.
Pattern Lines
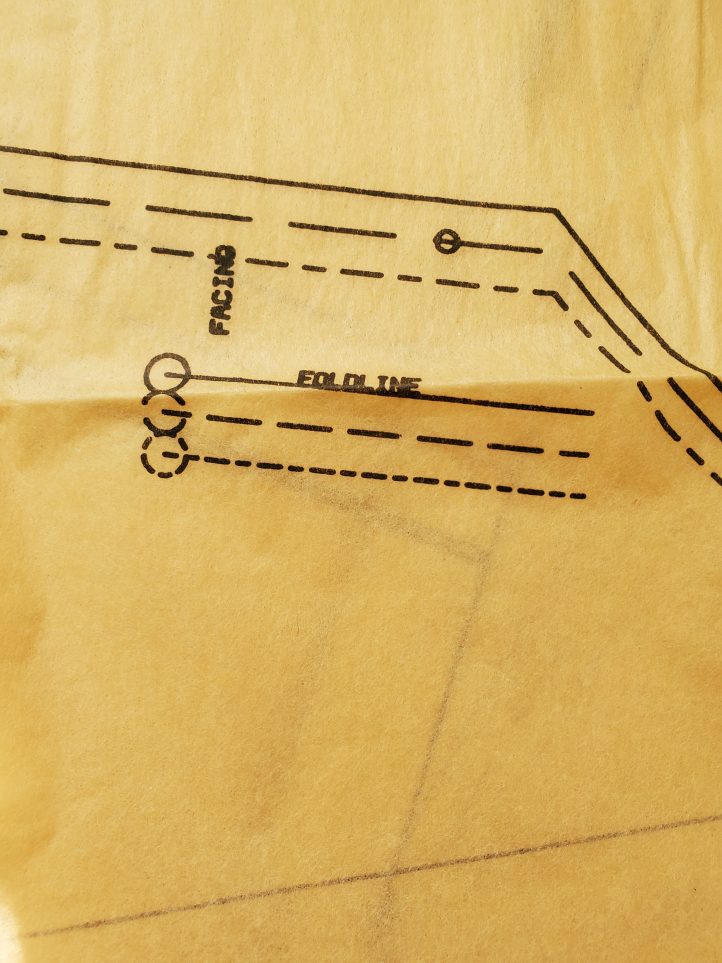
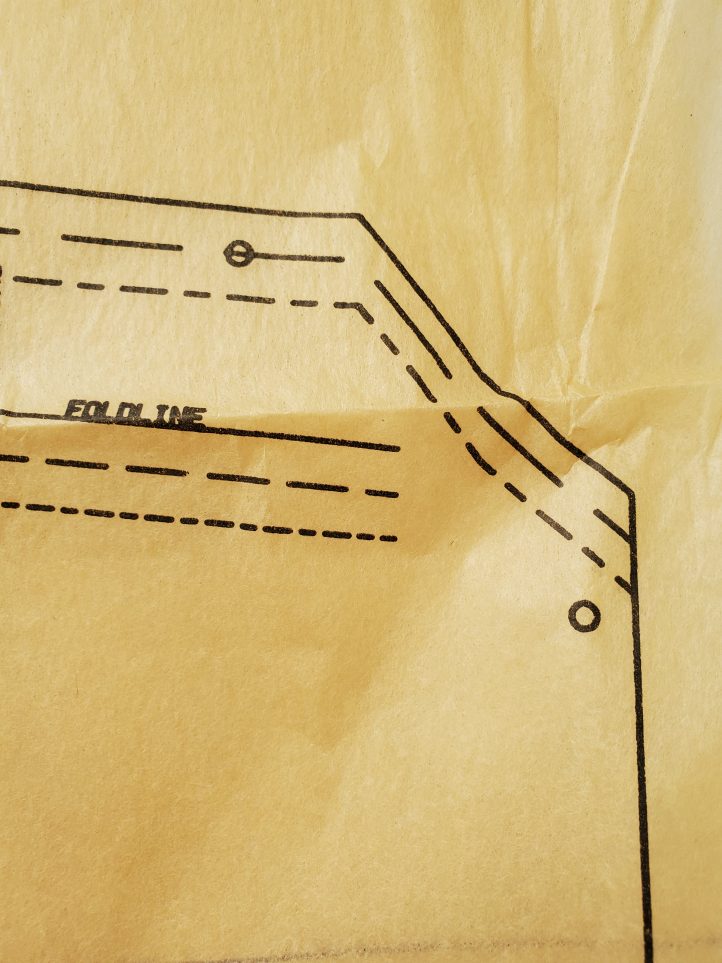
- Fold Line – Sometimes also marked as “Place on Fold Line”, the fold line is where fabric needs to be folded before cutting your pattern piece. This is most often for garments that have two mirrored halves (like a bodice of a top or dress); this will allow your pattern pieces to be symmetrical. When laying out your pattern, you will need to place the fold line directly onto your fabric’s folded edge; do not cut the fold line.
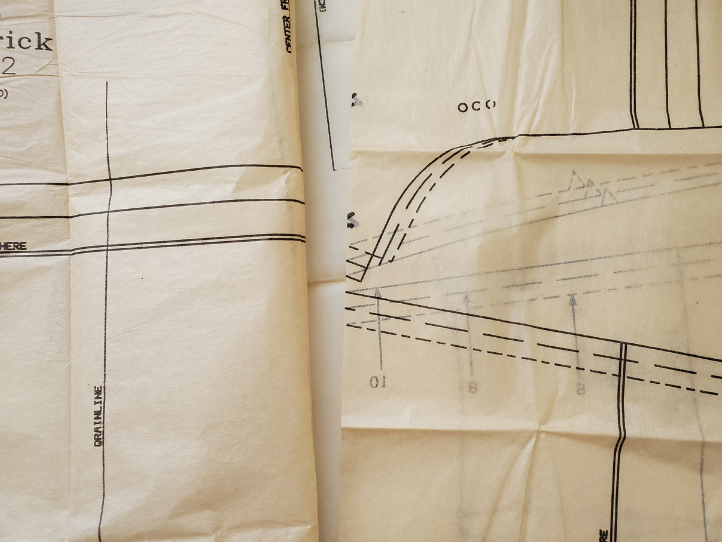
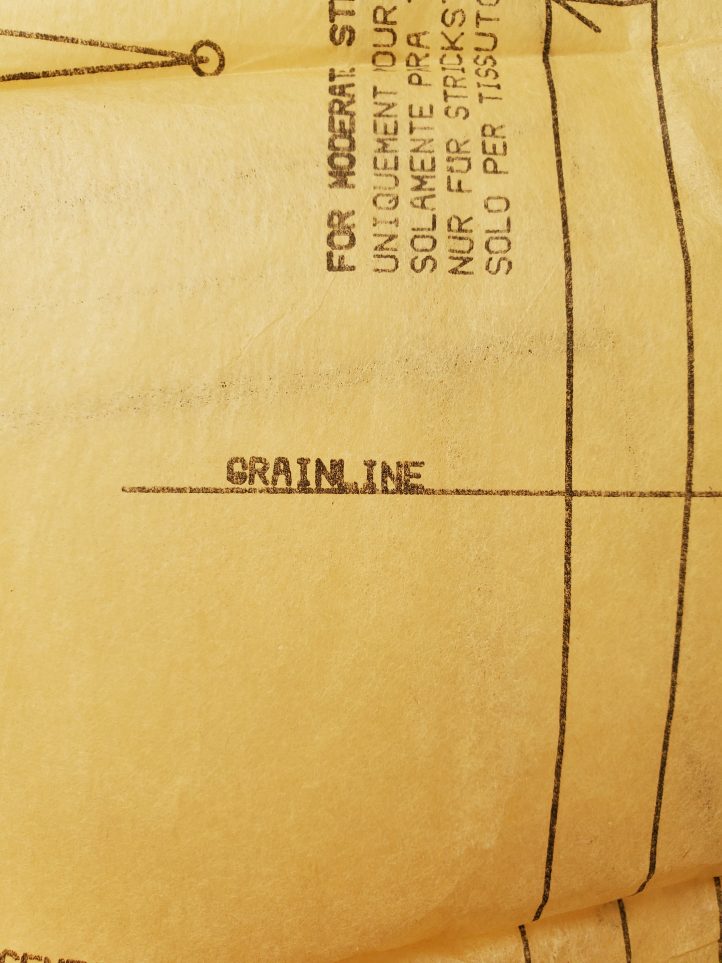
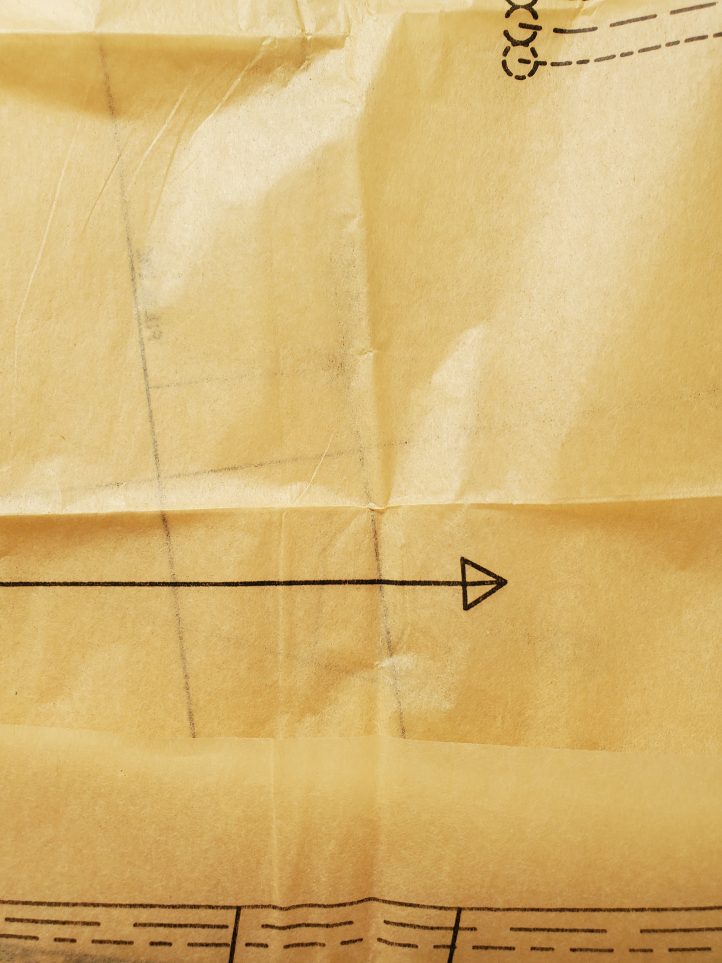
- Grainline – The grainline is a line with an arrow or arrows at the ends that shows you how to position your pattern pieces in relation to the selvedge of your fabric. Grainlines can be straight, meaning that they are parallel to the selvedge, or can be bias, meaning they are placed at a 45-degree angle to the selvedge.
- Cutting Lines – Cutting lines are most often marked by a solid black line found around the edge of the pattern piece. For patterns that feature multiple sizes, you will also see multi-size cutting lines that can be solid or dashed. With multiple sizes, it’s important to clearly mark your size so that you don’t get confused when cutting. With digital patterns, such as the majority of our PDF patterns, you are often able to de-select sizes you don’t need, so that when you print out your pattern, you are only printing out your pattern size.
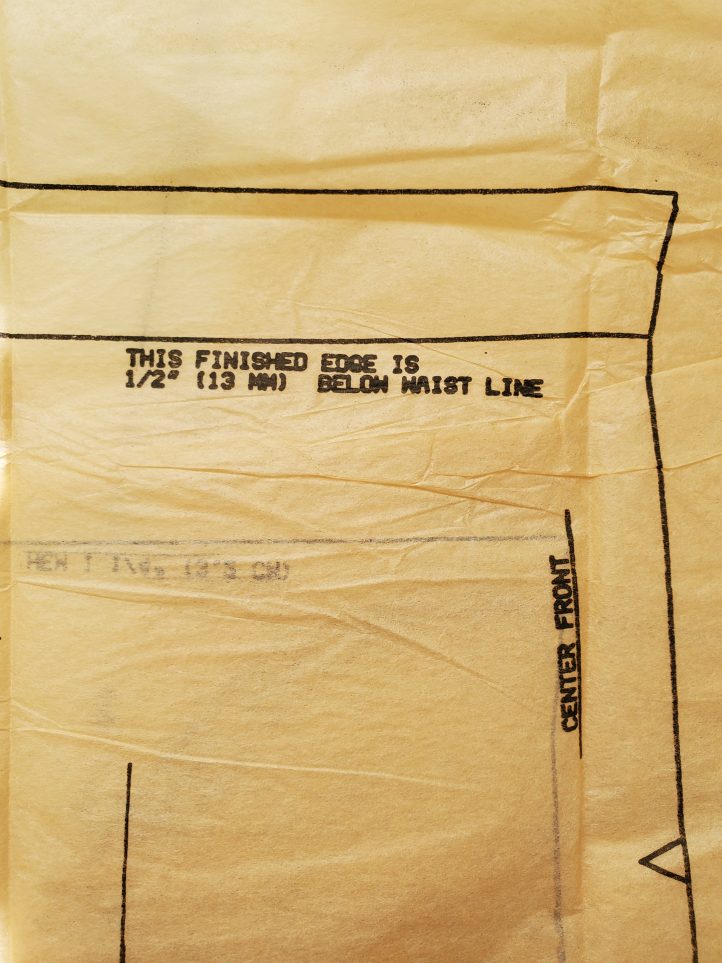
- Stitching Lines – Stitching lines show you where you need to stitch and are most often represented by a dashed line. It’s important to note that not all patterns will feature stitching lines, as some patterns specify the seam allowance within the instructions instead of printing them on the pattern. It’s vital to read through your pattern instructions before cutting and sewing.
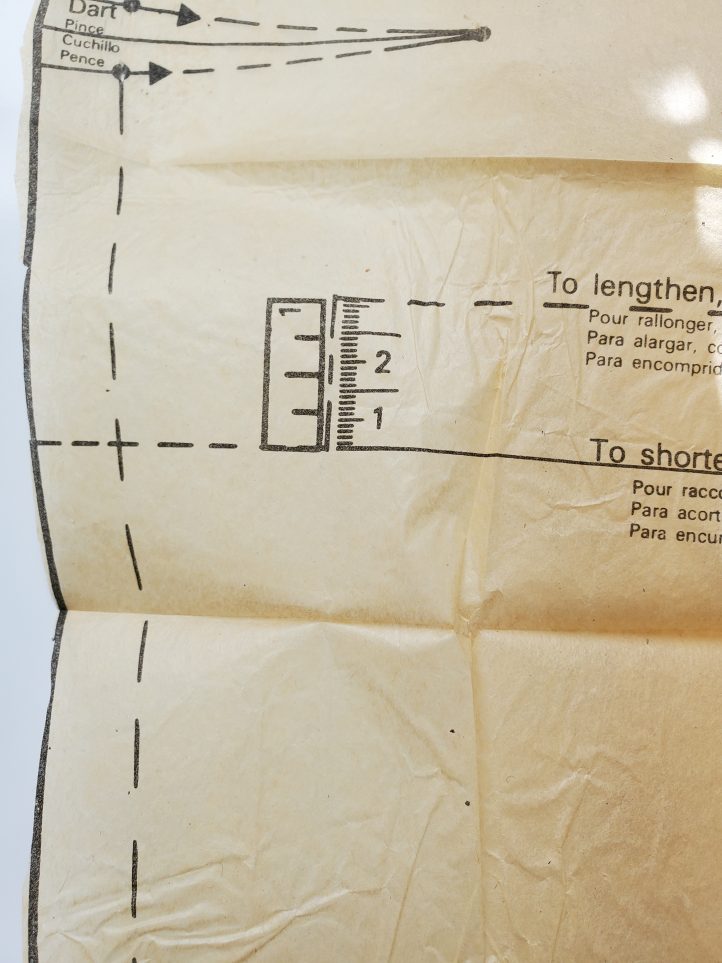
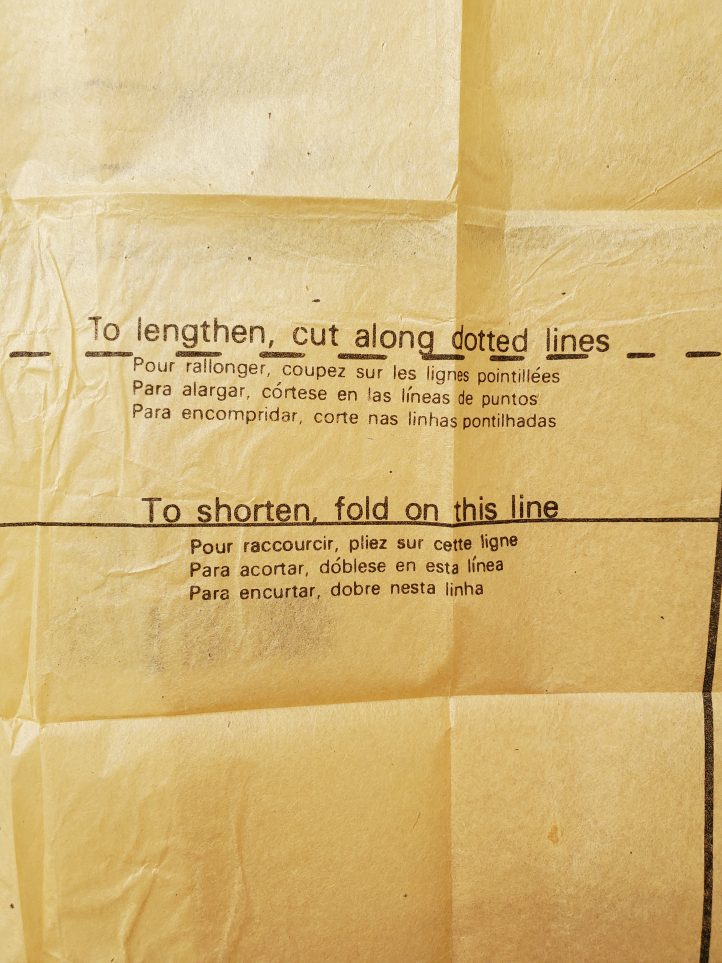
- Fit Adjustment Lines – Used to represent where to shorten and lengthen a garment, these lines are most commonly shown as single or double lines, although this can differ depending on the pattern (see photo example below). Again, this is why it is important to read through your pattern guide and instructions before beginning.
Pattern Markings
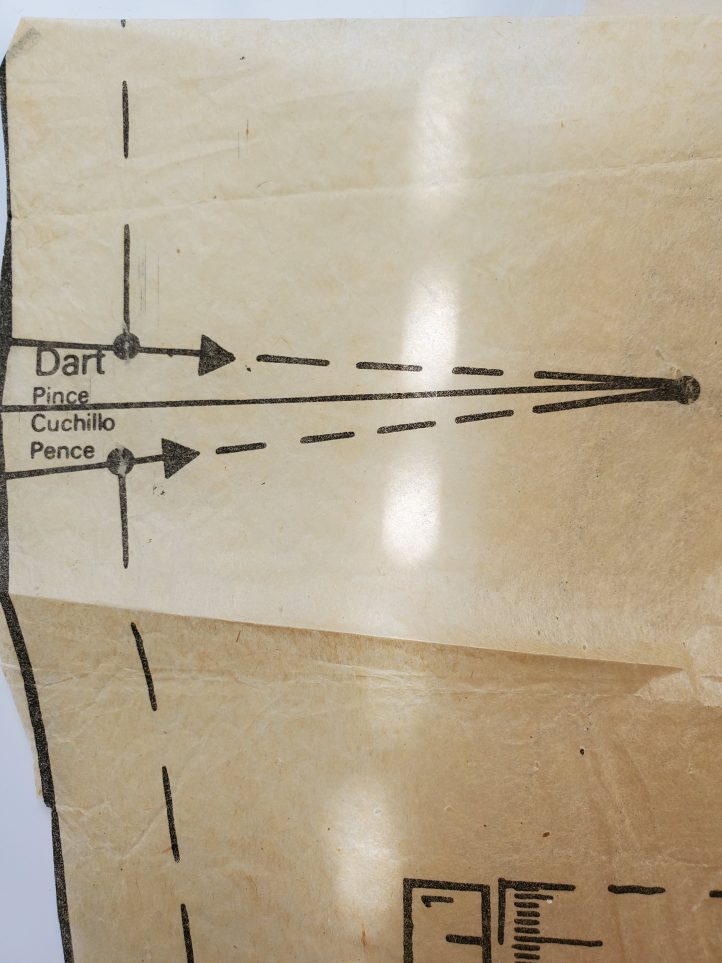
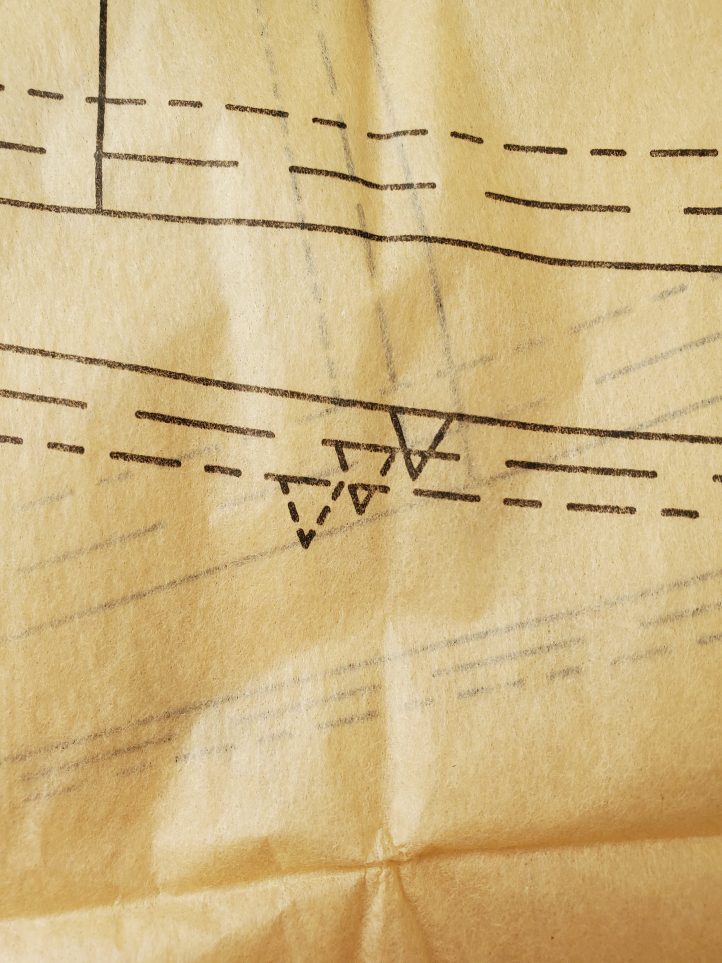
- Darts – Darts are often marked by a series of dots and lines that come together to form a triangle and indicate where a dart should be sewn. Darts are created by folding fabric and stitching and are used to create a more defined fit and shape. Darts are typically found at the bust, waist, and shoulders.
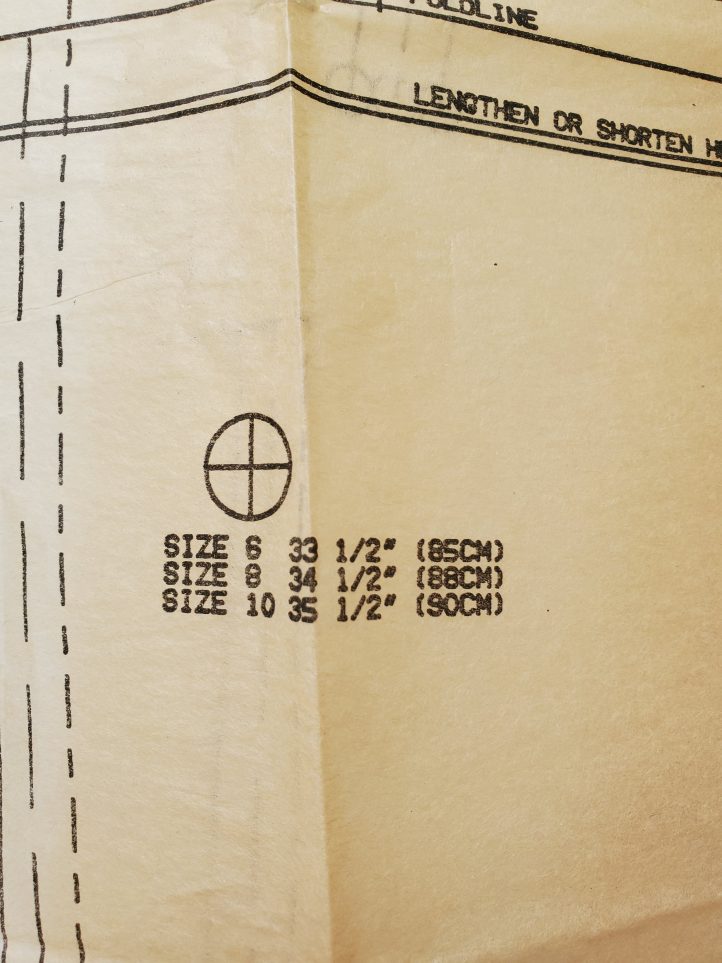
- Circumference Measurements – Represented by a circle with crossed lines, this marking shows where the pattern will land on different and specific body measurements. These are generally found at the bust and hip points on sewing patterns.
- Notches – Notches can vary from pattern to pattern, but they are most often shown as triangles and are located around the edge of pattern pieces. Notches show you where to position and join your pattern pieces together. Notches are shown as individual triangles, double notches, and sometimes triple notches; these will vary depending on where on the pattern they appear (front versus back of garment, for example).
- Dots/Circles – Varying from pattern companies, dots and circles are used to represent different markings on pattern pieces, although they are typically found on stitching lines. This allows sewists to more easily navigate garment construction and match up other pattern pieces. You may also see circles used to represent where markings should be transferred or where to start or stop stitching.
We hope you’ve enjoyed our quick overview of different pattern markings that you may encounter as you start sewing. It’s important to remember that markings can vary by pattern companies, so always read through your sewing instructions before you start cutting. Want more beginner-friendly articles? Let us know what types of articles you’d like to read in the comments below!