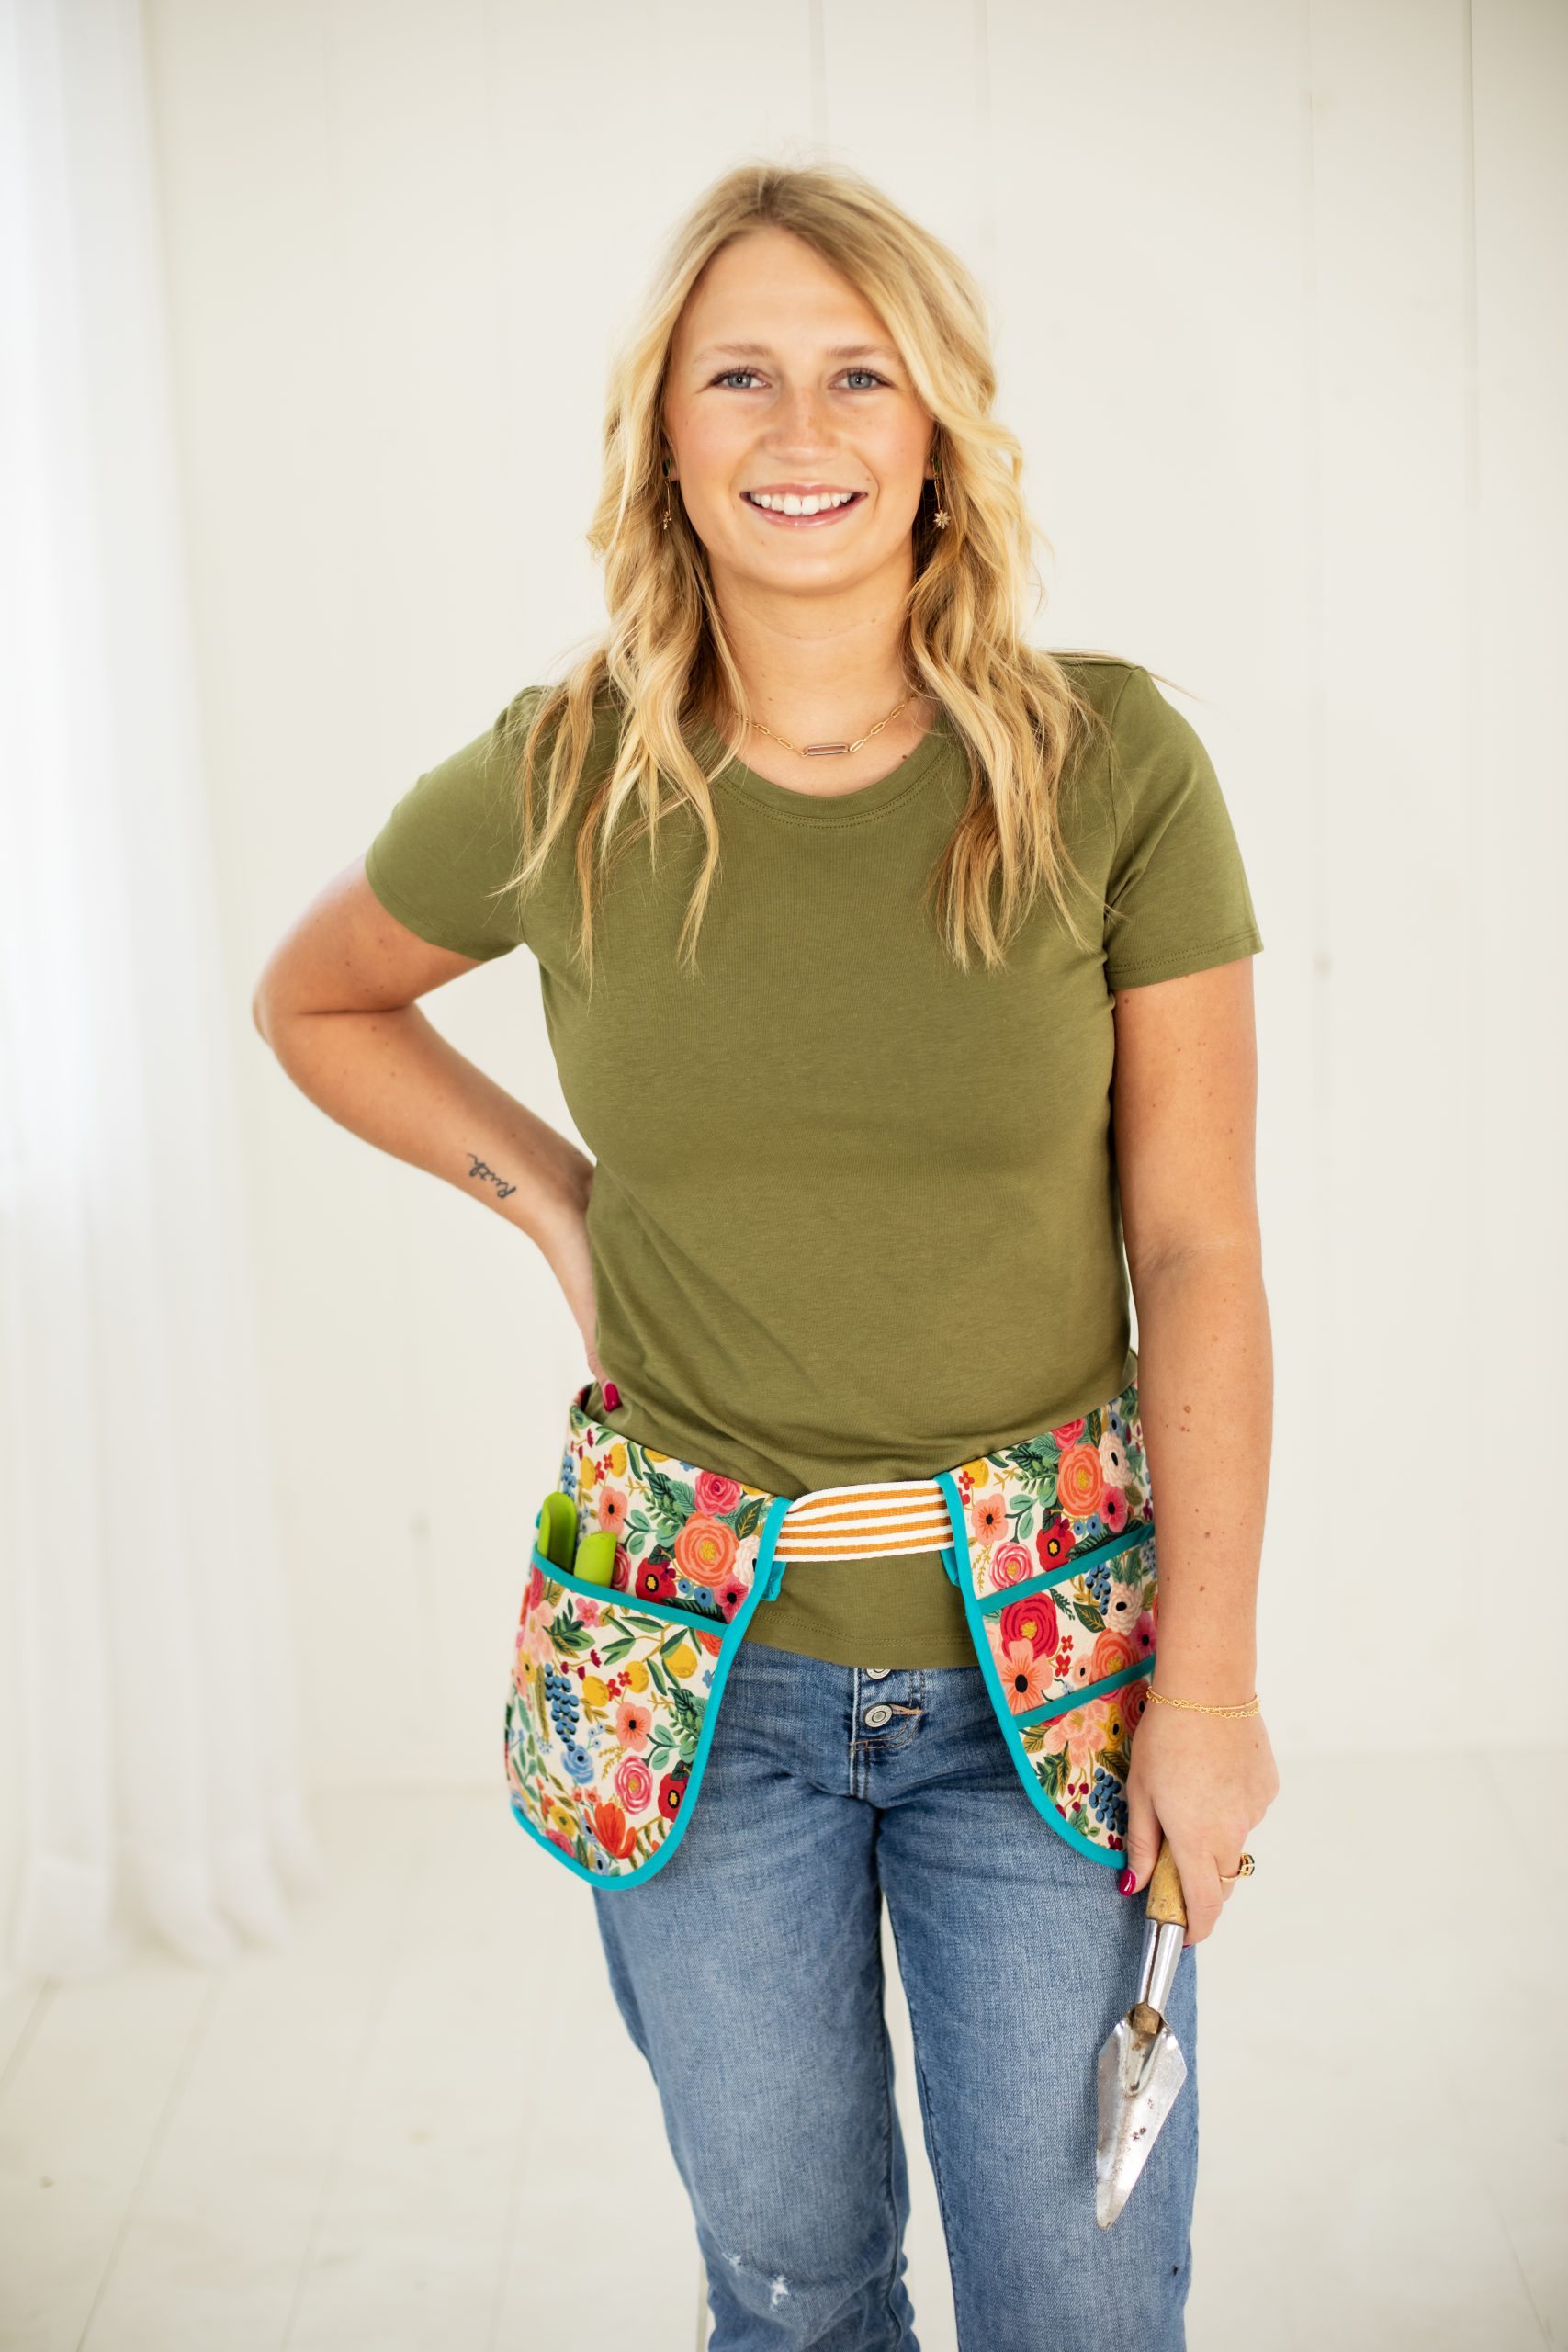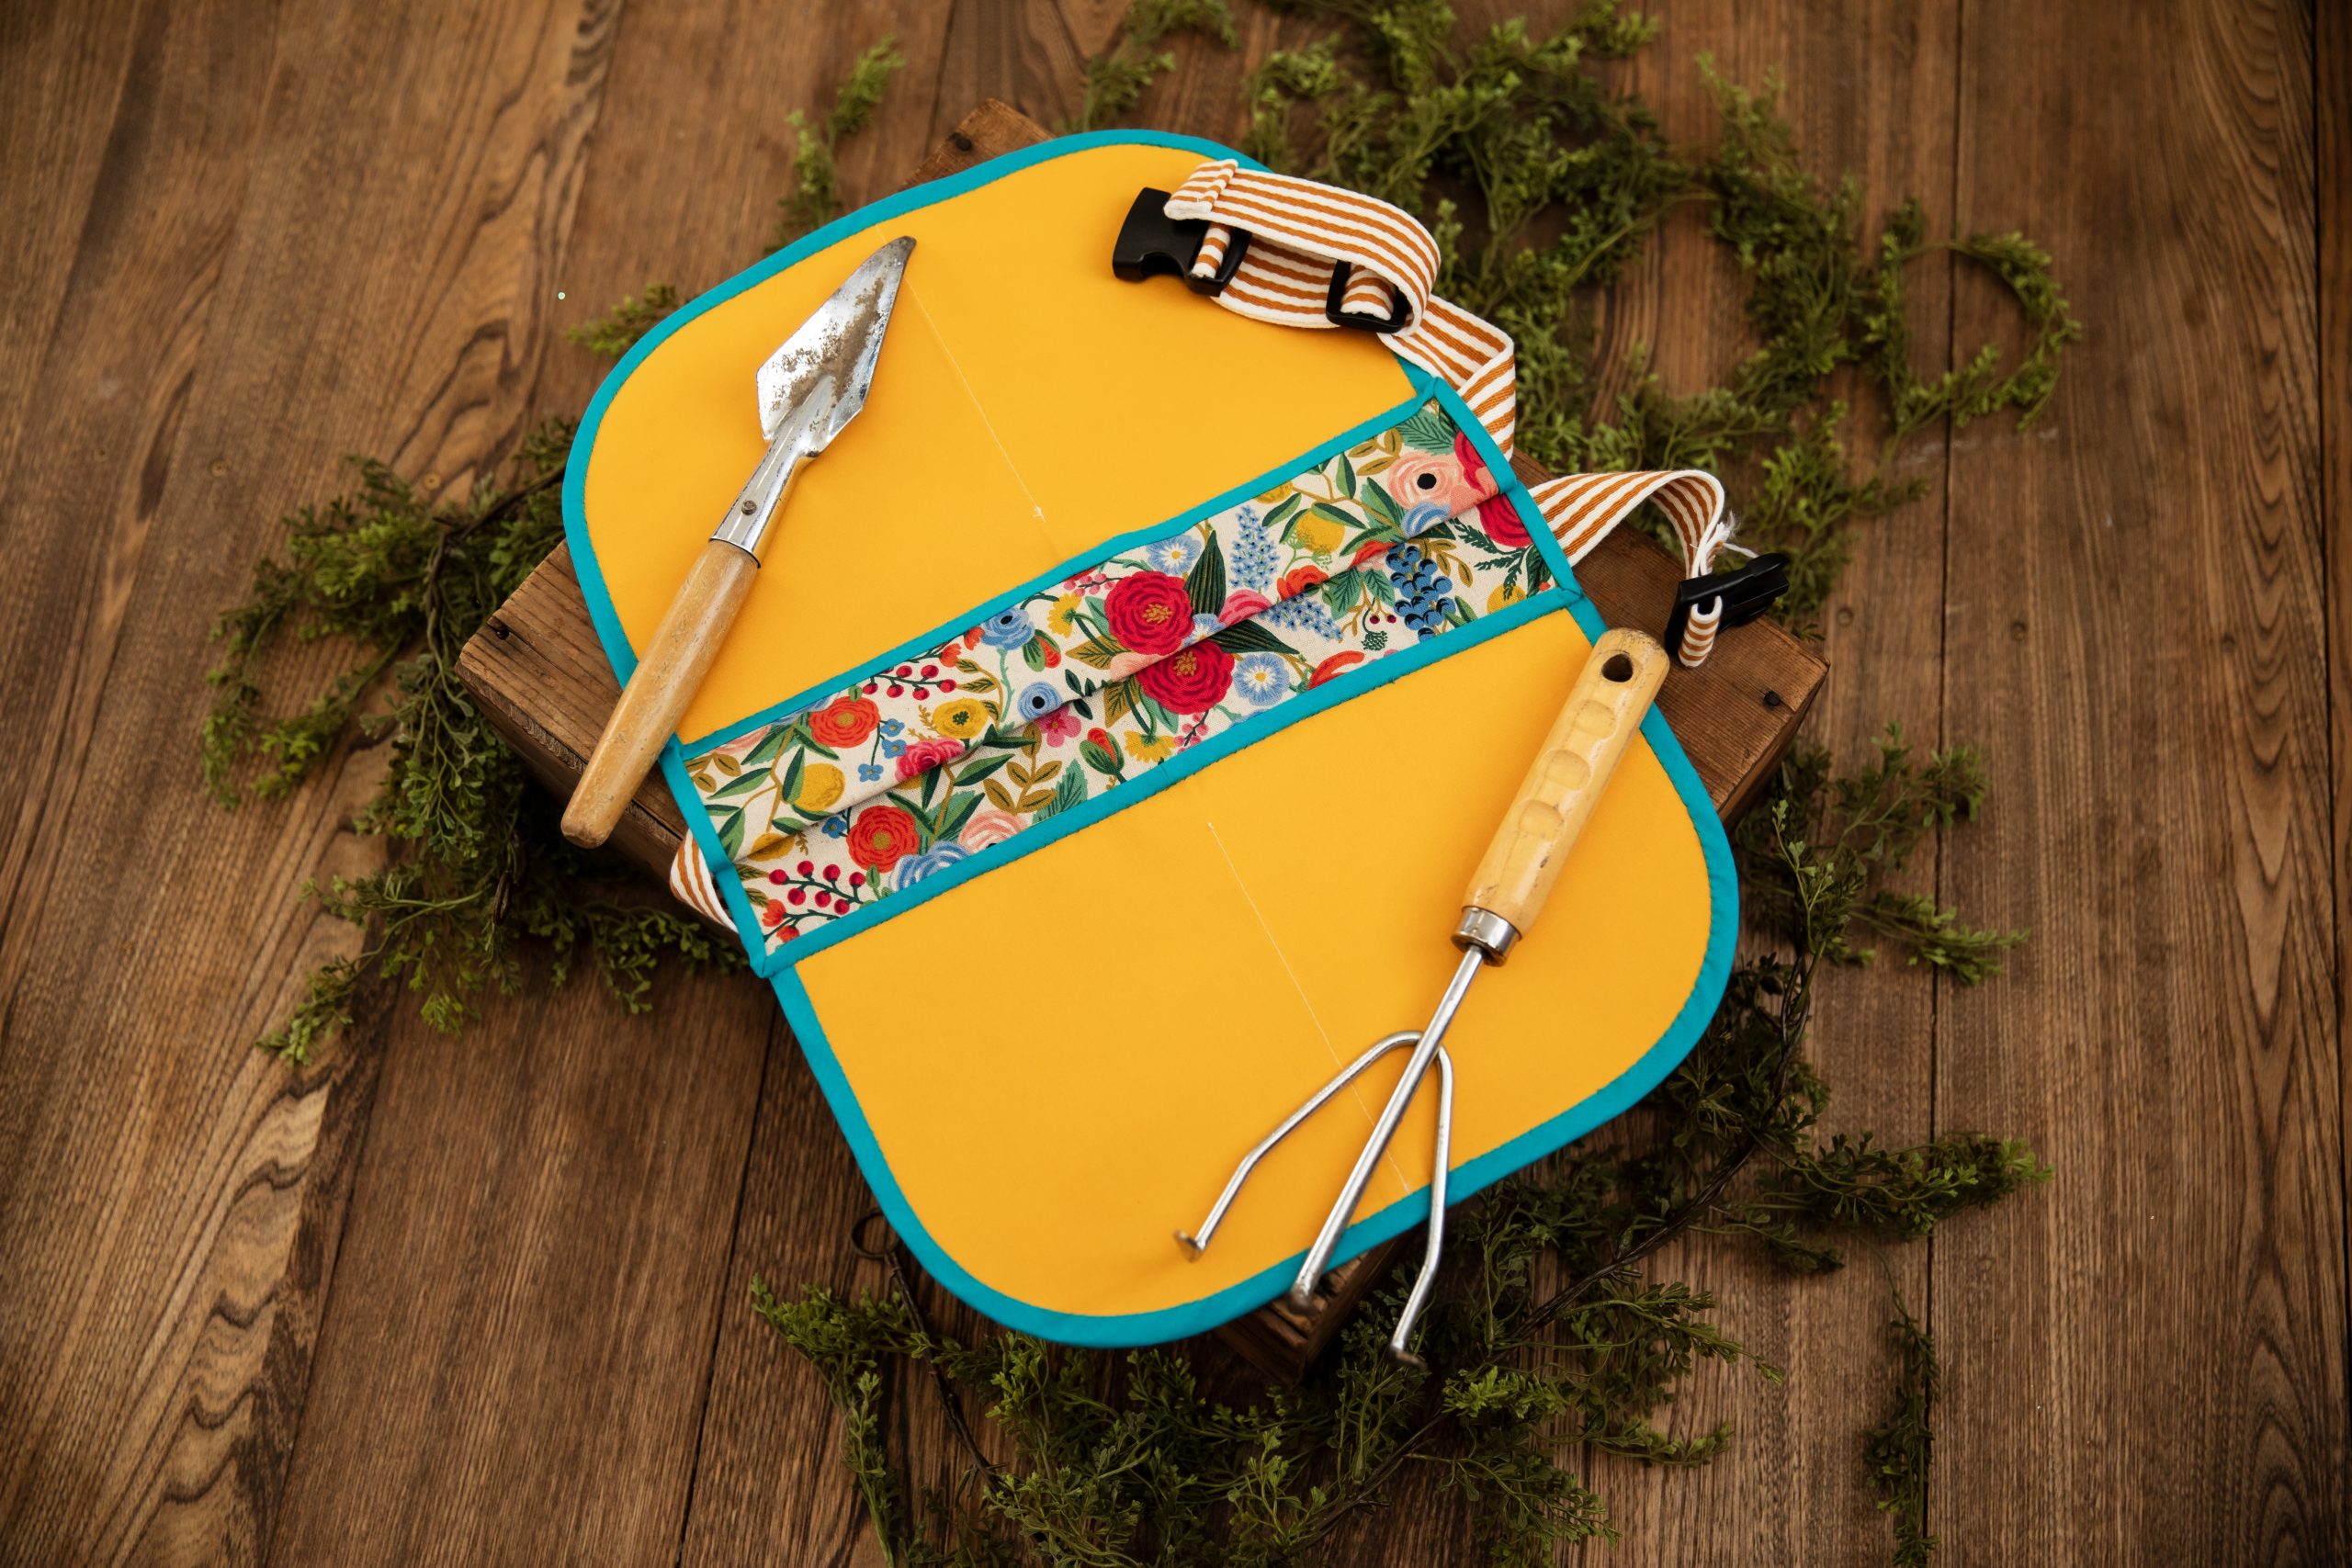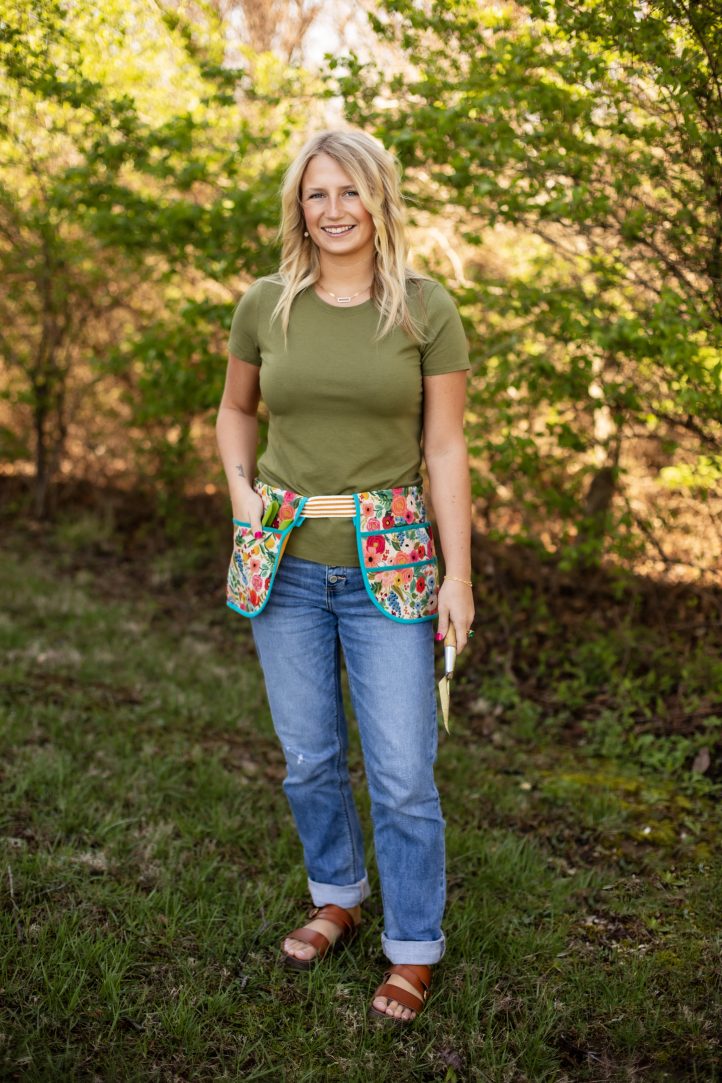
Finally, the gift every gardener wants this summer! Sew your own stylish and functional garden apron with this beginner-friendly sewing pattern. Made using a colorful, floral canvas, this gardening apron pattern features two roomy hip pouches to store your gardening tools and other essentials while you work. This gardening sewing pattern fastens securely with a sturdy buckle and the hip pouches can slide to fit you comfortably. Make this gardening apron for yourself or for Mom as a thoughtful, homemade gift.
Skill Level: Beginner
Finished Size: Each pouch is 10” x 14”
Designer Note: Press Like a Pro: When working with bias tape, it’s helpful to press it gently before applying it to your fabric. This can help it maintain its shape and make it easier to handle around curves and corners. We’ve also chosen to use fabric clips instead of pins throughout this project, to avoid leaving holes in the fabric and the bias tape.
Materials:
- Fabric: Floral canvas, yellow cotton, one yard of each
- Heavyweight fusible interfacing, one yard
- Lightweight fusible webbing, one yard
- 3/8” double folded bias tape: Teal, five yards
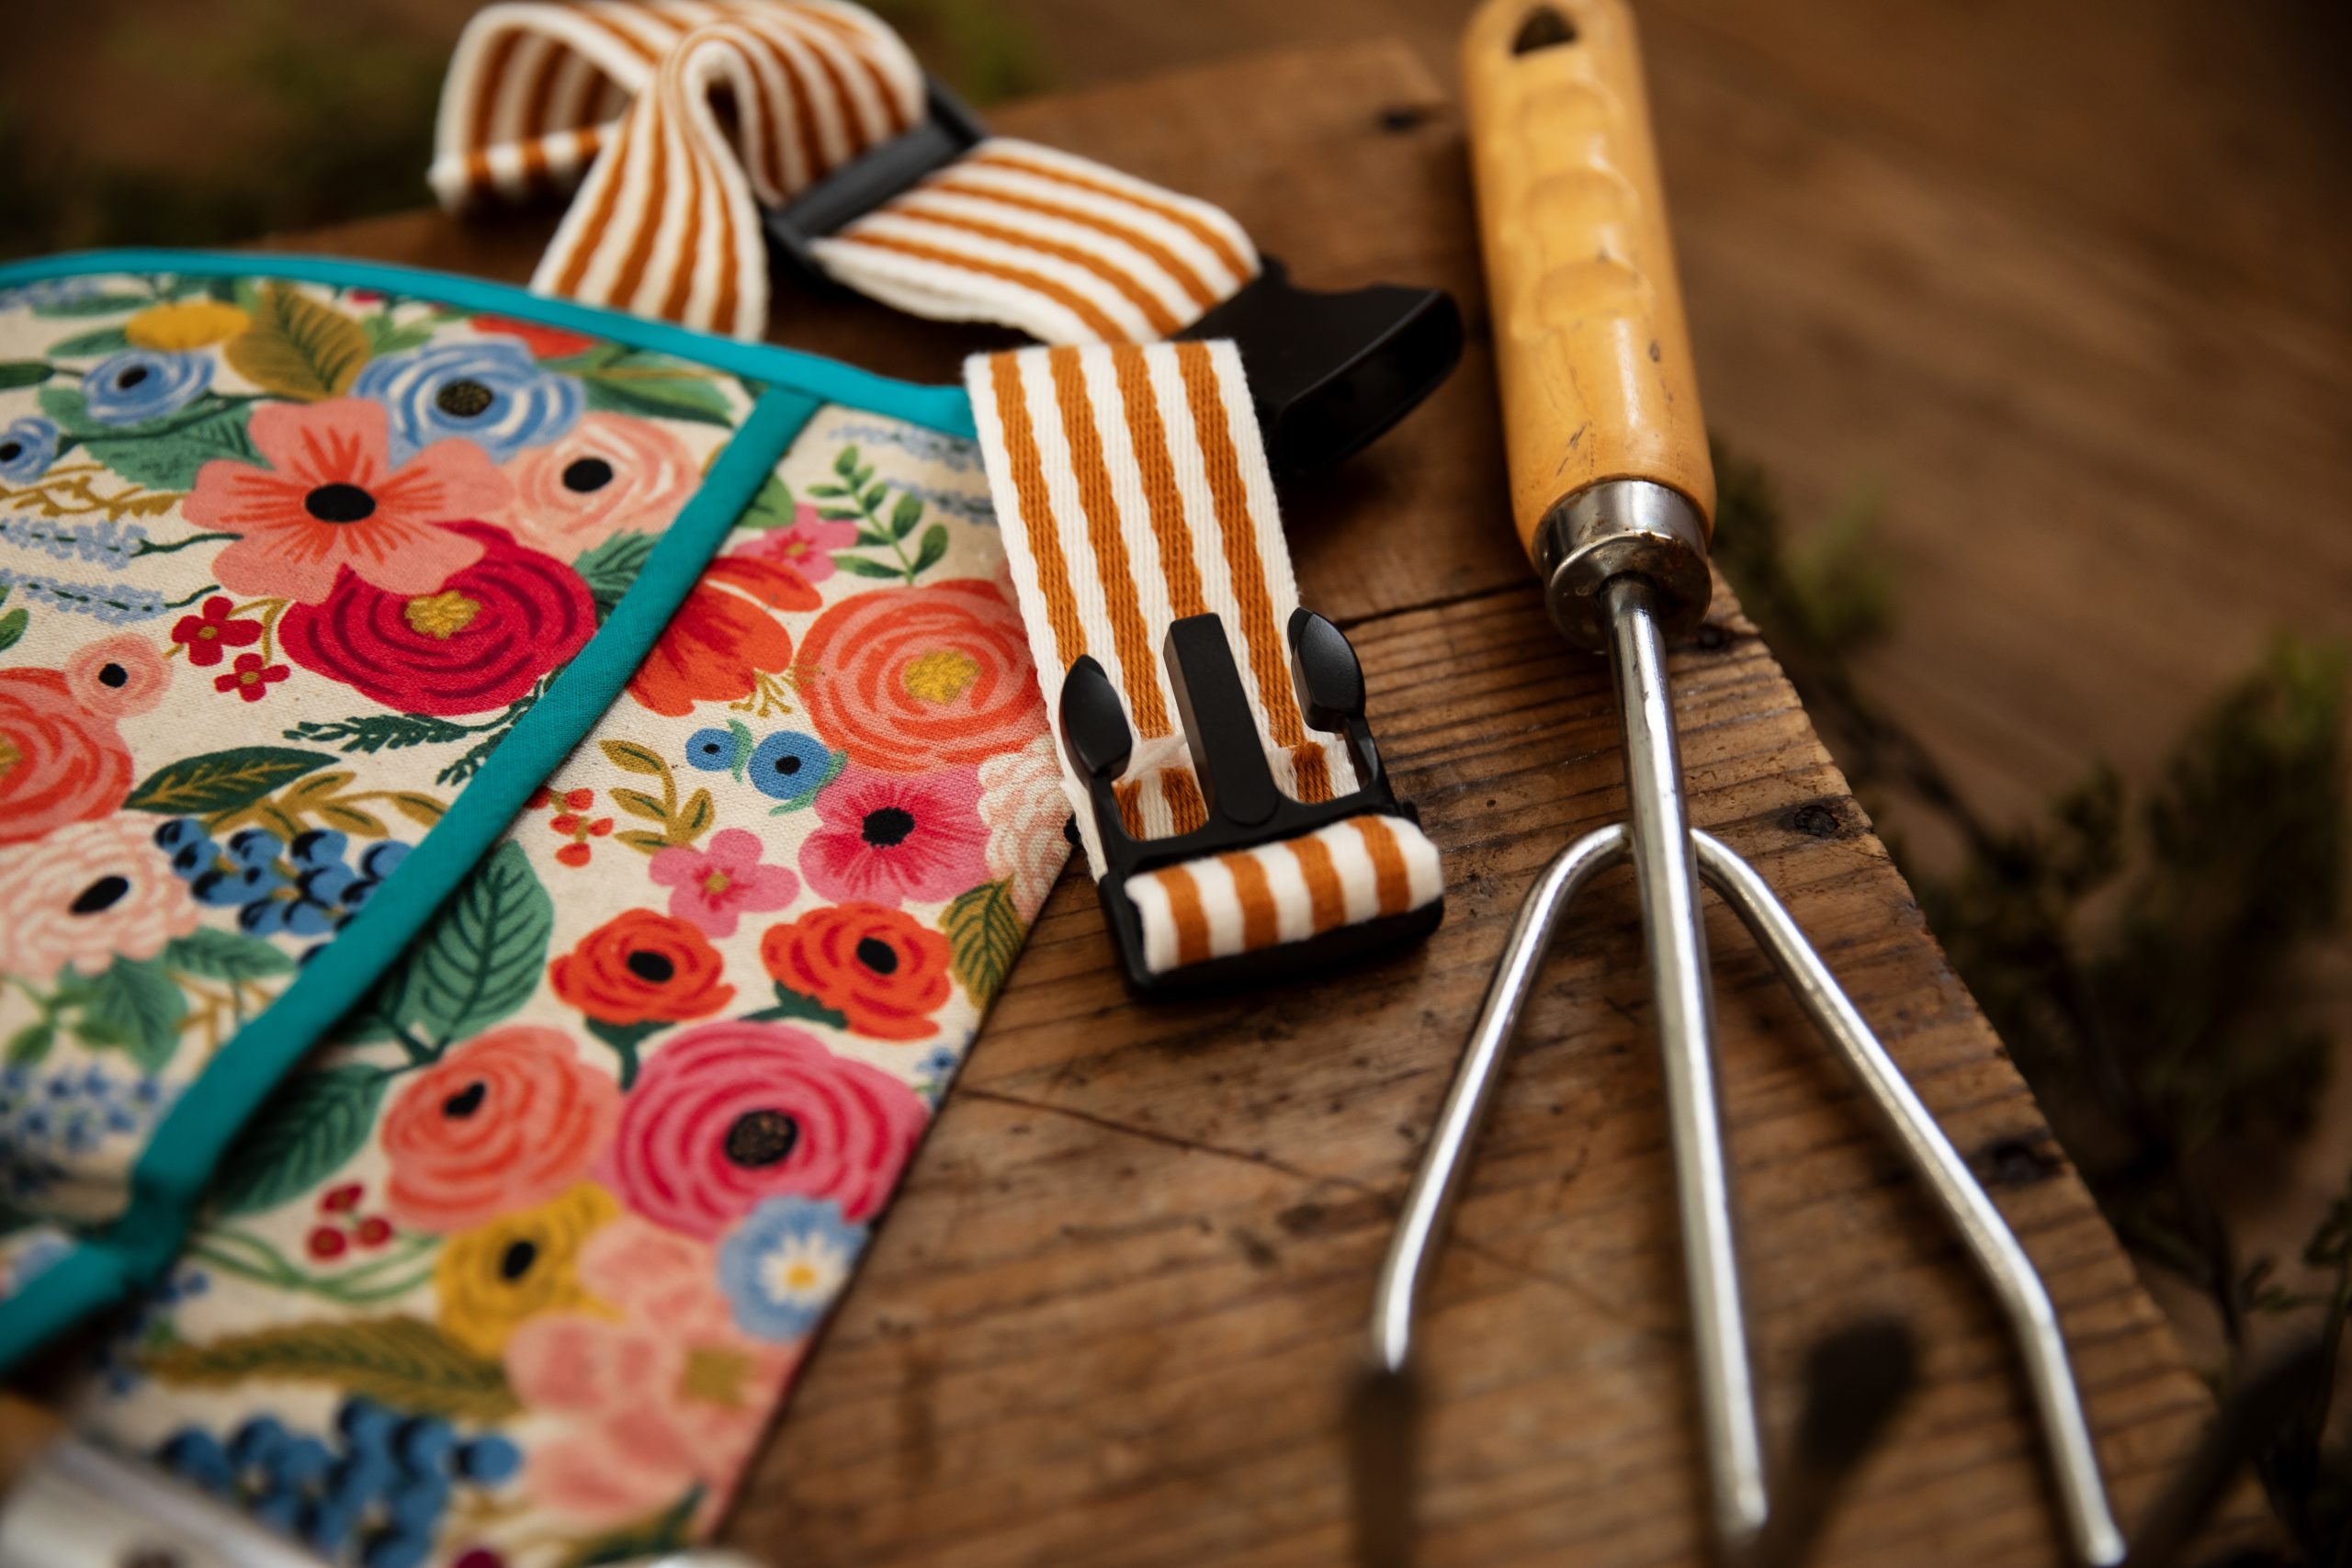
- Striped strapping, 1-1/2” wide, length sized to comfortably fit your waist or hips
- Buckle and slider set: 1-1/2” wide
- Thread: To match your fabric
Tools:
- Scissors or rotary cutter (rotary cutting mat if using rotary cutters)
- Tailor’s chalk
- Sewing clips
- Sewing machine
- Hand sewing needle
- Iron
Sewing Instructions:
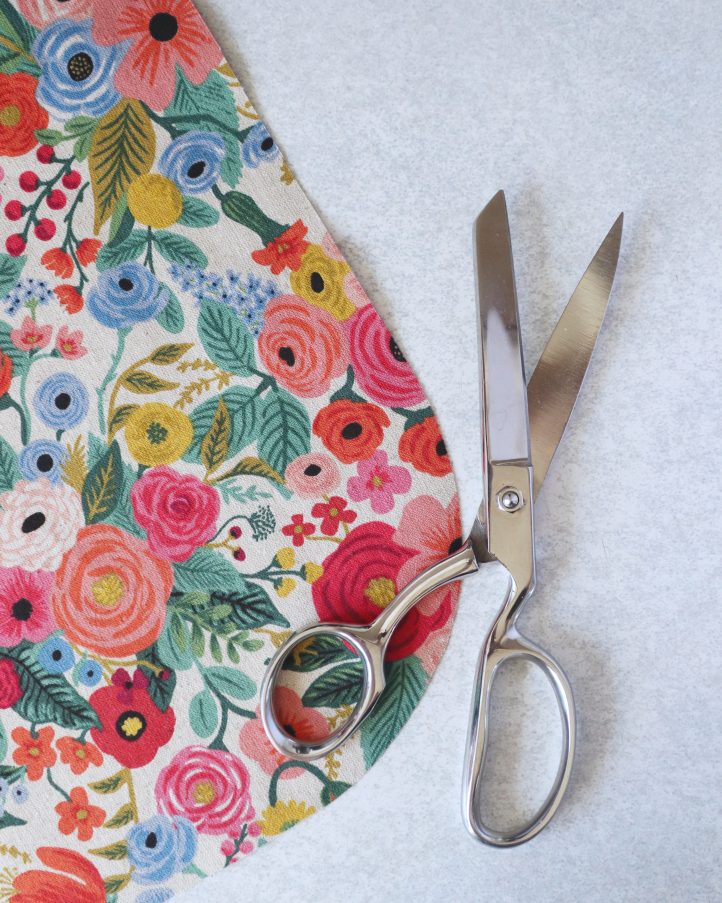
- Begin by cutting your first main pouch piece from the floral canvas fabric. Back the canvas fabric with fusible interfacing, then cut a 14” x 12” rectangle. Use a bowl or plate to round off the bottom corners, leaving the top corners square. If you prefer, you could use a pair of compasses instead.
- Using your canvas piece as a template, cut a second piece the same size and shape from yellow cotton. Place them together with the right sides facing out, sandwiching a layer of fusible webbing between them. Press to fuse all the layers in place, making sure the edges are neatly aligned.

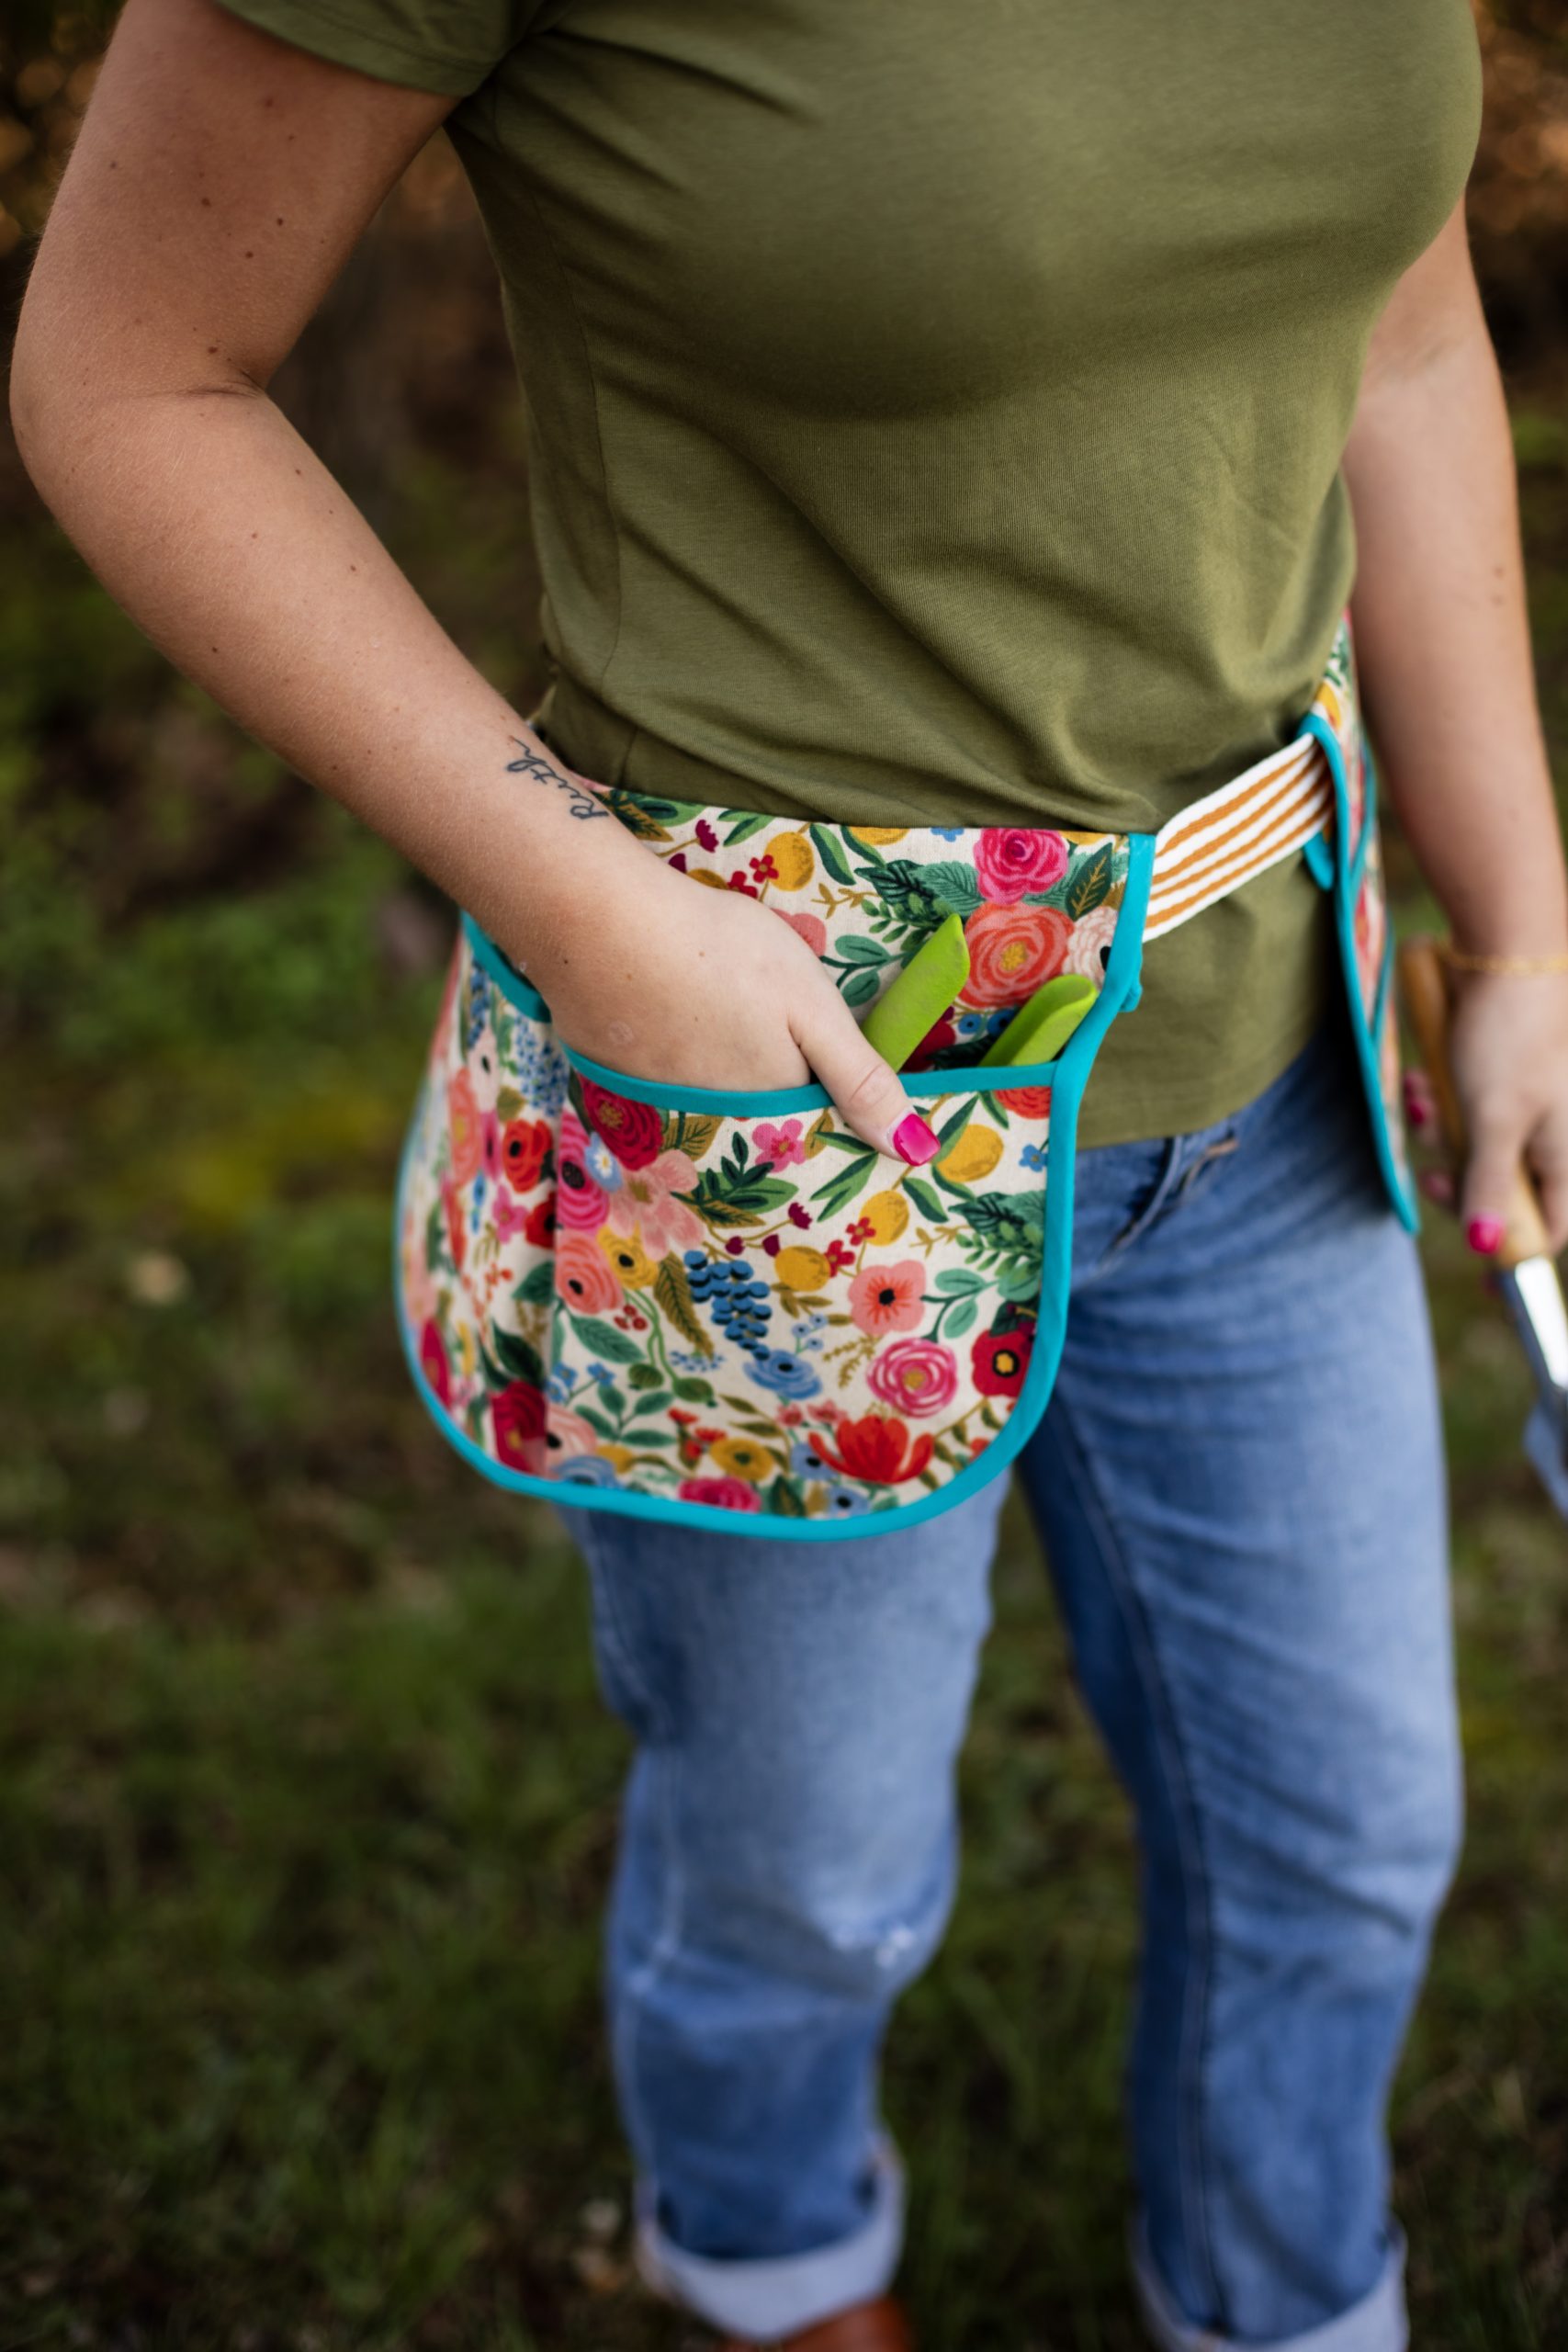
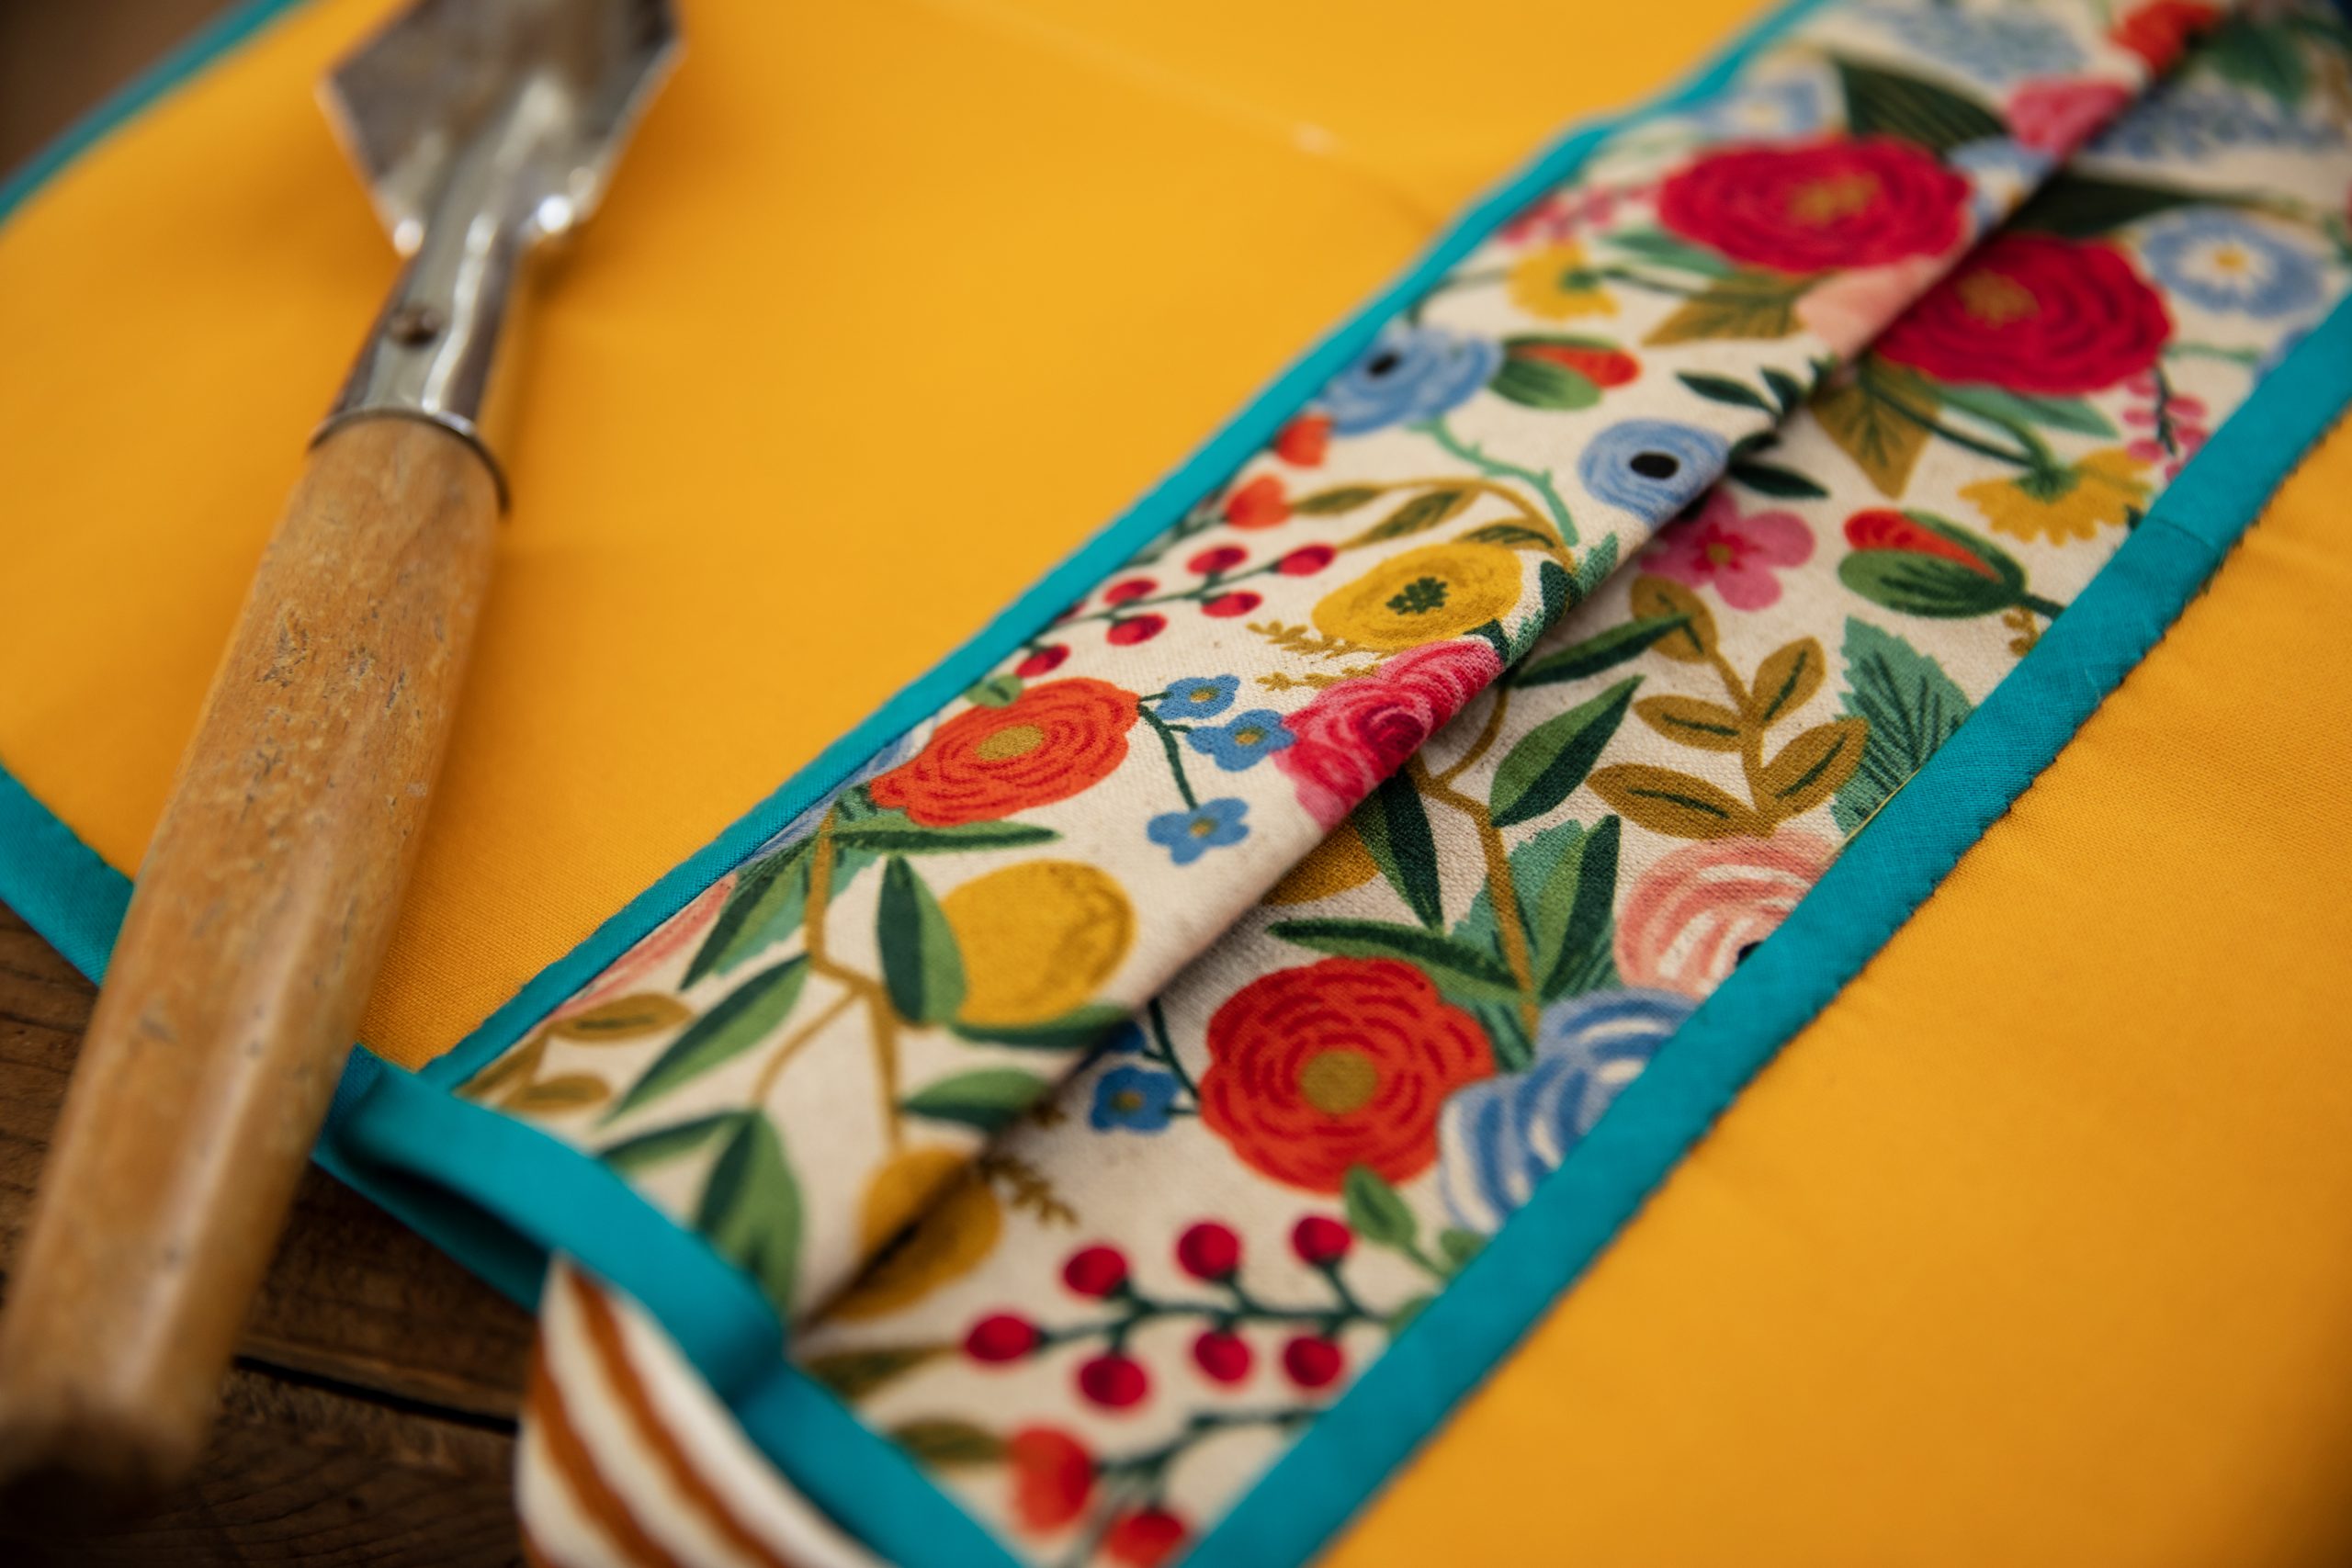
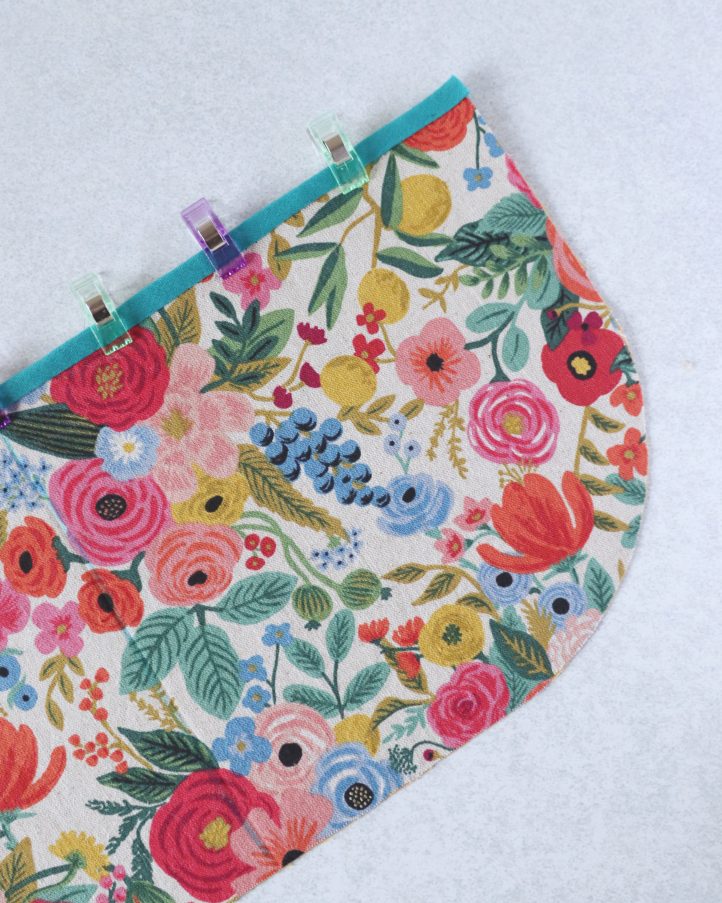
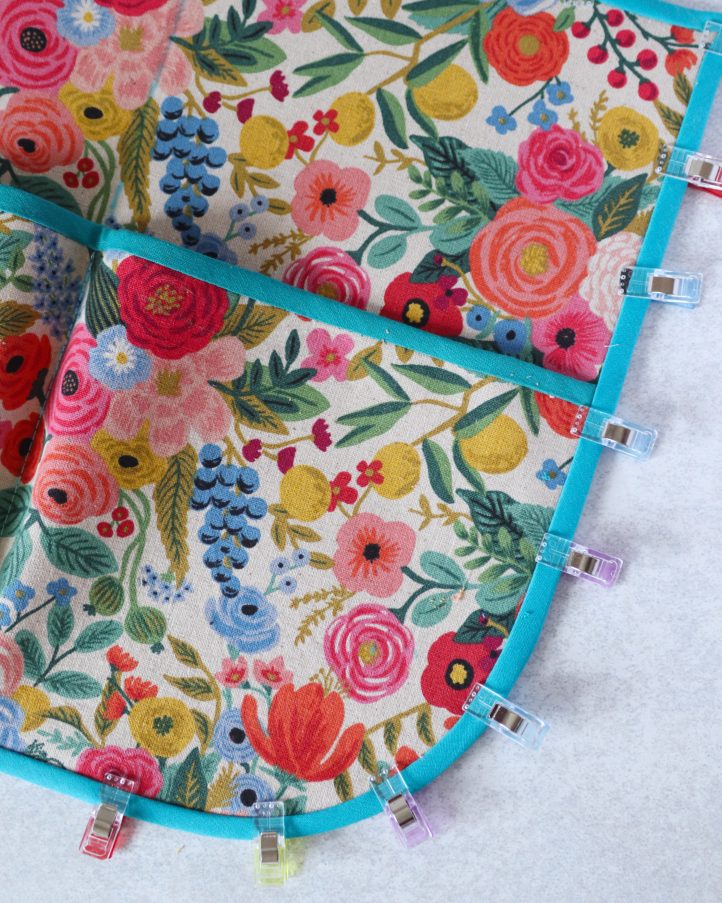
- Next, we’ll make the pocket piece. Cut 16” x 7” rectangles from both the floral canvas and the yellow cotton, then round off the bottom corners of each as before. Place the two layers together with the right sides facing out. Cut a 16” length of teal bias tape and clip it along the long top edge, with the right side of the tape facing the right side of the floral fabric. Sew along the tape with a straight machine stitch, leaving a 1/4” seam allowance. Fold the tape over to the wrong side of the work and hand stitch it into place to cover the raw edge.
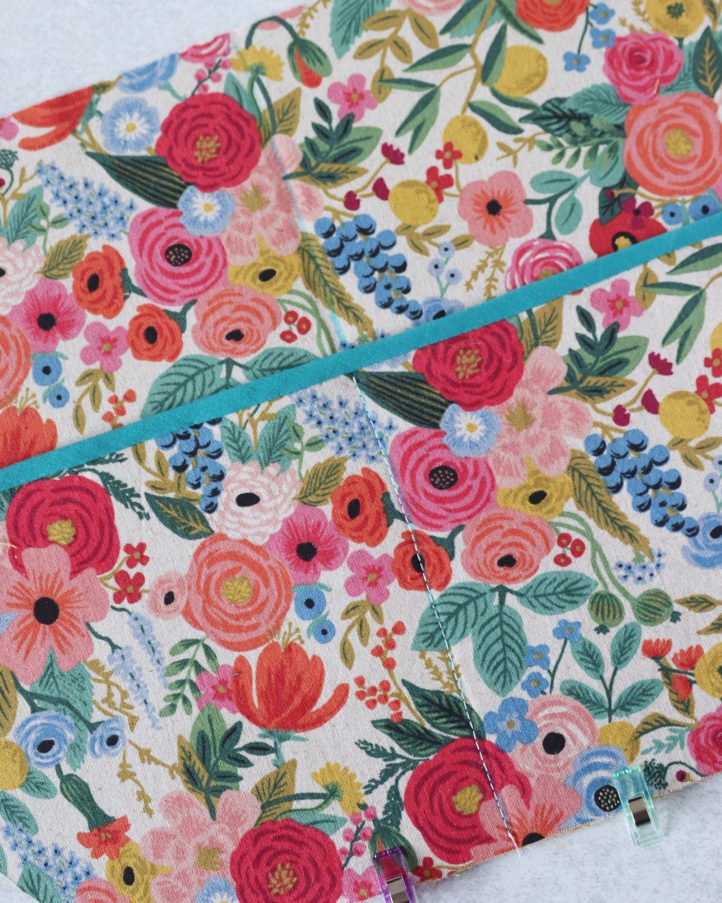
- Use a ruler and tailor’s chalk to draw a vertical line down the center of both the main fabric piece, and the pocket piece. Place the pocket on top of the main piece and align the center marks, then clip the layers together. Set your machine to work a 3mm straight stitch or about 9 stitches per inch, then sew down the middle of the pocket, to fix it in place.
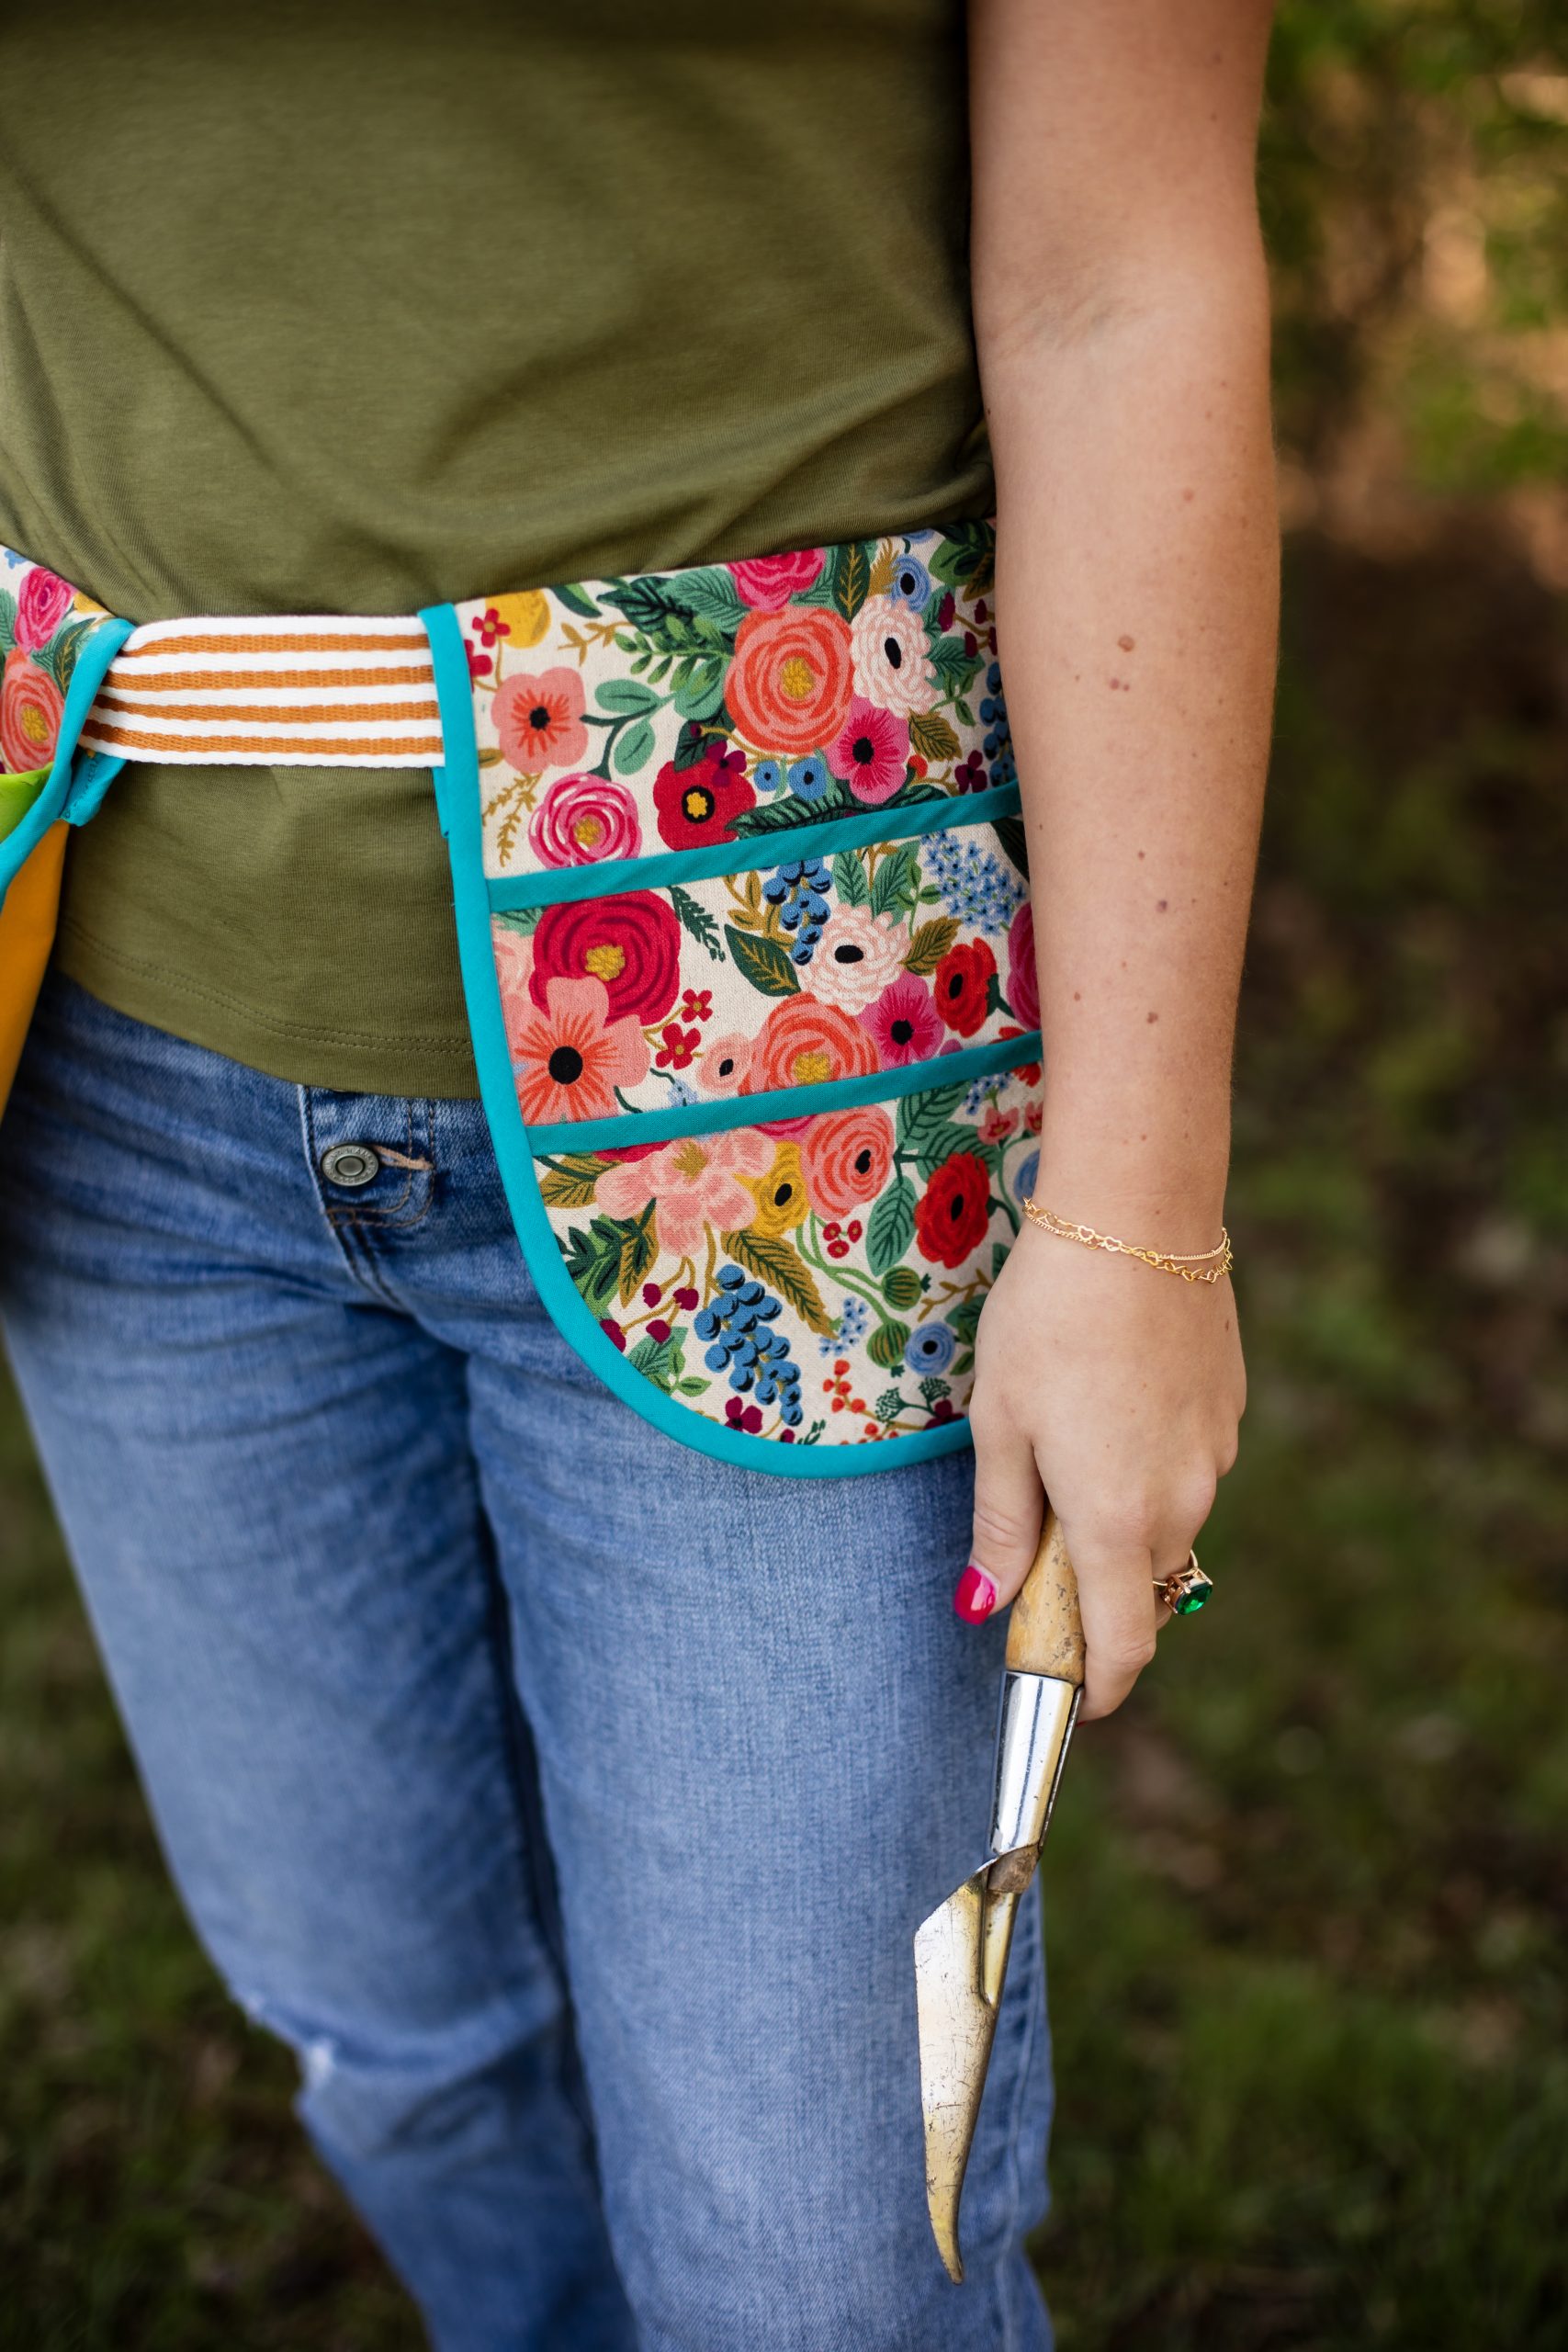
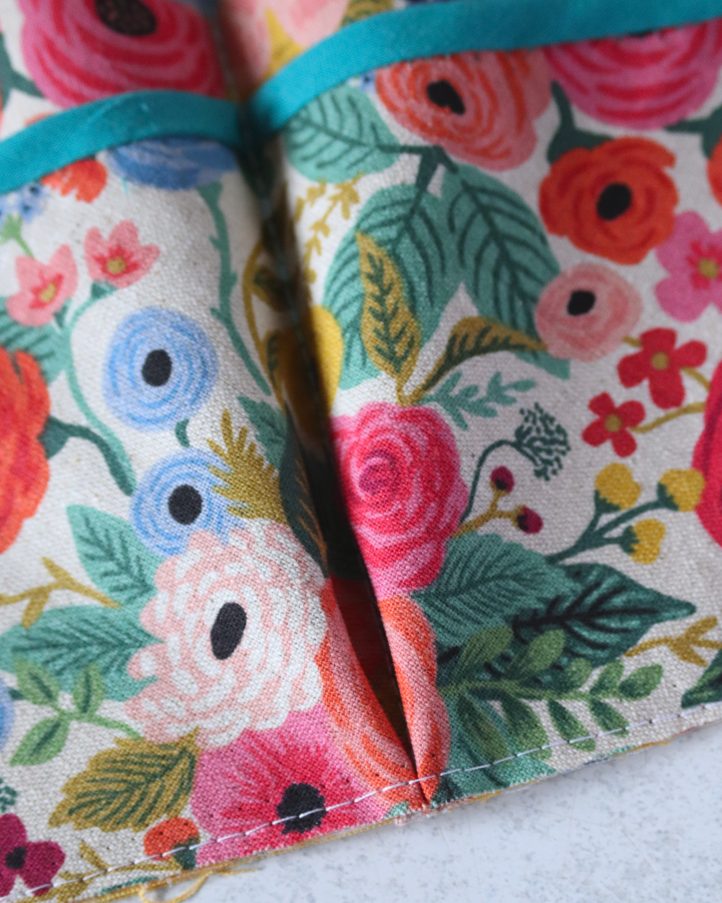
- The pocket piece is slightly wider than the main pouch piece, to create depth. Starting at the top of one side, align the edges of the pocket and the main piece and clip them together. Continue down the side, aligning and clipping as you go. When you reach the stitched center line, fold the excess pocket fabric over itself slightly, as shown in the photo. Repeat this process on the other side, starting from the top and working down to the center again. Once everything is neatly clipped, sew around the edge of the pocket with a straight machine stitch, leaving a 1/8” seam allowance.
- Add bias binding around the entire edge of the pouch, just as you did for the top of the pocket. Start by measuring out 3” of bias tape, then clip the strip along the outer edge, beginning in the top center. Align the edges of the binding and fabric as you go. When you reach a corner, fold the binding upwards and then back down on itself to create a neat miter. Continue clipping the tape all the way around the edge until you return to the starting point. Leave another 3” of binding unclipped and trim away any excess. Stitch the binding into place using a 1/4” seam allowance, but leave the first and last 3” of the clipped binding unstitched. Bring the two loose ends together and mark where they meet. With right sides facing, stitch the ends together at this point, then trim away the excess seam allowance. Stitch the joined binding to the edge of the fabric. Finally, as before, wrap the binding around to the back of the work and hand stitch to fix it into place.
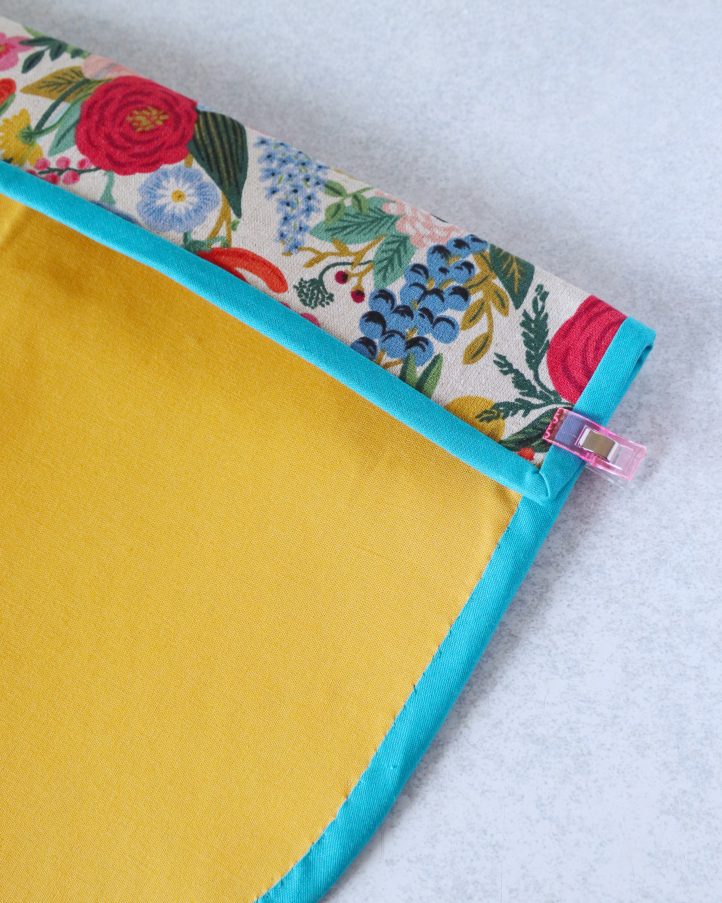
- Next, we’ll make a channel for the belt. Fold the top edge of the work over to the wrong side by 2” and clip it in place. Thread a needle and hand stitch the folded edge down, sewing through the yellow backing fabric and the interfacing only – take care not to stitch through to the floral canvas, as the stitches should be invisible from the front of the pouch.
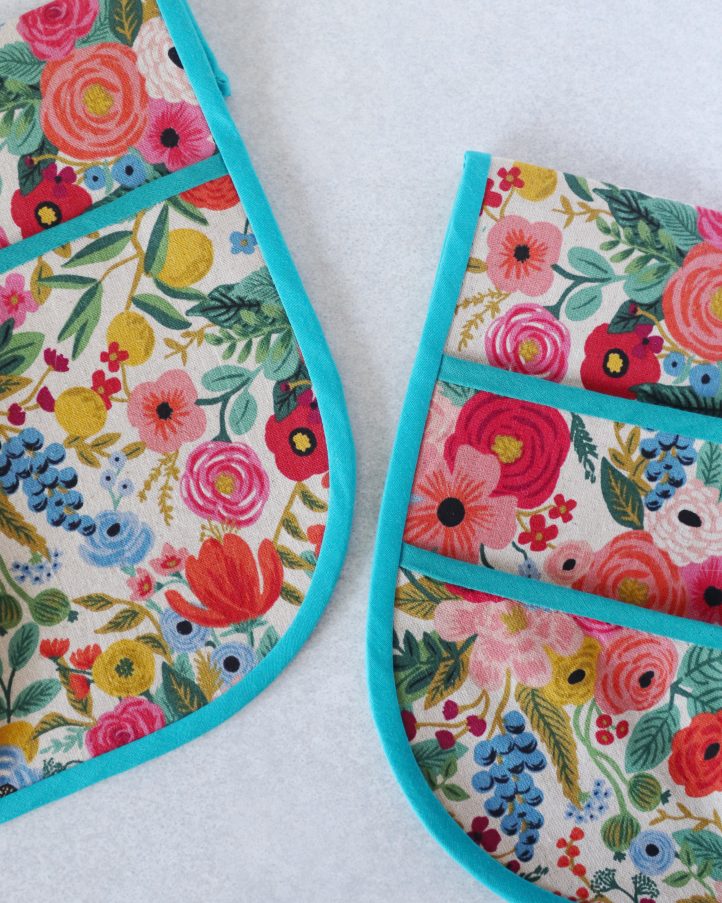
- Repeat Steps 1–7 to make a second pouch in the same way as the first. We added an extra, slightly smaller pocket layer to our second pouch for a bit of extra storage – if you’d like to do the same, simply attach it using the same method as before, layering the pockets on top of each other.
- Measure your waist or hips (wherever you’d like the belt to sit) and cut a length of strapping that fits comfortably, leaving a little extra length to spare. Thread the strapping through the channels at the top of each pouch, making sure both pouches are facing right side up.

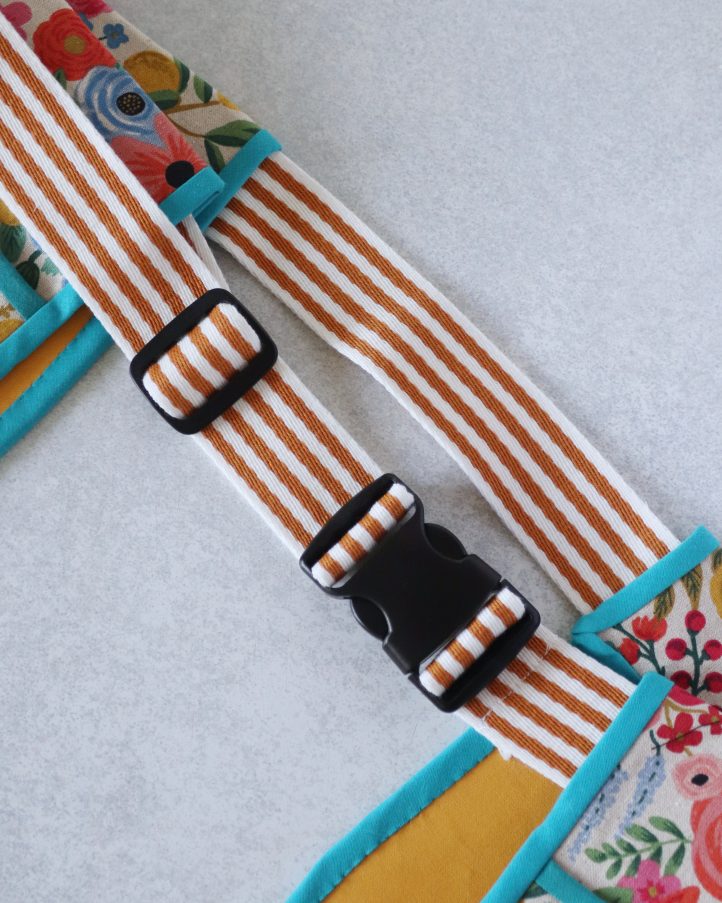
- Finally, add a buckle and slider to your belt for easy clipping. Thread one end of the strap through one side of the belt buckle, then stitch it into place. Add a slider to the opposite end of the strap, then attach it to the other side of the buckle to finish.