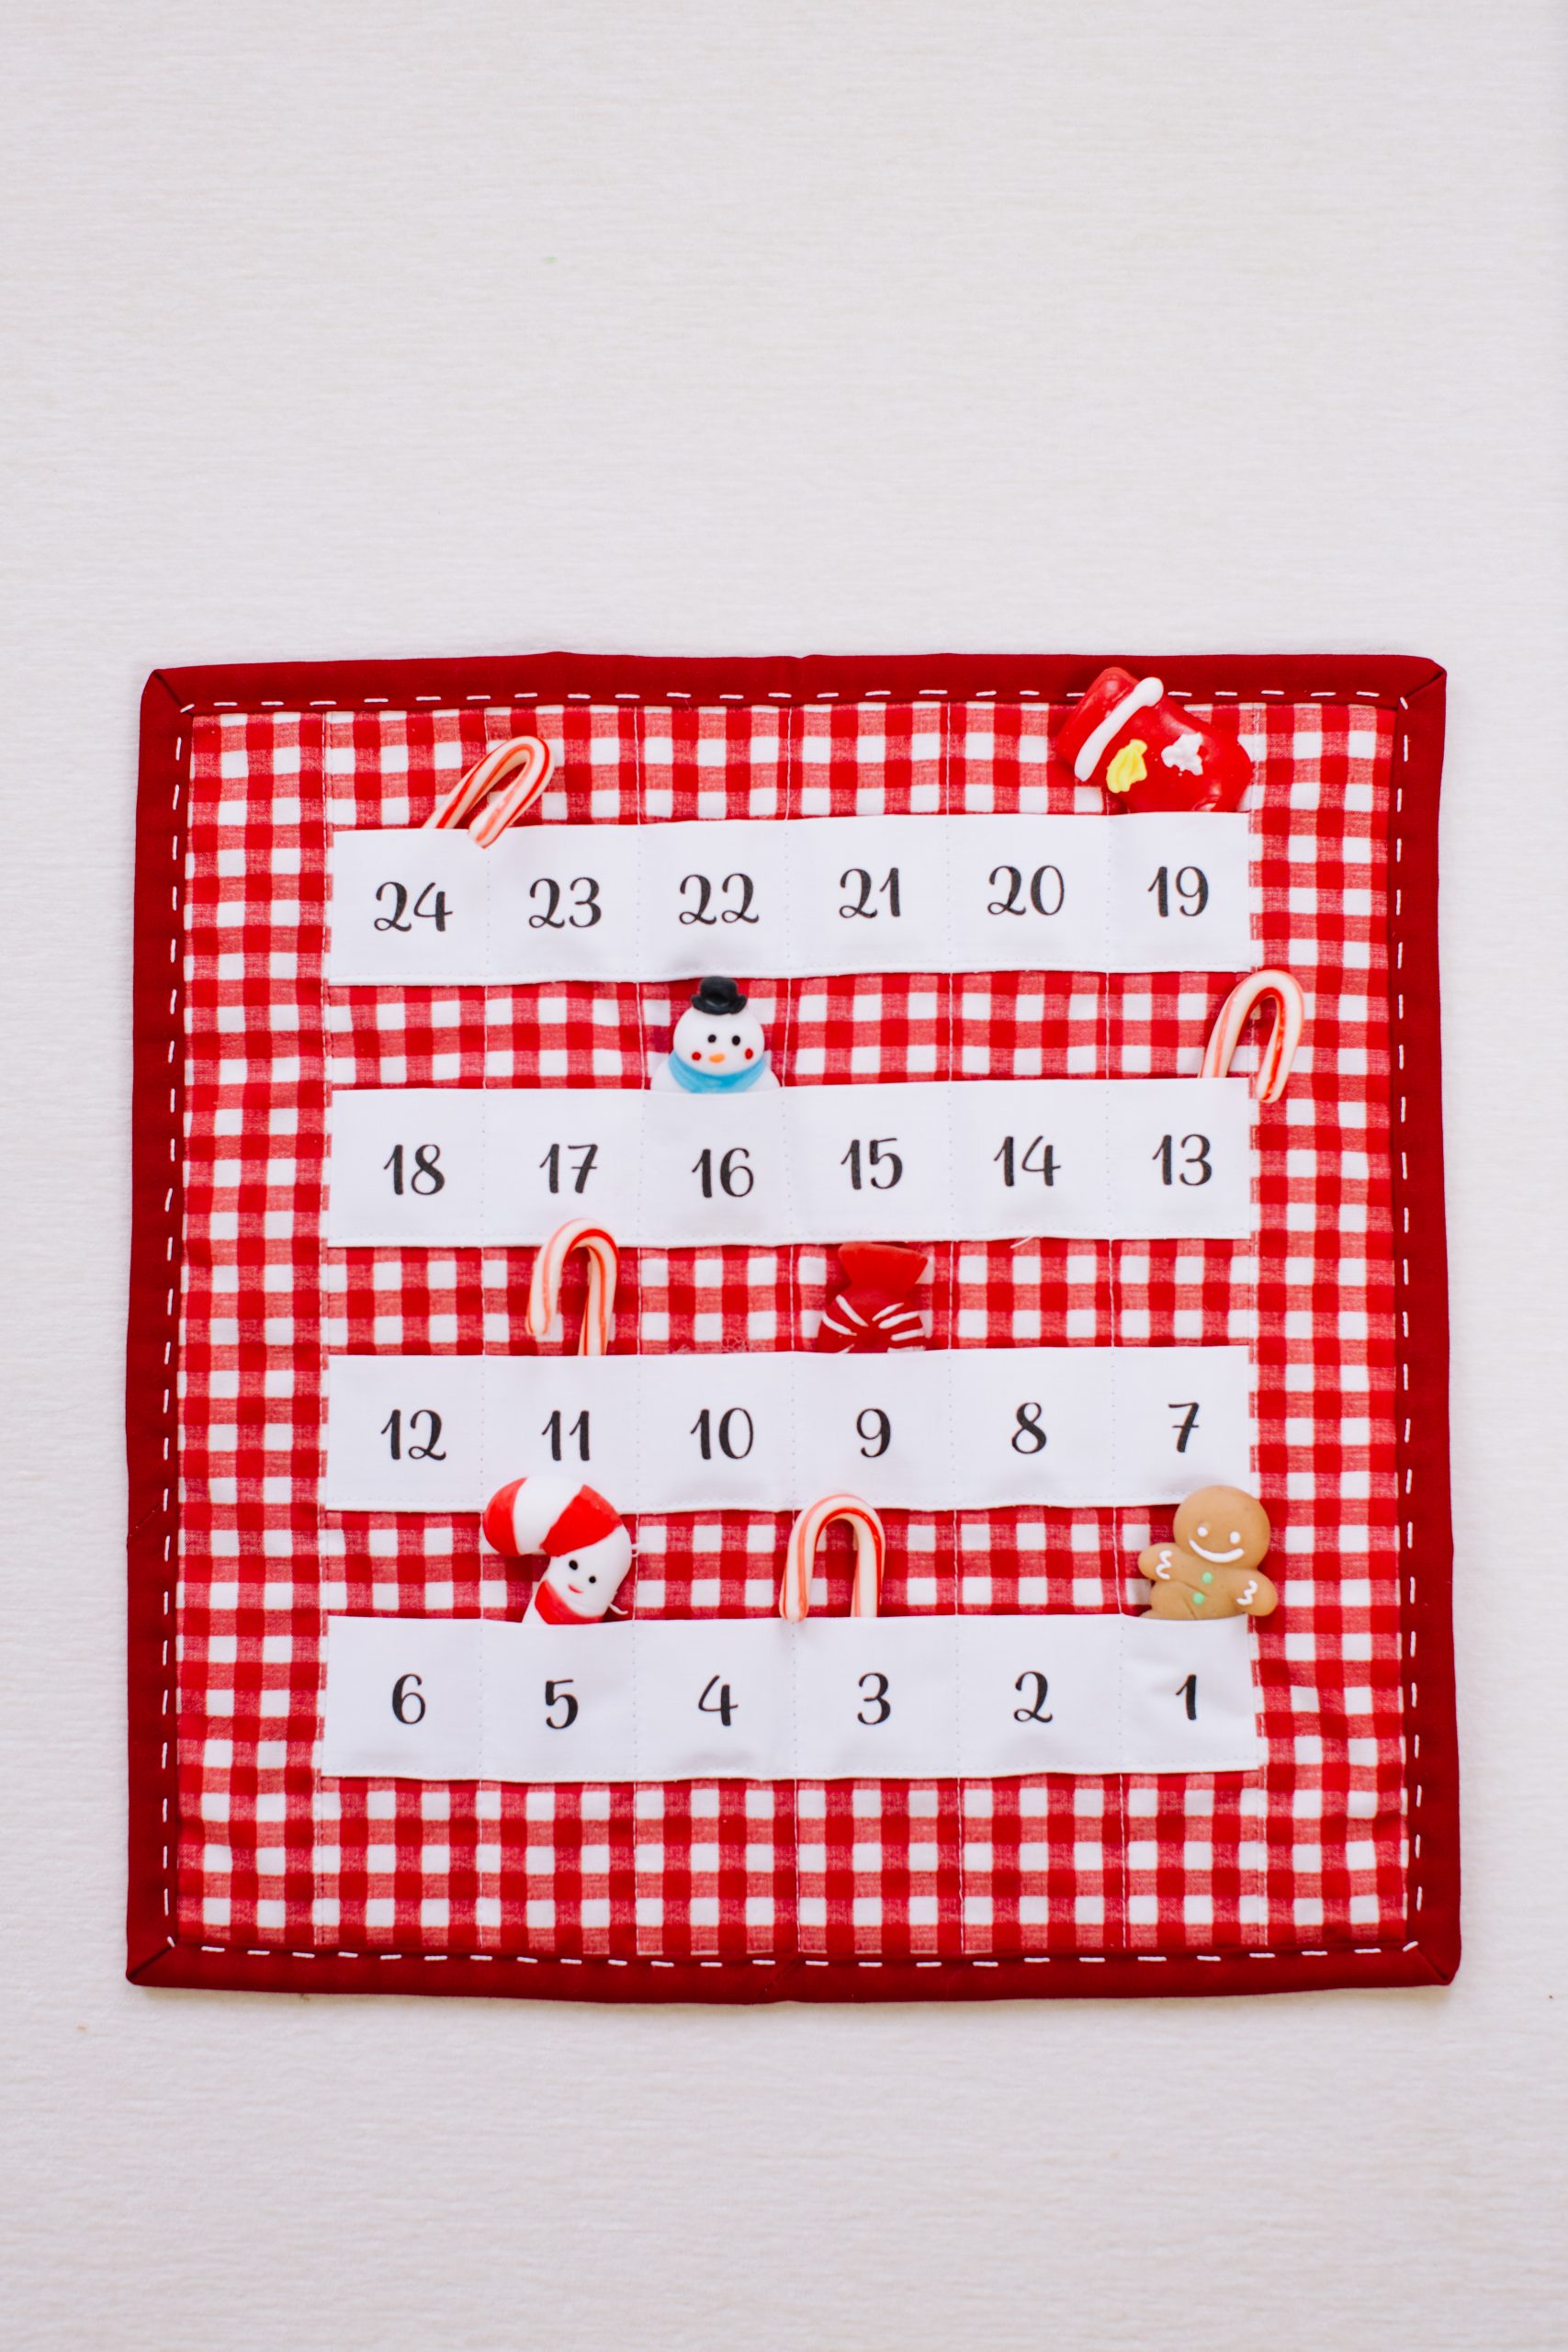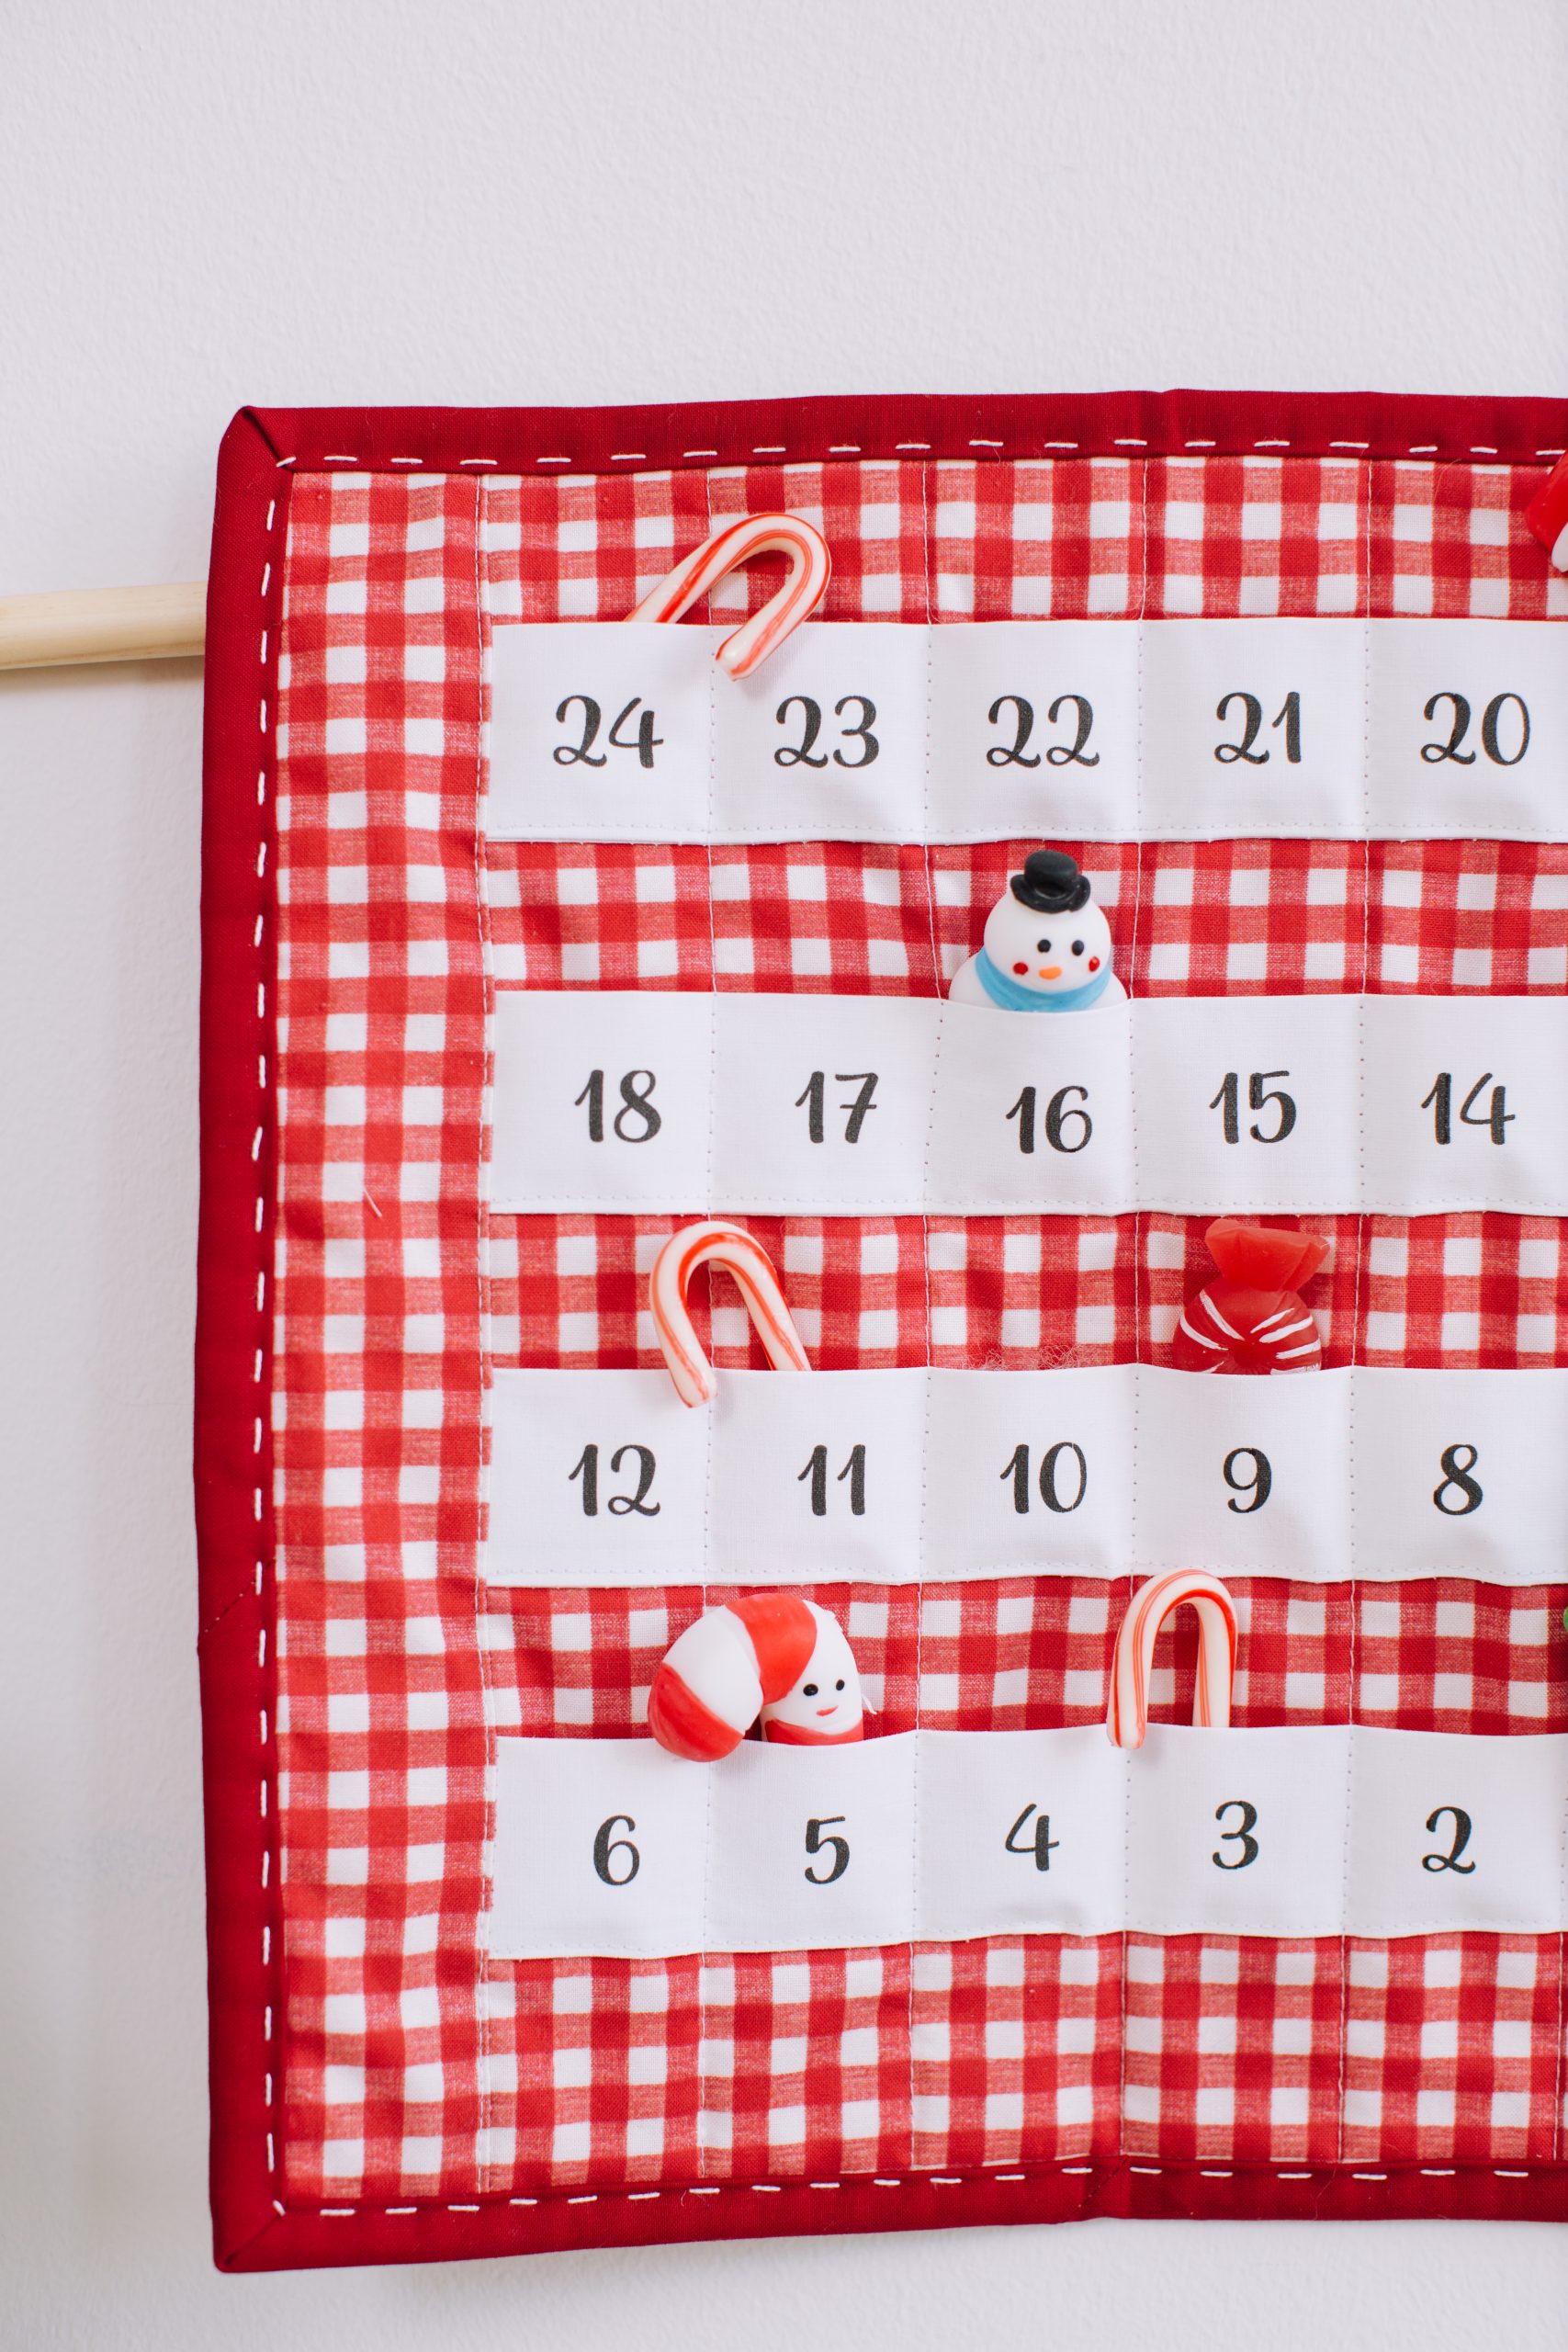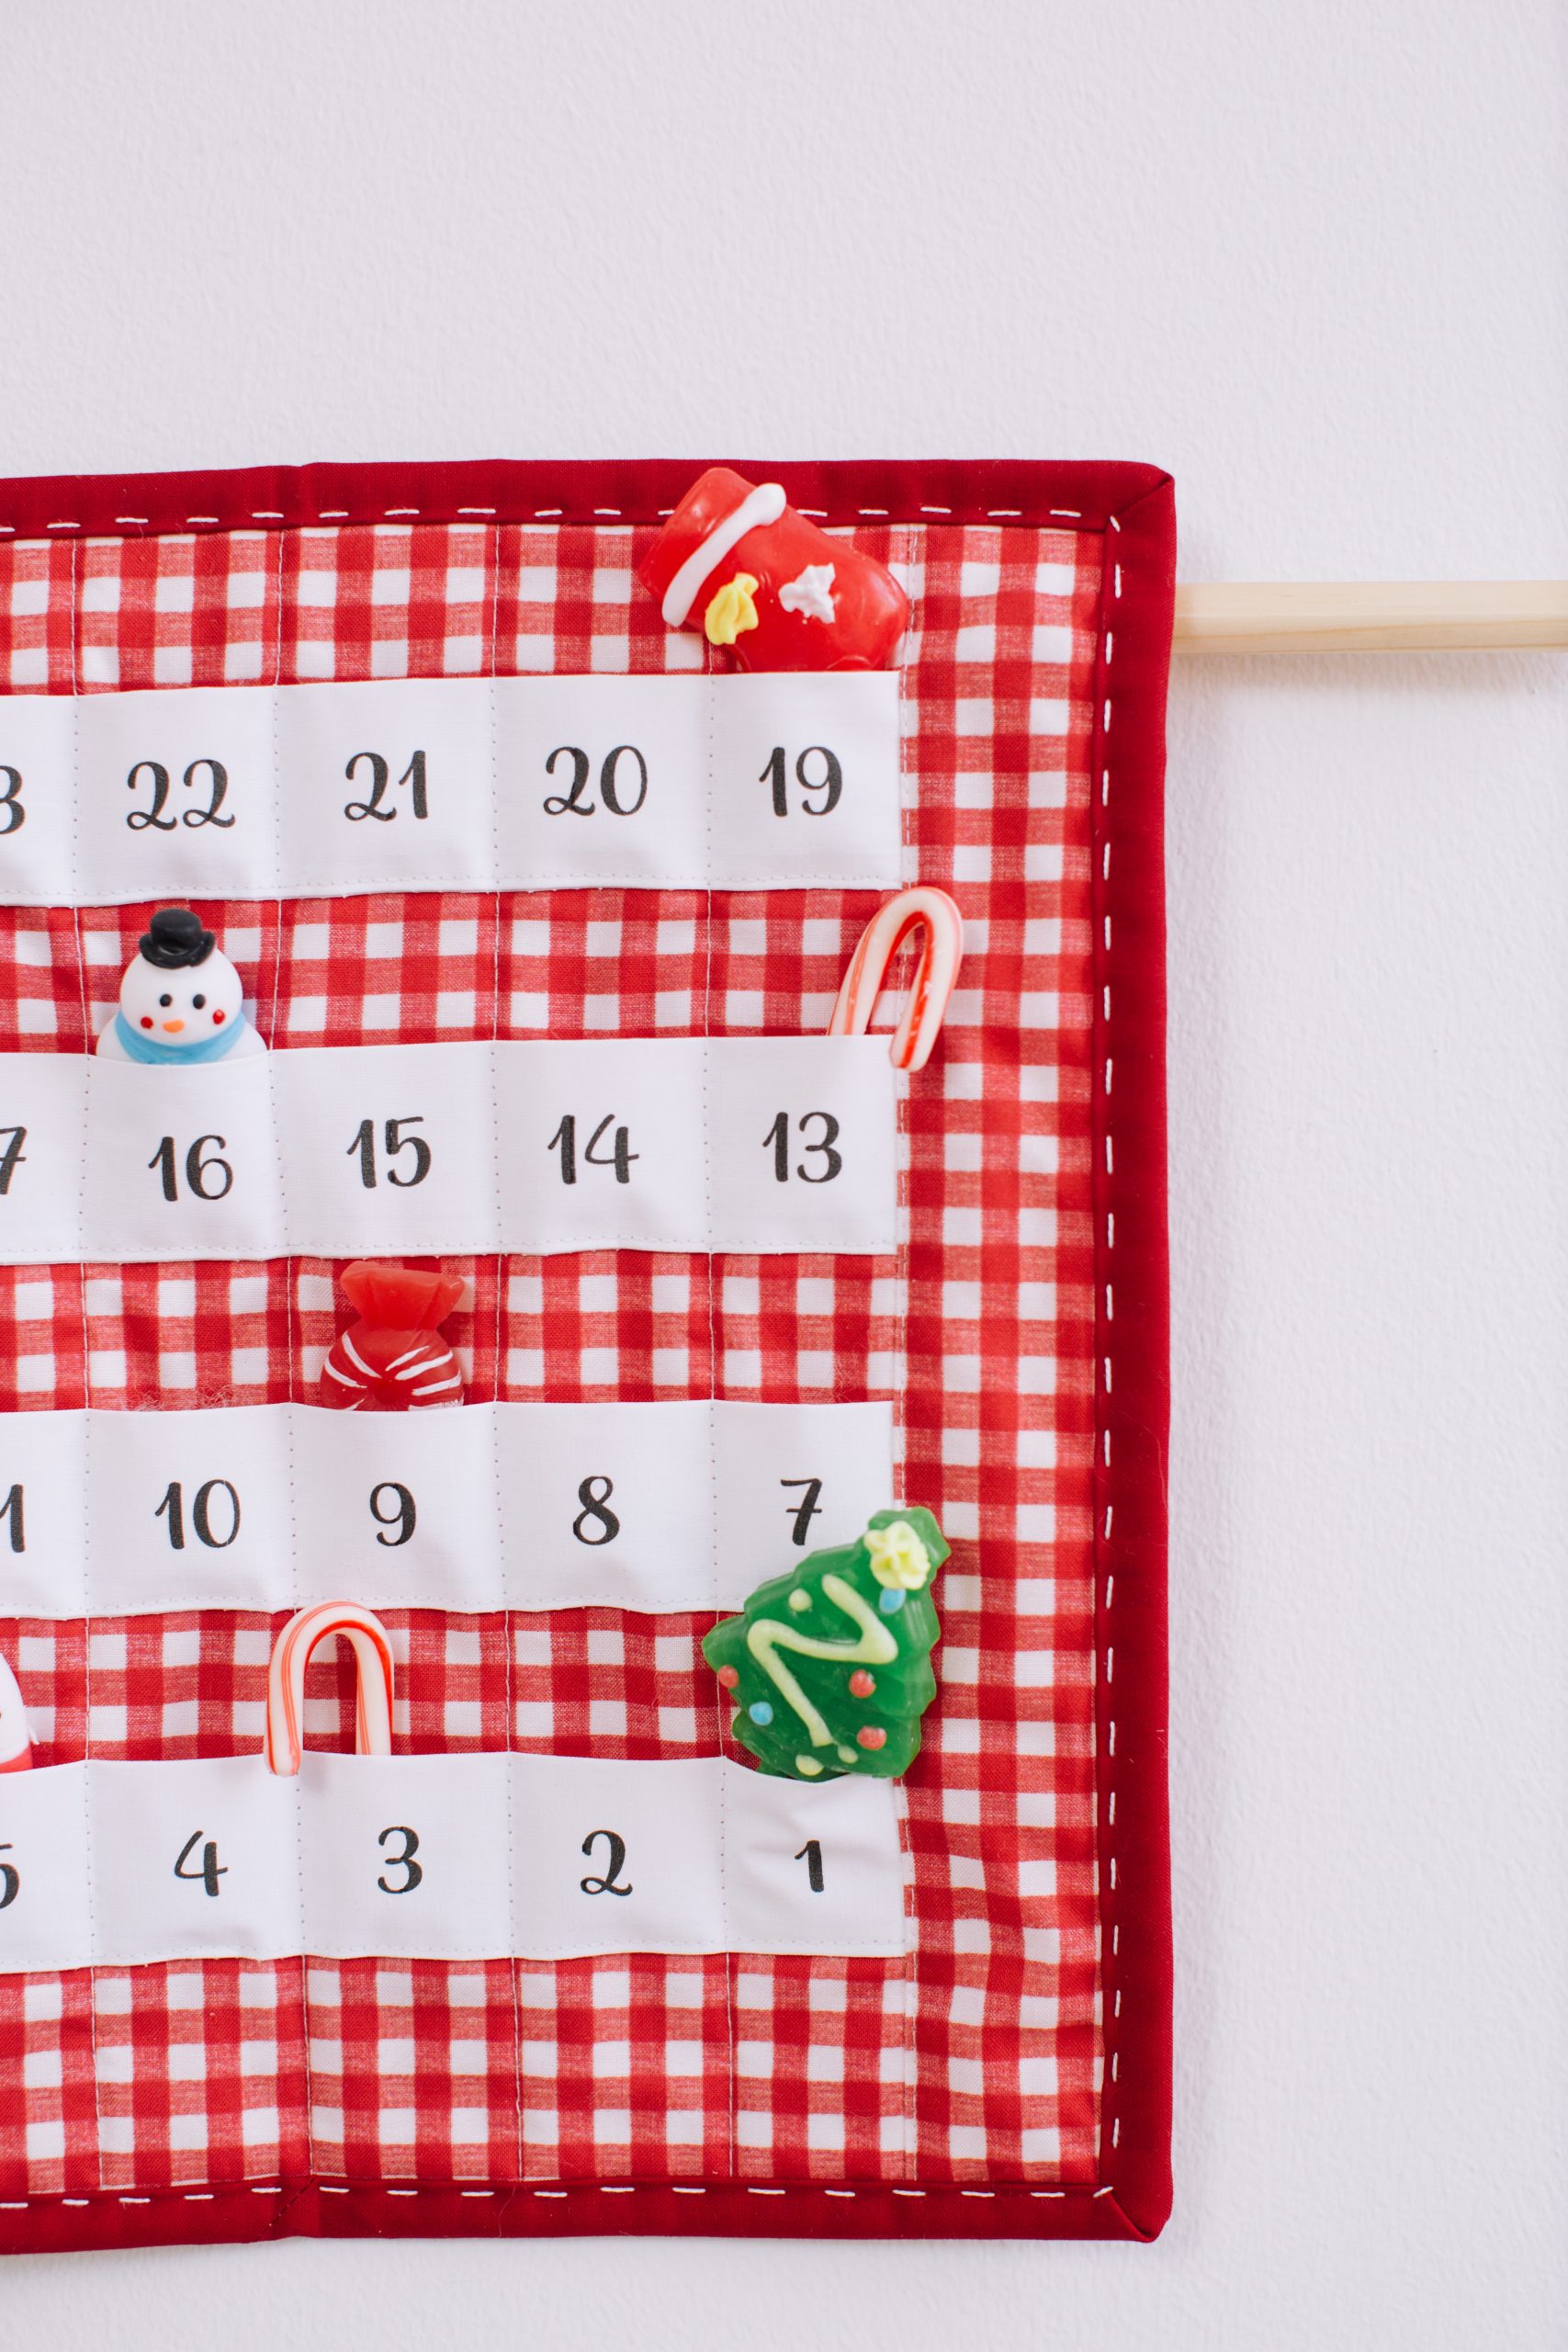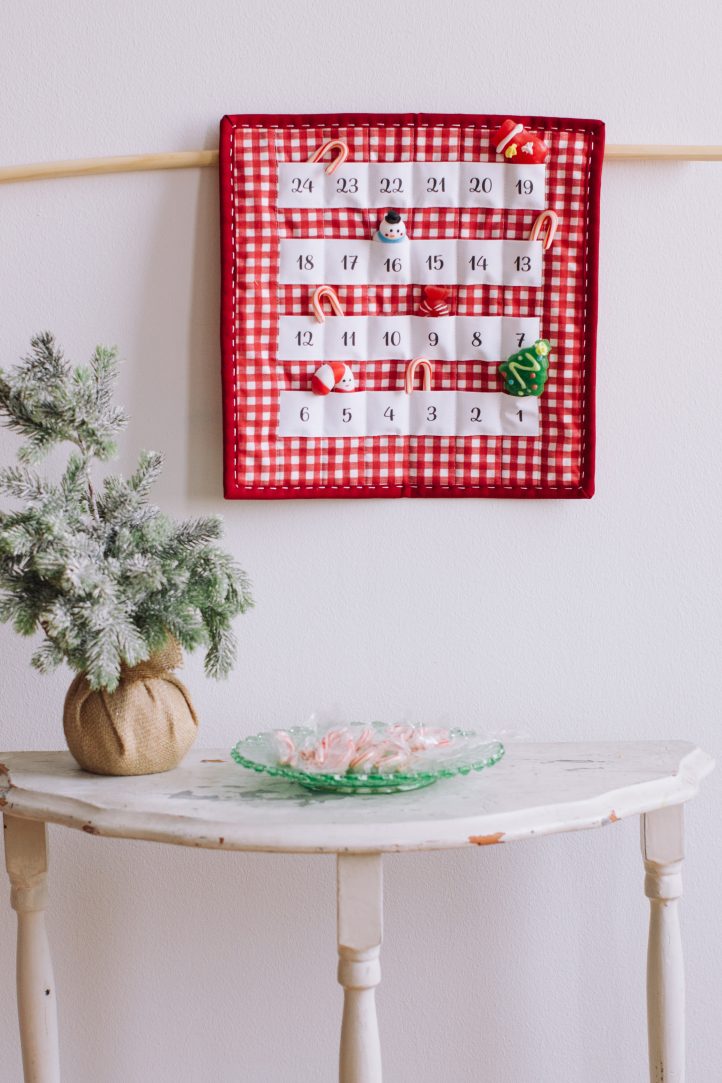
The countdown to Christmas has begun! If you and your littles can’t wait to celebrate the start of December, then you’ve got to make this stylishly festive quilted advent calendar. Featuring a background of traditional red and white gingham, this advent calendar pattern has tiny pockets to hold itty bitty gifts such as candy or toys. Start a new family tradition with this Christmas quilt project that will be treasured for generations to come.
Finished Size: 12″ x 12″
Seam Allowances: 1/4“
Abbreviations: RST = right sides together. WOF = width of fabric.
Materials:
- Red gingham cotton fabric: 1/2 yard or 2 fat quarters
- Red cotton fabric (for binding): 1/4 yard
- Batting: (1) 14″ x 14″
- White printable fabric sheets: (2) 8 1/2″ x 11″
- White embroidery thread: Size 8
- Embroidery hand sewing needle: Size 8
- PDF Template – This is located at the bottom of this page. Please see printing instructions below.
PRINTING INSTRUCTIONS:
Note: To download the templates, click on the pattern download button at the bottom of the page. We recommend opening your pattern download using Adobe Acrobat.
Cutting Instructions:
- Red gingham:
- (2) 4″ x 4″
- (2) 2″ x 12 1/2″ (sides)
- (1) 9 1/2″ x 12 1/2″ (middle)
- (1) 14″ x 14″ (backing)
- Binding: (2) 2 1/2″ x WOF
Sewing Instructions:
- Print the numbered pocket templates onto (2) printable fabric sheets. Follow the instructions on the package for drying and ironing.
- Cut out the numbered pockets from the fabric sheets on the outer lines. You should have (4) pieces that measure 3 1/2″ x 9 1/2″ each.
- Fold (1) numbered pocket lengthwise with wrong sides together and raw edges even. Press the fold.
- Remove the thread from the sewing machine. With only the needle, stitch 1/4″ from the long raw edges through both layers to create a non-sewn line in the fabric. This will create a perforated line that will make it easier to fold the edges under in Step 5. Repeat with the remaining (3) numbered pockets. Rethread the sewing machine.
- Fold under 1/4” along the perforated stitching lines on both raw edges on all (4) numbered pockets. Press.
- Lay out (1) gingham 9 1/2″ x 12 1/2″ with the shortest edge horizontal.
- Pin the 24-19 numbered pocket with the bottom folded edges 3″ from the top edge of the gingham. The edges should be even on the sides.
- Pin the 18-13 numbered pocket with the bottom folded edges 5 1/2″ from the top edge of the gingham.
- Pin the 12-7 numbered pocket with the bottom folded edges 8″ from the top edge of the gingham.
- Pin the 6-1 numbered pocket with the bottom folded edges 10 1/2″ from the top edge of the gingham.
- Sew 1/8″ from the bottom folded edges of each numbered pocket through all layers.
- Pin (1) 2″ x 12 1/2″ gingham RST on the left edge of the numbered section with the long edges even.
- Sew 1/4” from the edges.
- Press open with the seam toward the left.
- Pin (1) 2″ x 12 1/2″ gingham RST on the right edge of the numbered section with the long edges even.
- Sew 1/4″ from the edges.
- Press open with the seam toward the right.
- Layer the 14″ x 14″ gingham backing with the right side down, 14″ x 14″ batting, and the numbered top with the right side up. Pin or baste.
- Mark the following vertical lines on the numbered top:
- 1/8″ to the left of the left seam
- 1 1/2″ to the right of the left seam
- 3″ to the right of the left seam
- 4 1/2″ to the right of the left seam
- 6″ to the right of the left seam
- 7 1/2″ to the right of the left seam
- 1/8″ to the right of the right seam
- Sew on each marked line through all layers. This will create the pockets and provide quilting for the mat.
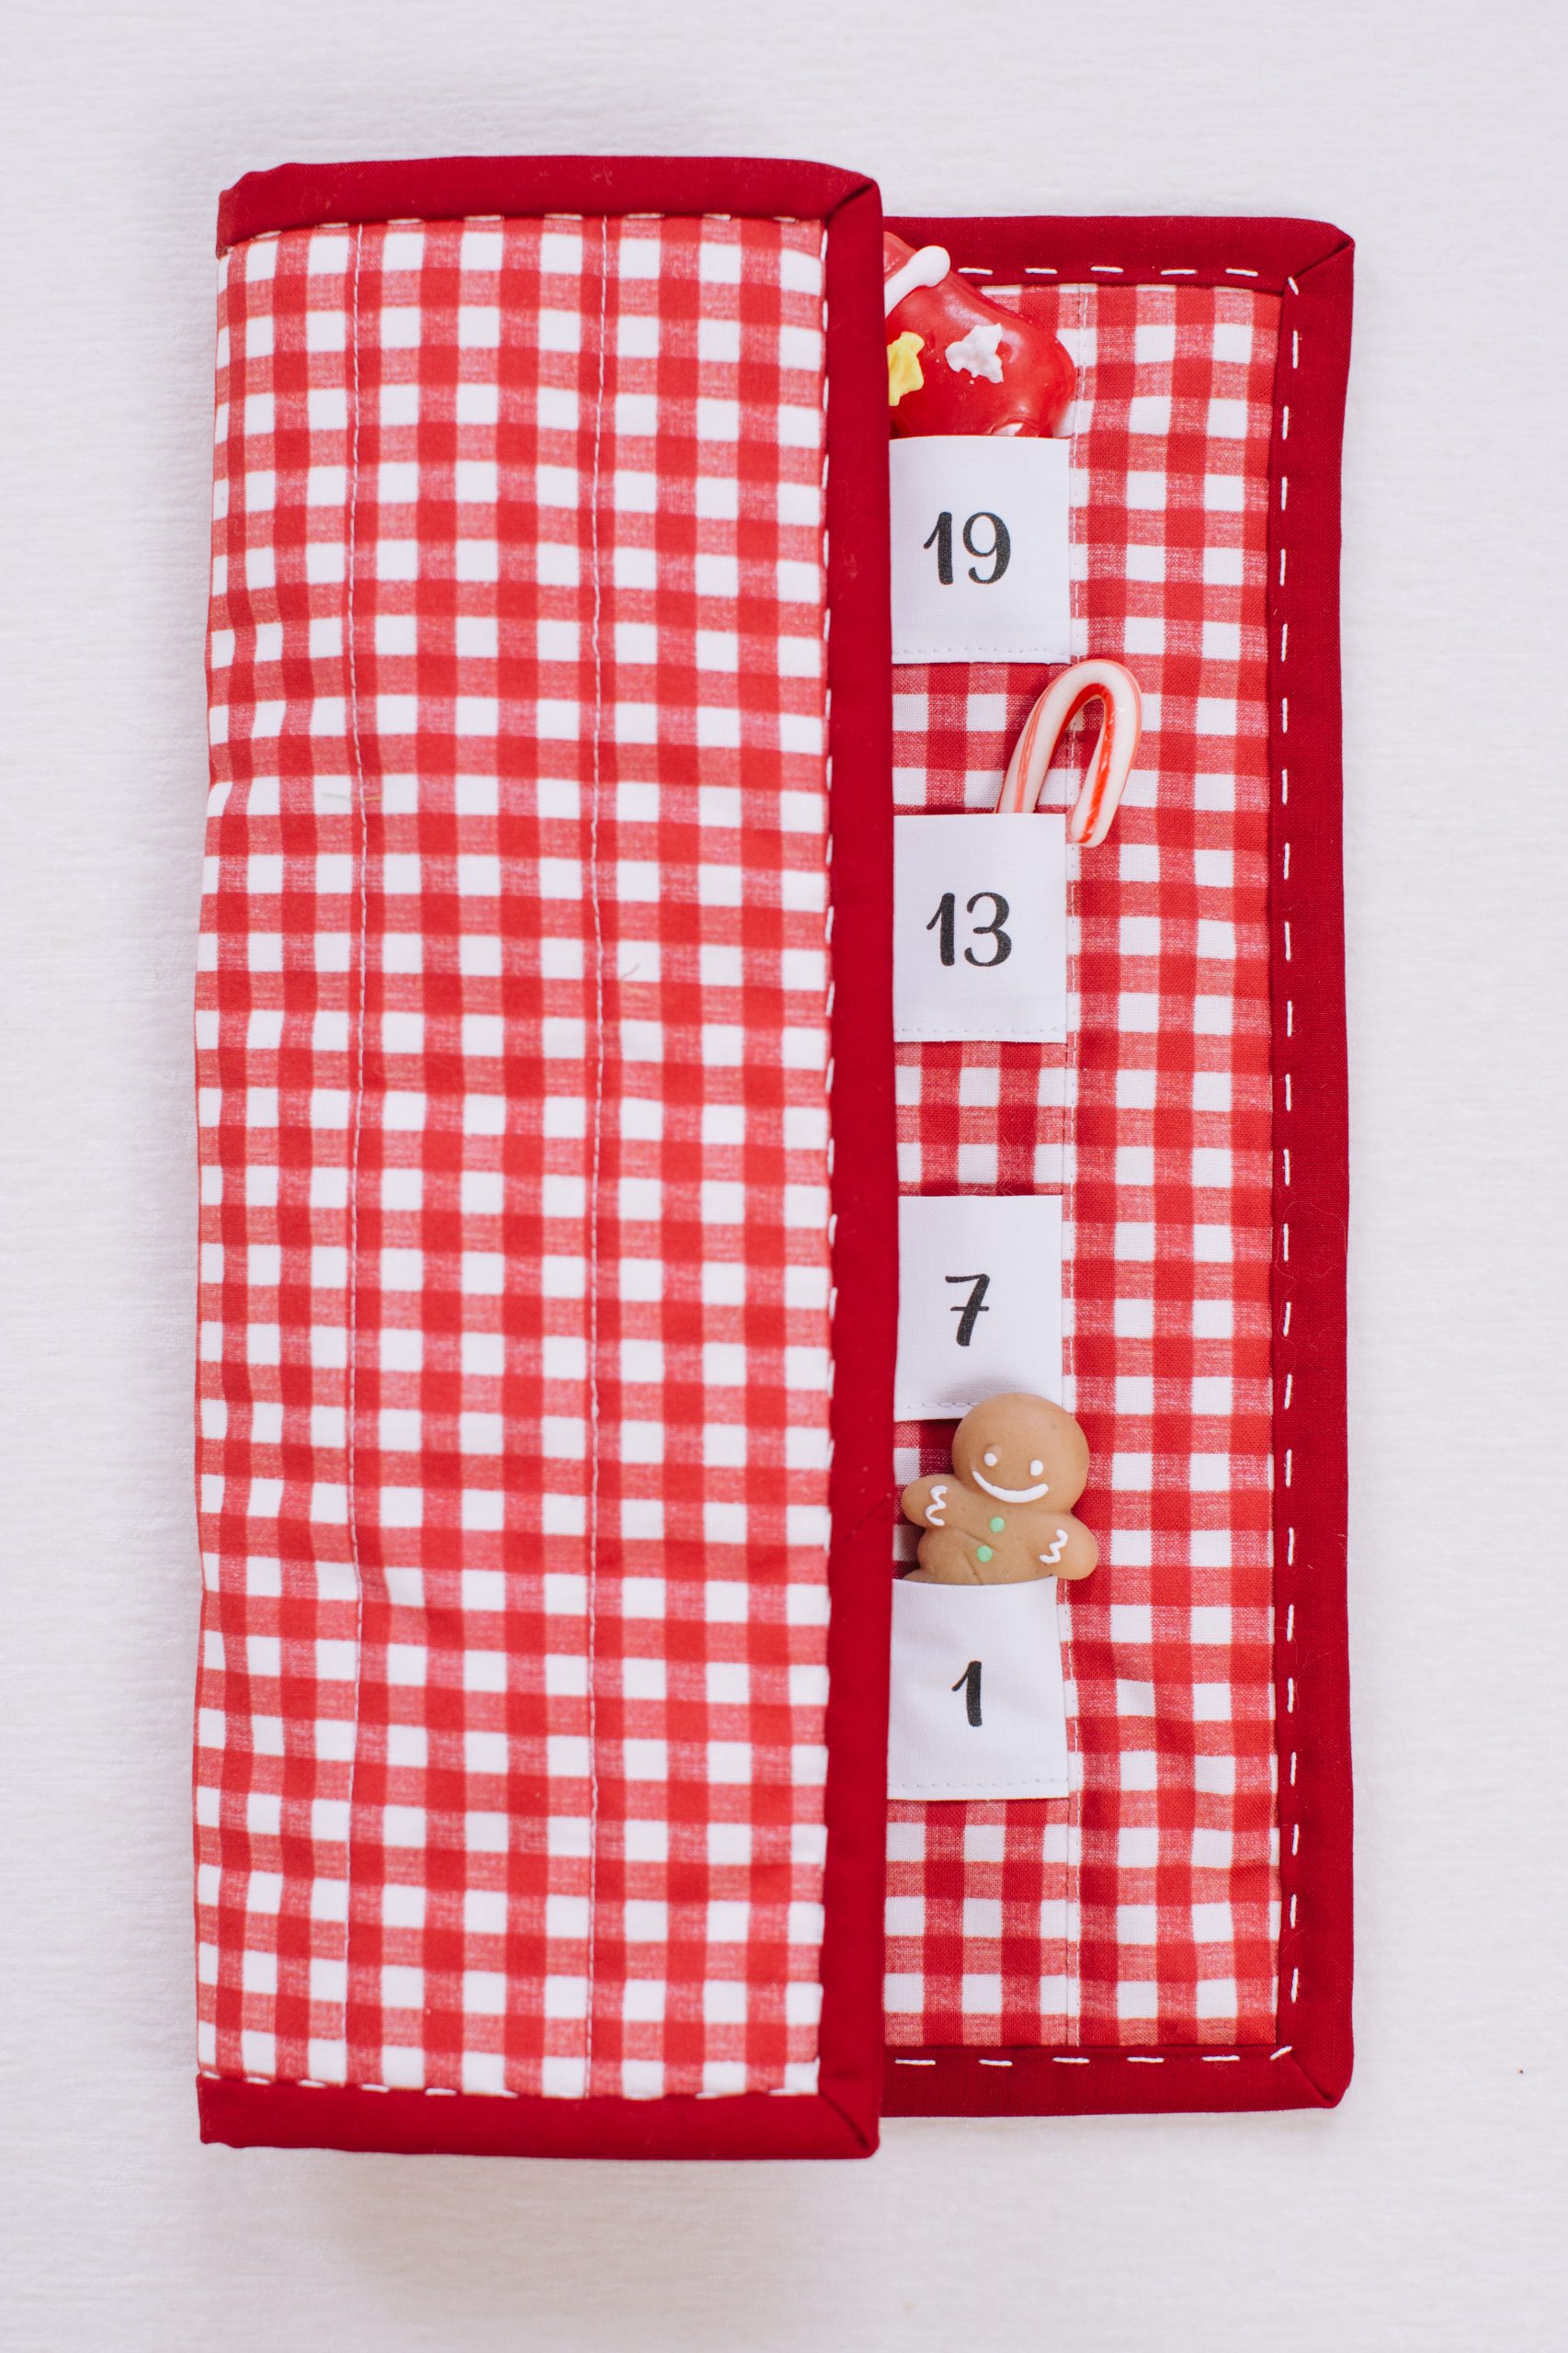
- Fold the (2) 4″ squares diagonally with wrong sides together.
- Pin (1) in the upper left corner on the back of the mat and (1) in the upper right corner to create hanging pockets. The edges should be even and the fold opposite the corner.
- Trim the selvages from the (2) 2 1/2″ x WOF binding pieces. Sew the ends RST to make (1) continuous strip.
- Fold binding strip lengthwise with wrong sides together. Press.
- Sew the binding around the edge from the backing side of the mat with raw edges even. This will secure the (2) hanging pockets in place. Join the ends using your favorite method.
- Wrap the binding to the front and clip in place.
- Hand stitch through the binding with the white embroidery thread using a large straight stitch.
- Insert a small dowel or skewer in the hanging pockets on the back.