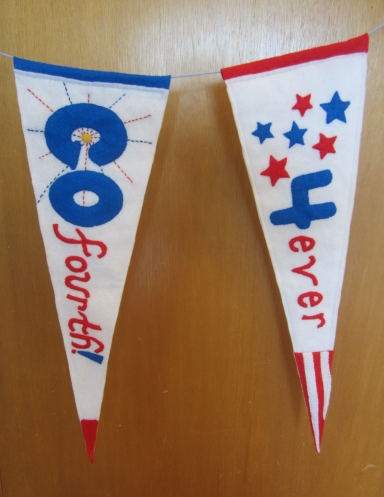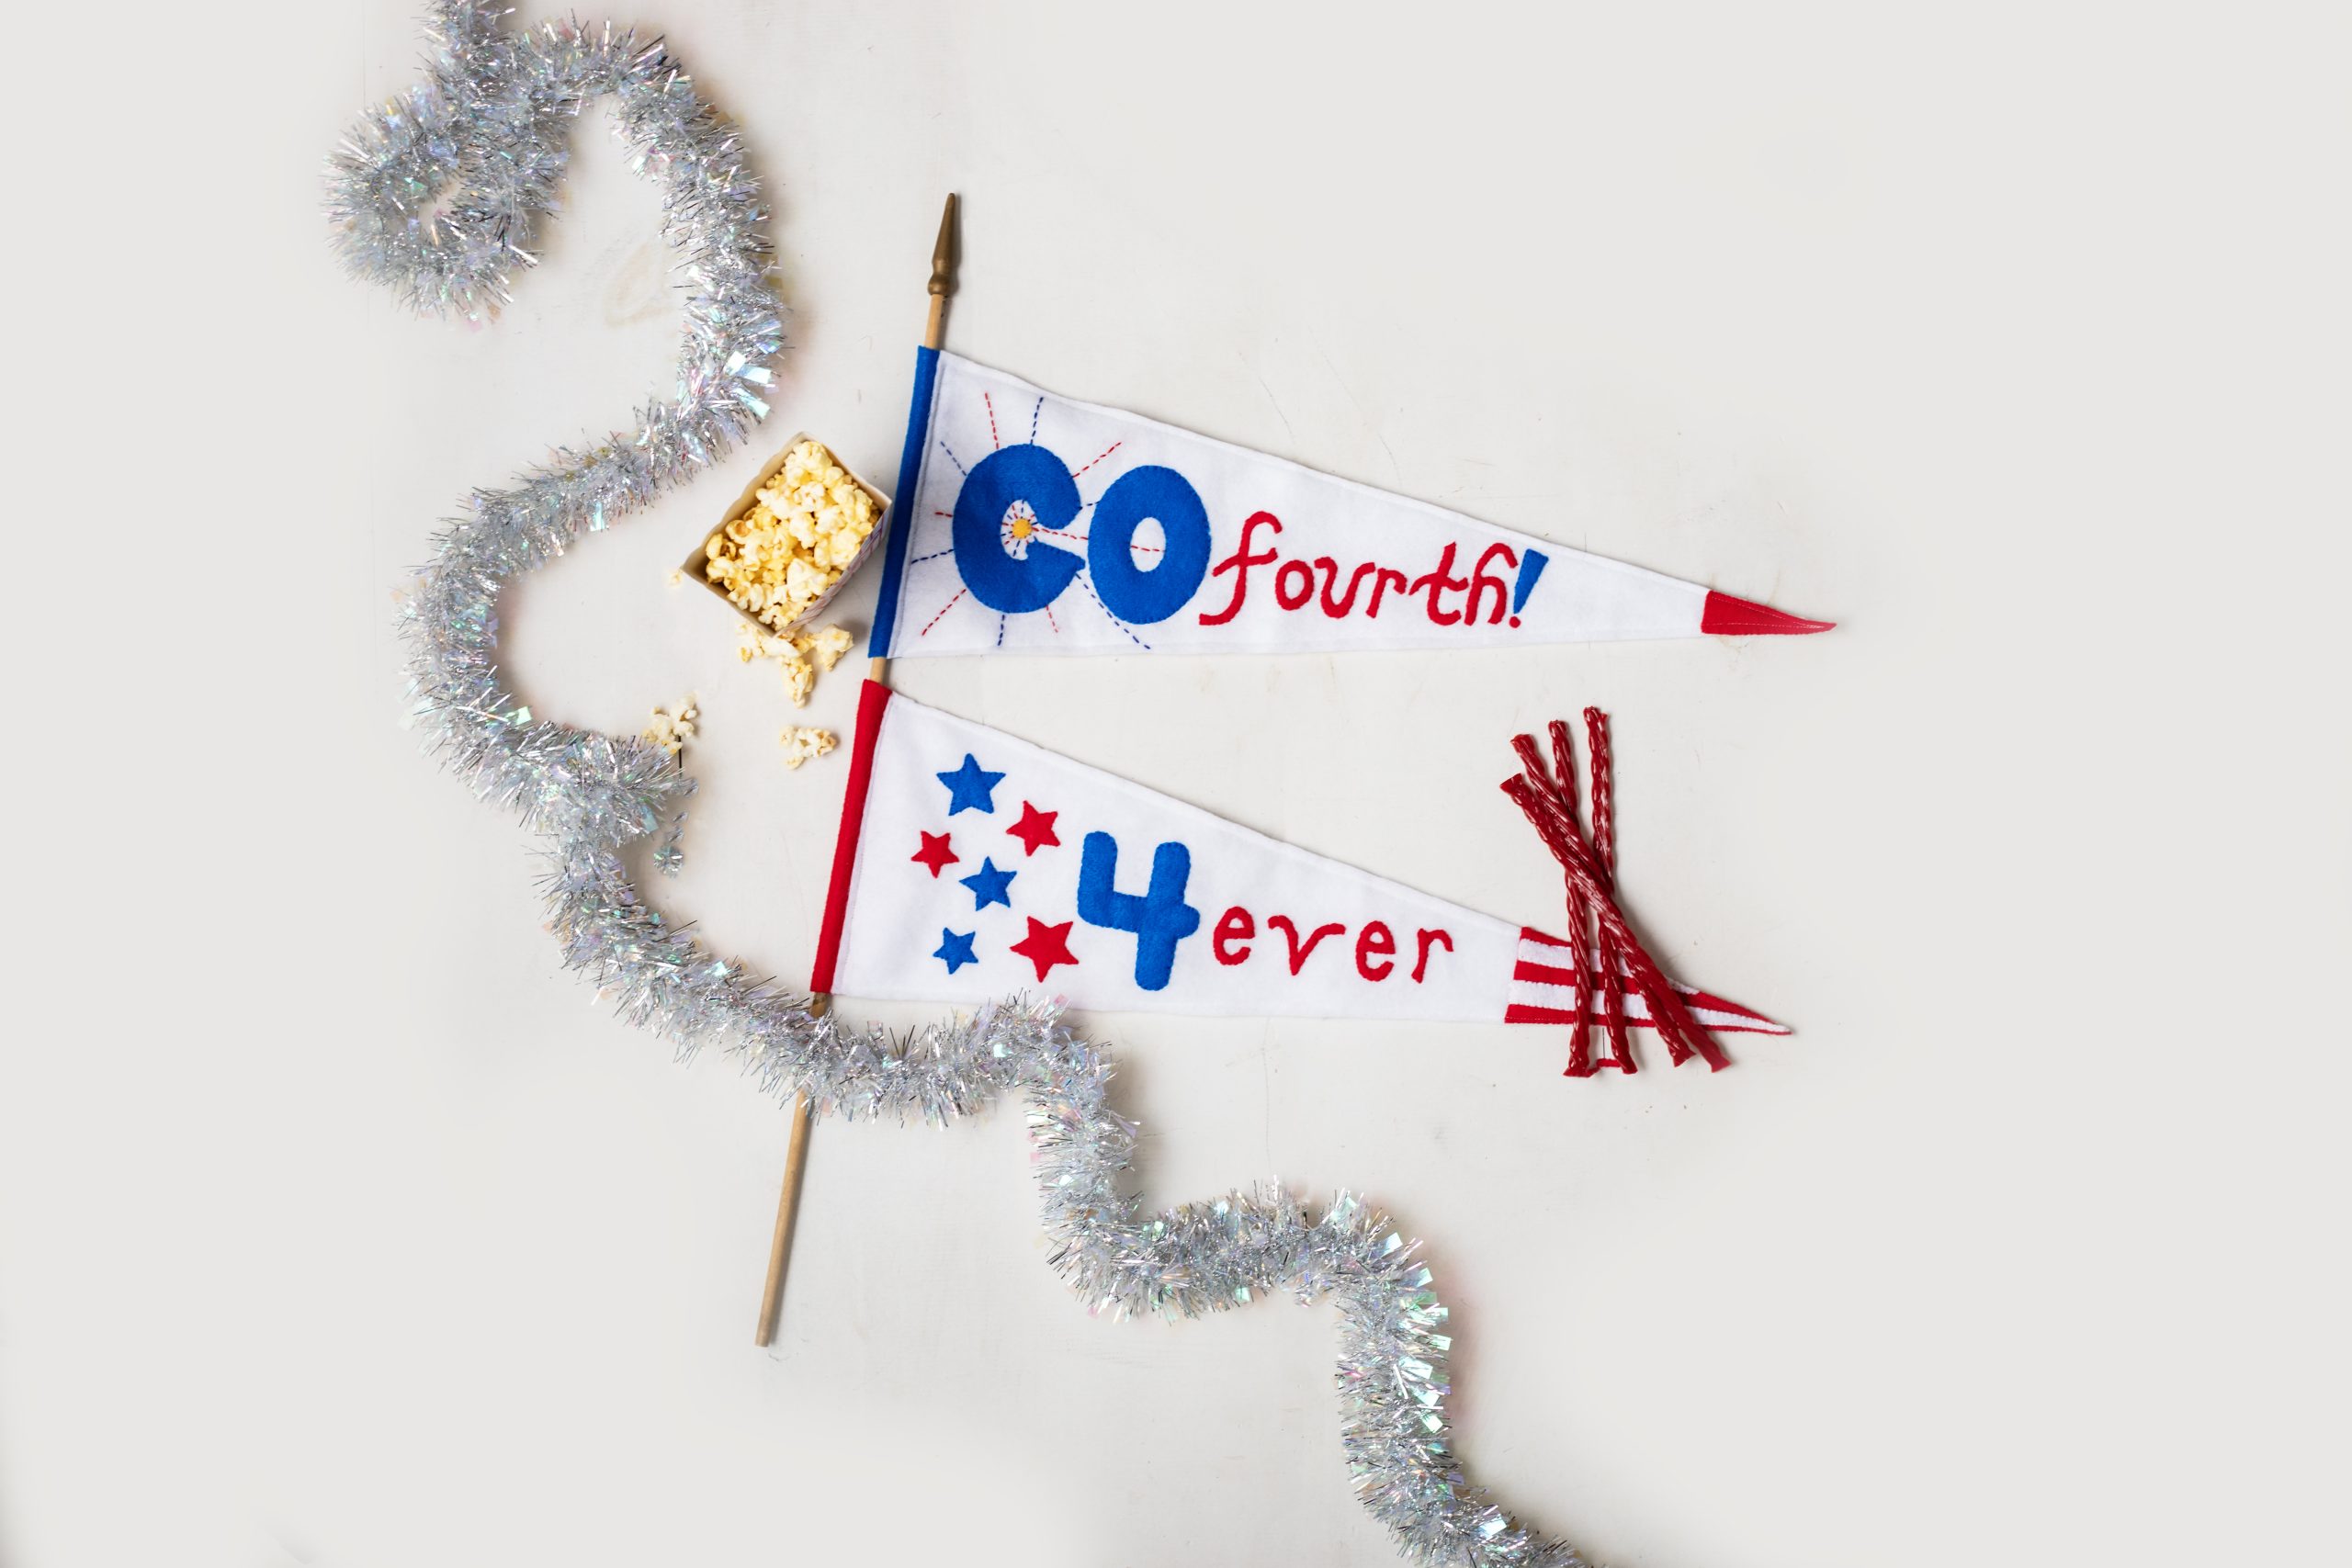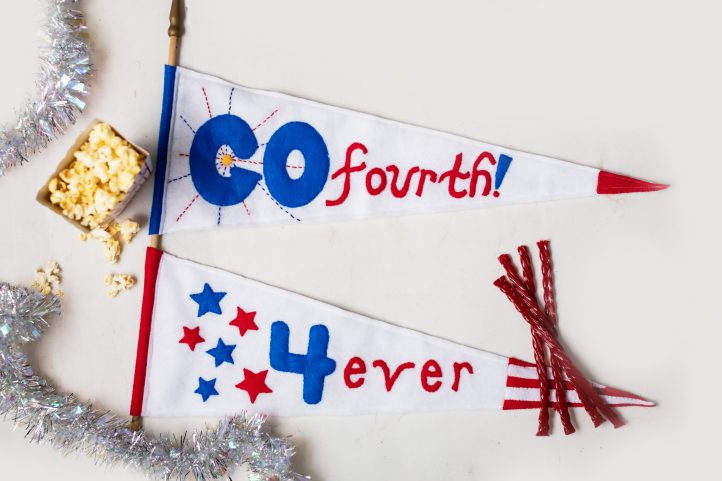
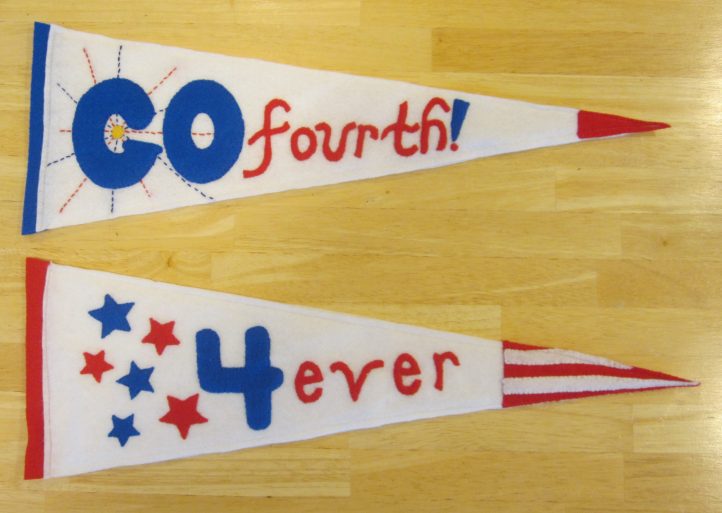
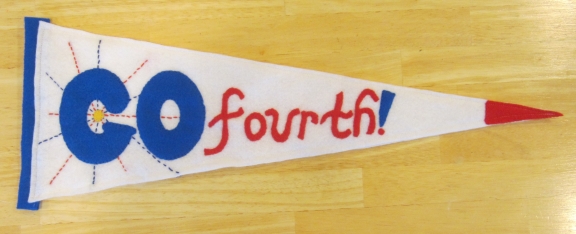
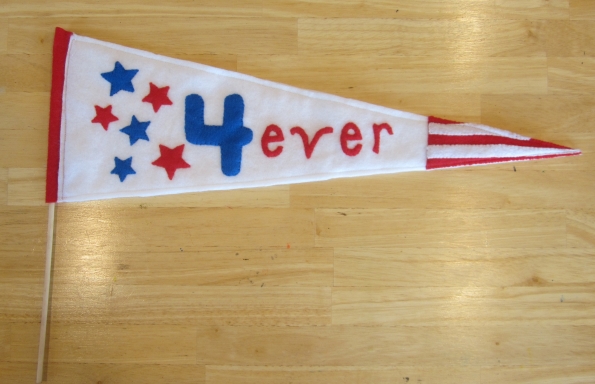
Show off your 4th of July spirit with festive and playful felt pennants! These patriotic pennants from Christy Jones feature two designs and include an attached casing, so that you can display your pennants with a dowel rod or string them for fun hanging decorations. Finish your patriotic sewing projects with embroidery details and proudly wave your pennants at your next holiday parade or fireworks display.
Skill Level: Easy
Estimated Time Per Pennant: 3 hours
Materials:
Note: The following materials are enough for both pennants.
- 3/8 yard white felt (72-inch wide)
- 1 piece red felt (approximately 9 x 12 inches)
- 1 piece blue felt (approximately 9 x 12 inches)
- Small scrap yellow or gold felt
- Matching threads
- Red and blue embroidery floss
- Embroidery or large-eyed needle
- Fine-tipped washable fabric marker or tailor’s chalk
- Ruler or straight edge
- Yarn or string OR a 1/4-inch or 5 mm dowel (optional)
- PDF Patterns – These are located at the bottom of this page. Please see printing instructions below.
PRINTING INSTRUCTIONS:
Note: To download the patterns, click on the pattern download button at the bottom of the page. We recommend opening your pattern download using Adobe Acrobat.
Instructions:
PREPARE THE PATTERNS AND PENNANTS:
- Print one copy each of the following patterns:
- pennant_partA.pdf
- pennant_partB.pdf
- pennant_casing.pdf
- pennant_letters.pdf
- Cut out all the pattern pieces.
- Overlap the straight end of the Patriotic Pennant Part B pattern with the gray area on the Part A pattern, forming a single large triangle. Tape the patterns together.
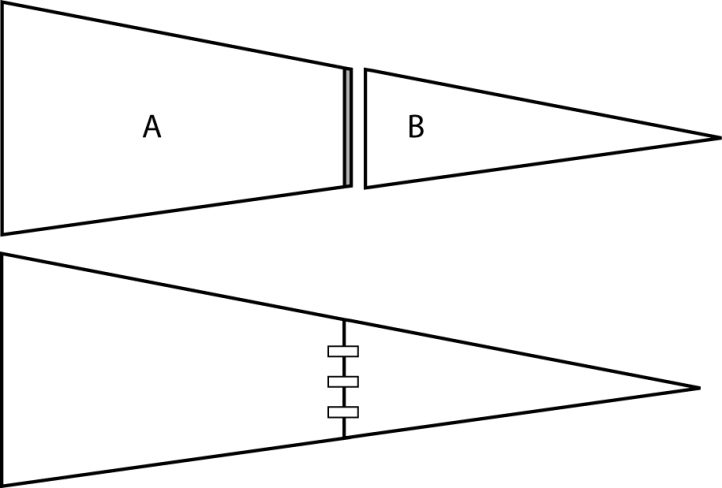
- Use the assembled pennant pattern to cut 4 large triangles from white felt. Use 2 of the large white triangles to be the pennant fronts, and set the other 2 aside to be the backings.
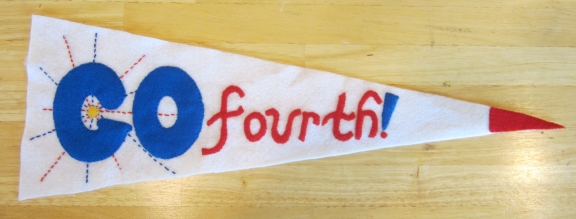
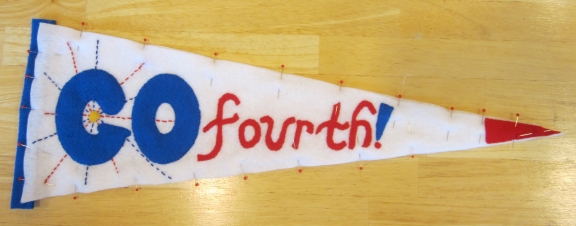
CUT THE “GO FOURTH” APPLIQUES:
- Cut 1 letter “G” and 1 “O” from blue felt.
- Cut the letters “f,” “o,” “u,” “r,” “t,” and “h” from red felt.
- Cut 1 exclamation point top from blue felt, and 1 exclamation point dot from red felt.
- Cut 1 firework center from yellow felt.
- Cut 1 solid point from red felt.
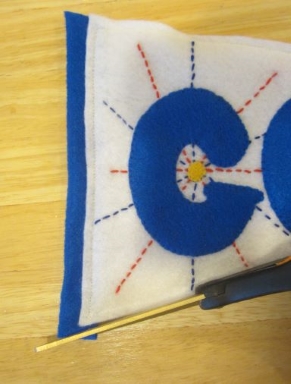
SEW THE FIREWORKS:
- Pin the fireworks pattern to the wide area of one of the white triangles, about 1/2-inch away from the edges. Make a dot on the felt next to each dot on the pattern, using chalk or fabric marker. These dots will mark the end of each line of the fireworks.
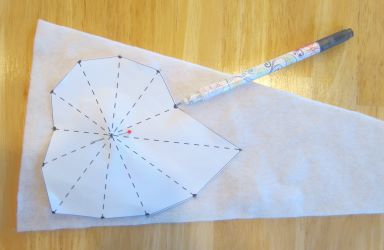
- Remove the pattern. Connect pairs of opposite dots using a ruler and a fabric marker or chalk.

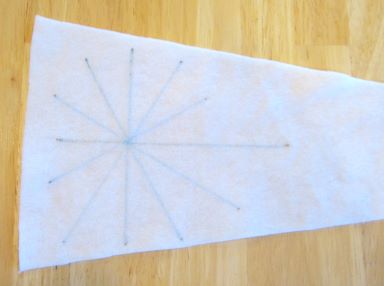
- Thread an embroidery needle with red floss (all six strands), and knot the end of the floss. Stitch along the horizontal line using a fairly closely spaced running stitch. To do this, poke the needle up through one of the dots, then bring the needle down about1/8-inch away. Poke the needle up through the fabric again a short distance from the first stitch.
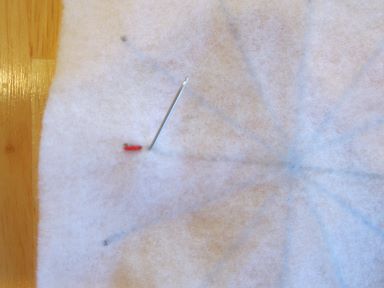
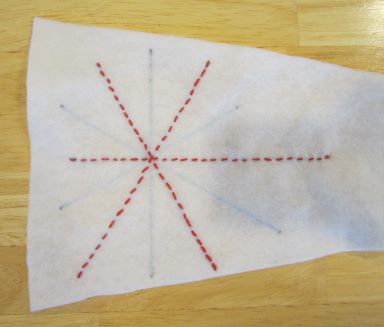
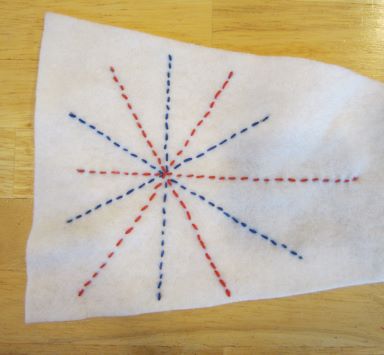
- Continue the running stitch all along the line to the opposite dot. Run stitches along the remaining lines, alternating red and blue embroidery floss.
SEW THE “GO FOURTH” APPLIQUES:
- Position the appliqués as shown on one of the large white felt triangles, centering the letter “G” around the center of the firework embroidery. Place the yellow or gold felt firework center over the area where the firework lines cross. Pin the pieces in place.
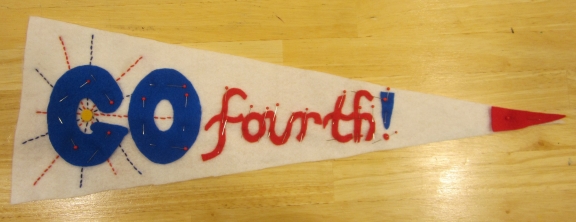
- Whipstitch around each appliqué using matching thread.
CUT THE “STARS AND STRIPES FOREVER” APPLIQUES:
- Cut 1 large number 4 from blue felt.
- Cut 2 of the letter “e,” 1 letter “v,” and 1 letter “r” from red felt.
- Cut 1 large, 1 medium, and 1 small star from blue felt and also 1 of each star from red felt.
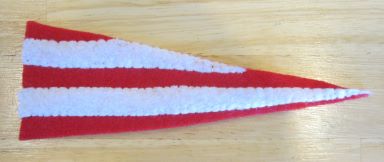
- Cut 1 red stripe area from red felt.
- Cut 1 upper white stripe and 1 lower white stripe from white felt.
SEW THE “STARS AND STRIPES FOREVER” APPLIQUES:
- Position the upper white stripe and the lower white stripe on the red stripe area and pin them in place.
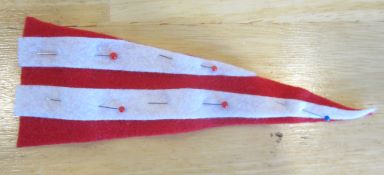
- Whipstitch the white stripes to the red felt using white thread.
- Position the appliqués as shown on one of the large white felt triangles and pin them in place.
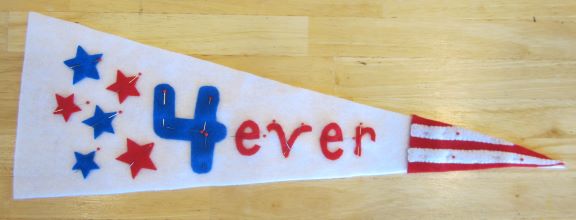
- Whipstitch around each appliqué using matching thread.

ASSEMBLE EACH PENNANT:
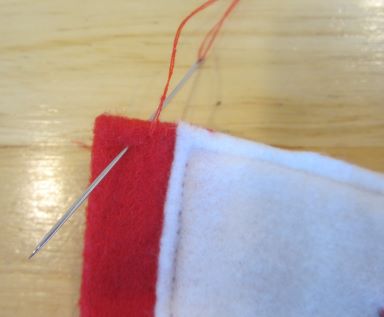
Use 1/4-inch seam allowance and white thread for all of the following sewing.
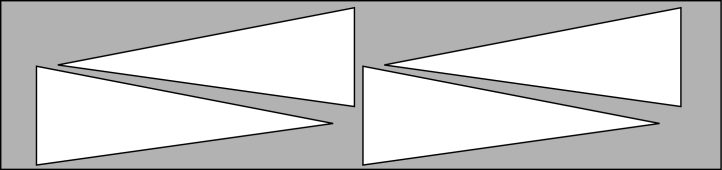
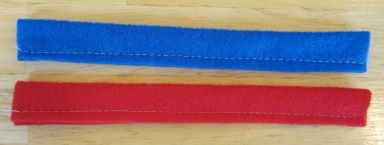
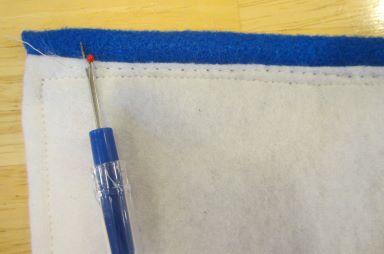
- Cut 1 casing from blue felt and 1 casing from red felt.
- Fold each casing in half vertically and baste along the edge opposite the fold.
- Place each casing on a large end of the plain white backing triangles, so that the casing overlaps the backing by about 1/2-inch. Pin in place.
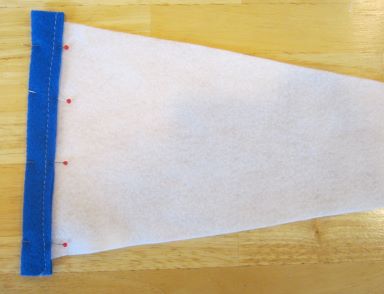
- Baste each casing to each backing.
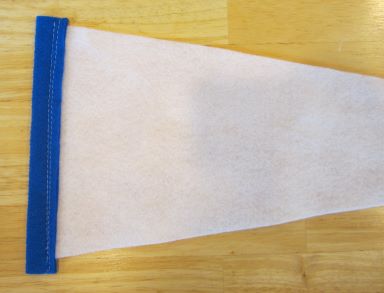
- Place the decorated pennant fronts on the backings, lining them up along the edges. Pin the pennant fronts and backings together.
- Topstitch around the edges of the entire pennant.
- Remove any basting stitches that show.
- Clip the ends of the casing even with the pennant.
DISPLAY THE PENNANTS:
To display a pennant on a dowel, whipstitch the upper edge of the casing shut, then insert a 1/4-inch or 5 mm dowel.
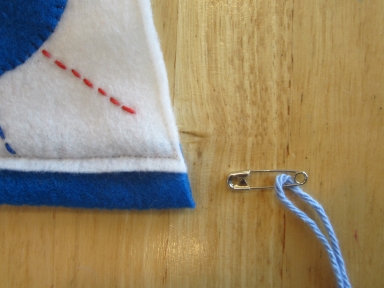
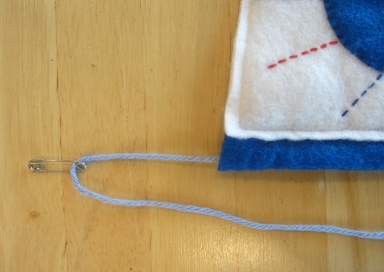
To string the pennants, insert the end of the yarn or string through a small safety pin, then push the pin through the casing. Remove the pin.
Go forth and celebrate!