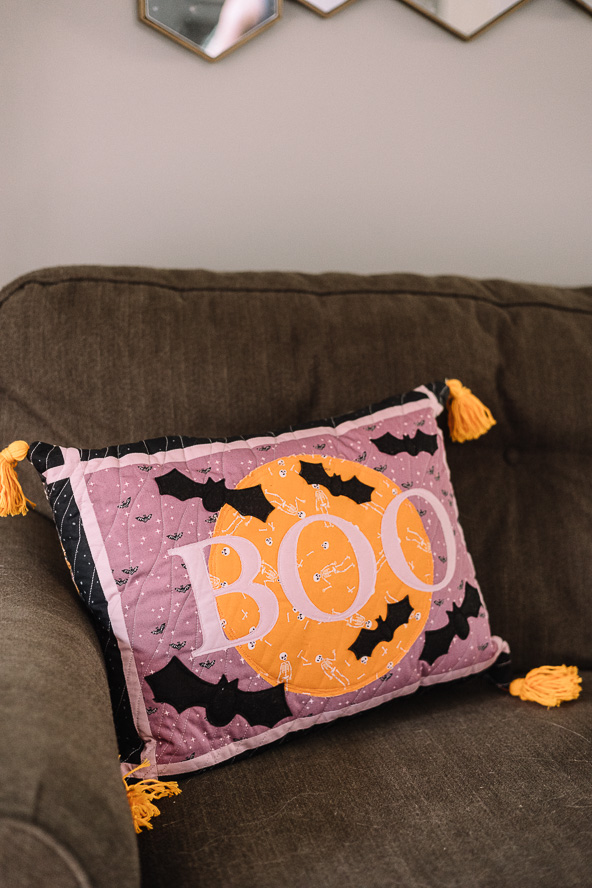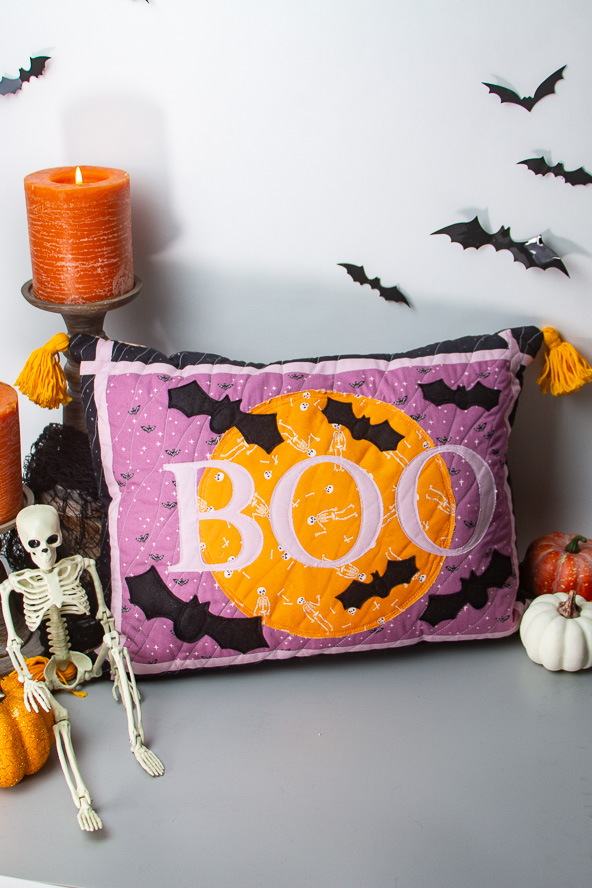
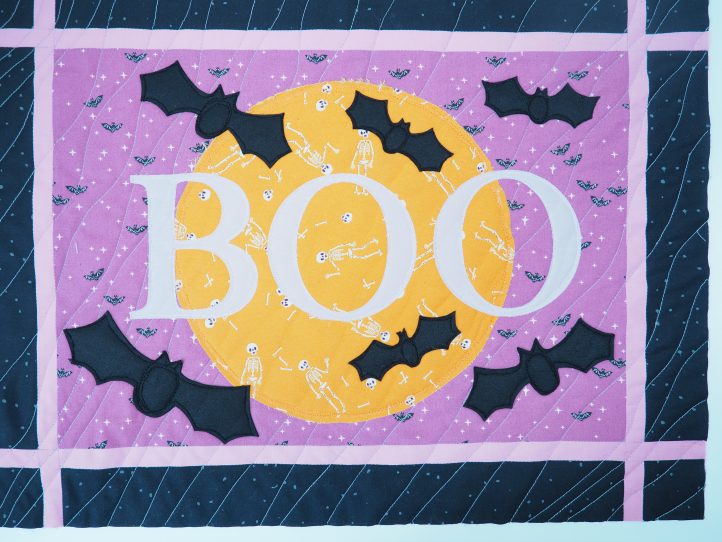
Design a bewitchingly breathtaking Halloween throw pillow just in time for All Hallows’ Eve. Aimed at intermediate sewists and quilters, this throw pillow pattern features a flock (or cauldron) of bats against an orange harvest moon and some fun applique letters. We love that this Halloween project lets you show off the range of your skillset, from basic sewing to free motion quilting to applique! Add some “boo-tiful” Halloween décor to your living room while putting your sewing skills to the test with this delightful holiday project.
Skill Level: Intermediate
Materials:
- Fabric: (Note: All fabric is from the Spooky ‘n Sweet collection by Art Gallery Fabrics)
- Fat eighth Fabric A – for the moon applique (Fabric: Mister No Body)
- 1/2 yd. Fabric B – for the background fabric (Fabric: Winging It)
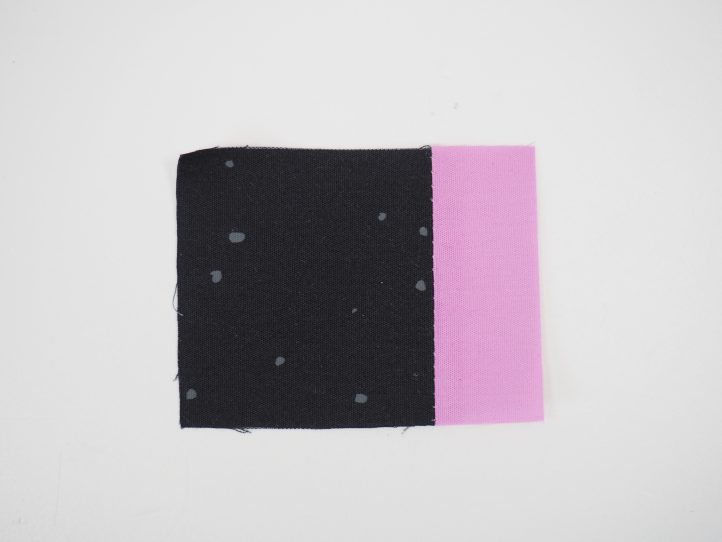
- 1/4 yd. Fabric C – for the sashes and cornerstones. (Fabric: Specktacular Black)
- Fat eighth Fabric D – for the applique letters (Fabric: Mauvellous)
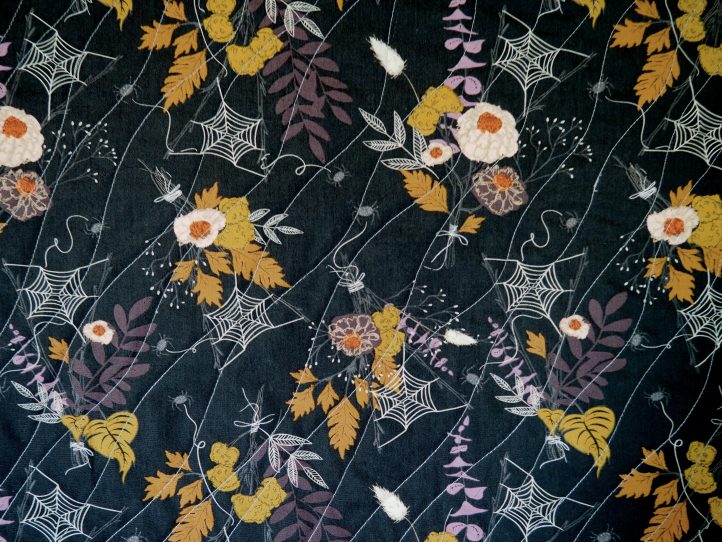
- 1/2 yd. Fabric E – for the backing fabric (Fabric: Cast a Spell)
- Fat quarter black wool felt for the bats
- Interfacing:
- 2 pieces 17” wide x 22” long 80/20 cotton mix batting (Vlieseline)
- Fat quarter Bondaweb (Vlieseline)
- 16” wide x 21” long cushion insert
- 50g ball cotton yarn in one of the colors for the tassels. Orange or purple works best.
- Slightly finer thread to match your cotton yarn (Note: The designer used a Perle cotton #8 for this. It is strong enough to tie the tassel but thin enough to stitch the tassel to the cushion.)
- Large tassel maker
- Letters to form the word ‘BOO’. The designer used Sassy Serif by Sizzix but if you do not have a die cutting machine and all the bits and pieces needed, you can download, enlarge and print letters via a Google search or Microsoft Word. Just make sure that you are going for something quite big and bold (about 4” high) so that they are easy to cut out.
- Die cutting machine, if using that option
- Coordinating threads for all fabrics and trims
- Basic sewing notions (including extra feet for your sewing machine, such as a darning foot)
- PDF Pattern – This is located at the bottom of the page. Please see printing instructions below.
DESIGNER NOTES:
- Please read all instructions and assembly requirements before beginning the pattern.
- Seam allowances are all 1/4” and have already been added.
PRINTING INSTRUCTIONS:
To download the PDF pattern, click on the download button at the bottom of the page. We recommend opening your download using Adobe Acrobat.
Instructions:
CUTTING:
- From Fabric A:
- 1 piece for the moon (see PDF pattern at the bottom of this page)
- From Fabric B:
- 1 piece 11 1/2” wide x 16 1/2” long for the front center panel
- From Fabric C:
- 2 pieces 2” wide x 16 1/2” long for the top and bottom sashes
- 2 pieces 2” wide x 11 1/2” long for the left and right sashes
- 4 pieces 2” sq. for the cornerstones
- From Fabric D:
- The letters B, O and O to form the word
- 2 pieces 1” wide x 16 1/2” long for the top and bottom trim sashes
- 2 pieces 1” wide x 11 1/2” long for the left and right trim sashes
- 4 pieces 1” wide x 2 1/2” long for the short cornerstone trim sashes
- 4 pieces 1” wide x 3” long for the long cornerstone trim sashes
- From Fabric E:
- 1 piece 16” wide x 21” long for the backing panel
- From the felt:
- An assortment of bats for the appliquè (see PDF pattern at the bottom of this page)
- From the batting:
- 2 pieces 18” wide x 23” long for the front and back panels
MAKING YOUR PILLOW:
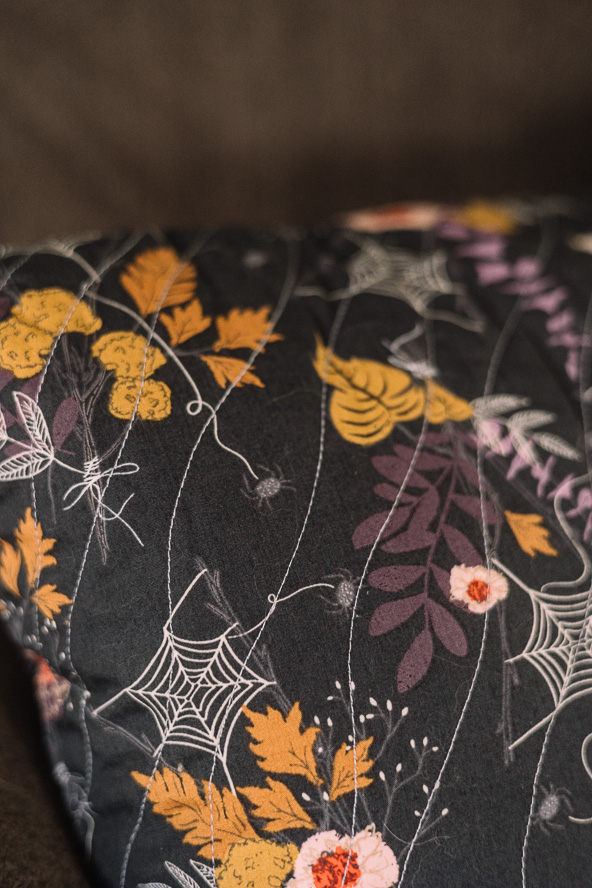
- Begin with the backing panel. Lay the fabric right side up onto one of the pieces of batting. Pin and quilt. TIP: A good choice for the quilting design is a random, diagonal wave, as shown below. This is easy to do on most modern home sewing machines and suits most applications.
- Trim the backing panel and set aside.
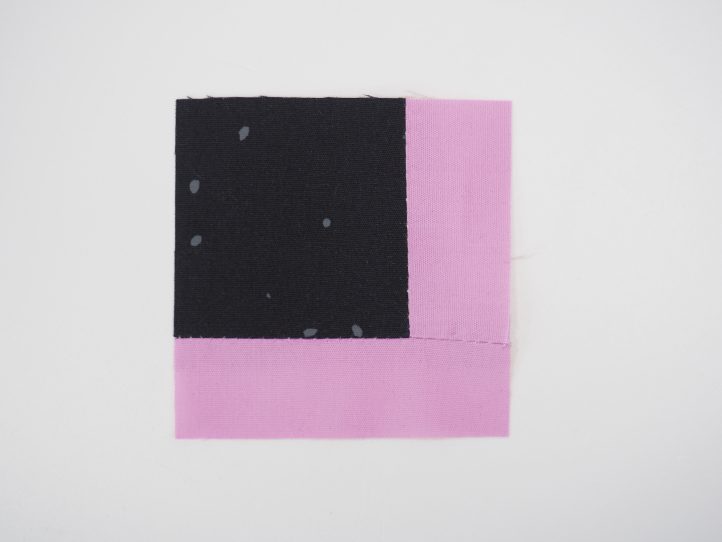
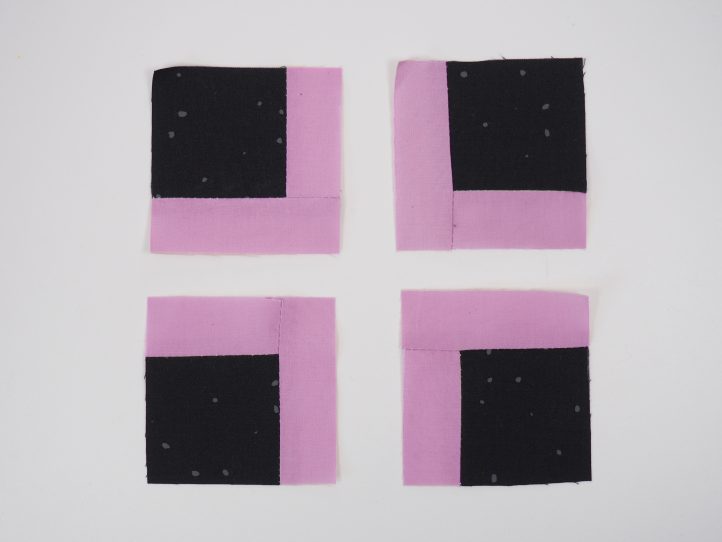
- To construct the front panel, bring in the front center panel (Fabric B), the sashes (Fabric C), the cornerstones (Fabric C), and the trim sashes (Fabric D). Begin with the cornerstone trim sashes. These are constructed in a Log Cabin style and they have a little extra length allowance for ease of handling. Add a short trim to one side of the cornerstone and trim the excess.
- Attach the longer trim to an adjacent side and trim that too. Repeat for the other three cornerstones.
- TIP: Pay close attention if you are using a strongly directional fabric. This will influence the side that the trims are added. The end result should look like the photo below.
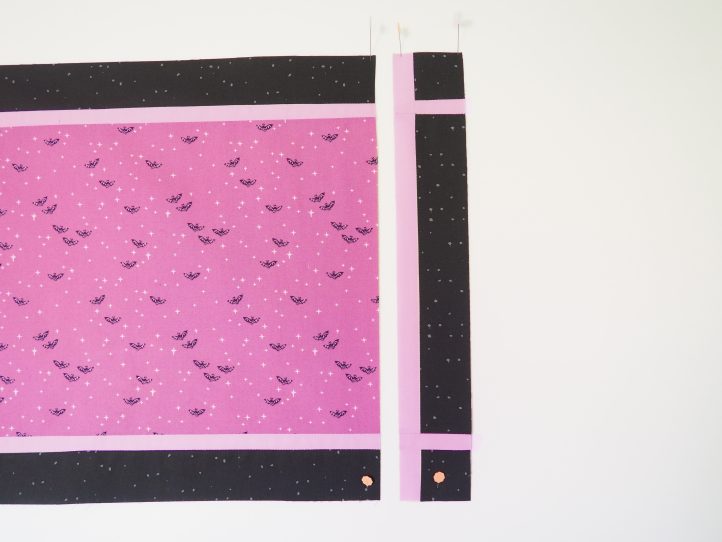
- On the main center panel, attach the top and bottom trim sashes and then the top and bottom main sashes. Trim any excess.
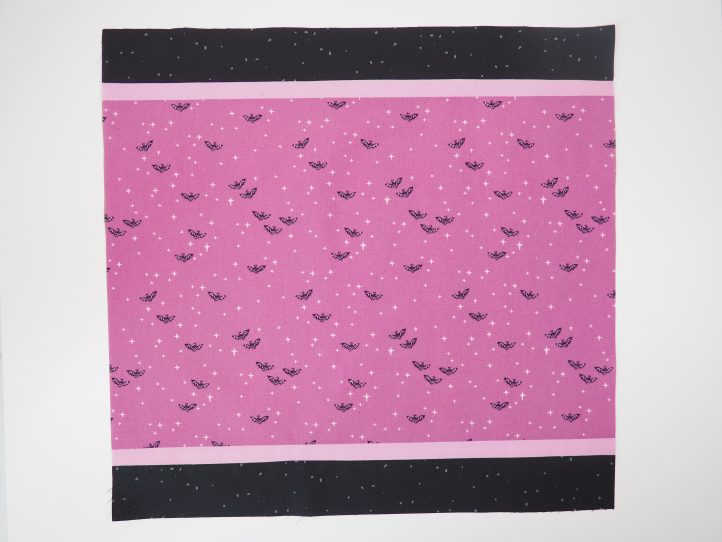
- The side sashes have the trimmed cornerstones and these are attached first. Add them and then press the completed front panel.
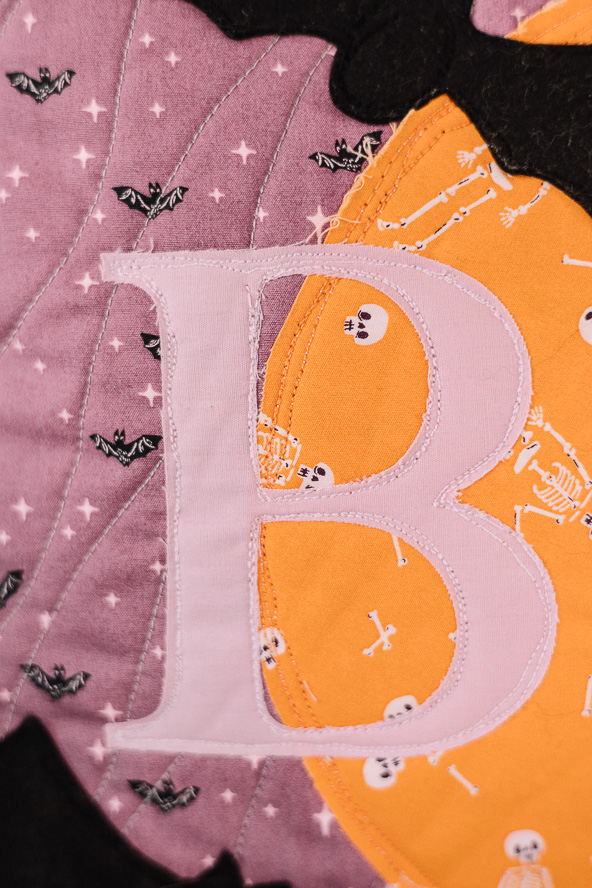
- Use the Bondaweb and the relevant fabrics to cut out the letters, the moon and the bats but don’t fuse any of these elements on just yet. Lay the front panel onto the other piece of batting and quilt to match the back.
- Set the sewing machine up for free motion embroidery. This is easy to do and suits most modern machines. Attach the darning foot and either drop the feed dogs or set the stitch length to zero.
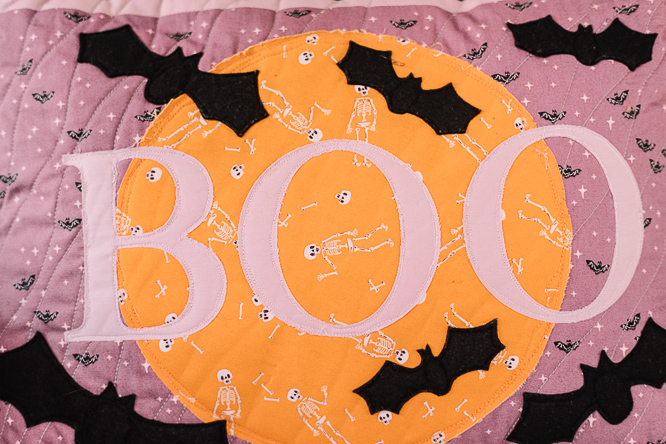
- Attach the appliquè elements beginning with the moon. Eventually (see the following tip) center the word over the moon and then arrange the bats around.
- TIP: It is best to appliquè each element on with matching thread rather than fusing them all on at once and then stitching. The moon goes first (orange thread), then the letters (mauve thread) and finally, the bats with black thread.
- Appliquè twice around each pattern piece with matching thread and do not aim for neatness. Trim any loose threads.
- The front panel should be 16” wide x 21” long. Trim it if needed.
- TIP: The front and back panels are exactly the same size as the cushion insert. This means that when the seam allowances take the cover in a little, it will be a lovely, plump cushion and not sad or floppy.
- Pin or clip the quilted front to the quilted back and sew all around leaving a turning gap in the lower seam. Trim corners and turn out through the gap. Gently push the corners out so that they are nice and sharp.
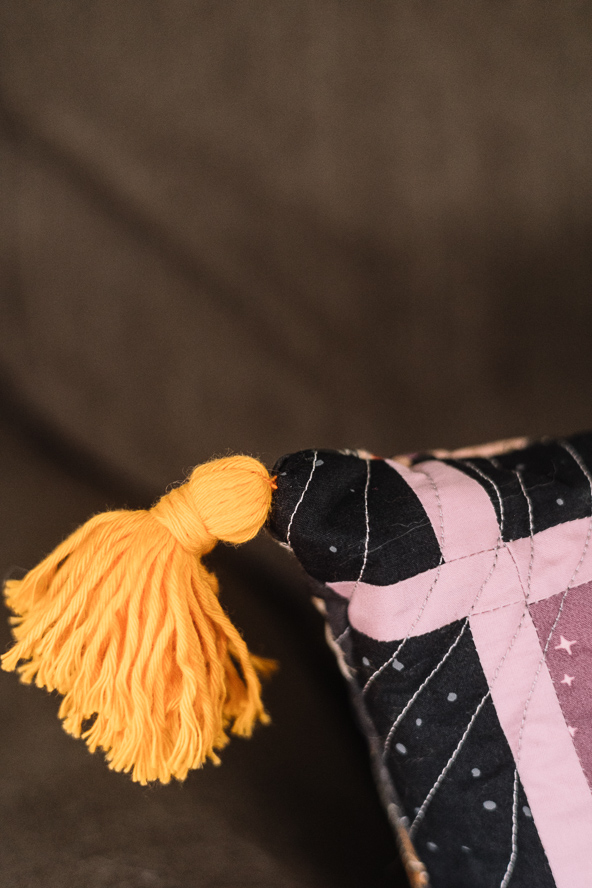
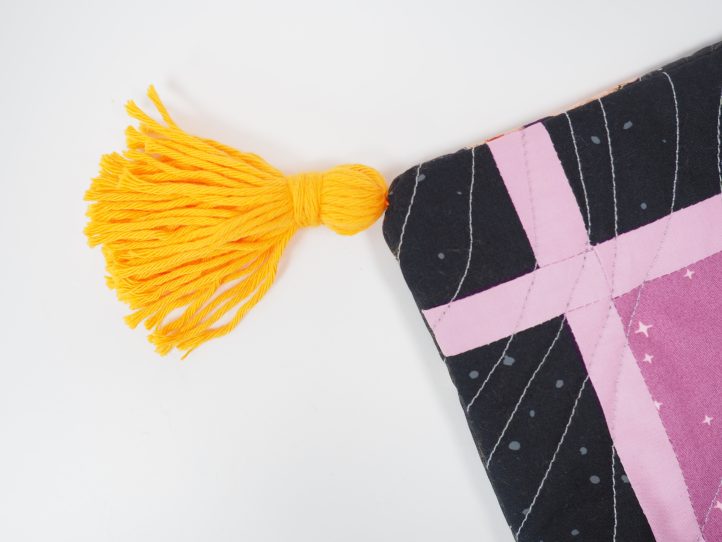
- Set the cushion cover aside and make four tassels using the tassel maker and the chosen yarn.
- TIP: When the middle of the tassel is tied, use the finer thread and leave it long enough to use it for attaching the tassel to the cushion.
- Use the finer thread to firmly attach a tassel to each corner of the cushion.
- Insert the cushion into the cover and close the gap with a neat and invisible hand stitch.