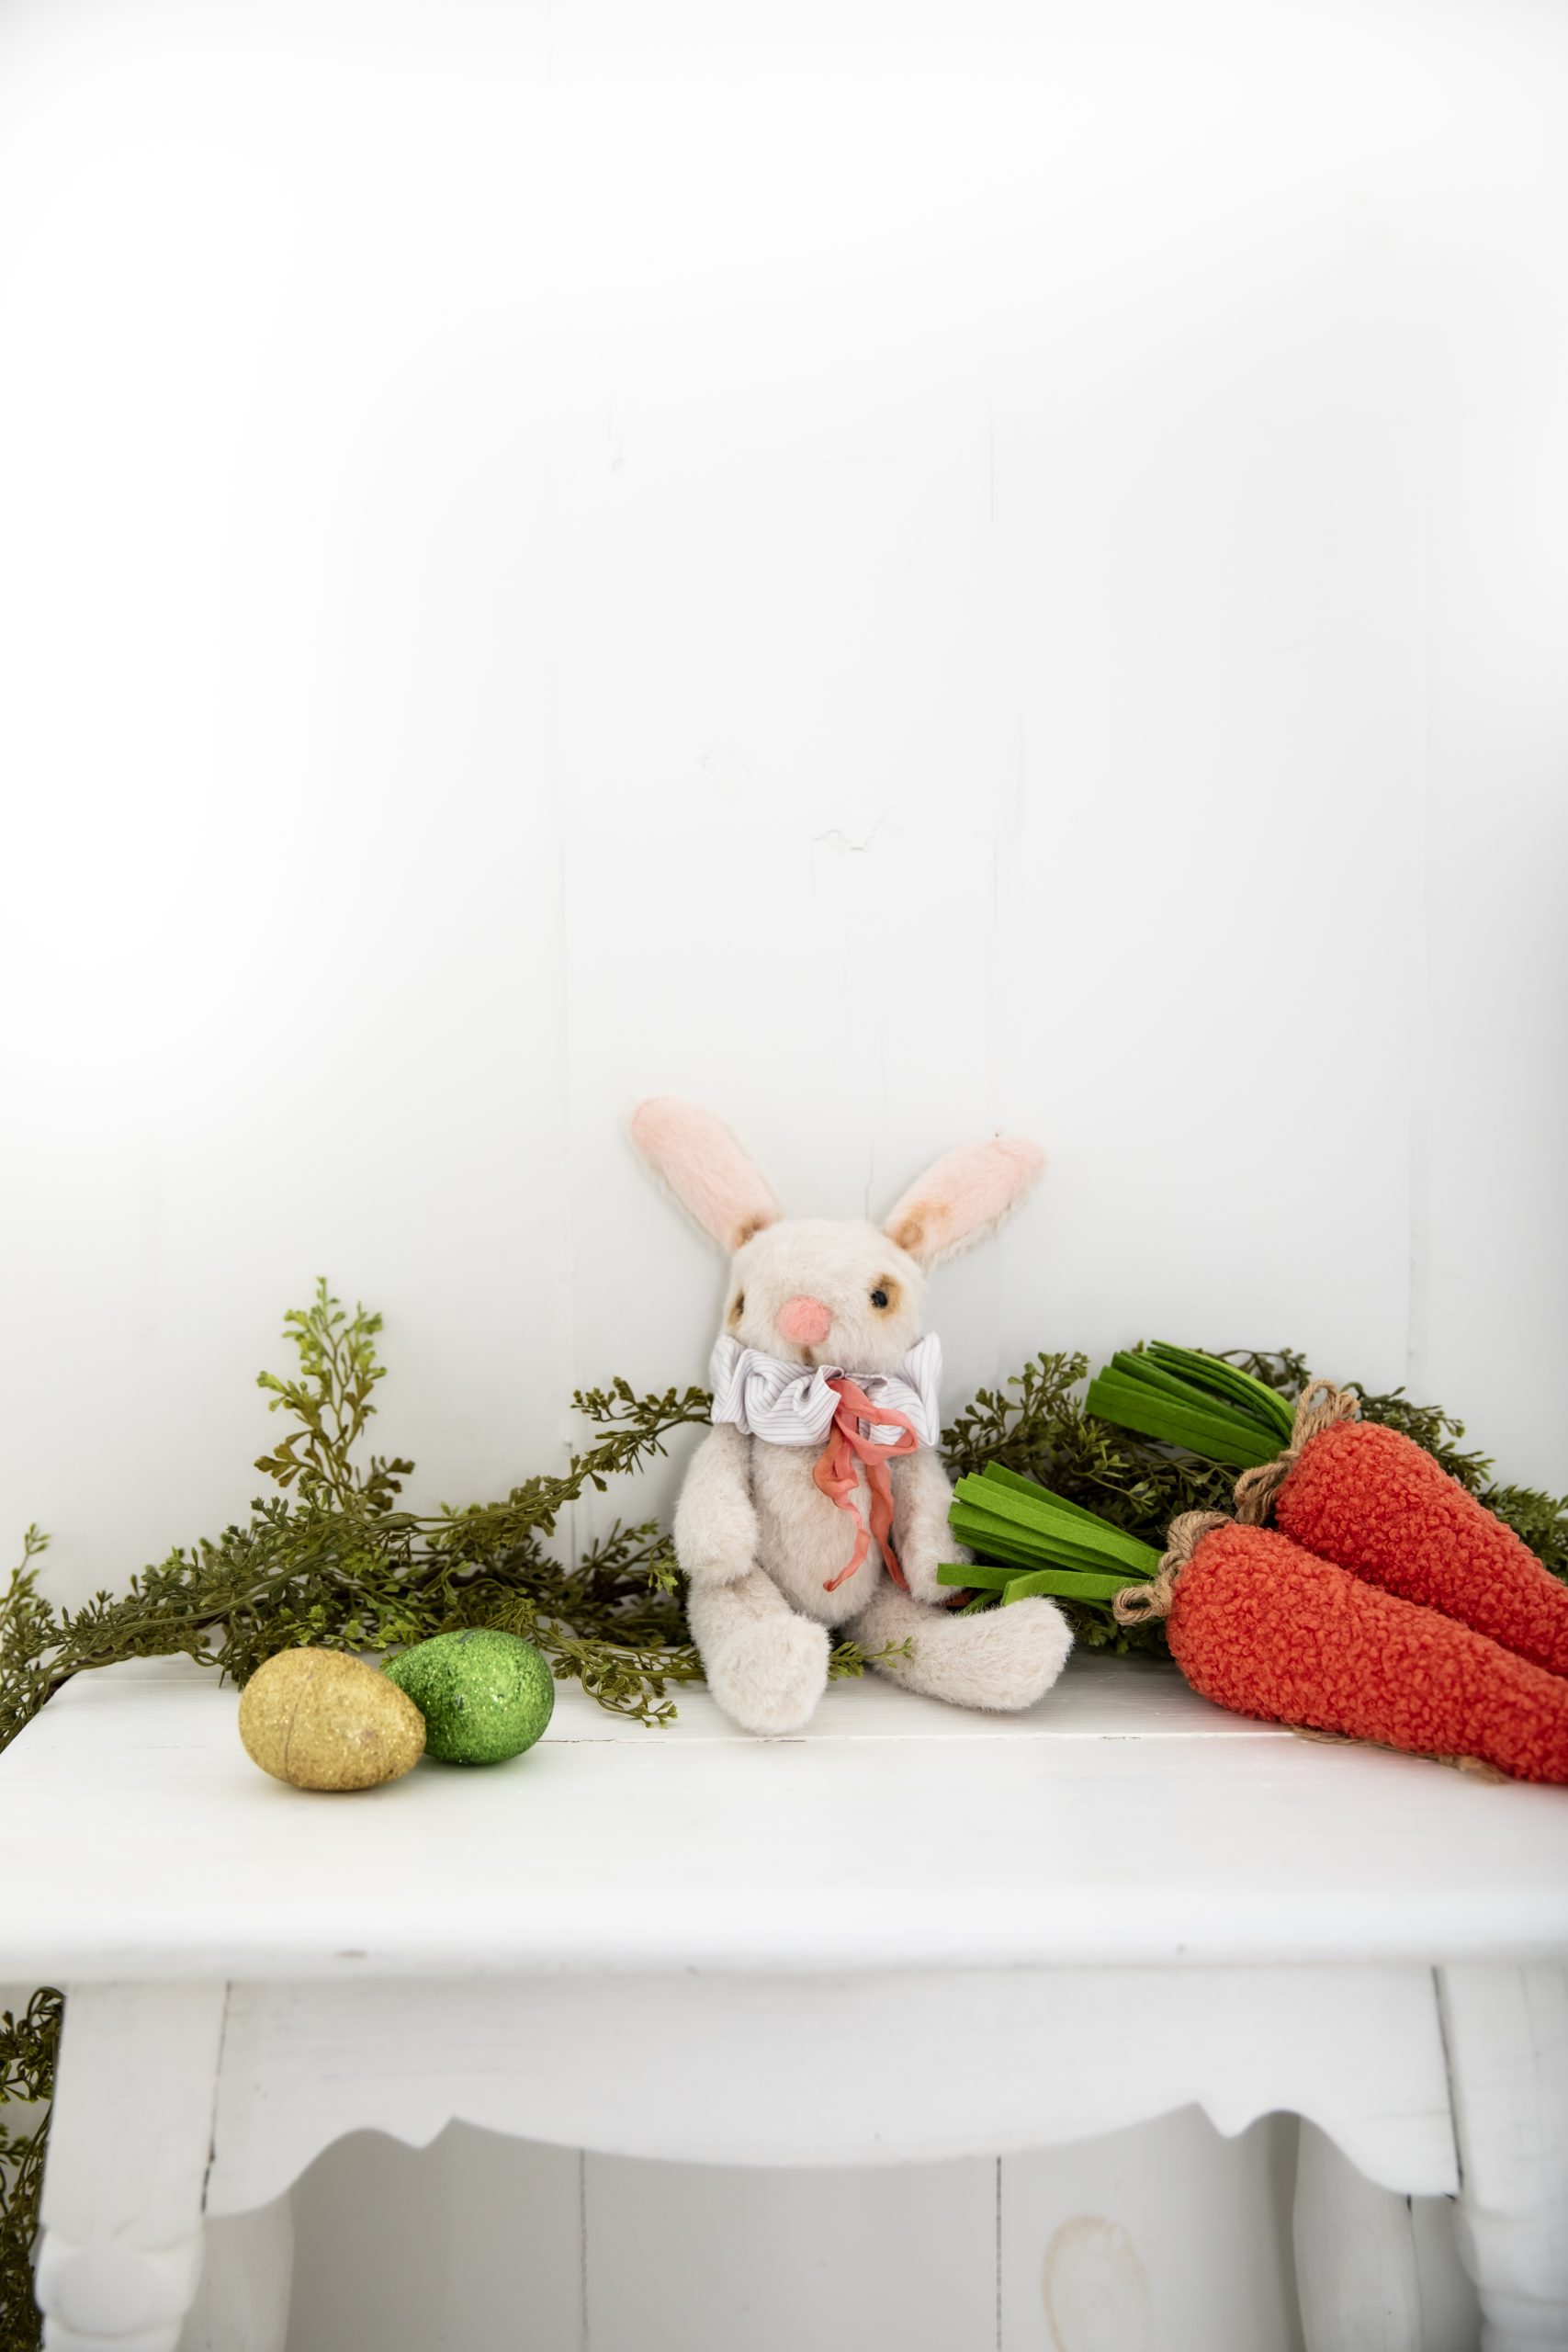
Our readers adore stuffed animal patterns, and this sweet bunny pattern from Jennifer Carson is a delightful project to make ahead of Easter. Designed for experienced sewists, this bunny sewing pattern uses viscose faux fur to give your rabbit a realistic feel and features pink faux fur on its inner ears. Complete your bunny with a tiny collar tied with a ribbon, so that your rabbit can look its best as it greets little ones on Easter morning.
Materials:
- 1/8 yard faux fur for body (the designer used viscose)
- 6” x 6” piece of short pink faux fur or other pink material for inner ears
- Cotton for collar, 3” x 12” long
- 18” length of ribbon
- 1—25 mm (1”) joint for head
- 4—15mm (1/2”) joints for arms and legs (If you are using the “new” two-part plastic safety-lock joints, you’ll need a joint insertion tool as well.)
- Poly beads for weight
- Stuffing
- 8 mm (5/16”) safety lock or sew-on eyes
- Pink roving and a felting needle, OR pink embroidery floss
- Embroidery needle
- Dritz turning tubes (VERY helpful!)
- Strong thread to match body color
- Heavy cardstock, plastic template sheet, or other similar material to make templates
- Quick dry fabric glue
- Sewing machine, sewing thread, scissors, basic sewing supplies
- Optional: Oil crayon for shading
- PDF Pattern – This is located at the bottom of this page. Please see printing instructions below.
PRINTING INSTRUCTIONS:
To download the PDF pattern, click on the download button at the bottom of the page. We recommend opening your download using Adobe Acrobat.
Sewing Instructions:
- Trace each pattern piece onto heavy cardstock, a plastic template sheet, or other heavy paper. Cut these out and, using an awl, punch the joint hole markings on the arm and leg. Be sure to mark the fur direction as well (shown with an arrow).

For all pattern pieces except the head gusset:
- On the wrong side of your fur fabric, trace the piece once, then flip horizontally and trace again to make a mirrored pair. Be sure that the fur is lying in the same direction as the arrow on the pattern.
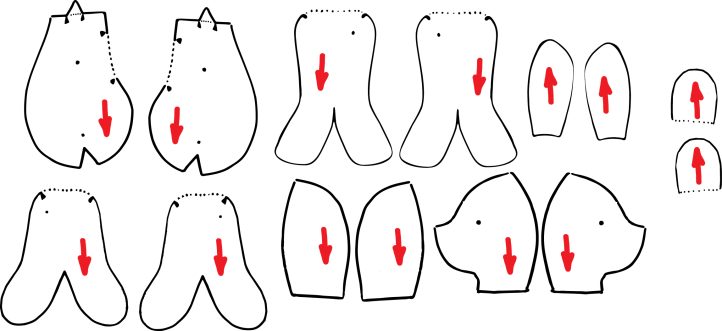
- On the back of your fur fabric, trace the front side head, back side head, legs, arms, tail, body, and the outer ear twice (be sure to flip each piece to get a mirrored pair.)
- Trace the head gusset once.
- On the pink inside ear material, trace the ear twice again for the ear interior.
- Cut all your pieces out just outside the drawn line. Put fabric glue on the joint hole markings—don’t be shy, this glue will keep your fabric from stretching after you insert your joint stem, so be generous with it. Let the glue dry.
- All seams are 1/4″. Always put your materials right sides together.
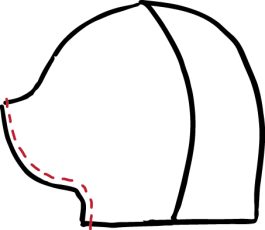
- While waiting for the glue to dry, trim away the fur from the seam allowance on all four head pieces about 1/8″ to 1/4”. Then, pin one side front head to one side back head and stitch. Repeat for other headpieces.
- Now pin the front side heads together from nose to chin and stitch.
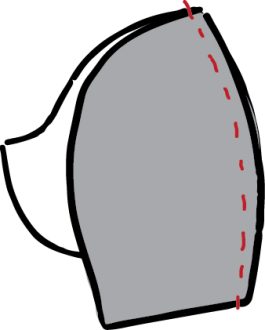
- To find the center line of the head gusset, fold it in half lengthwise. Mark the center line with a pencil tick. Place this center marking at the seam that runs up the face from the chin to the nose. Pin each side of the gusset to the side head pieces.
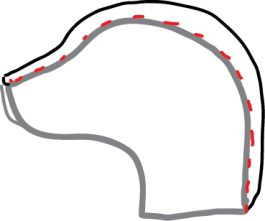
- Baste the gusset in place by hand. It’s important not to skip this step, as sometimes fur slips when you’re sewing it, and then you’ll have a center seam that’s not quite centered, and your rabbit’s face will look a bit wonky!
- Once the gusset is basted and in place, stitch with your machine. Dab glue on the eye placement marking if you chose to use safety lock eyes. After it’s dry, punch the hole with your awl, and insert the eyes before turning the head right side out. If you are using sew-on eyes, turn your head right side out (without gluing or punching the eye placements).
- TIP! Jennifer has found that sewing parts together is easier if she trims a bit of the fur away from the seam edge, as you did when sewing the head. It’s not necessary to trim all the parts, and it does take a little extra time, but if you find your fur slipping, or your machine having trouble sewing through the thickness, try trimming away the fur from the seam allowance.
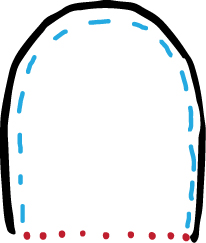
- Match one outer ear (body fur color) to one inner ear (pink material). Pin and stitch. Repeat for the second ear.
- Stuff your rabbit’s head. You’ll use more stuffing than you think! Make it nice and firm. With a strong thread, gather the neck opening. Place the flat end of your 25mm joint into the neck opening, and then pull the string tight. Knot your thread and clip the end. It’s important that the neck opening is closed very tightly around the stem of the joint. Trim the fur away from the stem about 1/4″.

- At this point, you’ll want to stitch the ears onto the top of the head. Fold the ears in half and make a few stitches to hold them together in this position. Then, stitch the ears on with a ladder stitch where the side head seams meet the gusset.
- If you chose to use sew on eyes, sew those in place now, then set your head aside.
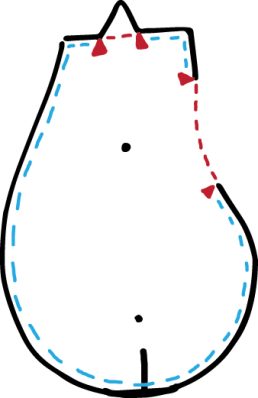
- With your awl, punch the joint marking holes in the body pieces. Match and pin the dart on each side of the body and stitch. Now, match, pin, and sew the body pieces together, leaving the turning opening in the back and the triangle at the top neck unsewn. Be sure to backstitch before and after the openings to keep the seam strong. Clip the triangle at the top of the body off.
- Match, pin, and sew the tail together, leaving the flat edge unsewn.
- With your awl, punch the joint marking hole on each leg and arm. Then, fold the legs in half, pin, and sew, leaving the top of the leg open as indicated on the pattern piece.
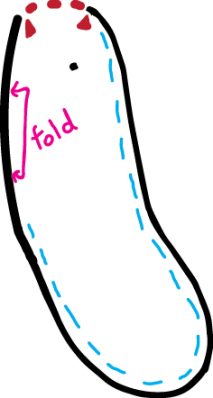
- Fold the arms in half, pin, and sew, leaving the top of the arm open as indicated on the pattern piece.
- Turn each piece right side out.
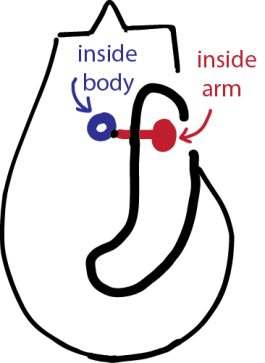
- Insert a 15 mm joint into each arm and leg. The flat head should be inside the arm, with the stem coming out of the hole. One at a time, find the coordinating punched hole in the body for each arm and leg. Push the stem of the joint through the hole, then insert the lock washer into the body and push it onto the stem of the joint, effectively sandwiching the fur of the inside arm/leg, and the body fur between the joint pieces. Repeat for the other arms/legs.
- For the head, push the stem of the joint through the opening at the top of the neck. Insert the locking washer onto the stem from the inside of the body. This one can be tough; you’ll have to get those arm muscles out!
- Tug on the head, arms, and legs to make sure everything is locked together tightly.
- The designer wanted a leg that dangled a bit, so she poured poly pellets into the foot of the rabbit, filling about a quarter to one-third of the leg. Stuff the top of the leg lightly and close the opening with a ladder stitch, knotting and burying the thread end.
- Stuff the arms lightly and close the opening with a ladder stitch, knotting and burying the thread end.
- Pour poly pellets into the body, stopping just below the turning opening. Fill the rest of the body with stuffing. Close the opening with a ladder stitch, knotting and burying the thread end.
- Fold the tail in half and place a few stitches in it to keep it in that shape. Pin to the bunny’s bottom and sew on with a ladder stitch, knotting and burying the thread end.
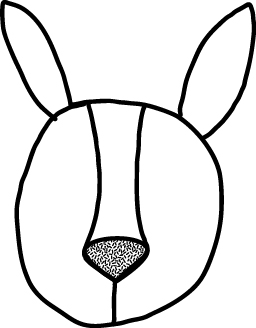
- For the bunny’s nose, clip fur from the nose end in a soft triangle shape. Using your pink roving and a felting needle, build up the shape of the bunny’s nose. You can needle felt his nose very well and leave it at that, or you can embroider over the roving for a more traditional nose.
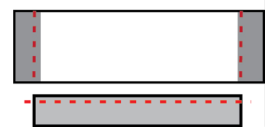
- To make Bunny’s collar, fold each end of the 3” x 12” strip of fabric about 1/2″ and press. Then fold the strip in half lengthwise, right sides together and press. Stitch the long side of the strip using a 1/4″ seam allowance. Clip threads and turn right side out.
- Thread the length of ribbon through the tube you created. Tie onto the bunny and adjust to create pleats.
- If you’d like, for a finishing touch, you can add a bit of shading around the bunny’s eyes, and anywhere else you’d like him to look a little worn, with an oil crayon.