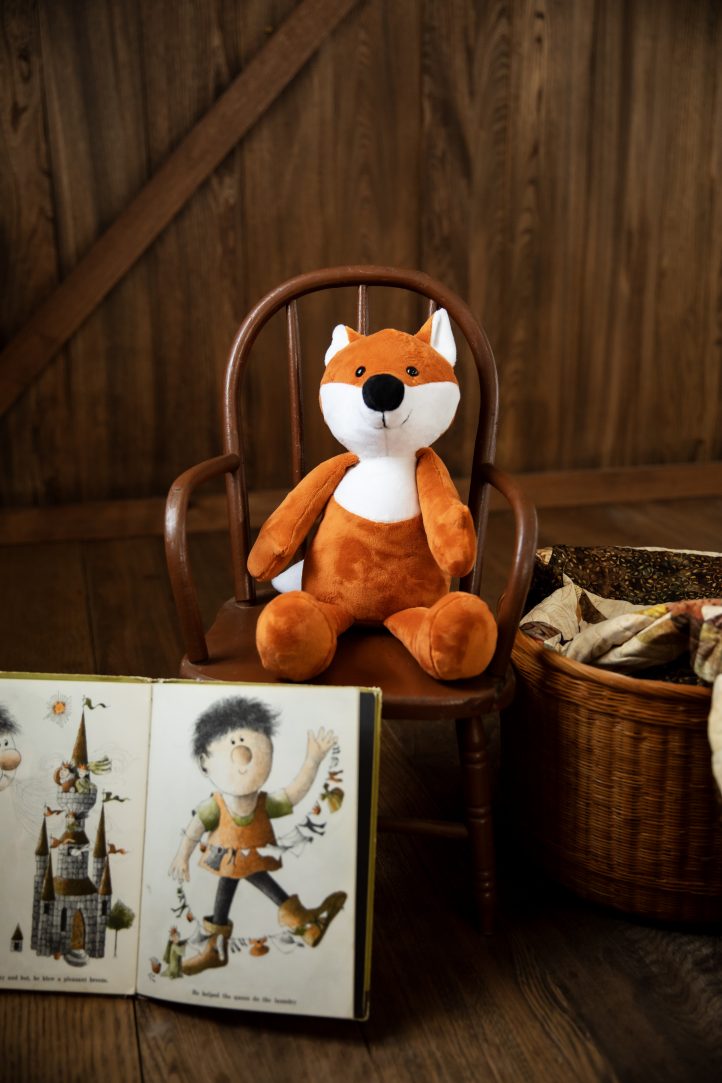
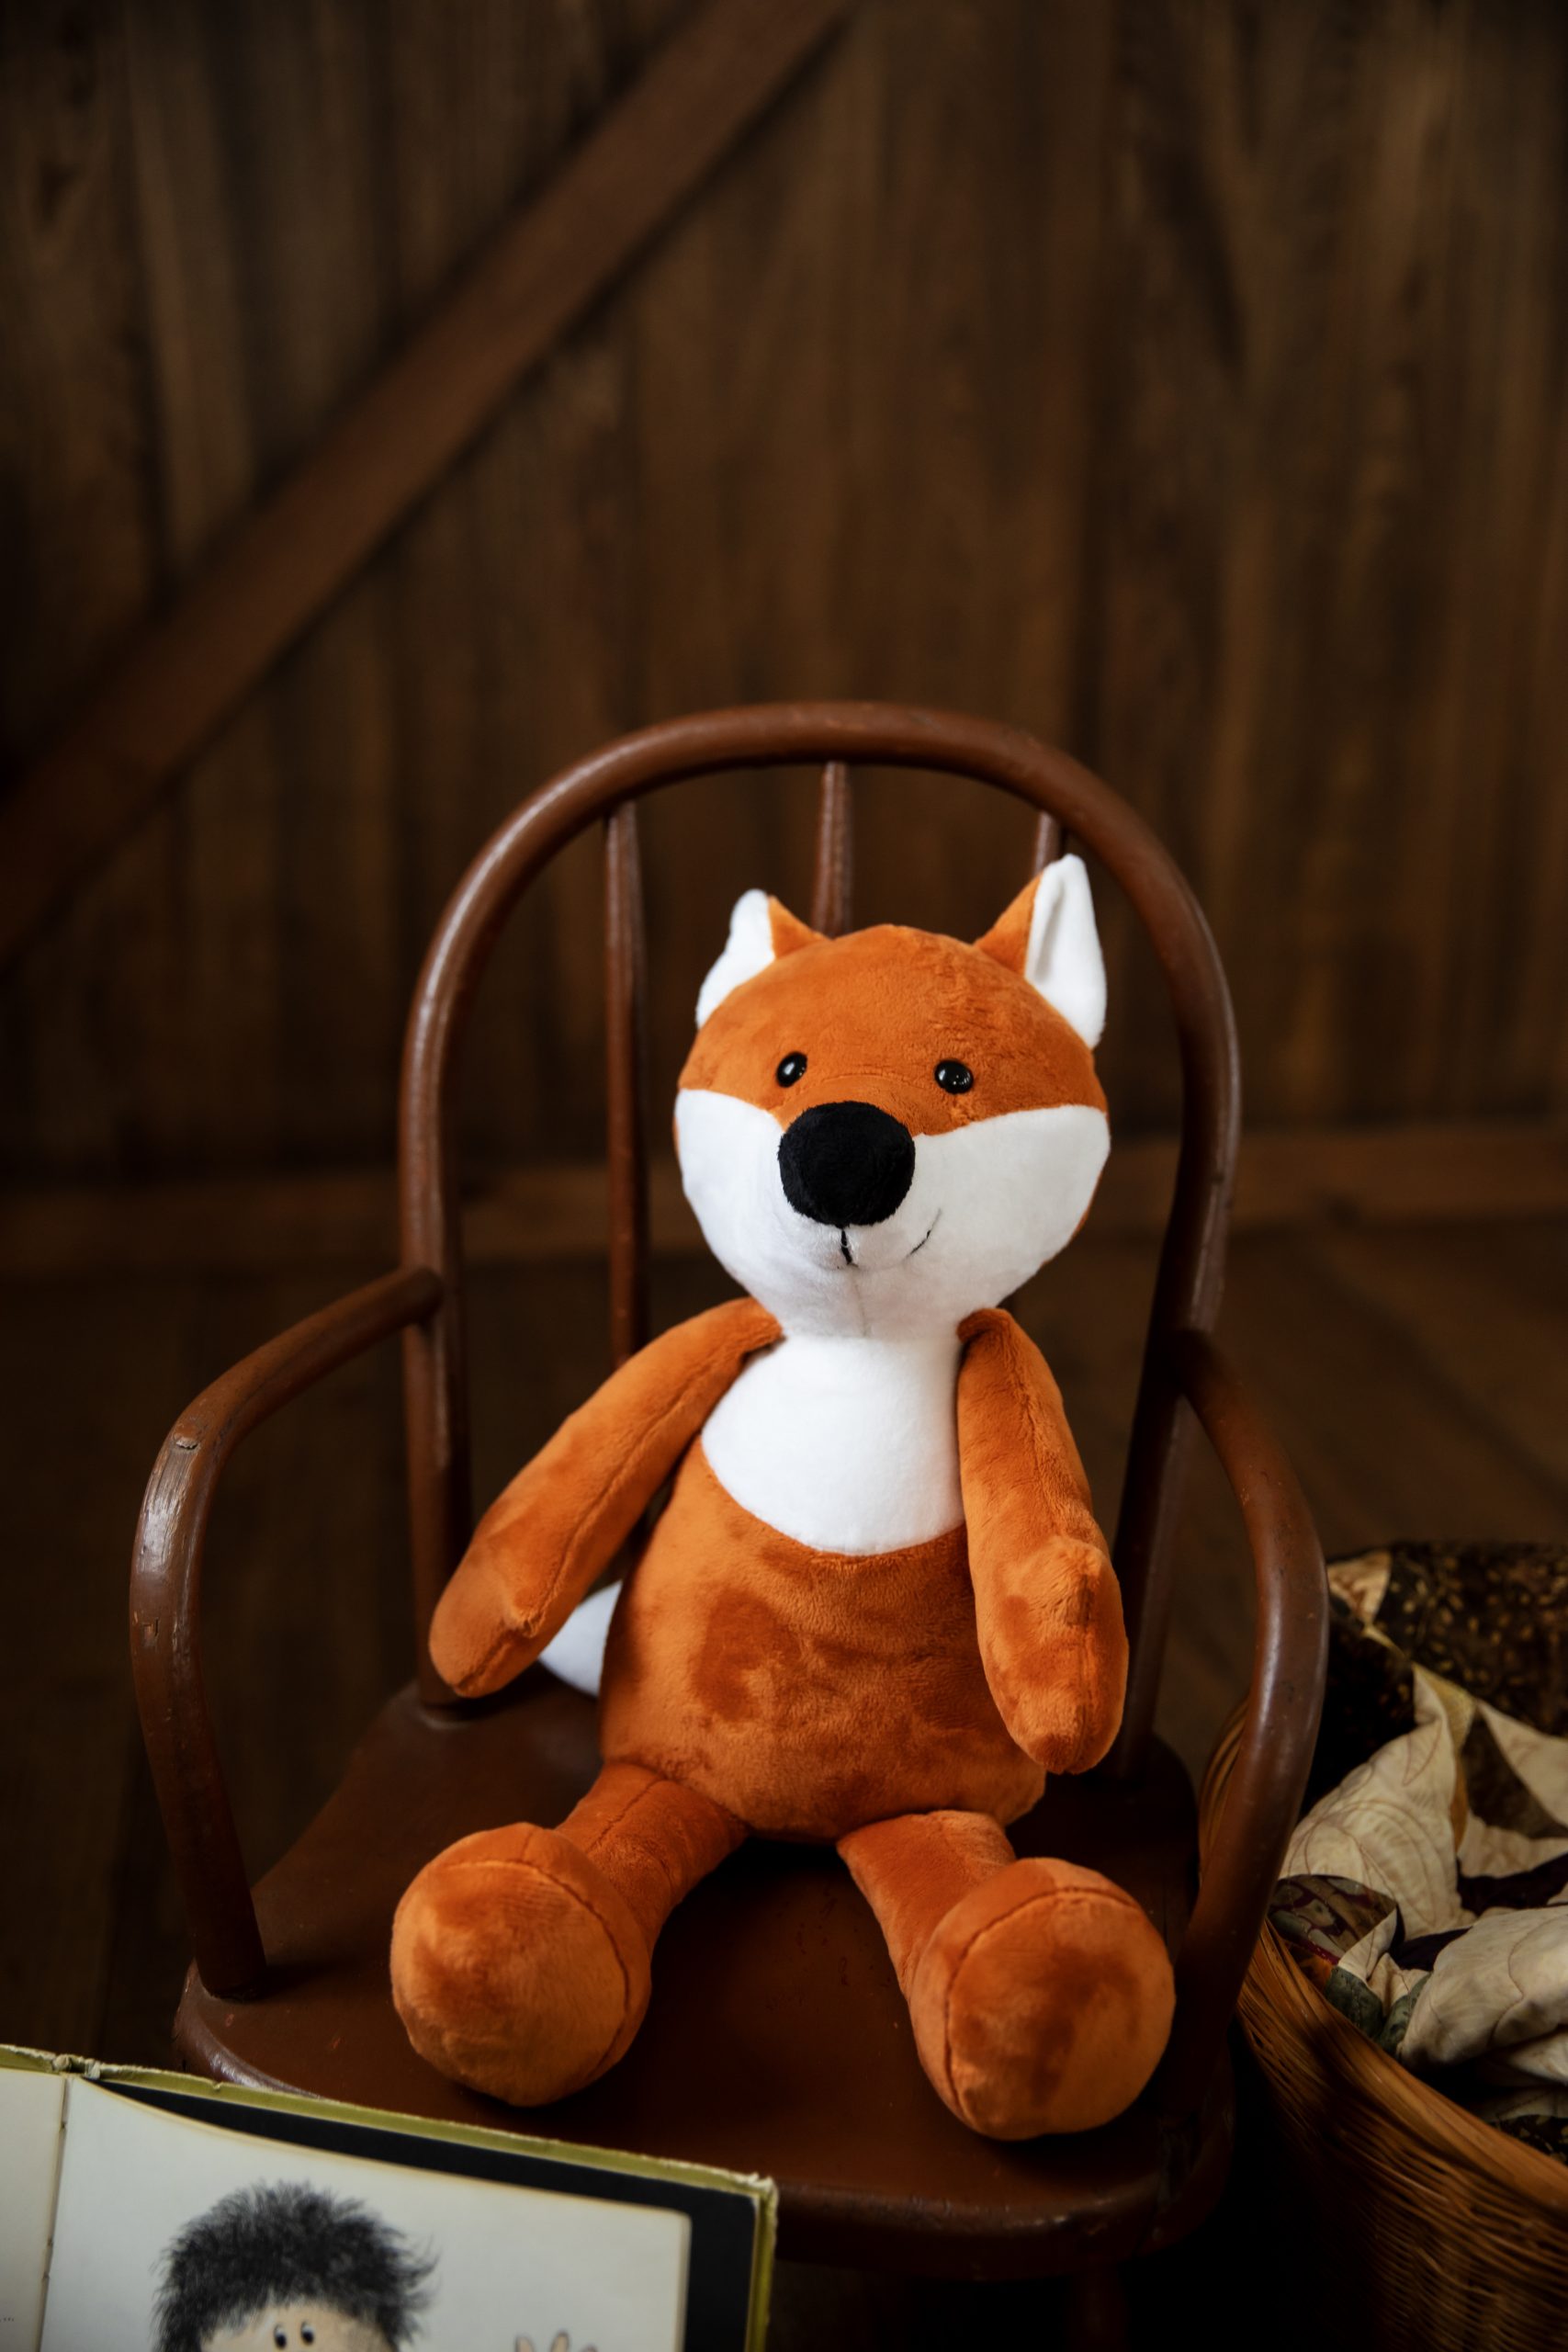
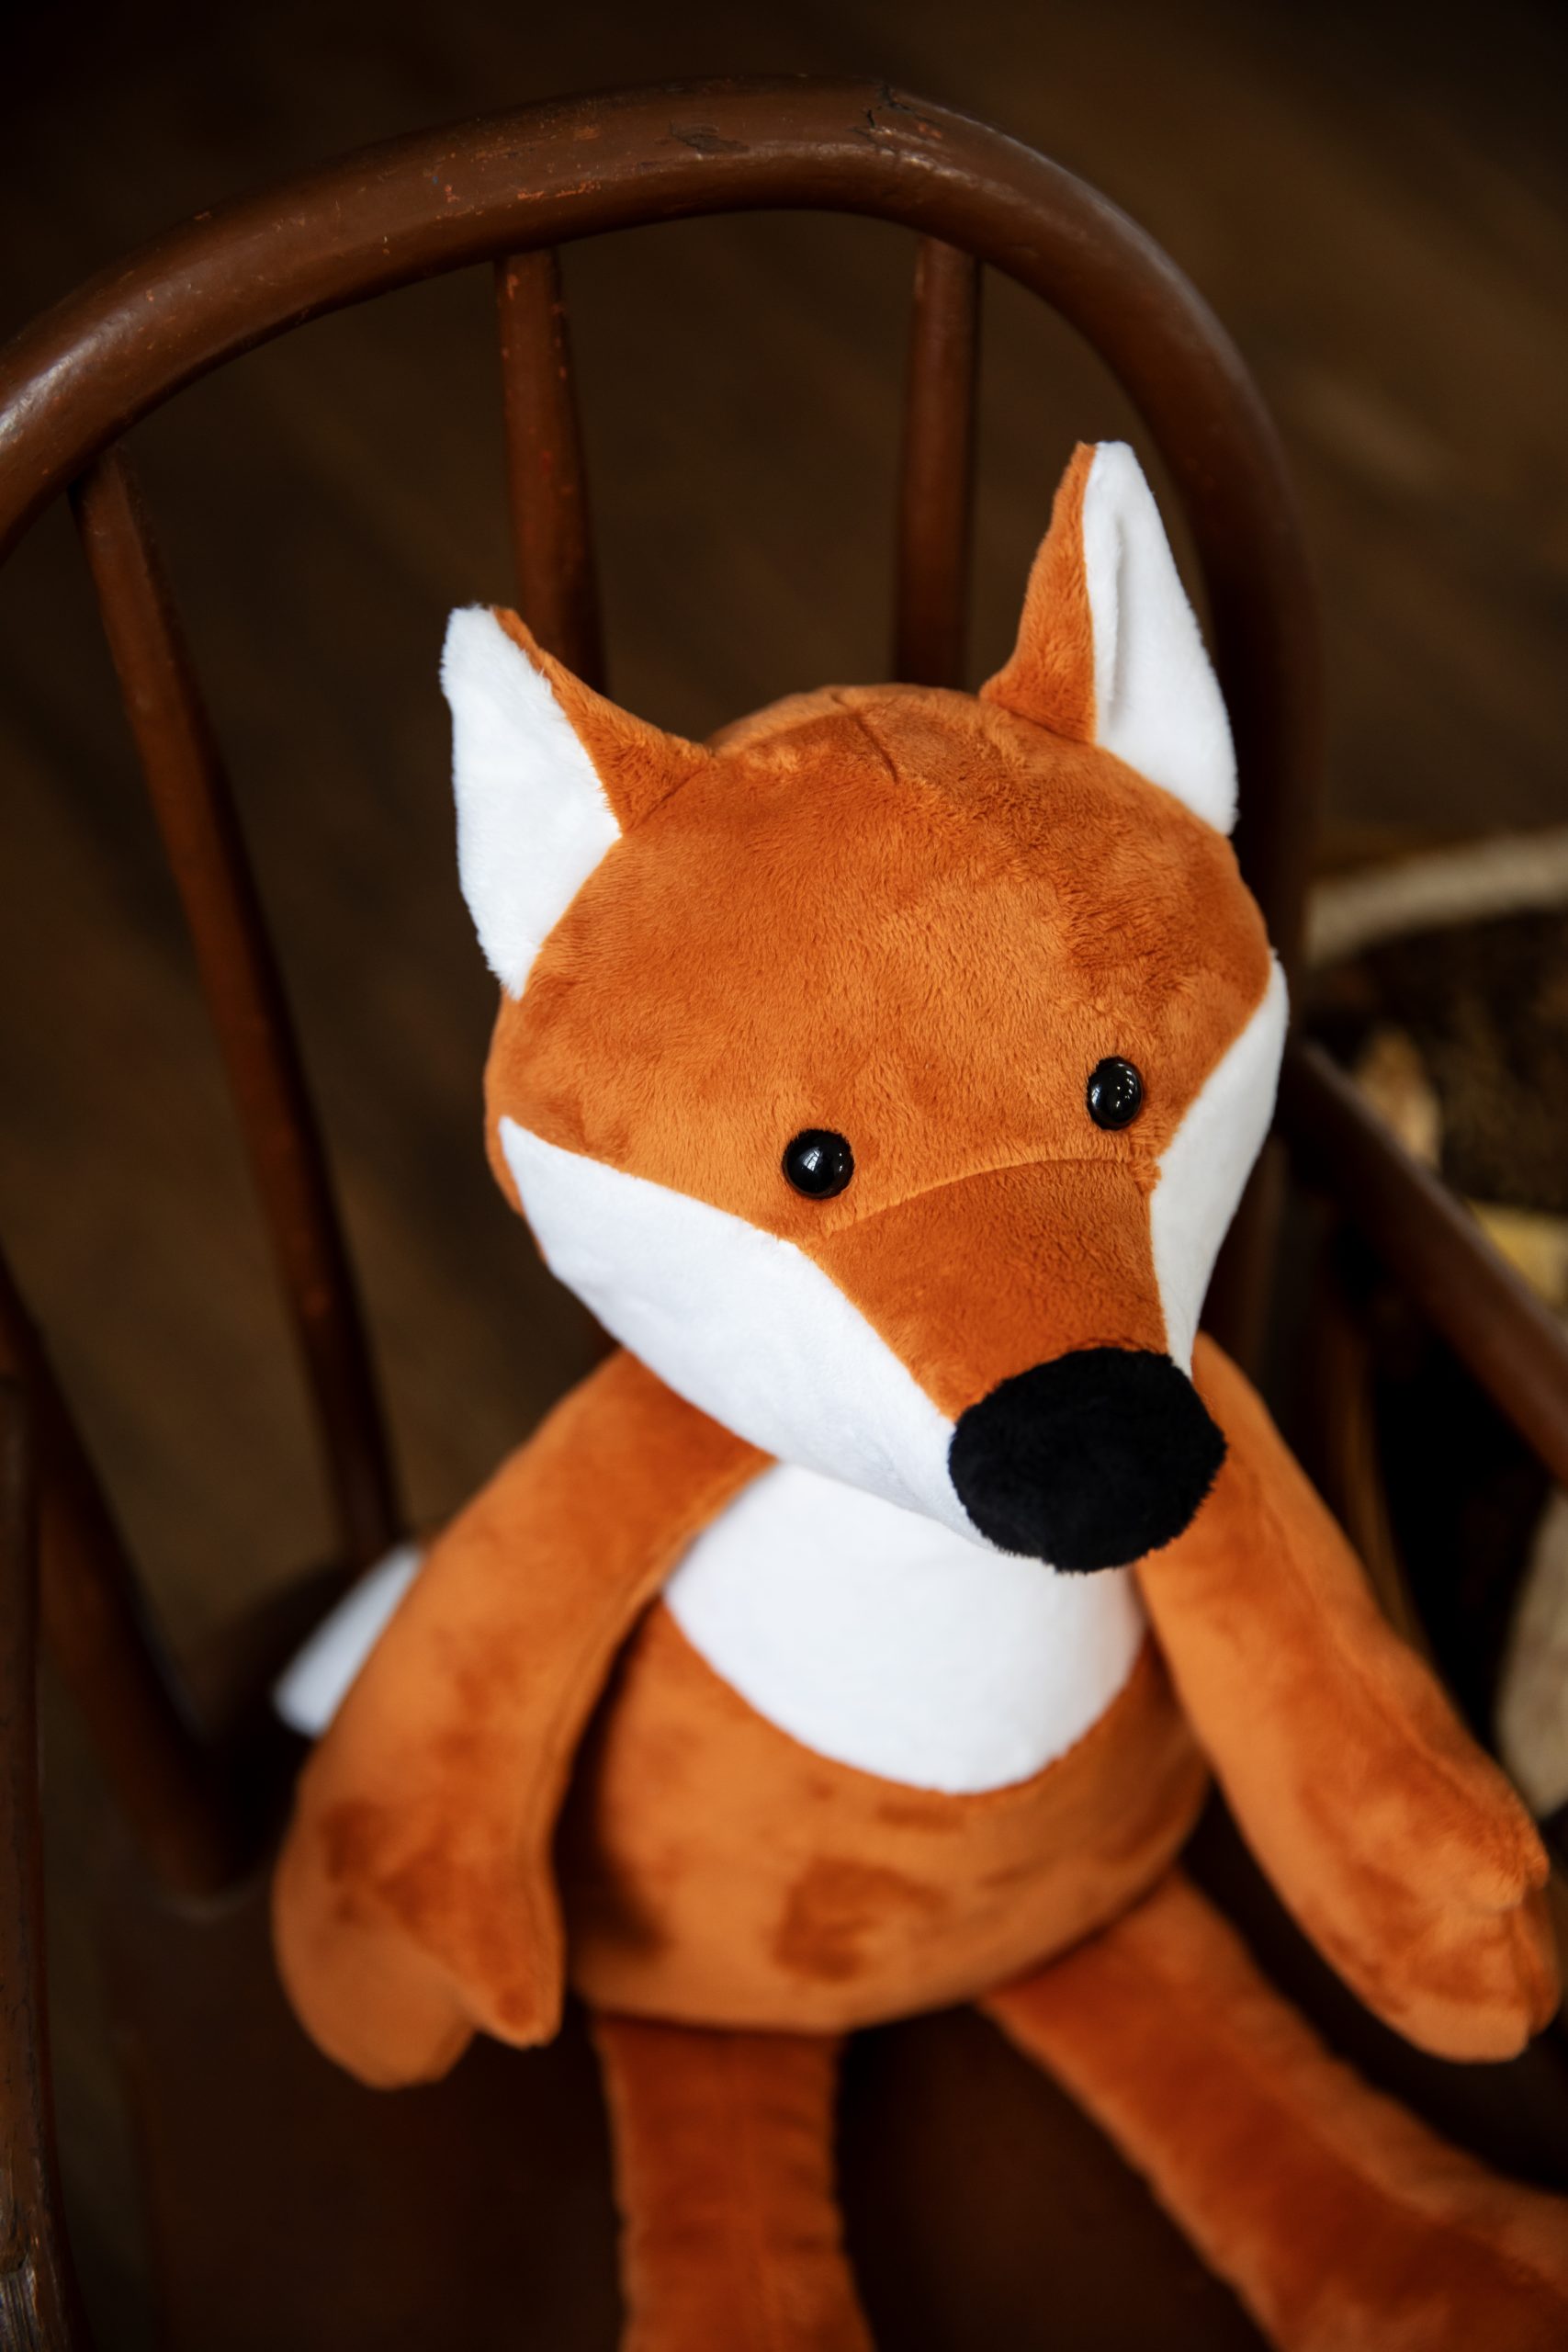
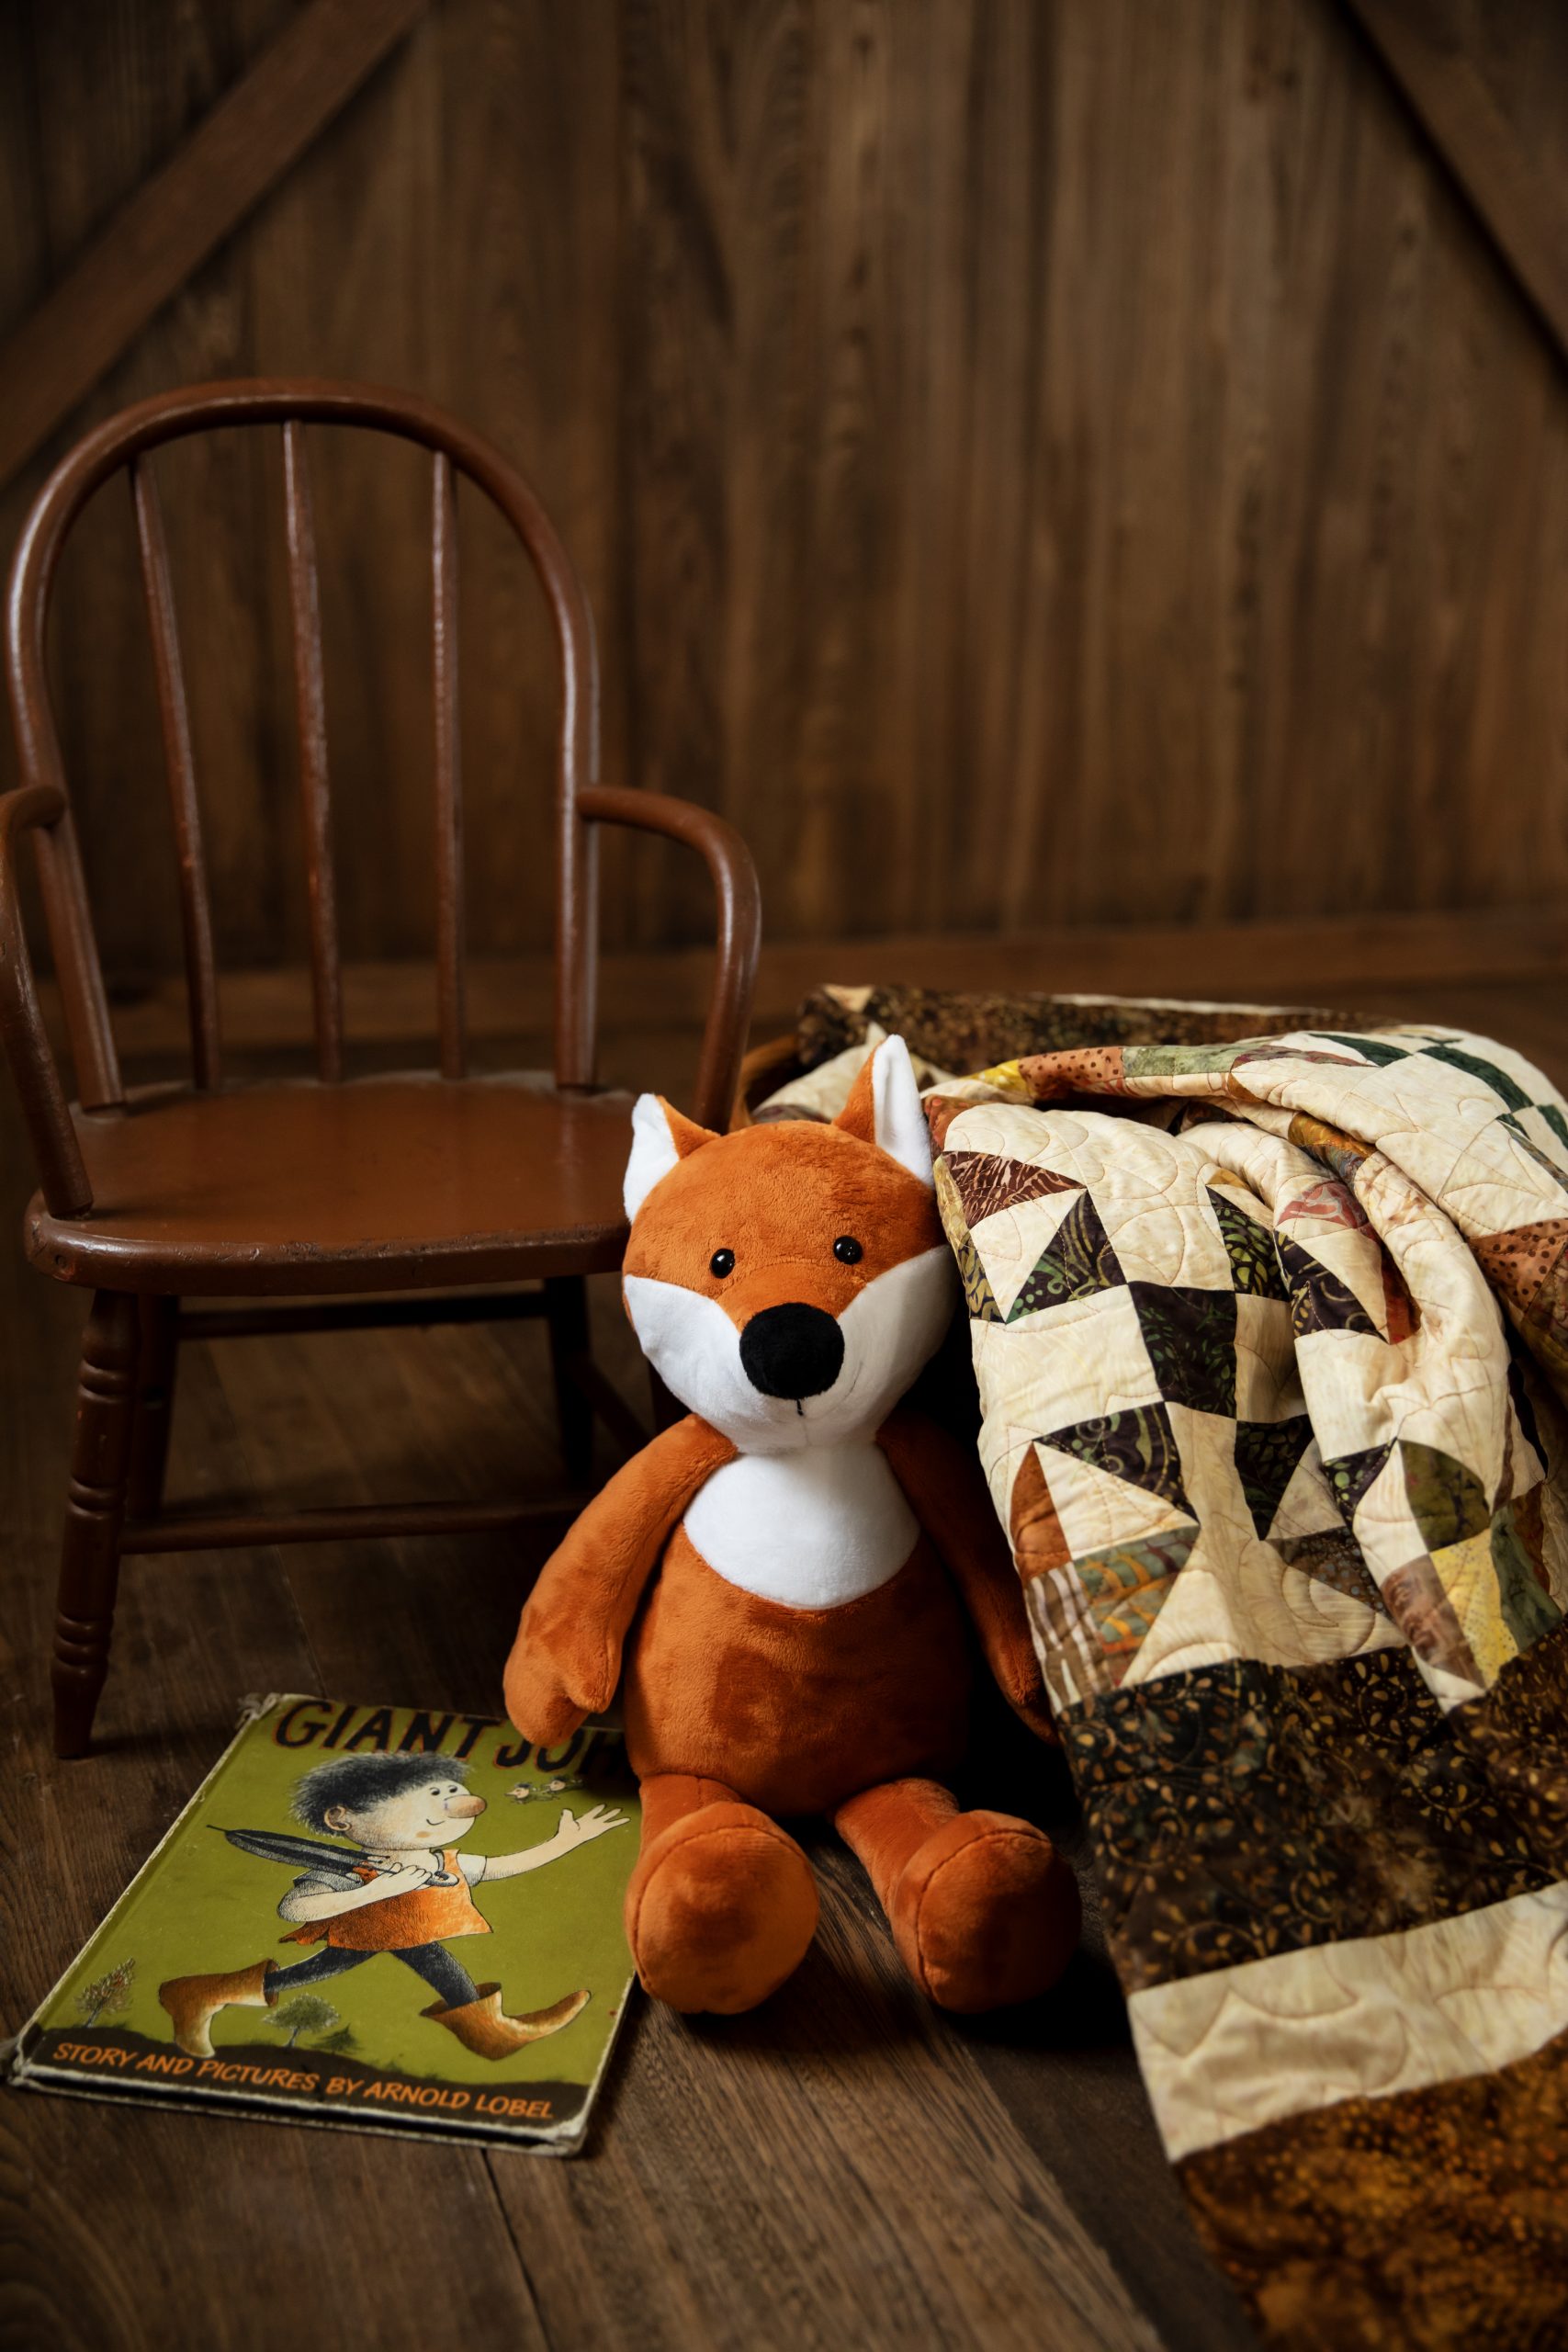
Obsessed doesn’t even begin to cover how we feel about this adorable fox! Designed by Jo Carter, this stuffed animal pattern is complete with a printable PDF and measures approximately 18 1/2 inches tall. If you’ve been searching for heartfelt, holiday gift ideas for your grandchild, look no further than this charming stuffed fox sewing pattern.
Finished Size: Approximately 18 1/2 inches tall
Designer Notes:
- Download and print out the PDF templates.
- Seam allowance is 6mm (1/4 inch), unless otherwise noted.
- Pattern templates include seam allowances, unless otherwise noted.
- RST = right sides together
- Arrows on the pattern templates indicate print/pile direction for marking and cutting out.
- As the ears, arms, legs, and tail are sewn directly into seams, it is advisable to go back and sew over the joins to make sure that they are well secured and to reduce the likelihood of them being pulled out.
- Remember: When the pattern specifies, cut 2 or more of a pattern piece; the pattern template needs to be turned over halfway through marking out so that the second half is cut as mirror-image of the first.
- When clipping, always take care to avoid any stitching.
Editor’s Note: The quilt featured in our styled photos is the Country Stars Fall Quilt Pattern by Megan Farrell. You can find this quilt pattern in our October 2025 issue.
Materials:
Note: cm: centimeter, in: inches.
- Fabric: (Note: Jo used Shannon Cuddle Solid Fabrics in Rust, White, and Black. Fleece fabric would also work well.)
- Dark orange Fabric A: 75 cm x 60 cm (30 in x 24 in)
- White Fabric B: 32 cm (13 in) square
- Black Fabric C: 14 cm x 8 cm (5 1/2 in x 3 in)
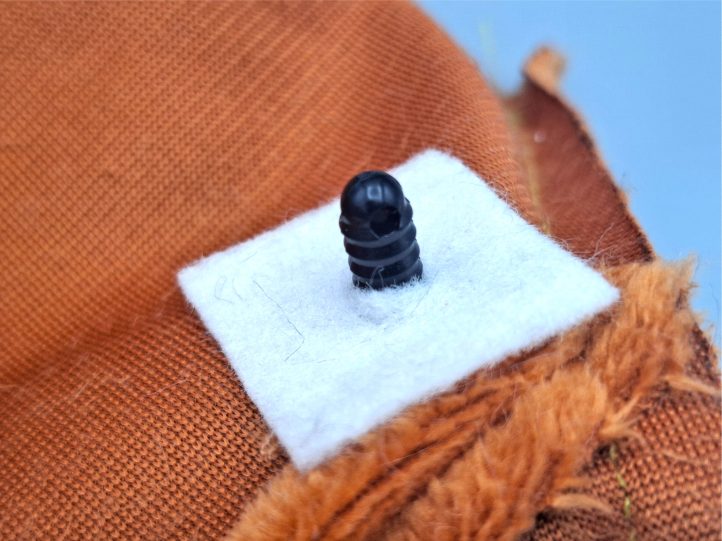
- 12mm plastic safety eyes
- Black embroidery thread
- Polyester toy filling
- Felt scraps
- Matching sewing thread
- Basic sewing kit
- PDF Templates – These are located at the bottom of this page. See printing instructions below.
PRINTING INSTRUCTIONS:
To download the PDF templates, click on the download button at the bottom of the page. We recommend opening your download using Adobe Acrobat.
Cutting Instructions:
Cut out as follows, using the PDF templates:
From Orange Fabric A:
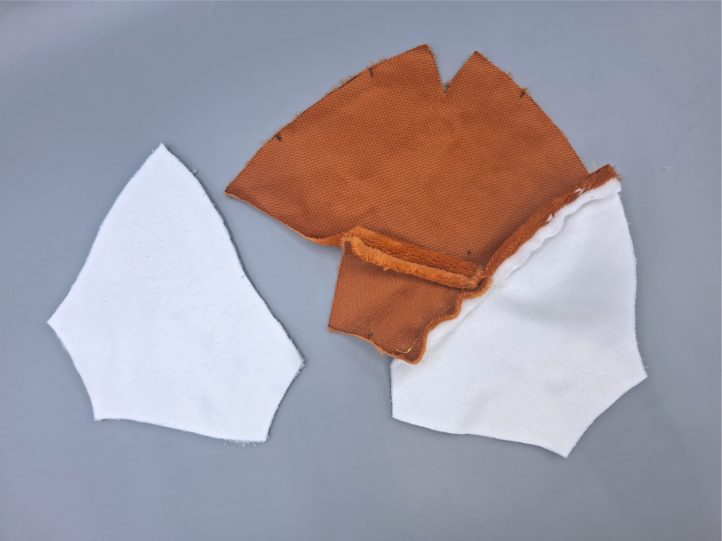
- Cut 1 Upper Face
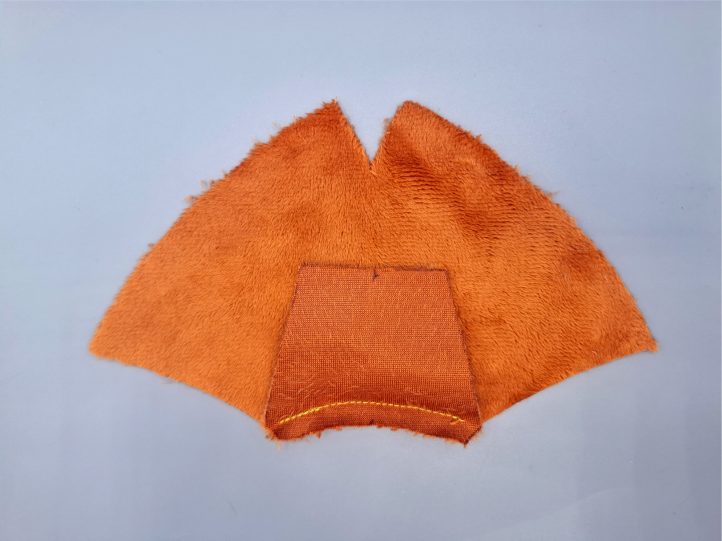
- Cut 1 Snout
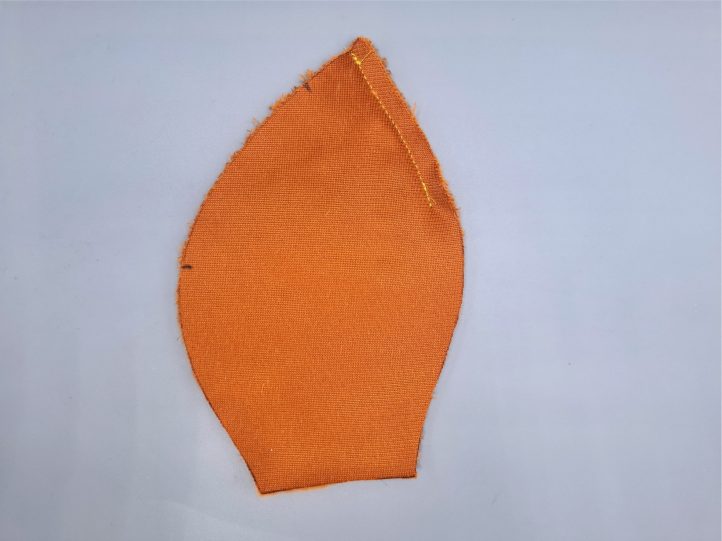
- Cut 2 Ear
- Cut 2 Back Head
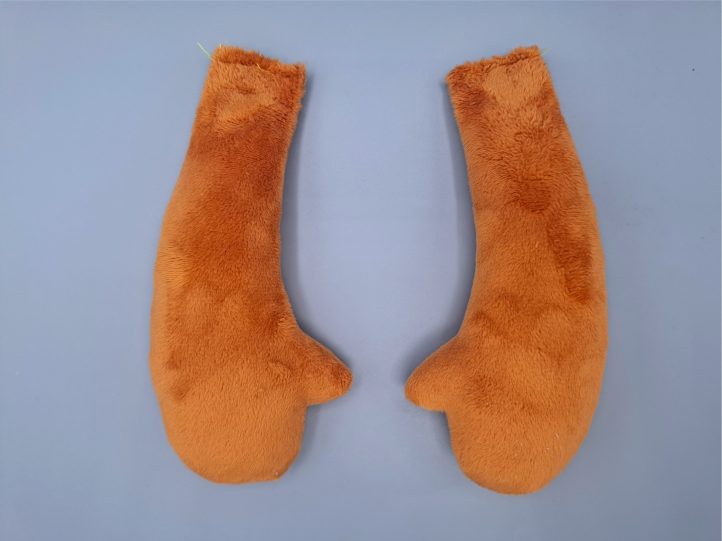
- Cut 4 Arm
- Cut 1 Stomach
- Cut 2 Back Body
- Cut 1 Base
- Cut 4 Leg
- Cut 2 Foot
- Cut 1 Tail
From White Fabric B:
- Cut 2 Lower Face
- Cut 2 Ear
- Cut 1 Chest
- Cut 1 Tail Tip
From Black Fabric C:
- Cut 1 Nose
Sewing Instructions:
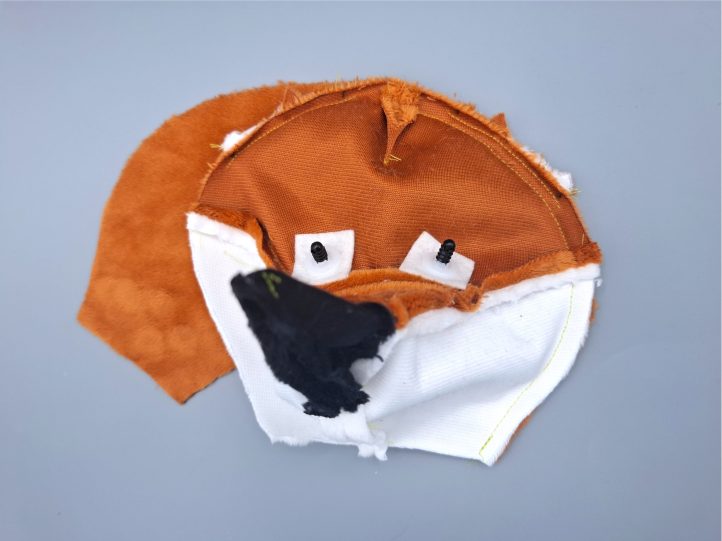
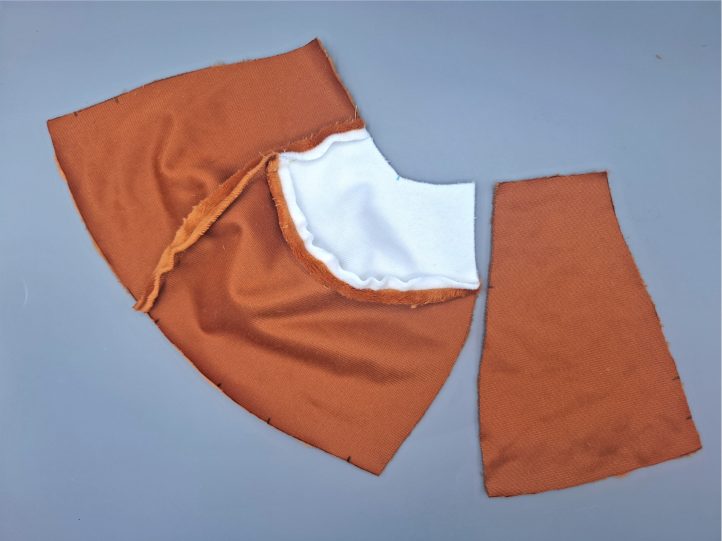
- RST, sew the top of the snout to the bottom center of the upper face where marked (a notch marks the center).
- RST, sew a lower face piece to its corresponding side of the upper face and snout. Repeat to attach the other lower face.
- RST, sew the curved edge of the nose around the front of the snout section.
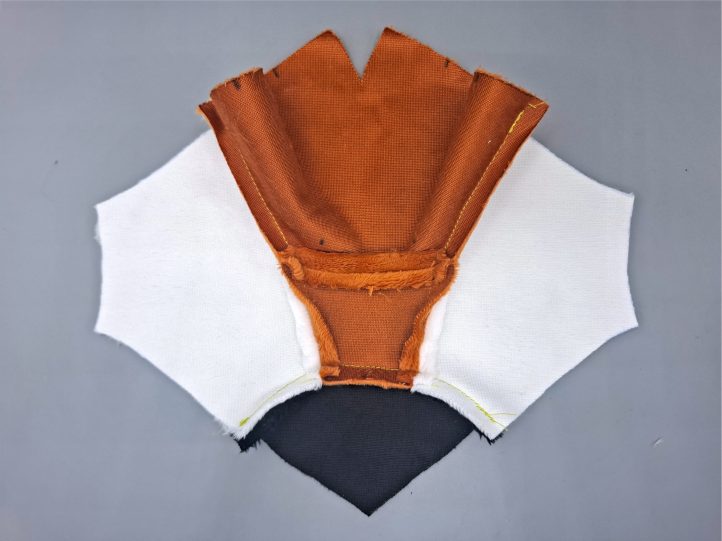
- RST, bring the front of the face together (fold in half) and sew from the neck edge up to the tip of the nose. The nose forms a cone shape and looks odd at this stage, but it is correct. Close the dart at the top of the upper face.
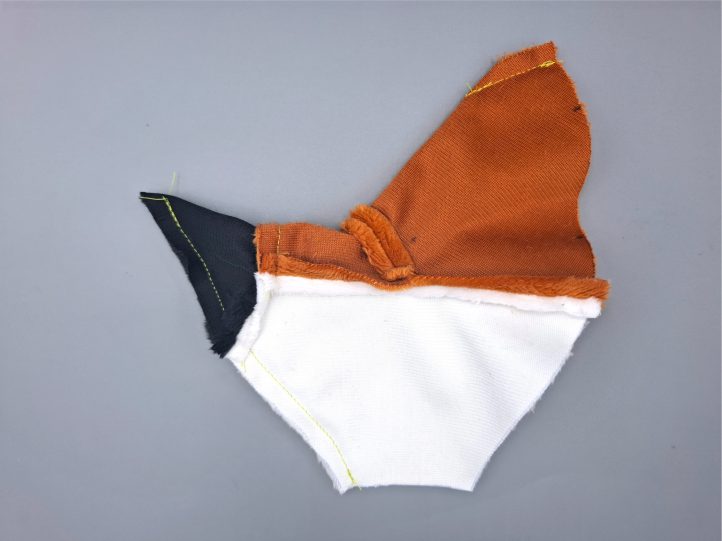
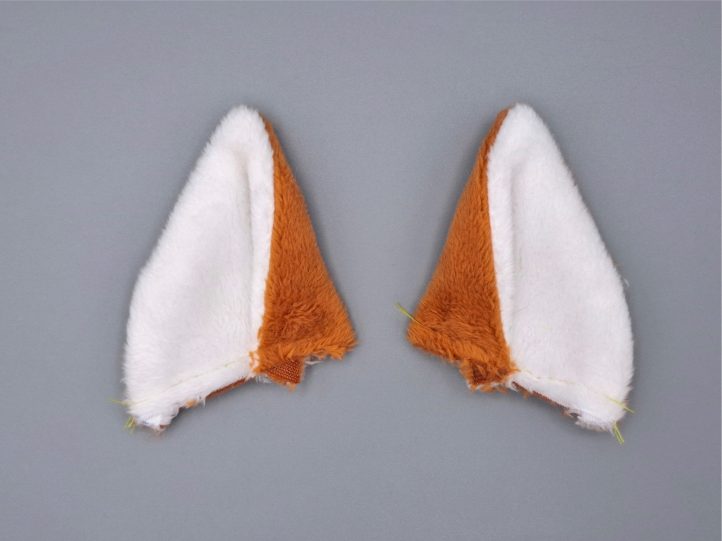
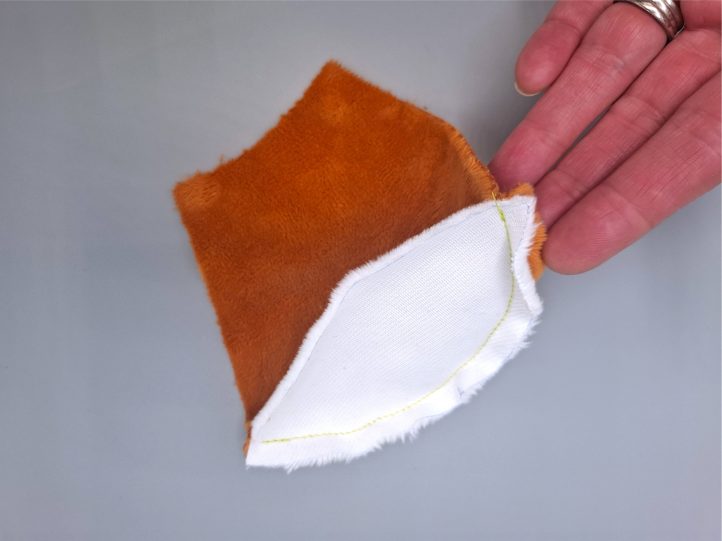
- RST, place front (white) and back (orange) mirror-image ear pieces one on top of the other and sew together around the sides using the pivot point (P) at the top to help turn the corner. Clip the seam allowance at the tip of the ear and then turn the right way out.
- Turn the ears right side out, with the front (white) side of the ear together, fold the shorter straight side over at the notch so that the raw edges are aligned along the bottom (clip the overhanging dog ears to give a neat edge if preferred). Baste the fold in place. Repeat to make the other ear, which will be a mirror-image to the first.
- With the front (white) side of the ears against the right side of the face and the folded sides facing towards the center dart, baste the ears into position on the upper face where marked so that the raw edges align.
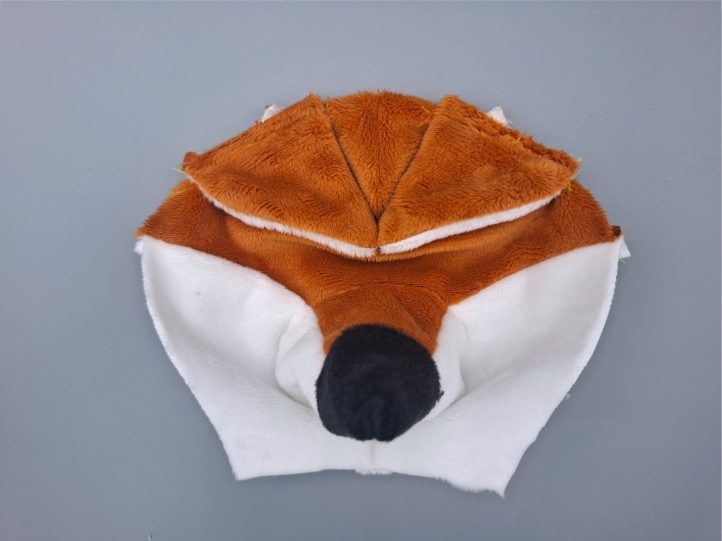
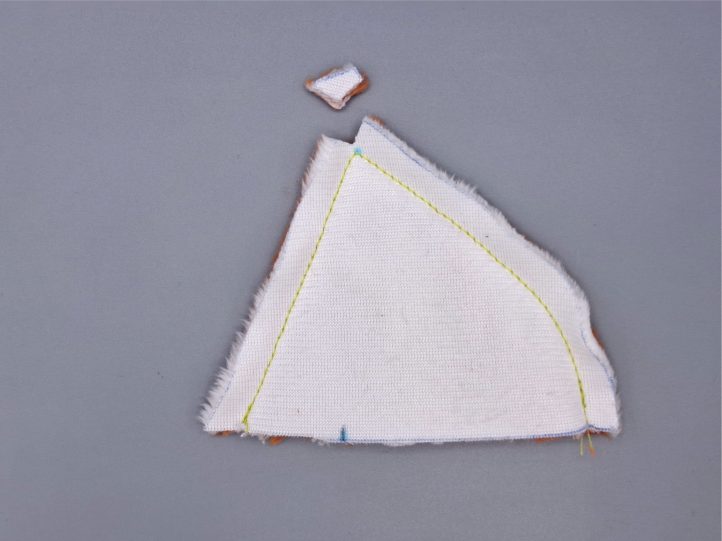
- RST, place the back head pieces one on top of the other and sew together along the back (notches for the ears indicate the side, no notches along the back) from the top down for 4-5 cm (1 1/2 – 2 in) to partially join them.
- Make the smallest holes possible through which to allow the shank of the eye in the upper face pieces where marked (Eye), and push the shanks through. I like to fit a 1 cm (1/2 in) square of felt with a small hole in the center over the shank on the back of the face at this point to give the back of the eye more to grab onto. Fit the backs onto the eyes as tightly as possible according to the instructions (moving any seam allowance out of the way that might get caught under the back).
- RST, line up the dart at the top of the upper face with the partial seam in the back head, and from this top point, sew the face and back head together down one side. Return to the top point and sew the remaining side together. Sewing the seam in two parts in this way is easier and helps to ensure a more even finish.
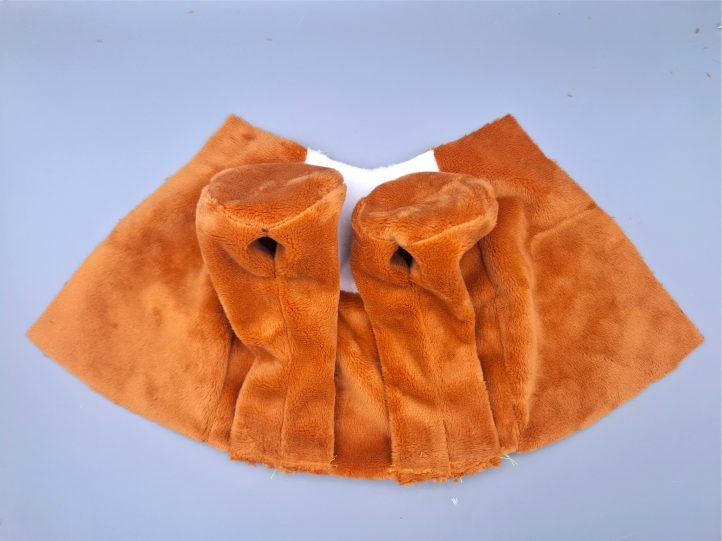
- RST, with the stomach positioned on top for sewing (this is the easiest way of completing this seam), sew the chest piece to the stomach around the curve on the top of the stomach.
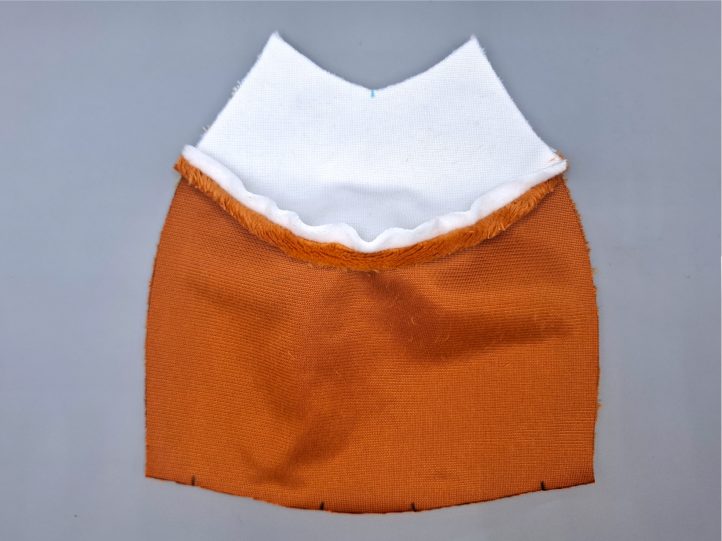
- RST, sew a back body piece to its corresponding side of the stomach/chest section. Repeat to attach the other back body piece to the other side.
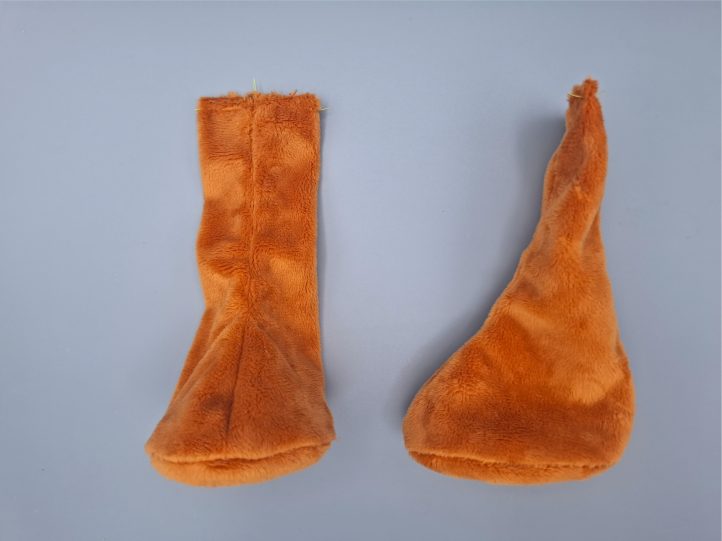
- RST, place two mirror-image leg pieces one on top of the other and sew together along the front. Clip the seam allowance at the curve above the foot. Repeat for the other leg.
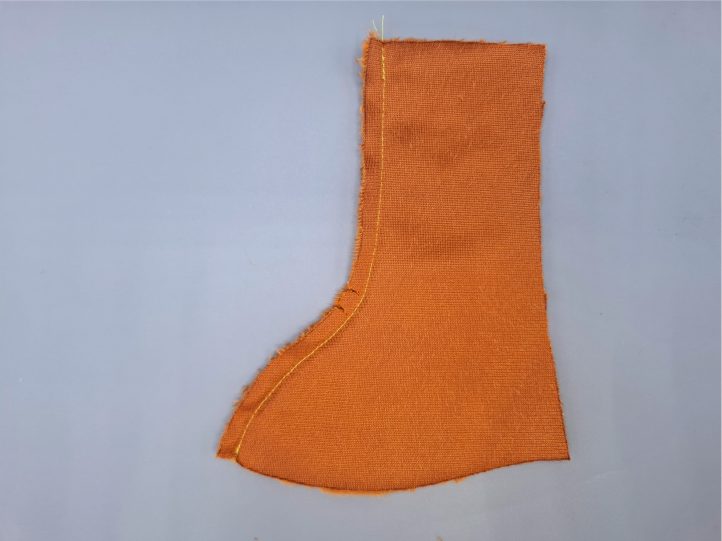
- RST, starting at the center back of the foot (and starting seam allowance width in from the non-sewn edge on the leg piece), sew the foot around the bottom of the leg. Repeat for the other foot piece and leg.
- Sew the back of the leg together from the top down, stopping 4 cm (1 1/2 in) from the bottom to leave an opening in the back of the leg. Repeat for the other leg.
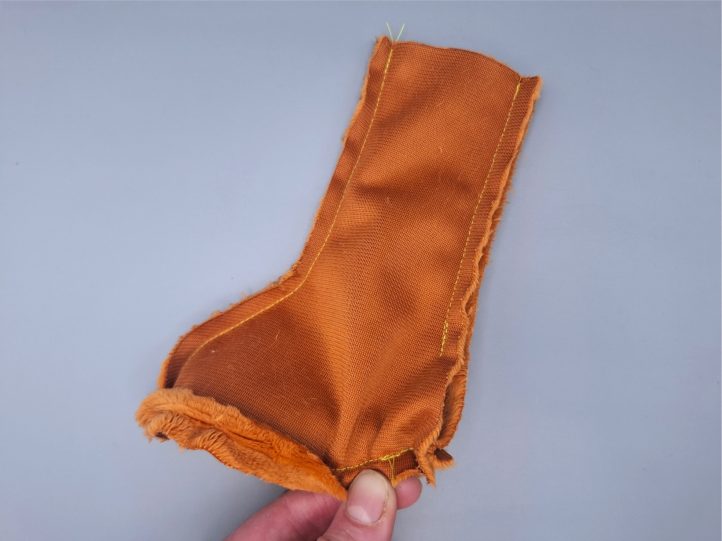
- Turn the legs the right way out. Reposition the open end of a leg so that the front and back seams are together in the center, then baste the top end closed. The legs (4cm/1 1/2 in openings) are stuffed and closed separately at the end. Repeat for the other leg.
- With the front of the legs against the right side of the stomach, baste the legs into position where marked (Leg).
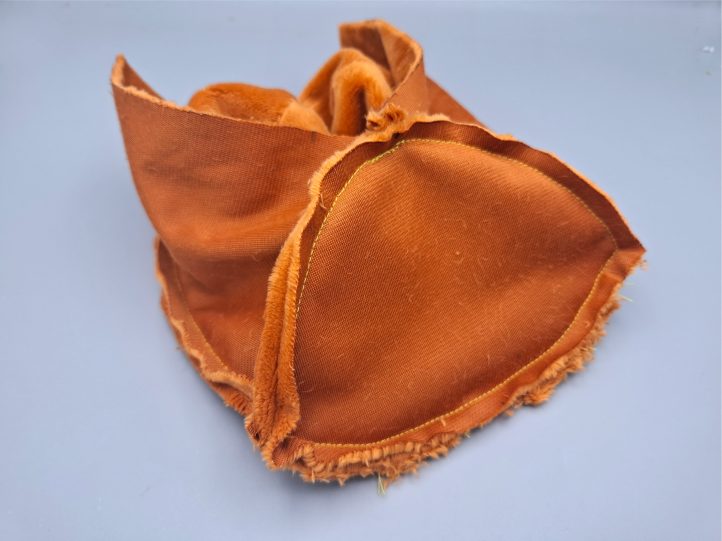
- RST, starting at the center back of the base piece (leaving the seam allowance free on the back body), sew the base around the bottom of the body, pausing with the needle down through the fabric at each pivot point (P) and lifting the presser foot to reposition the fabric before sewing the next part of the seam.
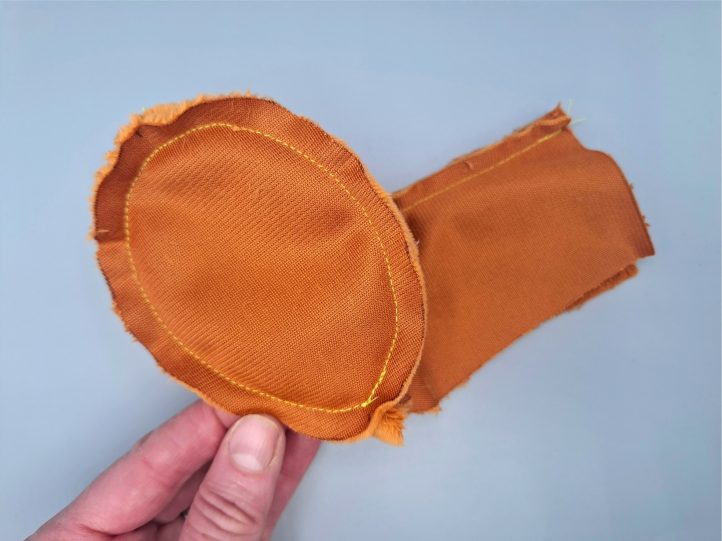
- RST, place two mirror-image arm pieces, one on top of the other and leaving the top open, sew together around the sides using the pivot points (P) to help around the ‘thumb’. Clip the seam allowance at the two internal corners above and below the ‘thumb’. Repeat to make the other arm.
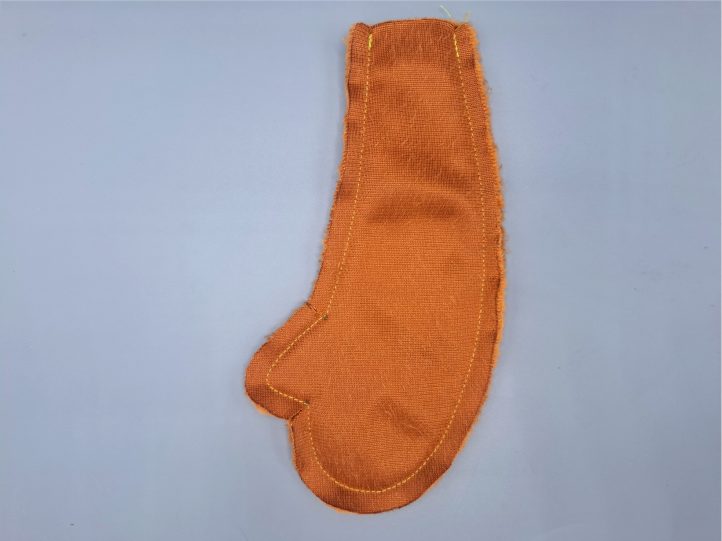
- Turn the arms the right way out and stuff, leaving the top 2-3 cm (about 1 in) free of stuffing, and then baste the ends closed.
- With the arms against the right side of the body and the ‘thumbs’ facing the center of the stomach, baste the arms into position where marked (Arm).
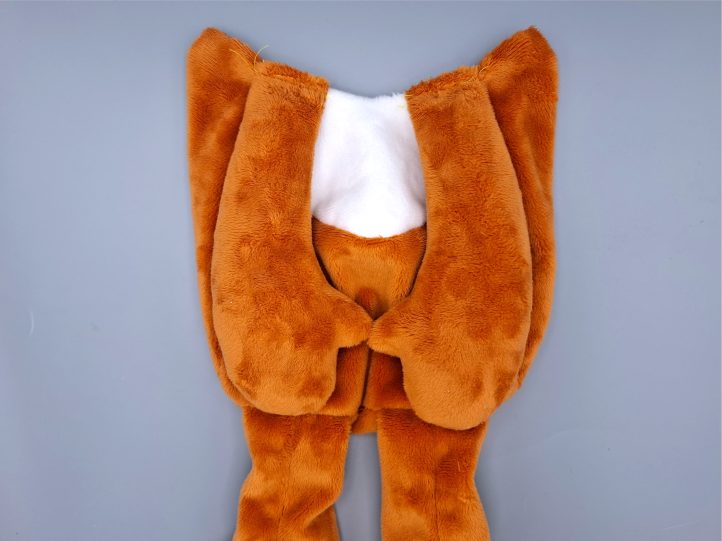
- Turn the head the right way out, but keep the body the wrong way out, tucking the arms and legs neatly inside. RST, if preferred before machine sewing, baste the bottom of the head to the top of the body by hand with long stitches to help keep it in place. Sew the head to the body either all in one go, sewing from side to side, or starting in the middle each time and sewing a side at a time. Remove any long basting stitches that might be visible on the finished fox.
- RST, sew the tail tip around the end of the tail.
- RST, fold the tail in half and sew along the side to the end of the tip, and leave the opposite end open.
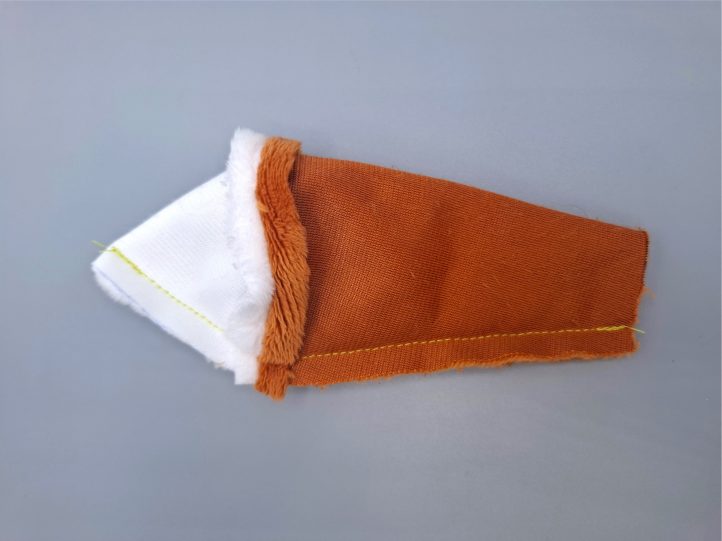
- Turn the tail the right way out and stuff, leaving the last 2 cm (about 1 in) empty. Baste the end of the tail closed.
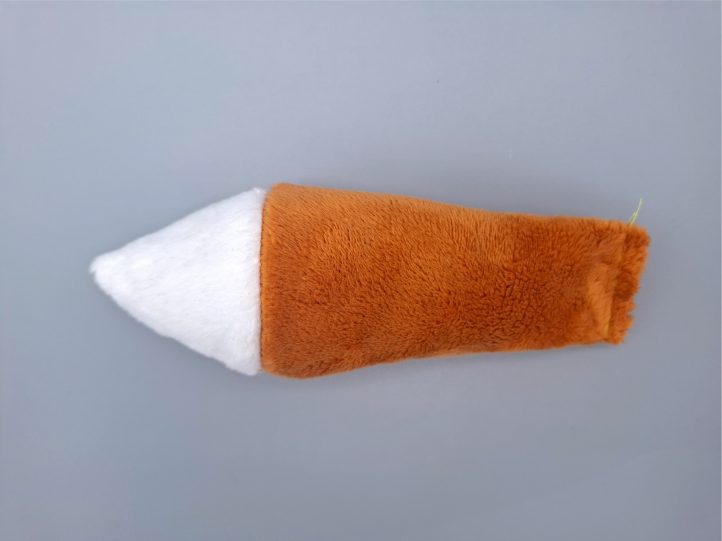
- Turn the fox the right way out. With the tail against the right side of the body and the seam side facing the base, baste the tail in position where marked (Tail).
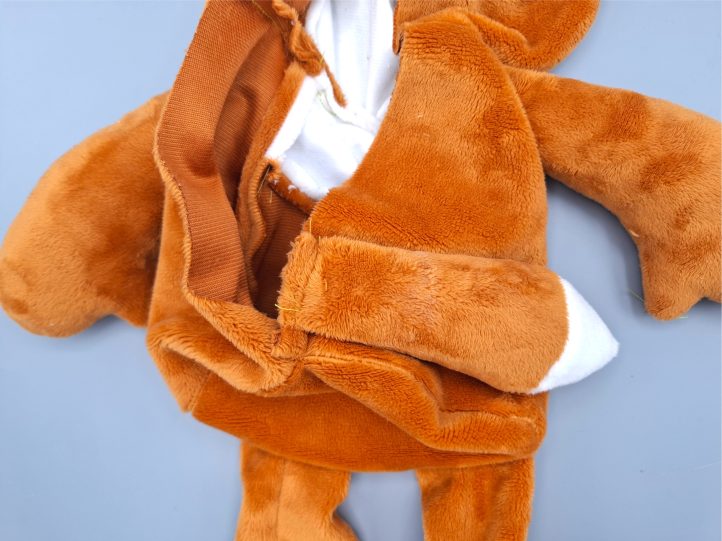
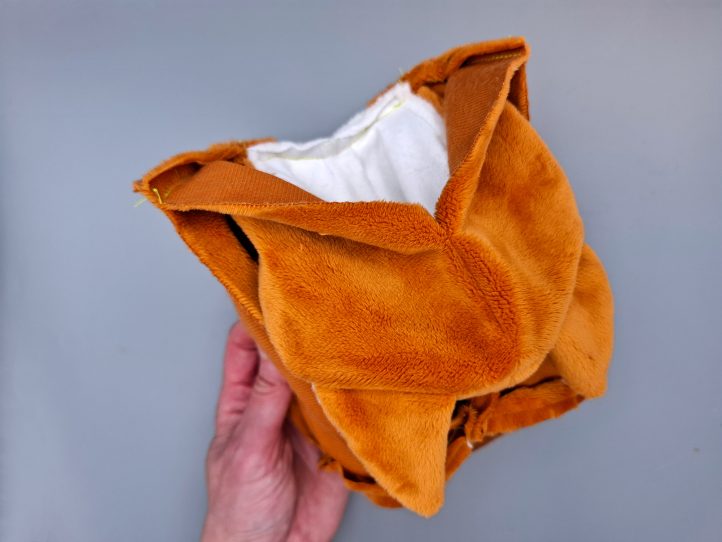
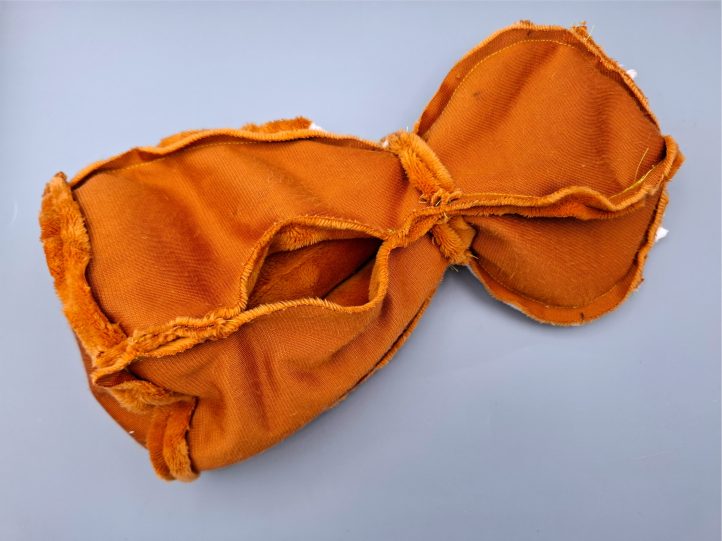
- Turn the fox the wrong way out again. Return to the partial seam in the back of the head, with RST, close the rest of the back of the head to finish just below the neck seam (reverse over these stitches so they do not open up). Sew the bottom of the body together from just above the tail down to the base (so that the tail is fully machine-sewn in place) to leave an 8-10 cm (3-4 in) opening in the back of the body.
- Turn the fox the right way out. Thread a standard hand sewing needle with coordinating all-purpose or strong thread, double it over, and knot the end. Bring the pointed tip of the nose down so that it meets the bottom center of the nose, and firmly hand sew it in place.
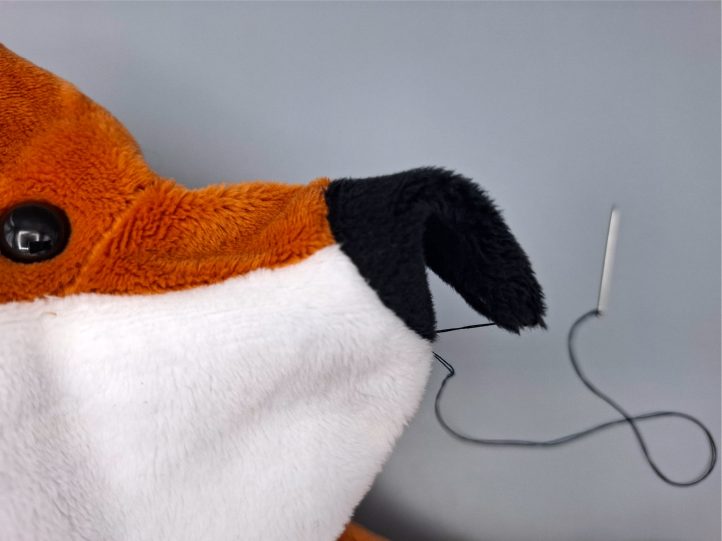
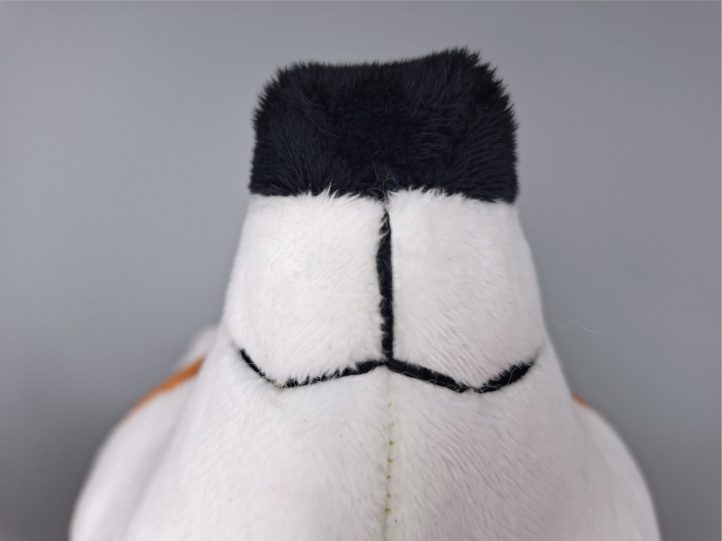
- Stuff the head only. Thread a long needle with doubled over black embroidery thread and knot the end. Take the needle in through the opening in the back of the body and bring the needle out at the bottom of the nose, make a stitch down following the seam, and then backstitch a flattened ‘W’ shaped mouth. When the mouth is completed, return to the bottom of the nose and make a few small stitches/knots, and then take the needle into the head and out again anywhere and pull on it and snip away the excess so that once released, the thread retracts into the head, leaving a tail of thread inside so that it is unlikely to work loose.
- Adjust any stuffing that became disturbed when embroidering the mouth, and then stuff the rest of the body and each leg, and close the three openings using ladder stitch or similar.

I’m unable to open the download for pattern
Hi Shannon! We are unable to replicate this error. Please note that this pattern is available to Gold Club members only. Are you seeing an error message when you try to download the pattern? Any additional information is appreciated! – Ashley, We Like Sewing
I made the little fox. It’s so cute
We’re so glad that you enjoyed this pattern! 🙂 – Ashley, We Like Sewing
Find this fox adorable! I teach children to sew and currently have twin 11 yr old girls who will love this fox. I try items they don’t have to buy patterns (too darn expensive) to find It would be easier if PDFs were provided for supplies and cut out information. They can see how it’s made on my computer, but taking the information home to purchase fabric would be easier with a printout. This is just a suggestion – I’ll make the PDF for them in Word.
I just joined – and after 50+ years sewing and quilting, I find your magazine VERY informative – especially for teaching children – I started with your first magazine this morning and look forward to the future reading. (I will make this for my granddaughter’s birthday in April.
Thank you so much for your kind comment! We hope you enjoy this pattern 🙂 – Ashley, We Like Sewing