All photos are provided by the designer.
Toggles closures are a popular button closure choice for a variety of garments. They are perfect for items like coats, capes, sweaters, and other kinds of sewing projects (especially outerwear!). Since they consist of two parts, it’s very important to line them up properly for the best look. Follow along to find out all about toggles and how they work, including how to sew them onto garments!
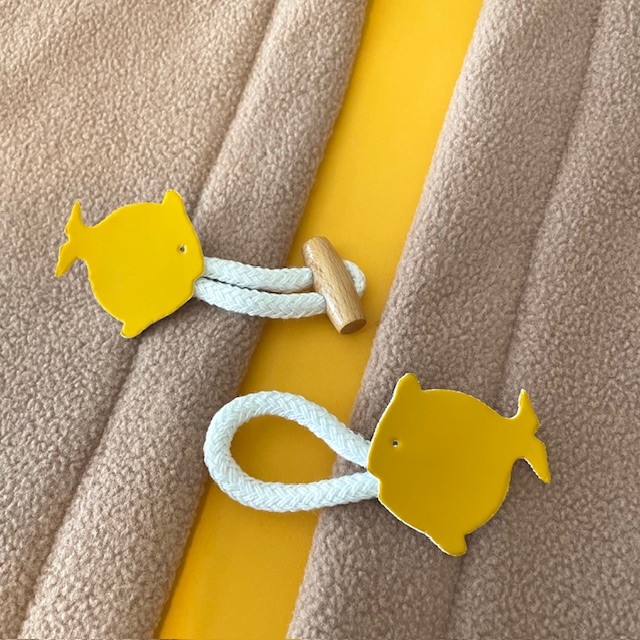
Designer Note: Fish toggles pictured in this article are from Vogue Fabrics in Evanston, IL.
What’s a Toggle?
A toggle consists of two distinct, separate parts: a loop of some sort, and then a button or other large shape that goes through the loop (both of which are attached to panels that are then sewn onto the garment). The two sides are separated and the toggle connects them at the placket (or other type of finished opening). This kind of closure has actually been used for centuries on clothing (and in metal versions for jewelry)! Toggles come in many sizes- from tiny to extra large. Sewing stores have many pre-made toggles available, or you can create your own using excess fabric scraps and extra buttons!
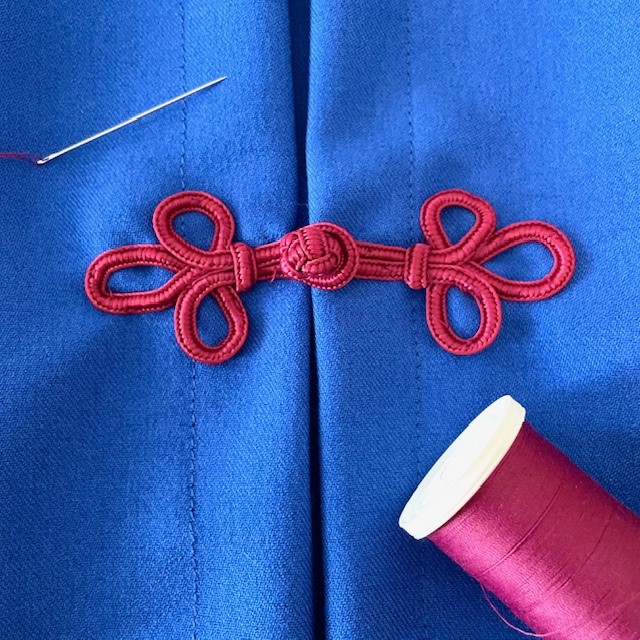
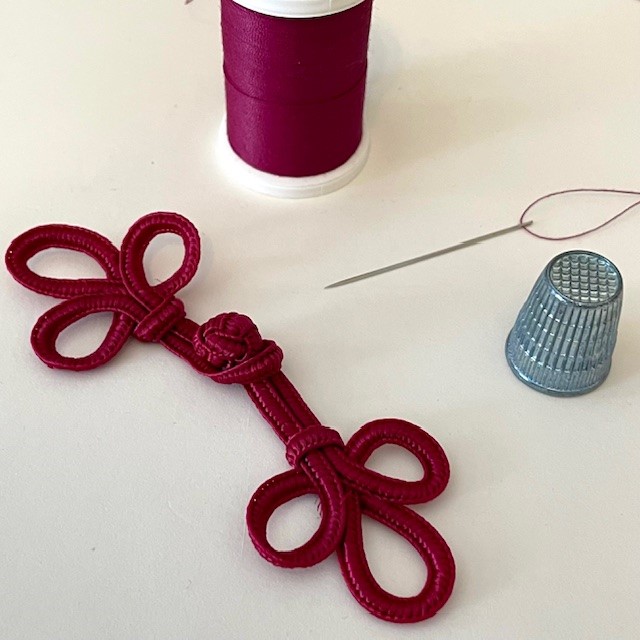
Typically the loop part is made from cording, braided fabric, crocheted yarn, or even elastic, and it can be stretchy or non-stretchy. Panels (or “tabs”) can be made from many different fabrics or materials (from cotton to leather). The button part of the toggle can also come in many shapes, sizes, and sources. They often are made from plastic, wood, metal, or even horn, contrasting from the loop in texture and scale. A toggle’s buttons are often long in shape with two holes (to provide more security so they don’t pull though), but this is not always the case. The string or cording attaching the button to the panel quite often matches the loop as well, or it can contrast. While most toggles consist of several types of materials, one notable exception is a “frog closure” that has both the buttons, loops, and panels made from the same silky fibers.
Note: Some sewing enthusiasts call the type of closure that has a plastic casing with an elastic running through it a toggle as well. For this article, we will focus on traditional two-part button toggles.
Best Uses for Toggles
Toggles can be utilized for garments on which a zipper or traditional buttons wouldn’t work or wouldn’t look as nice. As toggles typically connect two separate, finished sides, they are a wonderful choice for cardigan sweaters and outerwear (like in a row on jackets and coats). Toggles can often be found on items of clothing made with thick, heavyweight fabrics like faux fur and wool. They also allow for a bit more movement when the garment is being worn than zippers, snaps, or plain buttons.
Lining Up Toggles Properly
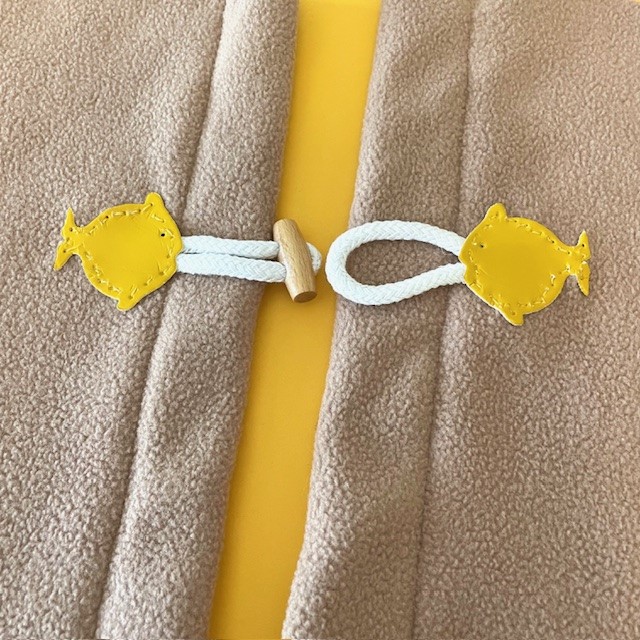
Proper spacing and placement is particularly important so a toggle sits flat and looks balanced. As mentioned above, most toggles will connect two different sides of an item of clothing, so you don’t want them to be askew! Ensure the toggle pieces are lined up correctly by working on a flat surface and checking the measurements several times before attaching them. The measurements of the space between the toggle panels and the edges of the garment should be equal (unless it has overlapping sides, in which case it should be centered over the finished look). Likewise for the amount of space from the top edge of the garment to the top of the panels holding the loop and button.
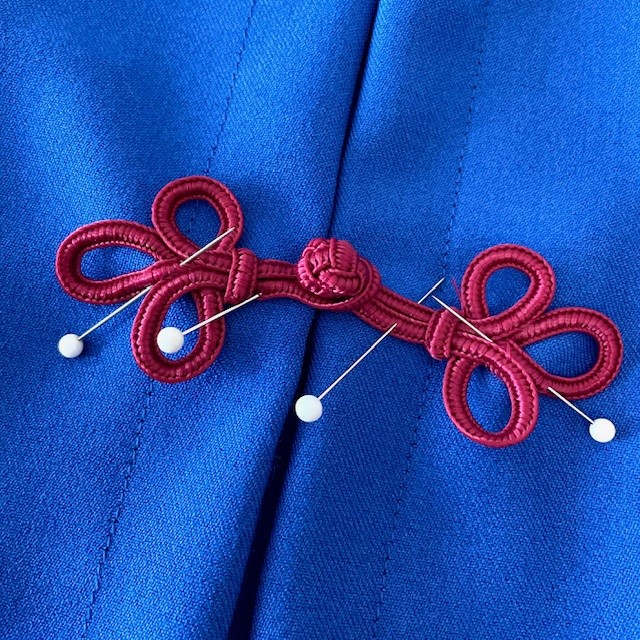
Keeping the toggles in place during sewing is crucial as well. Pins can be used only if they won’t leave marks or damage the fabrics. Sewing clips or magnetic pins are a great option for keeping the pieces steady if the toggle is delicate. Whichever method you choose, connect the toggle together after pinning it to make sure everything lines up before sewing.
Hand vs Machine Sewing Toggles
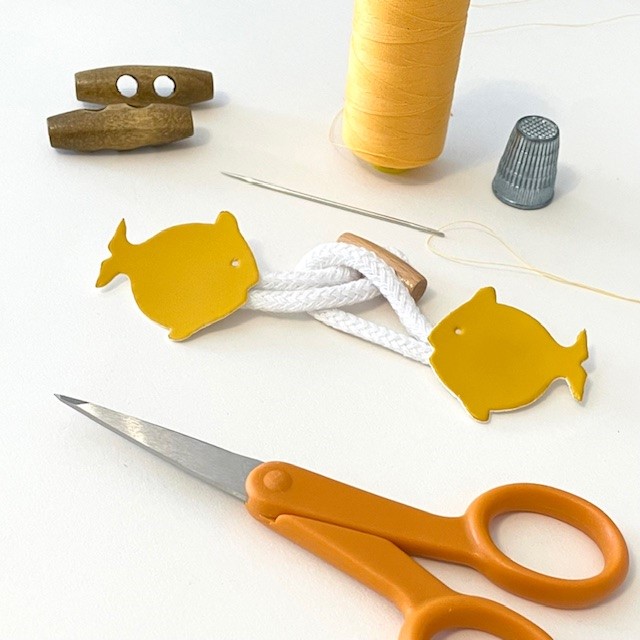
Now to sew them on! In most instances, toggles should be attached by hand. The panels that the button and loop connect to can be small, delicate, and hard to fit under a sewing machine. If this is the case, then hand-sewing is best. When putting your toggles on by hand, use a sturdy, new hand-sewing needle (like size 90/14 although this depends on the materials) and a quality all-purpose thread. Some pre-made toggles will come with small holes already drilled onto the panels, making it really easy to sew them on by hand uniformly.
One benefit of machine-sewing toggle panels on is that it creates a more uniform look for the stitches than sewing by hand. It also tends to be stronger than that done by hand. The same type of thread should be used in the sewing machine (all-purpose works in most cases) as well as a fresh machine needle. A regular universal or sharps needle should work unless the panel is leather, which requires a specialty machine needle. No matter the material being used, sewing a clean, even topstitch will finish the toggle nicely and also provide strength at the panels.
Extra Toggle Sewing Tips
- If the panels holding the toggle pieces are too lightweight or feel flimsy, they can be strengthened with interfacing on the undersides.
- Leather toggle panels may require a leather stitching needle (for both hand and machine) depending on thickness.
- Be sure your toggle is completely attached at all points, including where the loop and button connect to the panels.
- Some toggles can withstand repeated washing, but those made with leather and fragile buttons should be hand-washed or dry-cleaned.
- Washable fabric glue can be used to hold a toggle in place if pins or clips aren’t working. Use sparingly to make sure it won’t stain or damage the toggle and cloth.
Consider using a toggle for your next sewing project, and keep these tips for a successful result!
I just found some beautiful wooden toggle buttons from my mom’s stash that I inherited. I’m looking forward to making a garment so I can have fond memories and a made-by-me project.
This is such a great idea, Suzanne! We hope you enjoyed this article 🙂 – Ashley, We Like Sewing