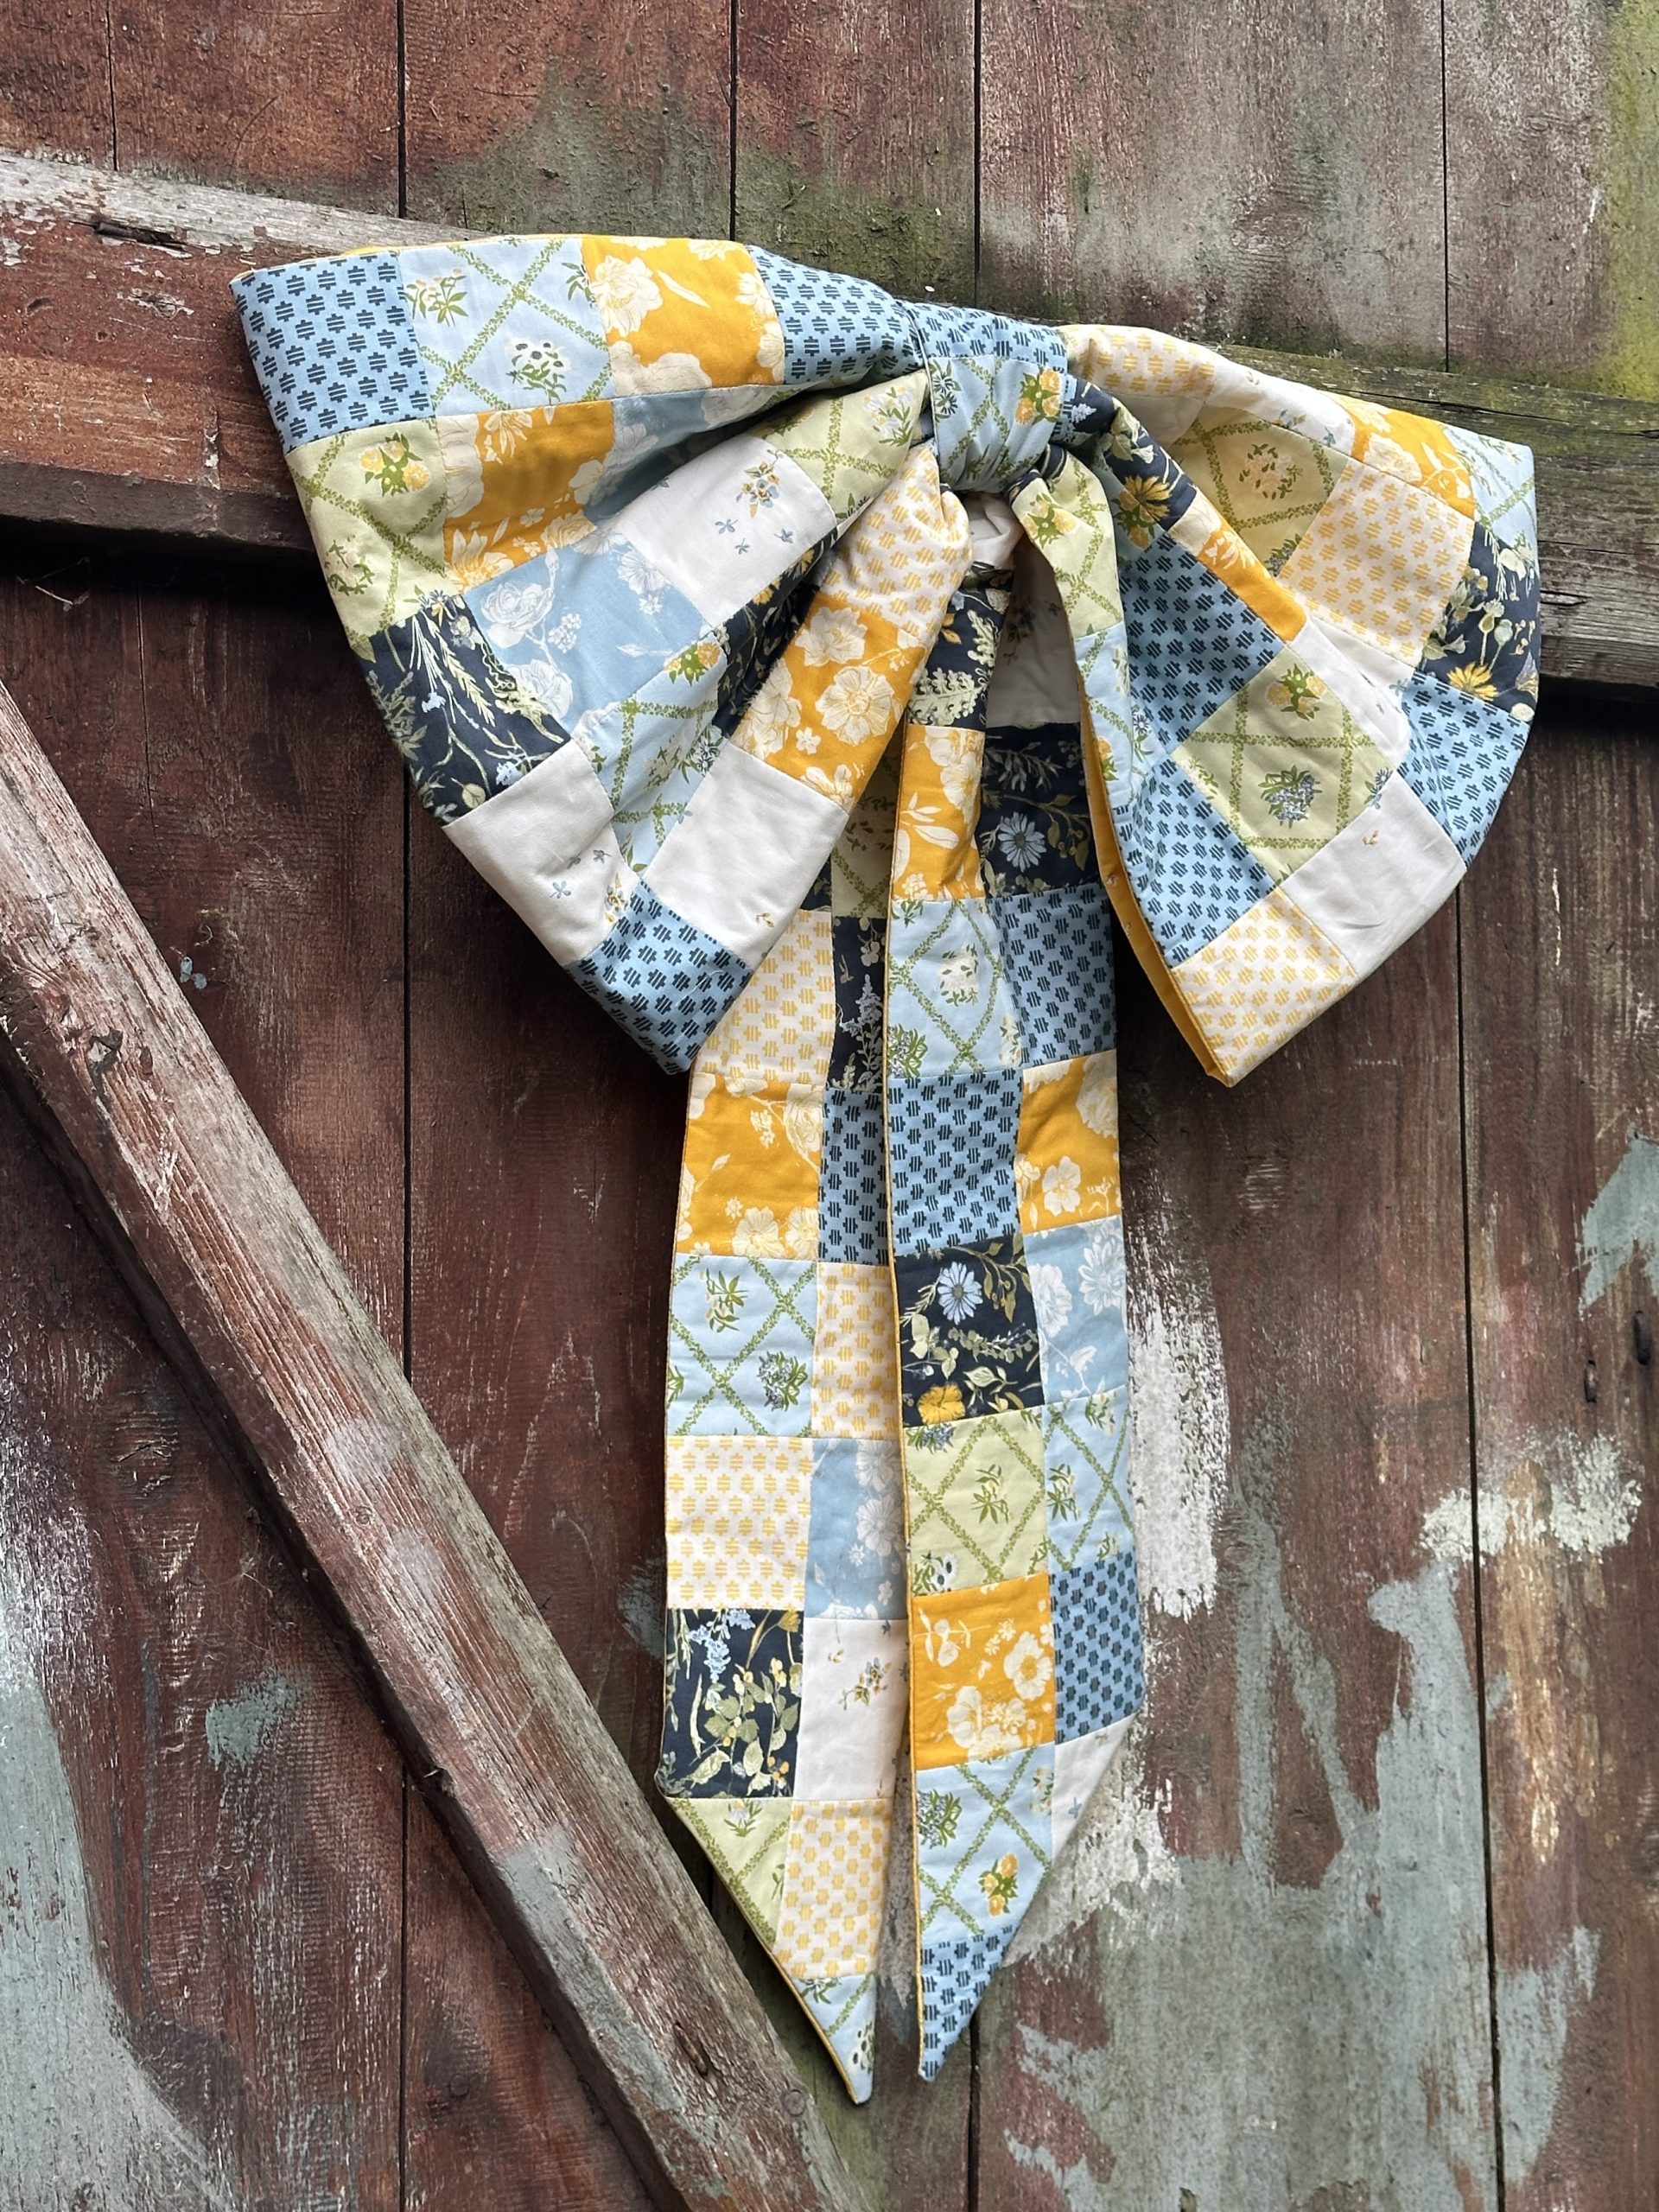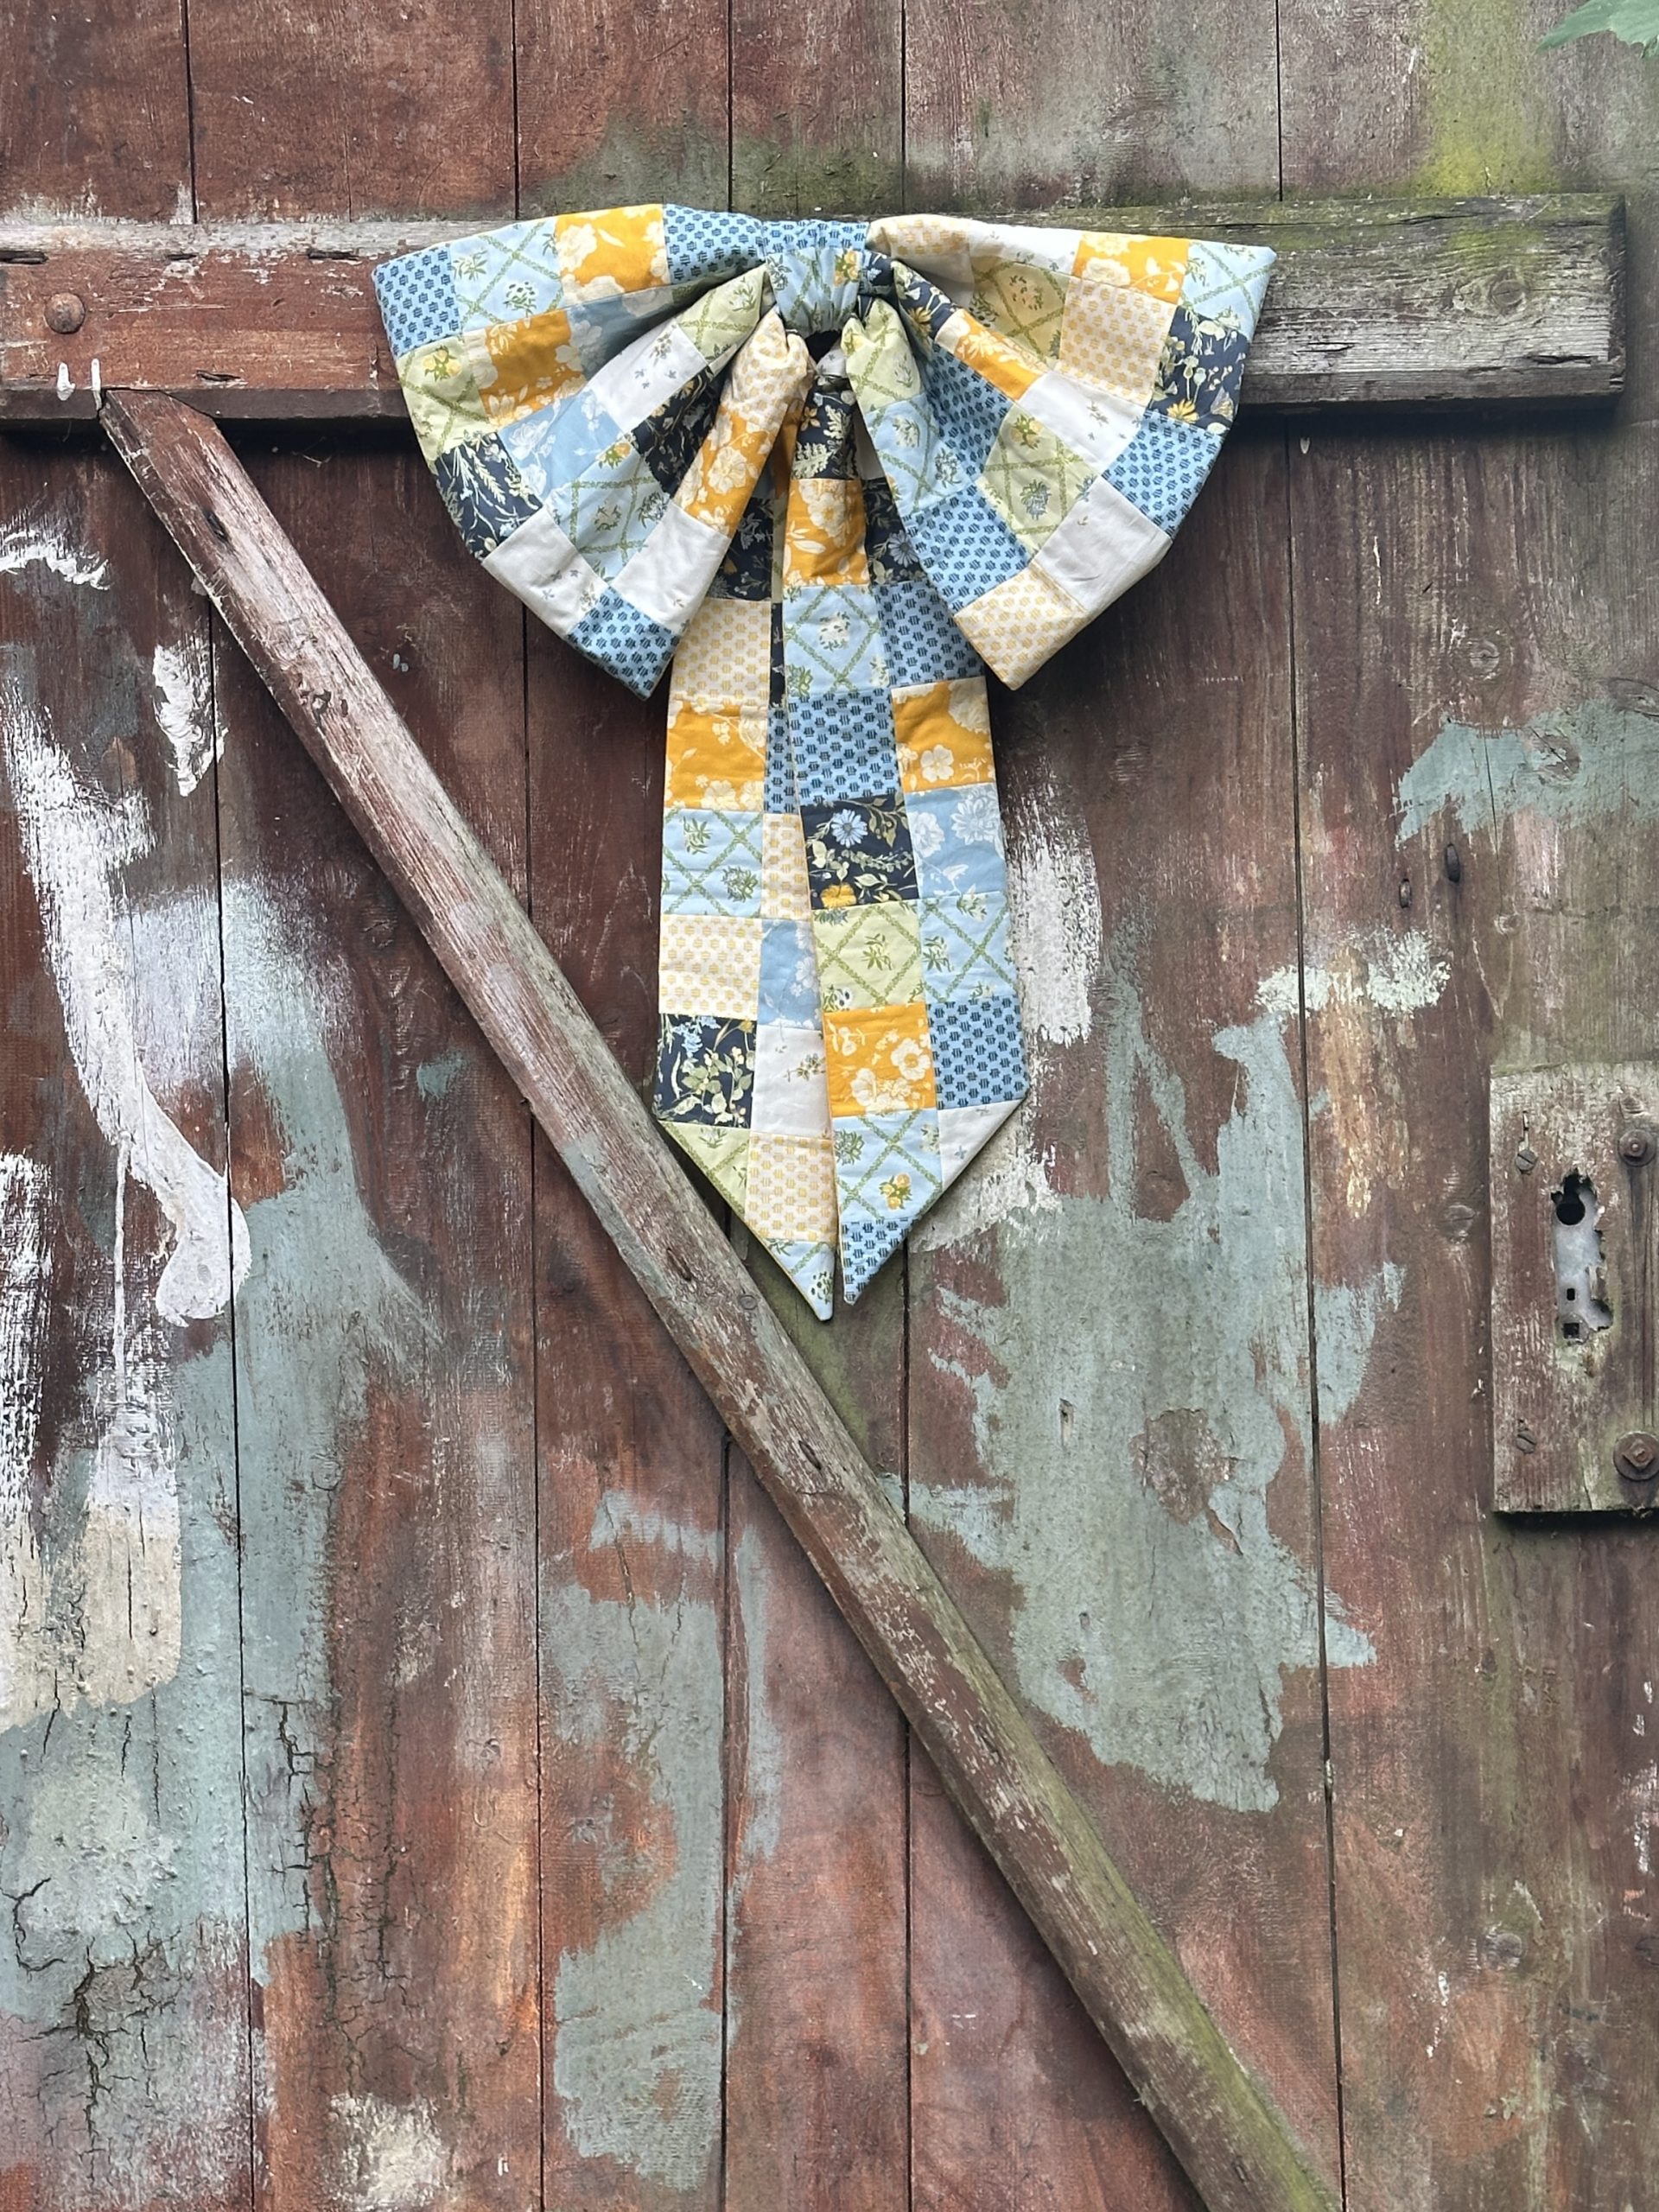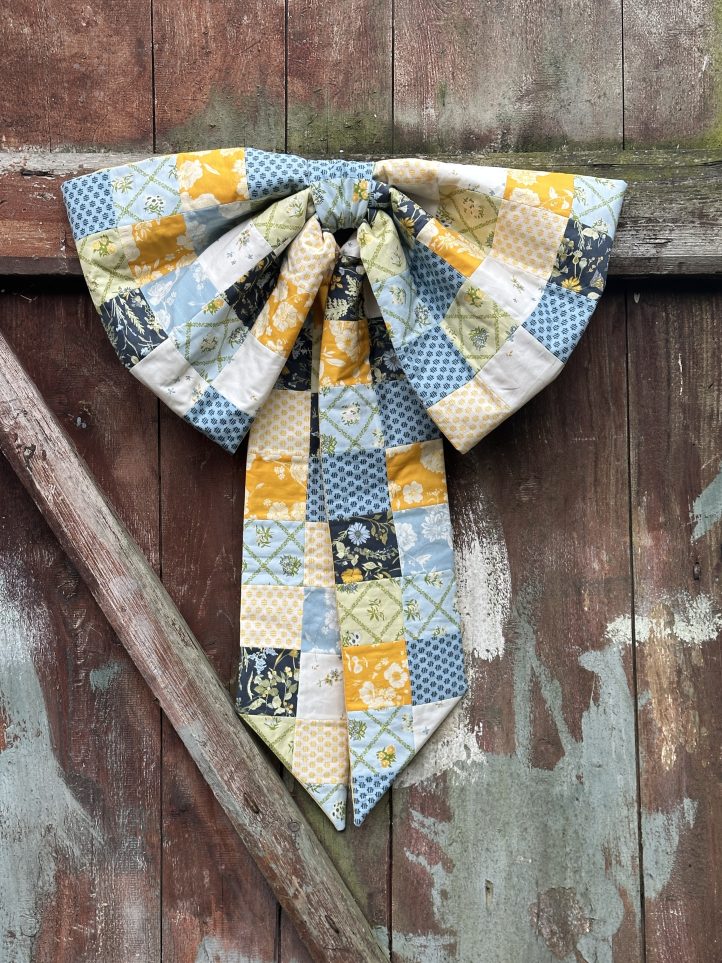
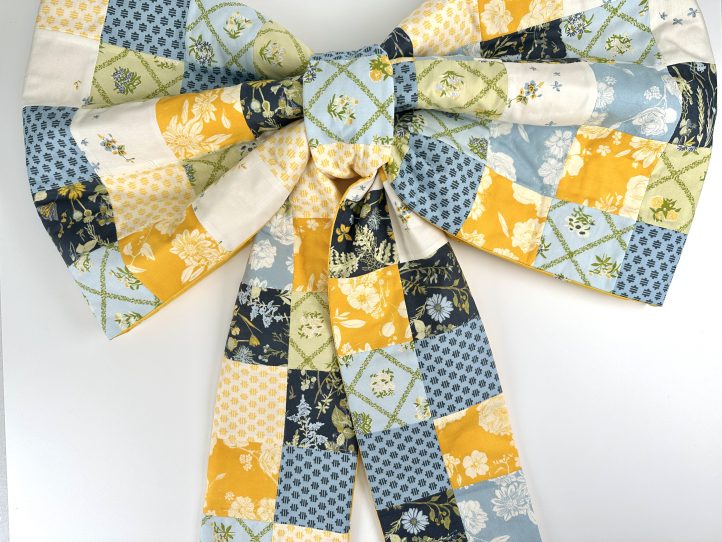
Welcome visitors to your home with a cheerful, playful patchwork door bow! New from Debbie von Grabler-Crozier, this fat quarter friendly project would look so pretty on your front door and features a small hoop or ring to easily display your design. Sew your door bow pattern in cheery fall blues and golds like the sample shown or in red, white, and green for the upcoming Christmas season.
Designer Note: Seam allowances are all 1/4” and have already been added.
Materials:
- Fabric: (Note: All fabric are by Art Gallery Fabrics and from the Potage collection by Sharon Holland.)
- 1 fat quarter pack
- 1/2 yard coordinating floral for the lining using the FQ “Fat Quarter” pack as inspiration. The designer’s choice is Delicate Balance Golden.
- Tip: This 1/2 yard is not quite long enough, but if you buy a piece long enough, you will have fabric left over, and it is a waste. Instead, use the same fat quarter from the pack to slightly extend the lining fabric.
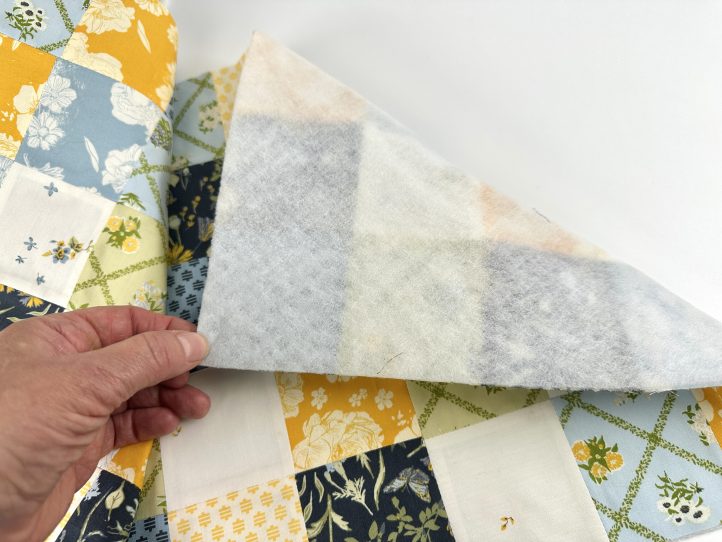
- Interfacing:
- 1 1/2 yards. H630 fusible fleece (Vlieseline)
- 1 small metal ring or similar to hang the bow
- Coordinating threads for all fabrics and trims
- Scissors
- Fabric marking tools
- Hand sewing needs
Cutting Instructions:
From the FQ pack:
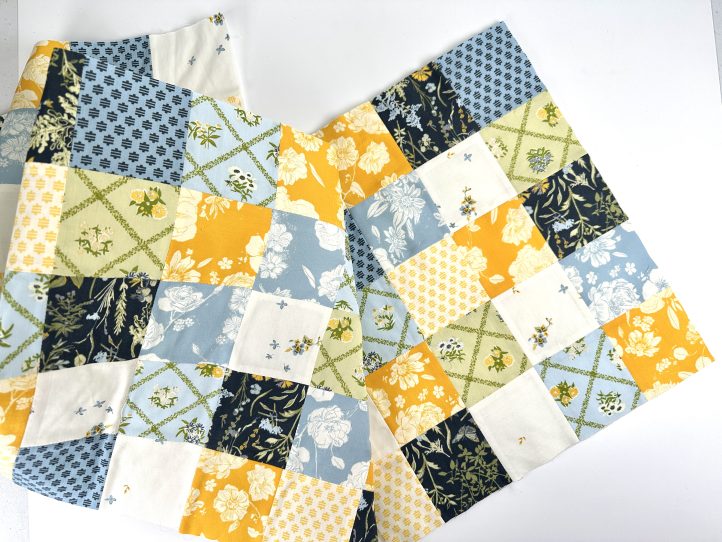
- 133 squares each, 3” square. Make these scrappy and random.
From the lining fabric:
- 1 piece 46” wide x 13” tall for the main bow body
- 1 piece 3” wide x 11” long for the center tie
- 1 piece 6” wide x 51” long for the bow ‘tails’
From the H630 fusible fleece:
- 1 piece 46” wide x 13” tall for the main bow body
- 1 piece 3” wide x 11” long for the center tie
- 1 piece 6” wide x 51” long for the bow ‘tails’
Sewing Instructions:
PREPARATION:
The bow is made in three separate sections- the body, center, and tails and then it is assembled to look as though tied perfectly.
Make the Bow Body:
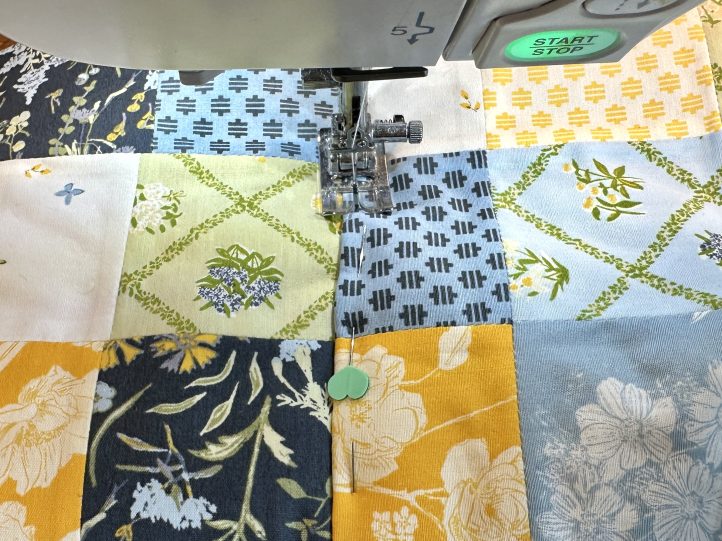
- Attach 90 random squares in a long strip, 5 squares deep and 18 squares long.
- Fuse the appropriate piece of fleece to the wrong side.
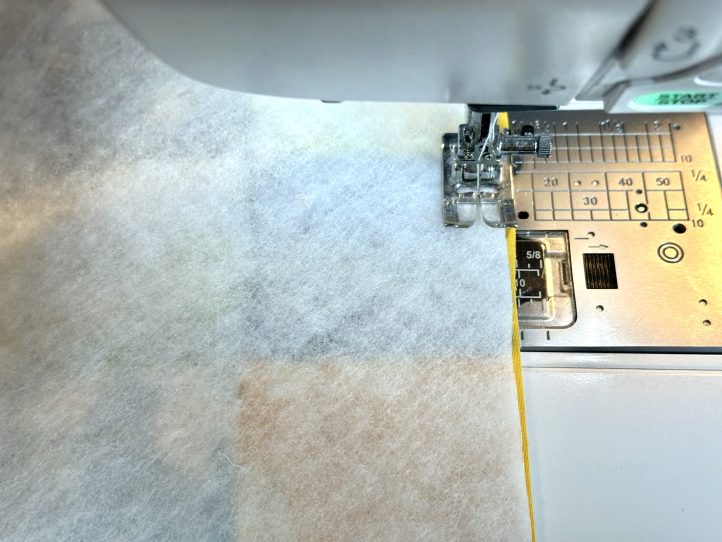
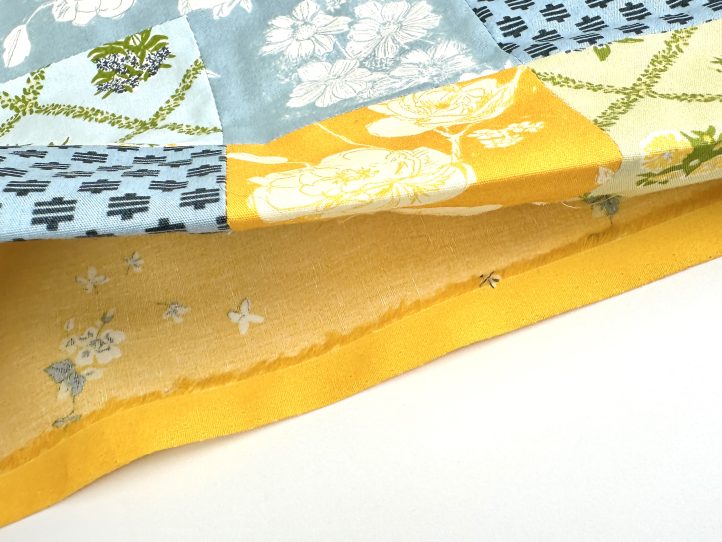
- Place this strip, right sides together, onto the strip of lining and sew the sides.
- Turn the right way out and press so that the side seams are perfect. Press the edges of one end to the wrong side by 1/2” all around.
- Poke the un-turned end into the turned one so that the turned end overlaps the other and the raw edges are hidden. Sew this end closed to form a loop.
- TIP: This sewn edge will be hidden in the bow center.
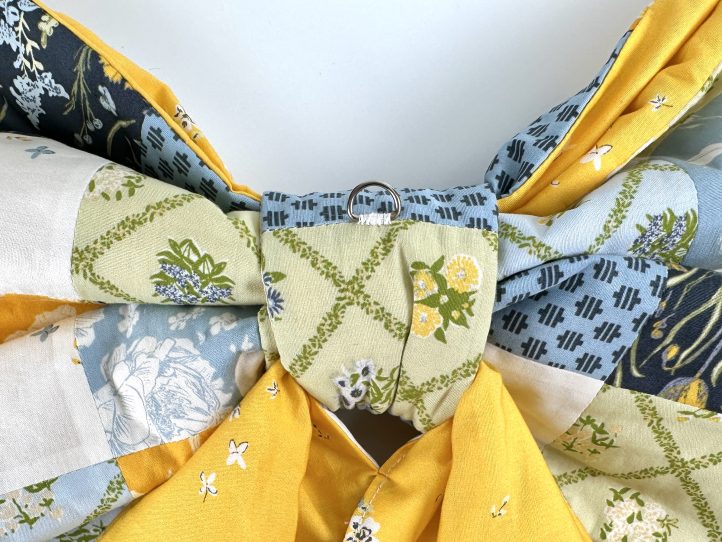
Make the Bow Center:
- Make a strip of 3 squares. Press and attach to a piece of interfacing. Line and form a loop as you did for the bow body.
- TIP: This time, Debbie recommends hand sewing the seam to make the loop. You haven’t got a lot of room to machine sew it, and hand sewing is actually neater and easier.
Make the Tails:
- Attach the squares to make a long strip, 2 squares wide and 20 squares long. Press and interface.
- Fold at the center and on the ends, shaping the tips as a mirror image. Measure up 5 1/4” (basically, it is the second square up from the bottom) on the outer edge of each tip and make a mark.
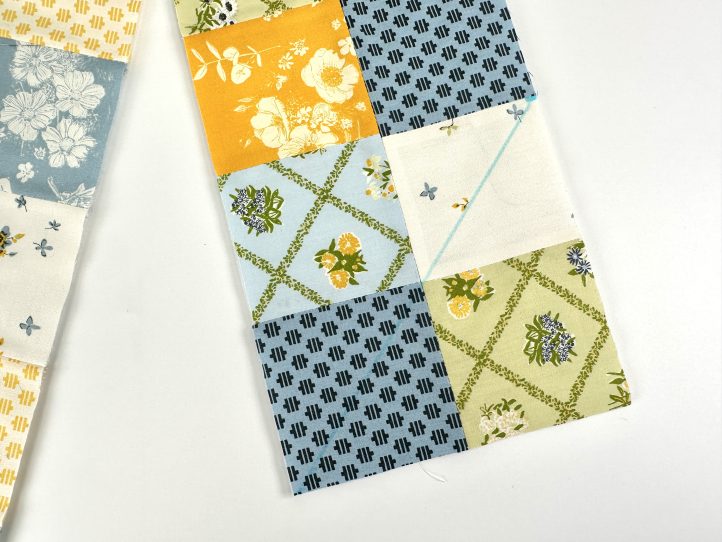
- From the inside edge to this mark, draw a line and then cut along the line.
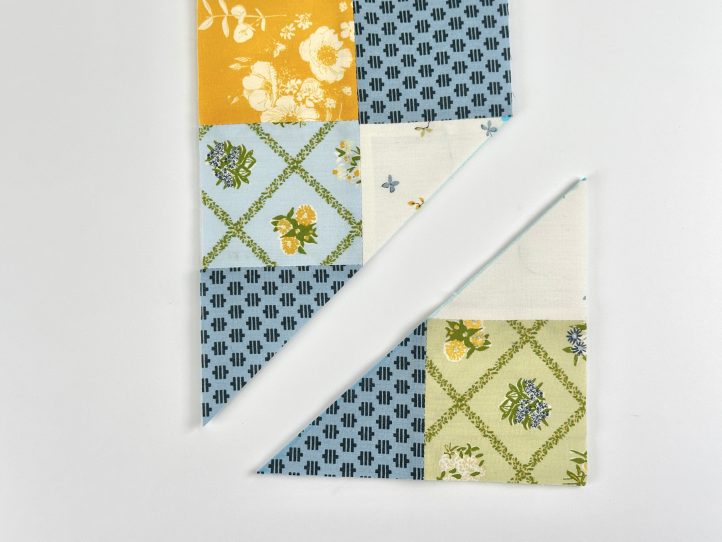
- Repeat on the other side to form the mirror image shaping.
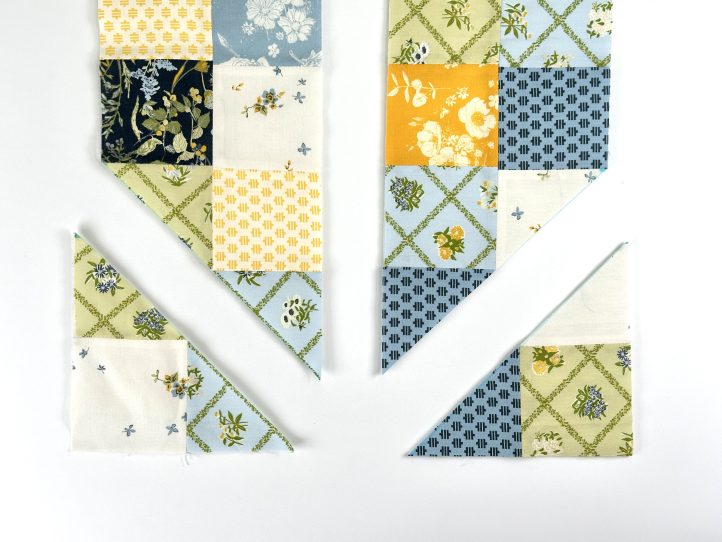
- Place the shaped and interfaced tail pieces right sides together onto the lining and sew all around the outer edge, leaving a turning gap somewhere on the side (near the center is most convenient because it will be hidden in the center loop).
- Trim the lining to match the interfaced top and clip across the corner points. Turn out through the gap. Close the gap.
MAKING:
- Slide the bow body into the center loop and arrange it nicely.

- TIP: The center is a snug fit because this makes the bow sit nicely without drooping.
- Pull the tail through the center loop and arrange it so that it sits at the bottom of the loop.
- TIP: Sometimes (especially if other fabrics or interfacings are used), the tails stick out a bit. It is a good idea to hand sew the tails together near the top. This helps them to sit nicely.
- On the back, attach the hanging ring.