
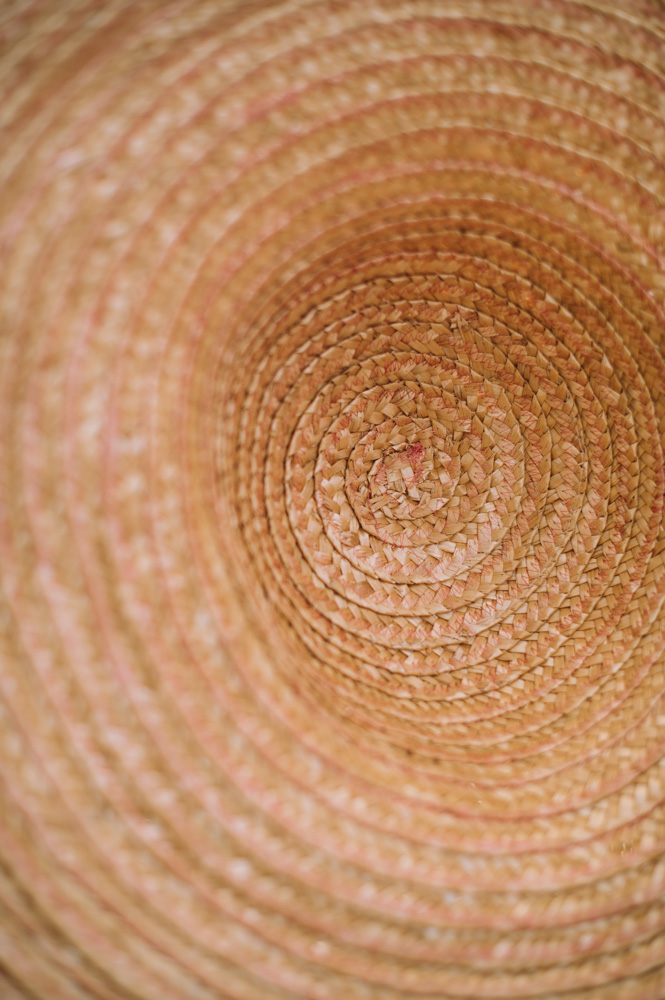
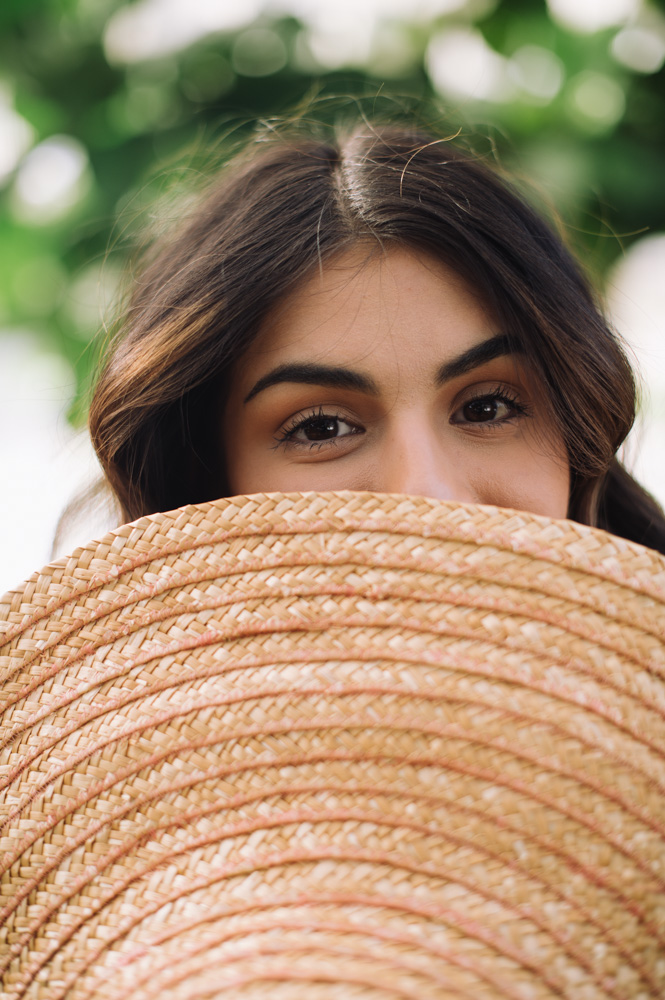
Keep the summer sun at bay by designing a simplistically chic sunhat! Made using natural raffia straw, this tutorial for how to sew a sunhat is a wonderful introduction to millinery and its intuitive technique resembles sewing a classic spiral rag rug. Dye your straw braids a vibrant color before you begin sewing to make a statement piece or keep it natural as shown. If you’ve always been intimidated by sewing hats or non-fabric materials, this easy sewing project is the perfect place to start.
Time: Afternoon Project
Skill Level: Beginner
Materials:
- 25 to 35 yards braided millinery straw 20 mm (3/4’’) width
- Matching thread (50 weight or heavier)
Tools:
- Scissors
- Sewing machine
- Heavy duty 110/18 sewing machine needles
- Steamer
FINISHED MEASUREMENTS:
- Brim diameter – approximately 18-20’’
- Hat depth – 6’’
- Hat circumference – 24’’
- Note: All measurements may be easily adjusted.
DESIGNER NOTES:
- A great way to keep this project low-cost is by shopping vintage millinery straw or thrifting placemats made from straw braids and deconstructing them!
- If at any moment in the process of sewing you notice the straw braid becoming brittle, re-steam all straw before continuing.
- If your straw breaks, or you need to add in more straw as you sew, simply overlap old and new braids 2-3” and sew as one braid to join.
Instructions:
PREP:
- (Optional) Dye millinery straw using fabric dyes such as Rit and completely rinse and dry before moving on. If dyeing, you may want to wear gloves when constructing the hat so as to avoid dye transfer.
- Place fully dry millinery straw into a plastic bag and safely steam into the bag using your steamer. Steam straw for 5-10 minutes, or until straw is more pliable and less likely to break when folded.
CONSTRUCTION:
- Set the sewing machine to a short, 1/4’’ wide zigzag stitch.
- Slowly and carefully twist the end of the millinery straw braid into a counterclockwise circle. If the braid shows signs of breakage, more steaming may be required.
- Carefully and slowly tack down the edge of the working millinery straw onto the circle using the sewing machine. Your working straw braid should be to the right of the needle, while your circle should be to the left.
- Begin slowly turning and stitching down the millinery straw into a spiral around the newly formed circle. Stitch in this way as a spiral until the circle reaches approximately 6 1/2 – 7’’ in diameter.
- If your machine has a slide-on table, remove it now. Begin shaping the crown of your hat by pulling slightly down on the spiral as you begin to sew the straw braid parallel to itself, as opposed to in a flat spiral. Sew to a depth of at least 6’’ before moving on to the brim of the hat.
- Work the brim of the hat as the beginning of the hat, by sewing straw braid in a flat spiral. Work the spiral until your hat reaches its desired size, or approximately 18-20” in diameter. When complete, align the end of the straw braid atop its previous round and sew a diagonal line across to the edge. Be sure to backstitch.
- Clip all threads to finish. Re-steam hat and shape flat. Leave out to dry completely before use.
Pair this sewing project with the Summer on the Cape Over-the-Shoulder Bag.


This is awesome! Now I can make my straw hats instead of buying them and I can make each of my grandchildren one!! Thank you for this tutorial!
You’re so welcome! We’re happy you enjoyed this project. Have a great day! – Ashley, WeLikeSewing