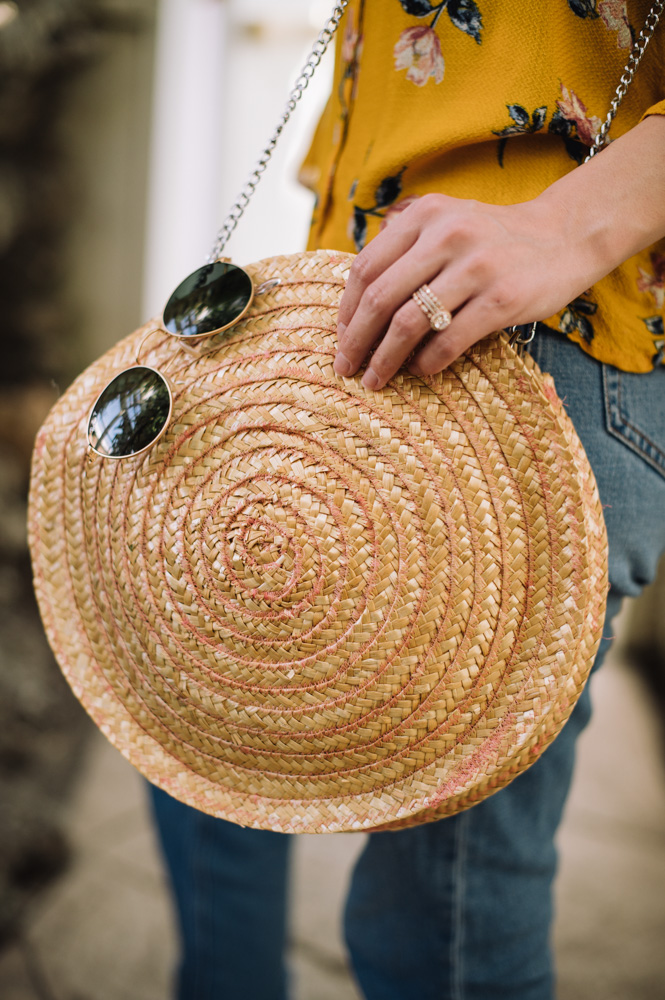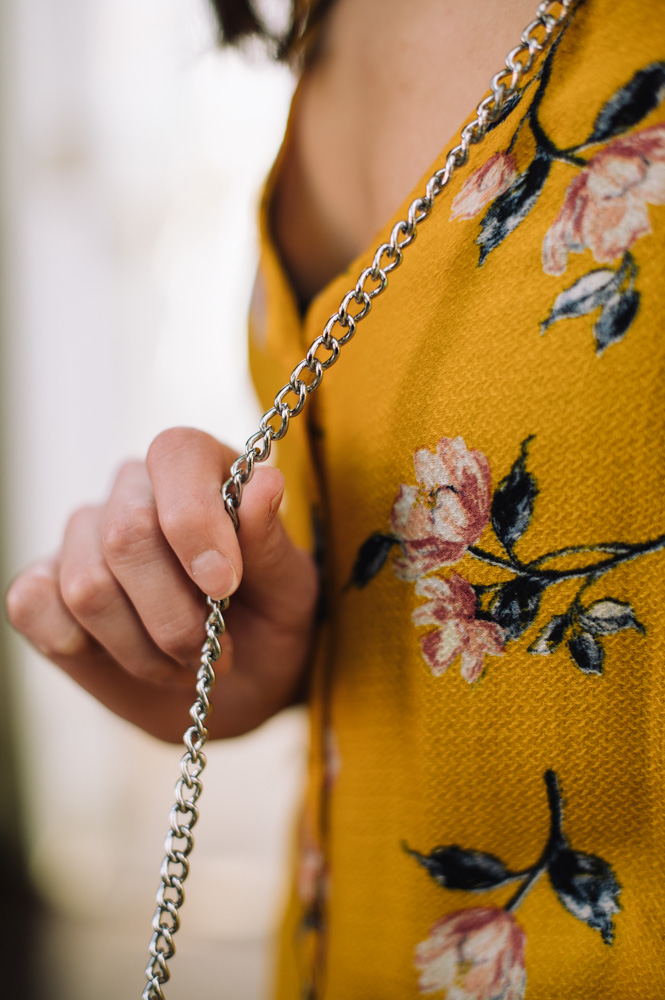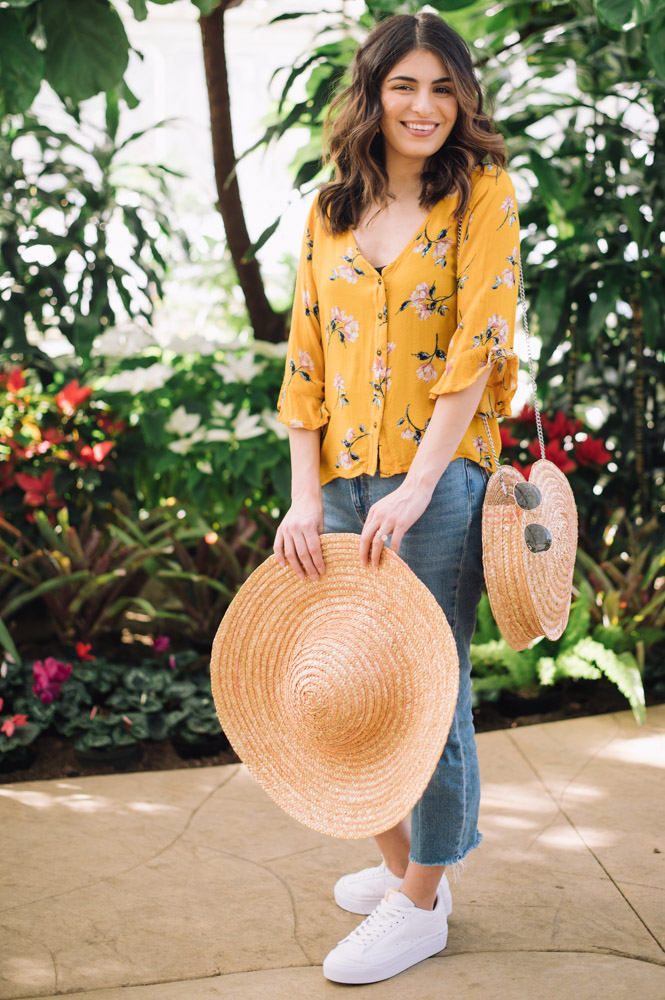
Combine the feel of handmade, natural materials with a sleek and sophisticated design when you make this fabulous summer bag. An excellent way to look chic at the beach or boardwalk, this over-the-shoulder bag uses raffia straw for a gorgeous texture and a simple metal chain for its straps. This bag is begging to be worn with your favorite sundress and stylish summer sandals. Embrace a boho, understated elegance by creating a fun and lightweight bag!
Time: Afternoon Project
Skill Level: Beginner
Materials:
- 20 to 30 yards braided millinery straw 20 mm (3/4’’) width
- Matching thread (50 weight or heavier)
- (2) 1’’ D rings
- 3-4’ bag chain
Tools:
- Scissors
- Sewing machine
- Heavy duty 110/18 sewing machine needles
- Steamer
FINISHED MEASUREMENTS:
- Bag diameter- approximately 12″
- Bag width: 3’’
- Note: All measurements may be easily adjusted.
DESIGNER NOTES:
- A great way to keep this project low-cost is by shopping vintage millinery straw, or thrifting placemats made from straw braids and deconstructing them!
- If at any moment in the process of sewing you notice the straw braid becoming brittle, re-steam all straw before continuing.
- If your straw breaks, or you need to add in more straw as you sew, simply overlap old and new braids 2-3” and sew as one braid to join.
Instructions:
PREP:
- (Optional) Dye millinery straw using fabric dyes such as Rit and completely rinse and dry before moving on. If dyeing, you may want to wear gloves when constructing the bag so as to avoid dye transfer.
- Place fully dry millinery straw into a plastic bag and safely steam into the bag using your steamer. Steam straw for 5-10 minutes, or until straw is more pliable and less likely to break when folded.
PANEL CONSTRUCTION:
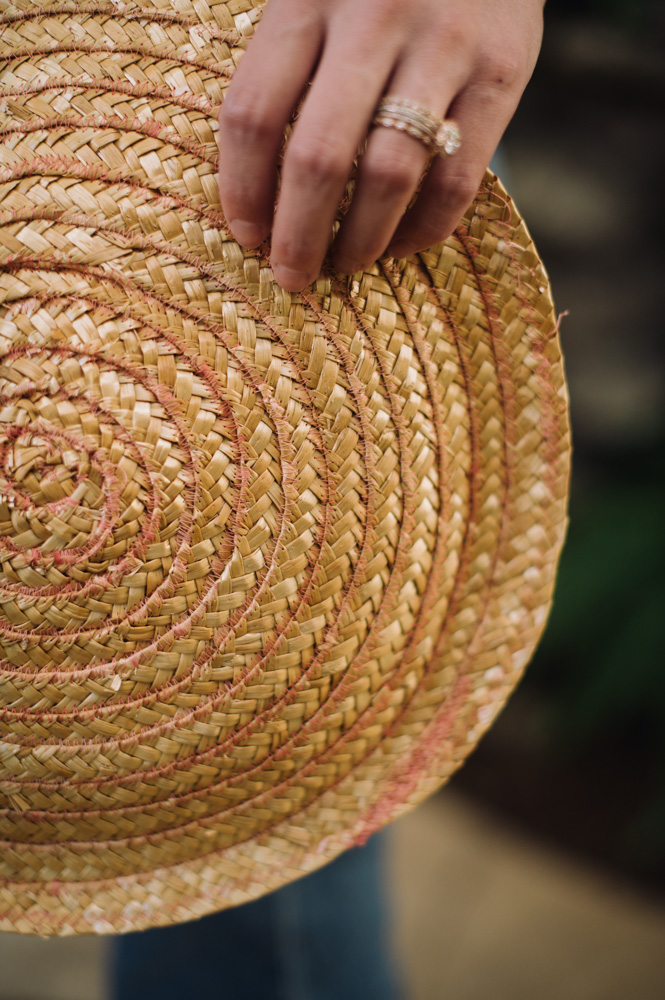
Note: Make 2 equal circular panels.
- Set the sewing machine to a short, 1/4’’ wide zigzag stitch.
- Slowly and carefully twist the end of the millinery straw braid into a counterclockwise circle. If the braid shows signs of breakage, more steaming may be required.
- Carefully and slowly tack down the edge of the working millinery straw onto the circle using the sewing machine. Your working straw braid should be to the right of the needle, while your circle should be to the left.
- Begin slowly turning and stitching down the millinery straw into a spiral around the newly formed circle. Stitch in this way as a spiral until the circle reaches approximately 12’’ in diameter.
- When complete, align the end of the straw braid atop its previous round and sew a diagonal line across to the edge. Be sure to backstitch.
MIDDLE STRIP CONSTRUCTION:
- Cut 5-6 strips of millinery straw braid at 2 feet in length.
- Place one strip atop another lengthwise with approximately 1/4’’ of overlap. Sew together using the same stitch dimensions as panels. Repeat until all strips are joined together to form a wide 2 feet straight strip of straw braid.
- Fold over both raw short edges of the newly formed strip at approximately 1/2’’ and stitch down.
- Cut 2 strips of new straw braid at 6’’ in length. Fold each in half lengthwise and place a D ring into the middle of each.
- Stitch D ring loops on either short edge of wide strip onto the side where the raw edge has been stitched. This will be the “Wrong Side” for Finishing.
- Clip all threads to finish. Re-steam bag and shape flat. Leave out to dry completely before use.
FINISHING:
- Take the middle strip and sew along one panel’s edge with the seam on the outside of the work and the wrong side of the middle strip facing the inside of the bag.
- Repeat this process to the other side of the middle strip using the second panel.
- Clip all threads to finish. Re-steam bag and shape flat. Leave out to dry completely before use. Attach the bag chain to the D rings to finish.