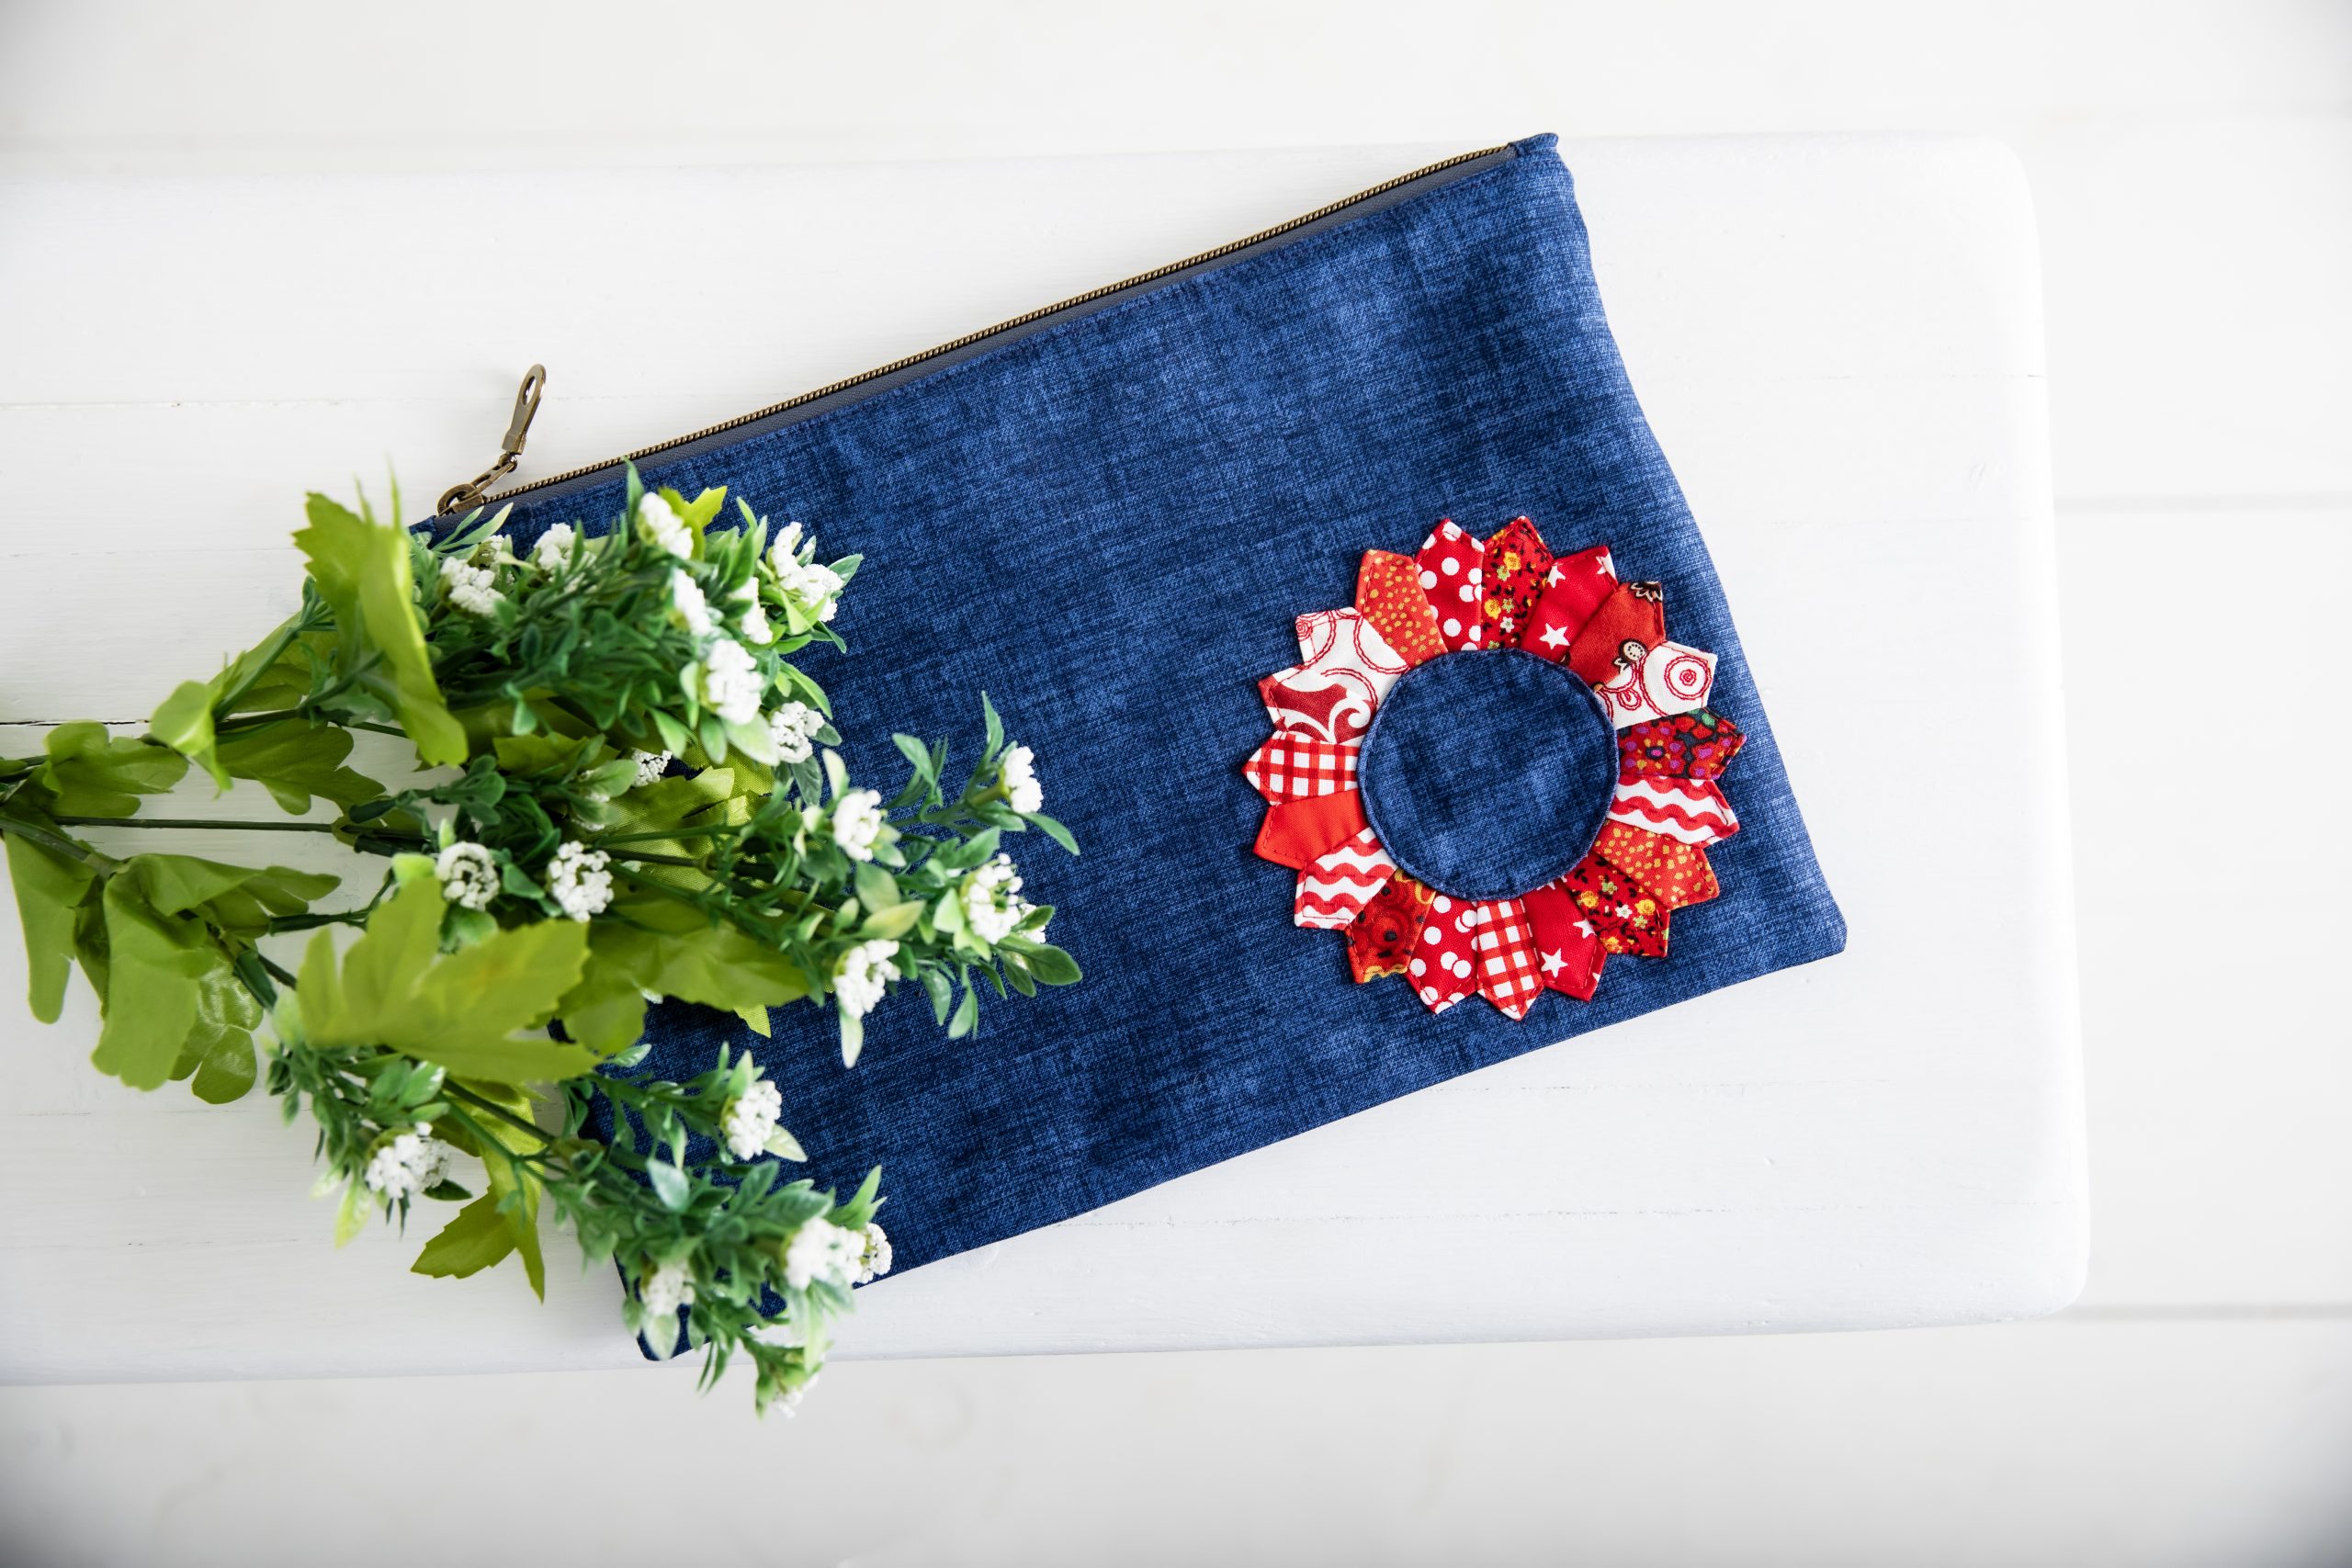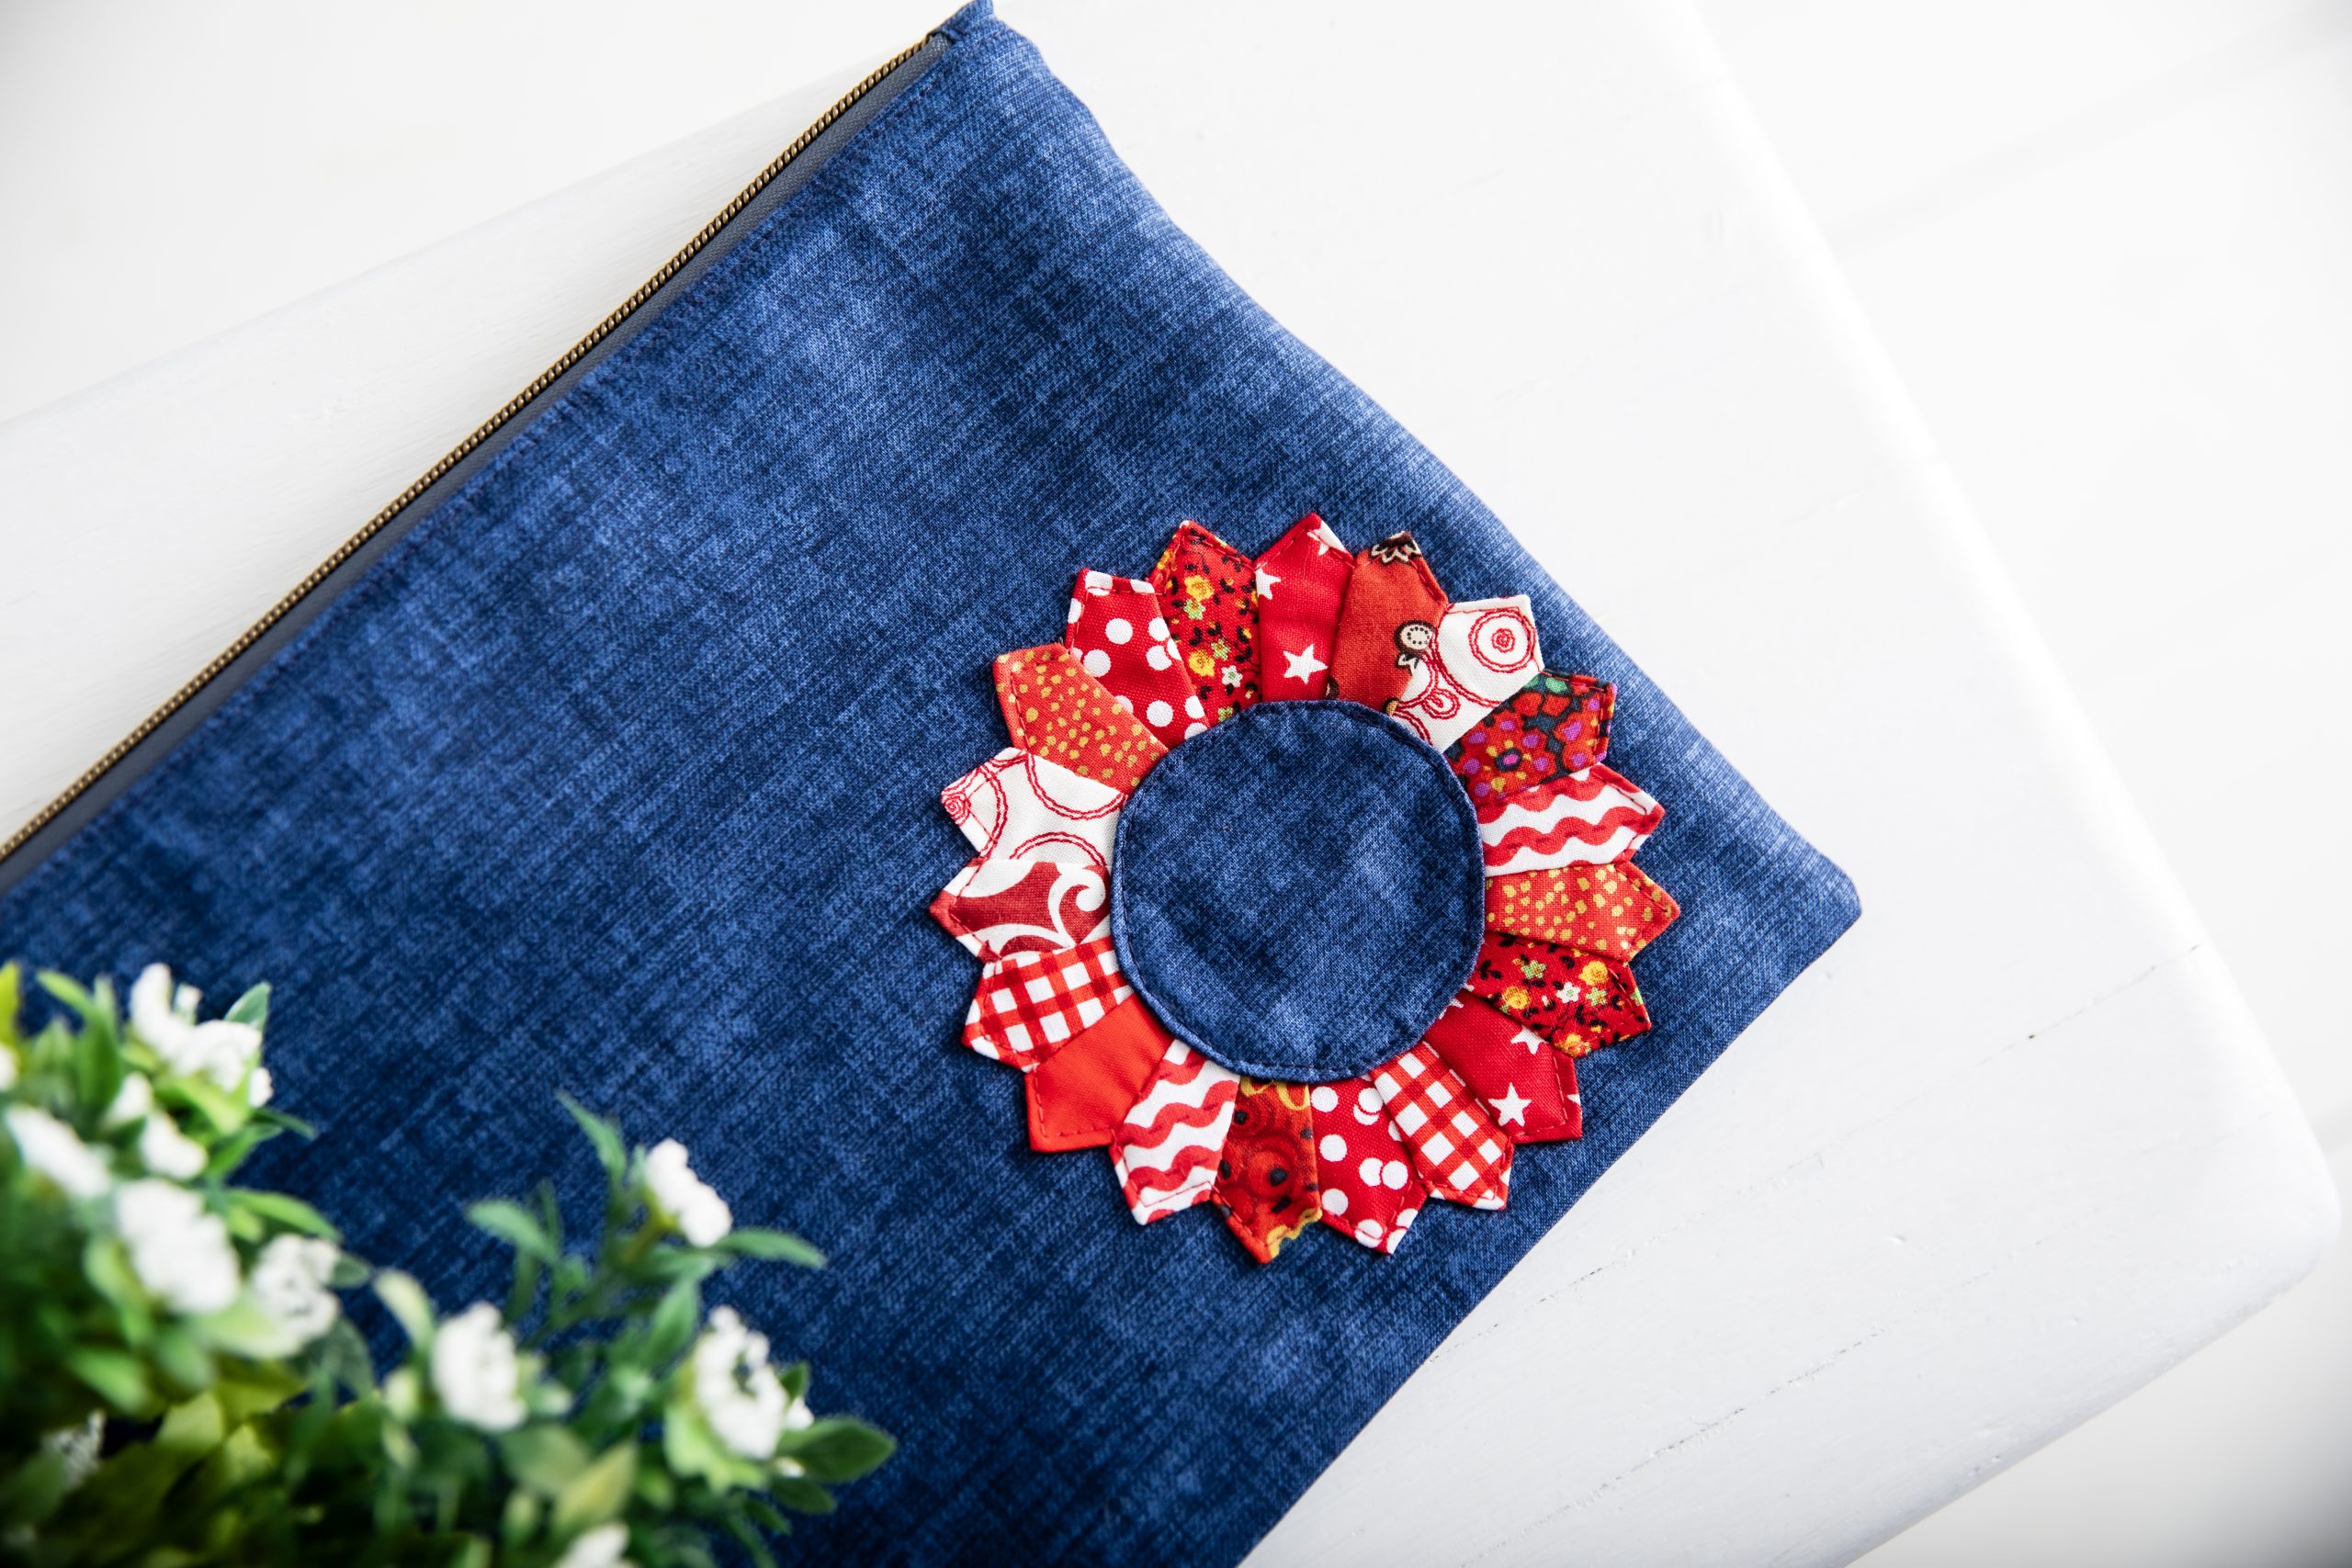
This sweet Dresden plate zipper pouch from Mallory Hill checks all of our boxes: fun details, classic design, and enough room to hold multiple items. Featuring a mini Dresden plate, this cute zipper pouch can easily be used as a stylish makeup bag or pencil pouch, but we also love it as a lightweight spring to summer clutch. If you’ve been saving up your fabric leftovers in bright colors and prints, this bag sewing pattern is a stylish way to show off those scraps.
Finished Size: Approximately 12 inches wide x 8 inches tall
Abbreviations:
- W=wide
- T=tall
- RSO=right sides out
- RST=right sides together
- RS=right side
Materials:
- 1/4 yard – exterior
- 1/4 yard – interior fabric
- 1/8 yard accent fabric for Dresden plate or a collection of scraps for a variety of colors/textures
- (1) 1/4 yard interfacing – Pellon SF 101 or similar
- (1) 14-inch zipper
- 1 spool coordinating thread
- PDF Template – This is located at the bottom of this page. Please see printing instructions below.
Tools:
- Rotary cutter/Cutting mat
- Iron/Ironing board
- Gridded quilting ruler
- Pins/Clips
- Scissors
PRINTING INSTRUCTIONS:
To download the PDF template, click on the download button at the bottom of the page. We recommend opening your download using Adobe Acrobat.
Cutting Instructions:
- Exterior Main – (2) 13 inch W x 9 inch T
- Interior Main – (2) 13 inch W x 9 inch T
- Interfacing – (4) 13 inch W x 9 inch T
- Dresden Plate – (19) scraps, at least 2 inch x 2 inch
- Dresden Plate Center – (2) 3 inch circles
- Zipper Tabs – (2) 2 inch x 2 inch
Sewing Instructions:
- Apply interfacing to your exterior and interior Main Panels.
- Make your Dresden Plate:
- Fold plate piece in half long-ways, stitching across the top using a 1/4 inch seam allowance.
- Flip sewn corner RSO, and poke out tip and press well.
- Repeat for all plate pieces.
- Sew plate pieces together two at a time, and repeat for all pieces.
- Continue sewing sets together until you have a full ring, and press well.
- Make the center.
- Sew your center circles RST with a 1/4 inch seam allowance.
- Cut a small slit in the middle of one circle and clip around the outside edge without cutting into your stitches. Turn the circle RSO through that slit. Push out all edges and press well.
- Attach Dresden plate to the pouch exterior.
- Lay one Exterior Main face up on your work surface. Place the Dresden Plate in the lower right corner, at least 1 inch from the side and bottom edges. Pin in place. Feel free to adjust to place the plate where you like it best.
- Top stitch around the edge of the entire Dresden Plate, pivoting at each point.
- Lay the circle in the center of the Dresden Plate, pinning in place.
- Top stitch around the circle.
- Press the entire Main Panel.
- Prepare your zipper.
- Trim your zipper so the length is 12 inches, not including any extra tabs past the metal stops.
- Fold zipper tab in half, wrong sides together, and press. Open up and fold raw edges in towards the creased edge. Fold again along the middle crease, enclosing raw edges, and press.
- Slip the tab over the right end of the zipper, and edgestitch in place. Repeat with the other tab on the other end of the zipper.
- Attach zipper.
- Lay your front exterior panel RS up on your work surface. Lay the zipper RS facing down, centered on top of the exterior panel with the zipper pull on the left side. Baste zipper to fabric with a 1/8 inch seam allowance.
- Lay one interior panel RS down on top of the basted zipper, match edges, and pin or clip in place.
- Using your zipper foot, stitch along the top edge, back stitching at the beginning and end. Move the zipper pull as needed.
- Fold both pieces of fabric away from the zipper, wrong sides together, and press.
- Repeat the process with the other exterior/interior pieces and the other side of the zipper.
- Unzip your zipper at least half way.
- Place your exterior panels RST and your interior panels RST. Make sure seams and edges meet and zipper teeth are folded towards the interior of the zipper pouch. Pin or clip around all four edges.
- Sew around the edges using a 1/4 inch seam allowance. Leave a 4 inch – 6 inch gap along the bottom of the interior panels. Do not stitch over the zipper or zipper tab. Backstitch at both ends.
- Turn the pouch right side out through the hole along the interior panels.
- Sew the hole in the interior panel closed by hand or with a tight edge stitch.
- Push interior inside the exterior and push out corners, pressing as needed. Enjoy!