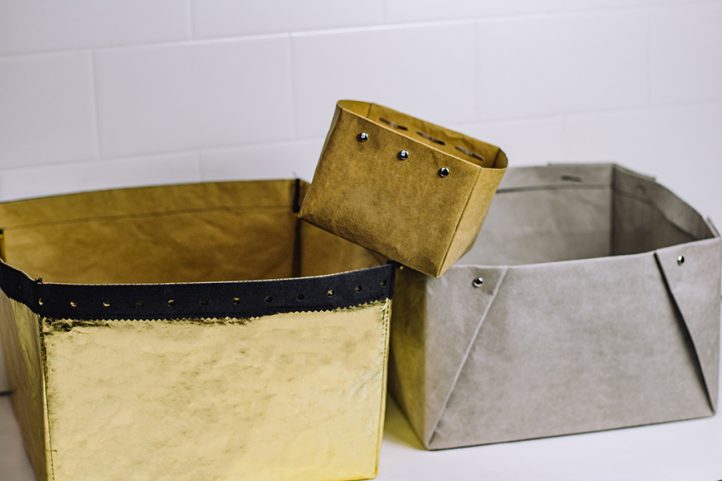
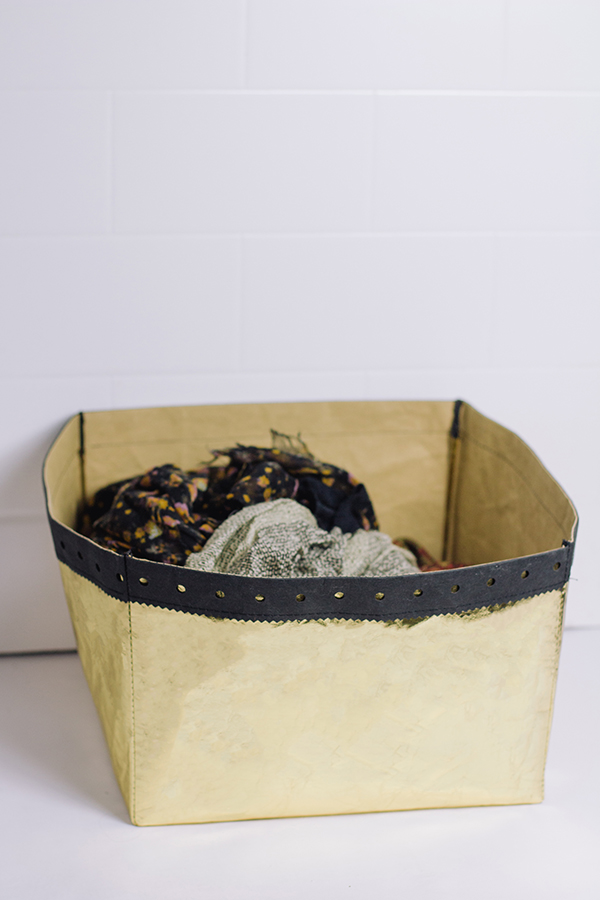
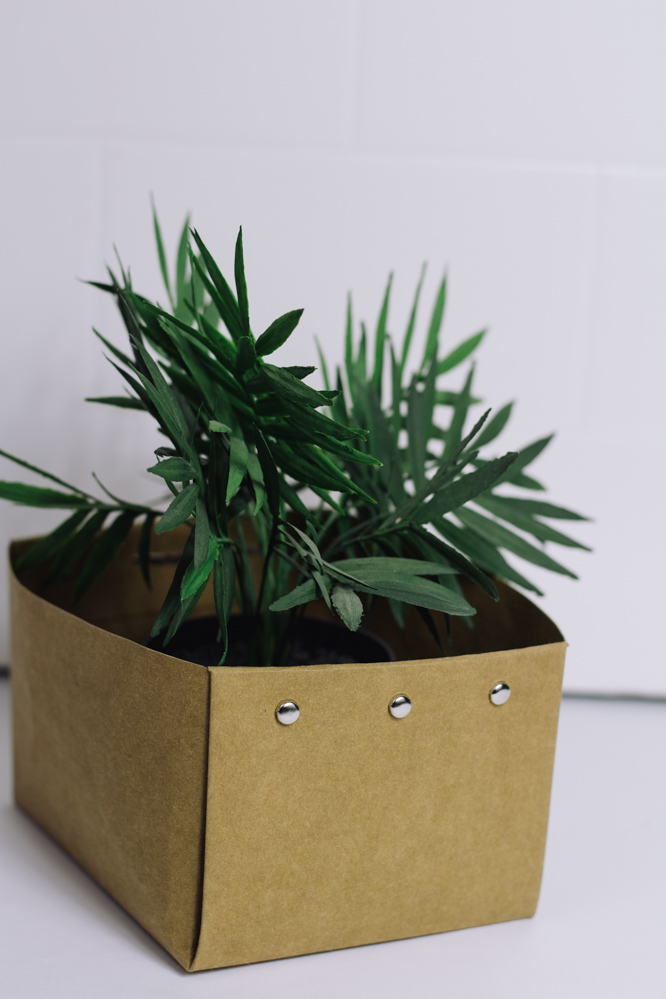
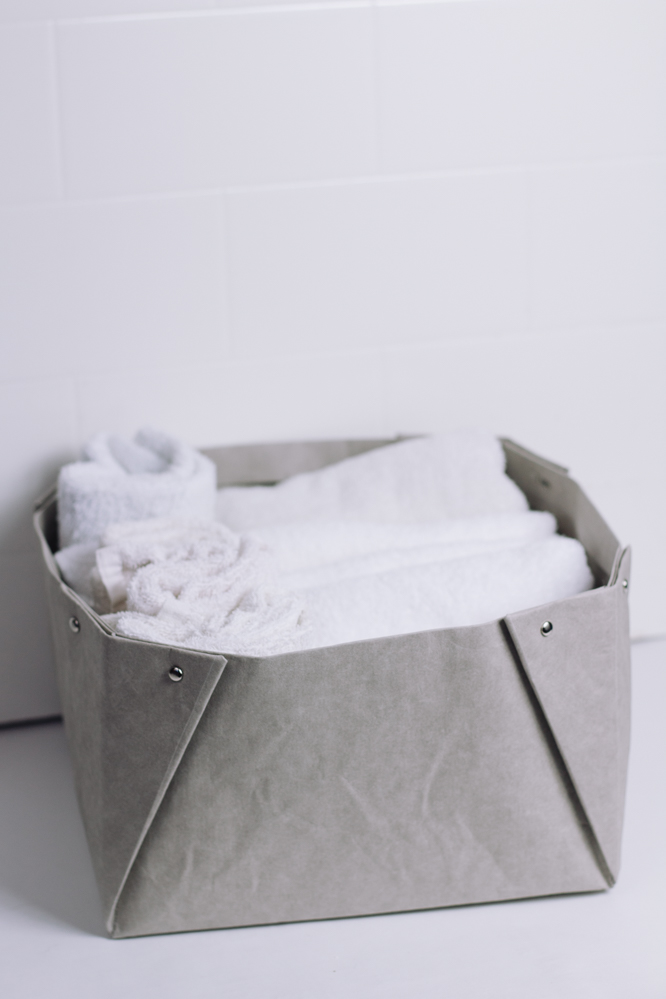
Conquer the clutter in your home by designing some effortlessly stylish storage baskets. A continuation of the storage baskets in our January 2022 issue, the designs we’re showcasing this month feature a sleek cube design and can be made using three different design methods. These DIY storage baskets are ideal for holding bathroom and bedroom necessities like washcloths, accessories, and more! You don’t have to sacrifice style for function with these minimalist chic storage baskets.
Materials:
- Pattern paper
- Pencil
- Ruler
- PDF Patterns – Located at the bottom of this page.
Instructions:
CUT-OUT DART METHOD TEMPLATE FOR CUBE-STYLE BASKET
Note: Pattern Paper – 80cm wide (31 1/2”)
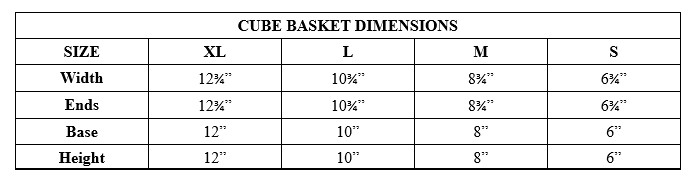
- Select a sheet of pattern paper, 31 1/2” wide x 31 1/2” long.
- Fold the sheet in half width-wise, then fold again length-wise, aligning all the edges.
- Place the folded paper on the work surface so that the folded corner is nearest you to your right.
- Label the corner, X. This is the radius point of the template.
- Draw a square from X.
- 1 from X = 15”
- 2 from X = 15”
- Square across the paper from point 2 and square up from point 1 to locate 3 at the intersection of the lines.
- Connect X and point 3 with a diagonal straight line.
- Connect point 1 and point 2 with a diagonal straight line.
- Measure the length of the diagonal lines. They should be equal or the grid is not square (90°).
- Draw the base of the basket.
- 4 from X = 1/2 the width of the basket. Square a line across the grid from point 4 to locate point 6.
- 5 from X = 1/2 the length of the basket. Square a line up the grid from point 5 to locate point 7.
- Point 8 is located at the intersection point of the lines (center of grid).
- Draw the height of the basket, or to the height you desire.
- Measure a point, 3/8” from 6 towards point 3. Label 9.
- Measure a point, 3/8” from 7 towards point 3. Label 10.
- Connect points 9 and 10 to point 8 with straight lines. Add 3/8” seam allowance parallel to line 8 – 9 and line 8 – 10. This is one corner of the basket.
- Punch a small hole at point 8 with a hole punch or awl to locate the corners of the basket.
- Staple through all layers of the folded paper and cut out the outline of the pattern, as shown in the PDF. Unfold the paper to produce the whole template.
FOLD & TUCK METHOD TEMPLATE FOR CUBE-STYLE BASKET
Note: Pattern Paper – 80cm wide (31 1/2”)
- Select a sheet of pattern paper, 31 1/2” wide x 31 1/2” long.
- Fold the sheet in half width-wise, then fold again length-wise, aligning all the edges.
- Place the folded paper on the work surface so that the folded corner is nearest you to your right.
- Label the corner, X. This is the radius point of the template.
- Draw a square from X.
- 1 from X = 15”
- 2 from X = 15”
- Square across the paper from point 2 and square up from point 1 to locate 3 at the intersection of the lines.
- Connect X and point 3 with a diagonal straight line.
- Connect point 1 and point 2 with a diagonal straight line.
- Measure the length of the diagonal lines. They should be equal or the grid is not square (90°).
- Draw the base of the basket.
- 4 from X = 1/2 the width of the basket
- 5 from X = 1/2 the length of the basket
- Square a line across from point 4 and up from point 5.
- Point 6 is located at the intersection point of the lines (corner of the basket).
- Draw the height of the basket, or to the height you desire.
- 7 from 1 = 1 1/4”. Square from point 7 across the paper.
- Points 8 and 9 are located at the intersection of vertical line squared from point 5 and points 7 and 1.
- Point 10 is located at the intersection of line 2 – 3.
- Draw the side of the basket.
- 11 from 10 = 1 1/4”
- 12 from 2 = 1 1/4”
- Connect points 11 and 12 with a straight line. Add a 3/8” seam allowance parallel to line 11 – 12, as shown.
- 13 from 11 = 1 1/4”
- 14 from 11 = 1 1/4”
- Square lines from points 13 and 14 to establish point 15.
- The outline of the pattern is 1 – 8 – 9 – 13 – 15 – 14 – 12 plus the seam allowance.
- Mark a small hole to indicate location of fastener placement on end section with a hole punch or awl. (You will have three small holes with one on the fold below 1 & 7.)
- Staple through all layers of the folded paper and cut out the outline of the pattern, as shown in the PDF pattern. Unfold the paper to produce the whole template.
FOLDED DART METHOD TEMPLATE FOR CUBE-STYLE BASKET
Note: Pattern Paper – 80cm wide (31 1/2”)
- Select a sheet of pattern paper, 31 1/2” wide x 31 1/2” long.
- Fold the sheet in half width-wise, then fold again length-wise, aligning all the edges.
- Place the folded paper on the work surface so that the folded corner is nearest you to your right.
- Label the corner, X. This is the radius point of the template.
- Draw a square from X.
- 1 from X = 15”
- 2 from X = 15”
- Square across the paper from point 2 and square up from point 1 to locate 3 at the intersection of the lines.
- Connect X and point 3 with a diagonal straight line.
- Connect point 1 and point 2 with a diagonal straight line.
- Measure the length of the diagonal lines. They should be equal or the grid is not square (90°).
- Draw the base of the basket.
- 4 from X = 1/2 the width of the basket
- 5 from X = 1/2 the length of the basket
- Square across from point 4 and square up from point 5 to the edge of the grid to locate points 6 and 7.
- Point 8 is located at the intersection point of the lines (center of grid)
- Draw the height of the basket, or the height you desire.
- Measure a point, 3/8” from 6 towards point 3. Label 9.
- Measure a point, 3/8” from 7 towards point 3. Label 10.
- Connect points 9 and 10 to point 8 with straight lines. This is one corner of the basket.
- Find the mid-point of line 3 – 6. Label it, 11.
- Find the mid-point of line 3 – 7. Label it, 12.
- Connect points 11 and 12 with a straight line.
- Connect point 11 to point 8 with a straight line.
- Connect point 12 to point 8 with a straight line.
- The connections produce a dart that will reinforce the corner of the basket.
- Staple through all layers of the folded paper and cut out the outline of the pattern.
- Mark a small hole to indicate location of fastener placement on end section with a hole punch or awl. Punch a small hole at point 8 using a hole punch or an awl to indicate the corners of the basket. Unfold the paper to produce the whole template.
Didn’t really like it!
Look great: I’m definitely going to try making a few!